So I had this post up and ready to go last Thursday night. But on Friday morning I found out that the only grandmother I’ve ever known passed away. She was one of the strongest most independent women I have ever known and I can’t even begin to tell you how many things she taught me.

She and her feisty personality will be dearly missed. ❤ ❤ ❤
Friday marked the one year anniversary of my little blog, I can hardly believe it! I posted my very first post about building our corner mudroom one year ago today, and it’s amazing how far the house has come since that post.
It’s also amazing to see how much my photography skills have begun to improve! I still have a ton to learn about blogging and photography in general, and I still feel like I don’t have any skill at all until I look back at older posts. It makes me want to give myself a small pat on the back haha 🙂
Today I thought it would be fun to share some of the progress that the house has made during my one year of blogging. So get ready to take a journey back in time, and through some pretty awful photography!
Let’s start with the mudroom since that was my first post. Here is how the space looked right after we moved in.

And here is how it looks today.

Not much has changed from the reveal in the original blog post other than the vase and “J” art which was a Homegoods clearance score for $5. It’s been awesome to have a place to drop our stuff as we come in the door!
After tackling the mudroom I moved on to the front door entryway. I don’t have a picture of what it looked like after we moved in, but this is the real estate picture, so imagine something like this only with the same ugly laminate shoe shelf that you just saw in before picture of the mudroom.

Here is what the space looks like today. I built my own entry table mainly because I couldn’t find one narrow enough, but also because it ended up being super cheap. We mounted it to the wall so that Tristan isn’t able to pull it down. We also added a new pendant light that I found on clearance at Lowes for $12.

It’s a small space, but I think I’m making the most of it. I still want to add some board and batten along this wall…one day!!
As I began to get more confident with my DIY skills I decided to add something I’ve always loved–a planked wall! I knew that the dining area was the perfect spot for this. This was the real estate photo

Here’s a picture of how I had it set up right after we moved in (also, take note of my awesome photography!).

This is what the space looks like today.
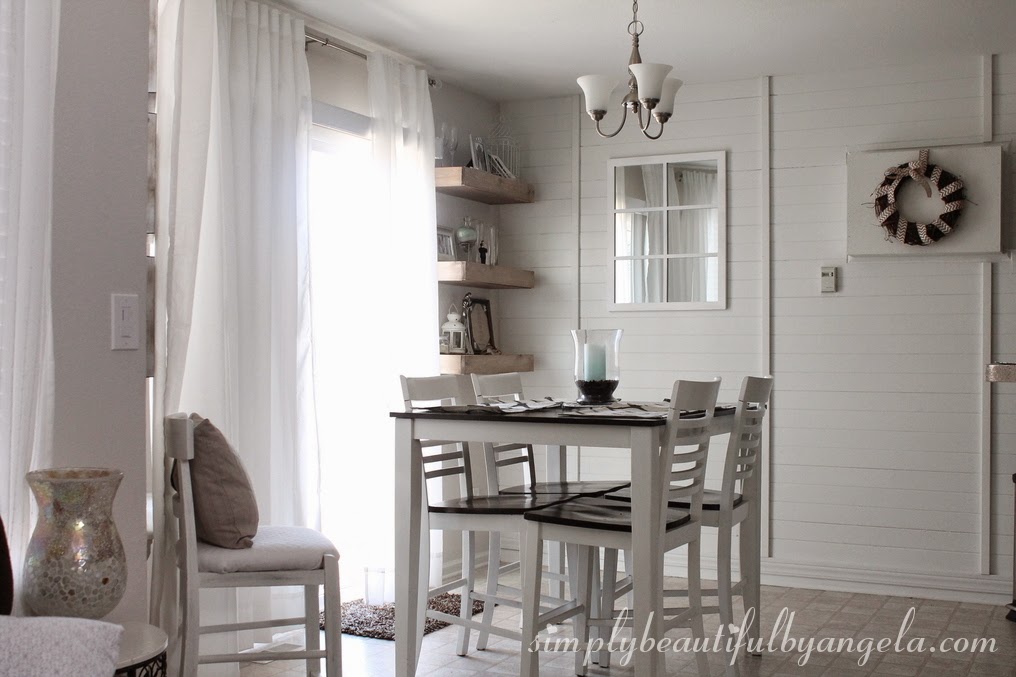
You may also notice that we ditched the glass display case for safety reasons and made some DIY floating shelves instead. I love how cozy they make this area and we get a lot of compliments on them.
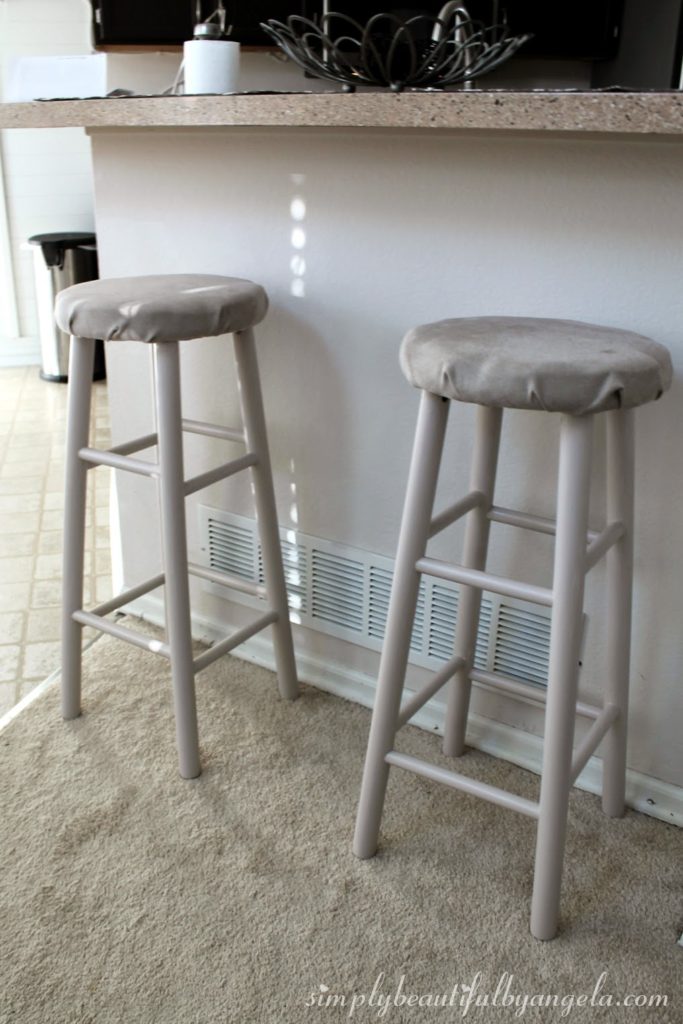
Once the plank wall was up, the breakfast bar area looked super drab in comparison. At first I thought it was just because the stools were too dark.

But even after gave them a “Wendy’s frosy” makeover (you can read about it here) there was still something missing.
So I added one of my favorite features, board and batten! I chose a really thin plywood since I didn’t want it to stick out too much. You can read the tutorial here.

It was a super easy and cheap project that has definitely made a statement. I’m now 100% content with this space. For now 😉
All of these thing definitely made our house more us, but the biggest transformation that has taken place is our kitchen. When we first purchased the house it was in need of some serious updating.

Unfortunately a professional kitchen renovation was just not in the budget, so we put in some serious DIY time to fix it up on the cheap.
We first refinished the countertops with the Rust-Oleum Countertop Transformations kit. I highly recommend this if you want new counters but can’t yet afford them. It was really simple to do and the results are gorgeous.
Then I painted the cabinets espresso and added some hardware. They turned out really nice actually.
However, this was before I realized how much I love white. I tried to live with them for while, but one day I decided to take the plunge and paint them again. Yes, I’m that crazy. You can read about that process here . This is how it looked after that.

Almost there, but not quite!
The last thing that this kitchen really needed was a backsplash. I was terrified to attempt this ourselves, but in the end I’m so glad that we did because it really wasn’t that bad and I’m so happy with how it turned out. You can read about how we installed our subway tile backsplash here.
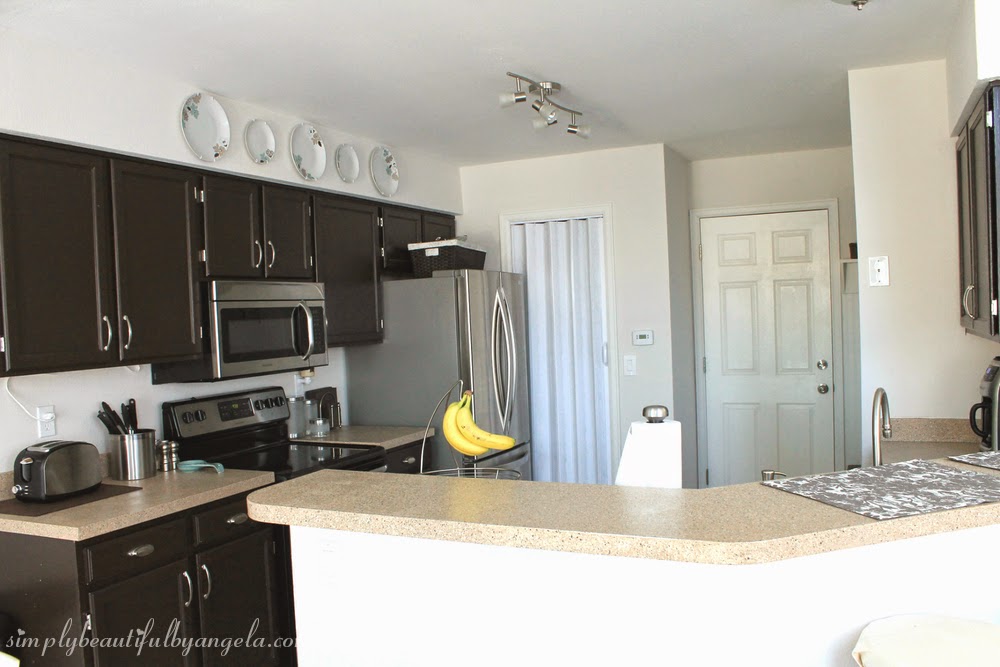
Here is our current day kitchen–white, bright and cheery!

One day we’ll replace the laminate flooring, but it was brand new when we moved in so we can put that project on hold for a little bit. I’m still trying to convince the hubby that we should do wood all the way through the downstairs but I haven’t won that battle yet.
I’m pretty proud of the kitchen renovation! We spent under $500 (not including new appliances obviously) and that was with painting the cabinets twice.
The backsplash was the last big project that we worked on around here because about a week after completing it we found out that we were expecting baby #2! I had a rough first trimester and I’ve been spending the second trimester getting Tristan’s big boy room set up so that we can use his nursery furniture for the new little guy.
We are still far from finished and I have big plans! Within the next year I hope to accomplish the following:
- Do a mini makeover on our master bedroom by adding a grid wall, upholstered headboard and painting our dresser
- Install board and batten in our upstairs hallway
- Paint both bathroom vanities
- Take off the accordion pantry door and create pretty organization so that we can leave it open
- Get our mess of a backyard turned into a little oasis
I hope that on my 2 year blogiversary I can look back at this post and check most of those items off. We’ll have see how we do adjusting to life with 2 little ones first!
Thanks for all of your support you guys, you truly keep me going!! 🙂
Linking up to these awesome parties!