Hello! As promised, I’m back today to finally share the reveal on the backsplash.
It’s funny that it took us almost a month to complete because it was actually very simple to do. We just spread out the steps one weekend at a time.
In case you’re new, you can catch up on the steps of the tutorial by clicking these links:
Before I get to the pretty pictures, I’ll explain why it took a week and a half after grouting to finally call this project done.
As I mentioned before, since I used Rustoleum Countertop Transformations to refinish the counters, when we removed the 4″ laminate backsplash, we were left with a strip of counter that was unfinished.
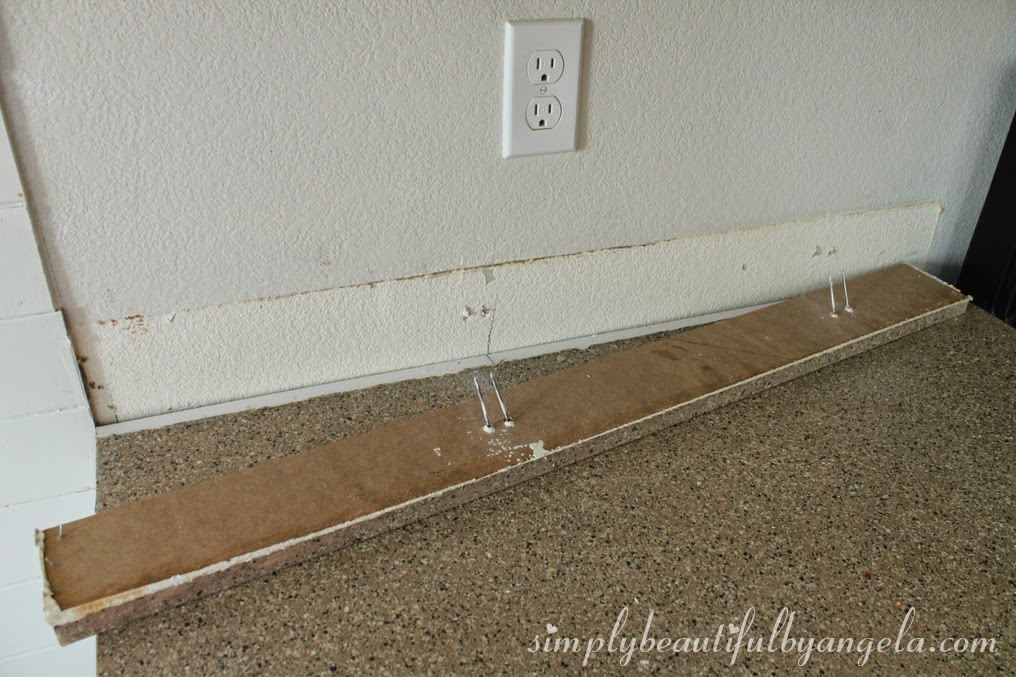
I went back and forth between adding molding to cover it up or splurging on new counters. Finally I decided to just touch them up with more paint and chips from the transformation kit.
I’m glad I did, because I truly do love the look of our counters and I think molding would have looked a little strange.
Anyways, I got sick so that step took me about a week to complete. Then it was time for the final step, which is caulking.
I found this neat tip online about using painters tape to get straight caulk lines. However, I must have ignored the part about removing it while the caulk is wet. When I pulled the tape back a day later, it basically took most of the caulk with it. Ugh!
So I scraped off what was left and did it again the correct way, and it turned out beautifully.
Okay now for the pictures!
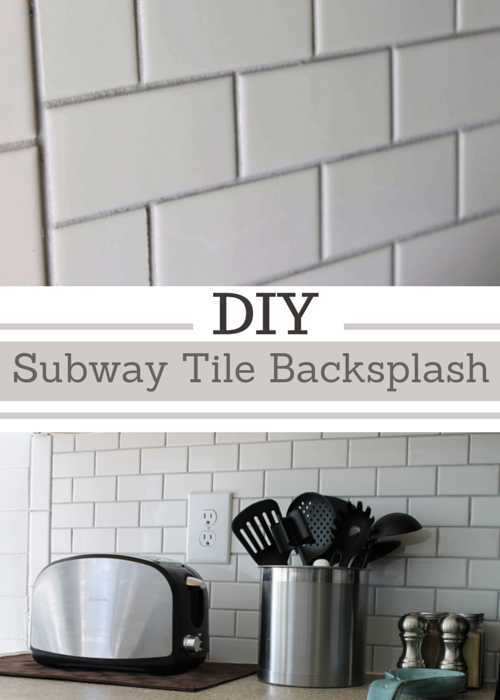
Here’s a close up. Don’t you just love the soft gray color of the grout? I couldn’t be happier with it 🙂


I was really worried about the left side here because our countertop is not level. So even though the tiles were all set evenly, there was an uneven gap at the bottom. Caulking totally saved the day though, as usual!

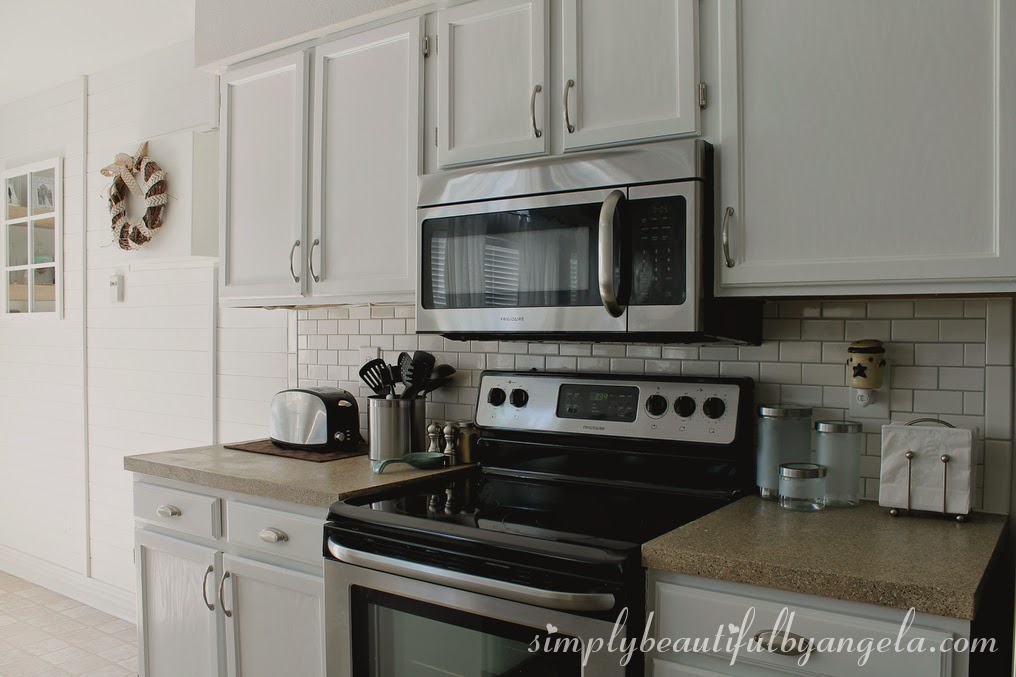
You may remember that the space behind the sink was a concern for me. Once we had two rows of tiles set, we only had a skinny space at the top and it would probably look funny to add a row of skinny tiles, not to mention a pain in the butt to cut them all. So I added some PVC trim and I think it completed the area perfectly.


I love how much more complete the kitchen feels now.


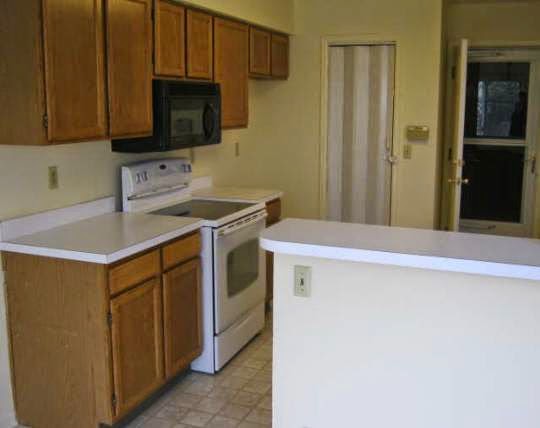
And because I love a good before and after…

You may have noticed that I added something new above the pantry, I’ll share the tutorial for that on Friday. You’ll be surprised about cheap it was to make!
I’ll leave you with a few more pictures. Have a great day everyone! 🙂


Linking up to these awesome parties!
This post was featured on City of Creative Links hosted by City of Creative Dreams and Before and After Party hosted by Thrifty Decor Chick! Click on the images below to take you to the feature posts.
|
|
Your kitchen is so pretty! I love the backsplash and the counters — I may look into the Rust-Oleum kit. 🙂
Thank you Dee! You definitely should, it was so easy (and actually fun) to do! 🙂
Love the look of white subway tile!! Your kitchen is so nice and bright! I love the color scheme!
Thank you Meg! Bright is what I was going for so I appreciate that! 🙂
I love the look of tile. It goes so nicely with the white cabinets. Beautiful kitchen!
Thanks Lysha! I was worried it would be too much white but I think the grout balances it oerfectly 🙂
I'm always so impressed by DIYers! The classic subway tile dressed up your kitchen so much. Looks great!
Thank you Nicki! And thanks for stopping by 🙂
I just adore subway tile and it looks so great in your kitchen!!
Wow. That backsplash works well and looks beautiful. Great job.
Such a big change from the before! Looks beautiful.
What color grout did you use??
It's called warm gray by Mapei 🙂