Hello! I’m really enjoying the extra daylight and the fact that it’s been paired with warm sunny weather this week has been icing on the cake. I’m trying to soak it all in before the next snowstorm!
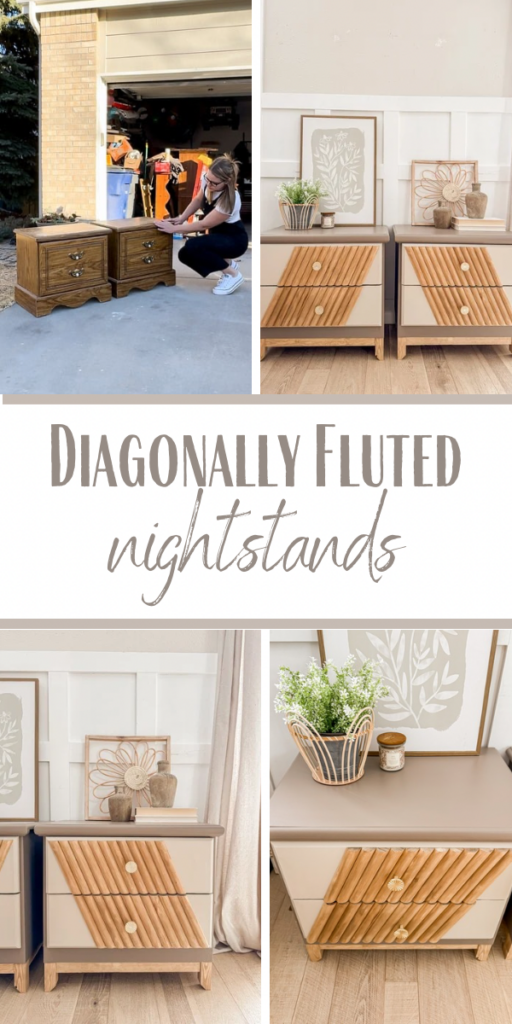
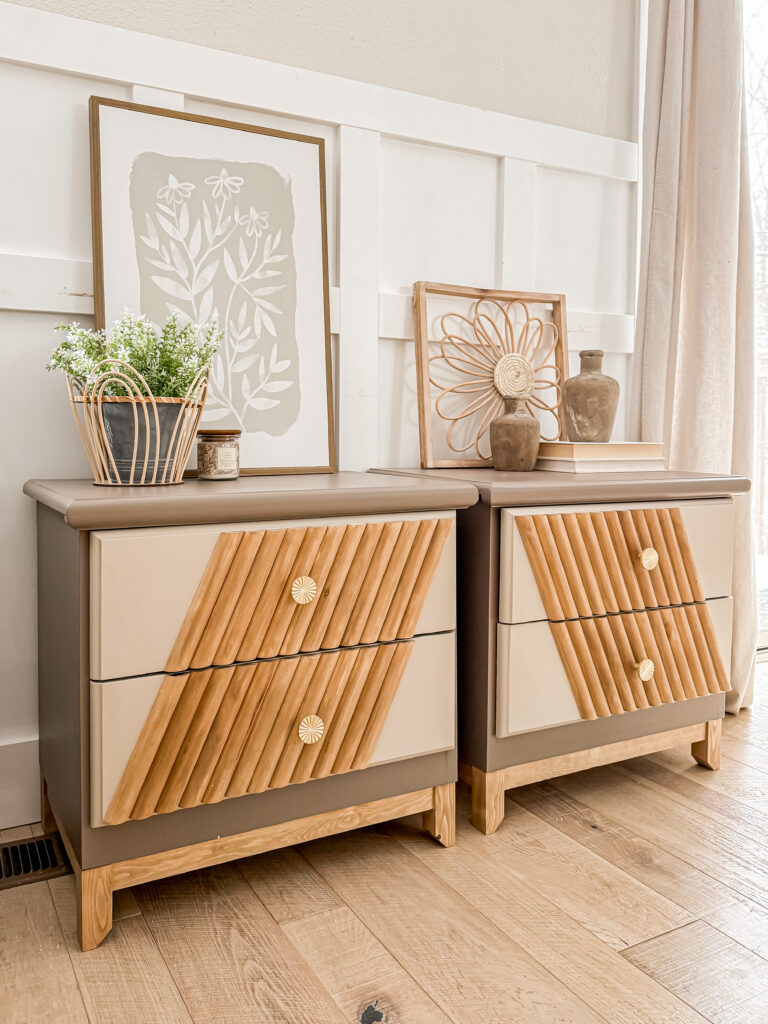
Today’s flip was from about a year ago and is still one of my favorite sets of nightstands that I’ve ever done.
I found them on Facebook marketplace and paid an embarrassing amount of money for them since I thought they were real wood.
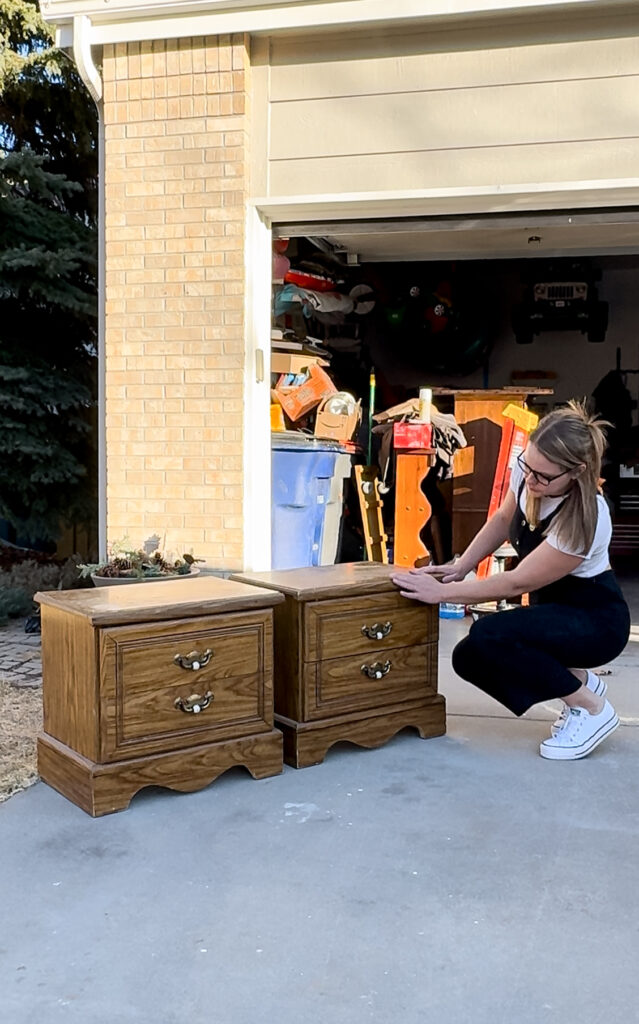
Anthony picked them up not knowing that they were supposed to be wood, and you can imagine my shock when he got them home and they looked like this!
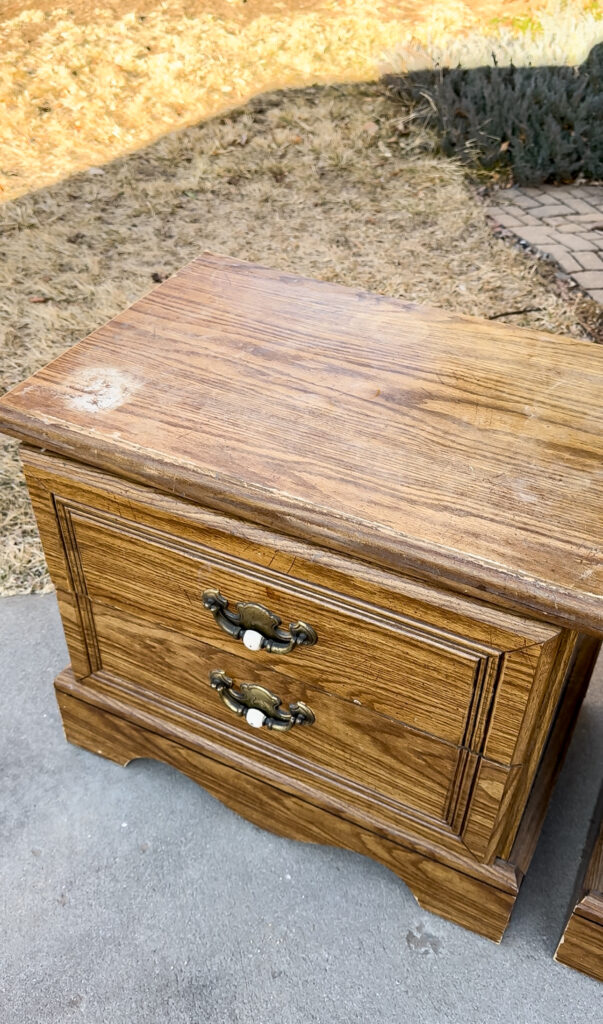
So not only were they one hundred percent MDF, they were also very water damaged on the top.
I set them aside until I could come up with a plan, and one day I had some customers picking up their pieces when they mentioned that they were in search of some nightstands. The size of these were perfect, so we came up with a vision!
Supplies Used:(Affiliate links may be provided for convenience. For more info, see my full disclosure here.)
- Sander
- Jigsaw
- Bondo
- Primer
- Paint
- Polyacrylic
- Stain
- Nail Gun
- Wood Glue
- Paint Sprayer
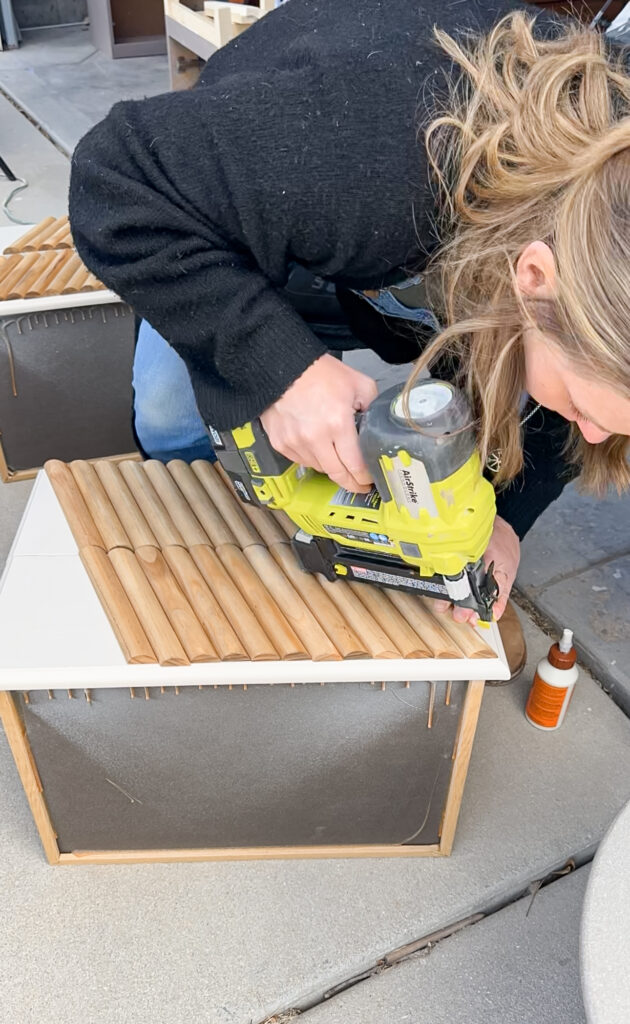
- Wood Dowels
- Miter
- 2×2
- Kreg Jig
- Knobs
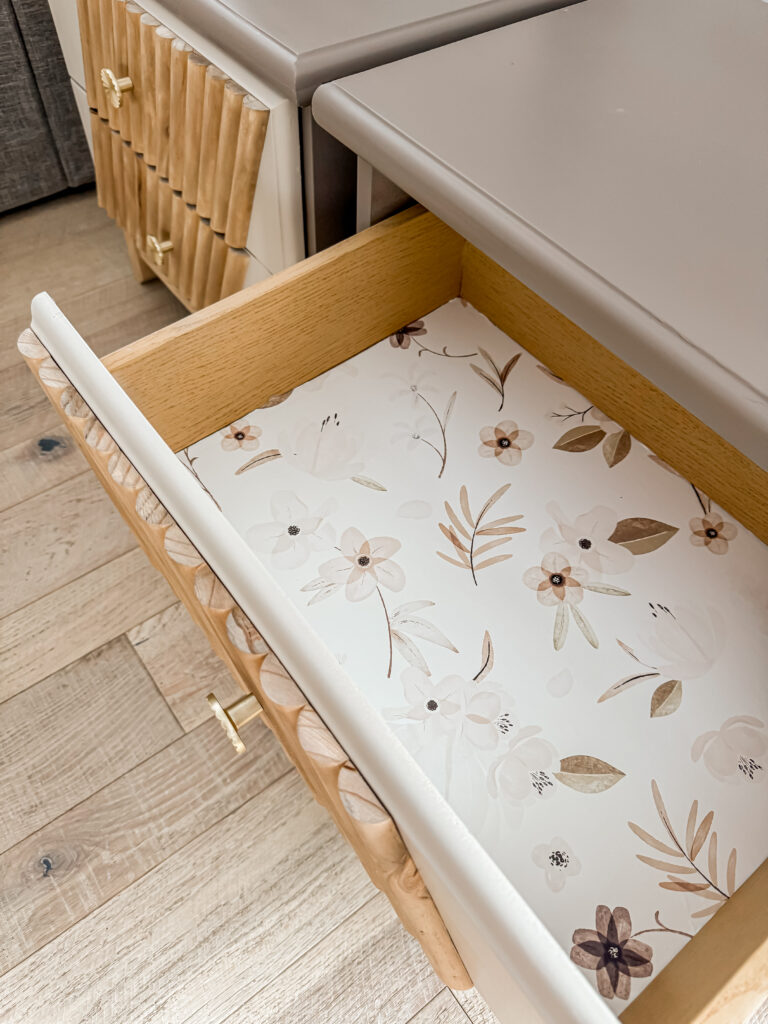
- Drawer Paper
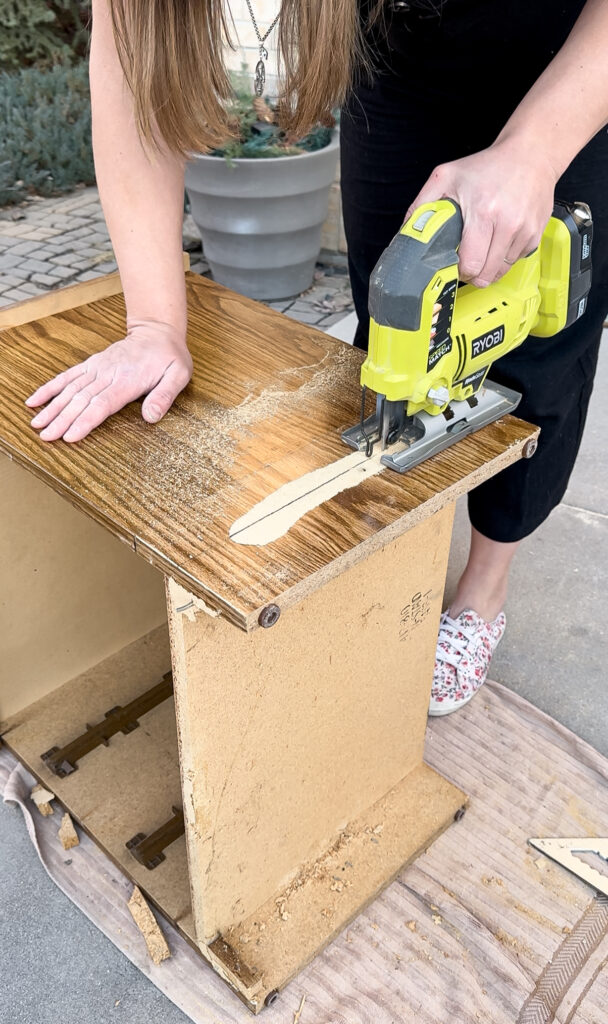
We started by removing the existing base trim.
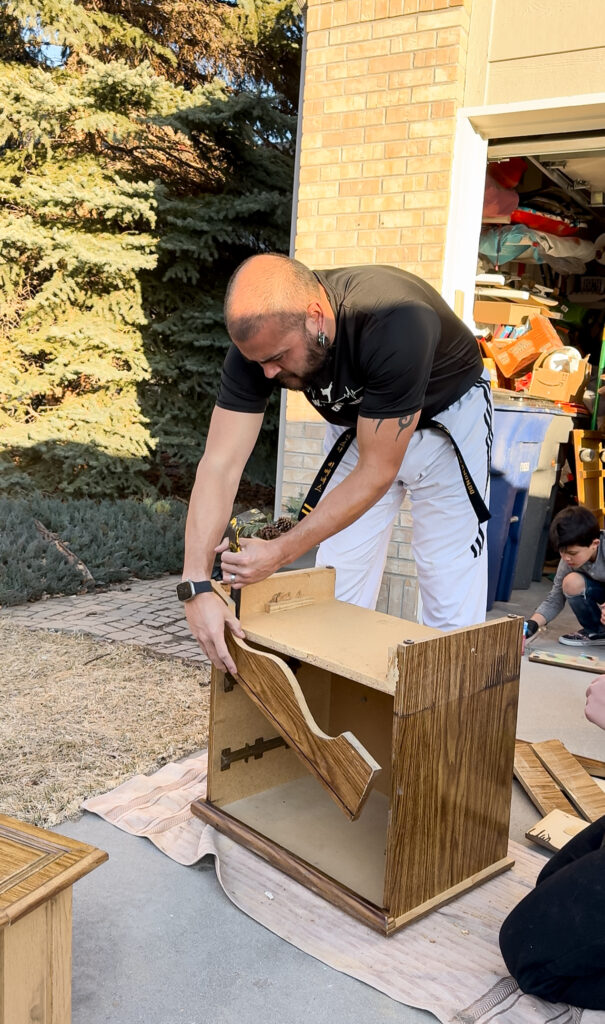
Next I marked out the base to cut it flush with the jigsaw.

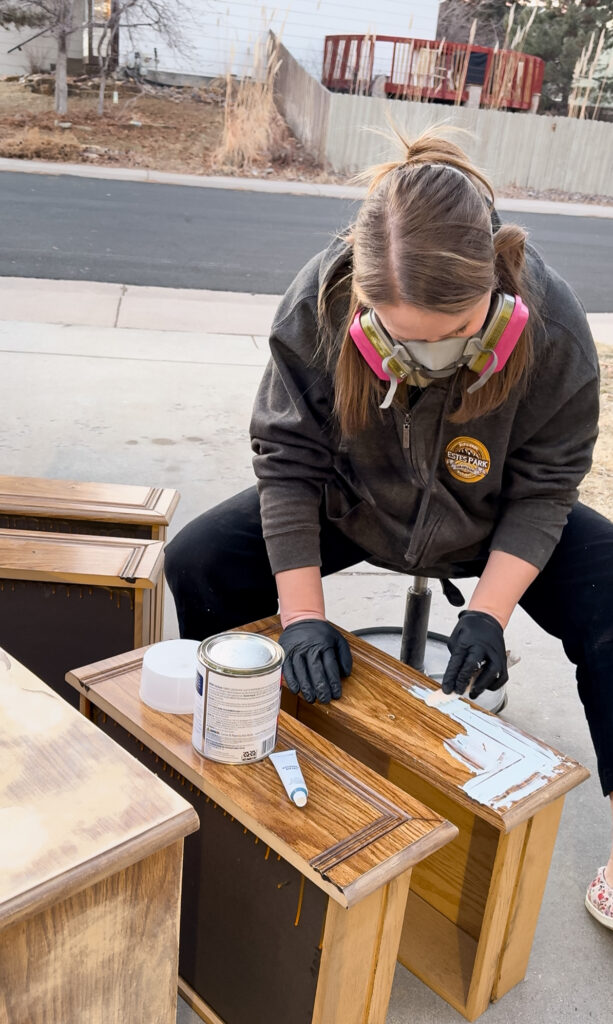
We decided to fill in the detailing on the drawers with Bondo for a smooth surface.
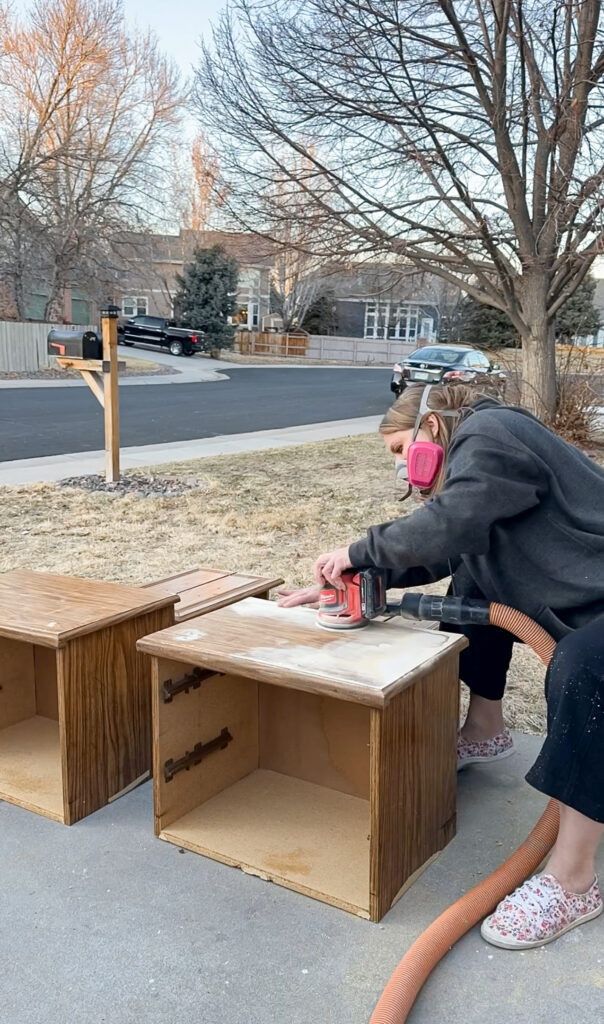
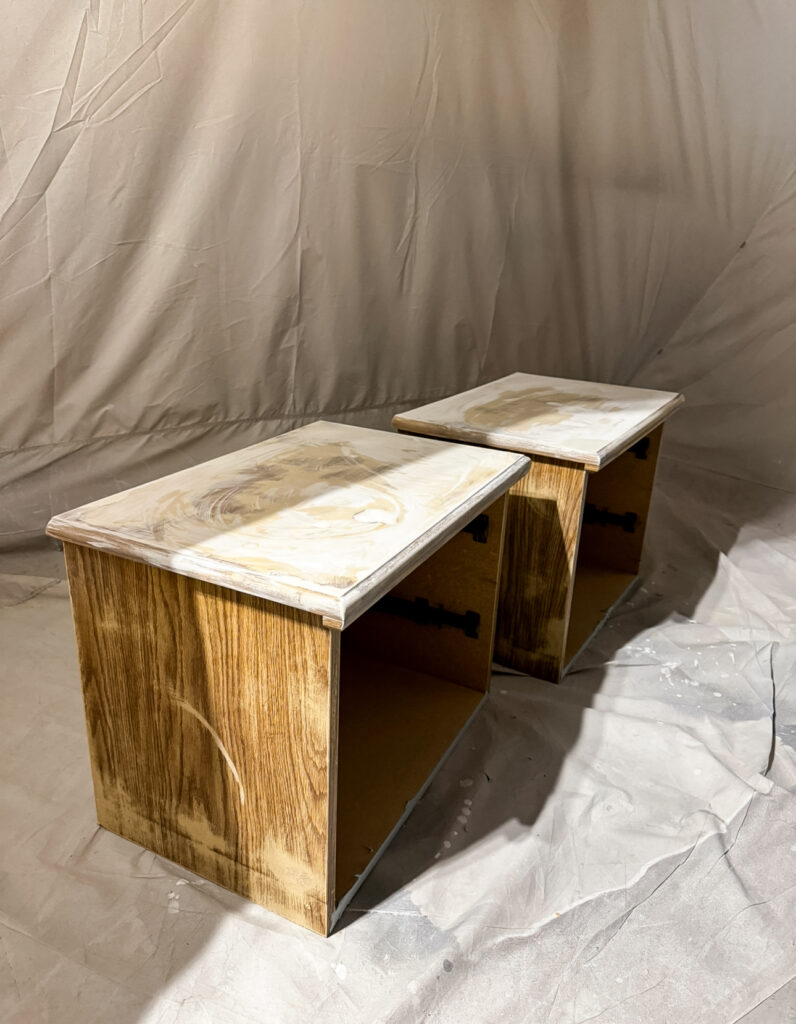
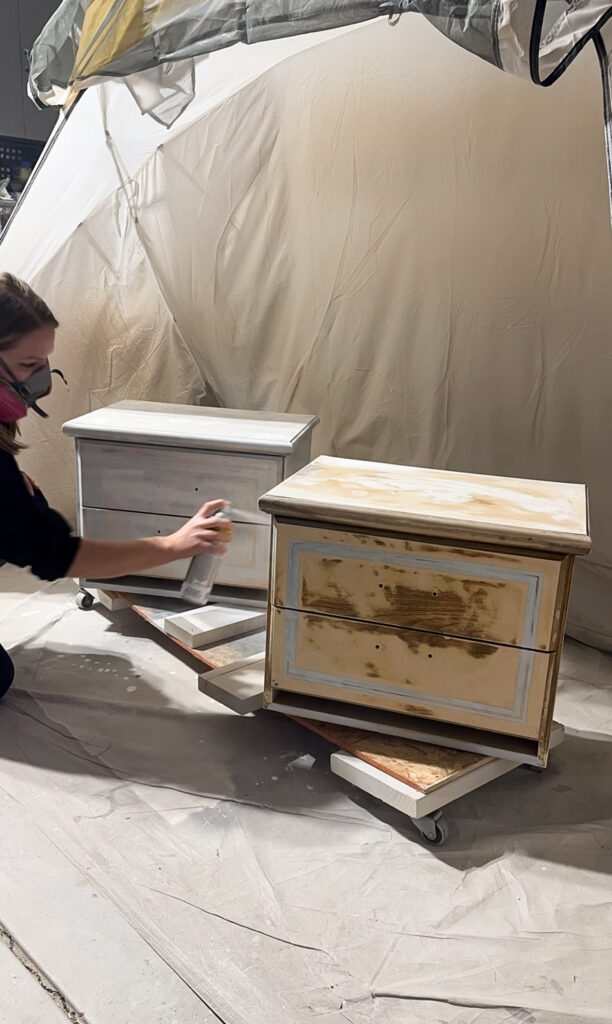
While that was drying I began sanding down the tops to get the water damage smoothed out. I also scuff sanded the rest of the surfaces to prep them for primer.
The exposed MDF from sanding needed to be covered before moving on, so I applied a coat of spackle.
Once that was dry I sanded it smooth and then applied the primer.
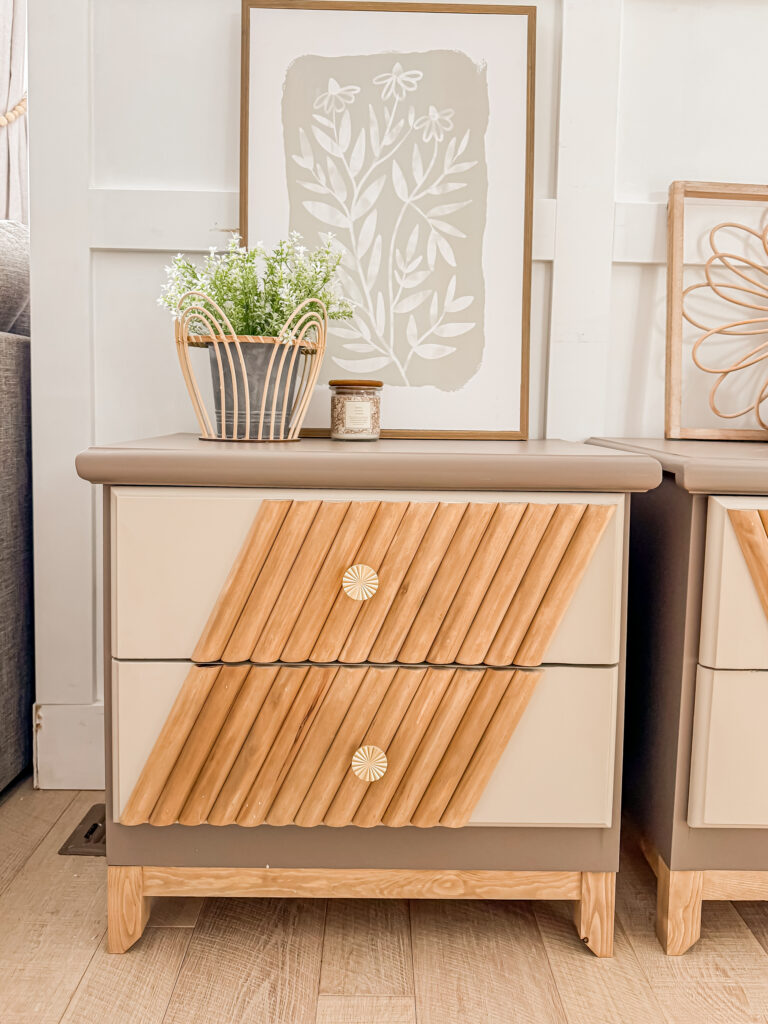
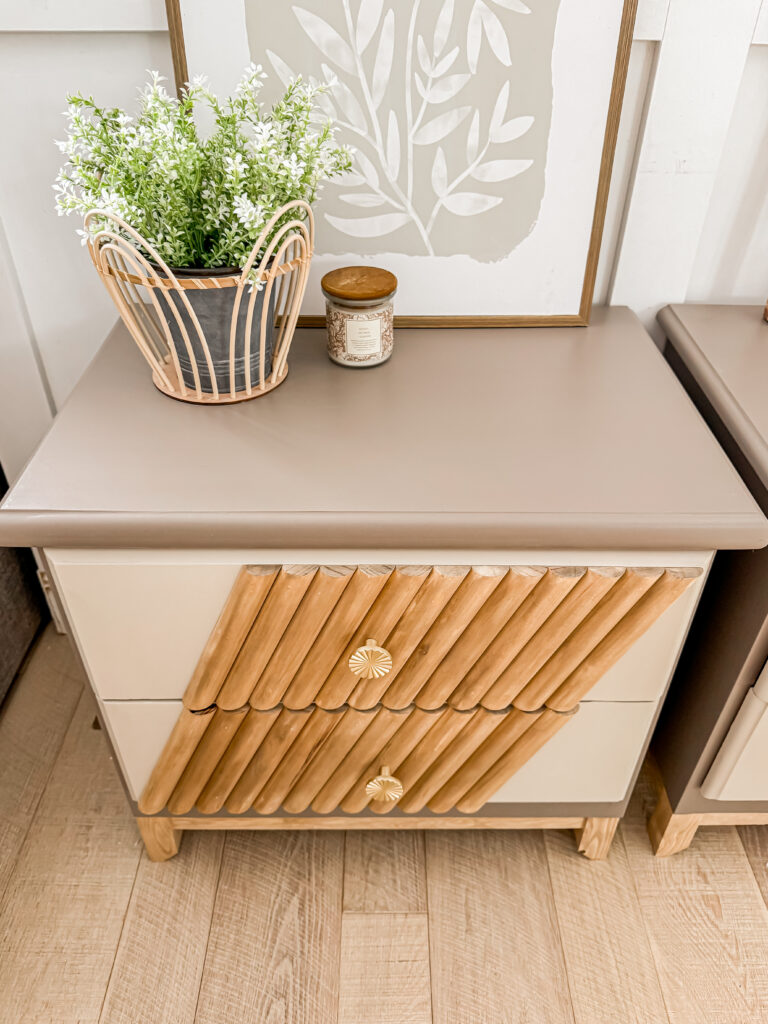
I failed to grab a color of the paint, but she chose Behr Wild Truffle for the body which is a gorgeous rich brown, and a lightened version for the drawers.
Once all of the paint was done it was time to add the design. We tossed around the idea of doing fluting or diagonals to match the diagonals in the headboard, and then she mentioned the idea of doing both and I was so on board!
We built new custom bases using the Kreg Jig and 2x2s, and this is how they turned out!
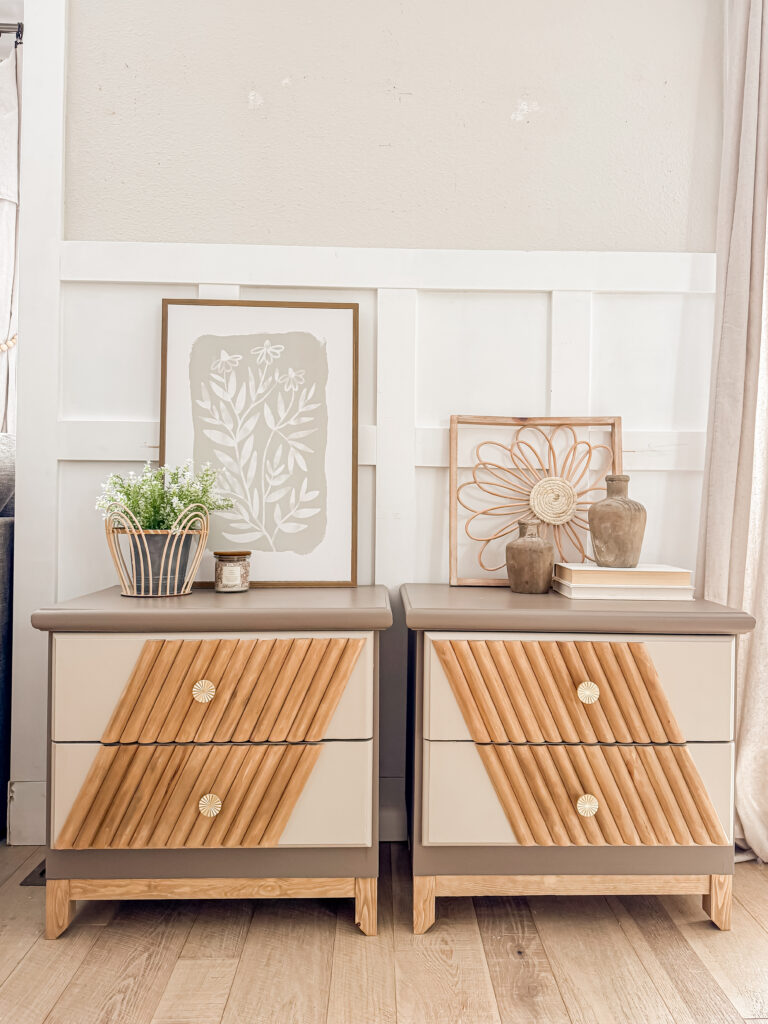
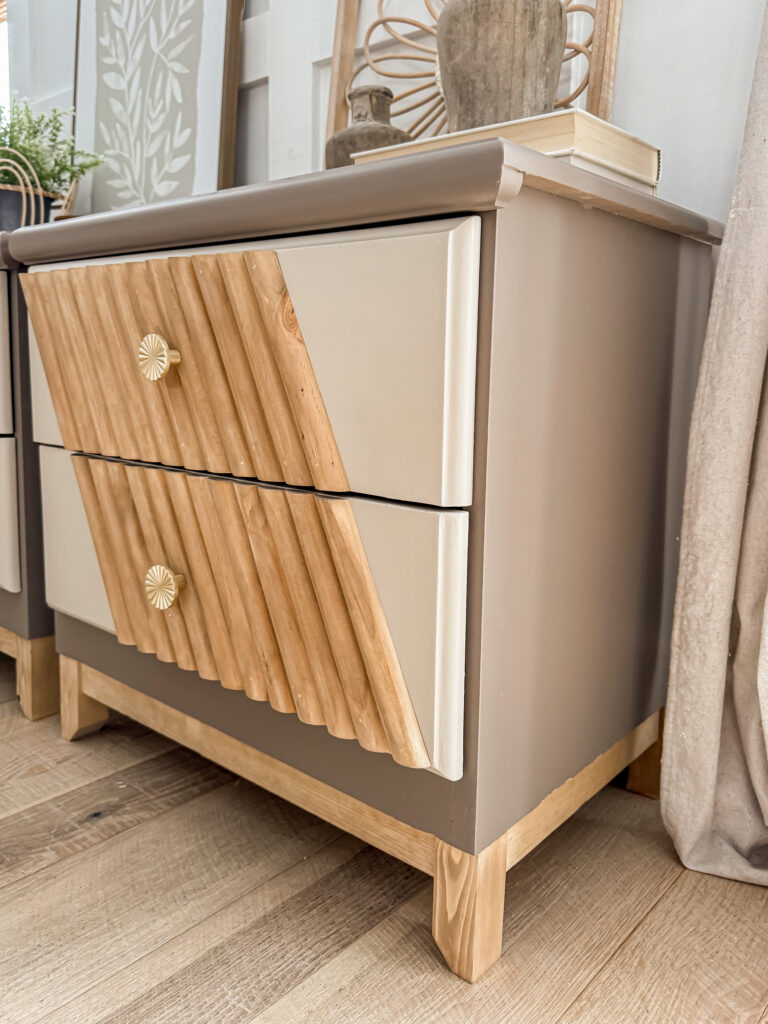
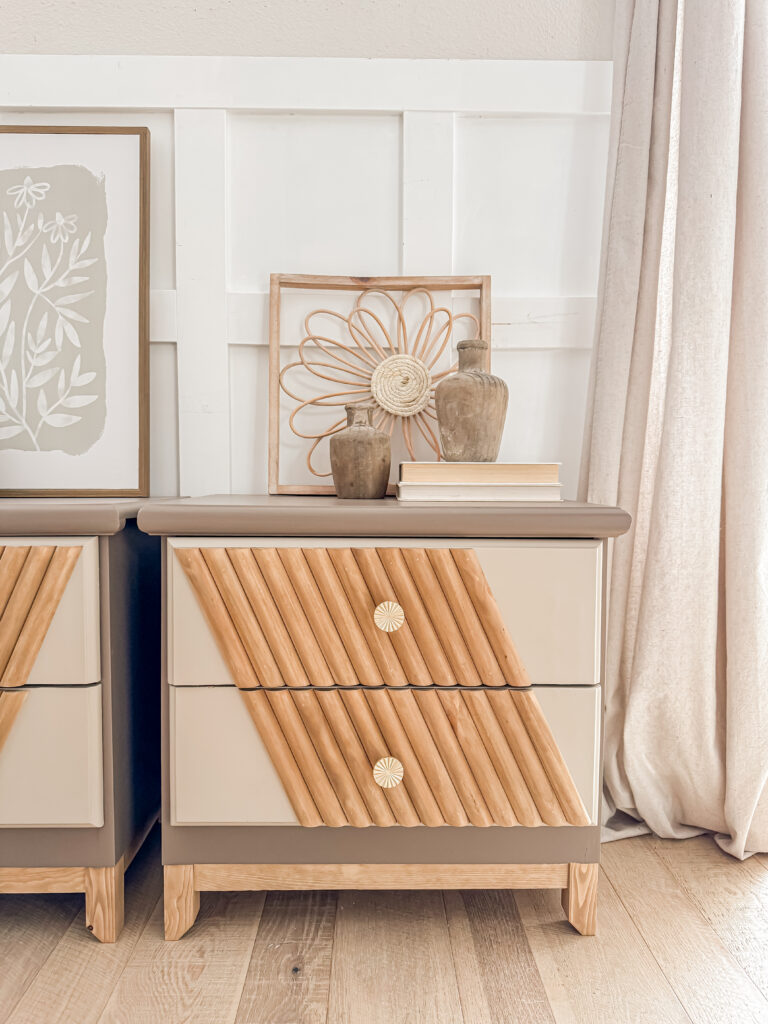
I am so happy she had the idea to do the fluting in a diagonal, it’s truly one of my favorite designs that I’ve done!
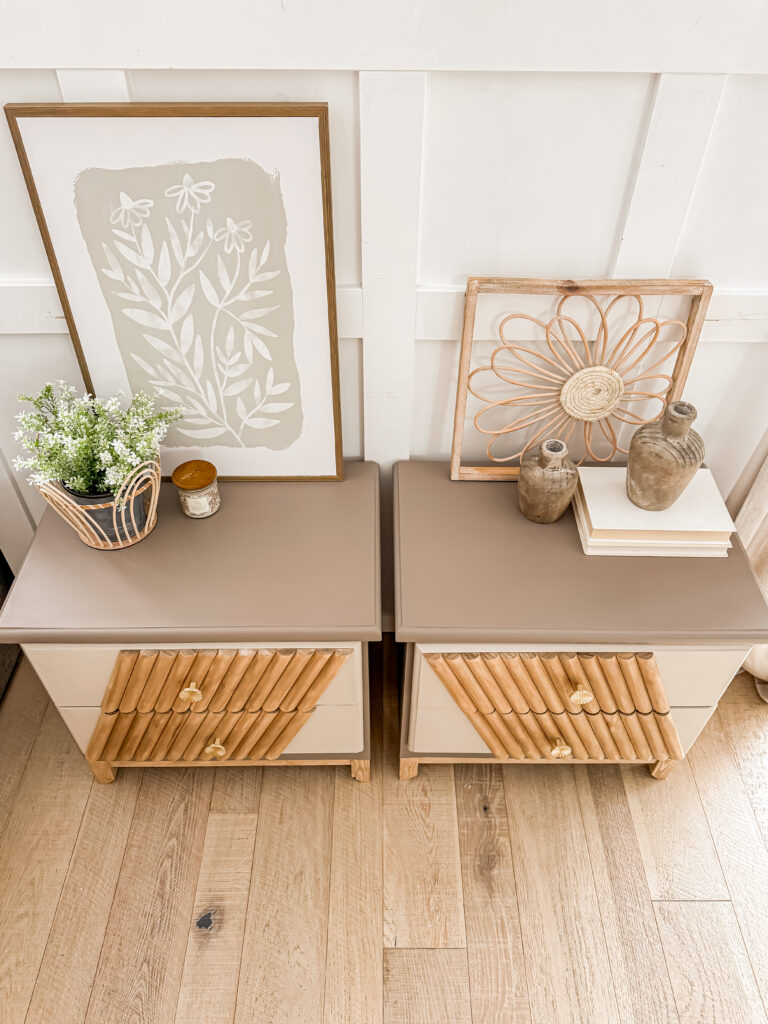
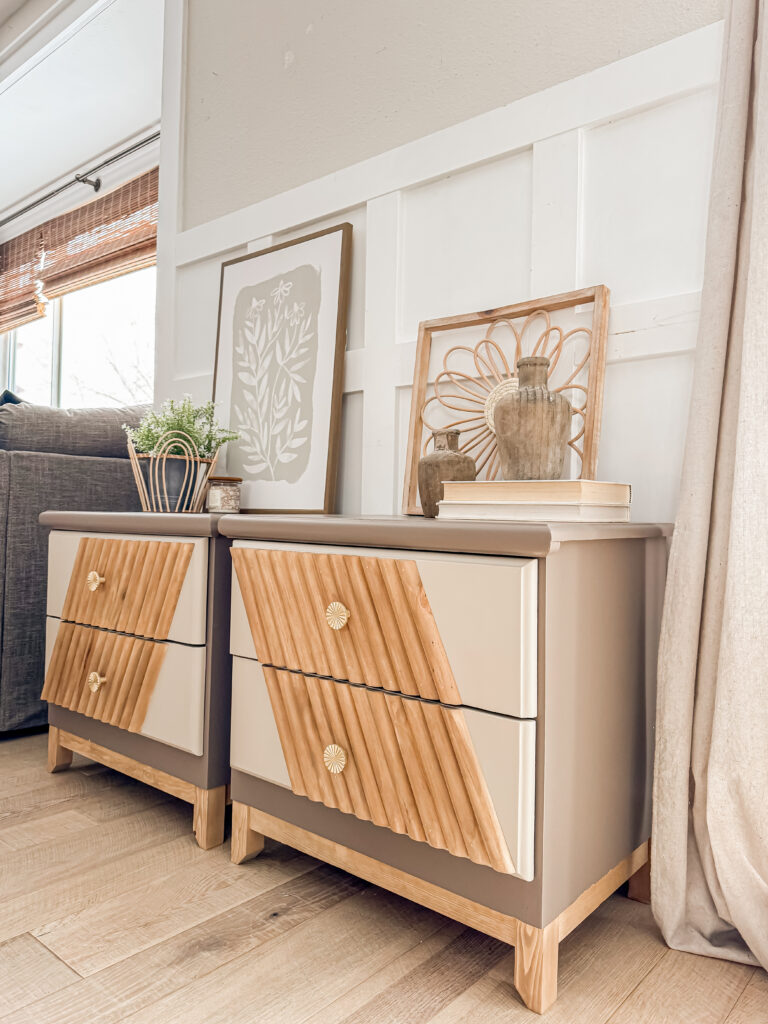
They hardly look like the same nightstands!
Thanks for stopping by, I hope you have a wonderful rest of your week!
PIN FOR LATER!