Simply Beautiful By Angela

creating simple beauty on a budget

  • Home Tours
  • Projects
  • Legal
  • Link Parties
  • Let’s Chat!
  • About Me

Chipboard Letters on Wood Planks

October 28, 2015

 
Hello friends!  Today’s tutorial is very similar to the DIY Dinosaur Plank Art that I shared on Monday, in fact that’s kind of where I got the idea.
 
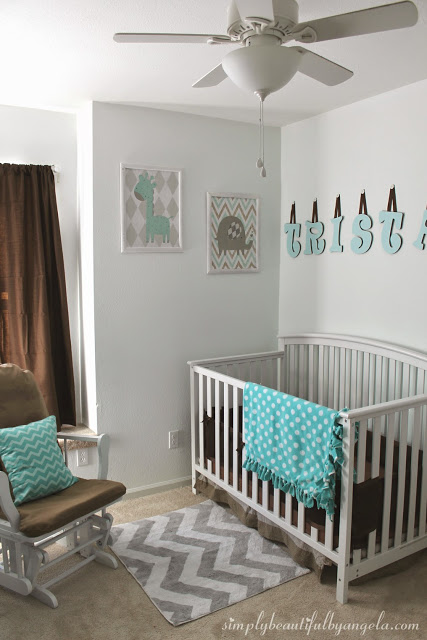
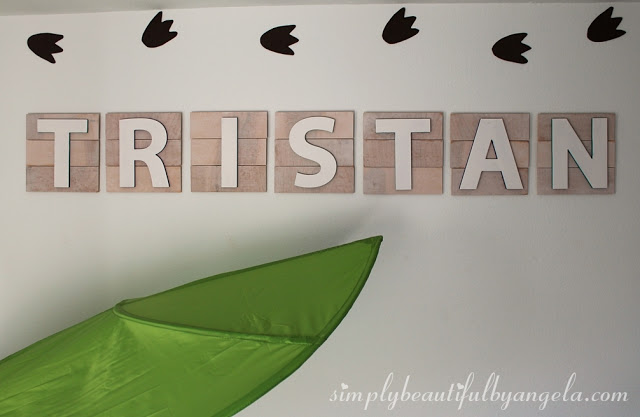
I had made some letters to spell out Tristan’s name in his nursery before he was born.  My original plan was to just reuse these, but switch out the colors.
 
They’re kind of cut off in this picture, but you can kind of get an idea of what they looked like.
 
 
Well as luck should have it, the original plan didn’t work out. I was thinking that when I made them before, I just applied some spray glue to the letters, laid them face down on the scrapbook paper and used scissors to cut the letters out. 
 
But when I went to do it this time, I was finding it impossible to cut good cuts in the tight corners.  So I ripped the paper off and went to plan B which was spraypaint.  However, some of the paper didn’t come off. I thought that some hammered spray paint would cover it up but I was wrong.  They looked terrible.  So I tossed them to the side for a few days until I could figure out a plan C.
 
By the way, I just remembered this morning that I actually used a box cutter to cut the paper away from the letters.  Ahhh!!  It’s okay, I like how these turned out better for his theme so it was actually a good thing that I didn’t remember this πŸ™‚
 
I purchased some chipboard letters at Hobby Lobby while they were 50% off.
 
 
(source)
 
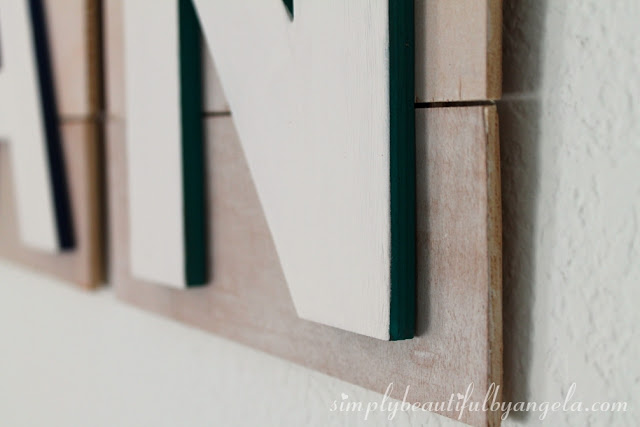
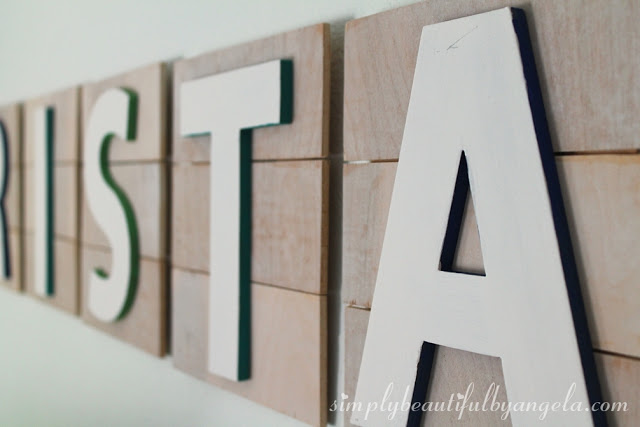
I then used a foam roller to paint the front of each letter white, and went back around with a small brush to paint the edges different colors.  I didn’t get a picture of this step (bad blogger!), but you’ll see what I mean in a bit πŸ™‚
 
I knew that I wanted them to sit on something to make them easier to hang and more visually interesting, so I made planks just like the ones that I made for our faux metal letters in the kitchen.
 
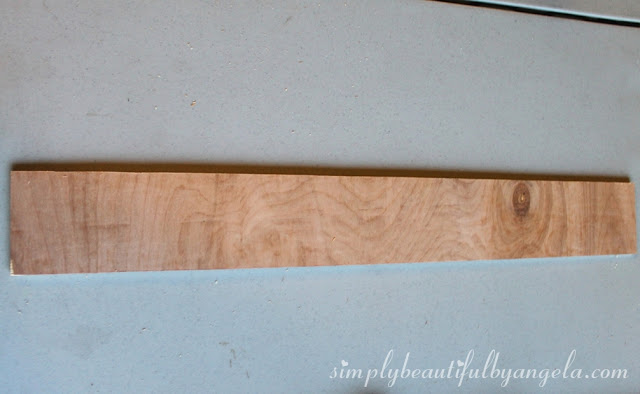
I purchased a 2′ x 4′ sheet of 1/4″ birchwood and the hubby cut it up into 3″ planks.
 

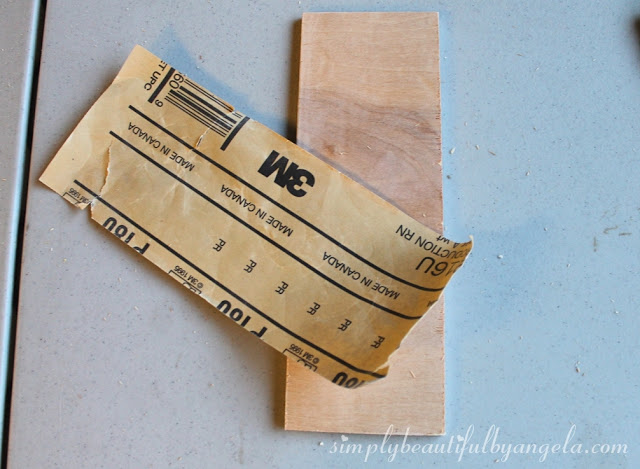
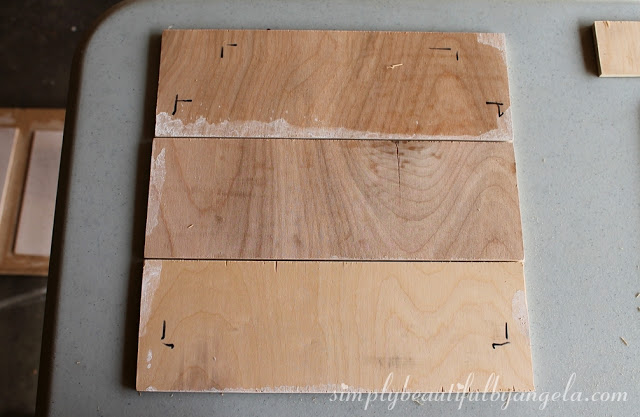
I then cut them into 9″ pieces until I had enough for 3 planks for each letter (21 in my case). I gave them a light sand to get rid of any rough edges that were created with the saw.

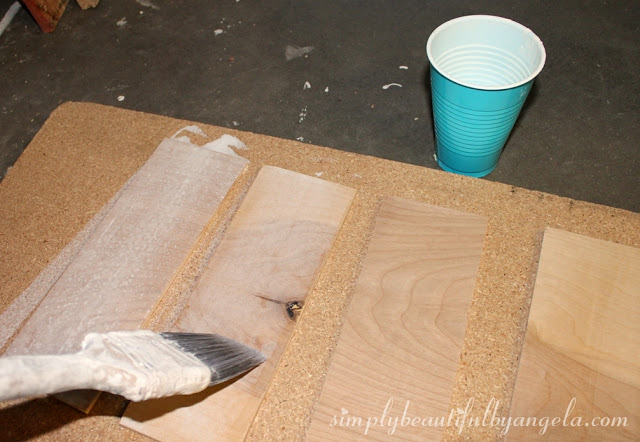
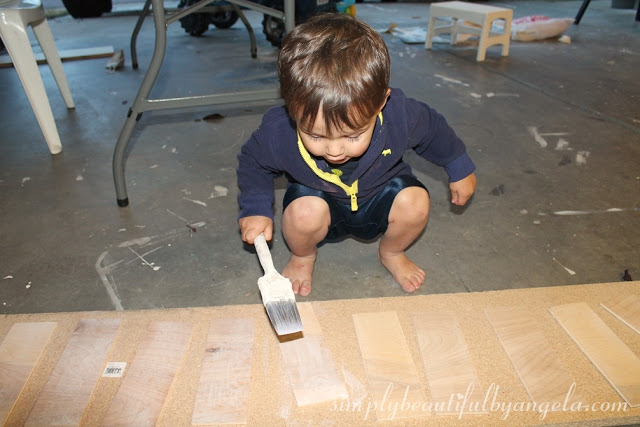
I went over each with watered down paint to whitewash them.  Each plank got two coats.

Tristan really enjoyed helping on this part.  In fact he had a huge temper tantrum when I told him we were all done and there weren’t any more to paint…

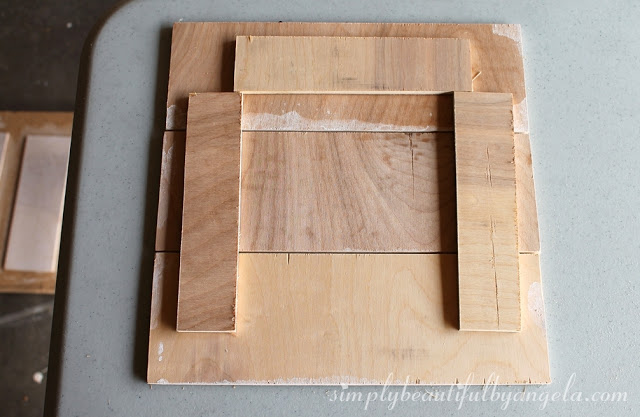
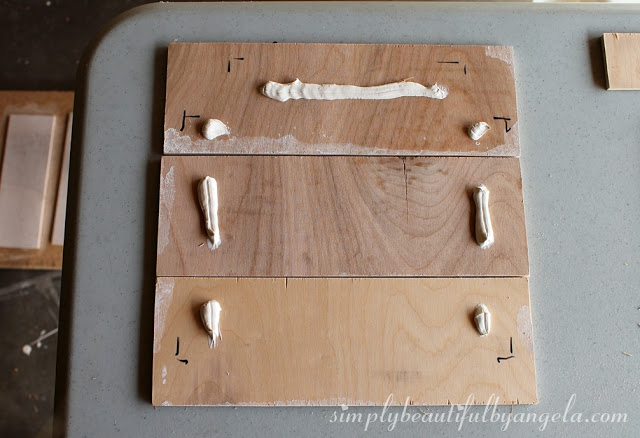
Once they were dry, I cut up some small scrap pieces to attach the planks together. I first positioned them where I wanted them, then marked the edges so that I knew where to apply the liquid nails.  Notice that I left a teensy tiny gap between the planks.

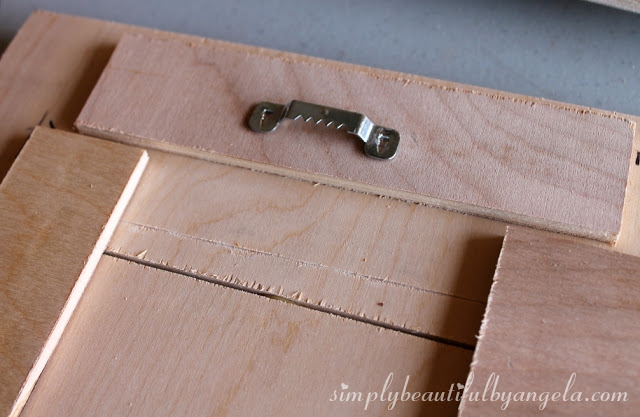
I set bricks on them and let them dry for a few hours.  Later, I came back and attached a sawtooth picture hanger to the back of each.

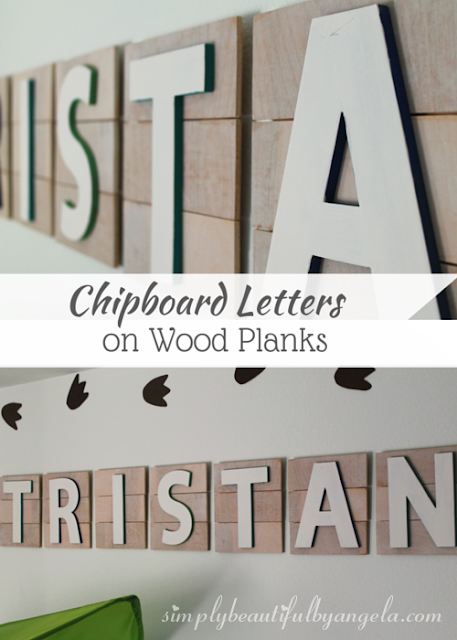
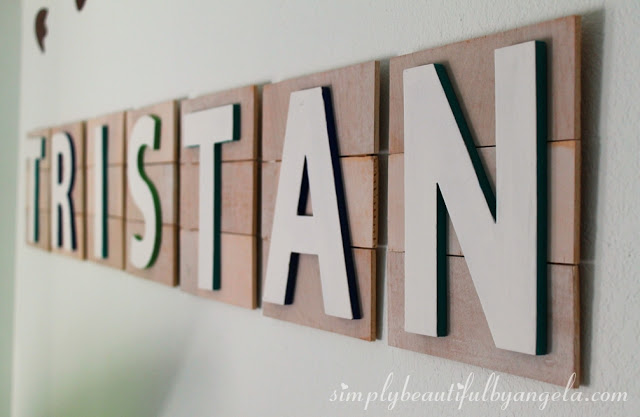
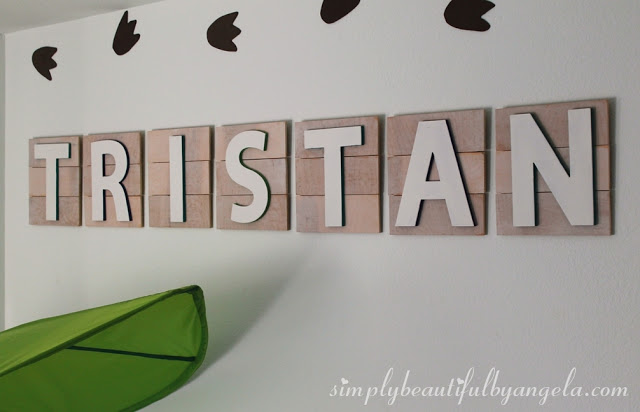
Then all that was left to do was to glue the letters on using liquid nails and hang them on the wall!

I really like how the white letters pop against the wood, it’s the perfect combination.

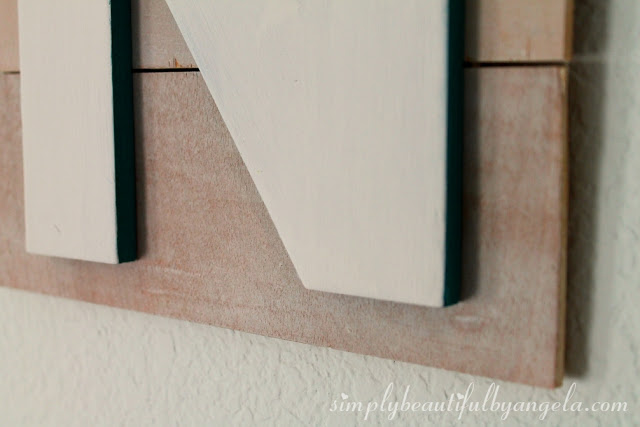
Adding the different colors to the edges of the letters really adds dimension.

Even though I will always love his old letters simply because they were in his sweet baby room, these are definitely a nice switch for his big boy room πŸ™‚

I didn’t budget for new letters, the cost wasn’t bad.  The letters were only $1 each and the wood $10.

Linking up to these awesome parties!

This post was featured on Creative Spark Link Party hosted by Weekend Craft, Artsy Fartsy Link Party hosted by Artsy Fartsy Mama and Be Inspired hosted by Elizabeth & Co! Click on the images below to take you to the feature posts.

Weekend Craft

Artsy Fartsy Mama
Elizabeth and CO

Β· Labels: Uncategorized

Comments

  1. Emma @ P is for Preschooler says

    October 29, 2015 at 2:33 pm

    Beautiful! And it's not childish, so he'll be able to have it on his wall for as long as he wants! Love it!

    • Angela says

      November 2, 2015 at 6:22 pm

      Thank you Emma! That's one of the reason I love them so much πŸ™‚

  2. Kelsie Kleinmeyer says

    November 2, 2015 at 3:29 pm

    These are super super cute. I love them a lot and think they could be really awesome in our future baby's room! Thanks for linking up with The Alder Collective! Hope to see you again Tuesday at 8 pm EST!

    • Angela says

      November 2, 2015 at 6:24 pm

      Thanks Kelsie! And thank you for hosting an awesome party πŸ™‚

  3. Anonymous says

    November 3, 2015 at 5:34 pm

    I love the bold look of these letters on planks! Nice tutorial, as well.

    • Angela says

      November 4, 2015 at 8:29 pm

      Thank you very much, they turned out better than I had imagined πŸ™‚

  4. Stacey says

    November 4, 2015 at 1:50 am

    This is so cute and could be used lots of different ways. Tristan is adorable too. πŸ™‚

    • Angela says

      November 4, 2015 at 8:30 pm

      Aww thanks Stacey, I appreciate it! πŸ™‚

  5. Kei says

    November 4, 2015 at 10:45 pm

    Wow, such an awesome project!
    Thanks for the tutorial!

    • Angela says

      November 5, 2015 at 5:18 pm

      Thank you Kei! πŸ™‚

  6. Sharon @ Elizabeth & Co. says

    November 10, 2015 at 2:00 pm

    Great project Angela! I could see using this idea all over the house. Featured at Be Inspired this morning. Thanks for sharing!

    • Angela says

      November 10, 2015 at 3:40 pm

      Thank you Sharon! And thank you so much for the feature πŸ™‚

  7. Andrew says

    January 12, 2016 at 7:06 pm

    Plans that provide sensible air circulation. Your router are going to be mounted underneath the counter high therefore it should have sensible air circulation so as to stay the motor cool. Router table plans designed by knowledgeable can take this all into thought as they savvy vital every of those aspects is to the success of a project.

  8. Aaron Nobel says

    February 19, 2016 at 2:03 pm

    It is an informative post.
    google.com

  9. Dustin T says

    February 20, 2016 at 8:00 am

    Wonderful points most people wrote in this article… Great items… I think you have made some genuinely interesting elements. Keep the good do the job.
    Jody

  10. jack says

    July 11, 2016 at 4:11 am

    That's so great. I think it's a nice project. Keep good to do it!

  11. Andrew A. Maclean says

    July 11, 2016 at 3:29 pm

    This is perfect for my kids's rooms. Good job! I'll try to make some for my kids. thanks for sharing!

Hello, I am so happy that you're here! My name is Angela and I love to create simple beauty in our home on a budget. Here you will find DIY decor and home projects, furniture flips and other home inspiration!

Never Miss a Post!


Diagonally Fluted Nightstands

Diagonally Fluted Nightstands

Hello! I’m really enjoying the extra daylight and the fact that it’s been paired with warm sunny weather this week has been icing on the cake. I’m trying to soak it all in before the next snowstorm! Today’s flip was from about a year ago and is still one of my favorite sets of nightstands…

Read More »

How to Update a Dresser with a Missing Drawer

How to Update a Dresser with a Missing Drawer

Hey friends, happy March! Even though I know we still have quite a bit of cold weather coming our way here in Colorado, it’s exciting to see these warmer days sprinkled in here and there. This week I am sharing how I saved an old IKEA dresser from ending up at the landfill! Supplies Used:(Affiliate…

Read More »

Vintage Ice Box Style Nightstands Makeover

Vintage Ice Box Style Nightstands Makeover

Hello friends! We just got back from our annual trip to the Great Wolf Lodge and it was fun times as always! Today I am sharing how I updated these fun vintage ice box style nightstands that I found on Marketplace! Supplies Used:(Affiliate links may be provided for convenience.  For more info, see my full disclosure here.) …

Read More »

Never Miss a Post!


GOOGLE 2

GOOGLE 3

GOOGLE 4

GOOGLE 5

GOOGLE 6

GOOGLE 7

Theme by 17th Avenue · Powered by WordPress & Genesis