Hello and happy Wednesday! I hope you all had a great holiday weekend. Ours was busy–but tons of fun. We took the boys out to the reservoir, which when you are born and raised in Colorado, is the “going to the beach.” The hubby is from California so he begs to differ haha.


Fireworks have never really impressed Tristan, and this year he was old enough to be able to express to us just how much he didn’t like the fireworks (which was fun because it was done with the whiniest of voices in between sobbing meltdowns). Lucas on the other hand was completely fascinated by them.


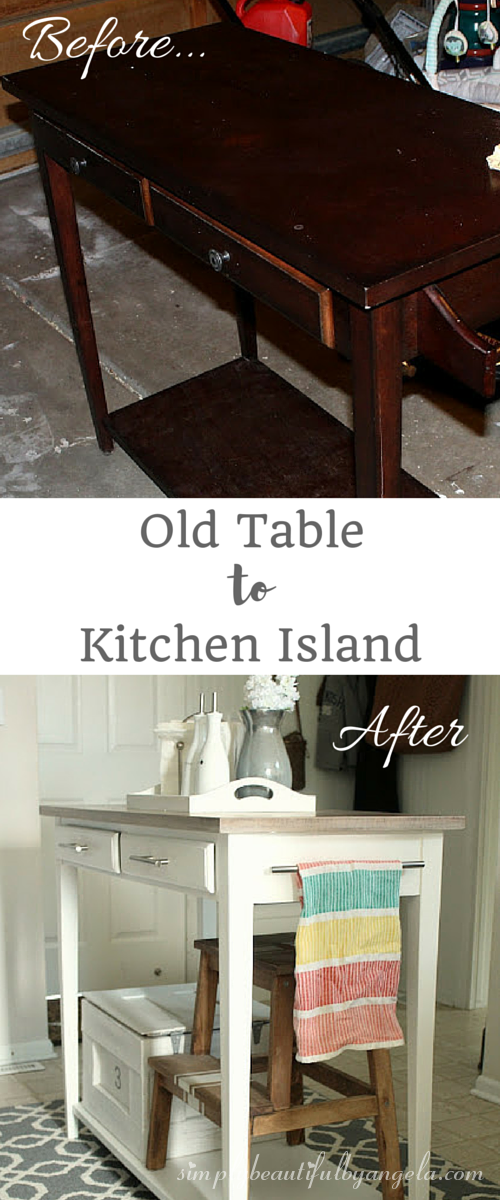
A couple of weeks ago the hubby sent me a picture of a table that he spotted at a garage sale and asked if I wanted it. (Sidenote–I really need to start taking better before pictures because this one is pretty terrible!)

I told him that although I was very ecstatic that he thought of me (and my obsession for furniture makeovers), I was going to pass because I have enough projects cluttering up the garage. However, as fate would have it by the time he got my response he had already bought it for 10 bucks, had it loaded and ready to come home!
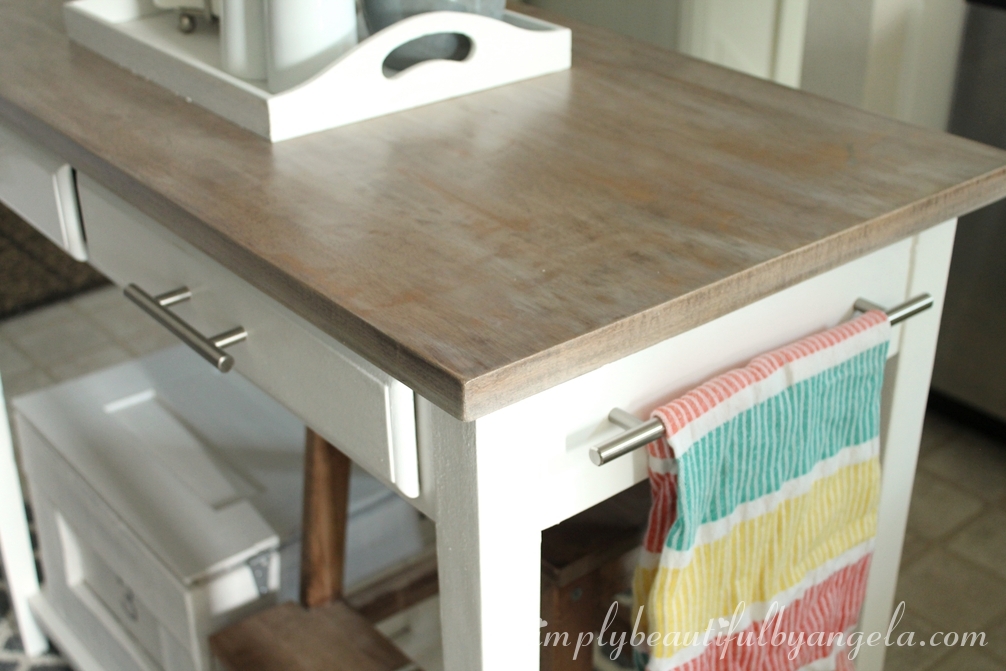
I’m so glad he did because when I saw that it had a towel bar on the side (I think it was used as a bar previously) I had a light bulb moment and realized what an awesome kitchen island this would make. The hubby thought I was crazy but I convinced him that it just needed a little makeover 🙂
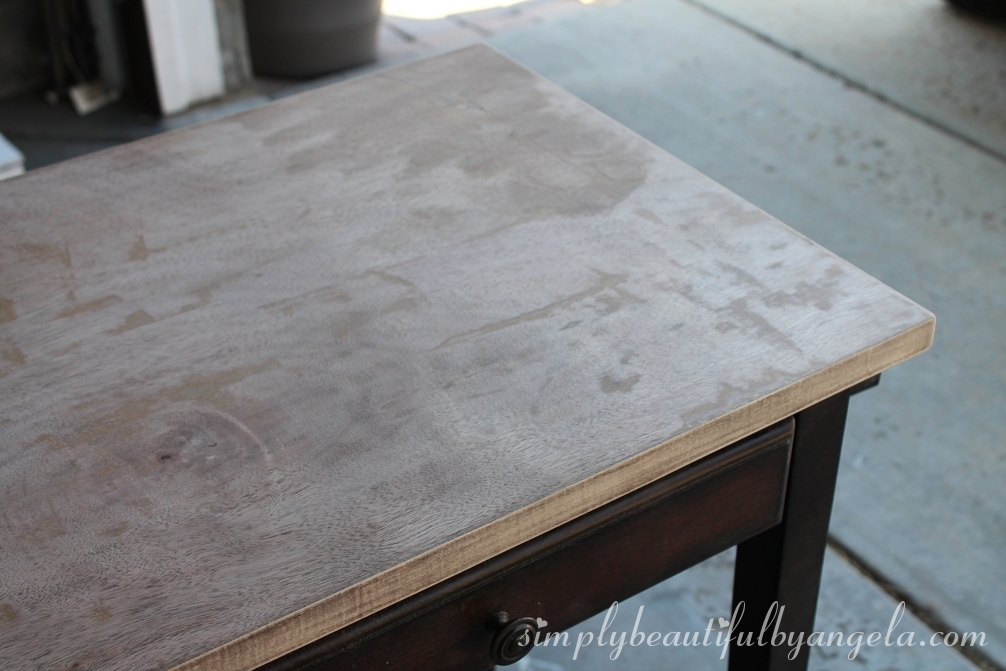
I began by sanding down the top so that I could re-stain it. I did most of it by hand even though I swore to myself that after sanding the basement staircase railing down that I would never, ever EVER hand sand a large piece again. I obviously didn’t keep that promise.

I got so tired about half way through that I attempted using a power sander. I honestly had no idea how to use it (hence the bottom shelf!). The hubby thought it was pretty hilarious when he saw my attempt and I got the “why didn’t you wait for me?” lecture haha. It looks like a two year old got a hold of it…

The good thing is that it took a lot off the finish off and made the rest of the hand sanding a little easier, but the bad thing is that I scuffed up the surface pretty bad–whomp, whomp 🙁
For the legs and drawers I used some deglosser that I had leftover from the Cabinet Transformations kit that I used on our kitchen cabinets. This stuff works great at getting the shine off so that you don’t have to do any sanding.
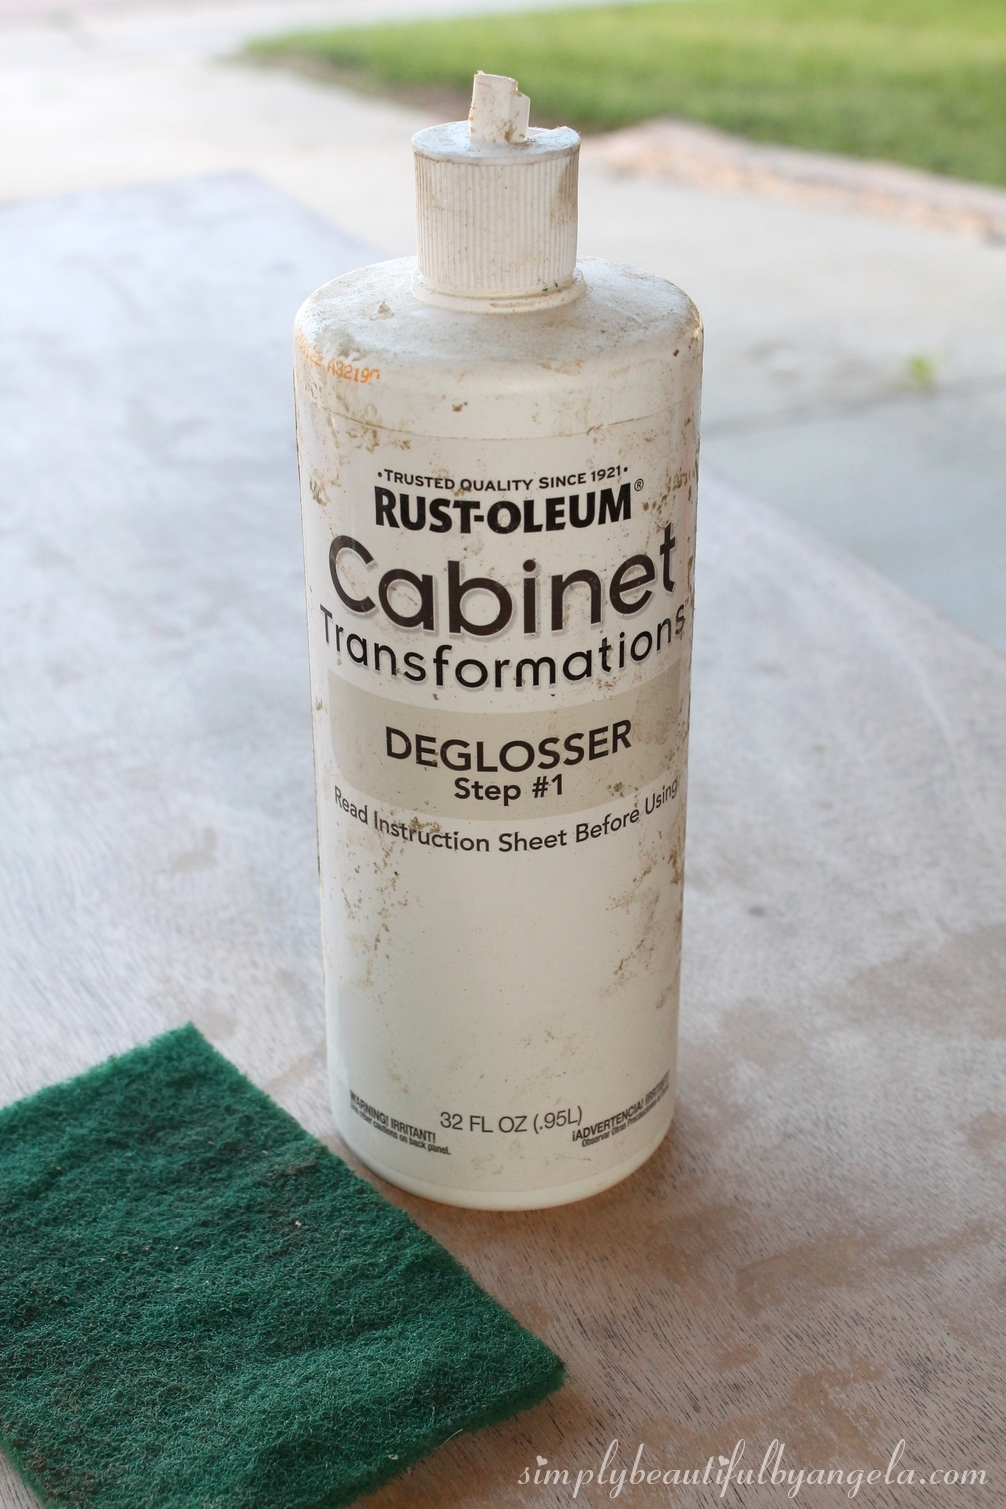
However, since I knew that this was going in the middle of the kitchen and will probably get a lot of bumps, I also quickly used some sandpaper after deglossing to make sure that the new paint really sticks.
I applied three coats of my left over kitchen cabinet paint (Behr Polar Bear in semi-gloss) using a foam roller and a paintbrush for the tight areas. Just a quick note here–using a roller makes the process of painting furniture soooo much quicker.
I realized before the final coat that I needed to fill the holes from where the old towel bar went.

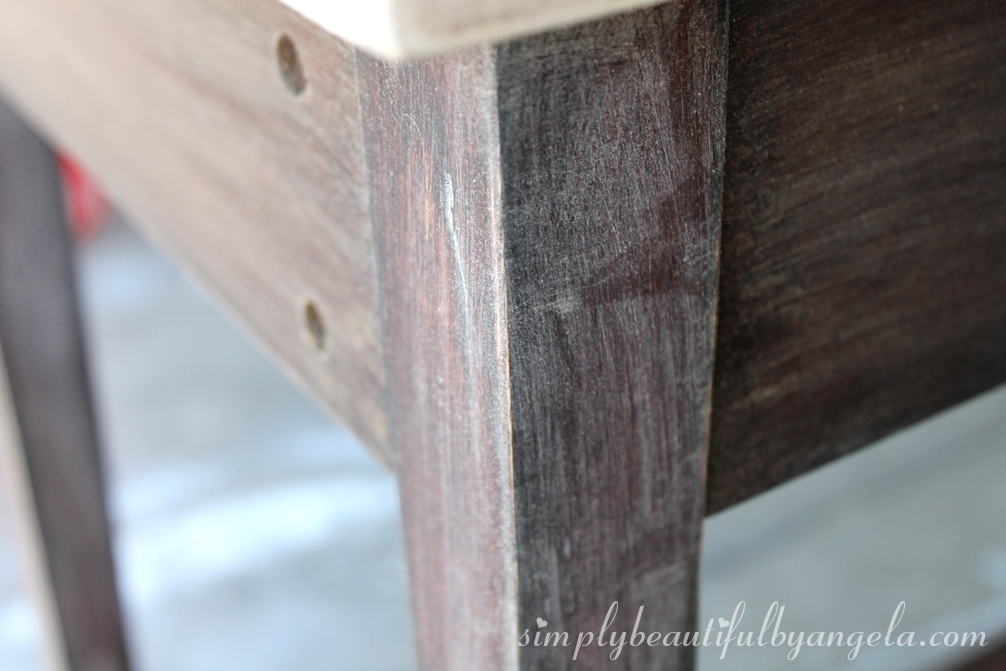
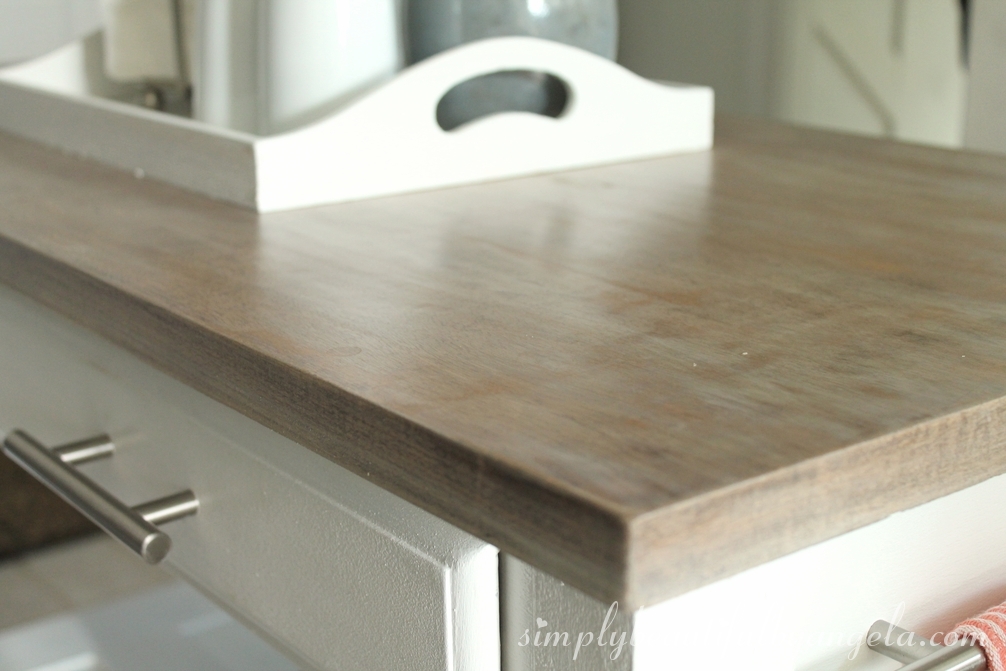
My power sanding incident was no biggie on the bottom shelf since I painted it. But on the top the marks were super visible through the new stain (which is Provincial by Miniwax).
To hide them I decided to try doing a whitewash over the stain. I used a thicker consistency than I normally do and I also went over it about 4 times using a rag to blend it in.

After 2 coats of polyurethane and some new hardware this beauty was ready to go in the kitchen!


I was worried that it was going to feel too cramped in our small kitchen and even googled “what distance should there be between an island and the cabinets” (which is 3 feet by the way). Luckily it fits just perfectly!

I’ve been making my lunch here every night since it’s so convenient to be right next to the fridge. It also serves as a great spot for putting groceries away in the pantry and fridge.
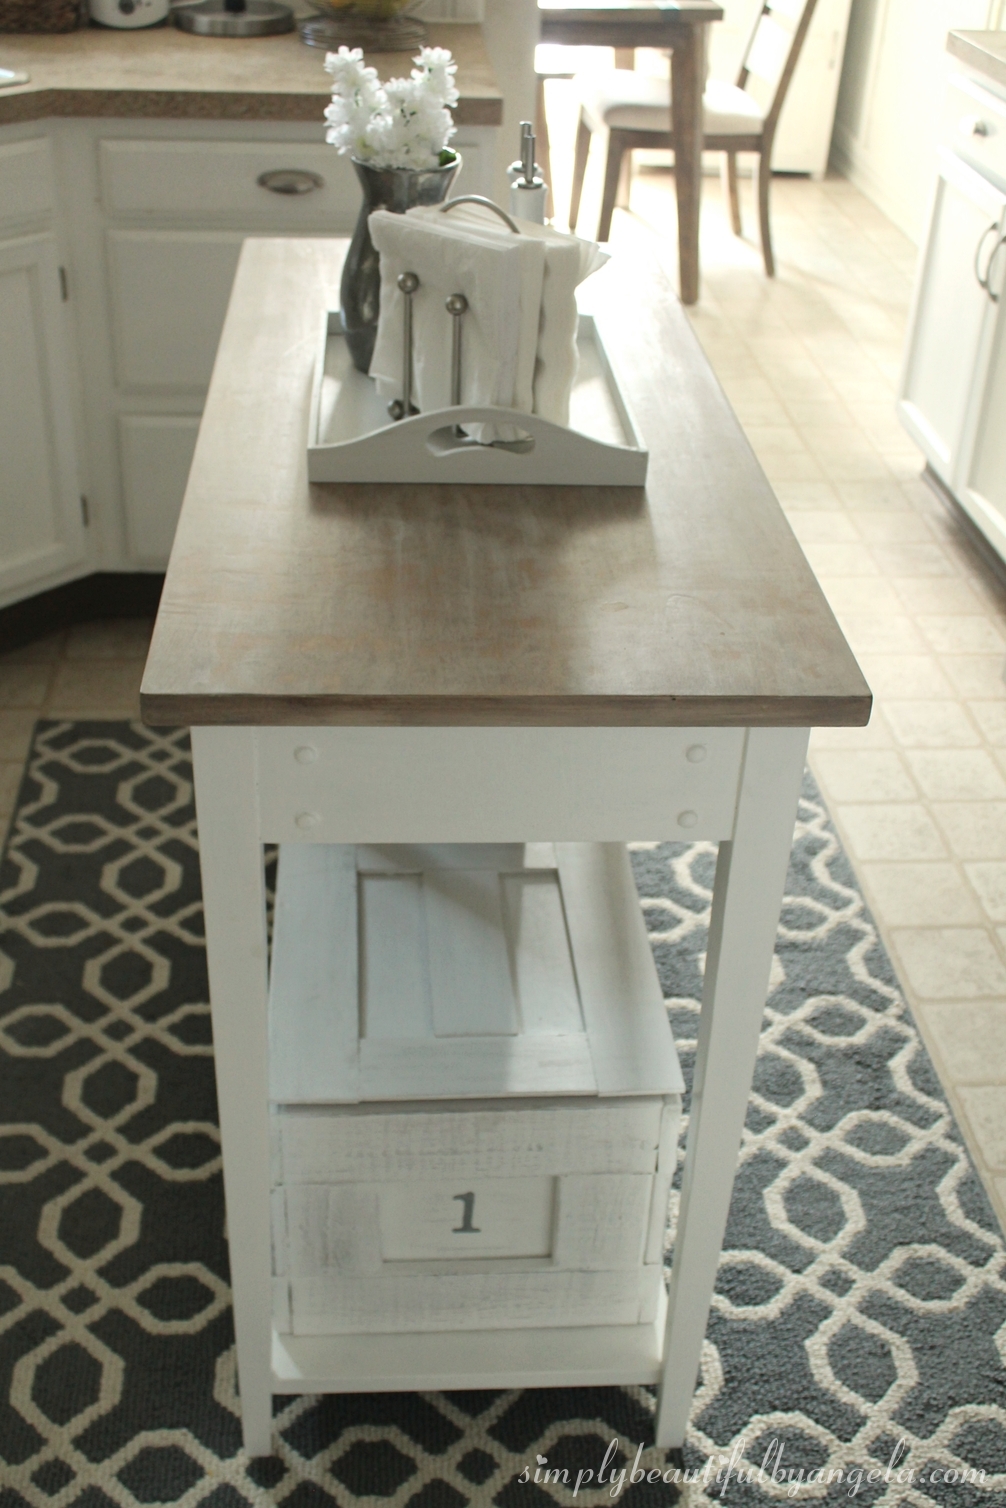
The top turned out great. The scuffs ended up adding to the character and makes it almost look like butcher block.
And I’ve already put the drawers to good use–papers that I need to hang on to in one and bibs in the other. Can you believe it, my little Lucas began eating solid food this weekend!
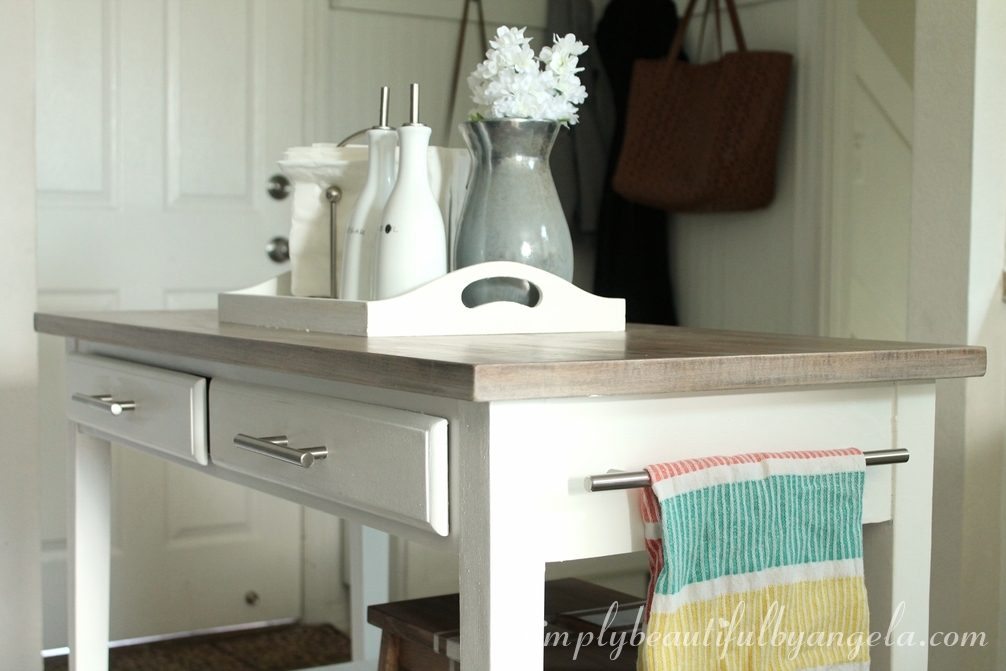


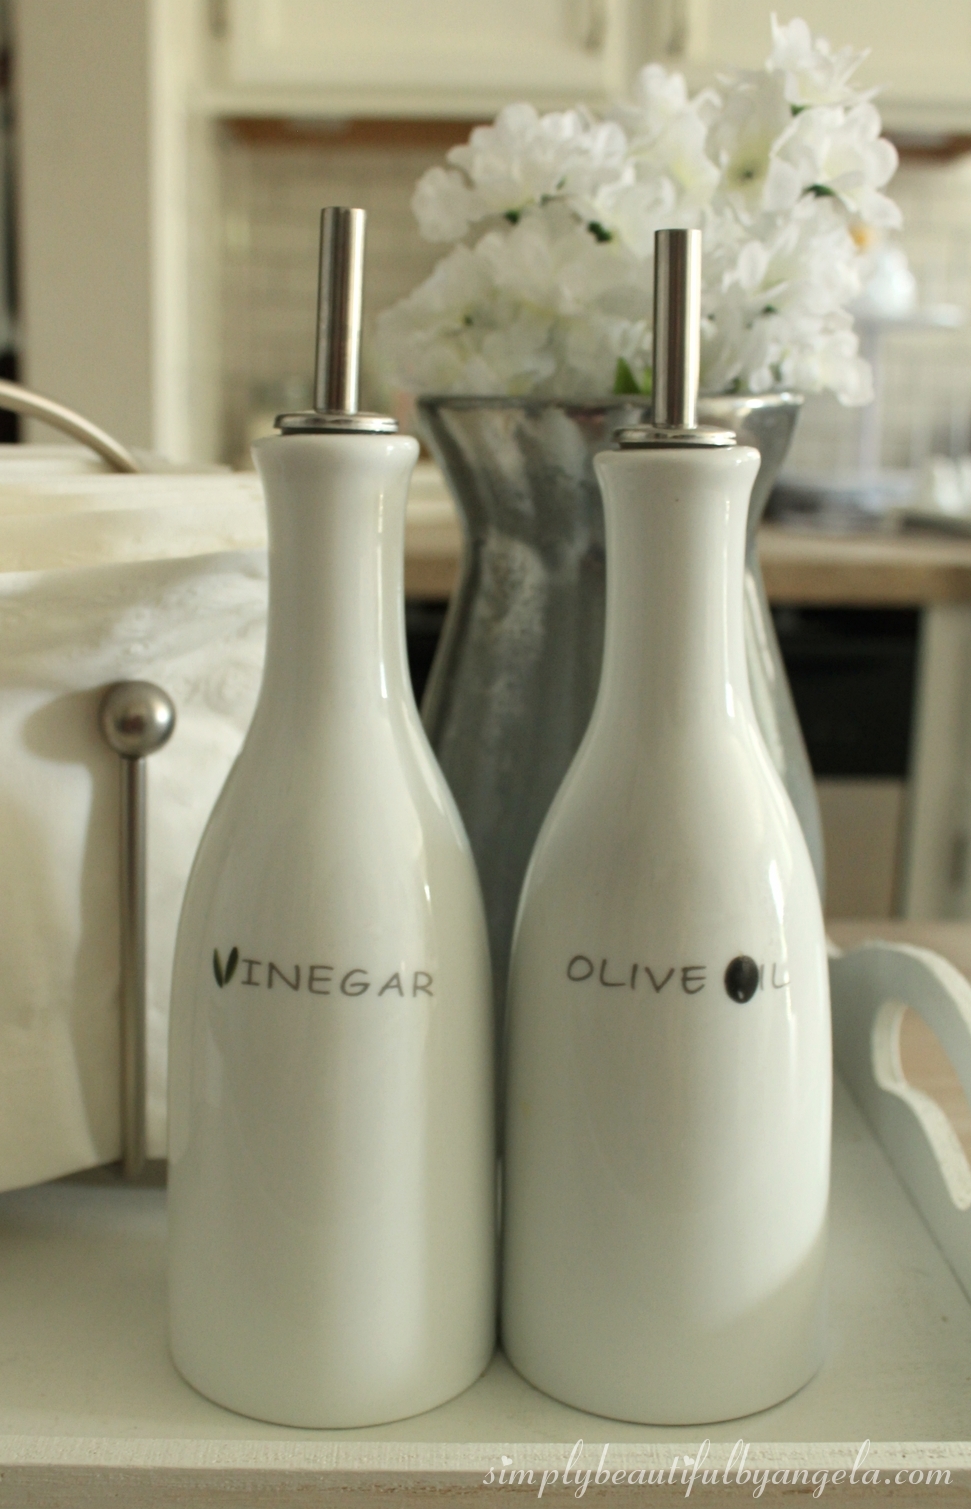
The tray on top holds some napkins and our oil bottles that are just too cute for words!

They are one of my favorite Goodwill finds of all time 🙂
It’s also been nice having the dishtowel right next to the sink because when I had it on the oven I would get water drips on the stainless steel and glass and it would drive me absolutely crazy!

I feel so fancy having a kitchen island. It’s the little things in life. See you all next week!

Oh I love the island. Great finish choices, esp. love that top color. Yes, hand sanding… I recently did an old toy box and tore my hands up so badly. Luckily, a family member took pity and bought me a power sander at a great price. Cute photos of your children also 🙂
Thank you so much Danice! I definitely need to learn how to use a power sander, glad you understand my pain haha!
Thanks for this inspirational makeover. The old kitchen island has been transformed in to a new one.
thanks
Wow nice post i really like it very much every human can share this post.
I took one see at the first picture and thought ugh! nice work! Like you said, it is so so easier to maintain once it is done. I really like http://www.StoneFryingPans.com the storage tubs without the lids. I found that with child's, lids just end up on the floor.
A free-standing organizer will store significantly additional tools than a wall-mounted one. during this means, you will be able to keep all large yard tools in one a part of your garage or work search tool eqiupment.
Extremely well transformed! Always enjoy reading the process of such beautiful furniture makeover;).
Oh, that’s a great coincidence because I have a post coming out soon with some ideas! 🙂 Congrats on the new kitchen, so exciting!Best Milk Frother Reviews
This is an excellent post I seen thanks to share it. It is really what I wanted to see hope in future you will continue for sharing such a excellent post. VanNuysGarageDoorRepair
Hello, Angela.
I have read your article very attentievely really this is very informative article.
I really love this blog.
Wow! She looks pretty! Very nice work. I really like Stainless Steel Cookware the way you clean your tubs. I learned a lot!
Outstanding blog post, I have marked your site so ideally I’ll see much more on this subject in the foreseeable future. http://www.beverlyhillsca-garagedoorrepair.com
Fantastic picture look like a greetings card.It's really amazing me.Thank you so much for sharing such a beautiful picture.It made me to learn photography.Actually i want to study photography.But mu home town there have no much facility.
Great article with excellent idea!Thank you for such a valuable article. I really appreciate for this great information..
Cultured Marble
I have read you post, Great work you really did it very well. Keep working like this and sharing informative posts like
this one. keep it up. I'm waiting for your next post…
why refinance your home
I have read you post, Great work you really did it very well. Keep working like this and sharing informative posts like
this one. keep it up. I'm waiting for your next post…
why refinance your home
I have read you post, Great work you really did it very well. Keep working like this and sharing informative posts like
this one. keep it up. I'm waiting for your next post…
elliot lake real estate
Great tips I have noted all in my diary I'll use your all tips as you mentioned I really like your article I was searching on this topic as I'm working on this topics too.you can see my work but yours is too good I personally appreciate you for this. Keep working like this.make your own shirt toronto
I think this is an informative post and it is very useful and knowledgeable. therefore, I would like to thank you for the efforts you have made in writing this article. stone plates dinnerware
I really impressed after read this because of some quality work and informative thoughts . I just wanna say thanks for the writer and wish you all the best for coming!. visit their website