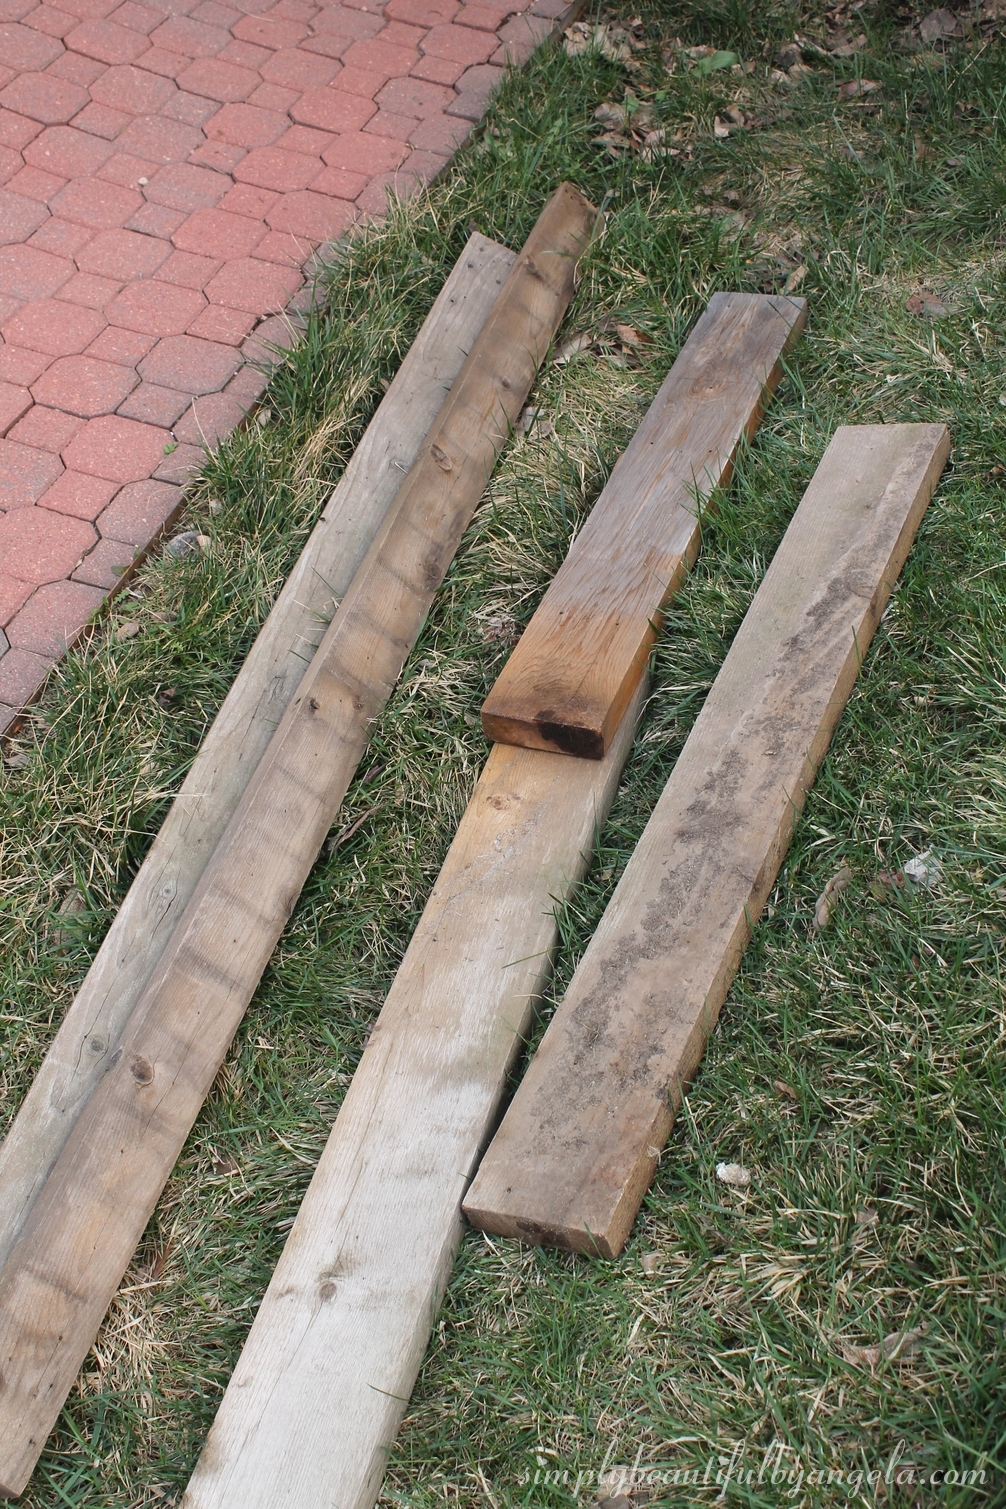
Simply Beautiful By Angela

creating simple beauty on a budget

  • Home Tours
  • Projects
  • Legal
  • Link Parties
  • Let’s Chat!
  • About Me

Backyard Scrapwood Turned Rustic Console Table

August 16, 2016

Hello!  As I promised you all last week, this is a very exciting week for my little blog because I’m sharing not only one–but two new pieces of furniture!
On the DIY scale, furniture building and furniture makeovers are probably at the top of favorites list.  Not only because furniture at the store can get crazy expensive, but also because I get to totally customize it to look exactly how I want.
During the early Spring I was working on cleaning up the yard and noticed a bunch of old wood on the side of the house that was left by the previous owners. 
A lot of people would probably look at this dirty, weathered wood that was covered in old nail holes and want to throw it in the trash–but not me 🙂  I instantly started brainstorming ways that I could put it to good use.
I had recently moved the console table that was in the basement up to our front entryway and the wall as you first walk into the basement was feeling super lonely.  I was looking around for something that was just the right size (and price) to put there and wasn’t having much luck.  Sooooo I decided to make my own!
Supplies Used: (Affiliate links may be provided for convenience.  For more info, see my full disclosure here.) 
  • 2x6s
  • 2x4s
  • 1x4s
  • Wood Glue
  • Wood screws
  • Nails
  • White paint
  • Minwax Wood Stain in Classic Gray
  • Medium grit sandpaper
  • Paintbrush
  • Polyurethane Clear Satin Finish
  • Corner Braces (aka L-brackets)
  • Pulls
 After scrubbing the wood down with soap and water, I made my first cuts:
4-2x4s at 32″ (legs)
2-2x6s at 32″ (front and back)
2-2x6s at 36″ (top)
I secured two 2x4s to a 2×6 to make each side using wood glue and screws.
To make sure that I was at a straight angle I used a triangle and another piece of wood at the bottom to check myself.

Once I had my two sides, I laid them down on the 2 pieces that I cut for the top to get an idea of what width my side pieces needed to be cut at.


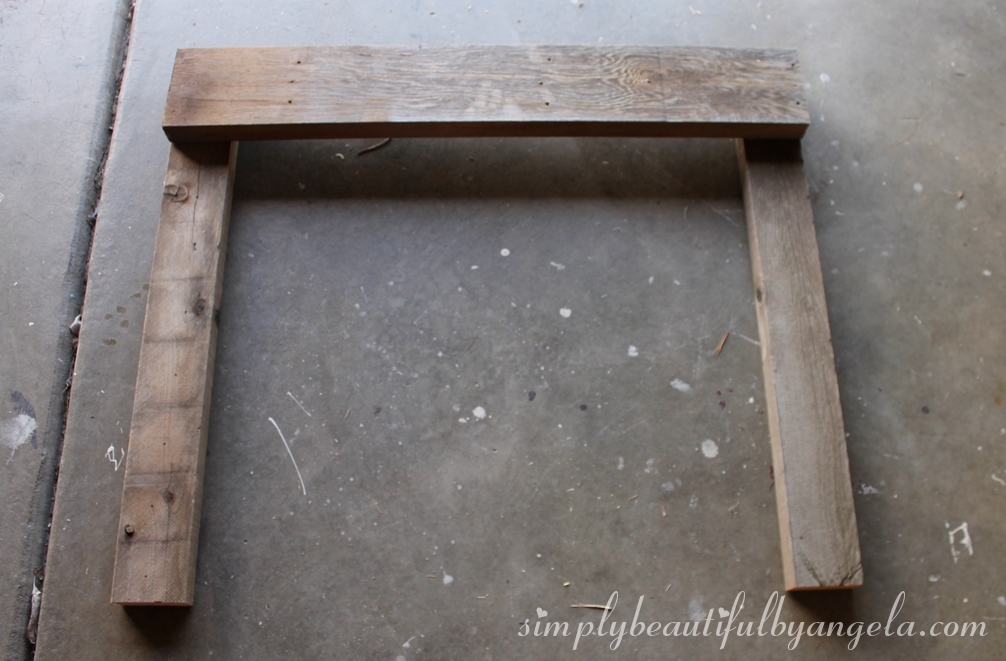
(As you’ll see later on I actually had to re-cut my top pieces because I cut them the same width as the table and didn’t leave any overhang on the sides–so ignore the top for a second!) I ended up cutting the sides a little on the big side so the two top pieces ended up with a small gap in between, but I actually ended up liking that look so I kept them like that.


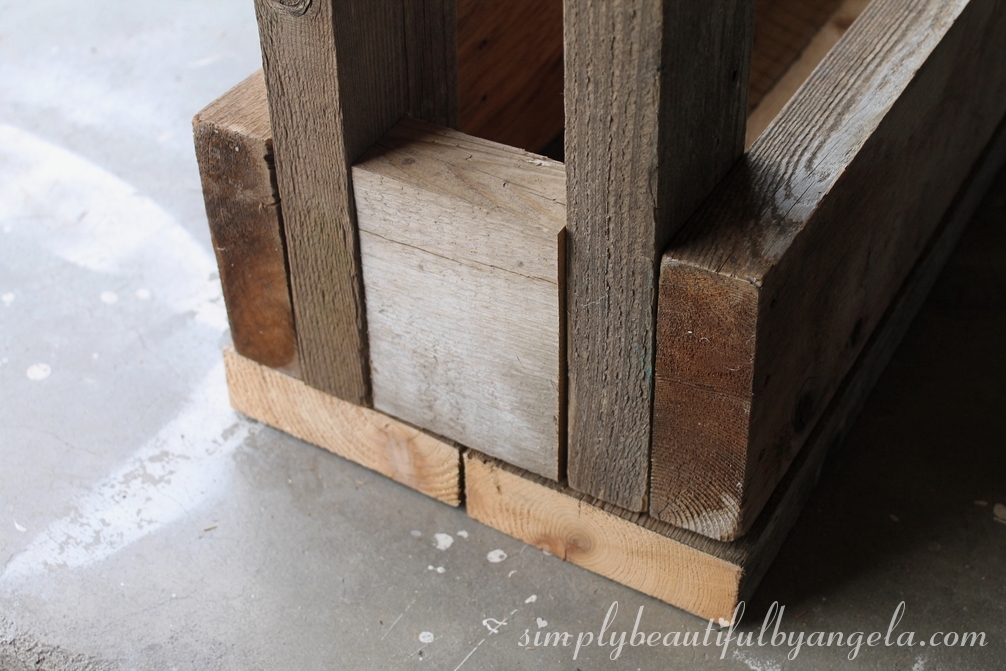
Once I had my side pieces I secured them using wood glue and L brackets.  A Kreg Jig would come in handy here but since I don’t have one I improvised haha.


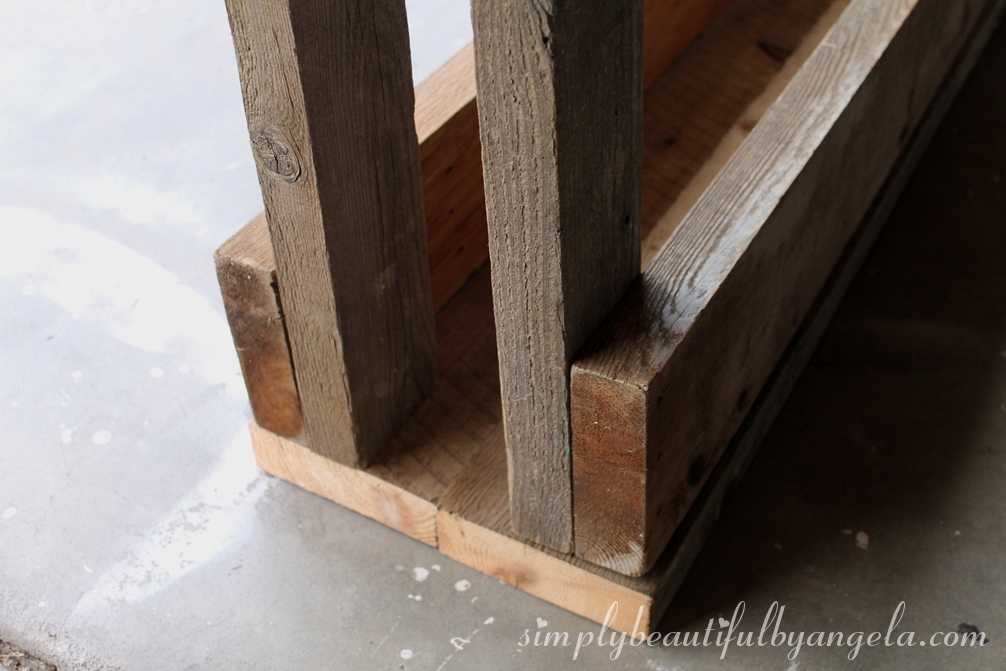
I also cut two more pieces this same size to secure at the bottom.  For these we just used screws from the front of the legs which added to the industrial charm that I was going for.


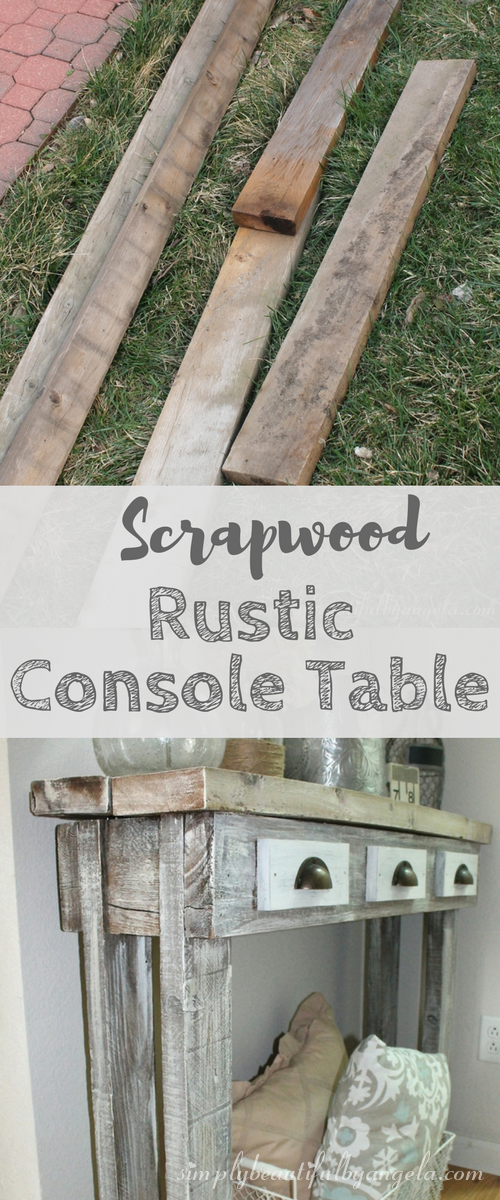
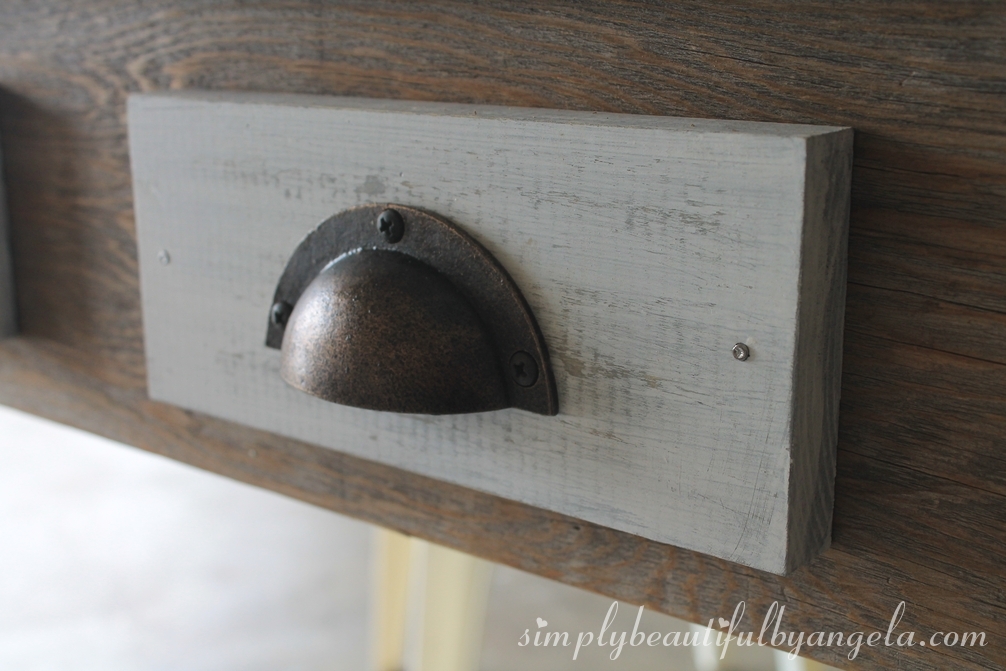
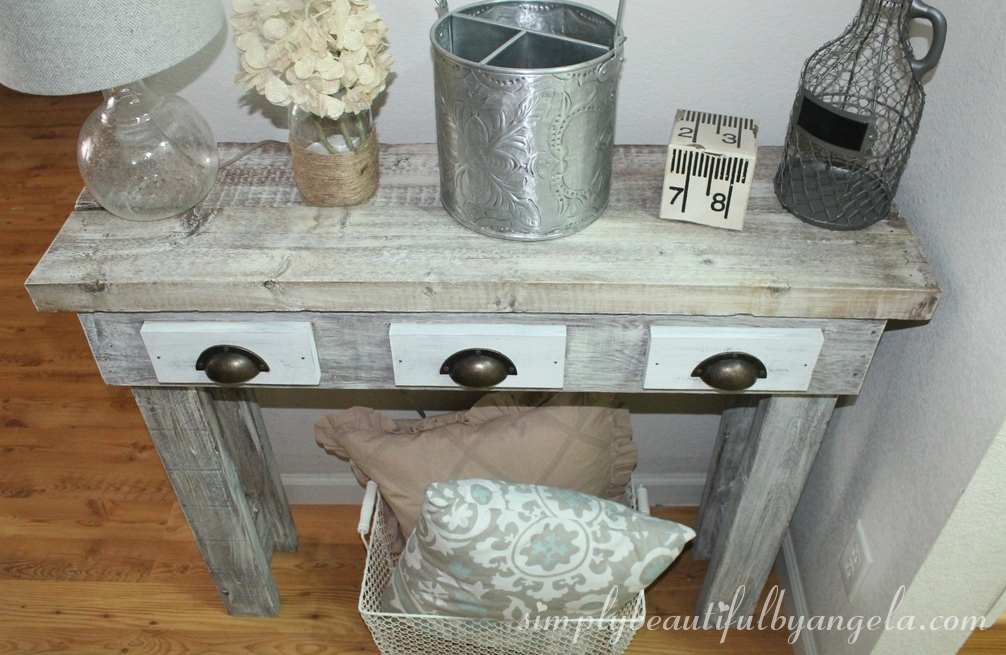
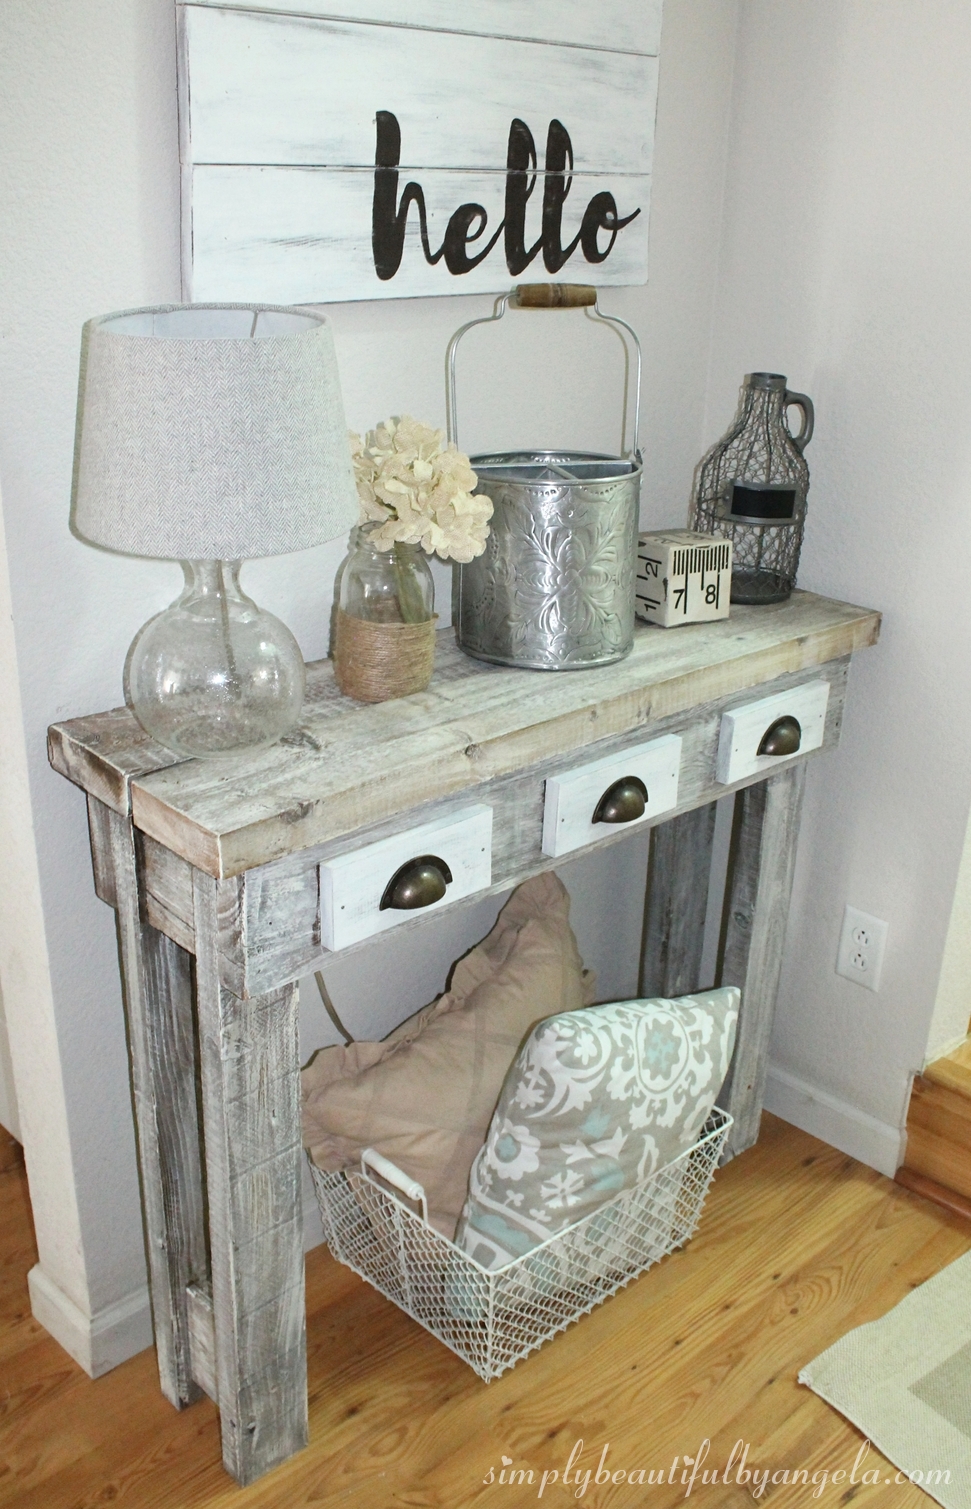
I’ll be honest with you.  At this point I wasn’t sure if I was going to actually keep the table or get rid of it.  It was looking awfuly dark and dingy and I was losing hope in my crazy idea to use this old wood. But then I decided to try adding some faux drawers to dress it up a little bit.  I cut 3 pieces out of a 1×4 and stained them with Miniwax wood stain in Classic Gray.  


I then painted each with a coat of white paint and used sandpaper to pull the gray stain out from underneath once the paint was dry.  After attaching each drawer with wood glue and nails I added a cup pull and finally–this table was starting to turn around!


But it was still too dark for my taste.  So I dry brushed it with some white paint and it turns out that is exactly what it needed.


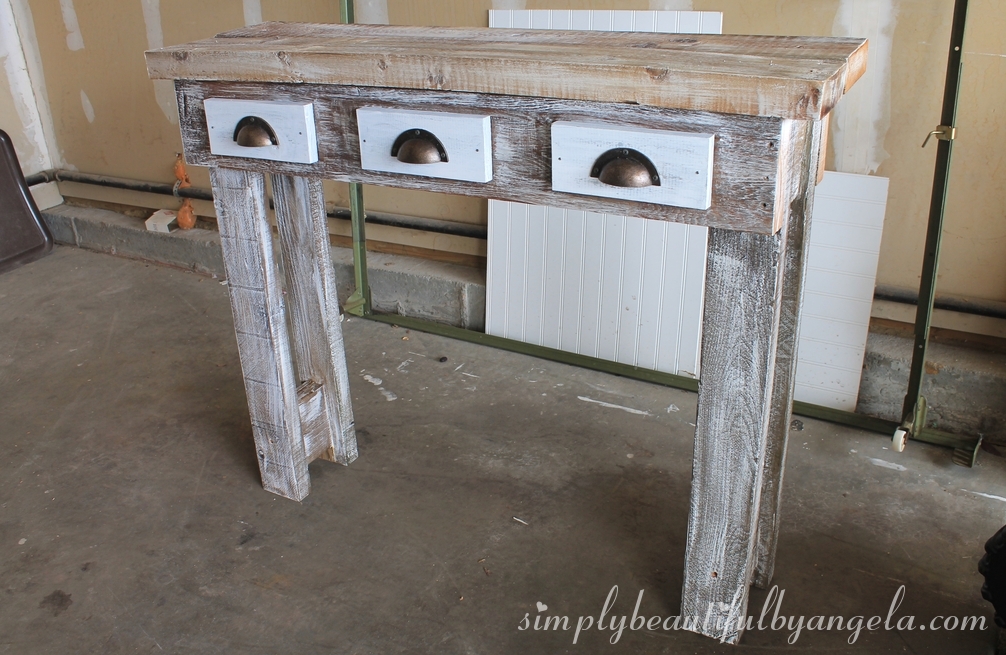
Well almost.  After putting on some polyurethane it turned it dark again. Whomp whomp… But a couple coats of whitewash saved the day!


I actually finished this sometime around Easter.  I kept wanting to get it upstairs to get better pictures of it in the natural light, but this thing is a beast and I decided that I would just try to play around with my camera settings to capture it’s beauty.  So please excuse the poor basement lighting!


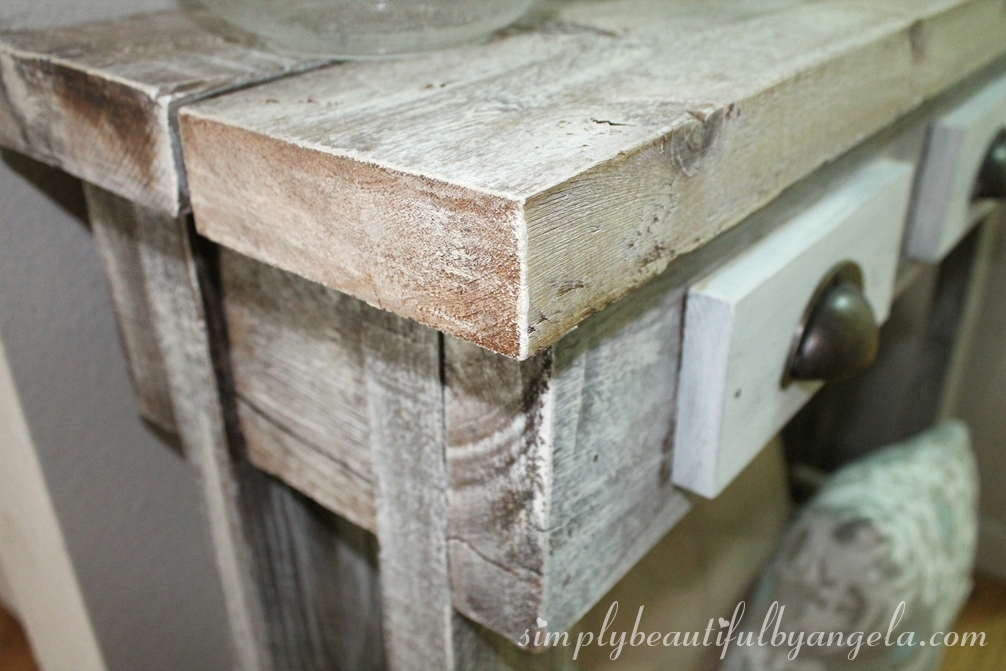
I love how the dry brushing not only lightened it up a ton, but it also pulled out all of the cool wood grain texture.


The dry brushing and whitewashing also nicely disguised the ends of the wood where I made the cuts.    


Since the wood was free and I already had all of the supplies on hand this table only cost me $6 which is what I paid for the pulls at Hobby Lobby while they were 50% off.


See the little cutie peeking out from behind?  I’ll be sharing the tutorial on that later this week so stay tuned!
Linking up to these awesome parties!

· Labels: Uncategorized

Comments

  1. Charlene says

    August 19, 2016 at 10:33 pm

    I love the rustic look. I need one of these tables. 🙂

  2. Jaclyn | One Thousand Oaks says

    August 23, 2016 at 1:13 am

    I love your table! It is so cute! Love the little faux drawers on the front! The coloring of it is perfect too!

    – Jaclyn

  3. Artsy VaVa says

    August 28, 2016 at 11:43 pm

    I love the table. Great job! Pinning.

Hello, I am so happy that you're here! My name is Angela and I love to create simple beauty in our home on a budget. Here you will find DIY decor and home projects, furniture flips and other home inspiration!

Never Miss a Post!


Diagonally Fluted Nightstands

Diagonally Fluted Nightstands

Hello! I’m really enjoying the extra daylight and the fact that it’s been paired with warm sunny weather this week has been icing on the cake. I’m trying to soak it all in before the next snowstorm! Today’s flip was from about a year ago and is still one of my favorite sets of nightstands…

Read More »

How to Update a Dresser with a Missing Drawer

How to Update a Dresser with a Missing Drawer

Hey friends, happy March! Even though I know we still have quite a bit of cold weather coming our way here in Colorado, it’s exciting to see these warmer days sprinkled in here and there. This week I am sharing how I saved an old IKEA dresser from ending up at the landfill! Supplies Used:(Affiliate…

Read More »

Vintage Ice Box Style Nightstands Makeover

Vintage Ice Box Style Nightstands Makeover

Hello friends! We just got back from our annual trip to the Great Wolf Lodge and it was fun times as always! Today I am sharing how I updated these fun vintage ice box style nightstands that I found on Marketplace! Supplies Used:(Affiliate links may be provided for convenience.  For more info, see my full disclosure here.) …

Read More »

Never Miss a Post!


GOOGLE 2

GOOGLE 3

GOOGLE 4

GOOGLE 5

GOOGLE 6

GOOGLE 7

Theme by 17th Avenue · Powered by WordPress & Genesis