Simply Beautiful By Angela

creating simple beauty on a budget

  • Home Tours
  • Projects
  • Legal
  • Link Parties
  • Let’s Chat!
  • About Me

How to Paint Stripes: A Refreshed Laundry Space!

September 8, 2016

Hello everyone! I hope you all had a fantastic holiday weekend.  Ours was jam packed with end of summer fun and we enjoyed every minute of it (…well almost every minute, there were just a few meltdowns and embarrassing scenes here and there that we could have done without haha).
Since we spent Friday night and all day Saturday and Sunday out and about, I thought I would start being productive on Monday during the boys’ naptime . 
Our basement used to have a coastal theme that I got tired of very quickly. So while the sea foam green paint in the laundry area was lovely at one time, it was now sticking out like a sore thumb and has been driving me completely batty. 
(Excuse the dark picture I didn’t have my settings right and I failed to notice because I was so anxious to start slapping paint up on those walls haha!)
I’ve been wanting to incorporate striped walls somewhere in the house so I decided that this was the perfect spot to test it out.  I figured that since it’s such a small space I could easily repaint it if I didn’t like it.  As it turns out, there won’t be any repainting of this area anytime soon because I am head over heels with how it turned out!
Supplies Used: (Affiliate links may be provided for convenience.  For more info, see my full disclosure here.) 
  • Two colors of paint
  • Measuring Tape
  • Pencil
  • Straight edge (I used a piece of scrap plywood)
  • Painter’s tape (Frog Tapeis my tried and true favorite and as you’ll later see, what I should have used for this project)
  • Paint Roller
  • Small paintbrush
I wanted my stripes to be white and gray so I began by painting the entire space white.  You could also begin by taping your stripes off and painting one color at a time, but since I was going over green paint I figured that the white under the gray would probably be a good idea.
It took me three coats to cover that green up and I swear I can still see it even though the hubby says he can’t.  I think I just got so used to looking at it.

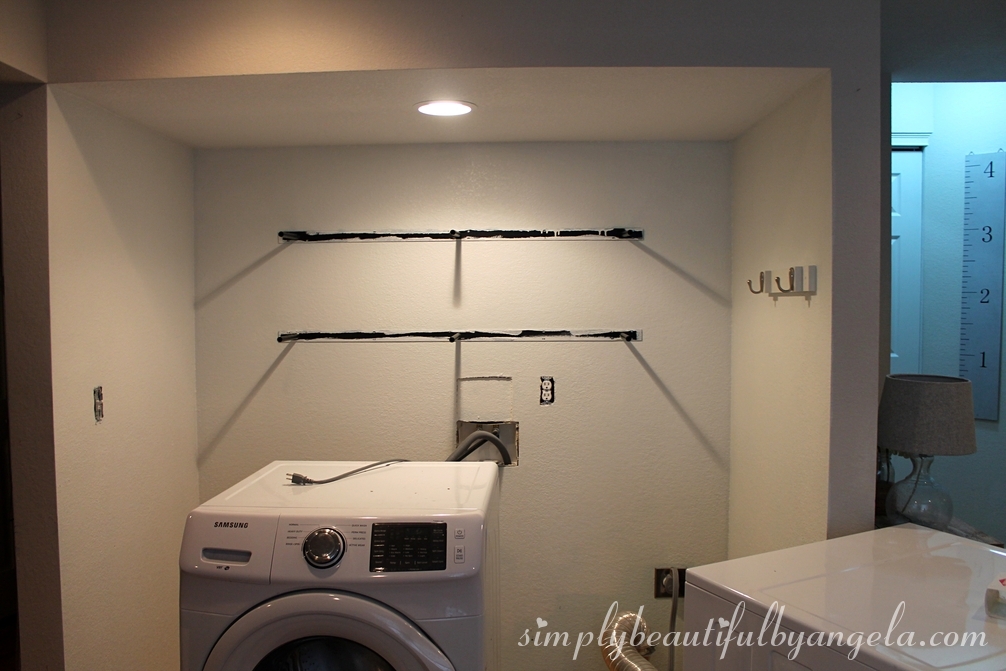
By the way, I about fainted when I saw how much debris was under and behind the washer and dryer.  Ick!!

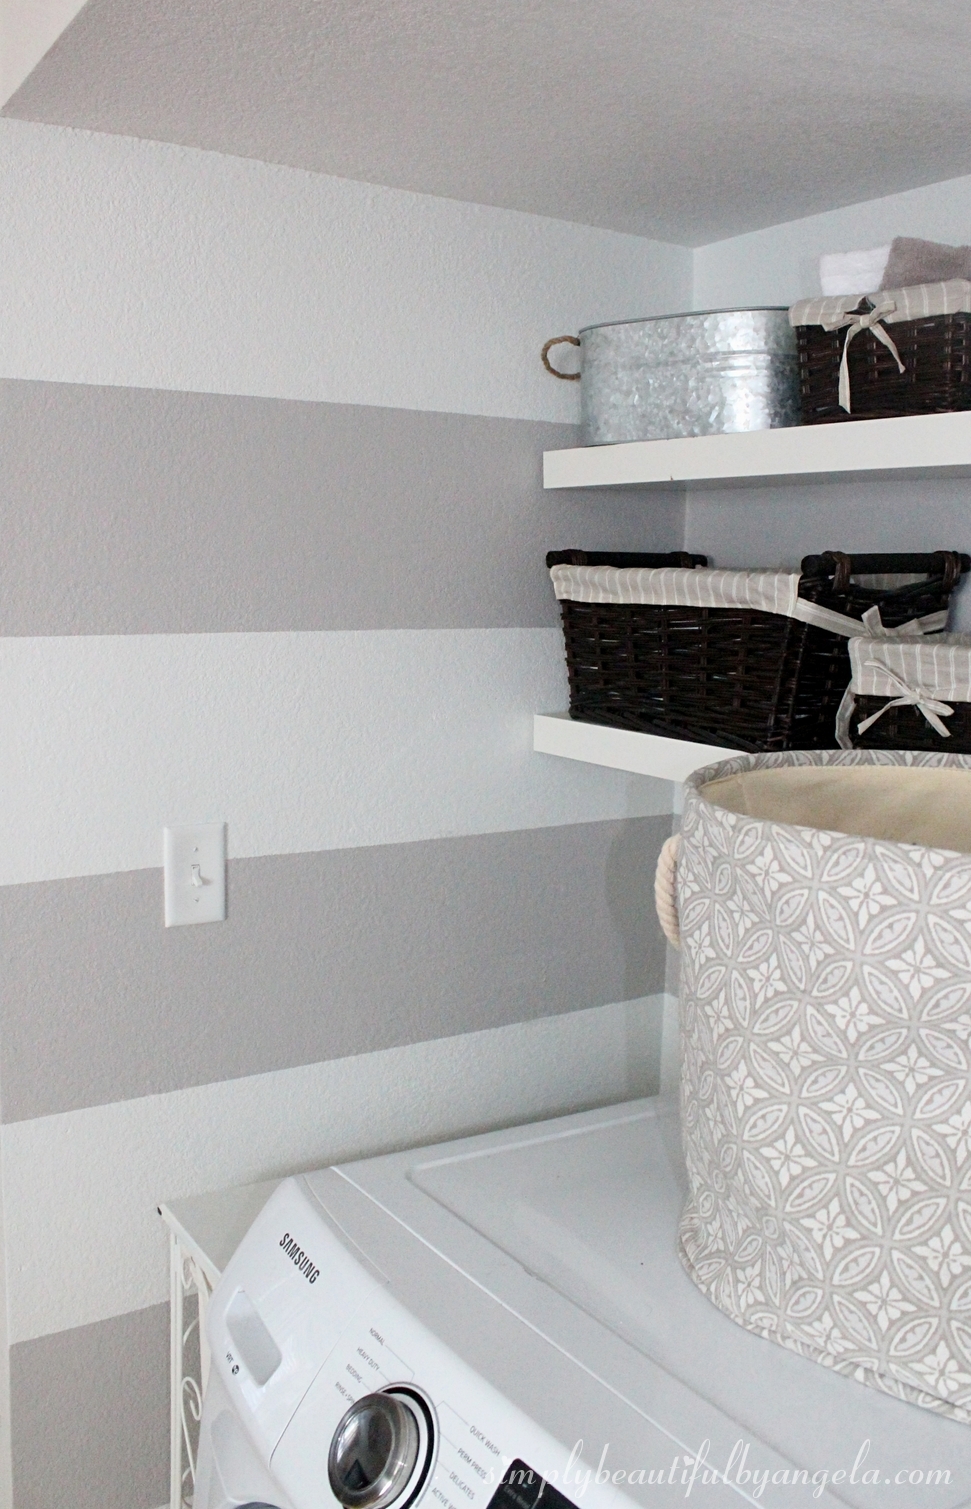
After the paint was dry I went back and began measuring.  I knew that I wanted fairly thick stripes, so I took my wall height which was 75″ and divided it by 7 which gave me 10.71.  I rounded that to 10.75″ on the measuring tape and you would never be able to tell that the bottom one is just a tad smaller. 

I marked this measurement on a piece of scrap plywood and then used this to make marks all the way down the wall.  To me this was much easier than measuring it out on the tape each time.

(Don’t mind the eraser that has been slightly chewed off by my almost 3 year old, apparently we must never feed him…)

Once I had both ends of the wall marked I used the plywood to line them up to draw a straight line.

Originally I was going to just make the marks at the edges and pull the tape straight across the two, but I found that having the penciled line as a guide while laying the tape helped tremendously.

Remember to tape outside the lines for the stripe you are painting.  This may seem like a no brainer but when it’s 9:30 at night it may or may not be easy to forget…

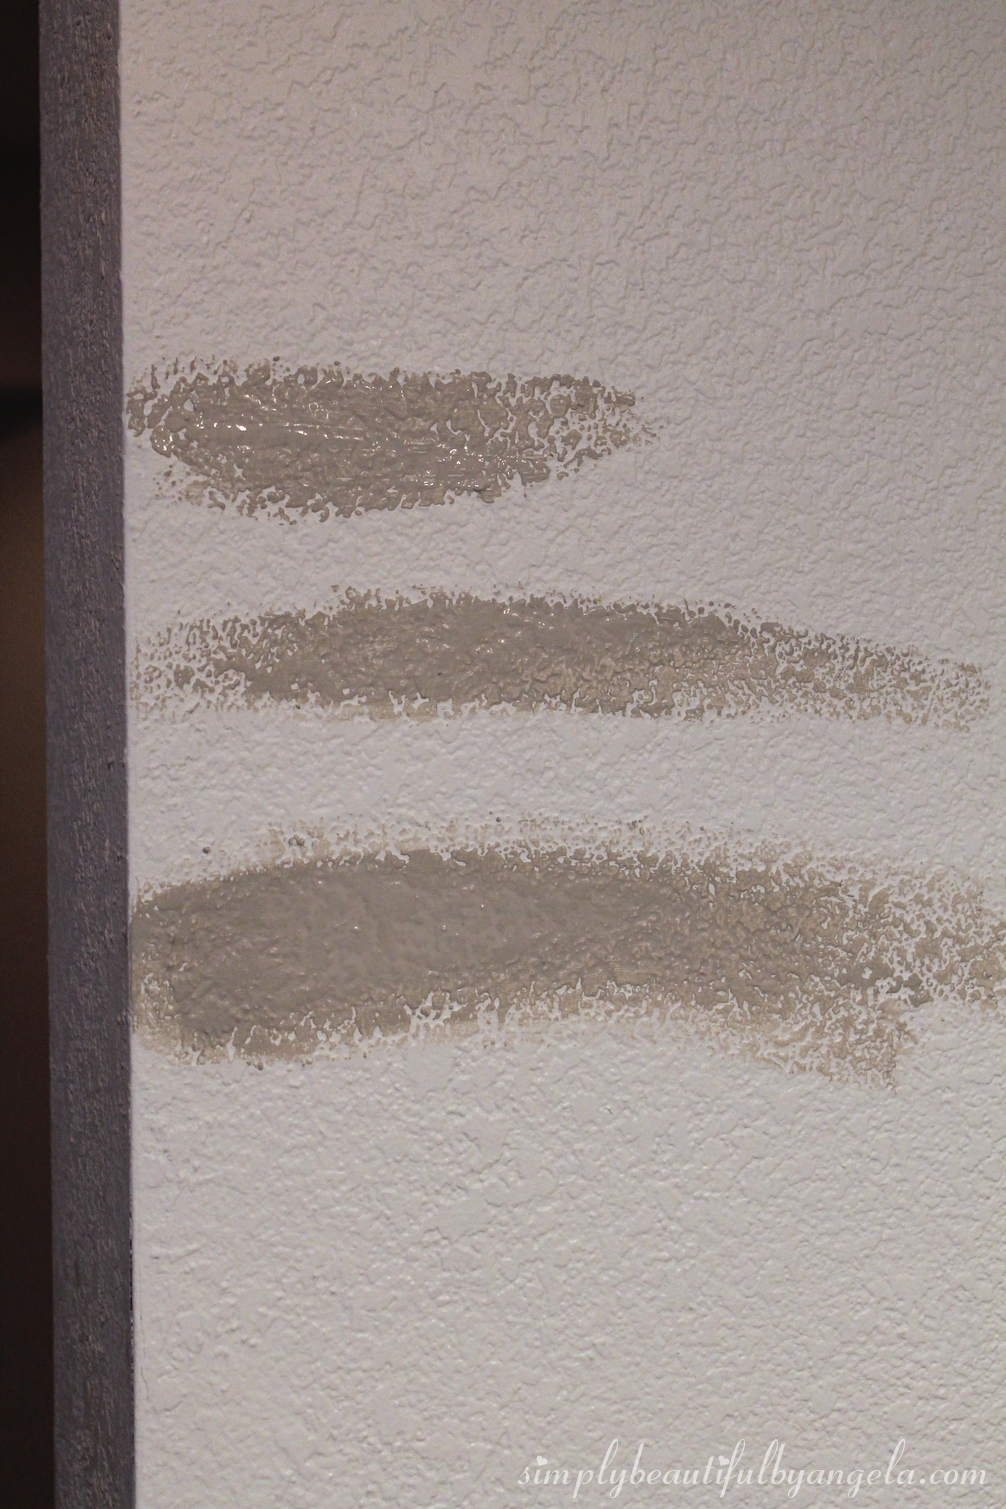
Since this was an impromptu project I didn’t have any gray paint on hand. So I got creative and ended up mixing my own which was actually a lot of fun and turned out great!

I had some Glidden Dusky Taupe stashed in the garage but have never cared for the pinkish hue that it had to it.  I added some black chalkboard paint (I got very creative haha) to gray it up a little, then kept adding white until I reached the lightness that I wanted.

I tested it out on the wall as I went. I have found that it’s really important to do this before committing to a color because even though colors may appear one way on a paint chip or on the top of the can, it can look totally different once it’s on the wall due to how the lighting is in that space.  Also, although they look the same in the picture above they were actually quite different in person.

Finally it was time to get that pretty paint on the walls.

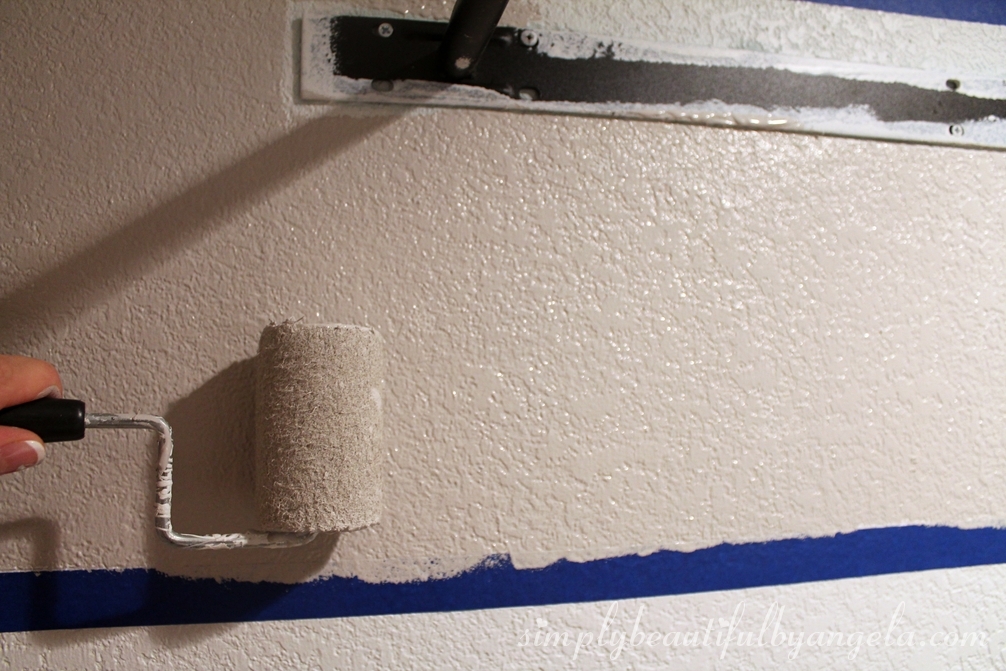
Our walls are extremely textured, so it was a serious struggle trying to get total coverage with my worn out roller.  I had to use quite a bit of pressure to get all the little crevices and it was actually pretty frustrating.

I like to pull off the tape before the paint has fully dried because I’ve run into problems with it peeling the paint off in the past if I wait too long. 

However when I did, I was extremely disappointed to see this…

Remember when I mentioned that I should have used my trusty Frog Tape?

This is why.

I thought that I could save a little money if I just pressed the cheap stuff on reeeeeeally hard, but found out the hard way that the only way to get those super sharp lines is to use Frog Tape.  So I will officially only by that from here on out.  Lesson learned!

Luckily it was an easy fix to go back along these spots with a small paintbrush and more white paint.

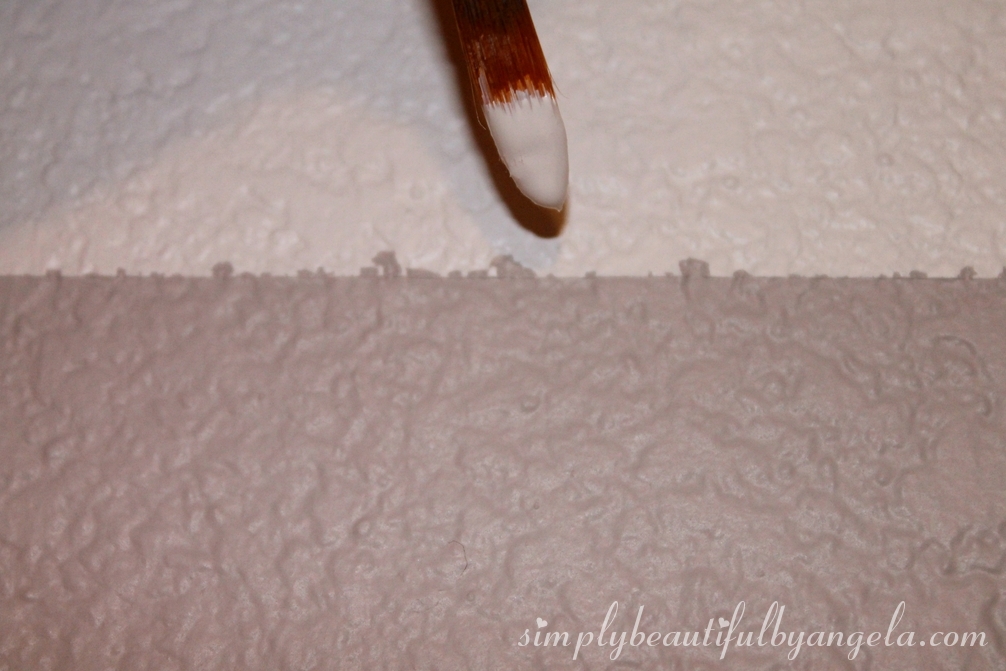
I said easy, not quick! I did this after I put everything back together so that I only had to touch up the spots that were visible which saved me a lot of time.

It feels so much more “me” now!  And even though the hubby was skeptical when I told him that I was going to paint stripes in the laundry area, he says it feels much more open and loves it just as much as I do 🙂

I’m really proud of my color mixing skills because this is the exact color I have been dreaming about and it couldn’t have turned out better.

I have some more plans for this space, but getting rid of the green makes me feel like I’m one big step closer to finally getting the basement of my dreams.

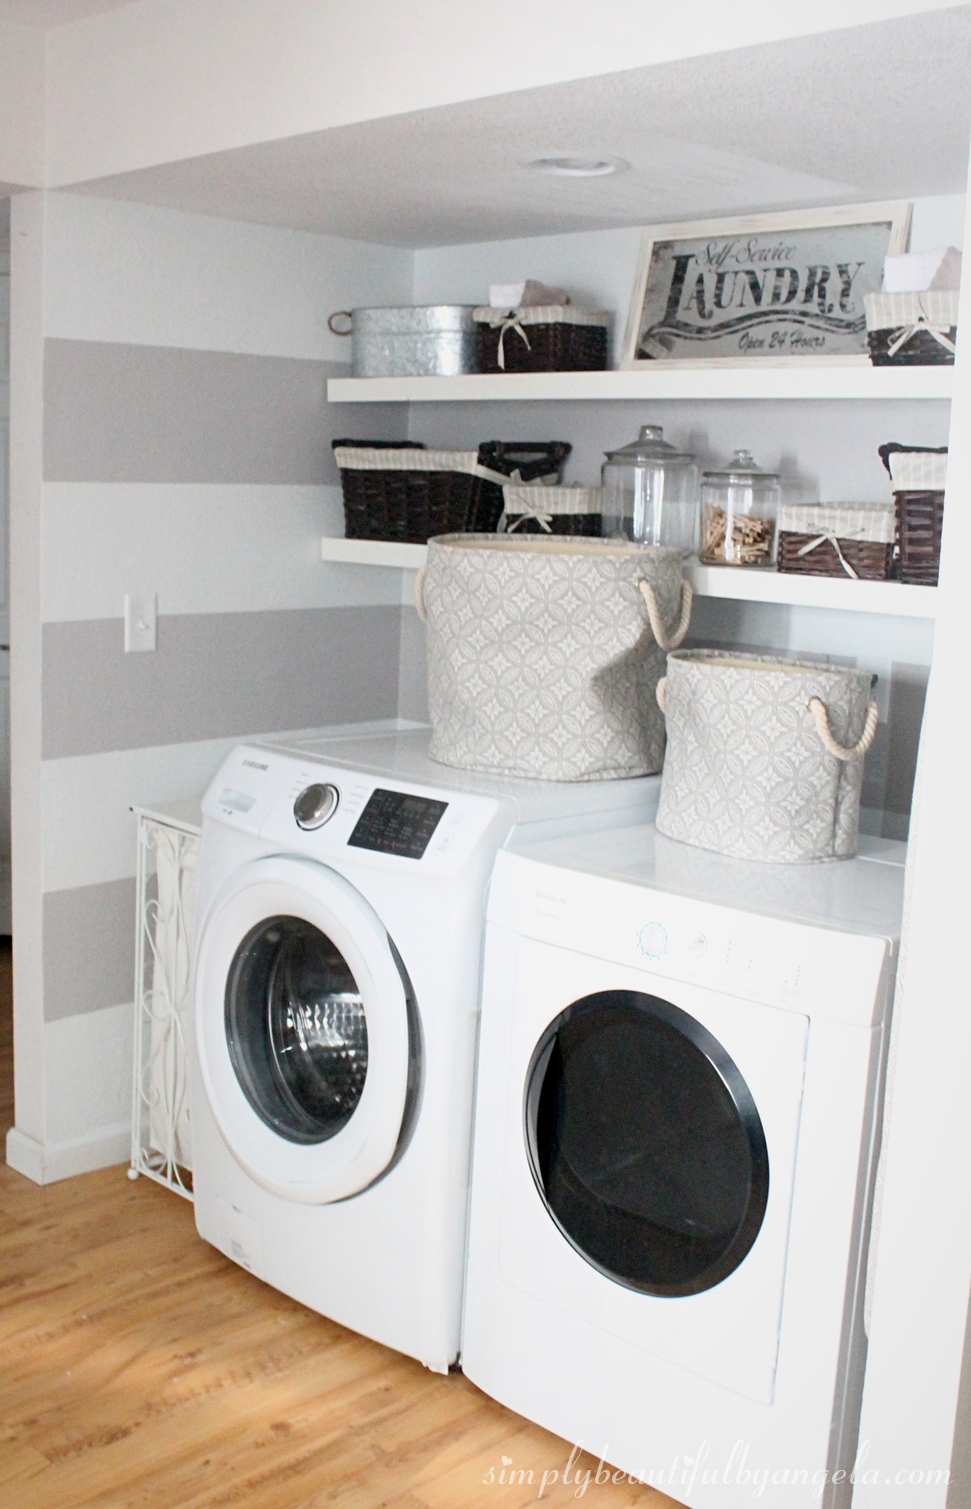
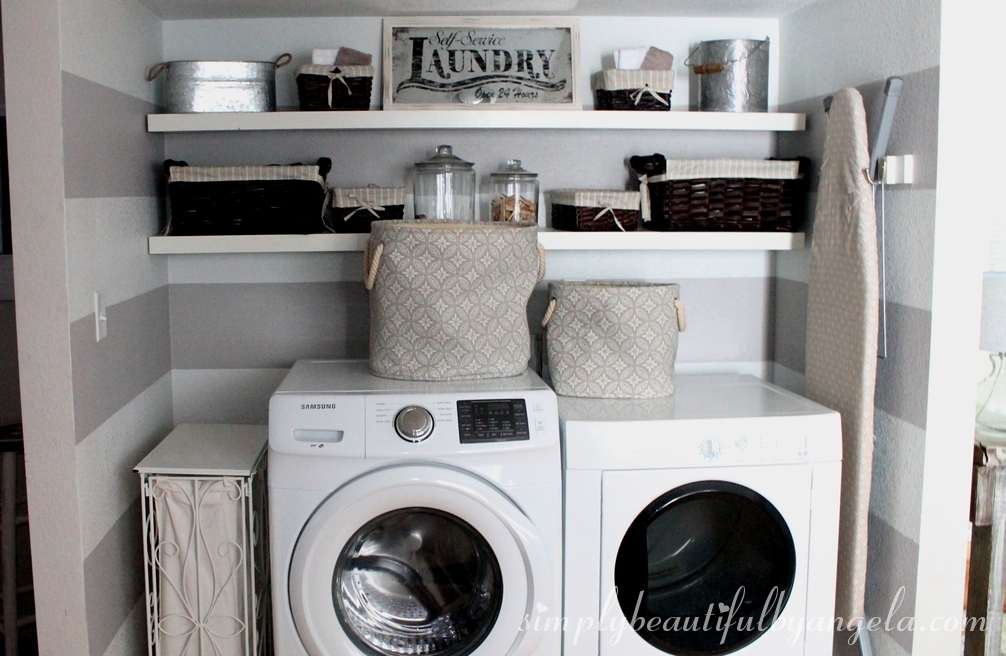
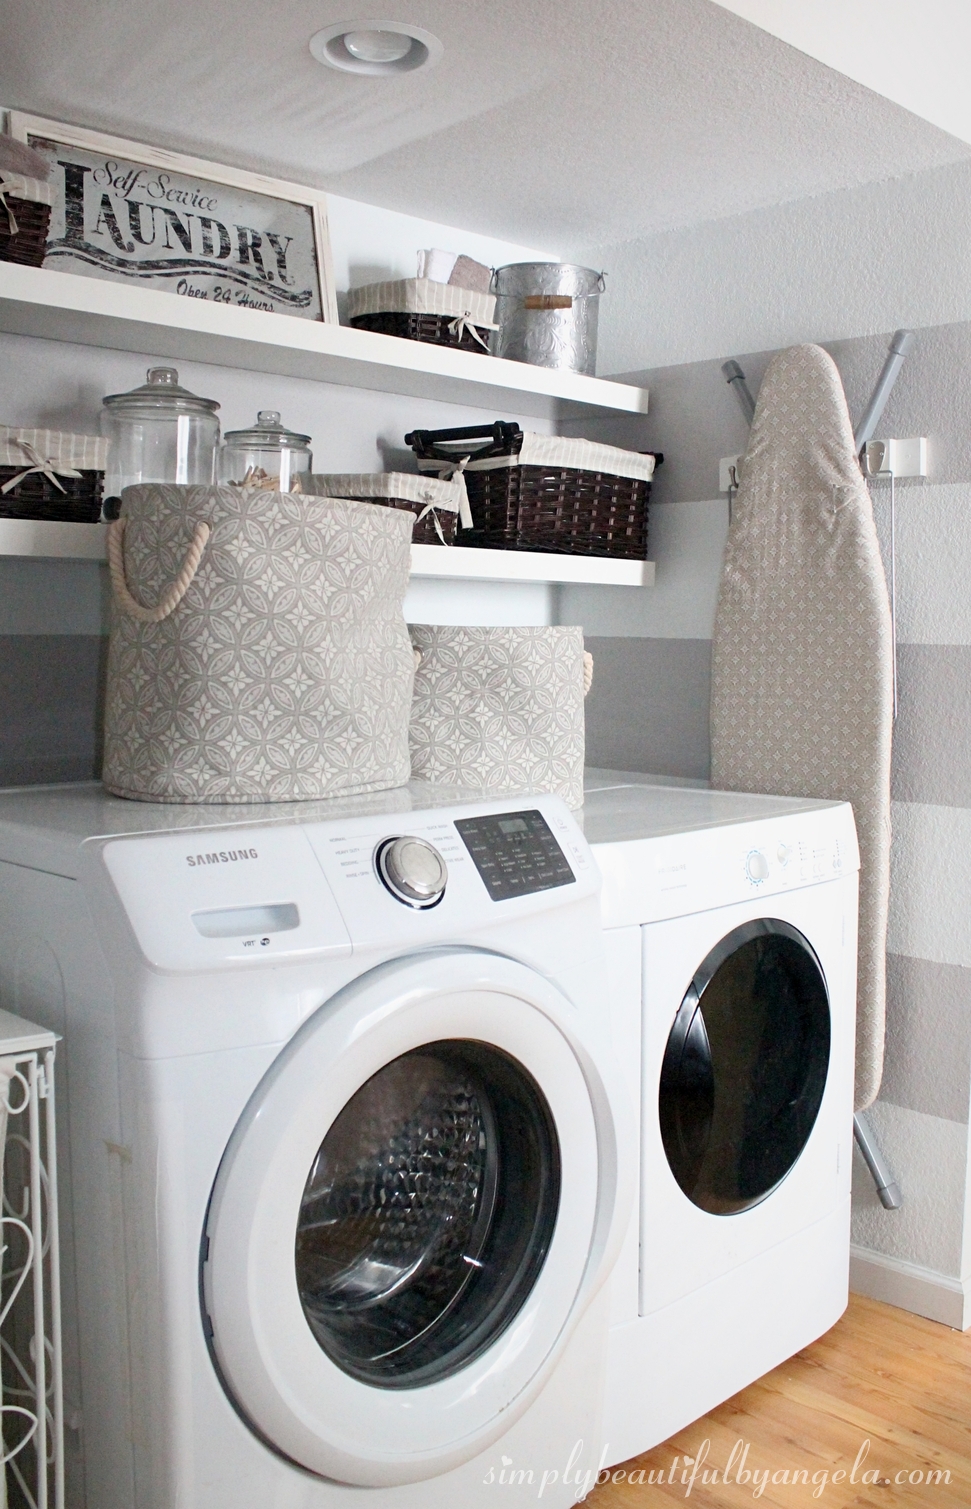
This is a quick and simple project that can make a huge impact on a room, especially if you are looking to add a little interest other than the more labor intensive wall treatments like shiplap and board and batten.  (And it looks super cute in kid’s rooms and nurseries!)

Thanks for stopping by, have a great rest of the week  ðŸ™‚

Linking up to these awesome parties!

· Labels: Uncategorized

Comments

  1. Pamela says

    September 8, 2016 at 4:29 pm

    This looks great. I also have the light seafoam shade in my laundry. I think it is moving the washer and dryer that has held me back from a redo. The stripes are really fun and are always a winner.
    Pamela

  2. Angela says

    September 8, 2016 at 5:17 pm

    Thanks Pamela! I was originally just going to leave them and paint around them but then realized that they slide out pretty easily without having to unhook anything so it worked out!

  3. Jamie Tomkins says

    September 12, 2016 at 3:09 am

    That turned out great!! Simple to do and beautiful! 🙂 Thank you for sharing with us at the #HomeMattersParty

  4. Mary Hunnicutt says

    September 13, 2016 at 3:38 pm

    The stripes make such a big difference! It looks great!

  5. Tarahlynn says

    September 14, 2016 at 5:01 pm

    Most people don't realize how difficult stripes can be unless they try it! Great post! And I also wanted to mention that the Wednesday "To Grandma's House We Go" link party just started over at grandmashousediy.com and I thought you might be interested in joining it, thanks!

  6. Garima Pal says

    November 26, 2016 at 9:47 am

    grt

  7. Lindsey @roofers maryland says

    February 3, 2017 at 5:21 am

    Really loved the concept of Laundry room. I am a big follower of your blog. Thanks for sharing such a useful ideas with us.

Hello, I am so happy that you're here! My name is Angela and I love to create simple beauty in our home on a budget. Here you will find DIY decor and home projects, furniture flips and other home inspiration!

Never Miss a Post!


Diagonally Fluted Nightstands

Diagonally Fluted Nightstands

Hello! I’m really enjoying the extra daylight and the fact that it’s been paired with warm sunny weather this week has been icing on the cake. I’m trying to soak it all in before the next snowstorm! Today’s flip was from about a year ago and is still one of my favorite sets of nightstands…

Read More »

How to Update a Dresser with a Missing Drawer

How to Update a Dresser with a Missing Drawer

Hey friends, happy March! Even though I know we still have quite a bit of cold weather coming our way here in Colorado, it’s exciting to see these warmer days sprinkled in here and there. This week I am sharing how I saved an old IKEA dresser from ending up at the landfill! Supplies Used:(Affiliate…

Read More »

Vintage Ice Box Style Nightstands Makeover

Vintage Ice Box Style Nightstands Makeover

Hello friends! We just got back from our annual trip to the Great Wolf Lodge and it was fun times as always! Today I am sharing how I updated these fun vintage ice box style nightstands that I found on Marketplace! Supplies Used:(Affiliate links may be provided for convenience.  For more info, see my full disclosure here.) …

Read More »

Never Miss a Post!


GOOGLE 2

GOOGLE 3

GOOGLE 4

GOOGLE 5

GOOGLE 6

GOOGLE 7

Theme by 17th Avenue · Powered by WordPress & Genesis