
Hello everyone, I hope you all had a fantastic Halloween!
As you may recall, when I installed the board and batten grid wall in our master bedroom I took down the cherry blossom canvases since I didn’t think that they worked very well there anymore.

But then the wall felt really lonely without them…

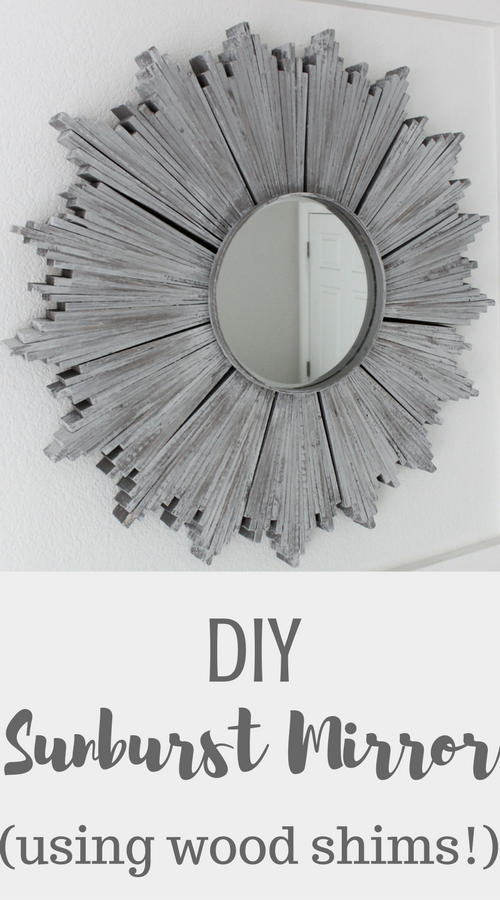
After a little browsing on Pinterest I soon had my heart set on what I wanted to put above the bed–a sunburst mirror!
BUT–these mirrors can get pricey! (This one retails for $400—Yikes!!)

Since I definitely didn’t want to spend over $50 and I knew the exact color and shape that I wanted, I decided to DIY!
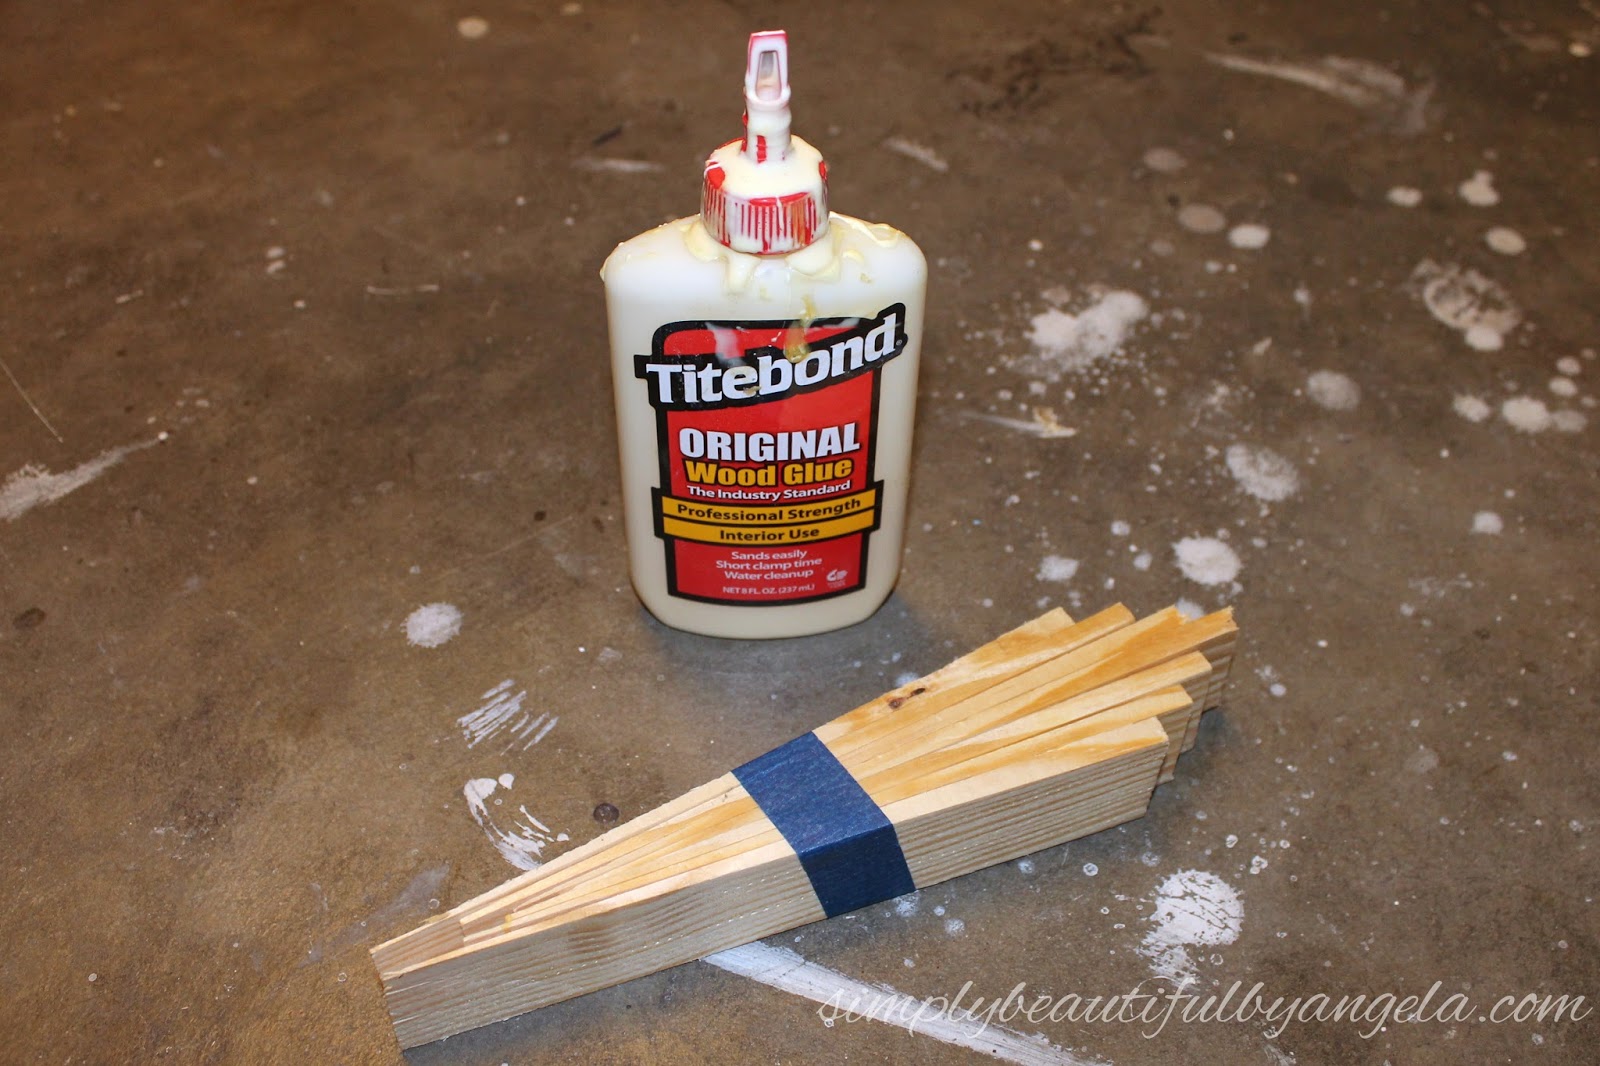
- 16 packages of 8″ wood shim (12 in each pack)
- Wood Glue
- Painter’s Tape
- 1/4″ plywood
- Loctite Power Grab Heavy-Duty Construction Adhesive
- Orbital Sander
- Chalky Spray Paint in Mink
- Light Gray Paint
- 7″ Mirror
- 7″ Embroidery Hoop
- Mirror Construction Adhesive
- Hot Glue
- Hangman Picture Hanging System
Fist thing is first–make sure that you measure the spot you are going to put it! I say this because I originally purchased 12″ wood shims before realizing that it would be too massive to fit above the bed.
If the employees didn’t think I looked crazy purchasing a whole case of wood shims, they probably did when I returned a whole case of wood shims haha…
Way back in the beginning of my DIY journey I created this sunburst mirror (tutorial here).

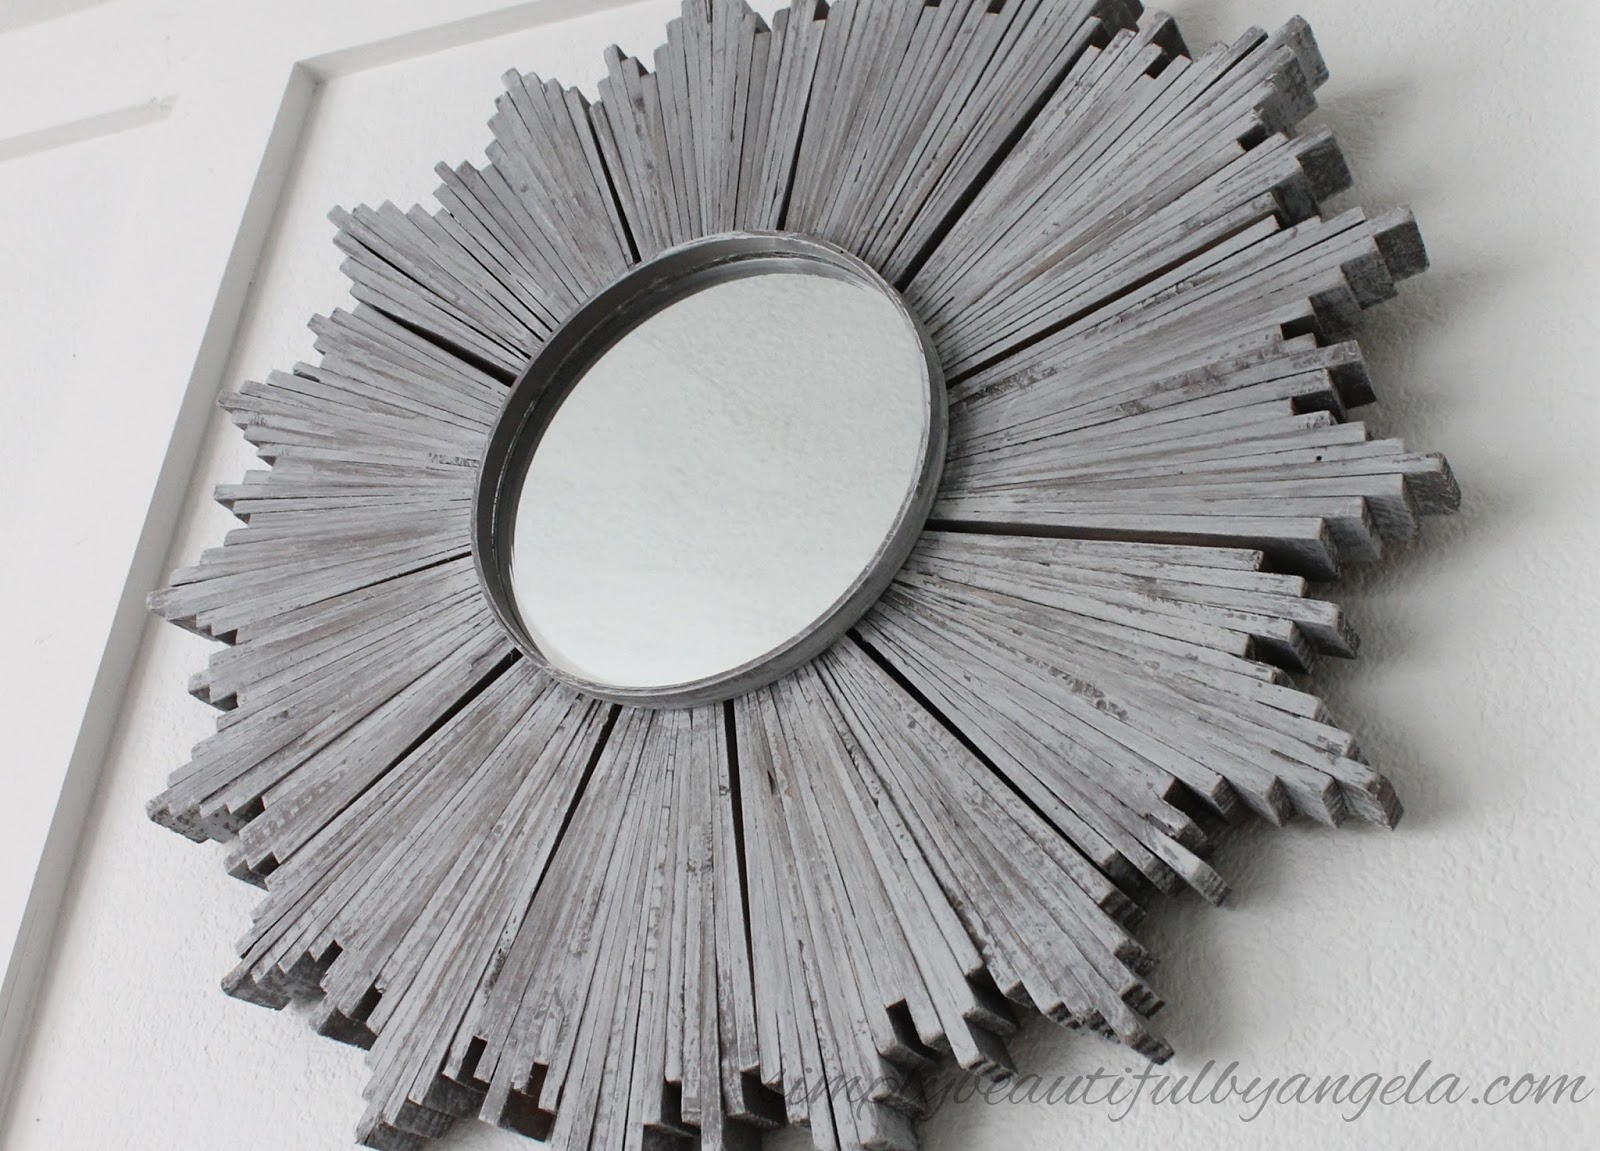
This time I wanted to do something a little different, so I purchased 16 packages of wood shims so that I could stack them next to each other to make the whole thing more 3-dimensional.

I began by creating bunches secured with wood glue. I wrapped each bunch in painter’s tape while the glue dried.
The hubby and I had a good method down where I would glue and then hand him the bunch to tape while I started on the next. It made it go so much quicker!
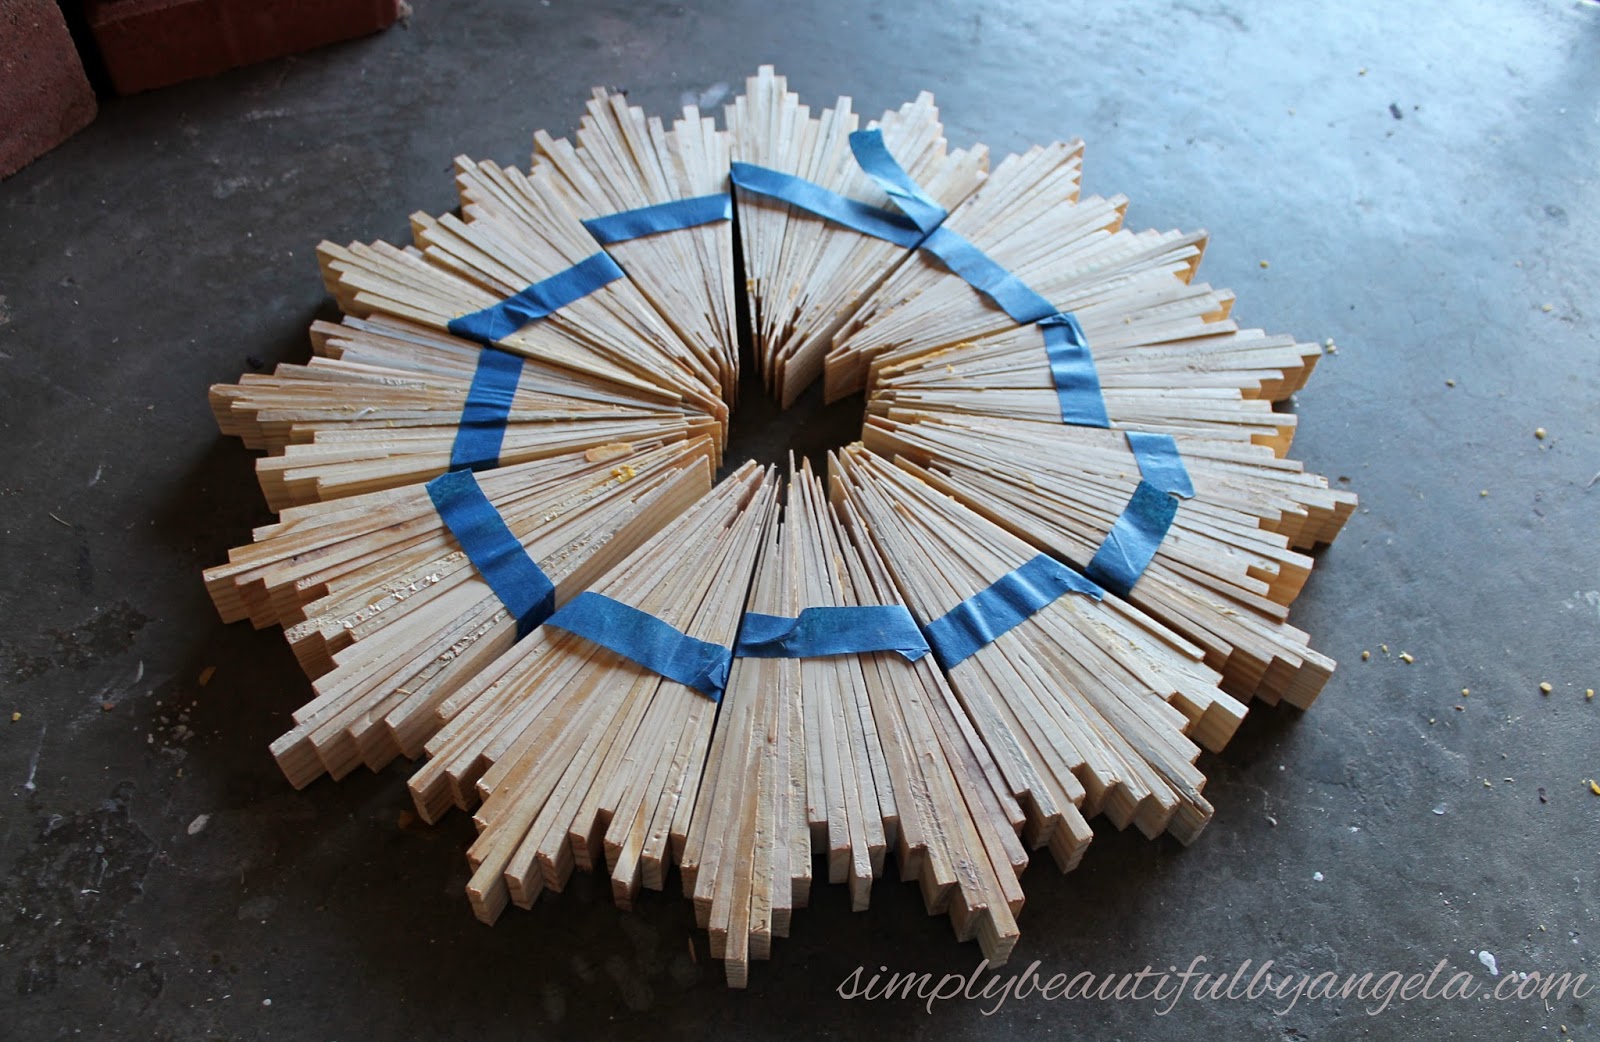
I created bunches with 5 and bunches with 7 and alternated the two. Note that I placed my bunches with 5 just slightly under the ones with 7.
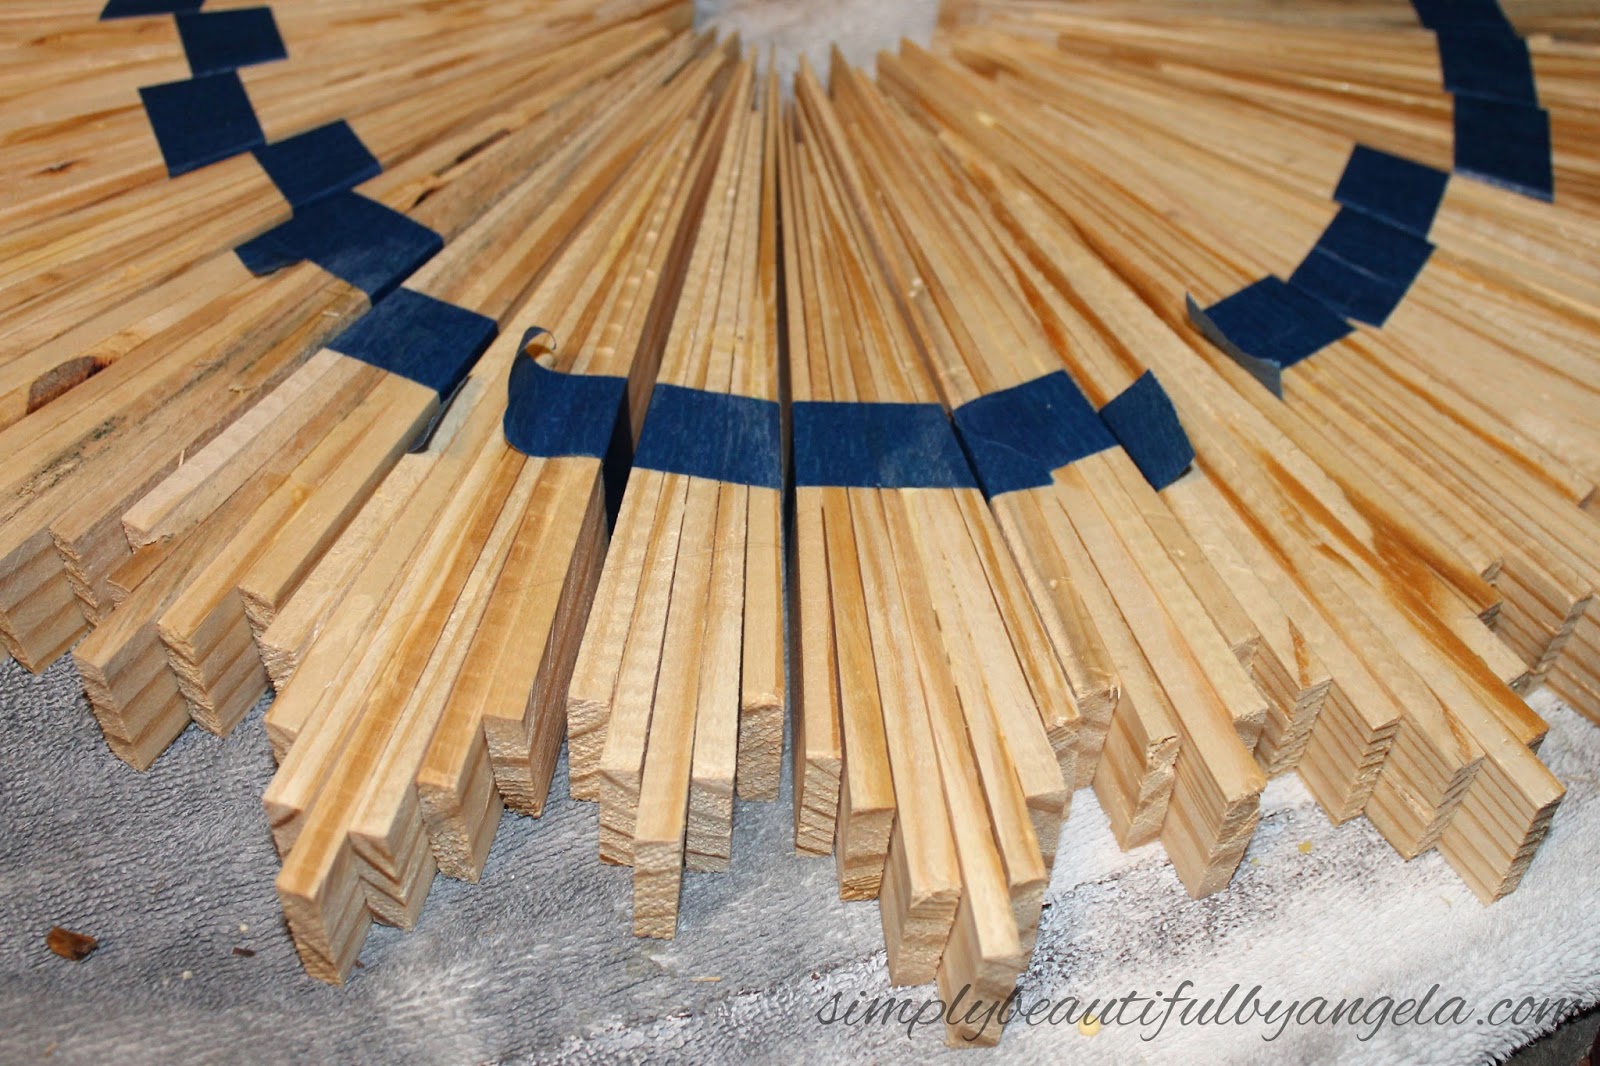
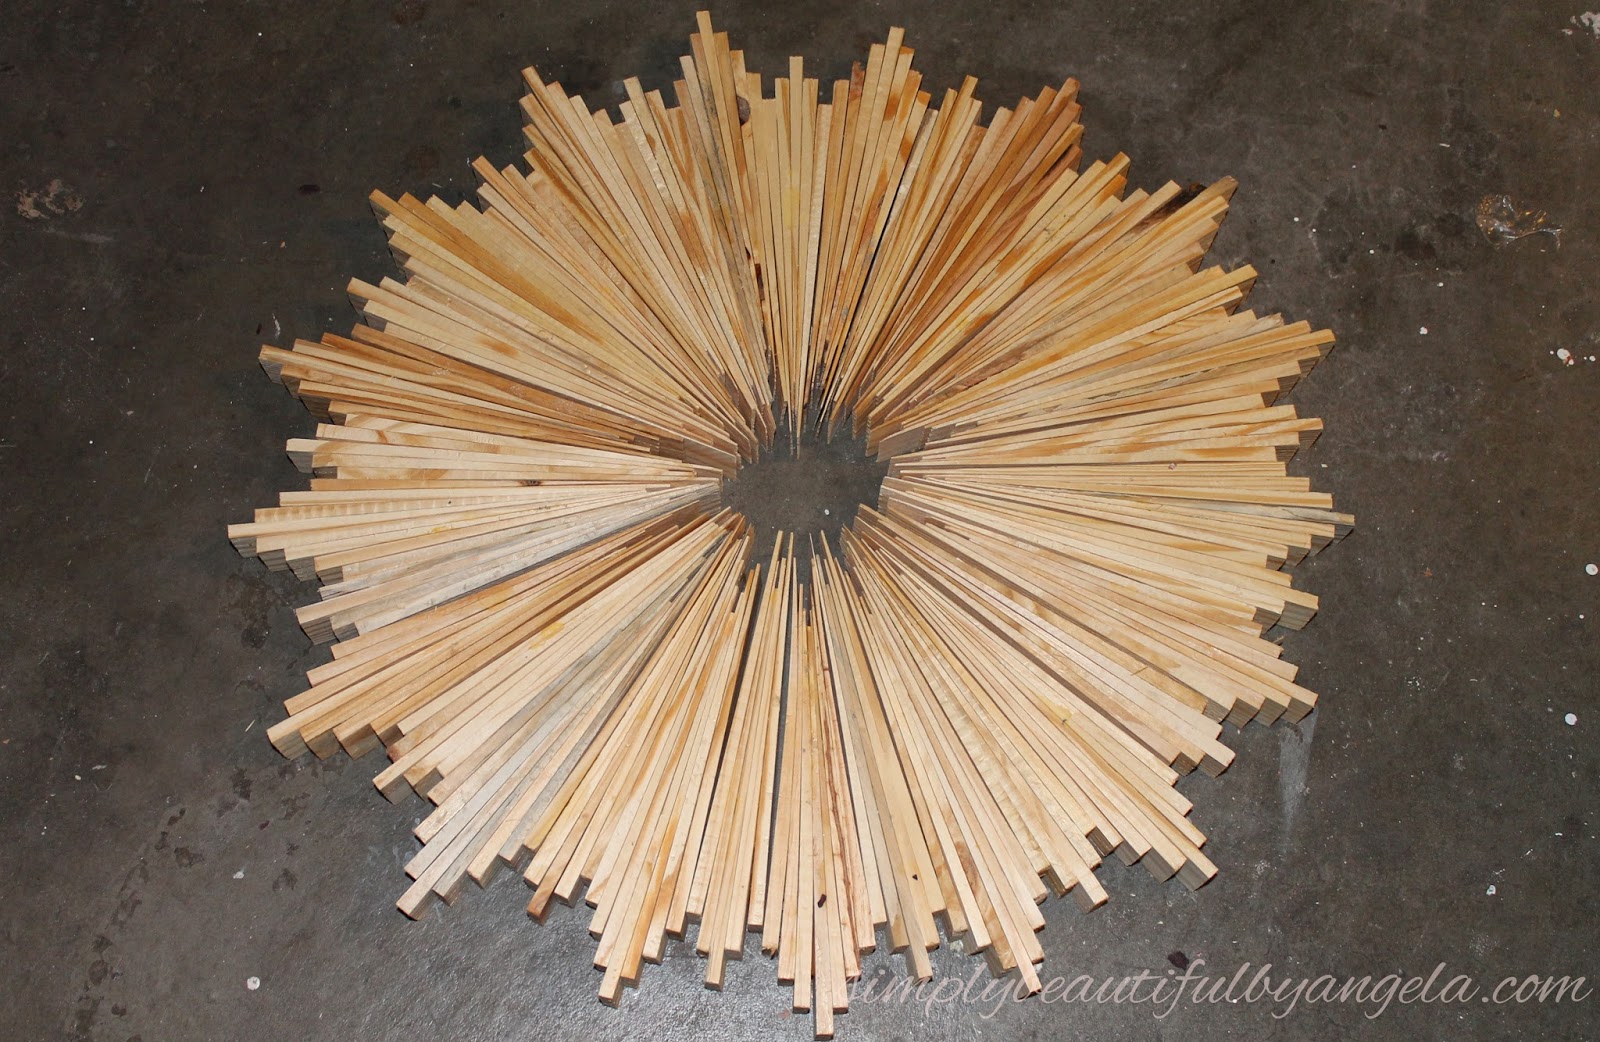
The next day I removed the tape and put them in their final arrangement.
I then put a ton of wood glue on a 1/4″ sheet of plywood that the hubby had cut into a circle with the jigsaw and placed it face down on my shims with bricks on top.
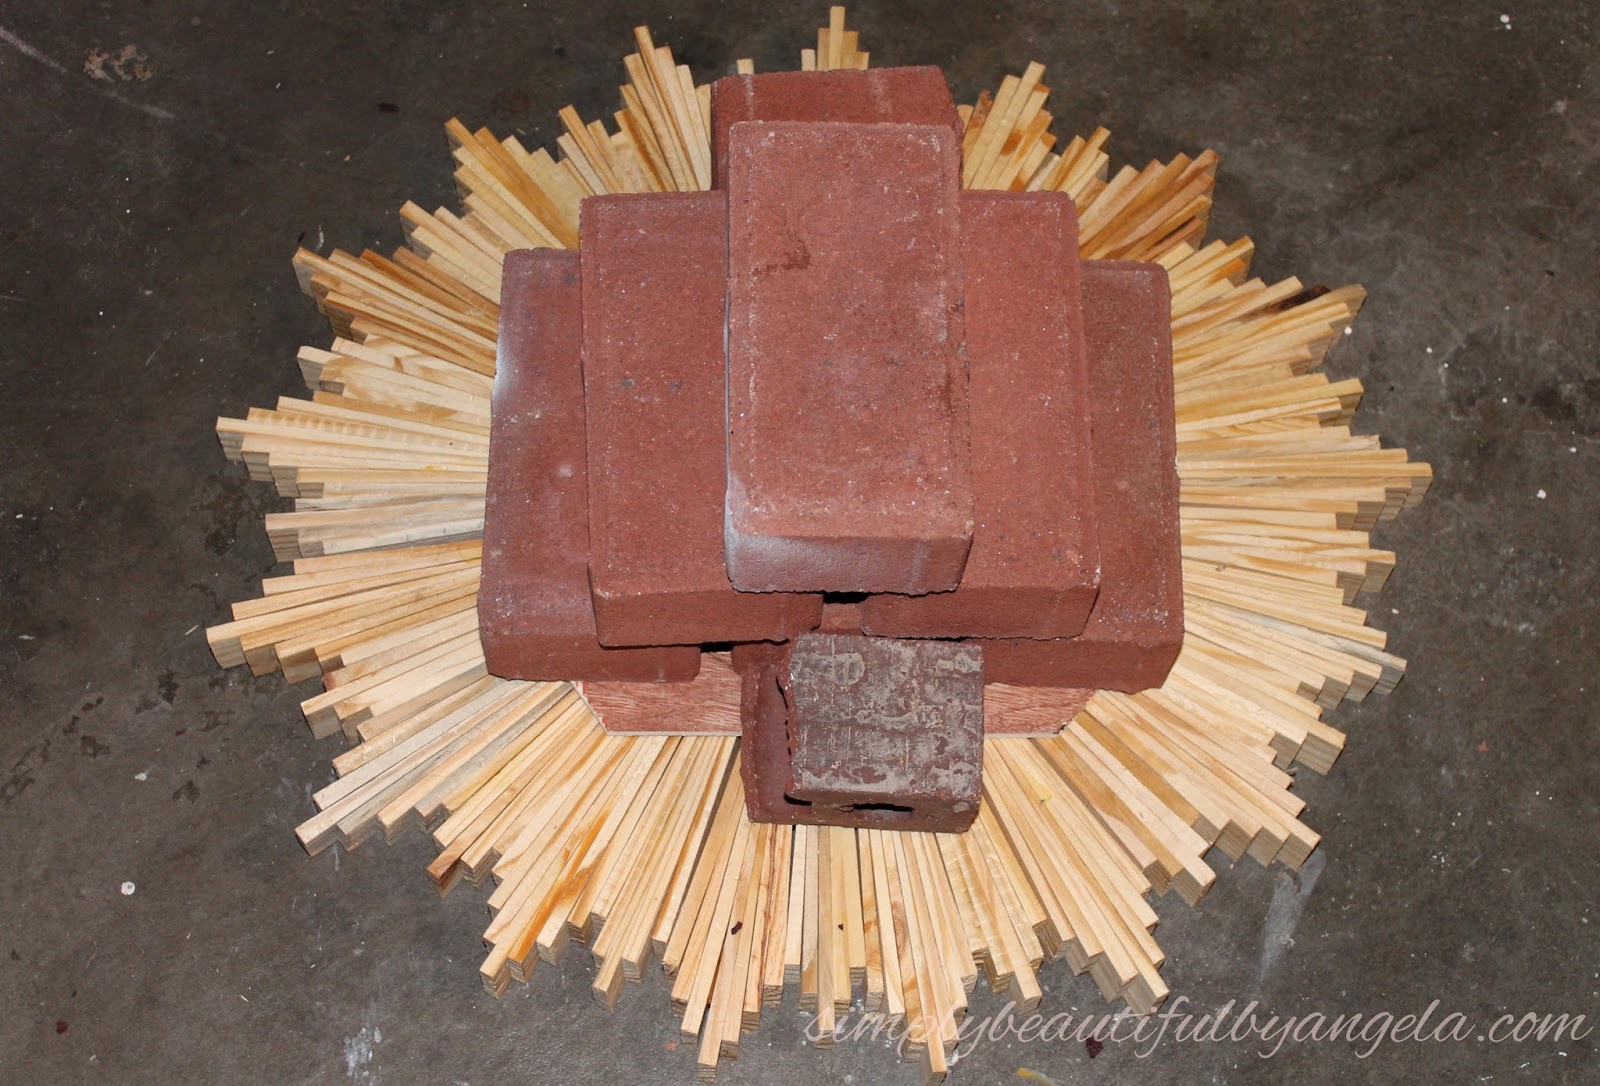
Sadly this did not work out so well…
The next day when I flipped it over the wood glue had not only dripped through the cracks to the front of my design (which was so not fun to sand off…), but it also didn’t hold them on very well and the bunches started falling off left and right.
So while I went to Lowes to get more plywood I spotted this stuff called Loctite Power Grab Heavy-Duty Construction Adhesive and thought I would give it a shot.
This time I decided that I wanted to stick the bunches to the plywood instead of the other way around so to make it easier I created more bunches in groups of 3 (with one group of 4).
Once the wood glue dried on these bunches I removed the tape, applied some of the Power Grab to the back and then applied them to the plywood circle. Once all were on I placed bricks on top. I didn’t get a picture of this because I wasn’t sure it was going to work–but it did!
Once it was dry it was time to start on my finish. After sanding I spray painted it with Krylon’s Chalky Spray Paint in Mink then distressed it a little with some sandpaper once it was dry.

I actually hung it up on the wall like this before deciding that it was just too dark for me. To fix this I went back over it with just a little bit of light gray paint.
I attached my mirror to the center with Mirror Construction Adhesive and attached my embroidery hoop to the mirror with a thin line of hot glue.

And voilà!
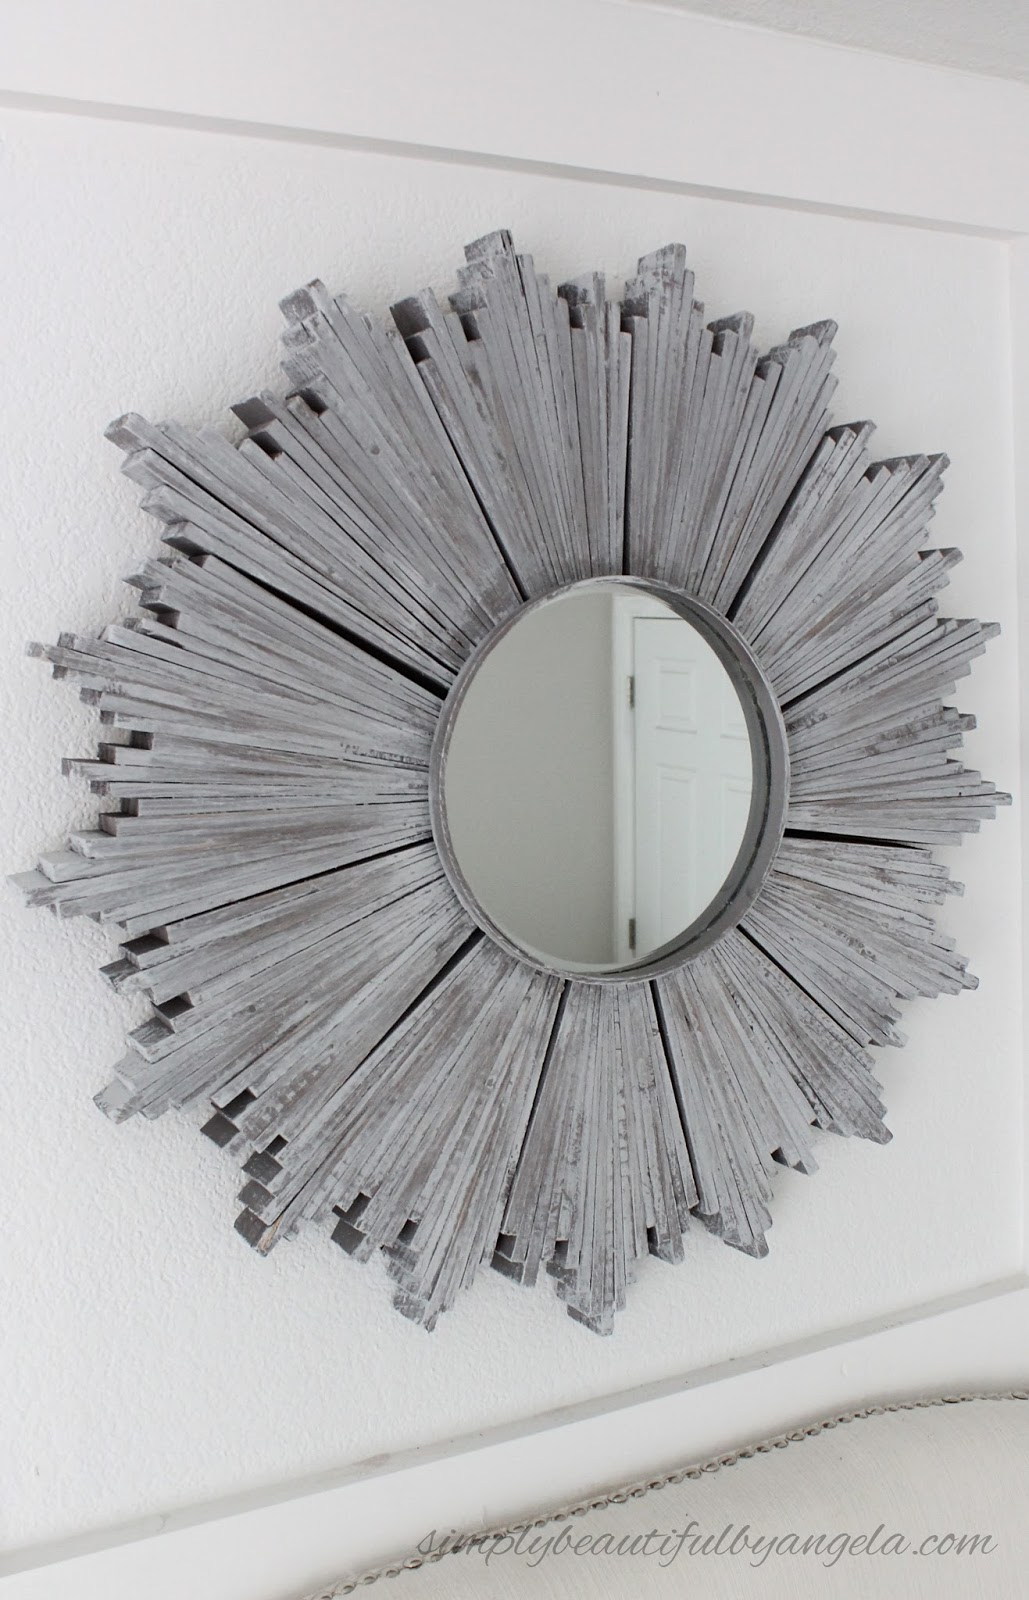
We used a Hangman Picture Hanging System since this bad boy is pretty heavy but I’m sure you would be okay with a regular picture hanger as well as long as you hit a stud or use drywall anchors.

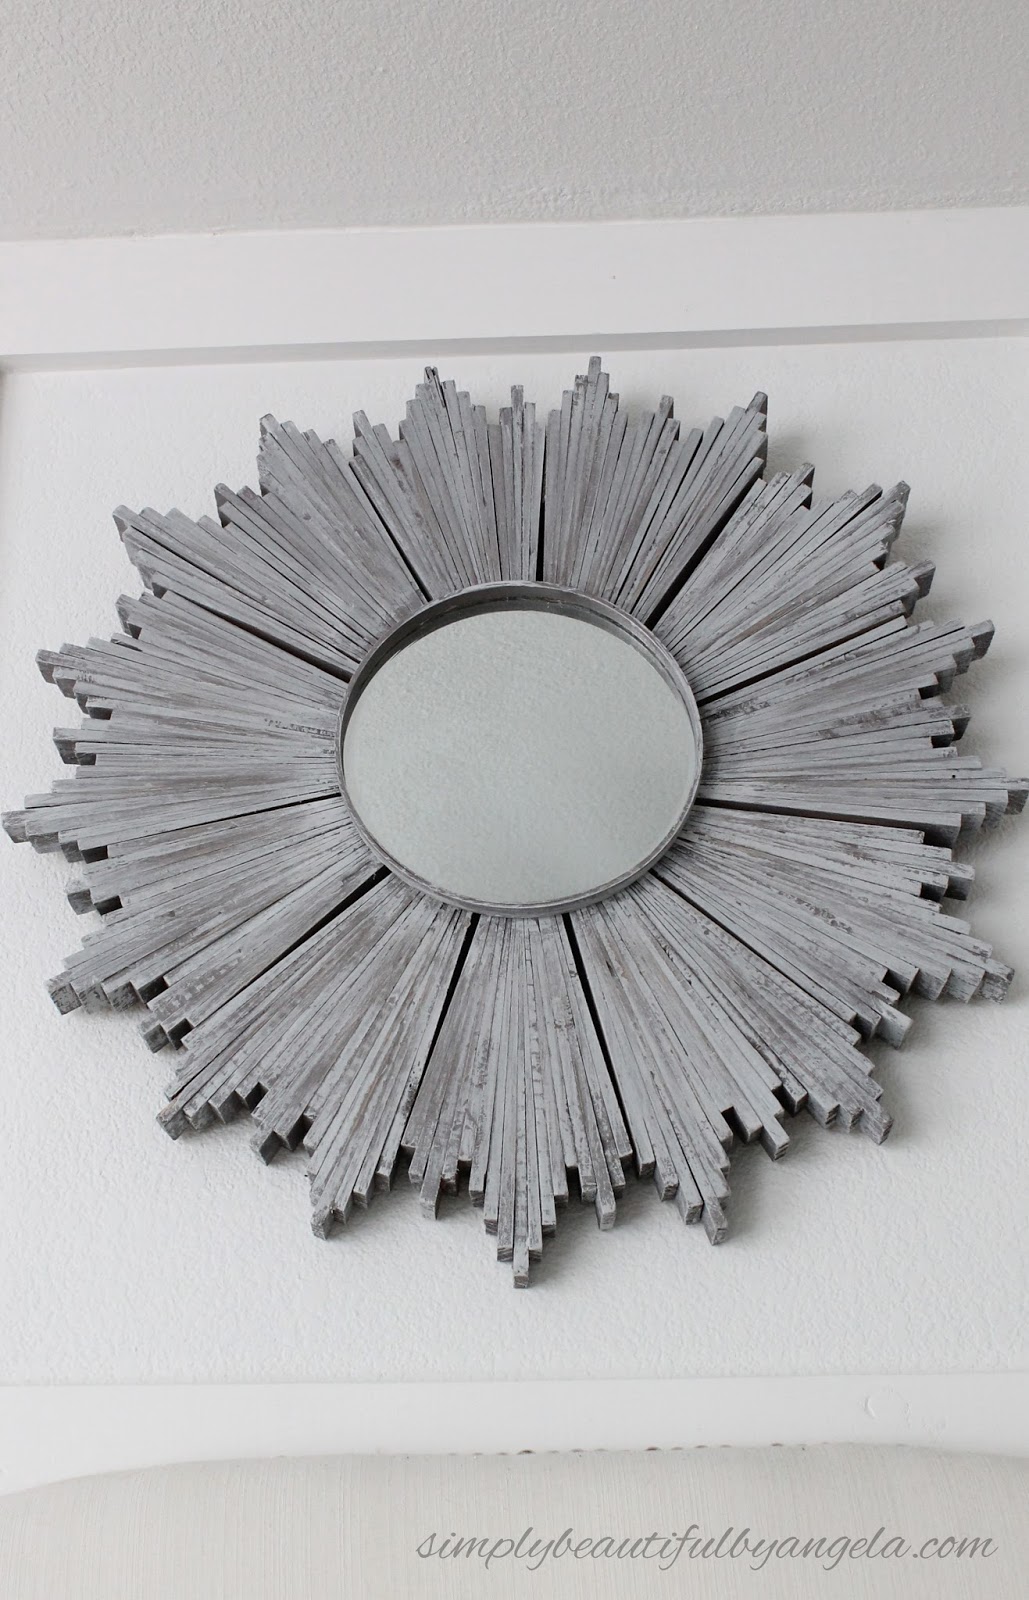
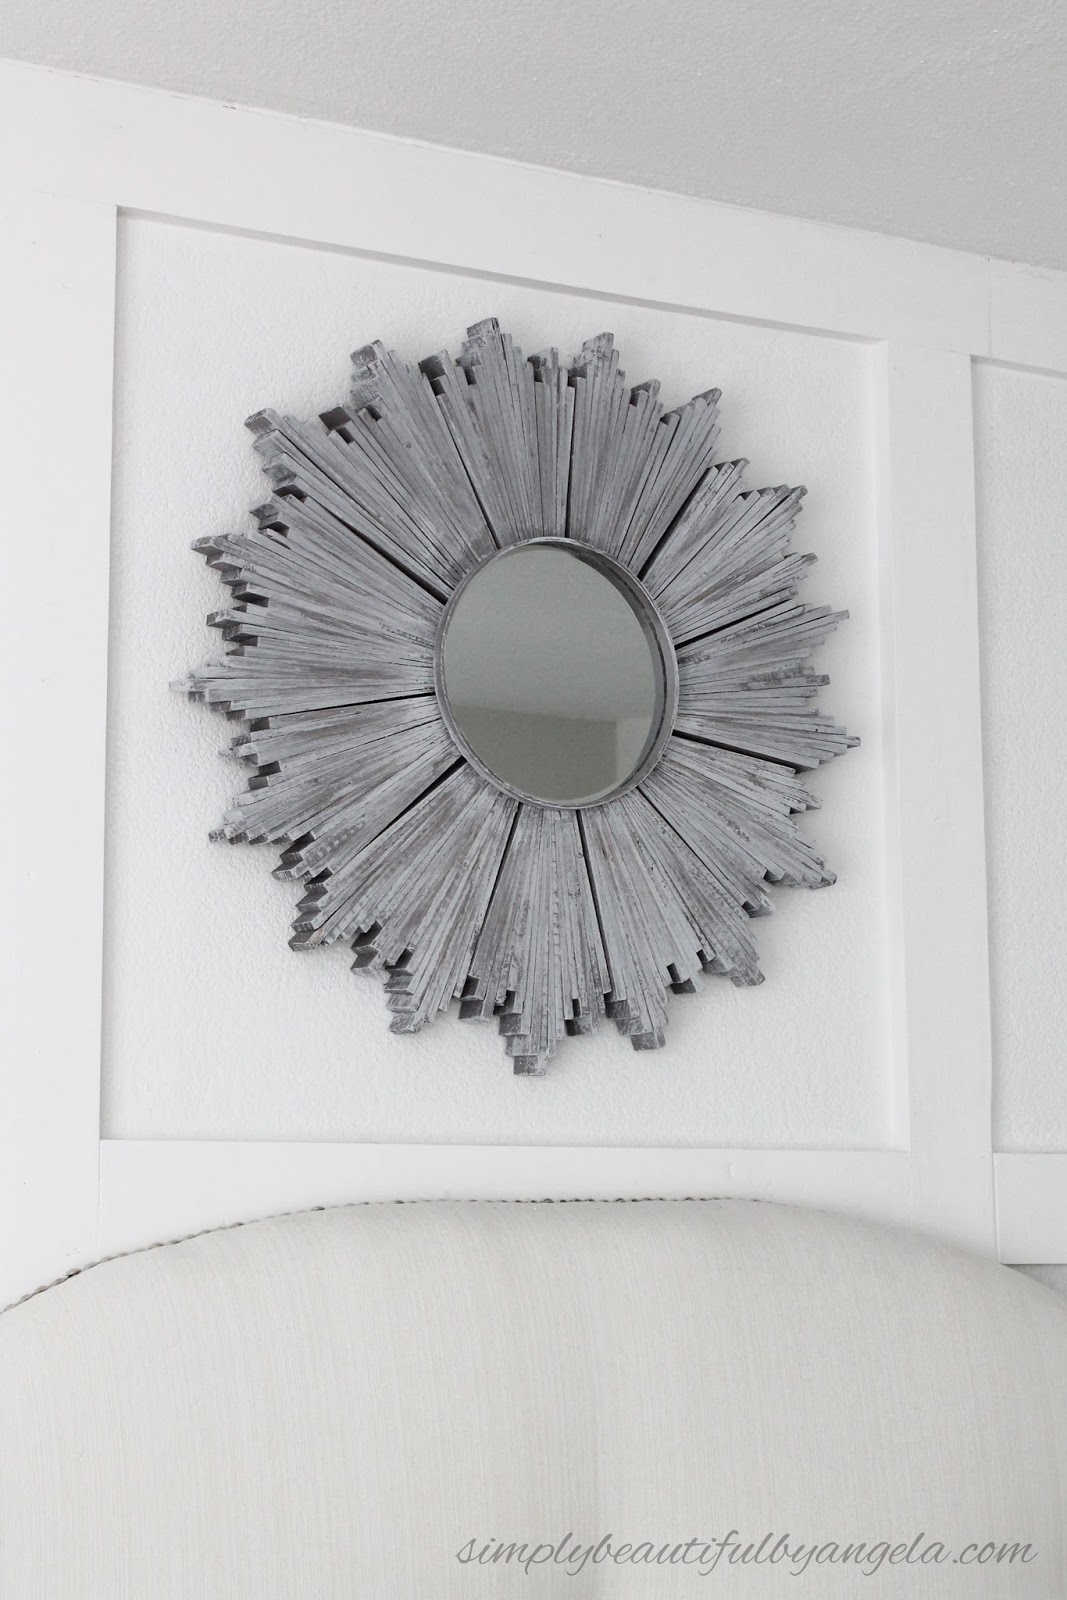
It makes such a beautiful statement piece for our room.


You did a beautiful job. The mirror is gorgeous.
oka… i LOVE this mirror. In fact, I'm going to try to make one. Thanks so much for the tutorial!
much talent for sure, those shims I have always thought would be great in crafts and now we know they are
come see us at http://shopannies.blogspot.com
I'm going to make one! So cool!
This is gorgeous! I've never been a sunburst mirror fan until now. So much so, I think I'm also going to attempt to make one. Thank you for such wonderful inspiration!
This may be the best DIY I've ever seen. It turned out gorgeous, especially considering the amount you spent. BRAVO!
I love your sunburst mirror and its a great add for your decor.i am doing one for my room.
I have a question for u .while trying to arrange all the groups in one big circle, i am getting gaps between the groups of shims. How did u fill those gaps?any idea how did u cover those gaps?
I actually had small gaps between the bunches as well, I just made them evenly spaced and it looks like it was meant to be that way 🙂