Hello! Did you all get a chance to check out my One Room Challenge Farmhouse Bedroom reveal last week? I am still pretty excited that it’s done AND super exhausted! I had a few days off from work last week and didn’t feel like doing a thing!
As promised, I am going to start sharing tutorials on the many DIYs that went into making this room. I’ll start with the one that was originally meant solely for function but ended up being a really pretty piece.
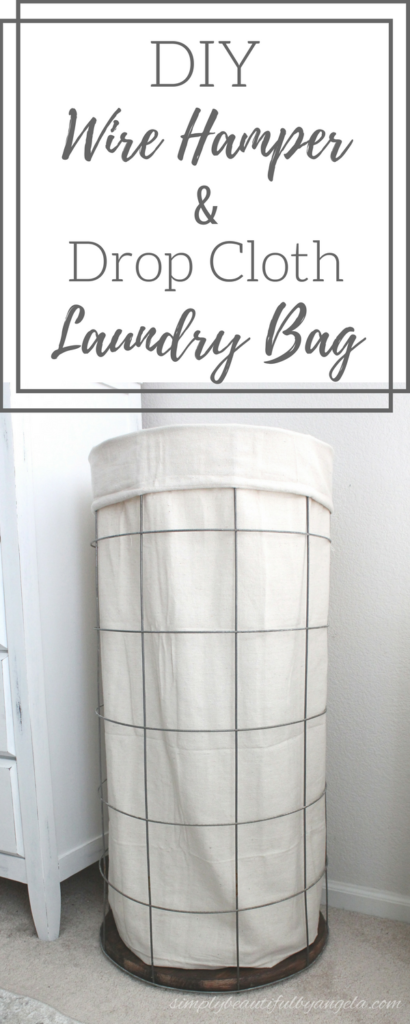
We used to have a small wicker hamper that only held a couple days worth of clothes before they started overflowing onto the floor. It seriously made my skin crawl and was soooo frustrating.
Every hamper that I found online or in the stores was just as small so I decided that we could try to make one. And I am so happy with how it turned out!
- 18″ round pine board (or use a jigsaw to cut one from plywood)
- 42″ x 84″ welded wire remesh sheet
- Rust-Oleum Wood Stain in Kona
- Plier
- Bolt cutter
- Staple Gun
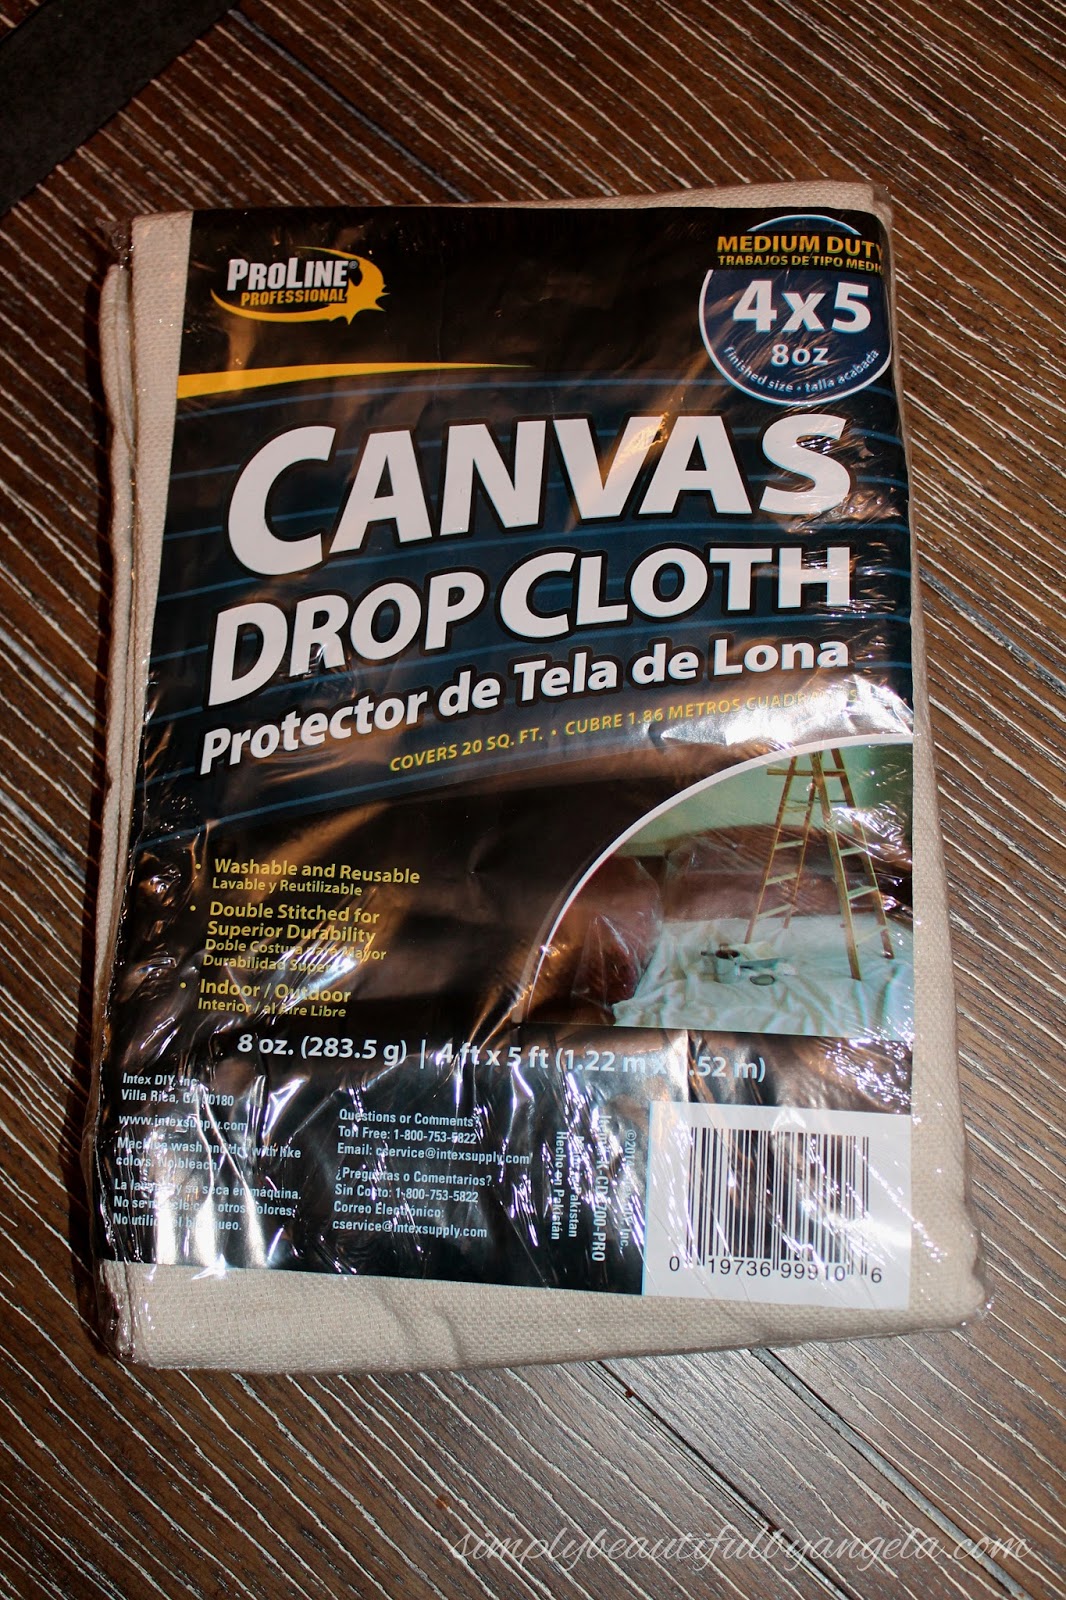
- 4′ x 5′ drop cloth
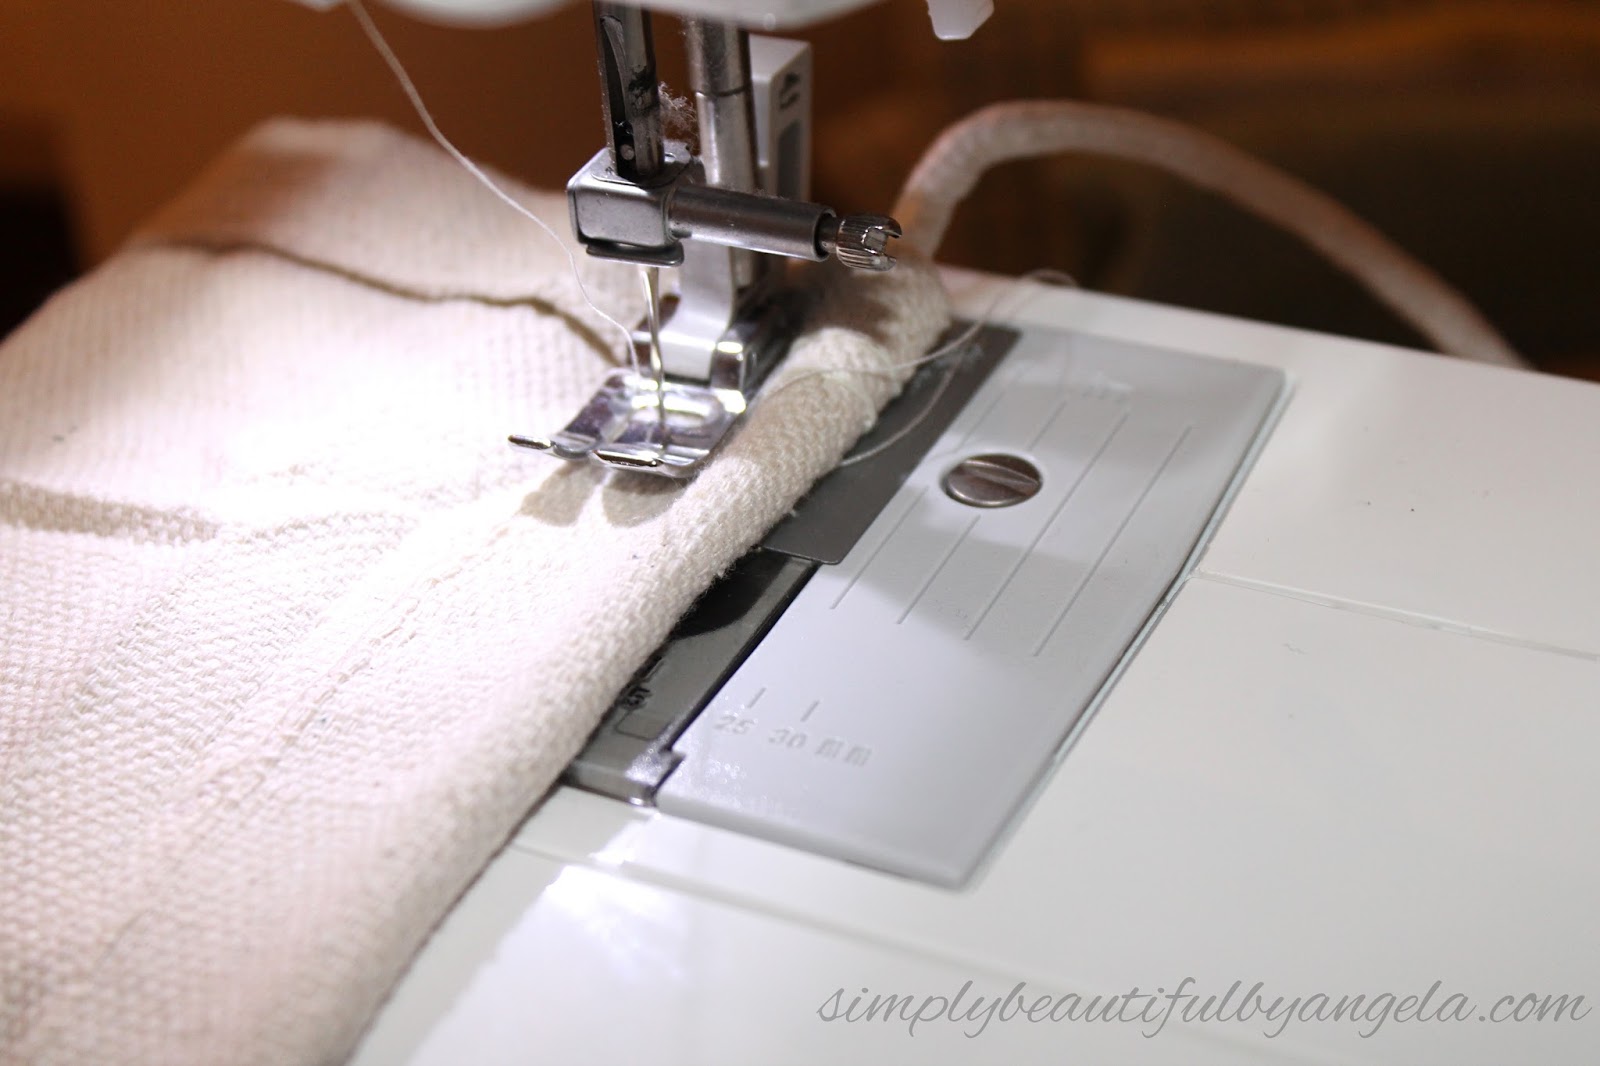
- Rope
- Sewing Machine
(this is mine and I love it!)
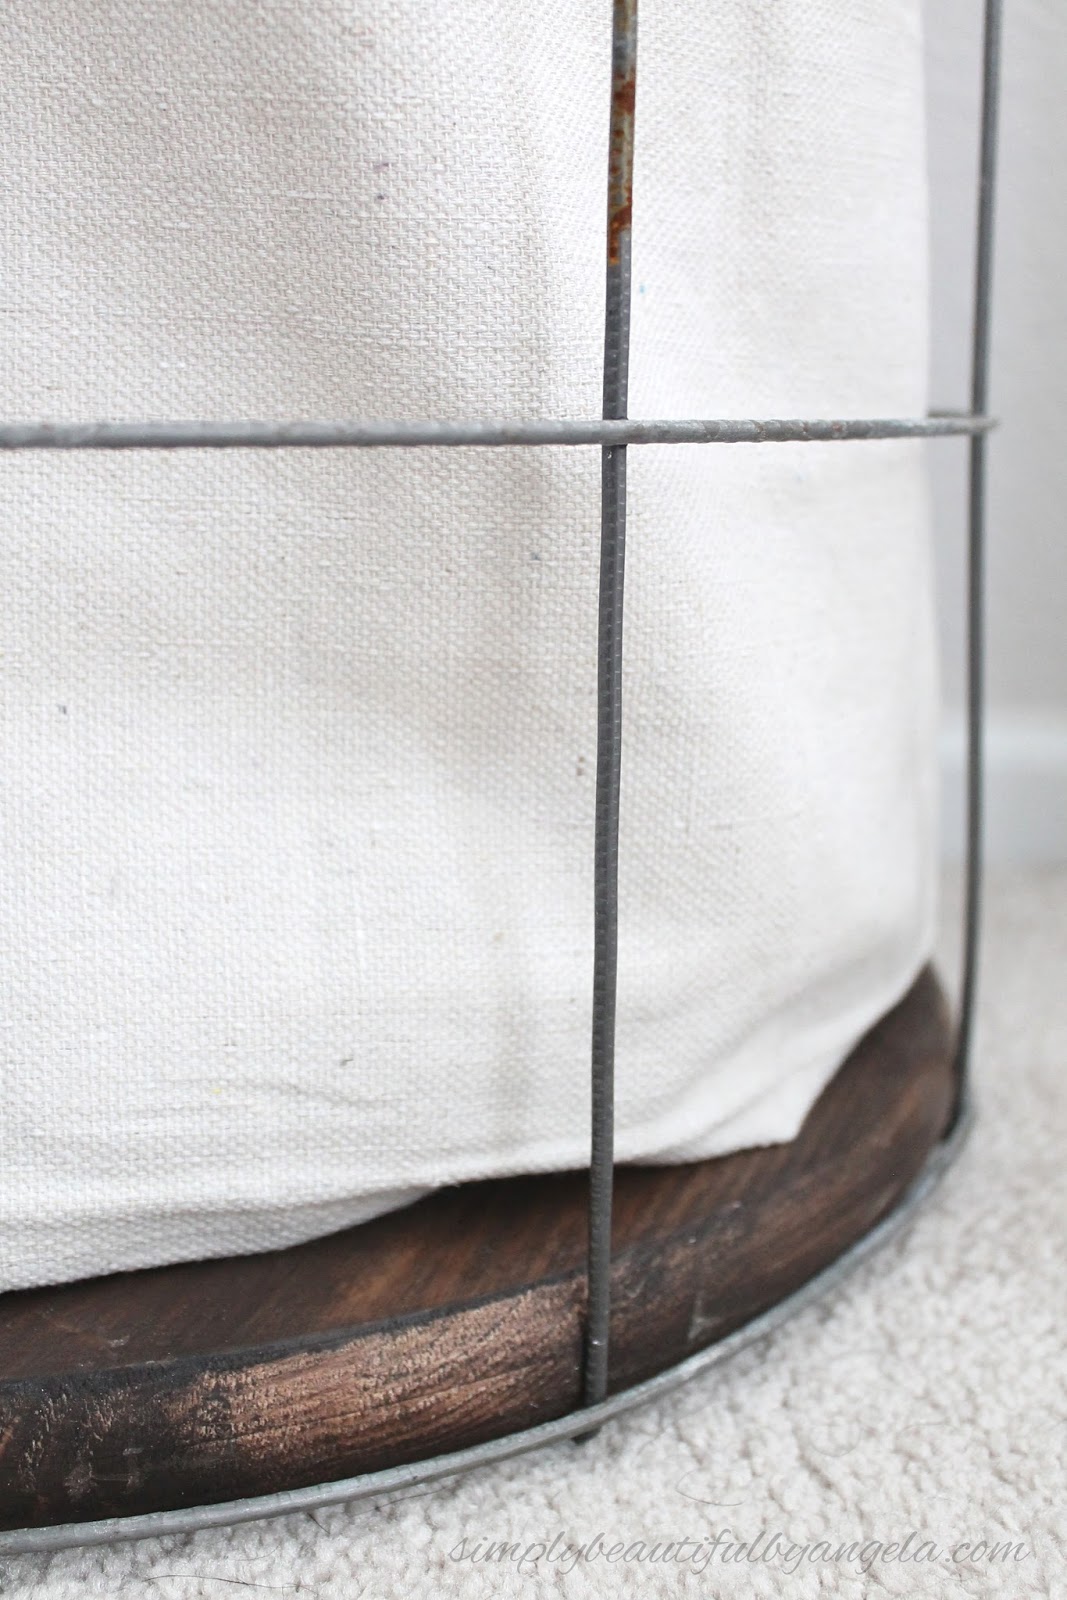
I began by staining my round pine board with Rust-Oleum Wood Stain in Kona. This was the most expensive supply at $11.50 but if you have some scrap plywood laying around you could cut one yourself with a jigsaw.

After this step I let the hubby take over since I was neck deep in all my other projects for the room. He figured out the circumference of the wood which was about 54″ and cut the excess off the wire remesh sheet with the bolt cutters. He left a few inches so that he had enough to fold over.
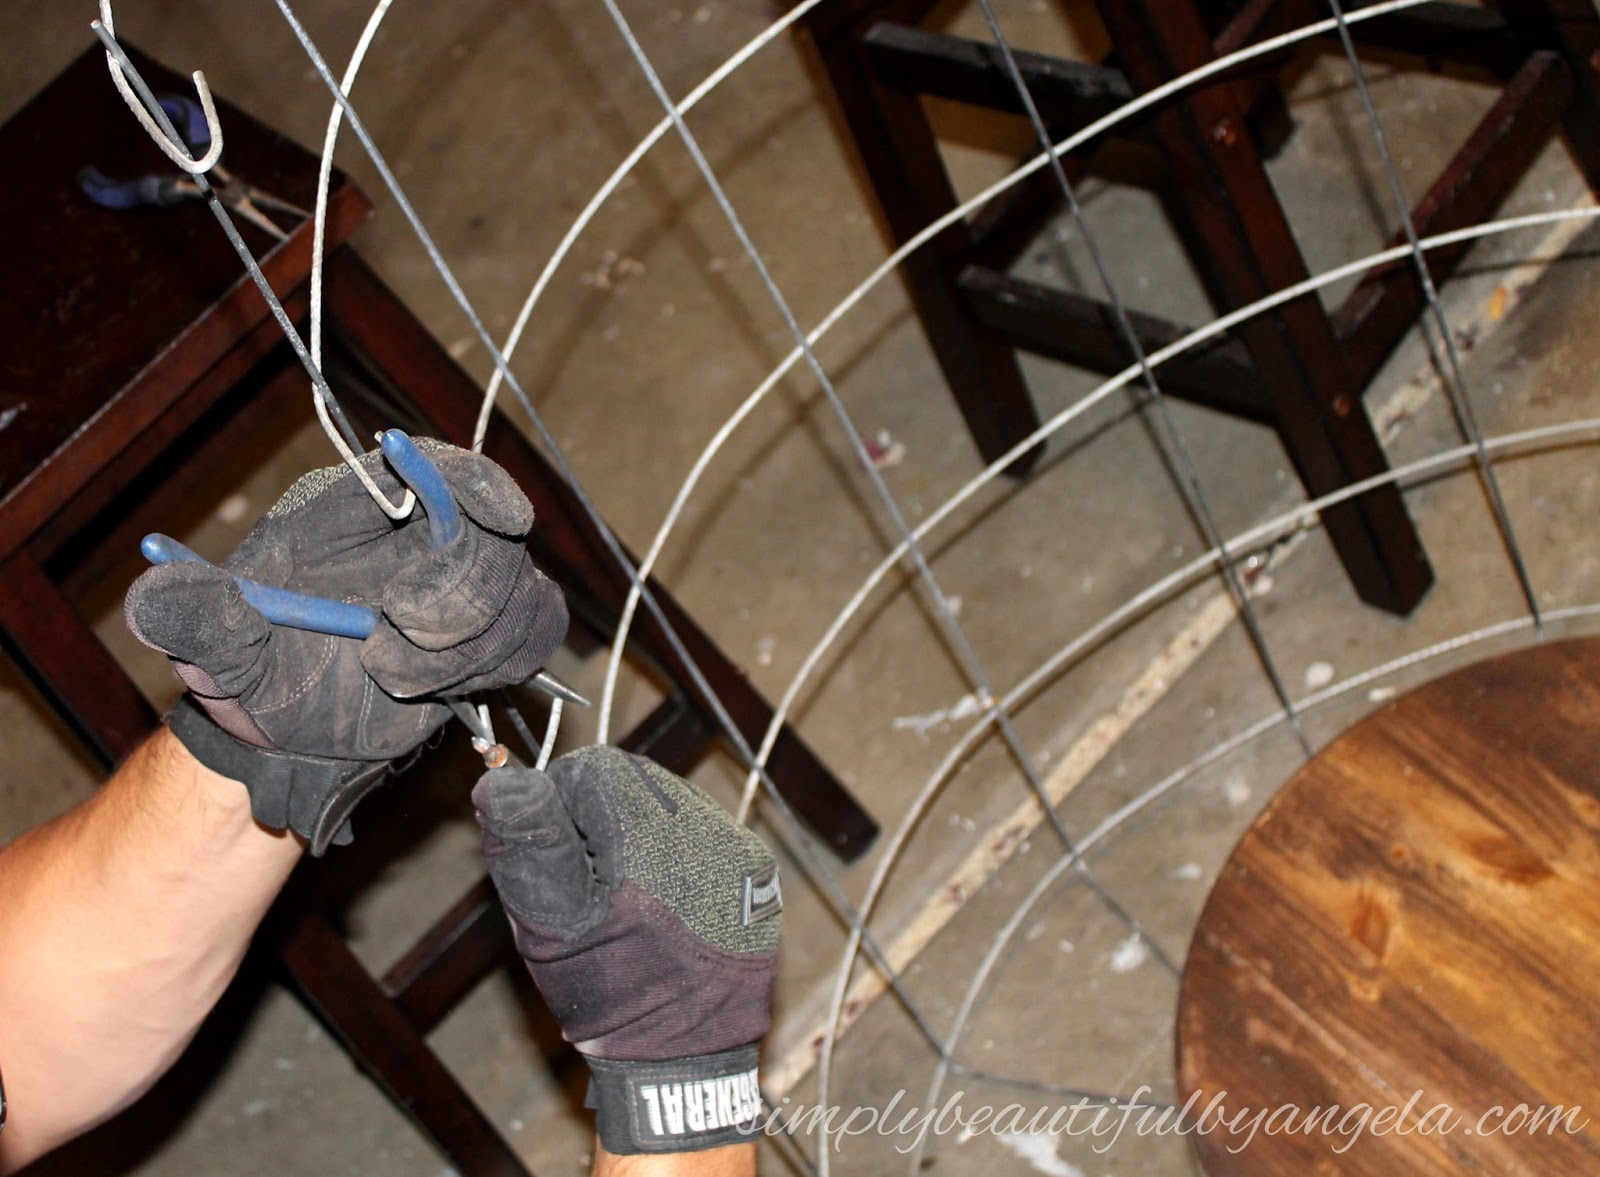
He used pliers to make a hook to attach one end to the other.


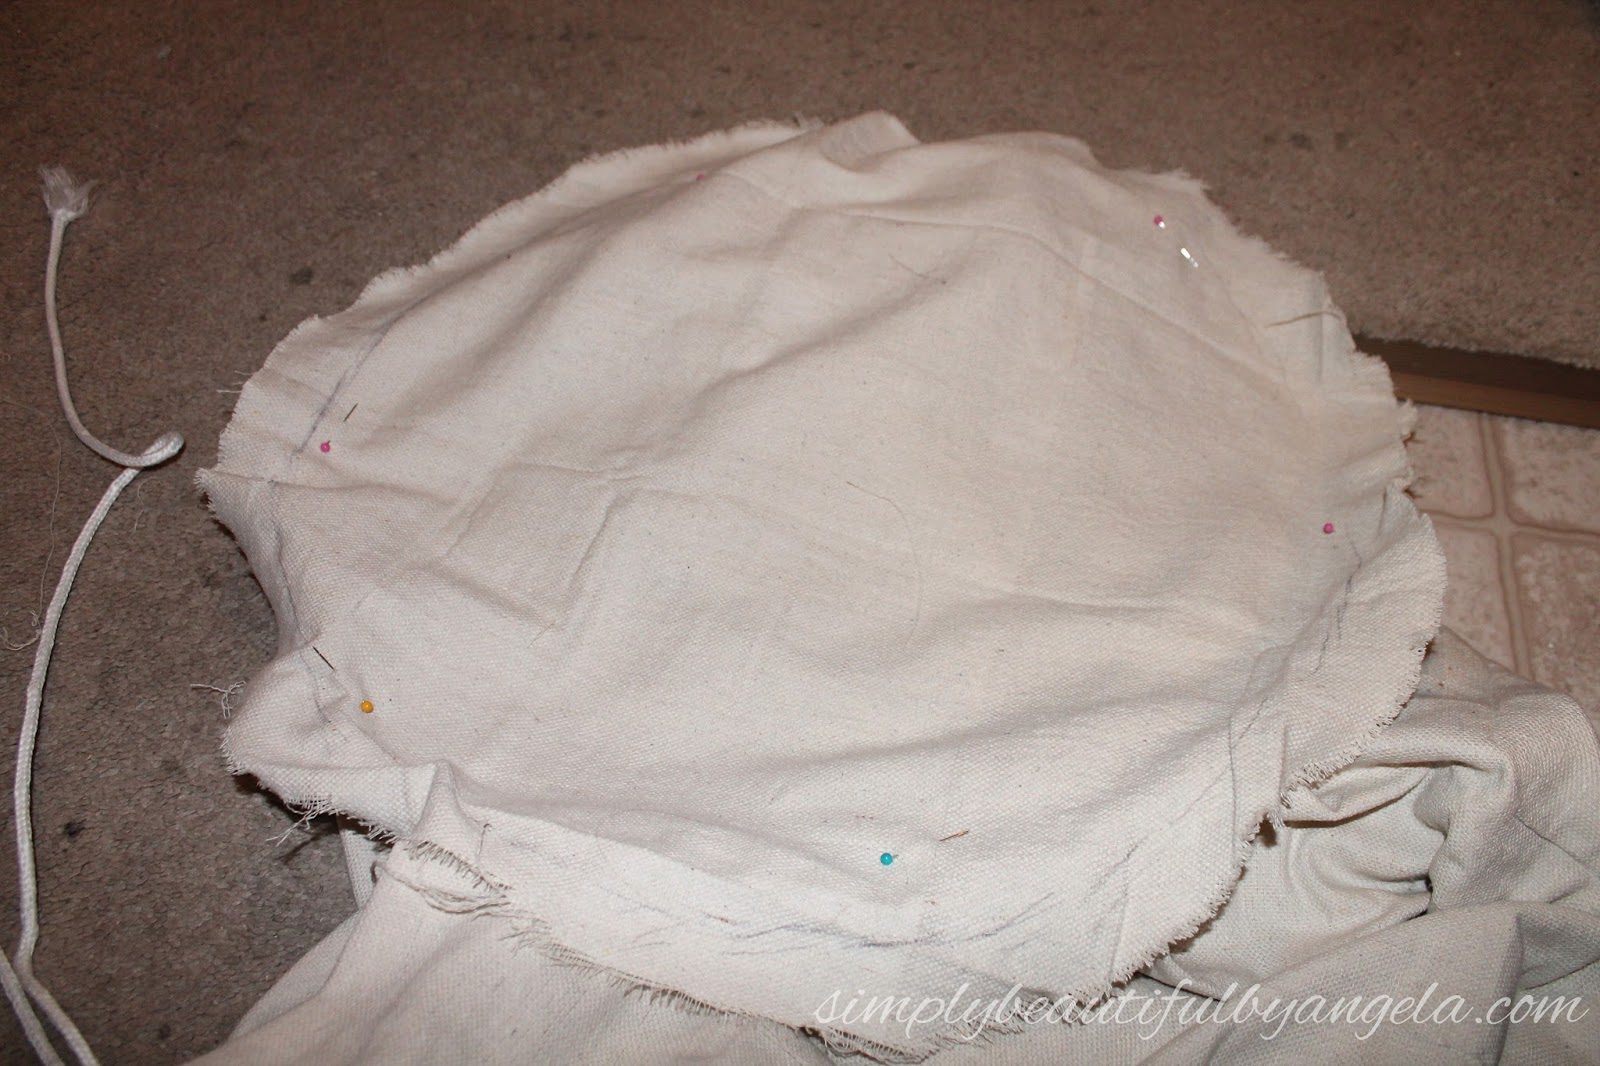
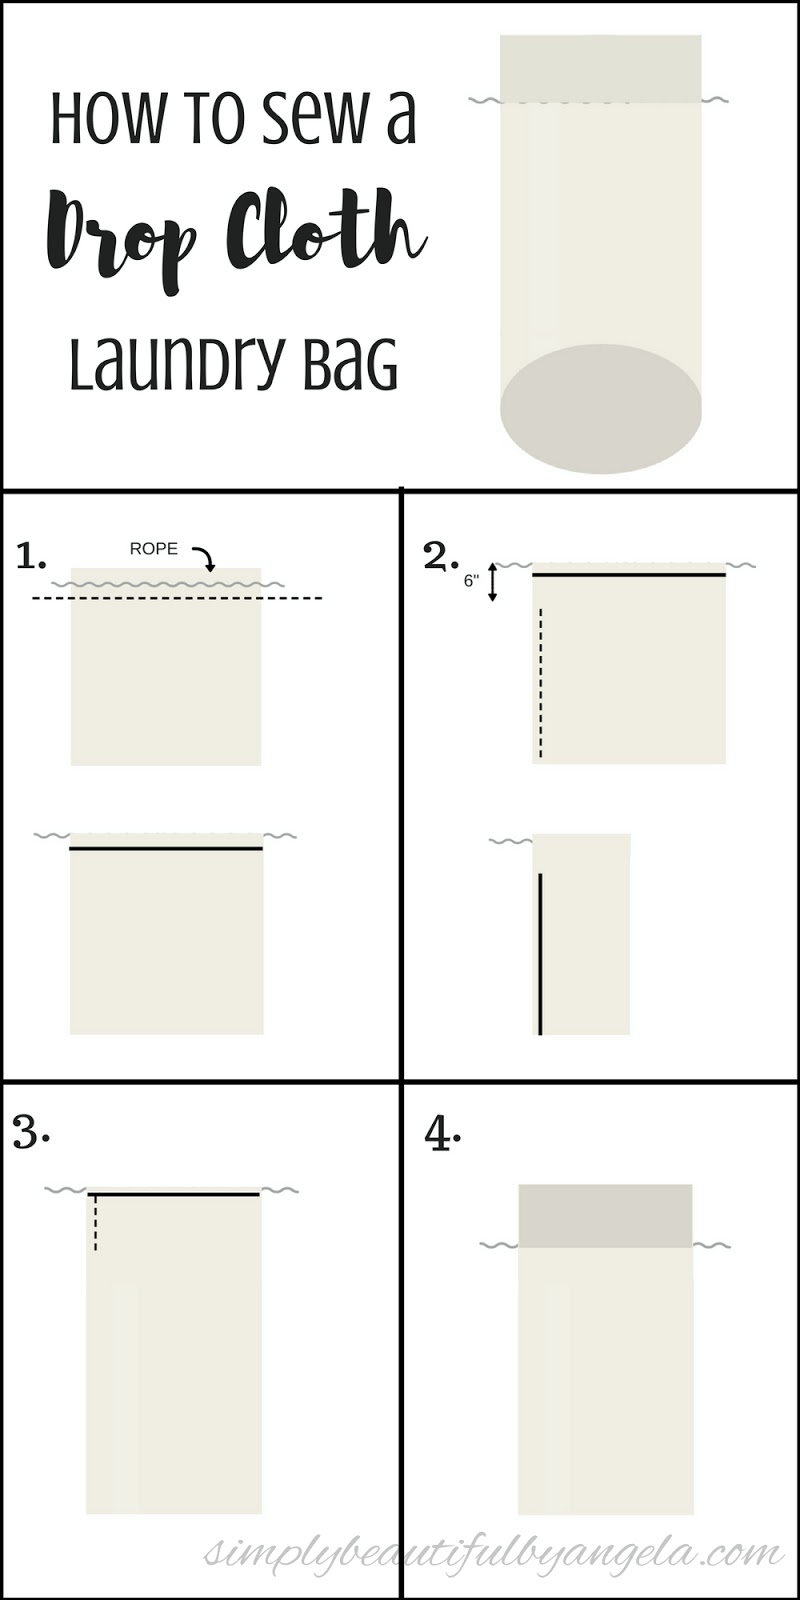
Once he was done with that I started on the laundry bag. Let me preface this by telling you all that I am terrible at sewing! But it was actually pretty easy to put together. It helps that the 4′ x 5′ sized drop cloth that I found at Lowes was the perfect size for this hamper and required no trimming or hemming.
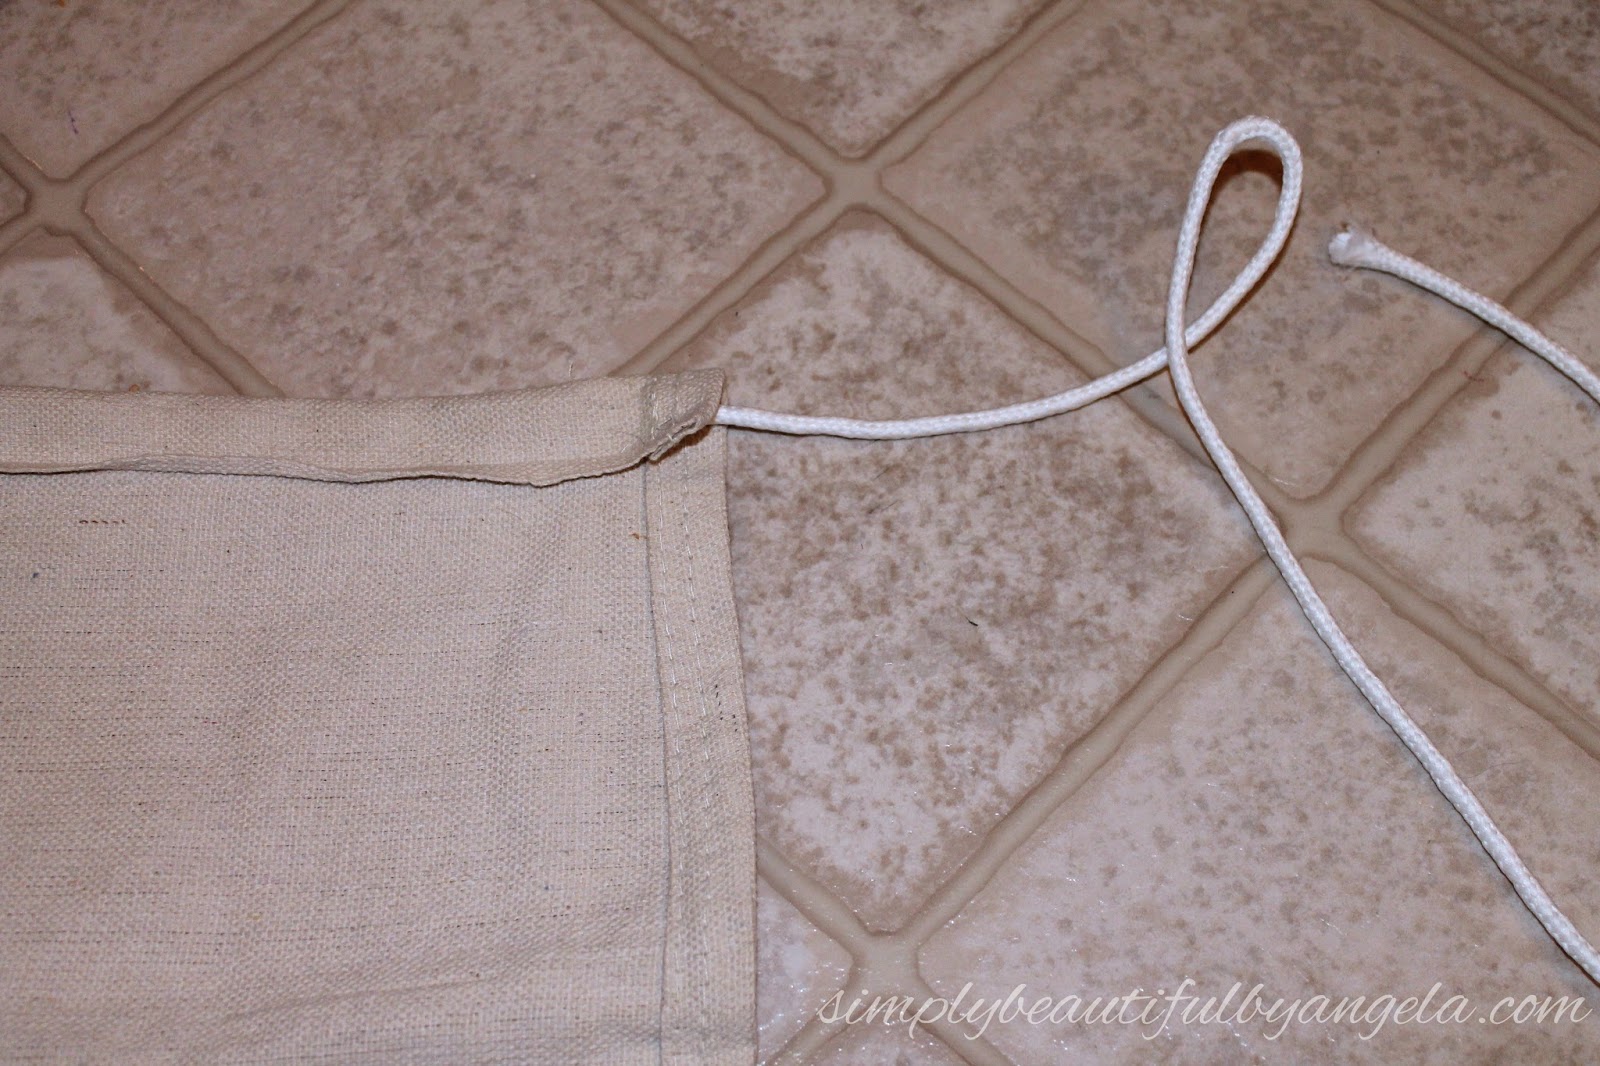
I began by placing my rope along the top of the 5′ side, folded it over and sewed that down.


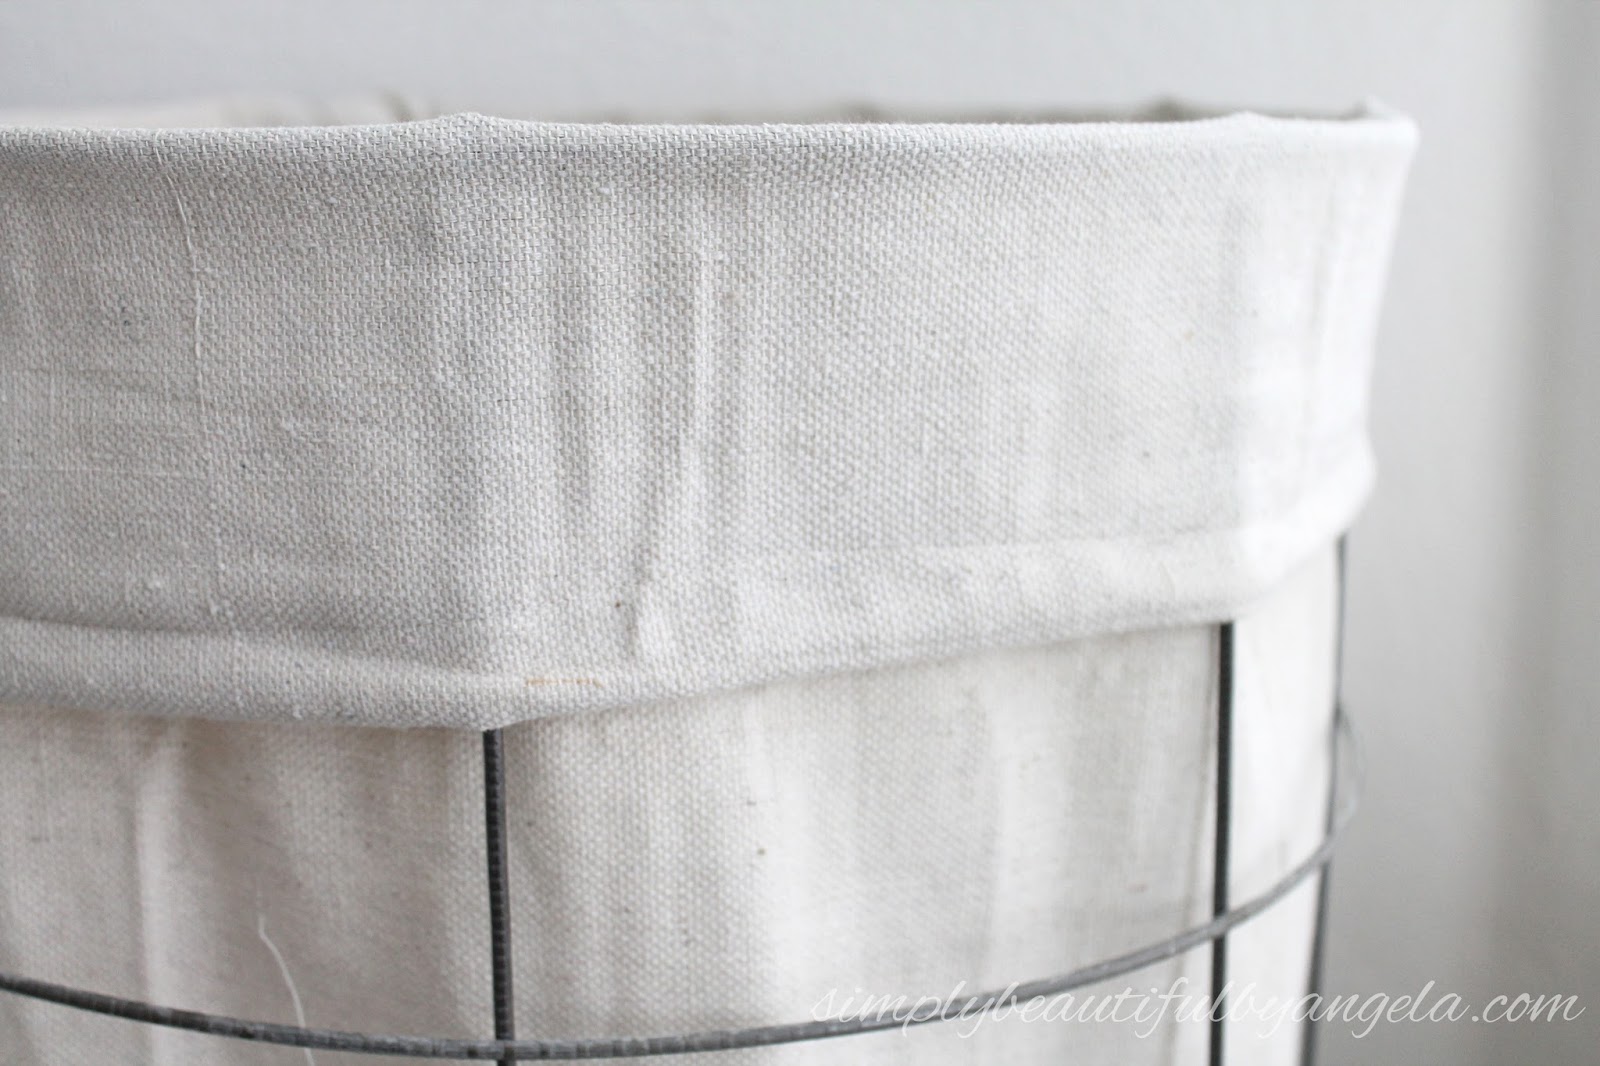
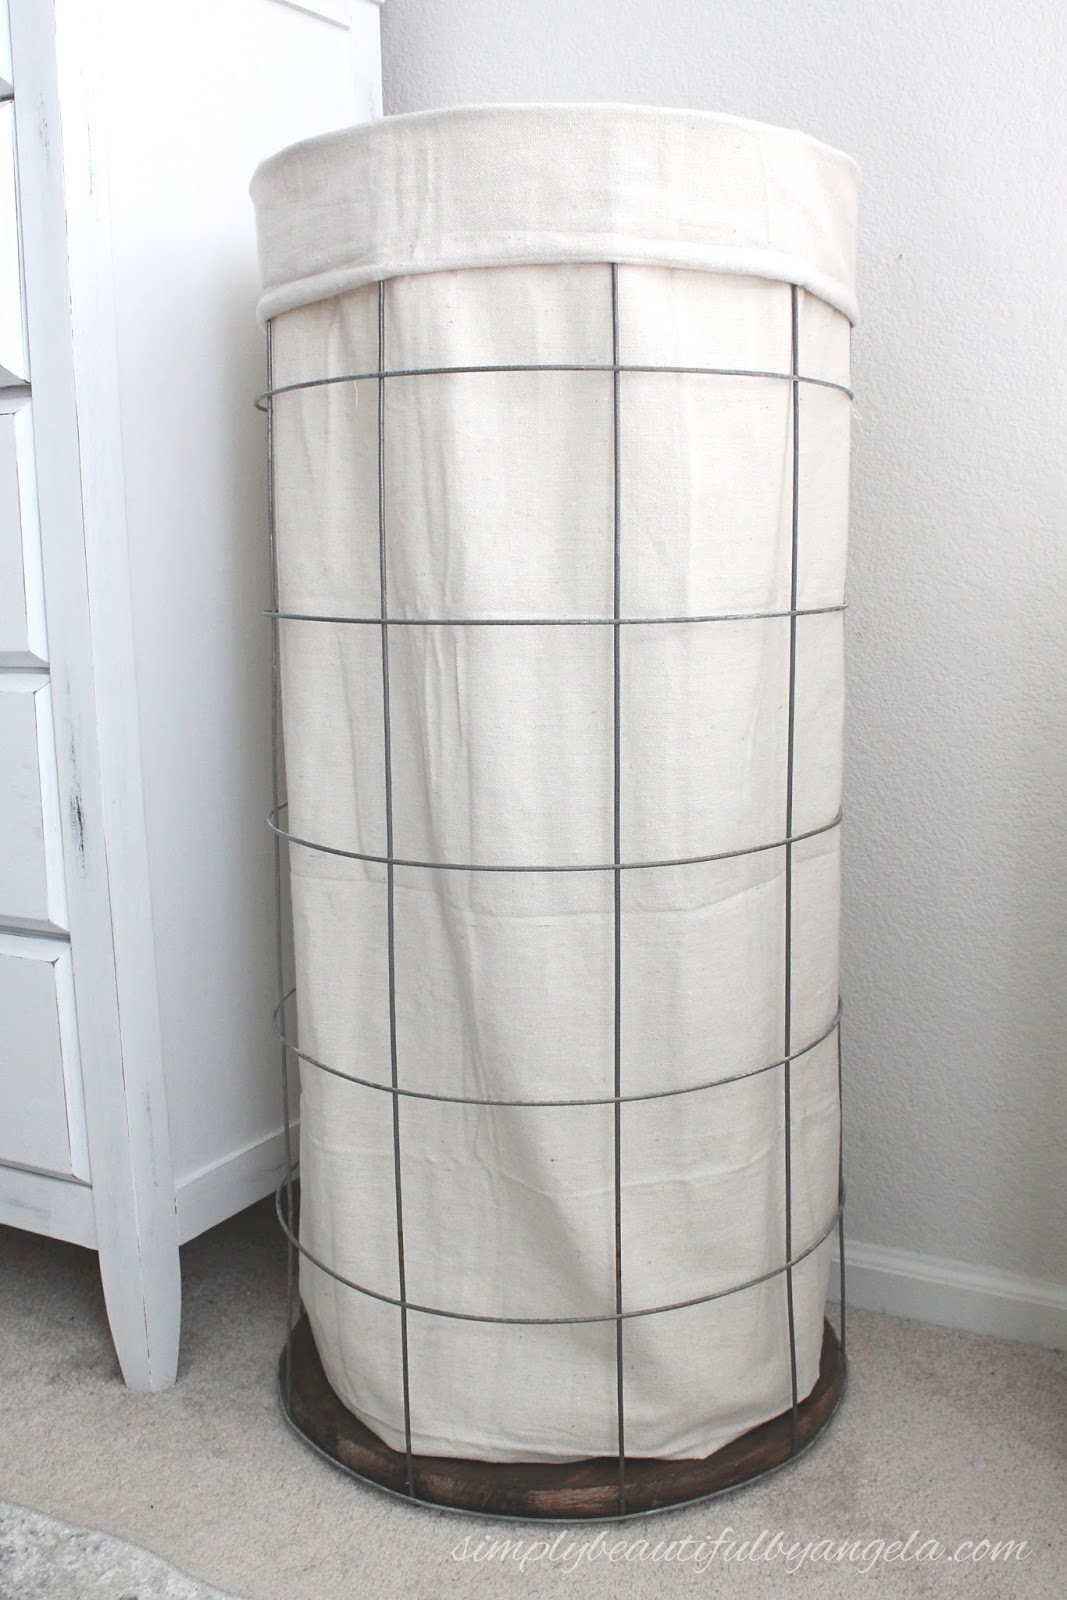
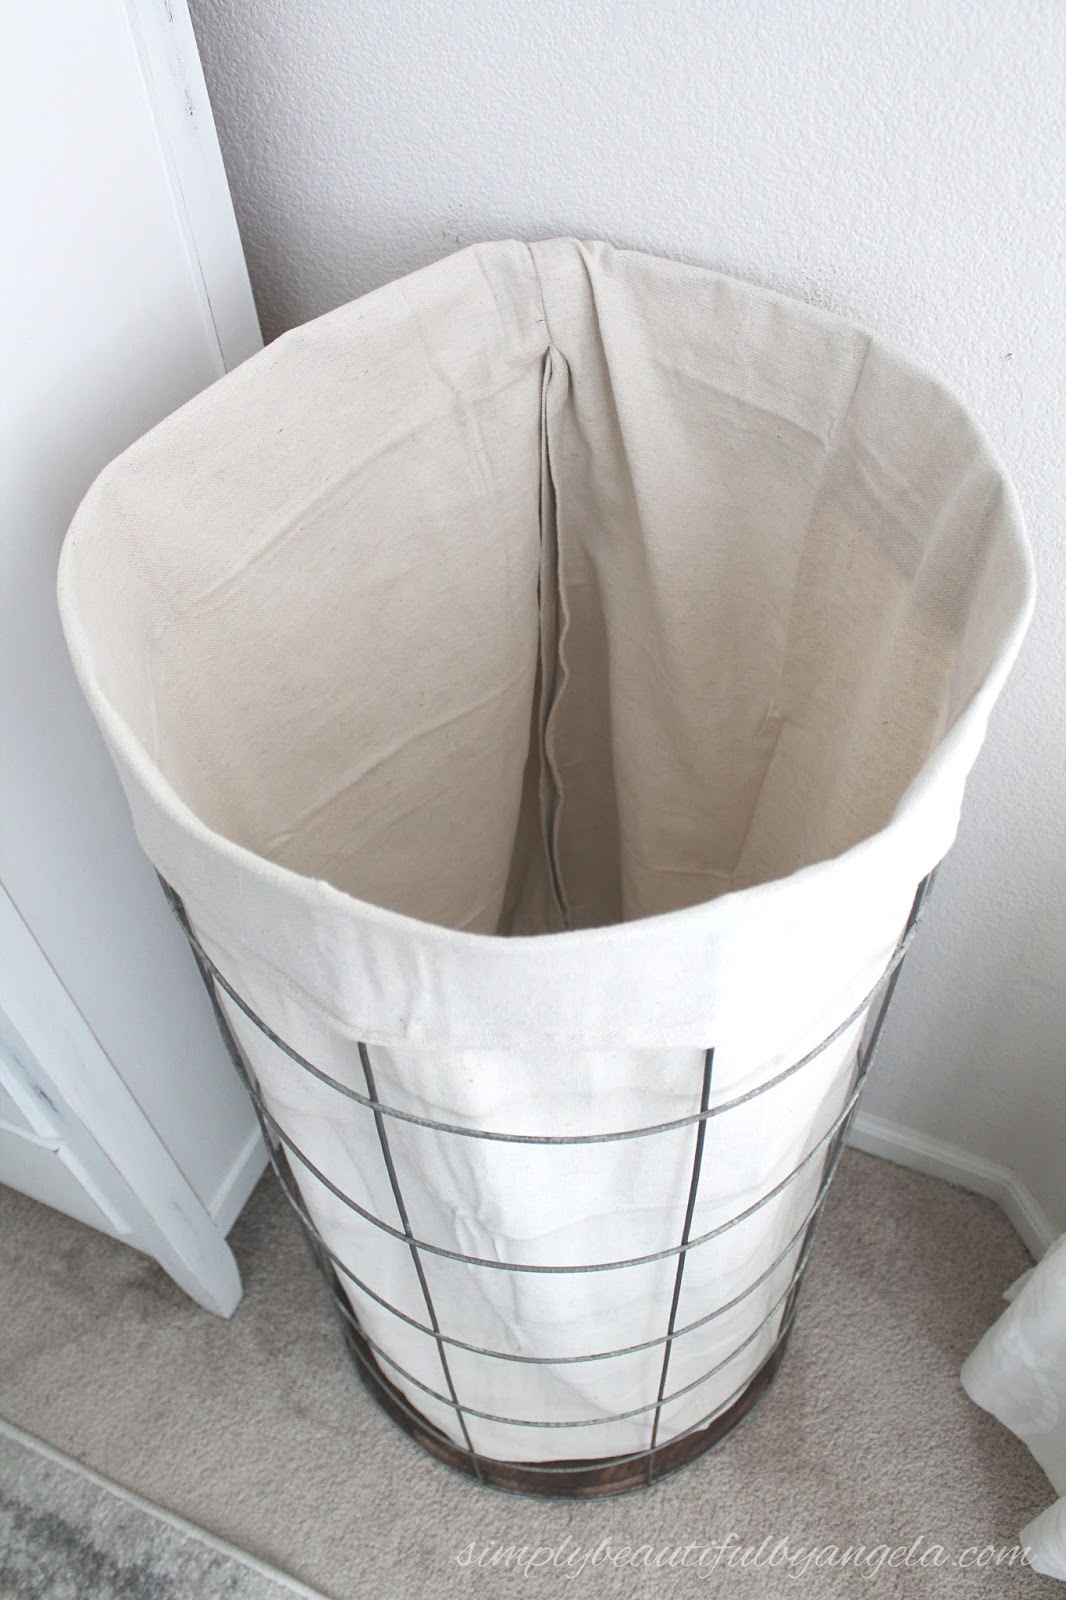


The wire isn’t treated at all so some parts are kind of rusted. I asked the hubby if I should spray paint it but he told me “no way!” because he likes the industrial feel it gives to it.


Oh my goodness, that is so cool!! Totally pinning to share!
Hollie @ http://www.quirkybohemianmama.com/
This is nice. Perfect idea for the Home Improvement. I am also a home improvement contractor and love to learn new ideas like this. I'll definitely share your idea and I'll try to implement this in my next project.
Awesome job. What gauge was the welded wire? Thanks
Thank you Brande! Not sure on the gauge but I used a wire remesh from Home Depot. I noticed that the link above is expired but here is the new one!
https://www.homedepot.com/p/42-in-x-7-ft-Remesh-Sheet-5901028/206261747