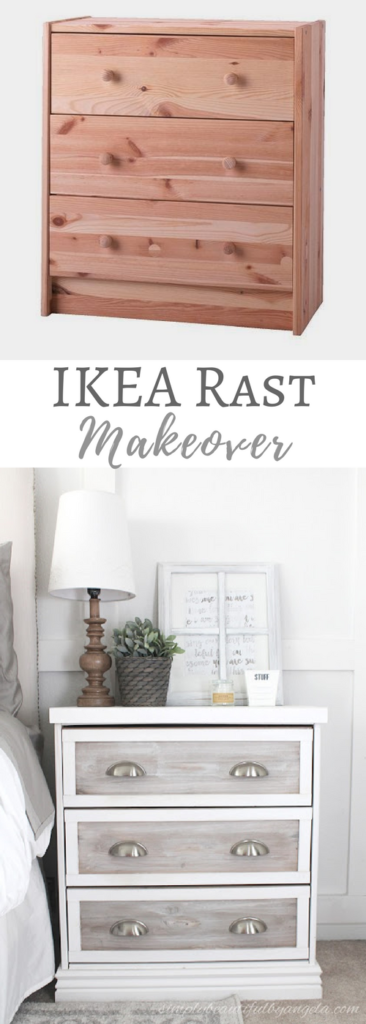


Pretty nice, right? But over the last two years I started having ideas about how I could have made them even better. So when I decided to give our whole bedroom a makeover for the One Room Challenge I decided to give them a second makeover!
- 2- 1x4s @ 24.375″
- 1- 1×6 @ 24.375″
- 1×4 scrap plywood and a 1×4 around 2′ (or anything you can find to build up the bottom lip to give the molding something to attach to)
- Lattice Trim (I used around 6′ per dresser)
- Moulding (I used around 5′ per dresser)
- Liquid Nails
- Wood Filler
- Orbital Sander
- Minwax Wood Stain in Provincial
- White paint
- White Caulk
- Chalky Clear Sealing Wax
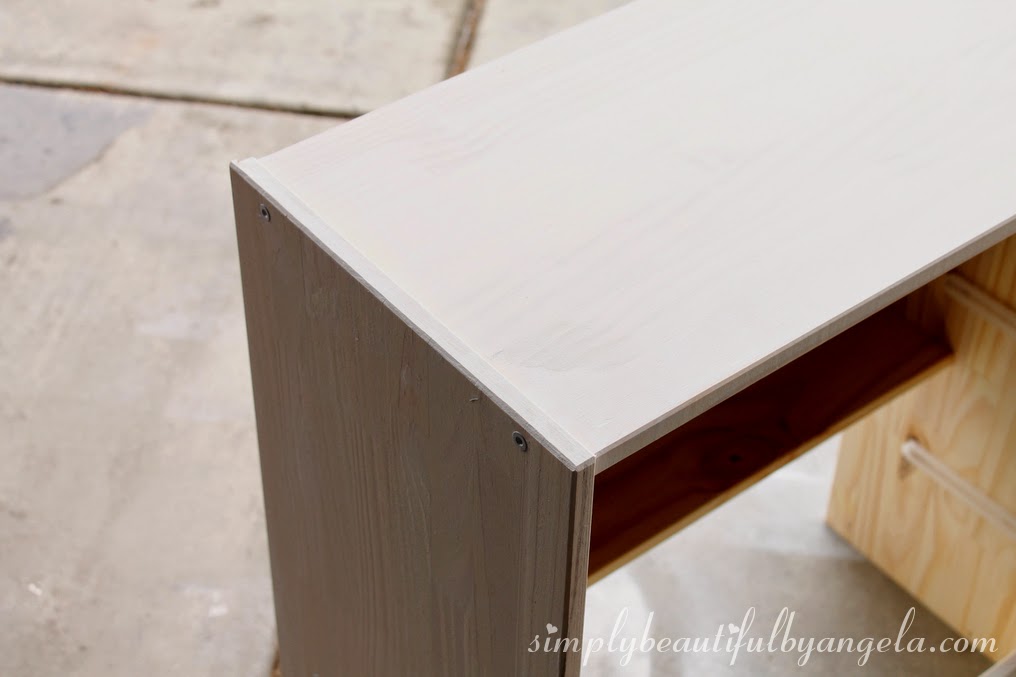
I first wanted to plank the top in order to hide the raised edges that were on either side. To do this, I simply attached two 1x4s and a 1×6 directly to those edges using liquid nails. You can see in the picture below that there will be a little overhang and I chose to place it over the front of the dresser.
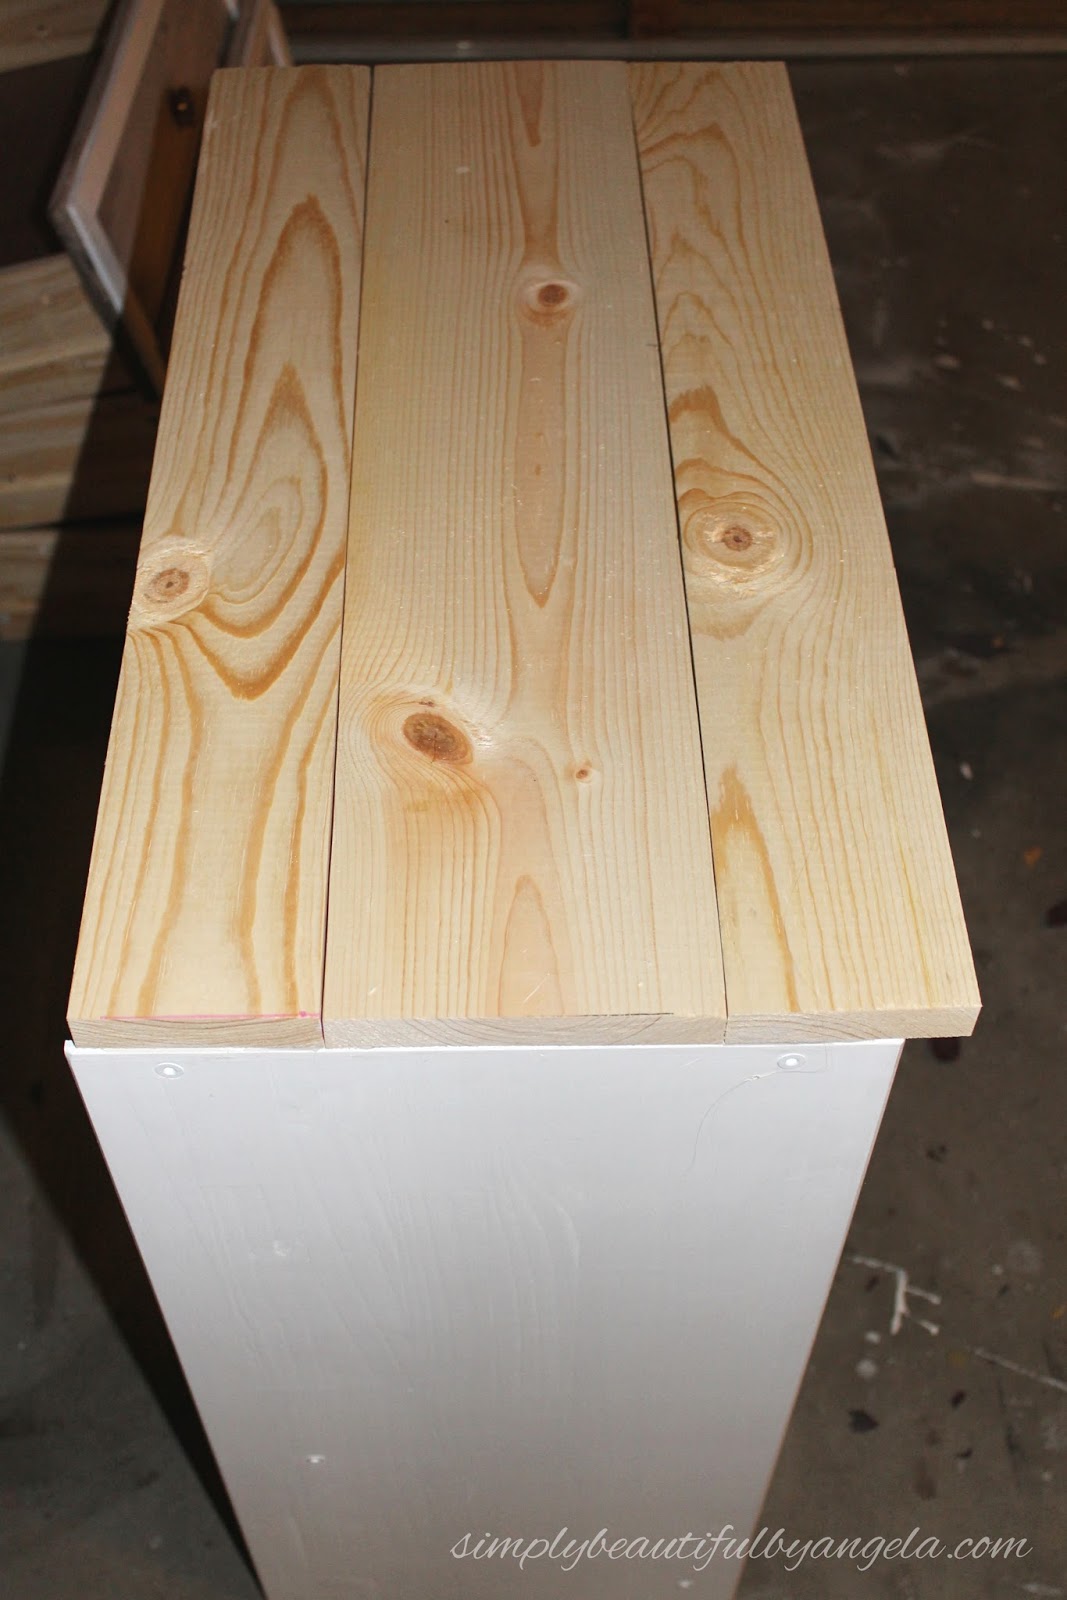

I then attached a 1×4 on top of those. I used a piece of scrap lattice to hold those pieces up while they were drying so that it was almost flush with the top.

The next day I went back with some lattice and framed out the top. I countersunk my nails by using a large screw to tap them in (perfect solution if you don’t have a nail gun that sinks them for you) and then filled the holes in with wood putty.

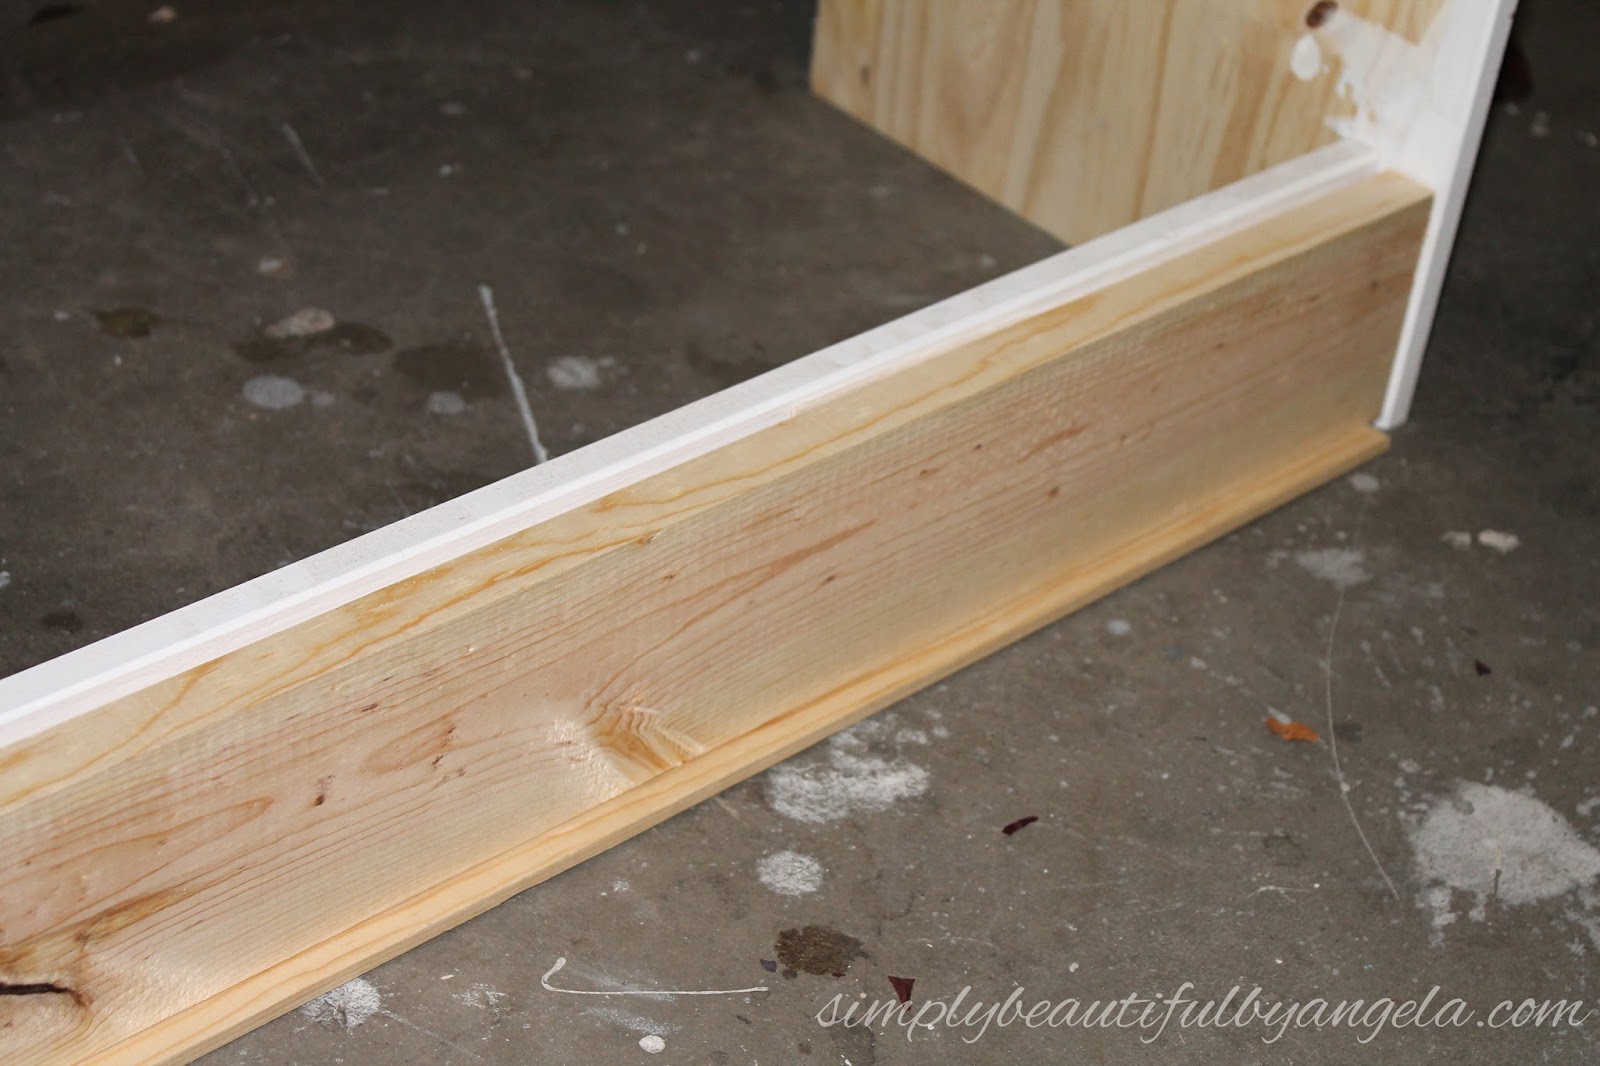
I used a miter saw to cut my moulding and attached it to the base using liquid nails. As you can see I decided that I only needed to put moulding on the front and the sides.
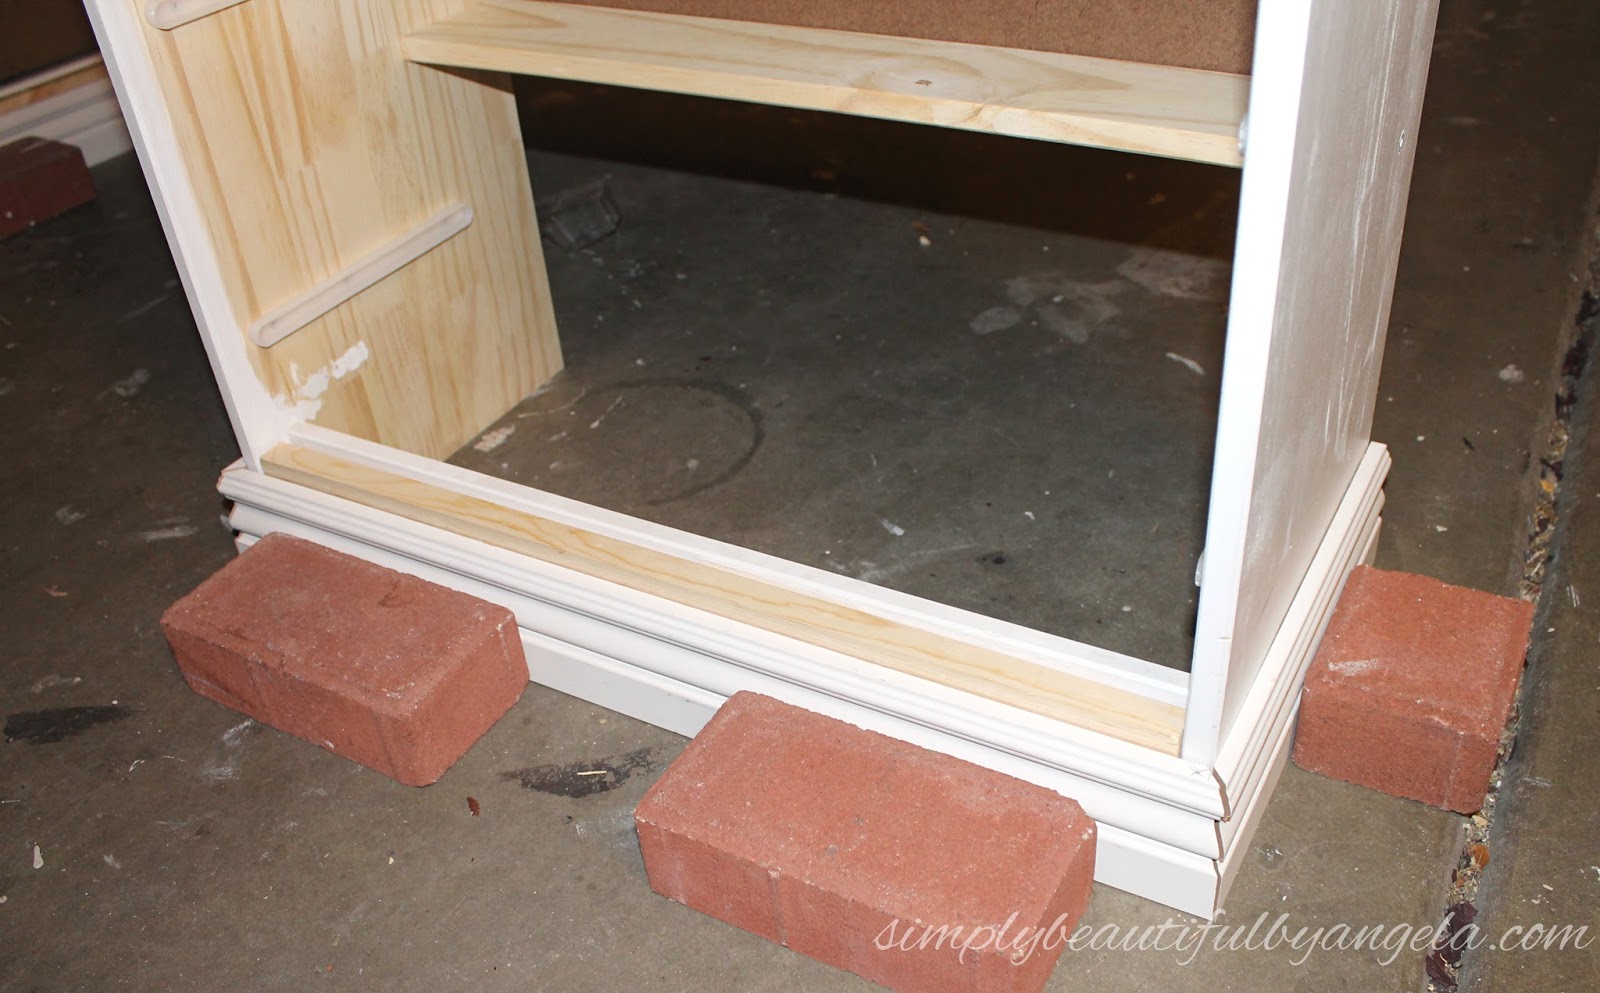
Once it was dry I went back with my trusty caulk gun and disguised the mitered cuts as well as where the molding meets the dresser.

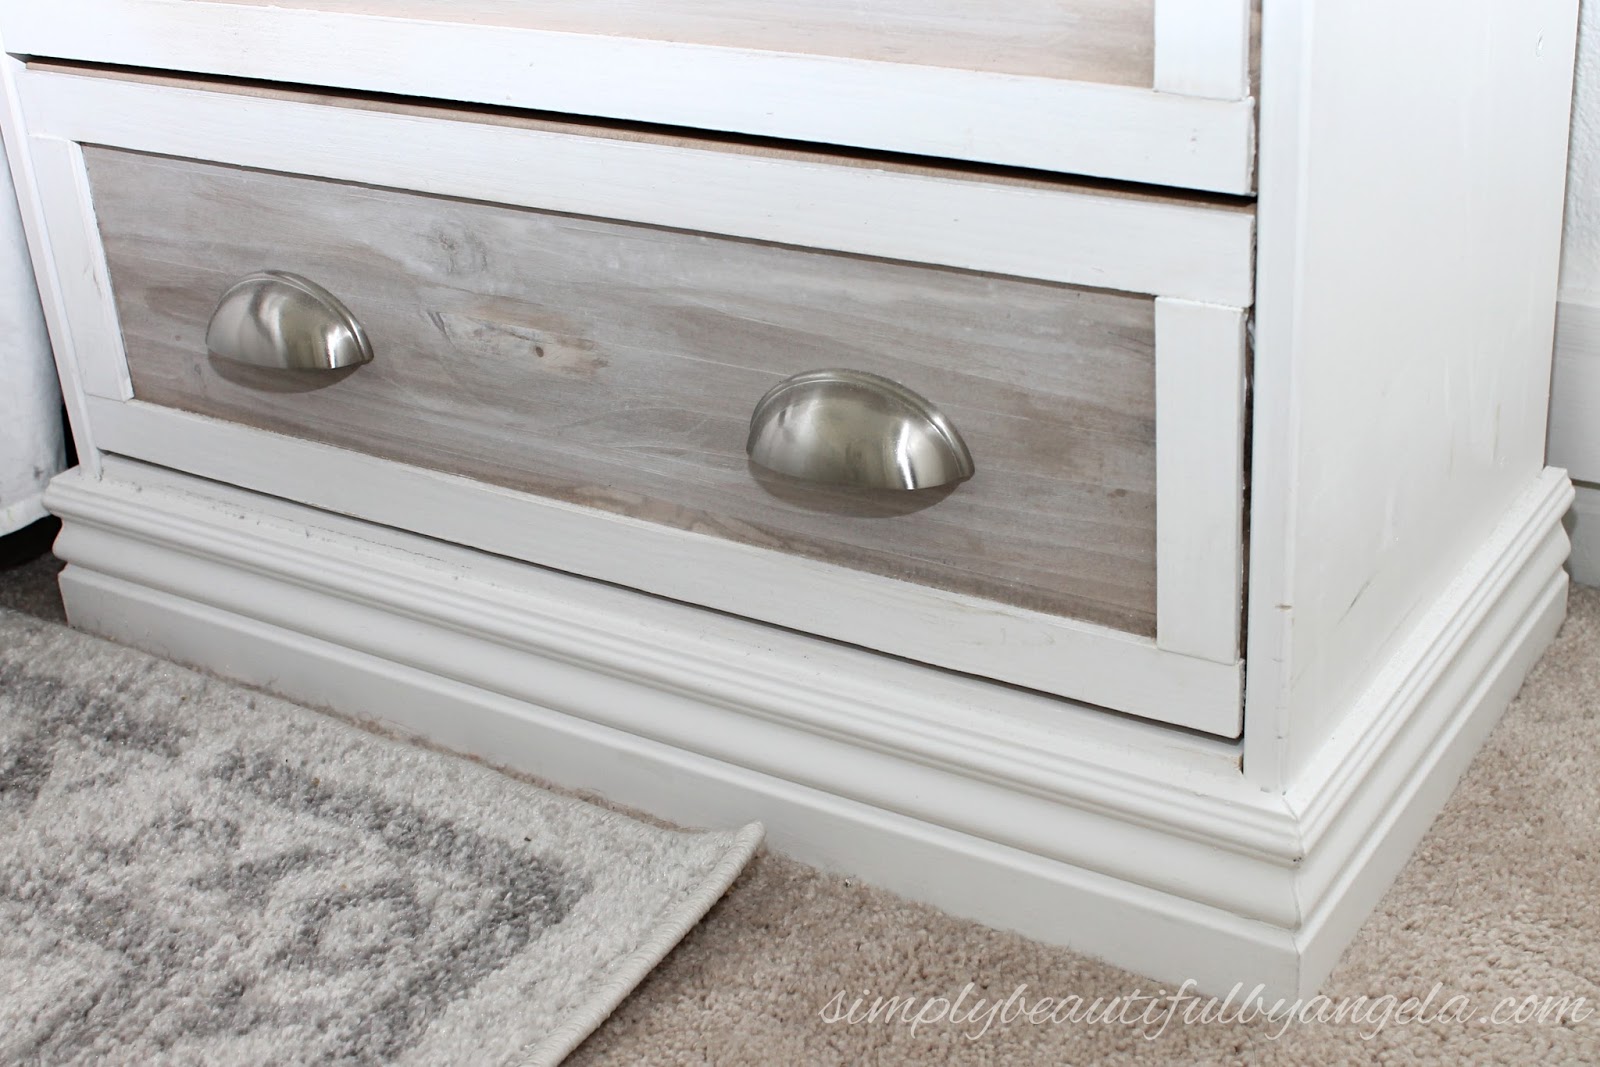
After painting the new top and the molding I gave it all a coat of my Chalky Clear Sealing Wax that I recently discovered and love.

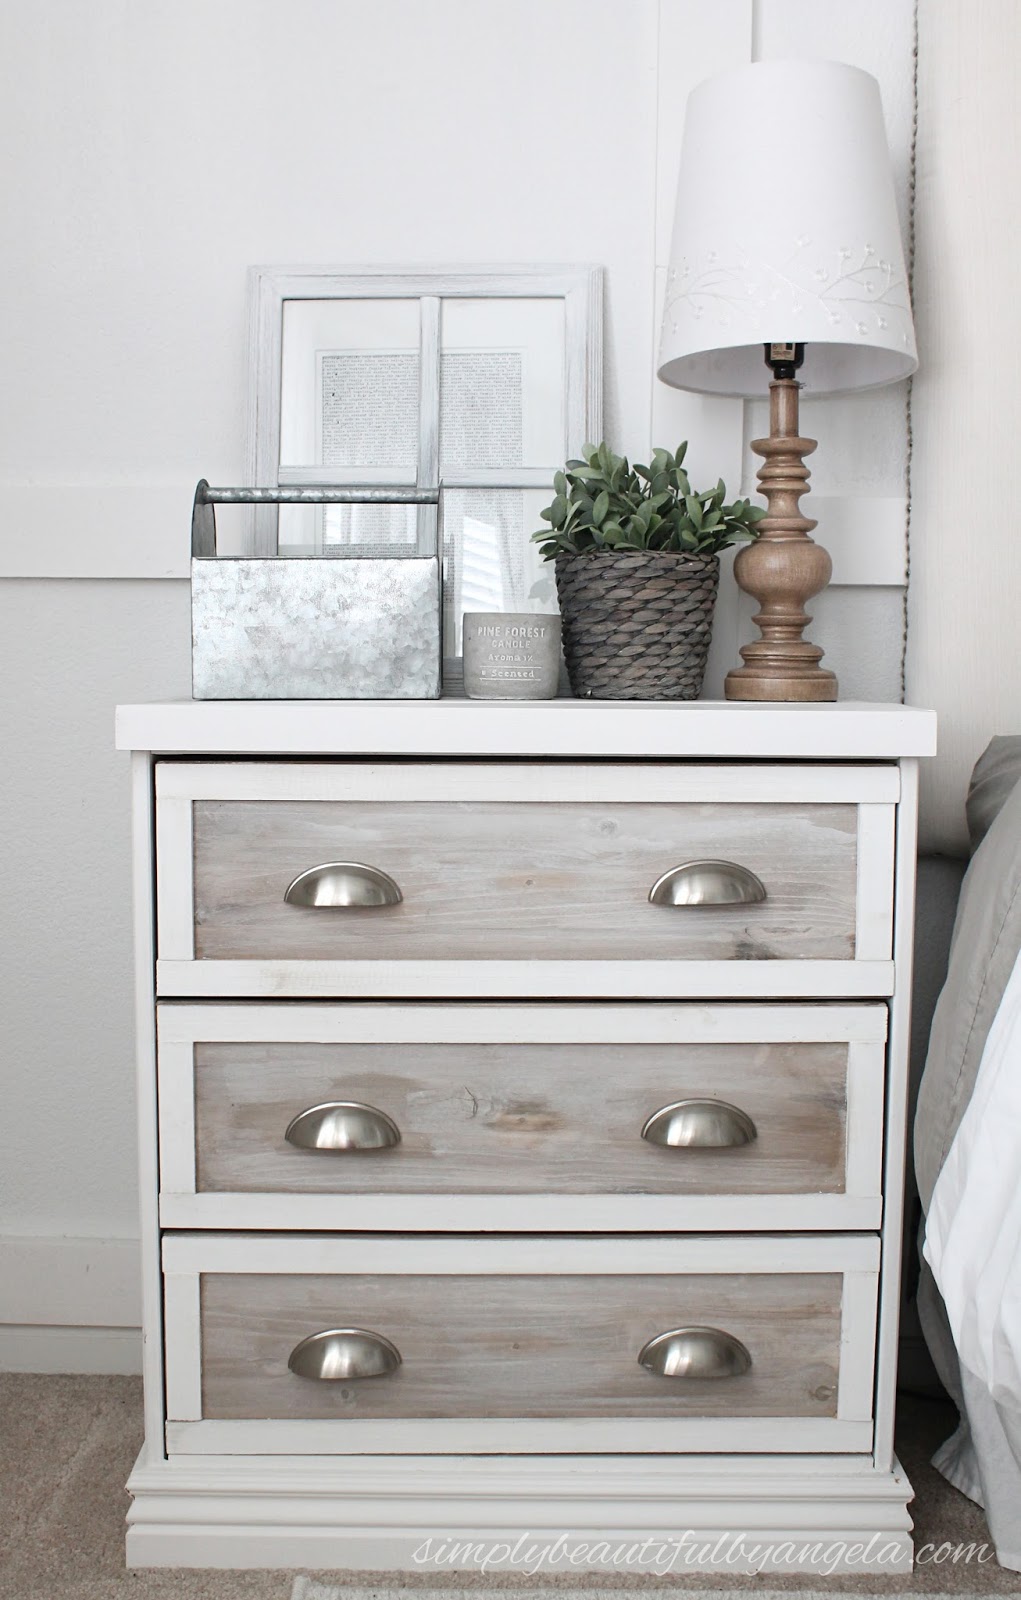
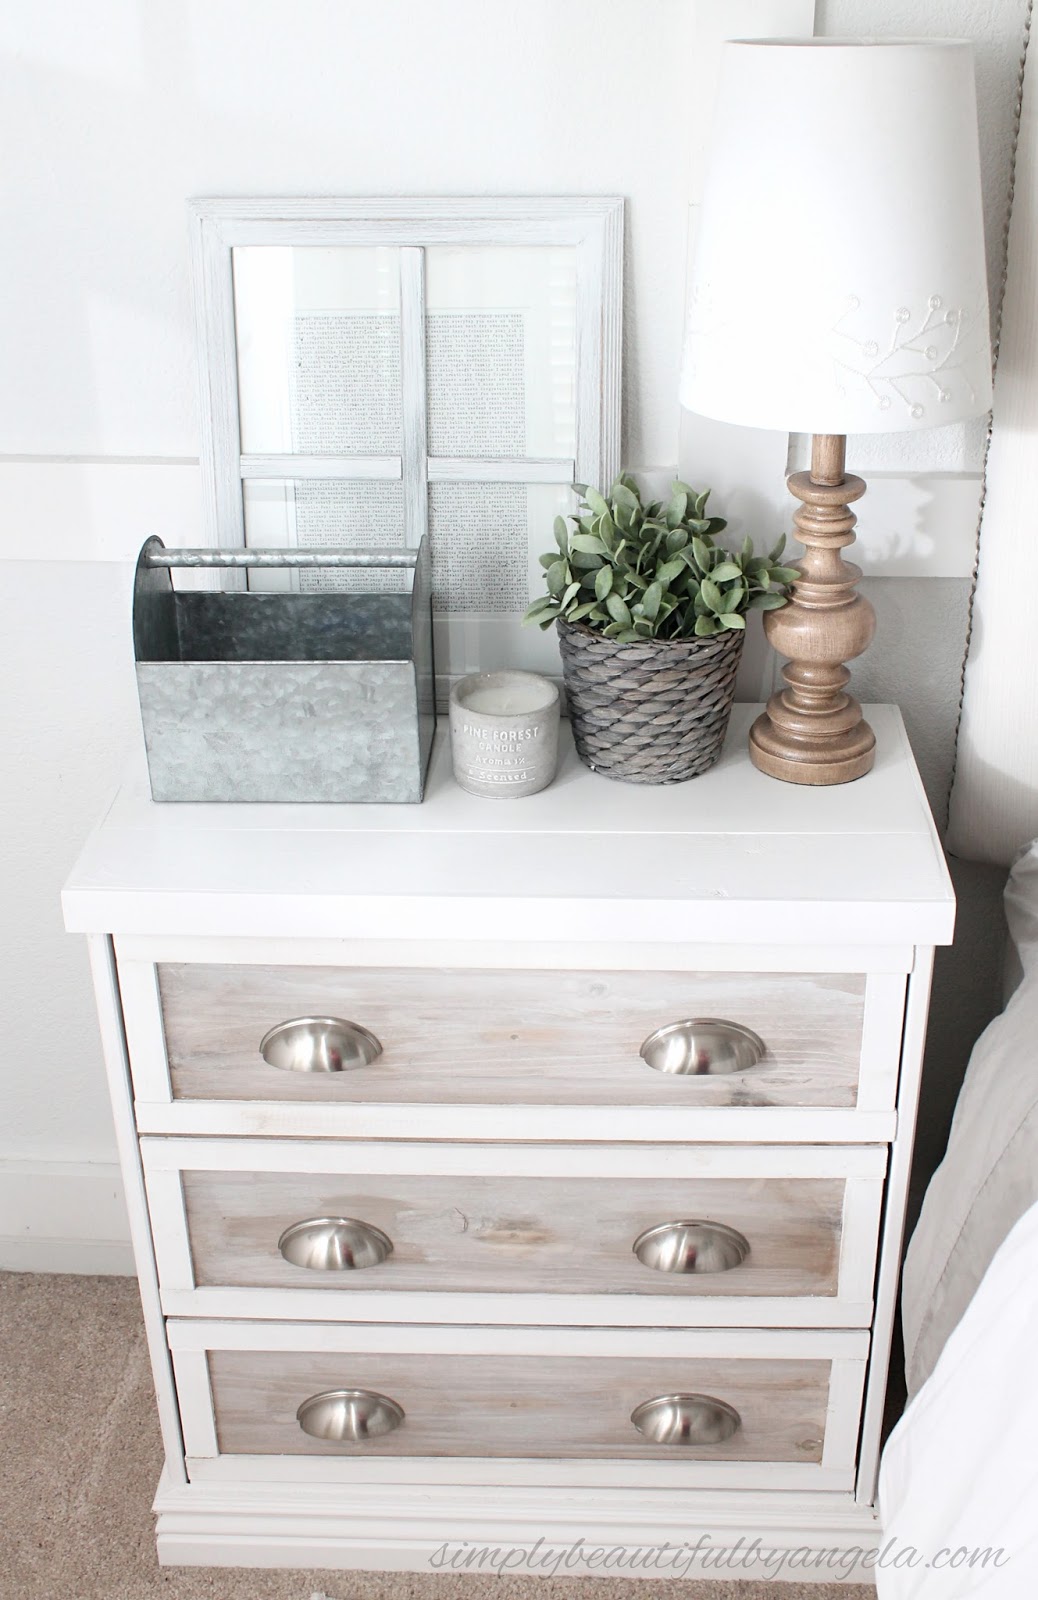
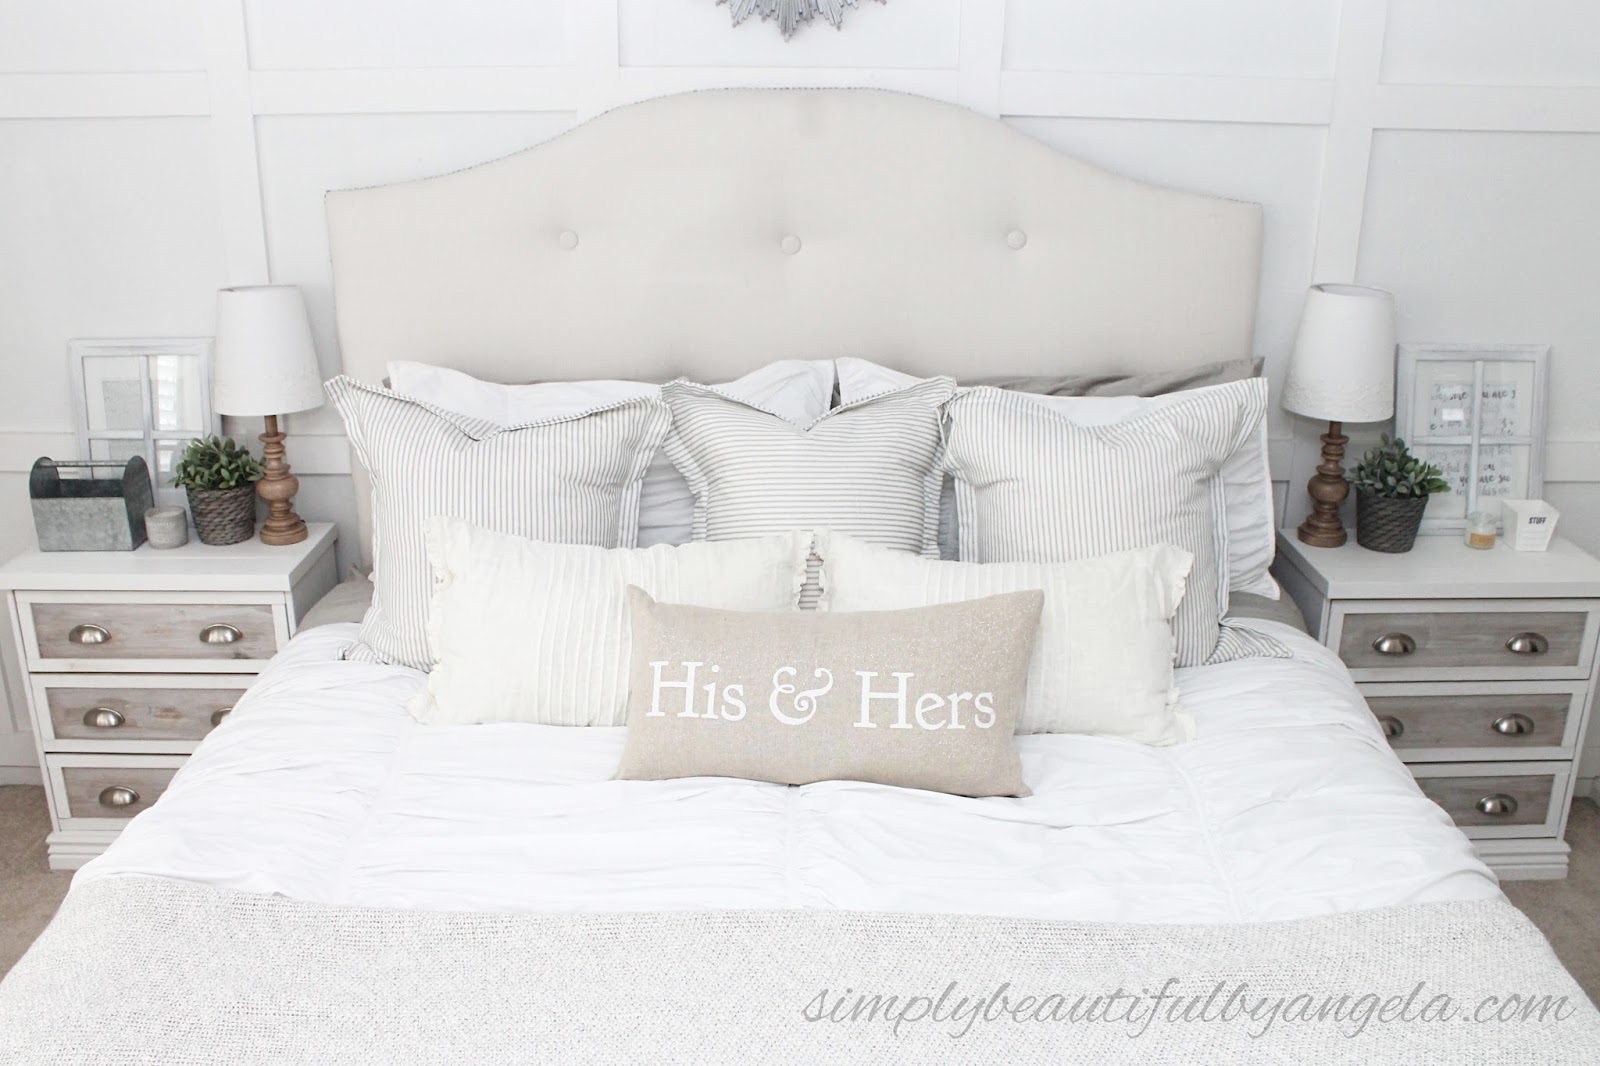
And here it is today!
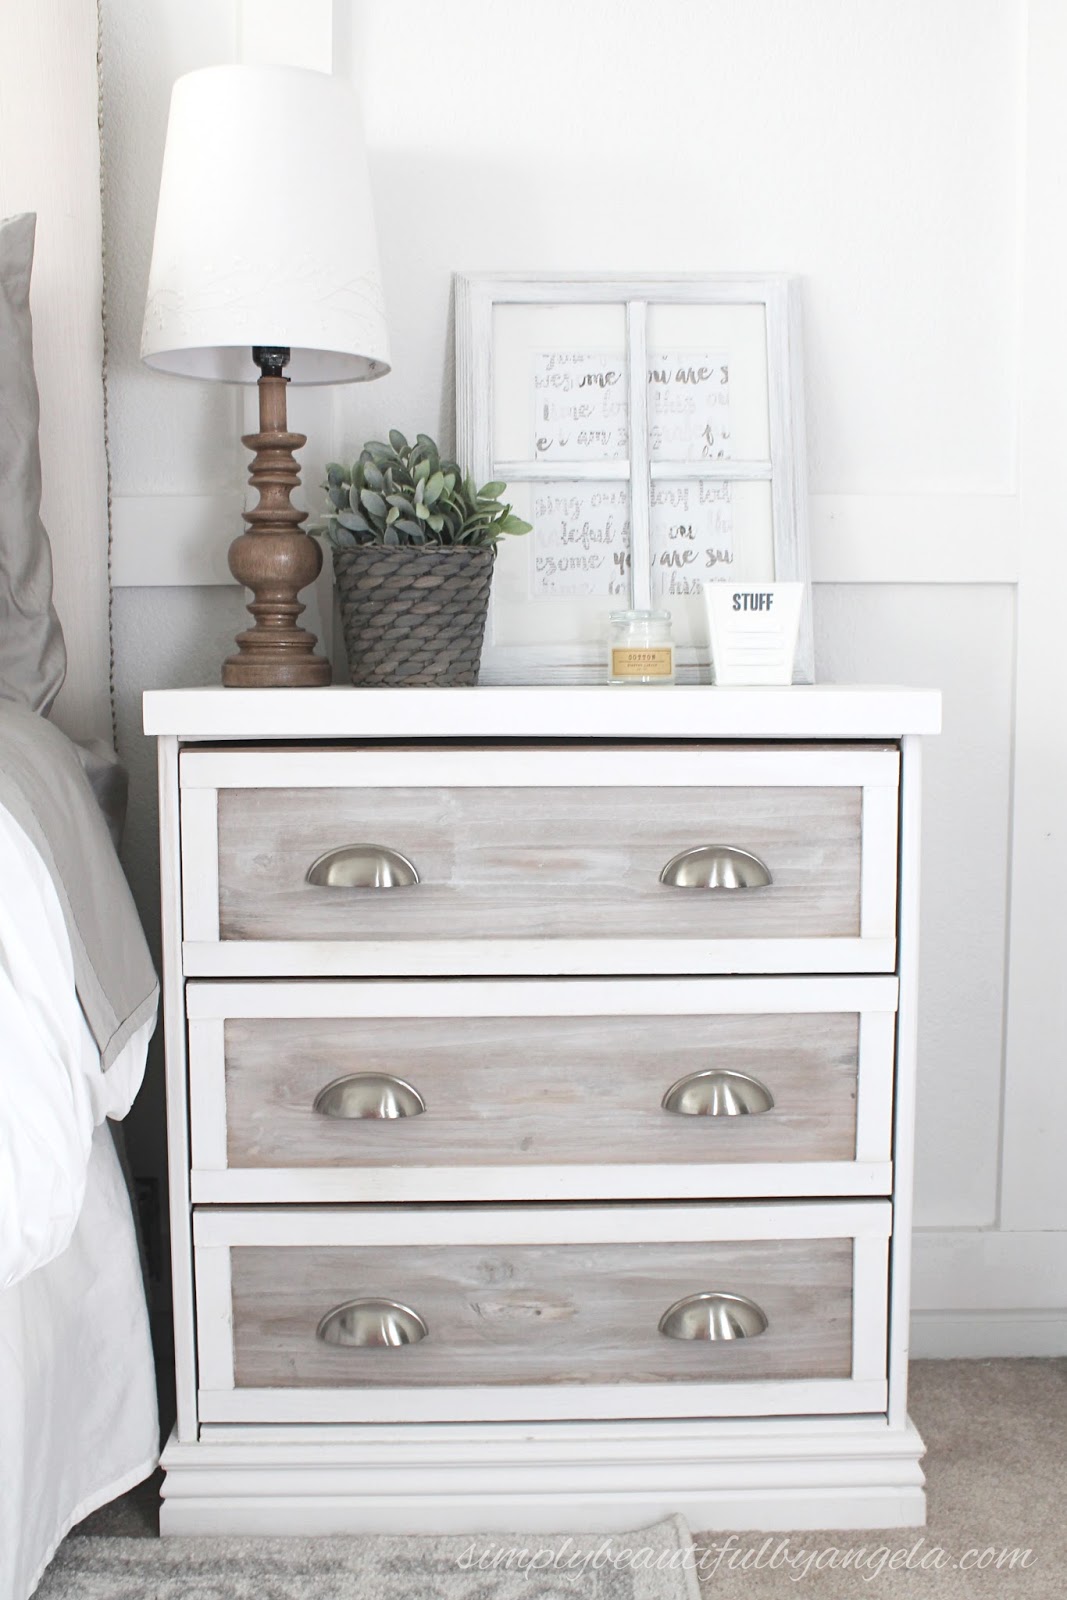
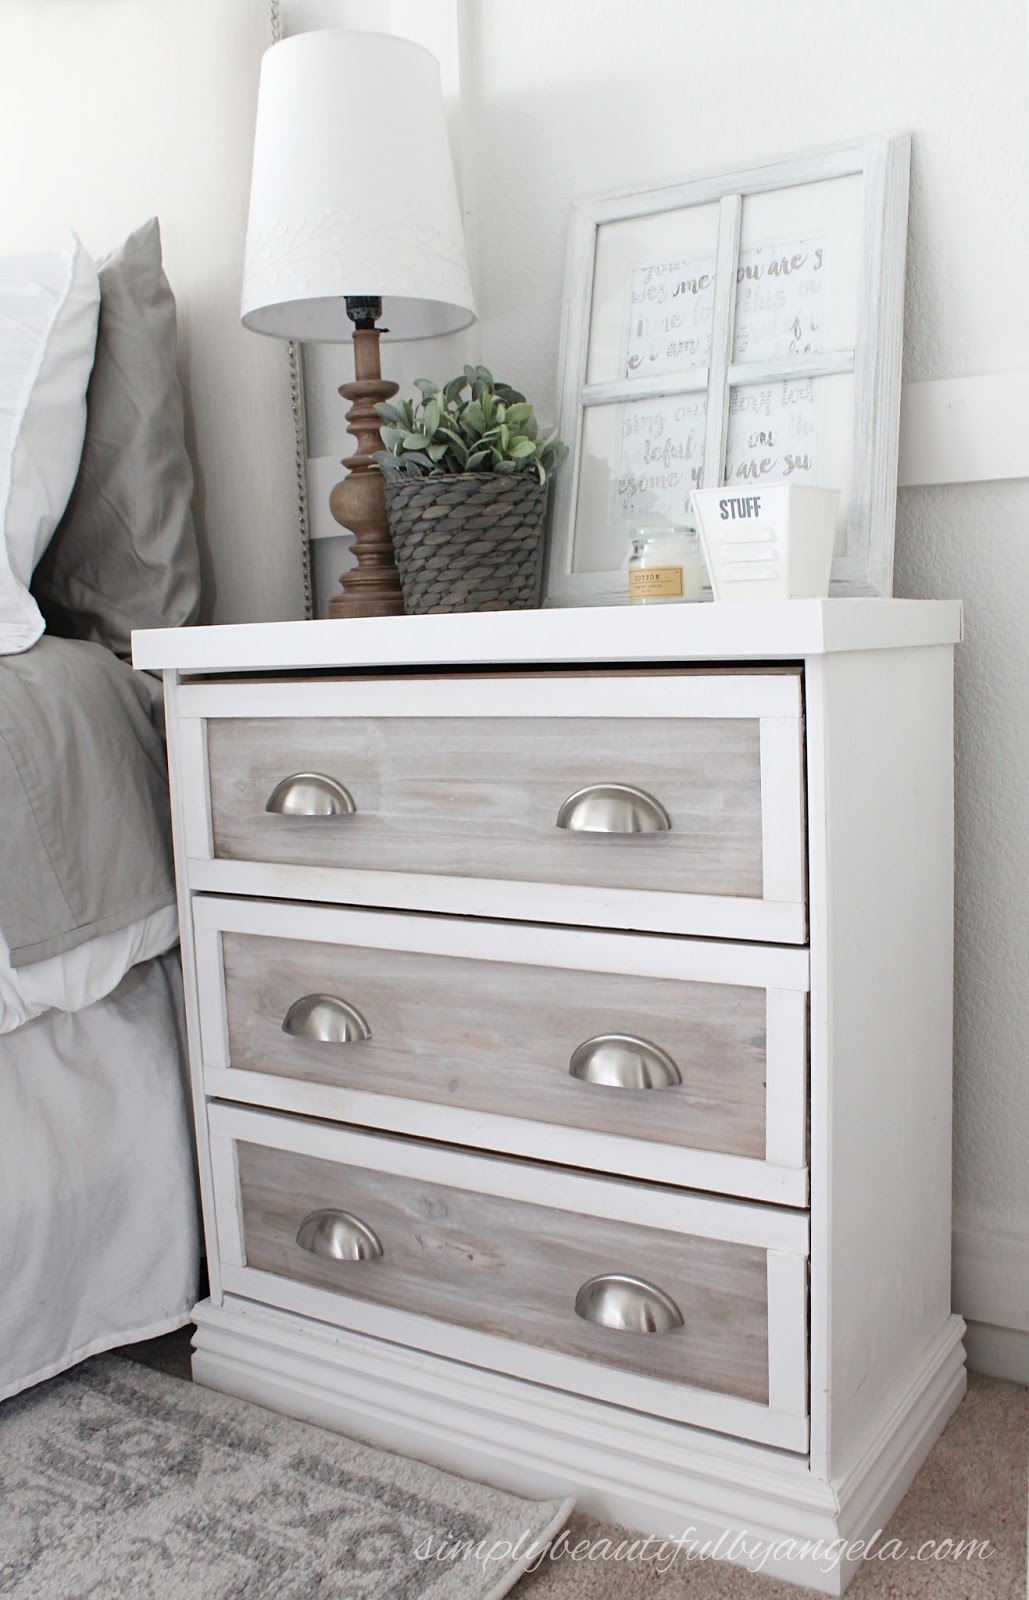

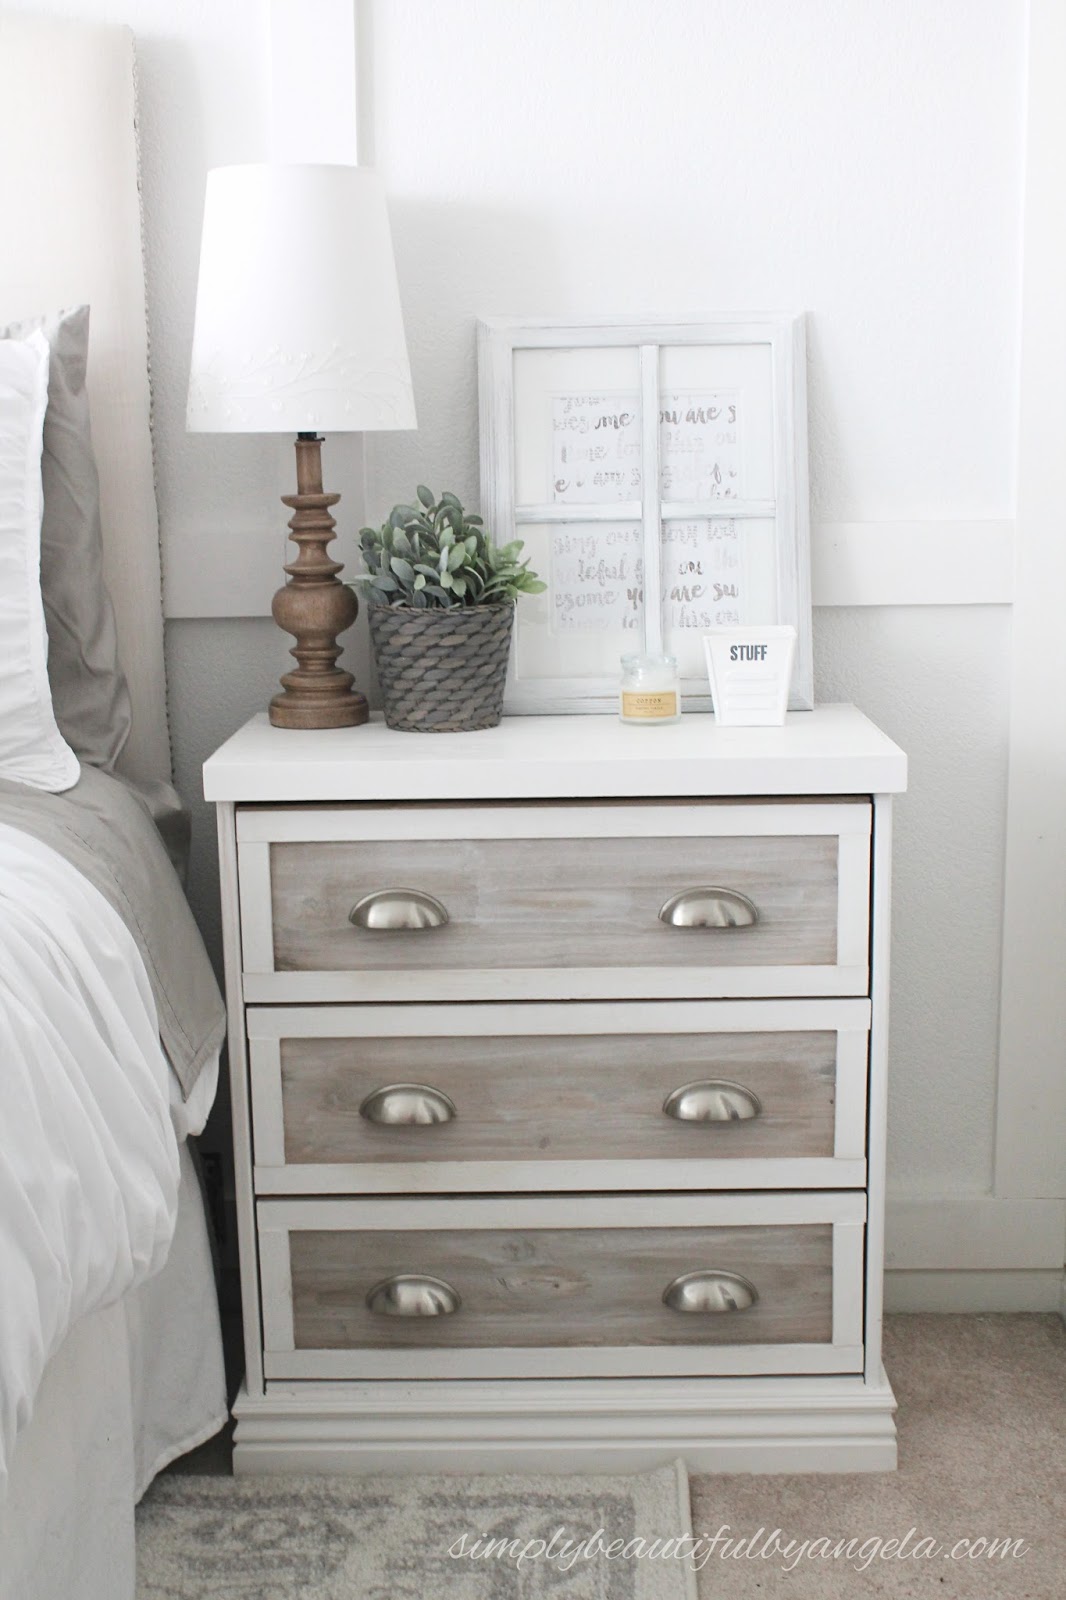
So much more polished–don’t you think?
I love that I no longer have those goofy little raised edges on the top and that I don’t have to look at that awkward indentation at the bottom.


Angela, what beautiful IKEA Rast hacks – they turned out lovely. Pinning
Thank you so much Marie!
This looks amazing! Love it:)
Sara @ finditfixitorbuildit.com
Thanks Sara!!
That turned out amazing! Pinning to my before and afters furniture board! We would love to have you at our To Grandma's house we go link party that opened this Wednesday morning and lasts all week! Its at grandmashousediy.com 🙂
Thank you so much Taralynn! I will add it to my list 🙂
Beautiful and attractive wooden bench piece. Angela, I am your biggest fan follower. I always tried to follow you but somehow I made mistake on my projects. Now, I am tried to follow you properly. Thanks for being an inspiration for all.
Thank you!
Both versions are lovely but your new update does make them look way classier and more expensive. They seem like a weighty piece of furniture now somehow. Pinning
Thank you Julia I completely agree!
The first version was really nice and never though you could get more beautiful than that, but you really did it! I came from Pin Me Linky Party, so I pinned your project 🙂
Thanks Natalie I really appreciate that 🙂
I love these! Pinned and shared! I have a dresser I want to makeover and this is perfect inspiration for it, it's my night stand too. Thanks for linking up to #HomeMattersParty
Thanks Emily! I am so glad I could help and I bet your nightstand will turn out beautifully!
This turned out awesome! Thanks for sharing at the Inspiration Spotlight Party @DearCreatives Pinned & shared.
Thank you Theresa!!
Where did you purchase the silver knobs for the dresser?
I got them at Lowes–I can't find them online but in my store they came in a 6 pack for $12!
These are just stunning and so crisp and clean looking! I wanted to let you know I'll be featuring you at tonight's Funtastic Friday Link Party! Thank you for sharing 🙂
Thank you so much, I really appreciate the feature! 🙂
I love a great Ikea hack. Love everything about this one. I will be featuring this tonight at my Winter Blues Wednesday party that opens at 8pm EST. Please stop by and pick up an I've Been Featured button. Thanks. http://diybydesign.blogspot.com
Thank you–IKEA Jackson are definitely one of my favorites for both budget and creativity! Thanks for the feature and for hosting an awesome party 🙂
These are beautiful!!!! I think I am overlooking something. How did you paint the drawers? They look grey, which I love
Thanks Lori! I went over them with two coats of whitewash (a cup of paint with a couple tablespoons of white paint mixed in) and then stained them with mini wax Provincial. Then applied a couple more coats of whitewash on top 🙂
Hi there! Love the whitewash effect and dying to do the same on a big wood bed we salvaged. Would like to clarify the whitewash technique, you said a cup of paint with a couple Tablespoons of paint in it…Did you mean water with 2 Tablespoons paint? Thanks for the share!
I always just kind of eyeball it but yes I would say it's about 2 tablespoons that I use 🙂
Nice post!! Thanks for sharing.
stella@Dermology Skin brightener
These posts helps a lot and give ideas for innovation. While functional, furniture also serves to introduce colour, pattern and texture into a room therefore contributing to the deco and comfort. Thanks for sharing such an informative information.
Love it! I have these same nightstands from ikea and am definitely going to do this!
Pretty much Design all pretty. Thanks for sharing. I have to go to the house to eat.
afsid
Hi Angela, I really love this idea, especially the drawers. I have one question: the drawers look a bit more grayish in the second make over, is that because of the heavy white wash you gave the drawers to hide the hole in the middle? I kind of want to get that grayish look and I am not sure if I should stop after the first two white washes and stain or should I keep going further with another white wash on top. Many thanks for posting this!! 🙂
Nevermind!! I saw somebody asking the same question further up on the thread, so I now know the answer. Sorry!