
The Rules:
- Upcycle an item(s) from a thrift store, resale store, or garage sale into a new piece of decor.
- There’s no monthly theme.
- There’s no budget to stick to.
Meet the Hosts
Maureen | Red Cottage Chronicles Pili | Sweet Things
Debra | Shoppe No. 5 Marie | DIY Adulation Sue | A Purdy Little House
Chelsea | Making Manzanita Ann | Duct Tape and Denim Karen | Dragonfly and Lily Pads
Kimm | Reinvented Kathleen | Our Hopeful Home Megan | C’mon Get Crafty
Victoria | Dazzle While Frazzled Shirley | Intelligent Domestications Angela | Simply Beautiful by Angela Michelle | Our Crafty Mom Jeannee | Shepherds and Chardonnay
Jennifer and Vicki | 2 Bees in a Pod Ali | Home Crafts By Ali Denise | My Thrifty House
Make sure you follow our board on Pinterest for more upcycled decor inspiration!
Before we get started, I have a major confession to make. I am a project hoarder. I always have at least 3 (on a good day!) project items stashed in my garage at all times.
Sometimes it’s because I just haven’t figured out what I want to do with something yet but most of the time it’s because I find an item that I love and have great plans for it but then move on to something else before I even touch it.
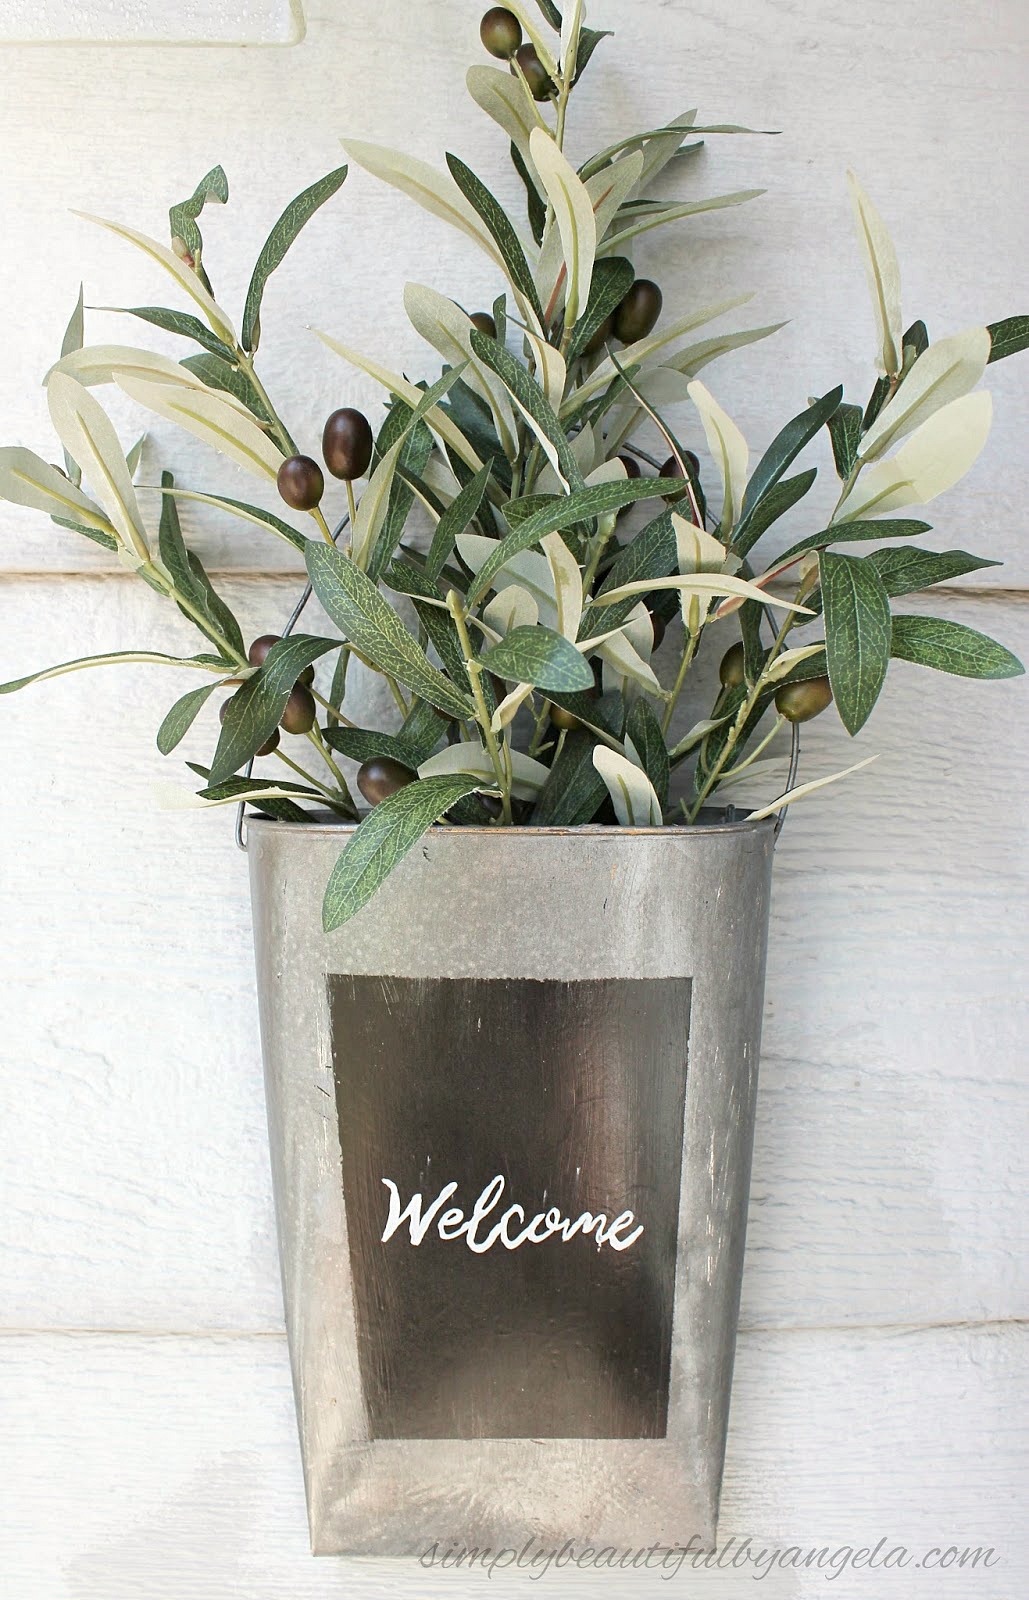
So for my first Thrift Store Décor Upcyle Challenge I had actually planned on working one of my abandoned projects. However last Friday we swung into Goodwill to kill some time on our way to an appointment and I spotted this guy.
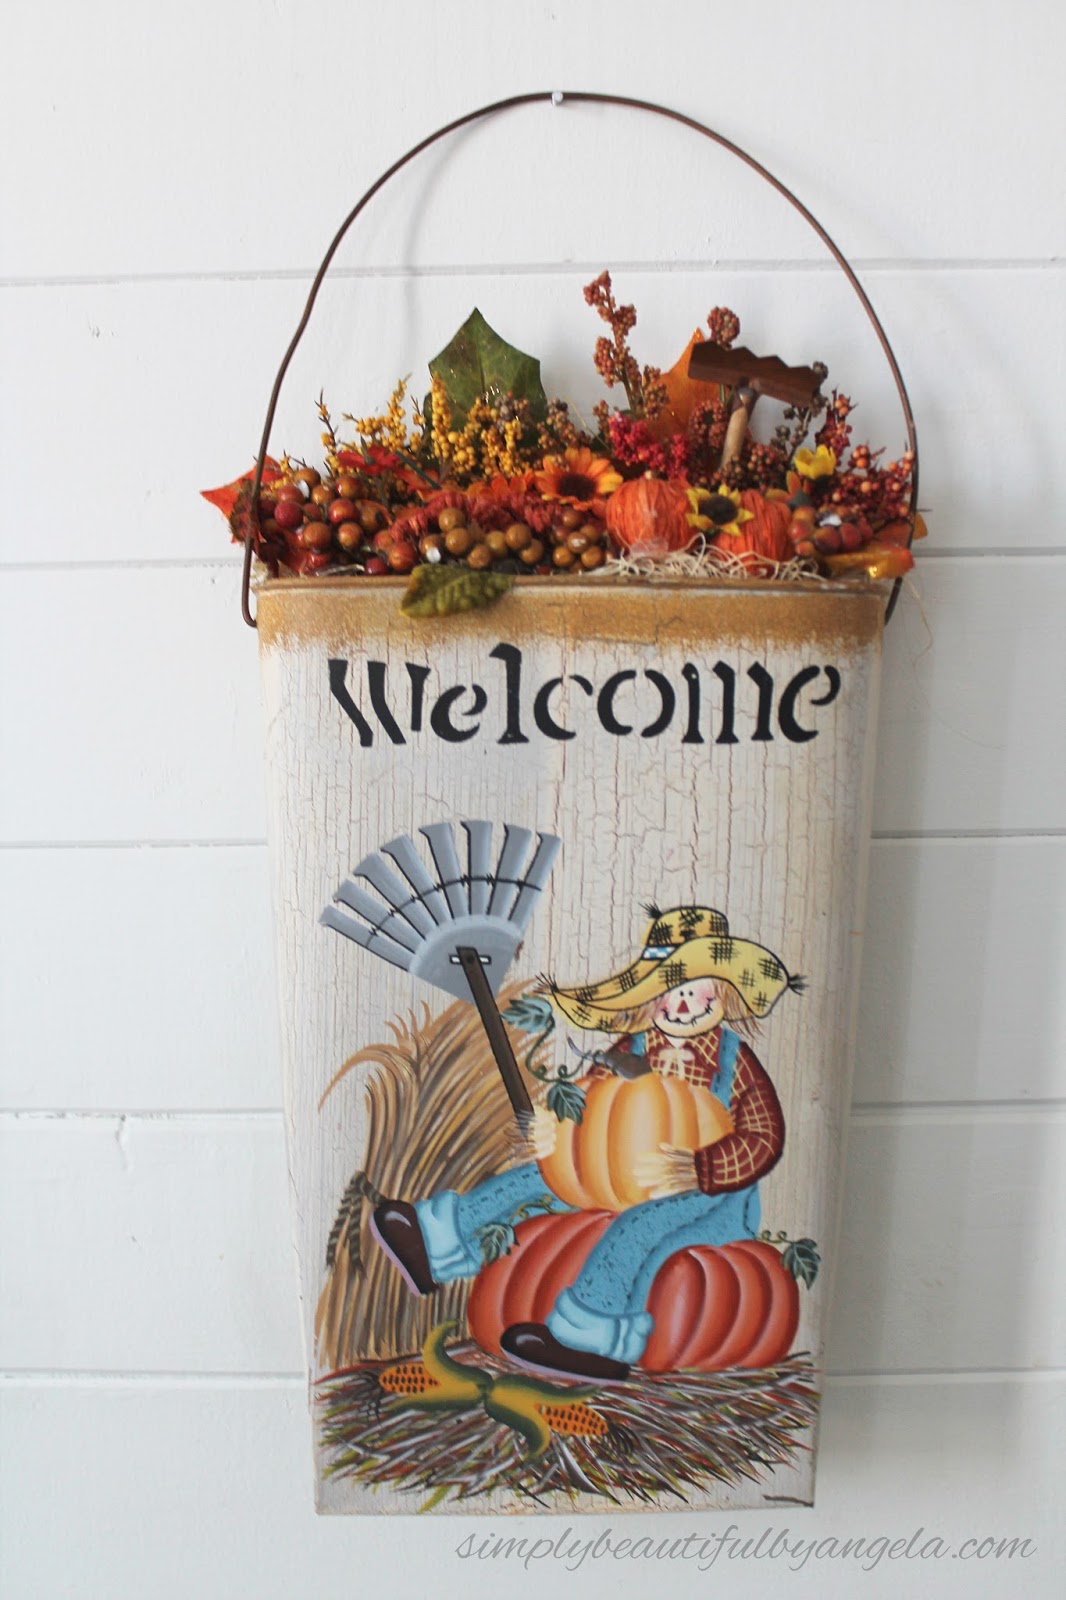
I have been wanting something cool for our front door for ages and just couldn’t wait to make this “me” and hang it up on our door!
Supplies Used: (Affiliate links may be provided for convenience. For more info, see my full disclosure here.)
- Rust-Oleum Spray Paint in Weathered Steel
- Masking Tape
- Acrylic Paint
- Small paintbrush
- Printed font
- Chalk
- Krylon Crystal Clear Acrylic Spray
- Foam Floral Brick
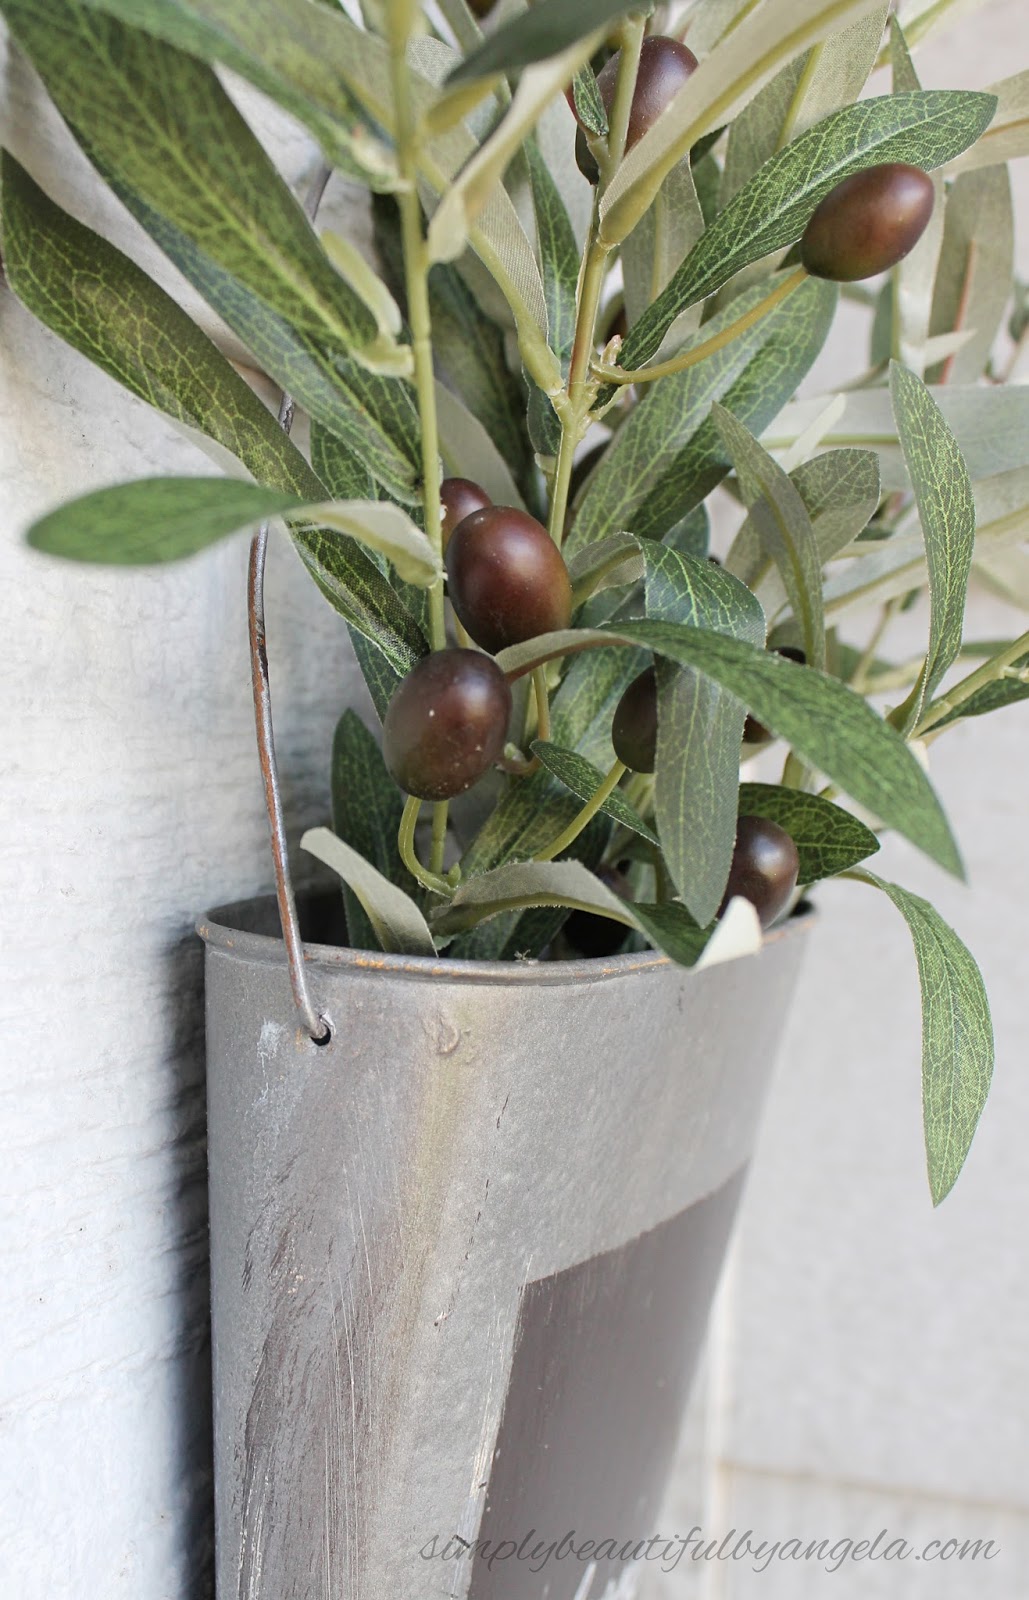
- Olive stems
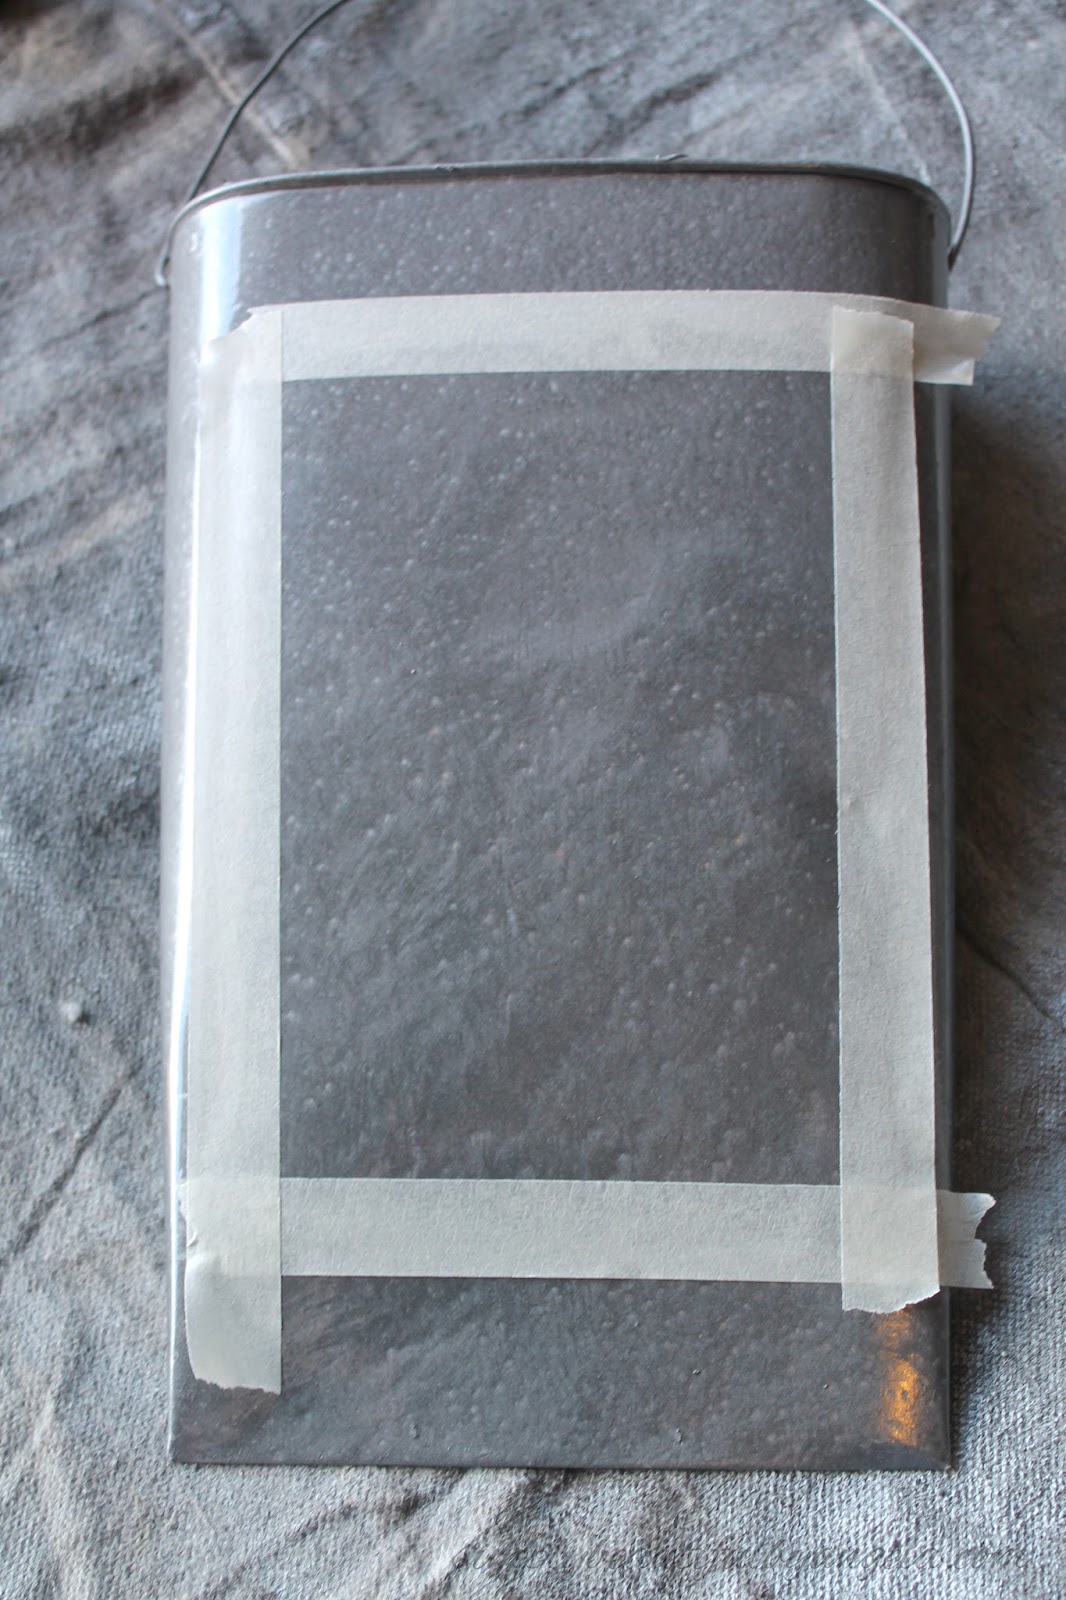
I began by giving the front and back a coat of Rust-Oleum Spray Paint in Weathered Steel. I love that this has the primer built in and how it can make almost anything look like aged metal.

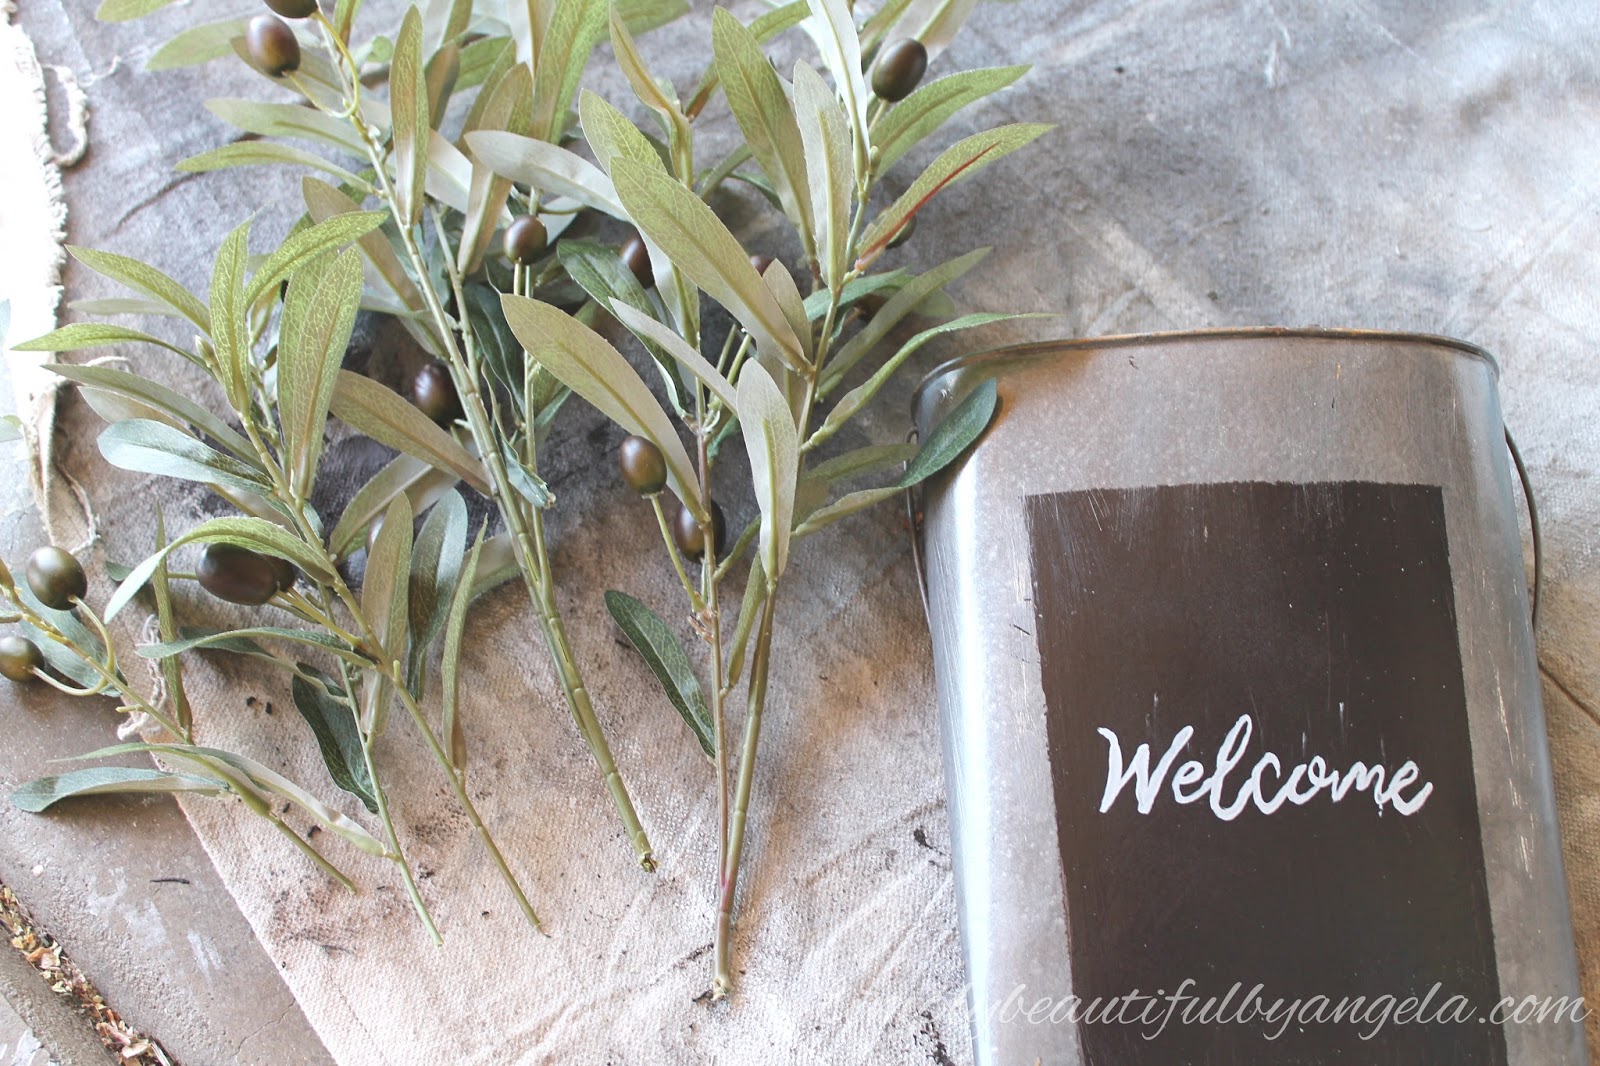
Once it was dry I taped off a rectangle in the center and then painted it with some dark brown acrylic paint.

Then it was time for some lettering! I used my favorite website Canva.com to spell out the word “welcome” and printed it out.

I then ran some chalk along the backside of the paper, pressed it down and traced it with a pen.
When I pulled the paper away I was left with a nifty impression.


I carefully went over the impression with some gray acrylic paint using a small paintbrush. Much better looking than if I had tried to freehand it!

Since this was going to be outside I protected it with a coat of Krylon Crystal Clear Acrylic Spray.

Once that was dry I inserted a foam floral brick and popped in some olive branches.

I was sooo bummed to realize that our screen door won’t close with a wreath hanger on it. I didn’t want to hide it behind the screen door (it’s just too pretty!) so instead I hung it next to our door. Which I think I like even better!
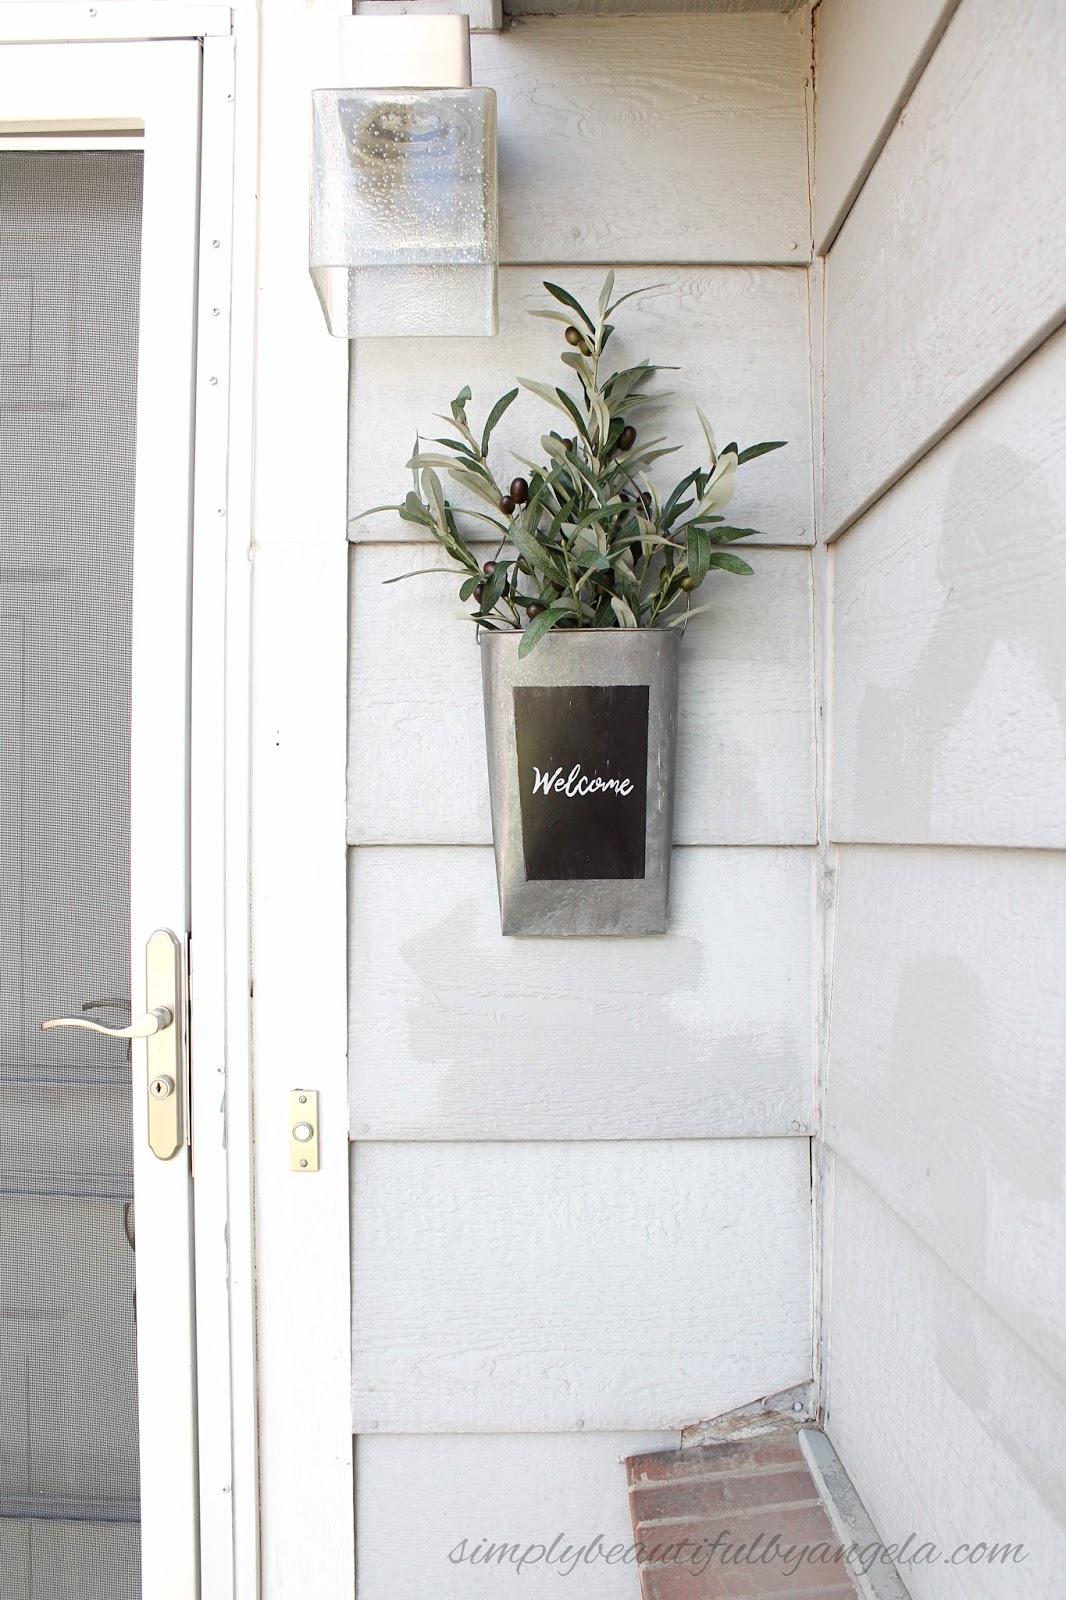
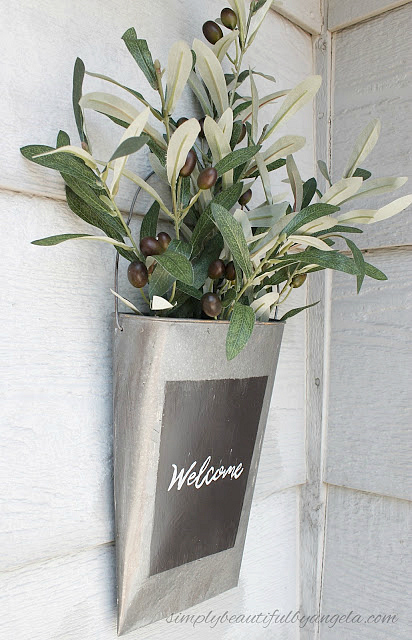
It’s pretty much impossible for me to NOT distress something so I went back over some spots with a little bit of sandpaper to make it look a little more worn.

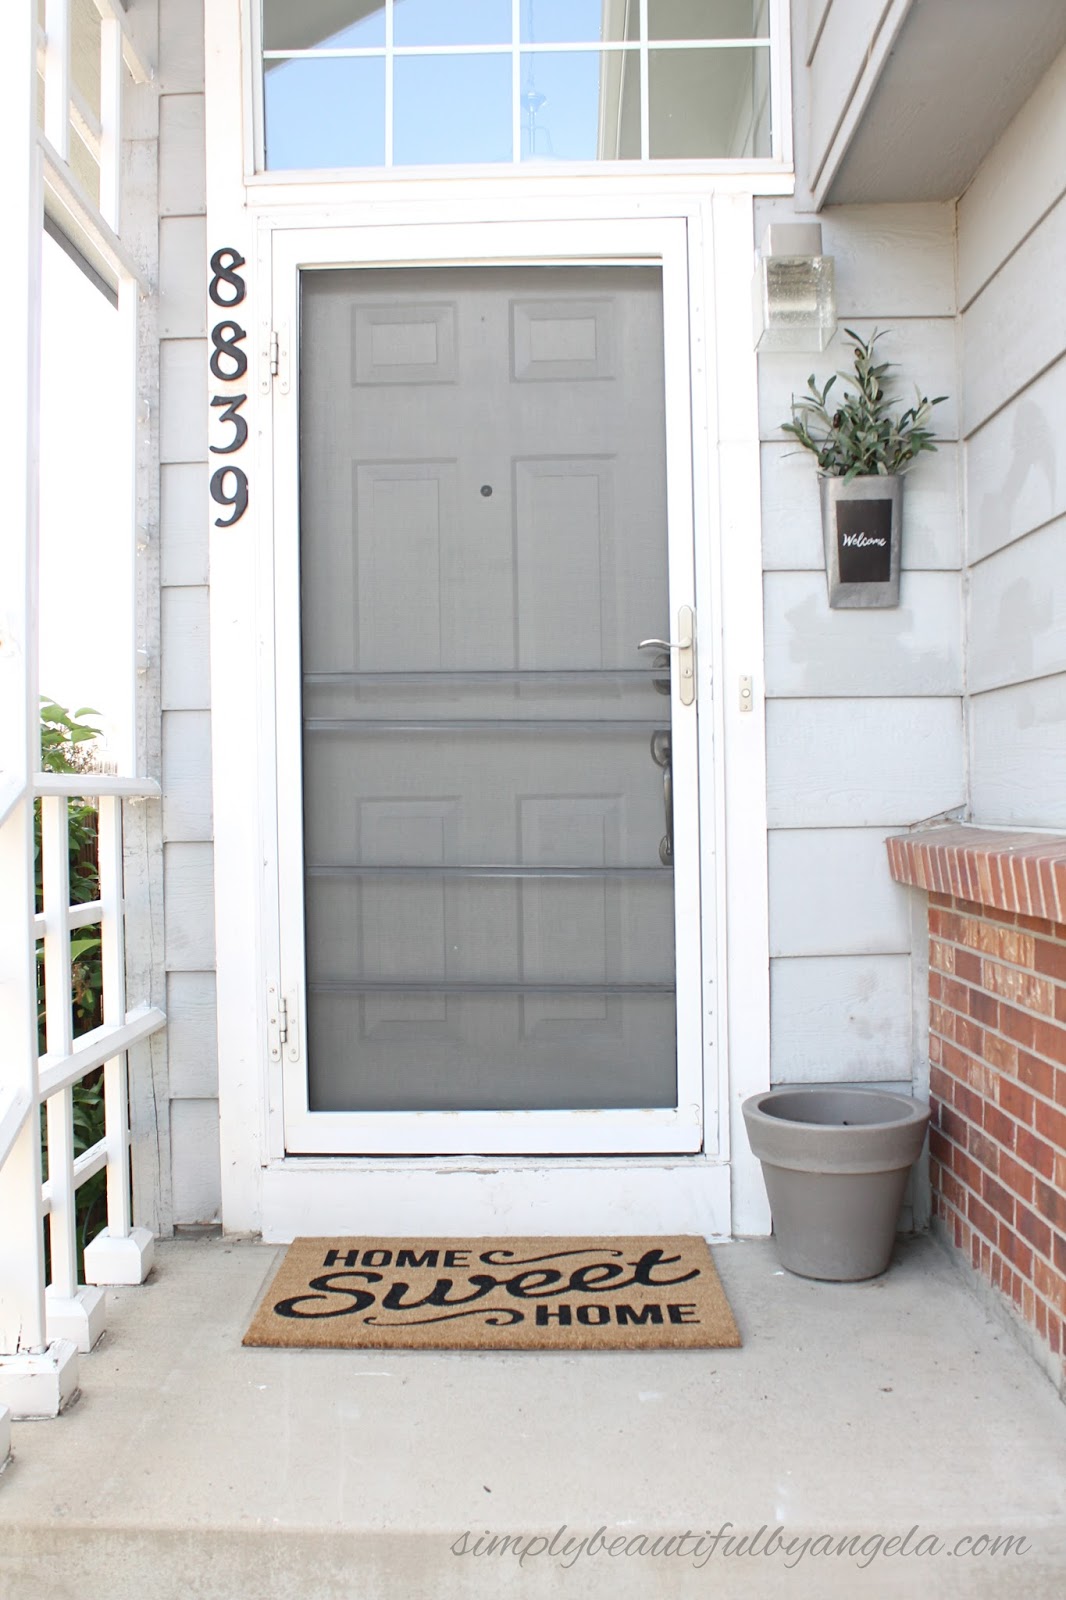
Once I get some flowers in our sad empty pot our entry will start looking nice and spiffy!

And now for more thrifty goodness!
Check out what my fellow upcyclers created below!
I love this idea! And I think it looks great next to the door.
Thanks Amanda! Maybe when we put the glass door on during the cold months I can suction cup it to the door but for now it looks pretty happy here!
I love this! You did a great job re-purposing it. And it looks great next to your gray front door. Visiting from Thrift Store Challenge.
Thank you so much Victoria! It does blend with the gray nicely 🙂
Such a fun and unique welcome. I am a HUGE fan of door or entry decor that can be changed up with the seasons and holidays throughout the year. You have checked all the boxes here. Can't wait to see what you do next. Visiting via Creative Circle
Thanks Pamela! I I defiantly think it will be fun to switch this out for the seasons 🙂
Looks very stylish, I can imagine something like this hanging on my apartment door also! Thanks for sharing @The Pin Junkie
Thank you! It would be a great way to spruce up an apartment door for sure!
This turned out SO cute! I will definitely have to try that spray paint on one of my projects!
Thanks! You definitely should I promise you won't be disappointed!
This turned out great. I have on sort of similar at my booth in white. If it doesn't sell soon I think I will do this. Thanks for the inspiration.
Thanks Debra! I bet a white one would look awesome too–of course I'm a sucker for white decor haha
I love this upcycle so much I have featured it this month on 'Create, Inspire, Love'… http://miabellapassion.blogspot.co.nz/2017/05/create-inspire-love-27.html
Thank you so much Tracey I really appreciate that!!
I love the final product and the idea of olive branches in a welcome sign is subtle but awesome. I feel like you ended up with something you could buy in a store!
Thanks Megan you are so kind! It's surprising how much it really does look like the fancy ones in the store!
Lovely! i especially think the Olive Branches are perfect in it!
Jeannee@shepherdsandchardonnay
Thank you Jeannee! Olive branches are definitely my favorite but I may switch it out for Fall and Christmas 🙂
Those are sort of expensive in the store and yours is just way better. Rust-Oleum has the best paint products, don't they! I'm like you, got multiple projects in the hopper at all times. Love this!
Thank you Shirley! I'm always so amazed with their products they really are the best! Glad I'm not the only project hoarder out there haha 🙂
This turned out great! It looks so pretty by the Door & I love the little welcome mat too 😀
Thanks Michelle! Our old mat was super worn and hanging this guy up actually inspired me to splurge on a new one lol
I love how you saw the potential, I do the same thing! I like where you put it better than on the door,too! Great job:) xo Kathleen|Our Hopeful Home
Thank you Kathleen! I'm glad you like it there better–I guess things always work out the way they are supposed to right? 🙂
Oh my gosh I love that paint! When I first saw this I thought how did she get all the crazy fall print off. I can't believe how great that paint made this look! Awesome project! Love it!
Kim
Thanks Kim! It is crazy what good coverage this paint givss–it only took one coat to make it look like it was steel from day 1!
This is impressive. Thanks for sharing!!
Thank you so much Julie!!
Thanks for sharing at the #InspirationSpotlight party @DearCreatives
Omg, this is sooooo cute! I can't believe the transformation. That metal looking spray paint looks crazy real, I've never used it before. Great job.
I like all your posts. Very informative and interesting. Some ideas really helps a lot. Thanks for sharing great ideas.
I LOVE the outside light next to your front door. Can you tell me who makes it and where you got it? I need to replace mine soon and yours fits my modern decor. Thank you!
Thank you Beth! I got the light when we moved in 3 years ago so I don't recall the name but I do know that I got it from Home Depot online 🙂