Hello friends! I hope you are all having a great week.
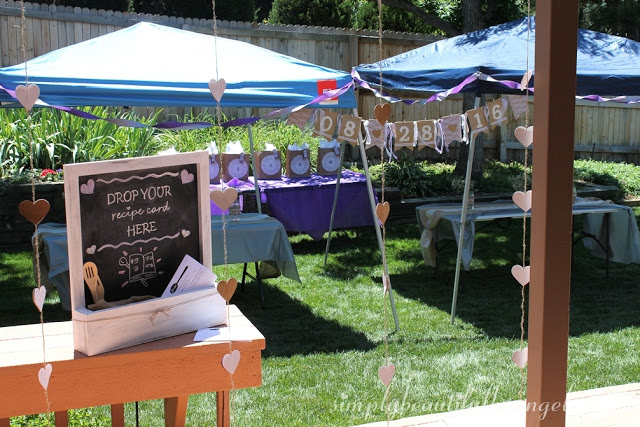
So remember when I shared my best friend’s burlap and lace bridal shower and I promised to show you how I made the chalkboard that I used to hold the recipe cards?

Well it may be over a year later, but I am finally going to share the tutorial! Try not to judge me…I get easily sidetracked when it comes to posting my projects!
Supplies Used: (Affiliate links may be provided for convenience. For more info, see my full disclosure here.)
- 1/4″ thick MDF cut to 18″ x 24″
- 1×2
- 1×3
- 2×6
- 1×6
- Brown Paint
- White Paint
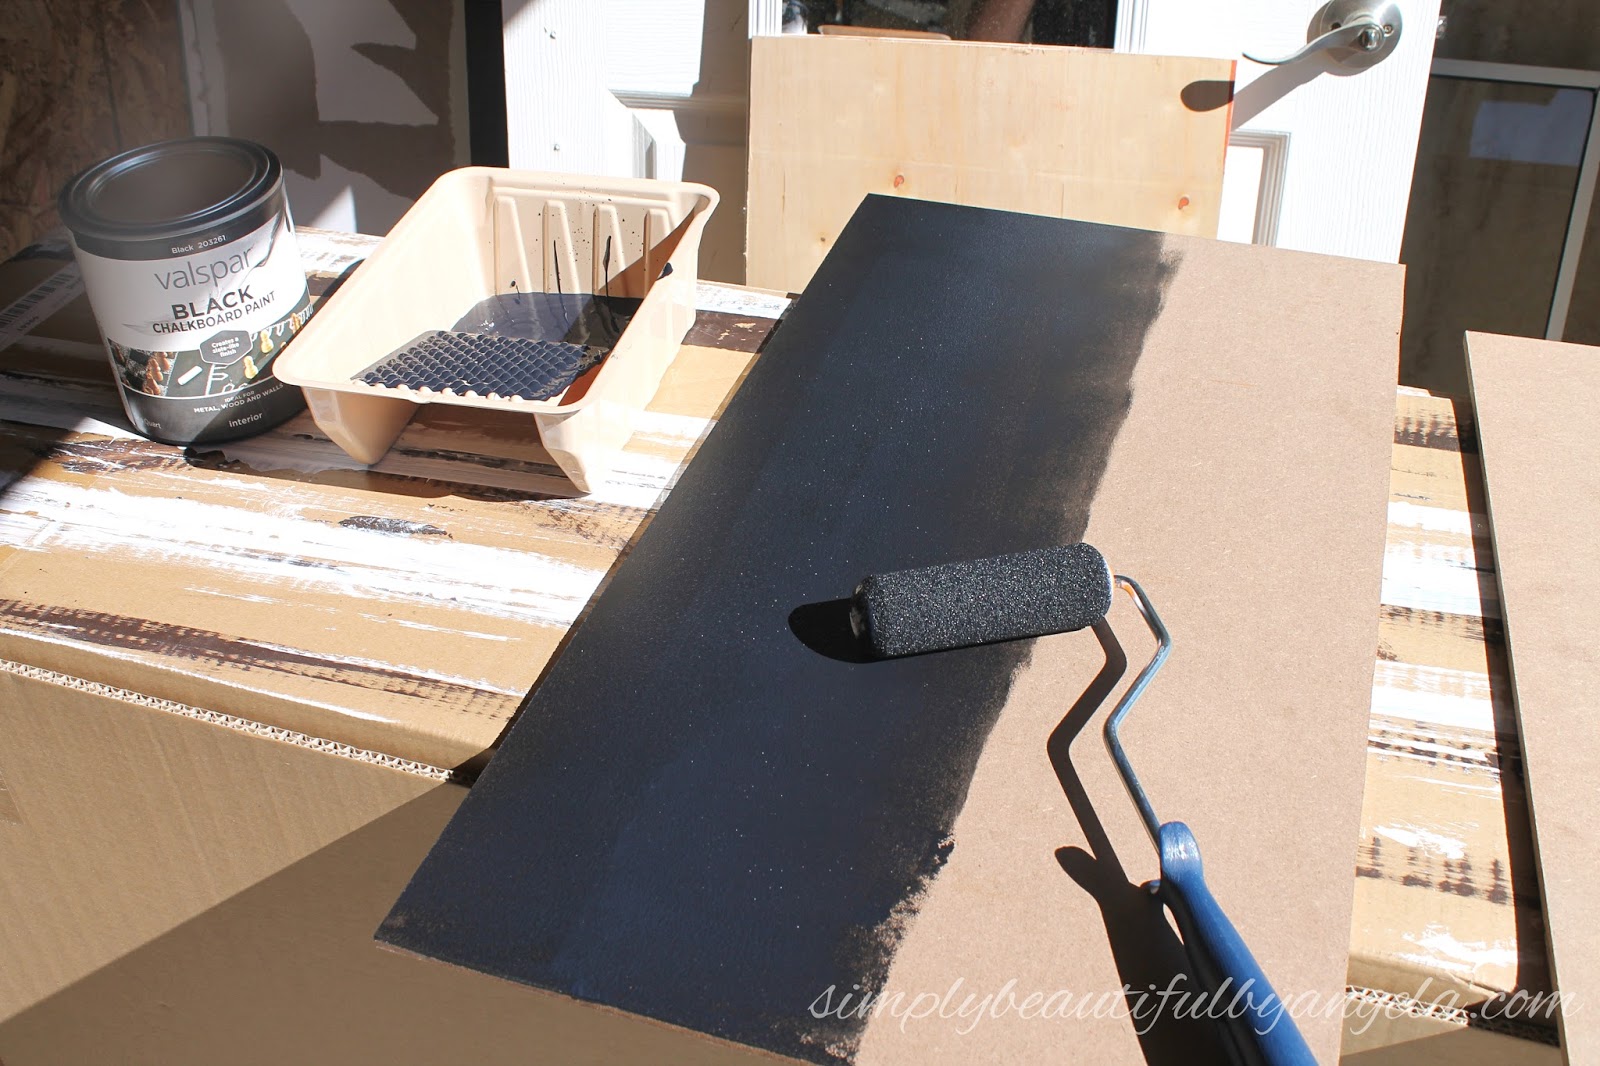
Chalkboard Paint
- Mini Foam Roller
- Wood Glue
- Staple Gun
- Wood Filler
- Key Hooks
- D-Ring Hangers
The first thing that I did was paint all of my wood with a coat of brown paint followed by two coats of white. You could also do this step later but I found it easiest to do it first.
I used the miter saw to cut a 45 degree angle on the end of the 1×2. I then held it on the MDF and marked where it needed to be cut.

I prefer this method over using the measuring tape because there is less room for error!
I did the same thing for the other side.
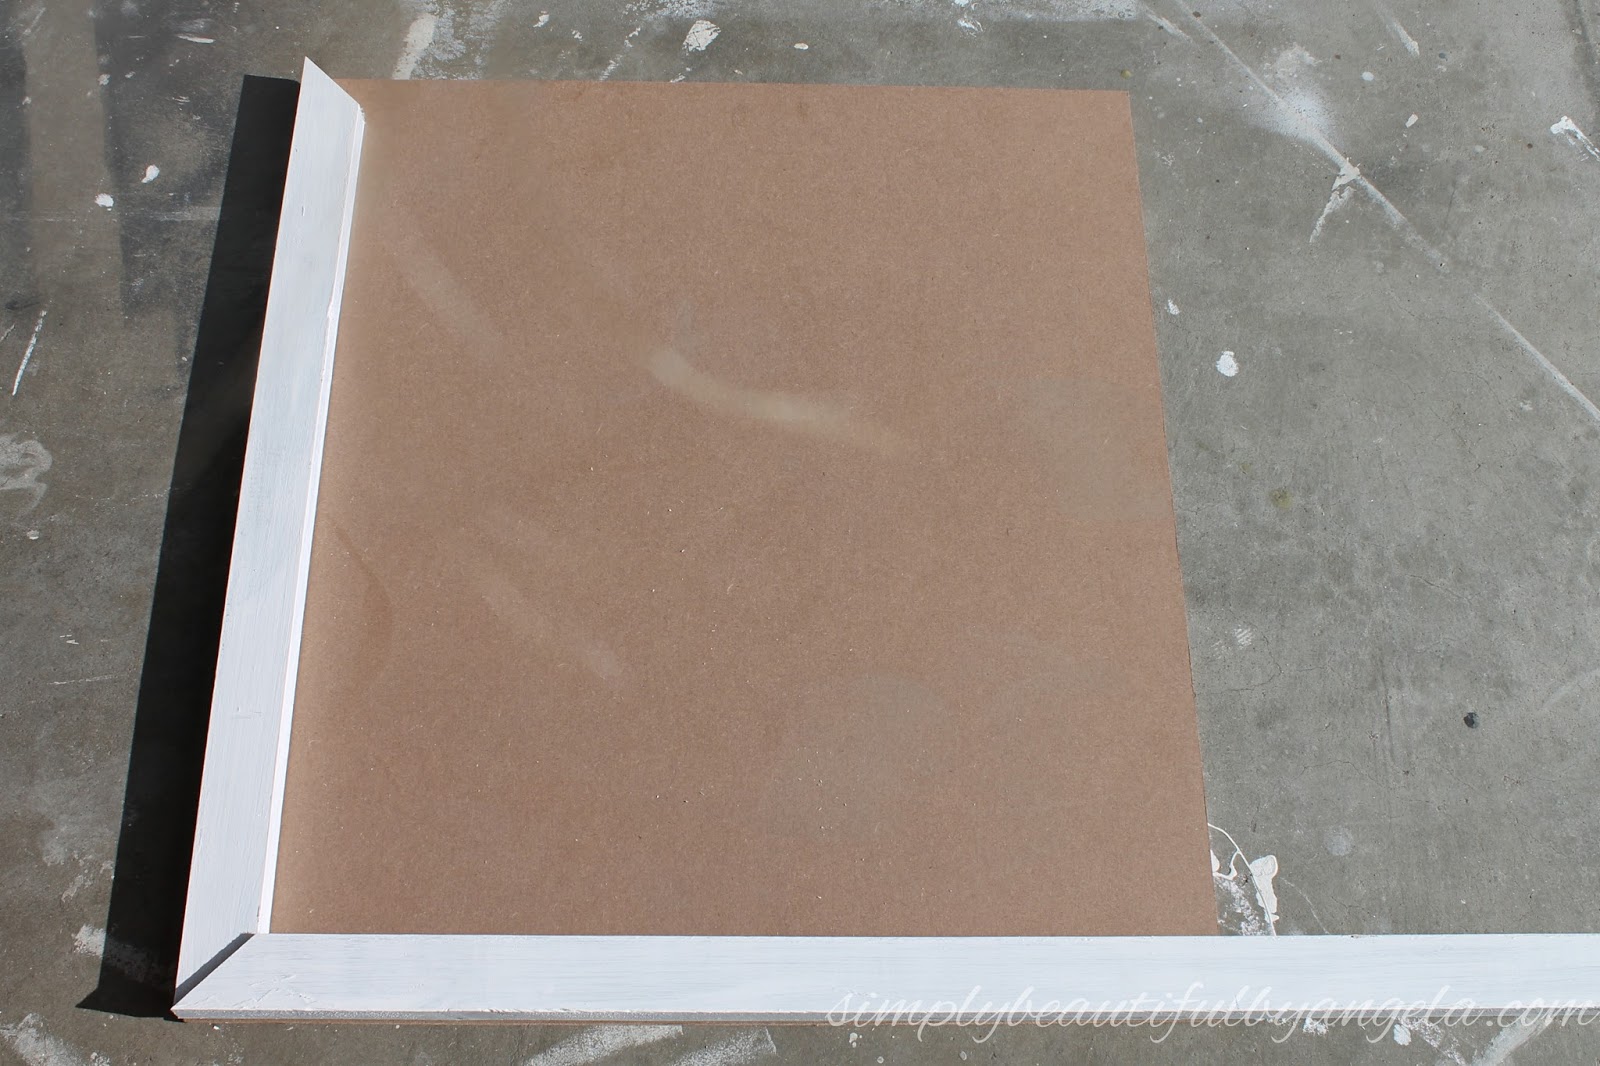
Once I had those done I was able to just copy them for the other two sides.
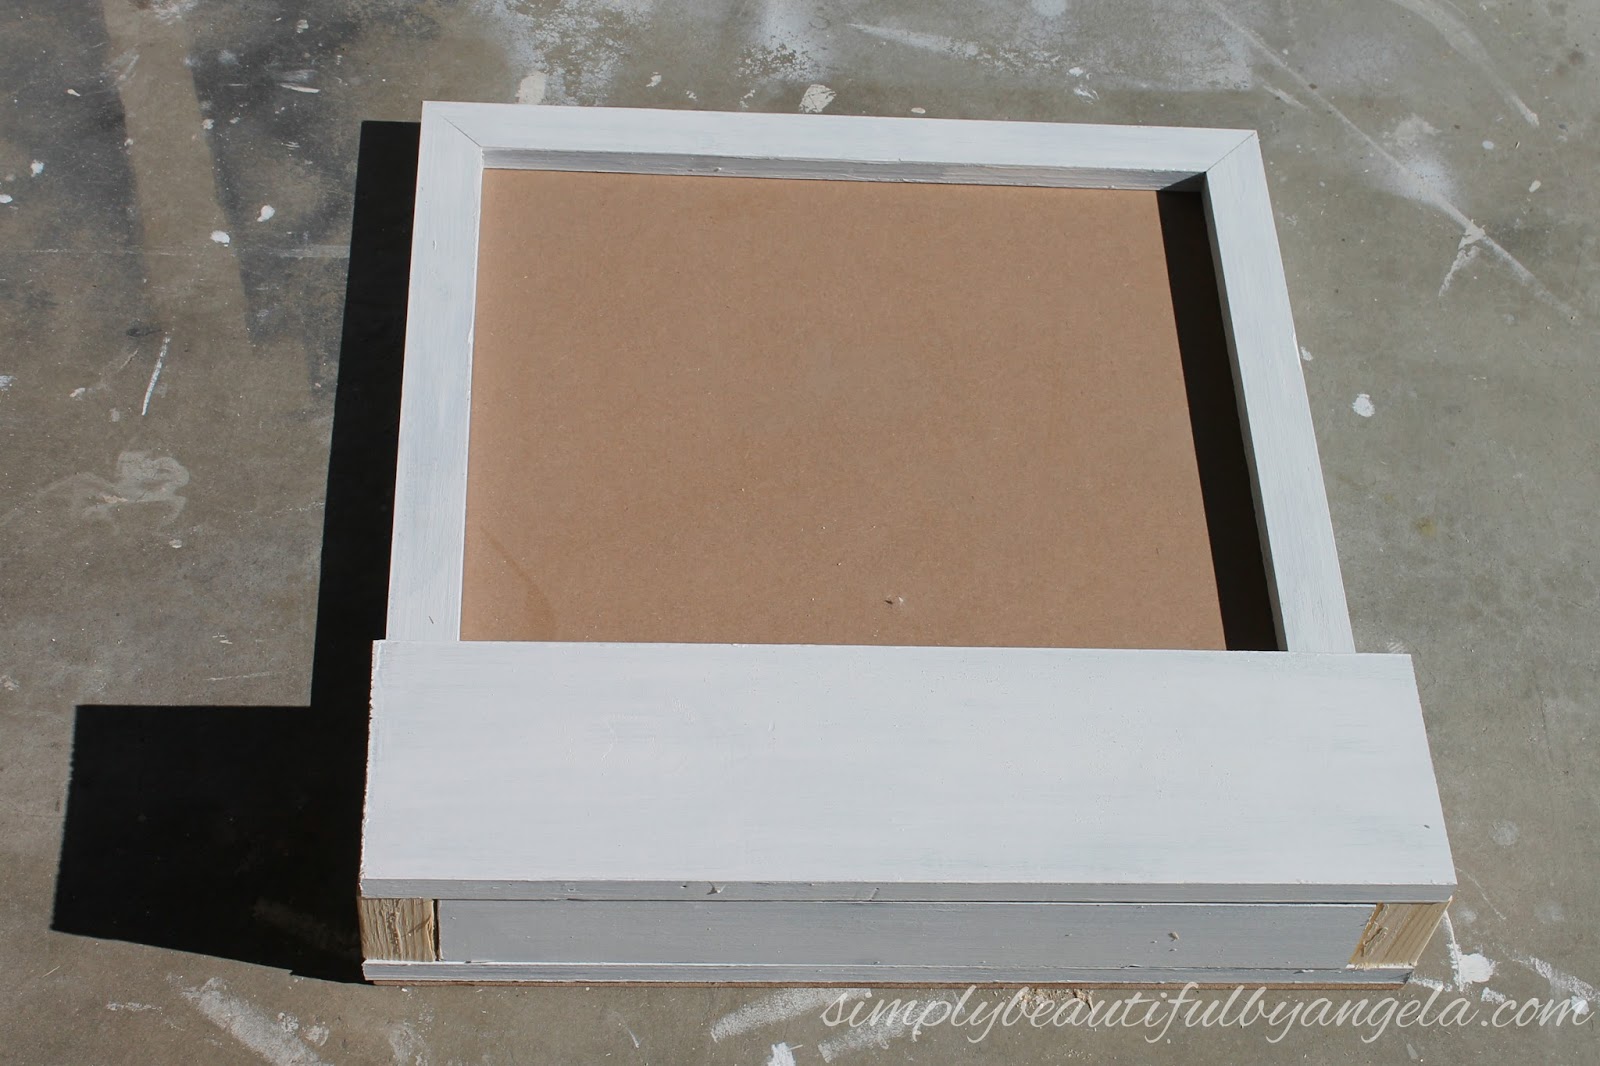
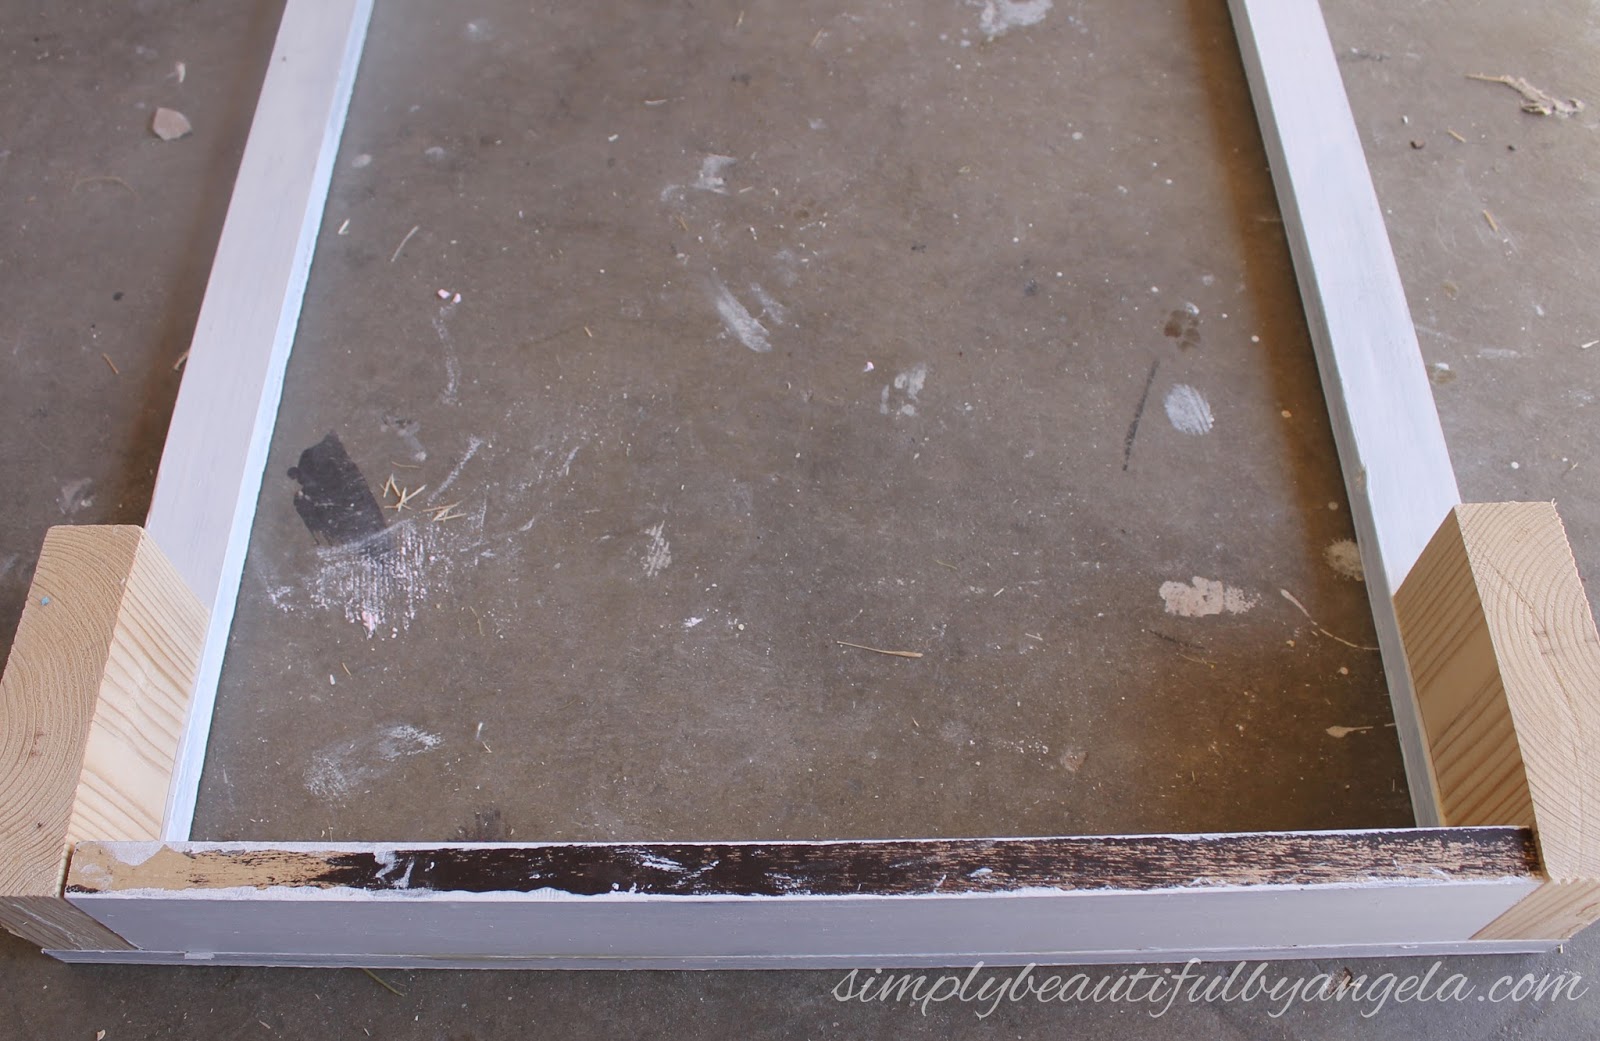
Next, I placed the 1×3 at the bottom and held up the 2×6 next to it. This allowed me to mark exactly where the 2×6 needed to be cut for each side.

I then marked where the 1×3 needed to be cut between the two 2×6 pieces.
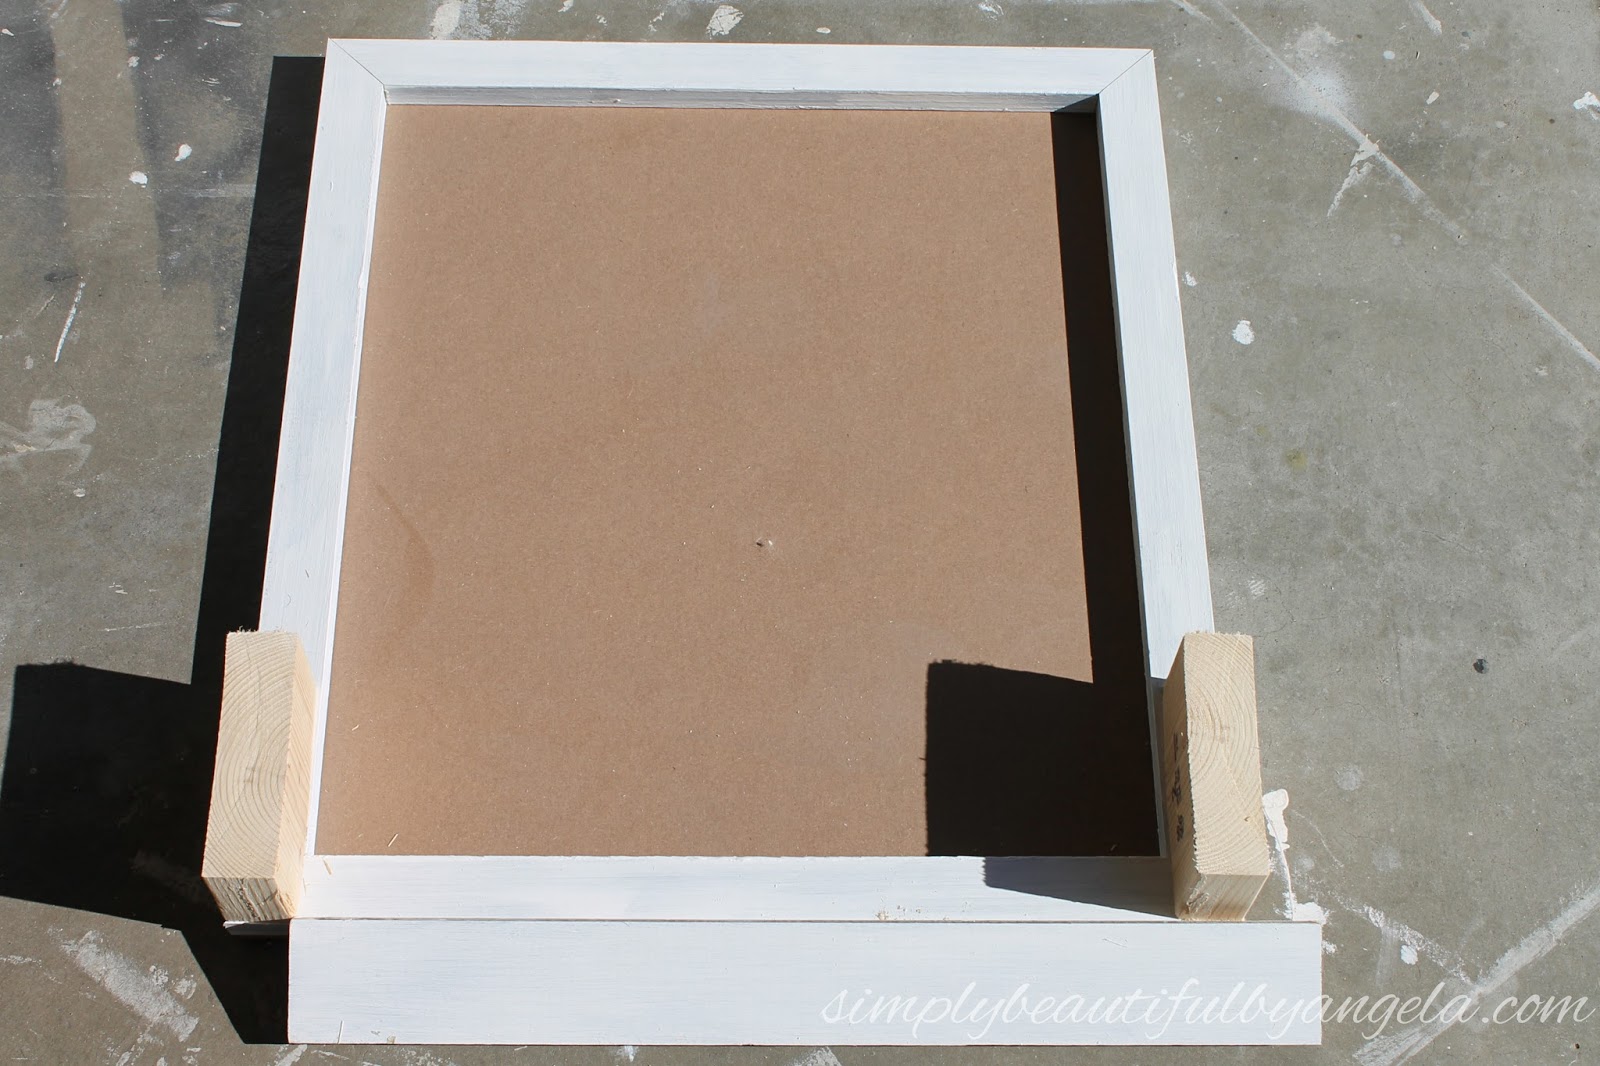
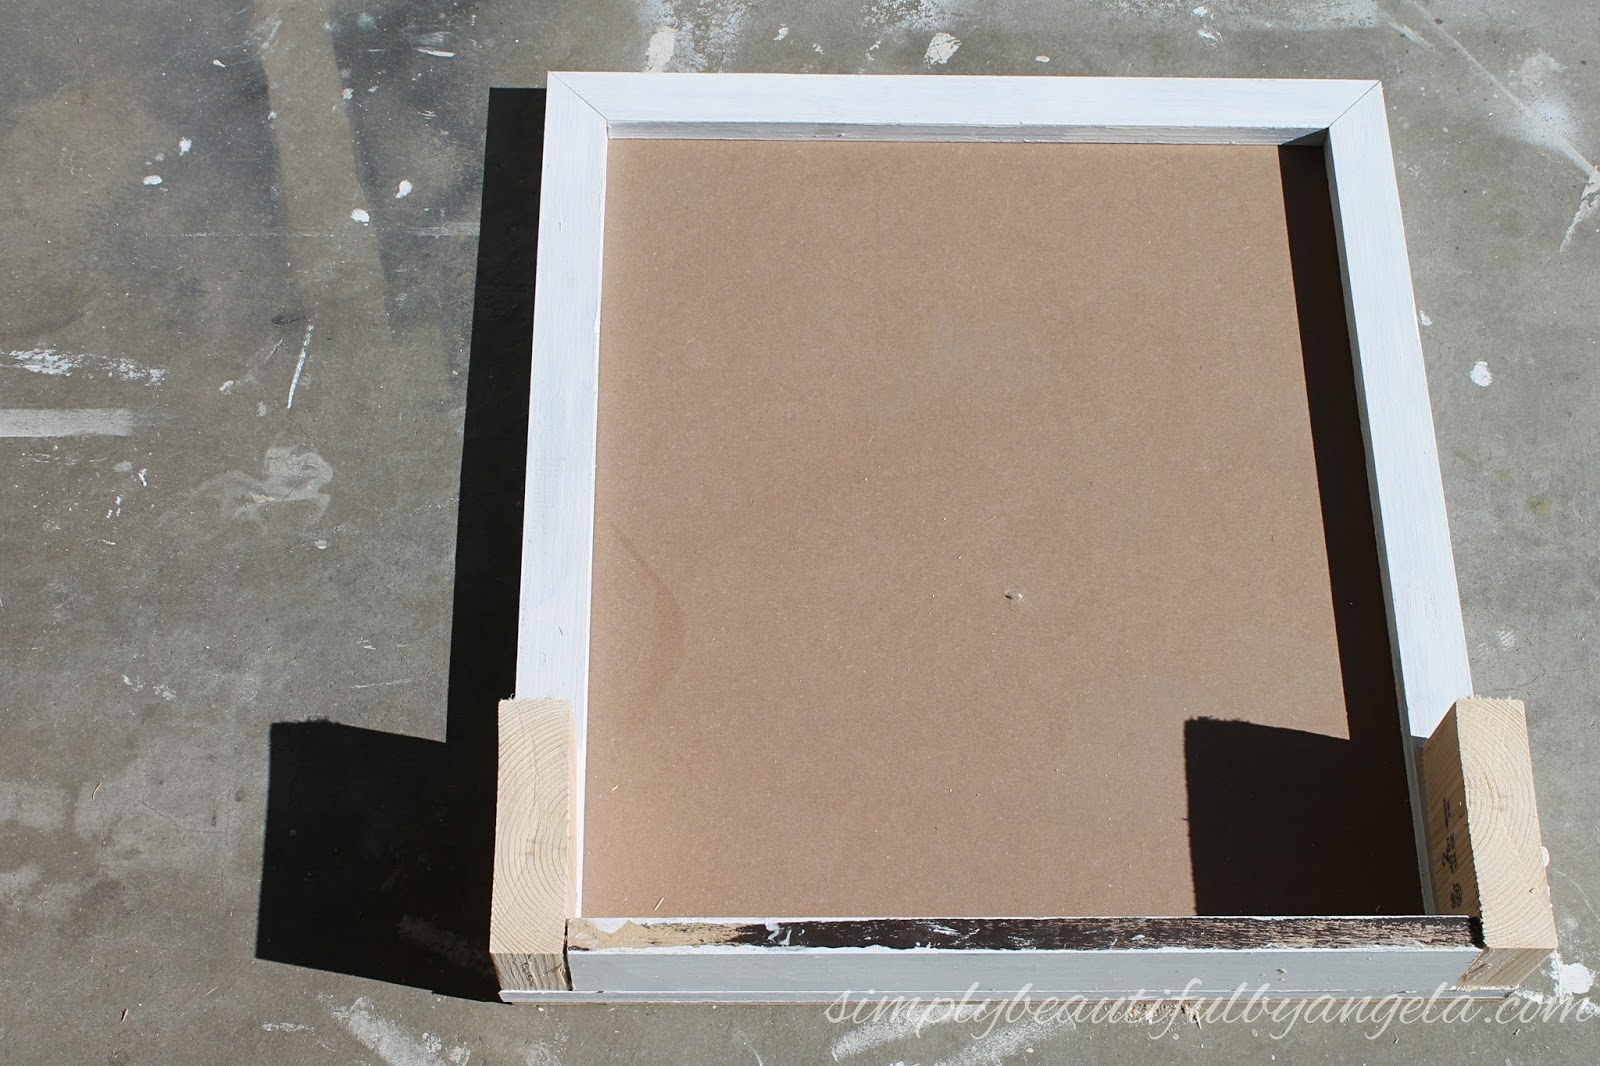
Finally, I measured how long the 1×6 needed to be across the front.
Using my small foam roller I applied two coats of chalkboard paint to my MDF board.
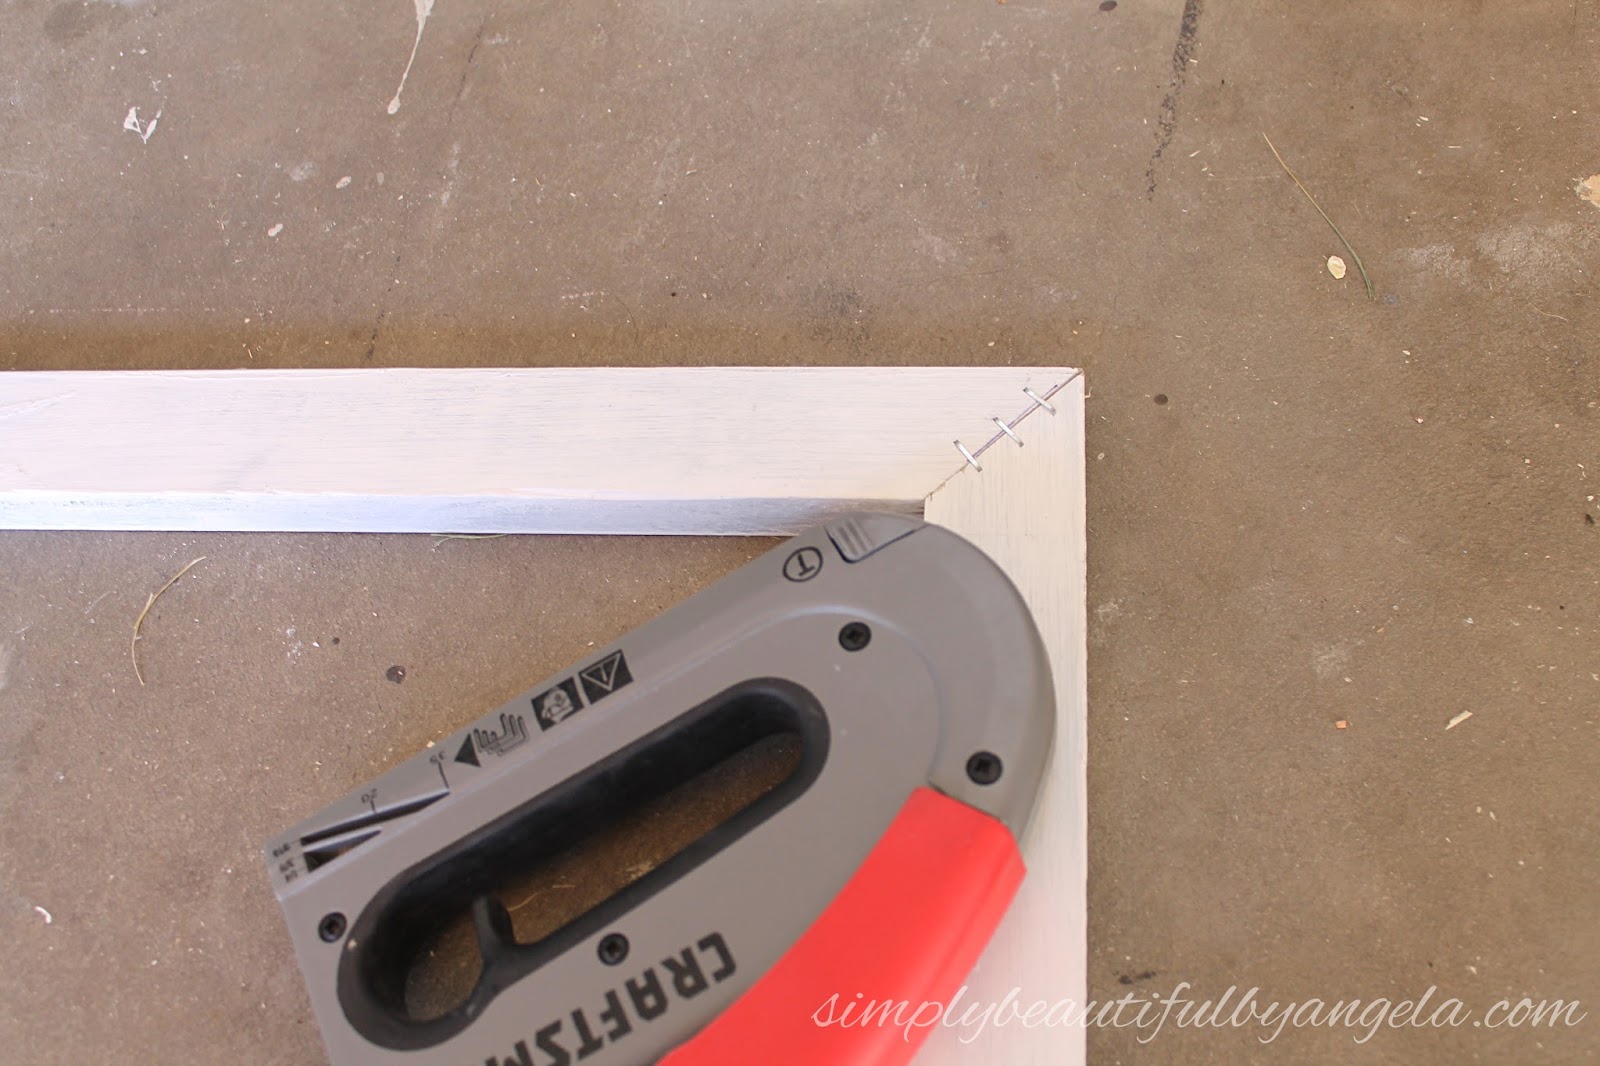
While the chalkboard paint was drying I used some wood glue to attach the mitered corners of the frame together.

I also used a staple gun to secure them together from the back.
I used some more wood glue to attach the remaining pieces.


Once everything was set I put some heavy bricks on top to help the glue adhere better.

When it was dry I flipped it over and put nails through the back to attach to the 1x2s and the 2x6s. I also used some nails to attach the 1×6 to the 2x6s. (I hid the nails by tapping them in with a large screw and covering them up with wood filler.)
I used some sandpaper to distress the wood which pulled a little bit of the brown paint and raw wood out from underneath.
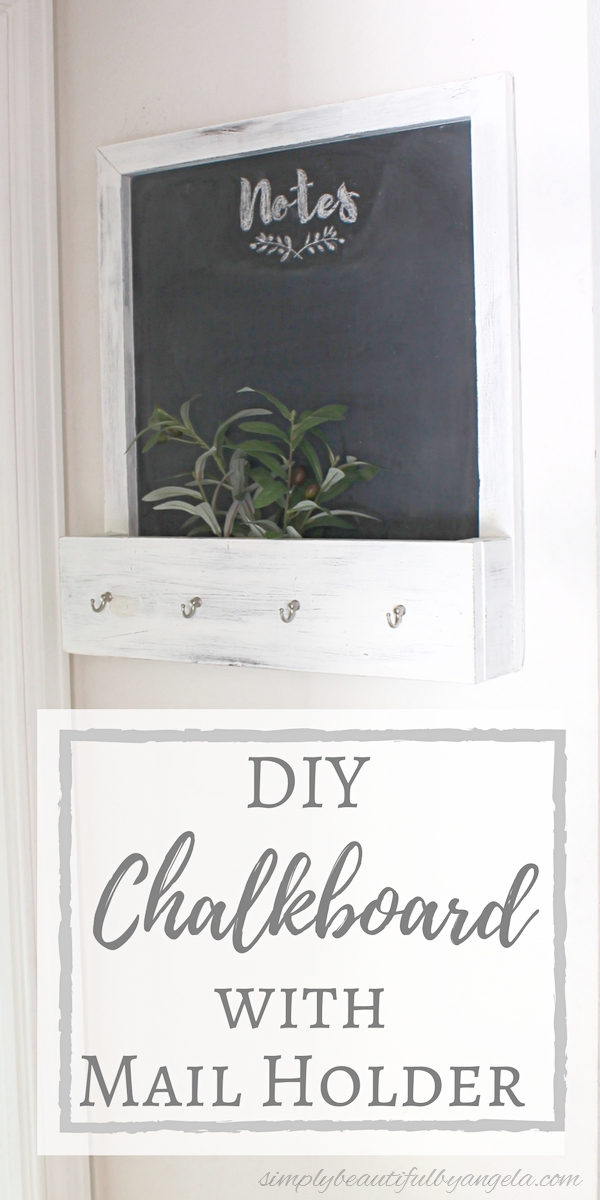
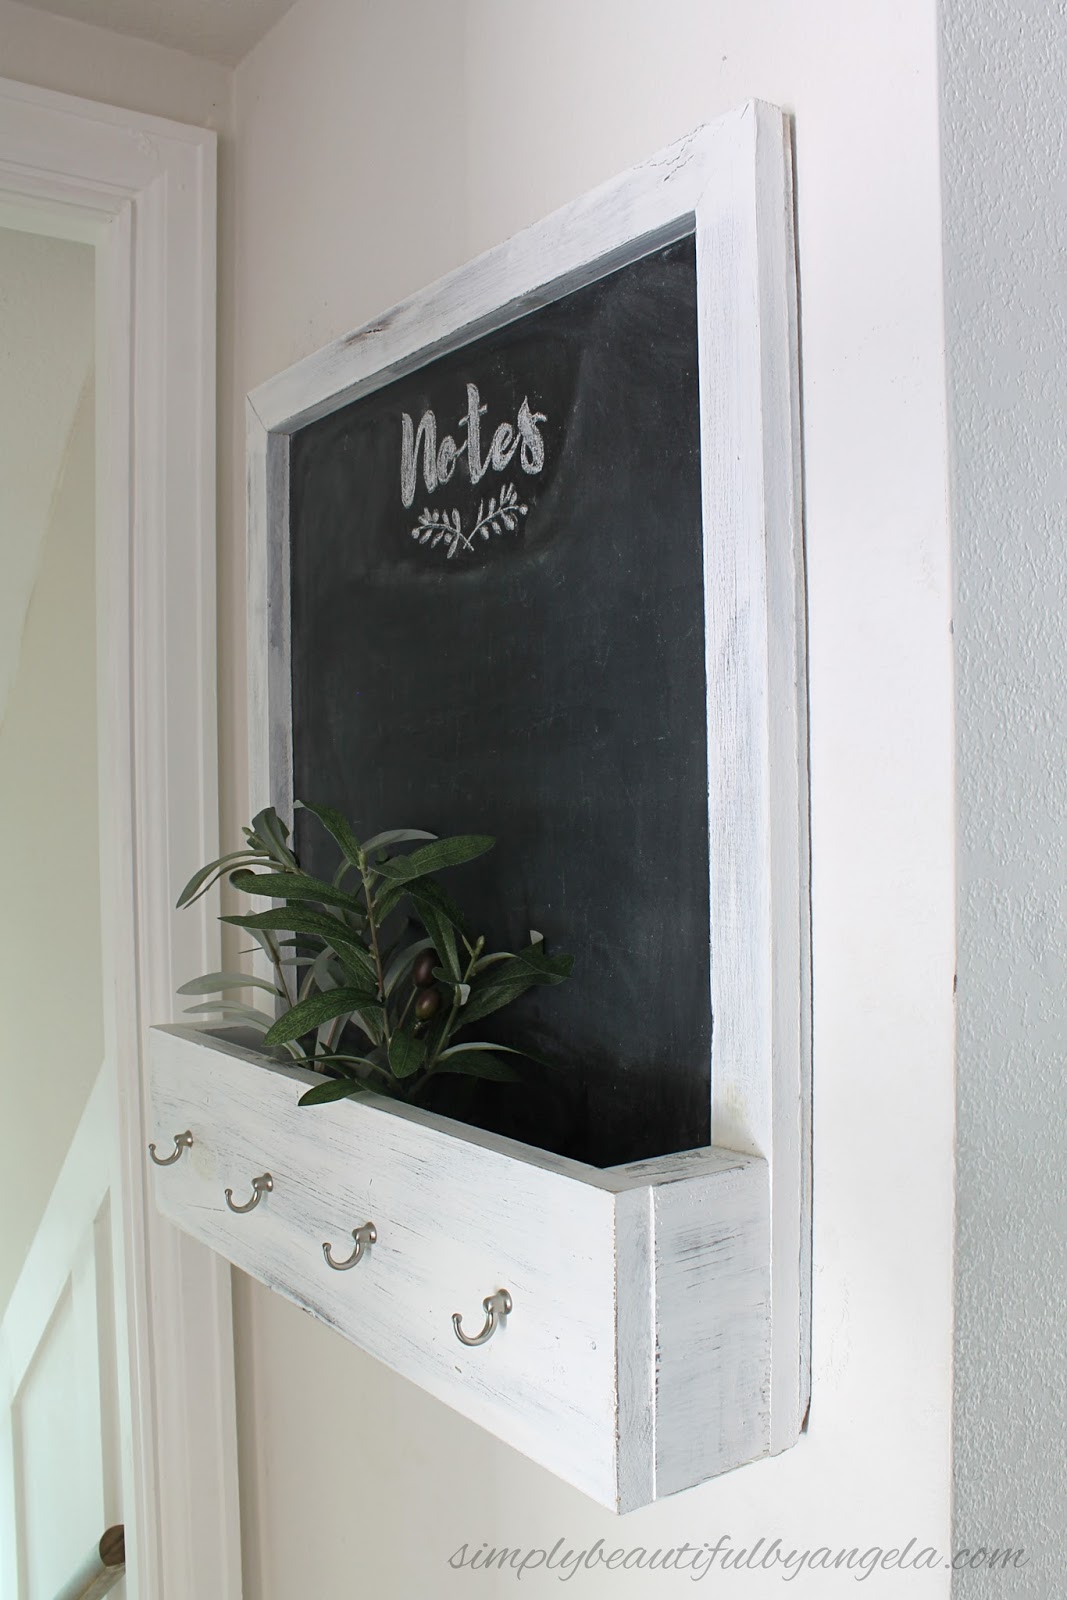
After the bridal shower was over I decided to turn it into a chalkboard for our garage entryway by adding some d-ring hangers to the back and some key hooks to the front.

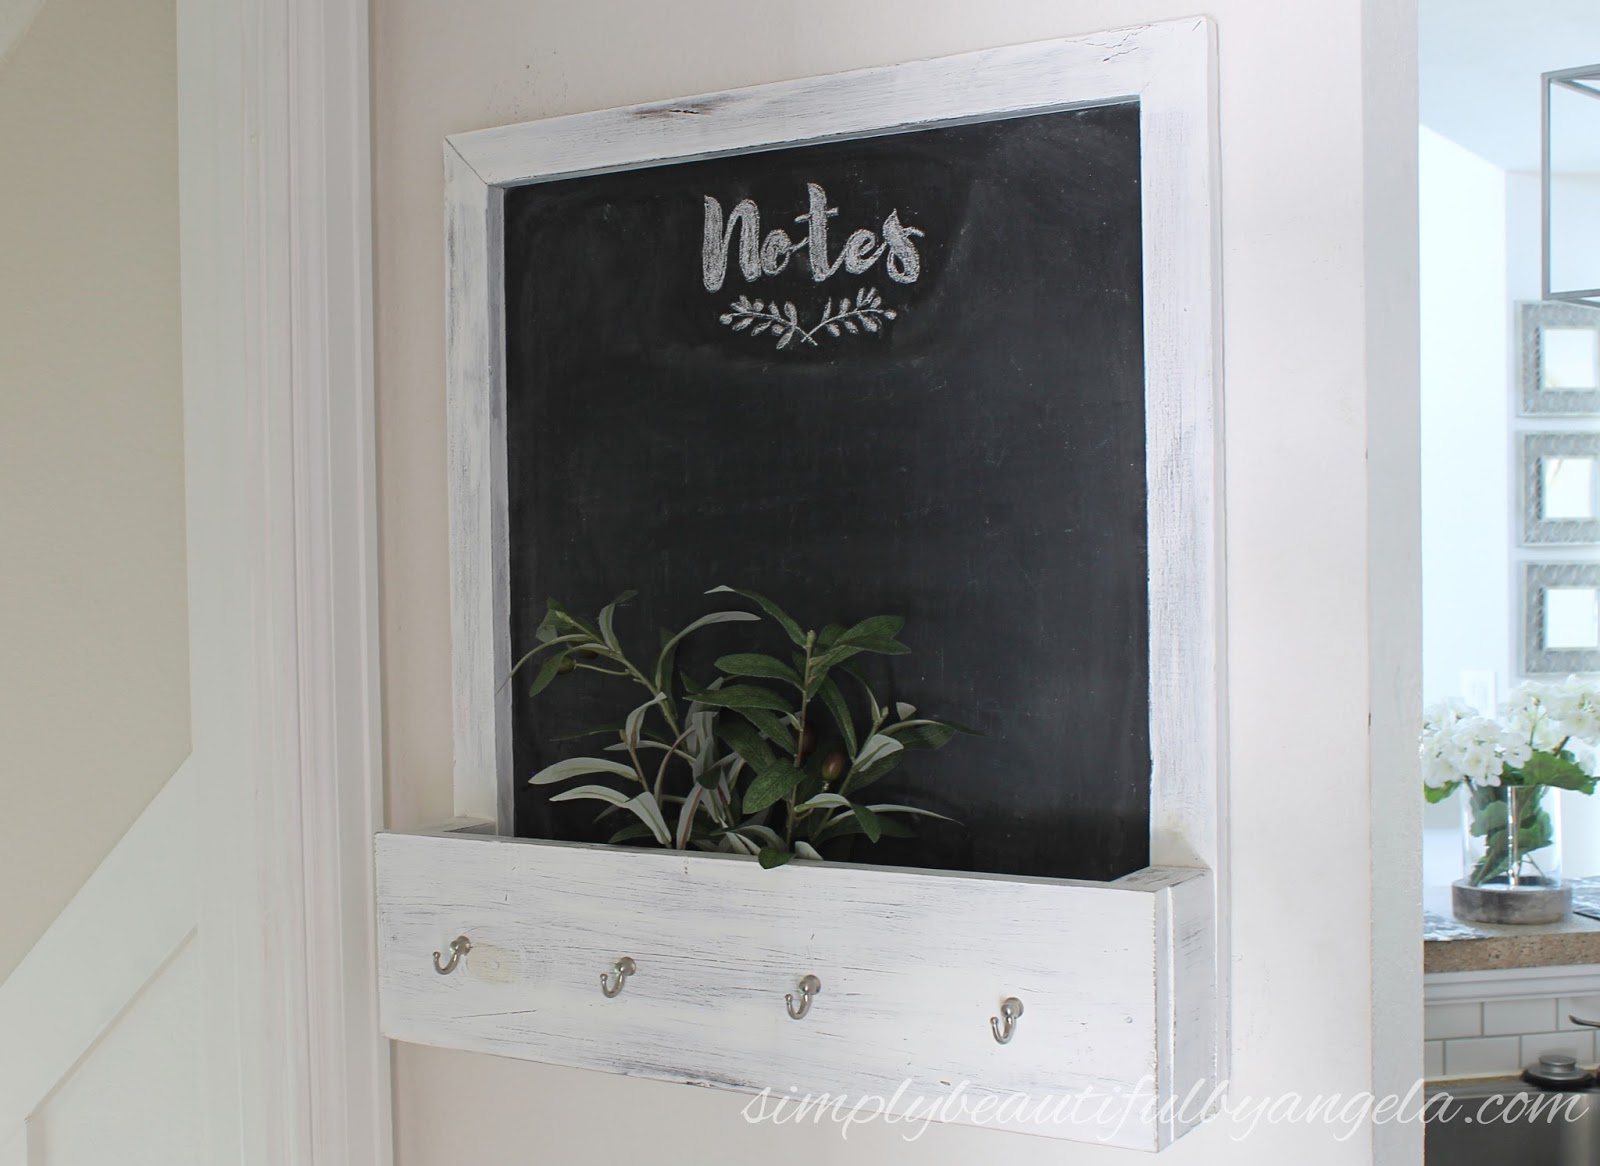

I usually write out our weekly mean plan on here although I have been totally slacking on that the last couple of weeks!
It’s so nice to have a spot to hang our keys as we walk in. We still have the occasional “I can’t find my keys!” moments, but definitely not as many as before!

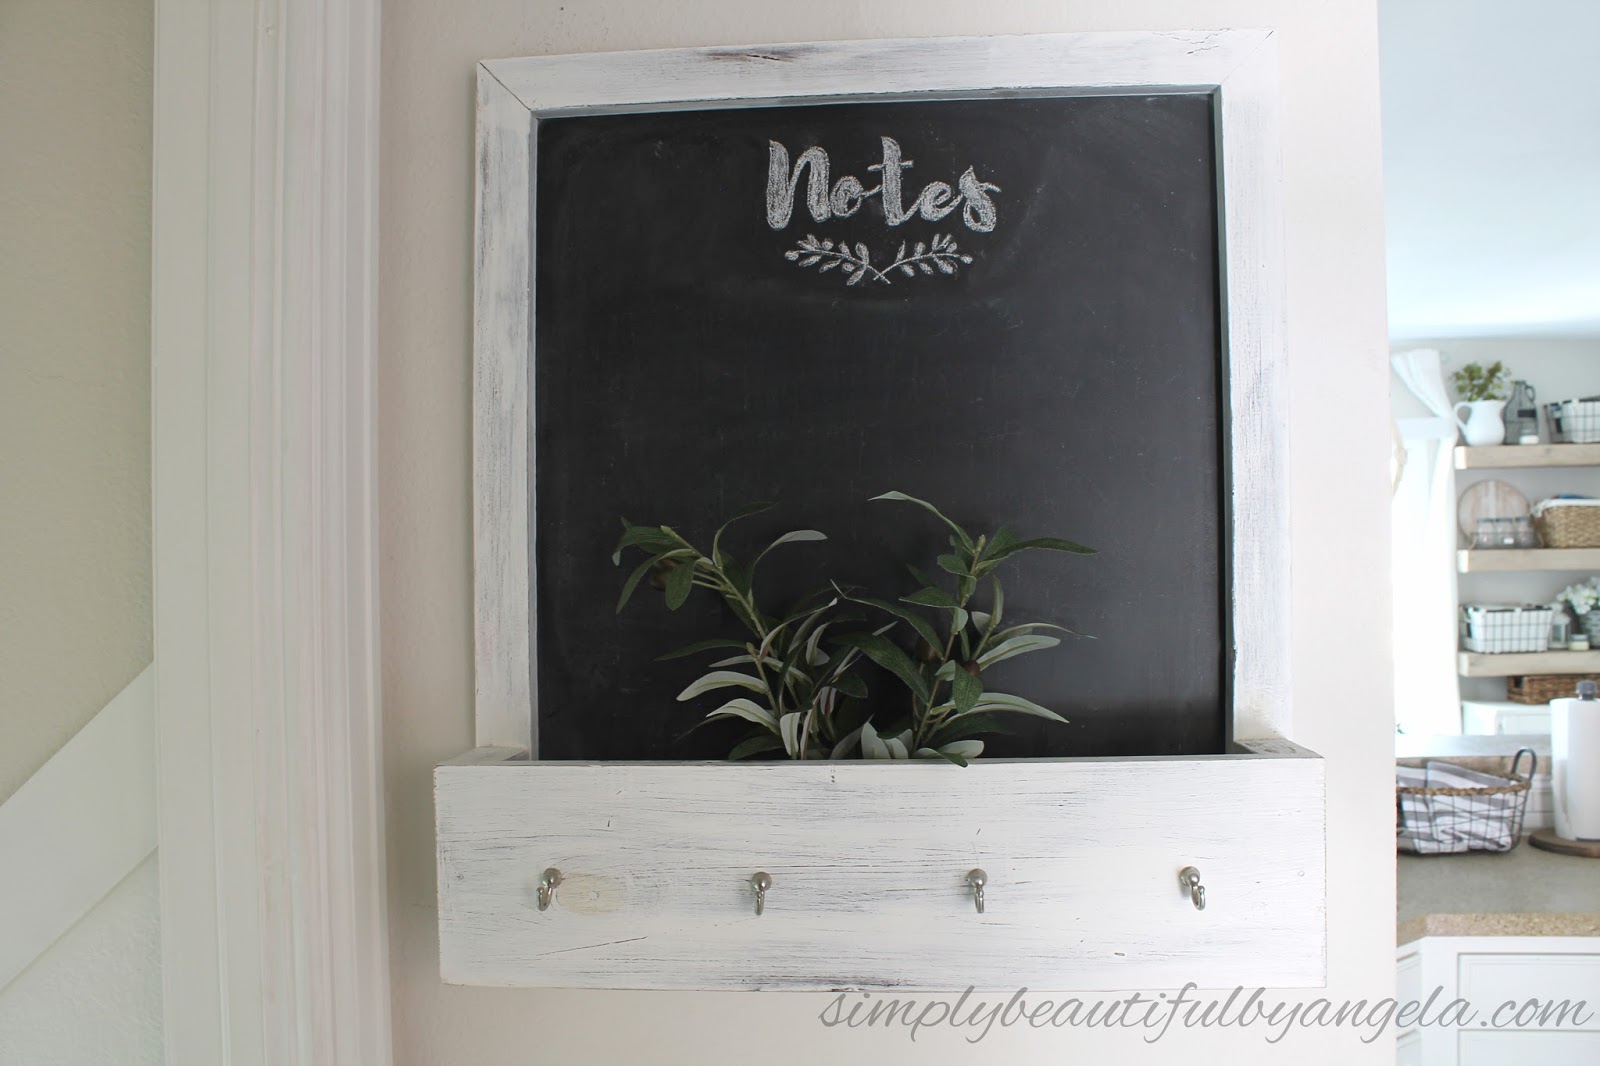
The box in front is perfect for holding mail or important papers. I like having one space in a central location of the house because it forces me to not let it get out of hand before going through it!

Thanks for stopping by to hang out with me today guys! I hope you all have a great weekend and I will be back next week for another fun Thrift Store Décor Upcycle Challenge. Wow–how in the world are we already almost at that time again? I feel like we just had one! This Summer has been flying right by, am I right?!

Well that was worth the wait. Great tutorial. I even love your handwriting "Notes". Mine sucks. Saw this on the Thrifty Thursday Link Party!
Thank you so much Cindy! Trust me my writing is awful–here's the secret: I print my words out, rub chalk on the back, then trace over the letters with a pencil to create an outline on the chalkboard that I can go over. Works like a charm!
Super cute! I love this!
Thank you so much Melissa!
Great DIY.
Thank you Dalwi!
Very pretty. Thank you for the tutorial. I love chalkboards 🙂
Thanks Danice! Me too–I would have one in every room if I could!!
Oh, I love this! And it looks so quick and easy to put together 🙂
Best,
Kelly
Thank you Kelly! It really was a simple build and cost so much less to DIY than buy!! 🙂
I love how you made this chalkboard with a mail holder and keys hooks. It looks great! Thank you for linking up with us at the #HomeMattersParty – please stop by and link up at this week's party (opens Friday!)
This is awesome!! Thank you so much for the detailed instructions. I think it would be great to have one of these for right by the back door.
Thanks for joining the Grace at Home party. I'm featuring you this week!