Simply Beautiful By Angela

creating simple beauty on a budget

  • Home Tours
  • Projects
  • Legal
  • Link Parties
  • Let’s Chat!
  • About Me

One Room Challenge (Week 6): Woodland Big Boy Room Reveal

May 10, 2018

Happy One Room Challenge reveal day you guys!  The day has finally arrived and I am SOOO excited to show you how Lucas’ big boy room turned out.
In case you aren’t familiar with the One Room Challenge, let me back up for a minute to explain.  This is bi-annual event is hosted by the lovely Linda over at Calling It Home. Designers have just 6 short weeks to transform a room and share their progress along the way.
You can catch my progress posts here in case you missed any!

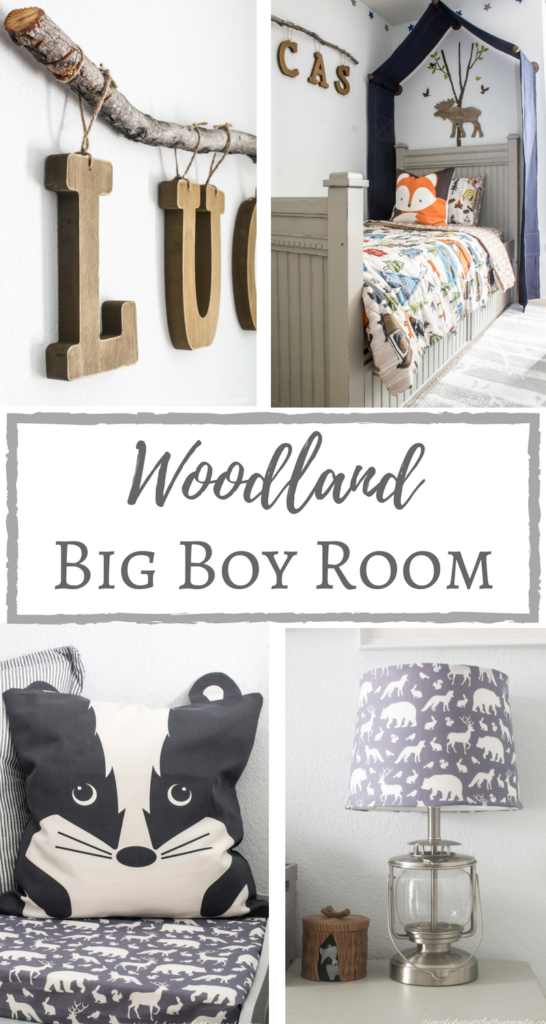
One Room Challenge (1): Woodland Big Boy Room Plans
One Room Challenge (Week 2): A VERY Slow Start
One Room Challenge (Week 3): Moving Right Along
One Room Challenge (Week 4): Big News!

One Room Challenge (Week 5): The Finishing Touches
This was my fourth time participating in this crazy yet rewarding challenge and out of all of them this was definitely my most stress free one.  Well almost…
 
Although there were no major projects in here like wall treatments or flooring, we ended up going under contract on a new home during week 4!  It made finding the time to wrap this room up somewhat of a challenge.  And I actually even questioned whether or not I should finish it since it will all be coming down in a few weeks.
But I decided to push through for my little man so that he could at least see it all put together for a little bit before the big move.  I also figured that I already have to patch and paint nail holes when we move, so what’s a couple more!
But enough with the chit chat, you all are here to check out the new room right?!
As a reminder this is what Lucas’ room looked like 6 weeks ago at the beginning of this challenge.
I put off creating his big boy room much longer than I did with Tristan since he’s my last baby and I wanted to hang on to his sweet nursery for as long as possible.
But once he became a crib climbing ninja I knew that it was time. Here is how it looks today!
My favorite thing in this room is without a doubt the tent canopy over the bed.

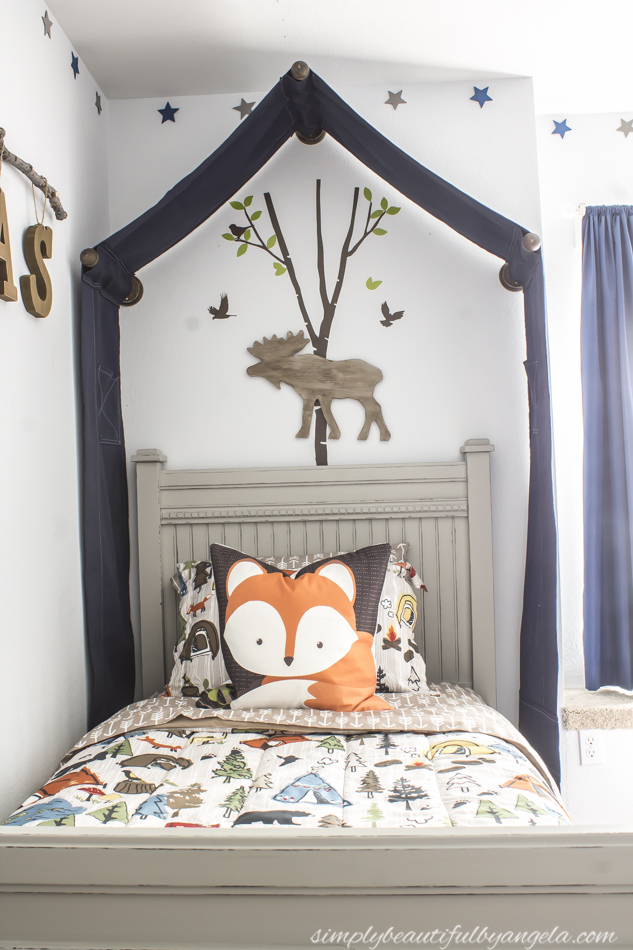
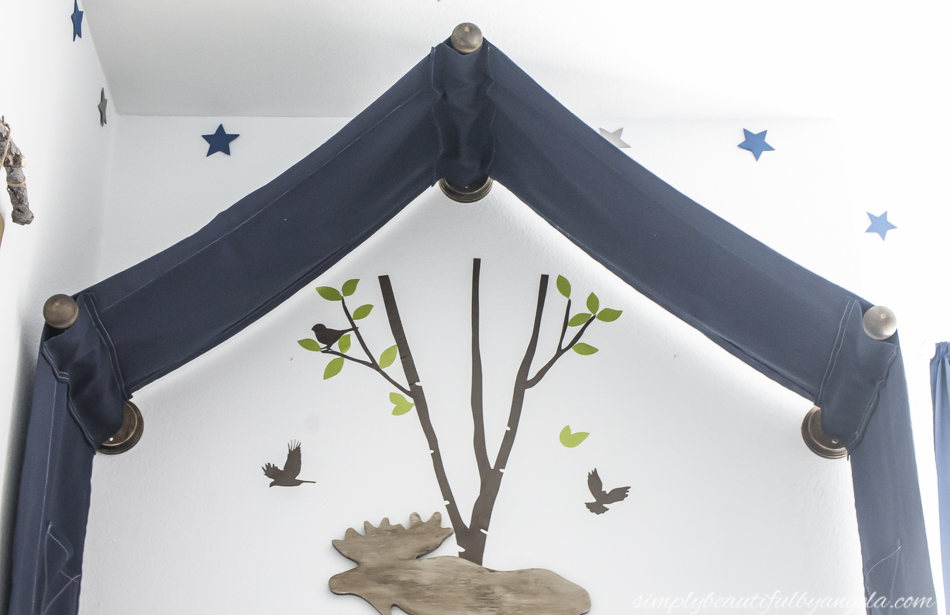
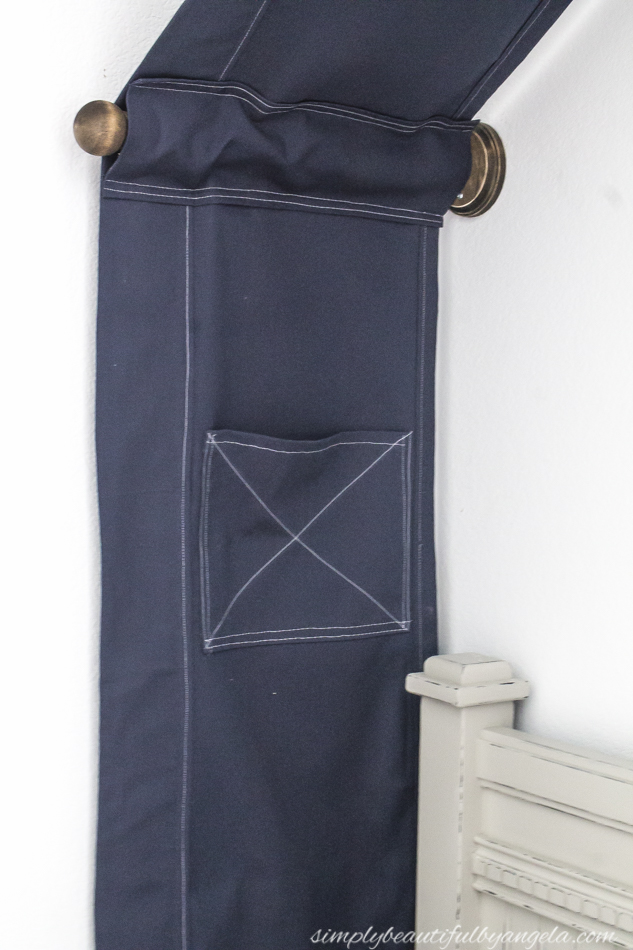
I slaved away at the sewing machine for many hours and ran into several hiccups but I am so pleased with how it turned out!

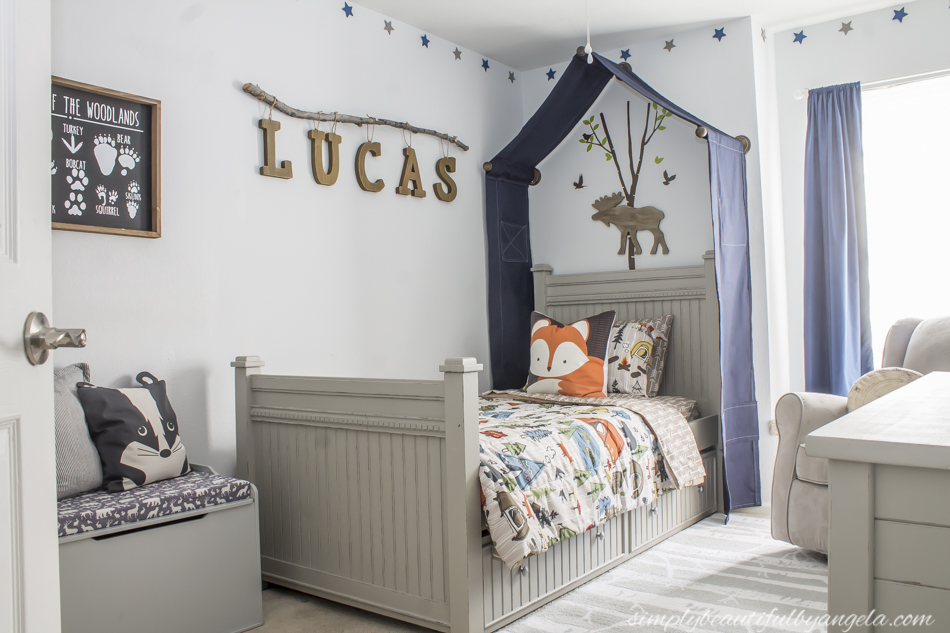
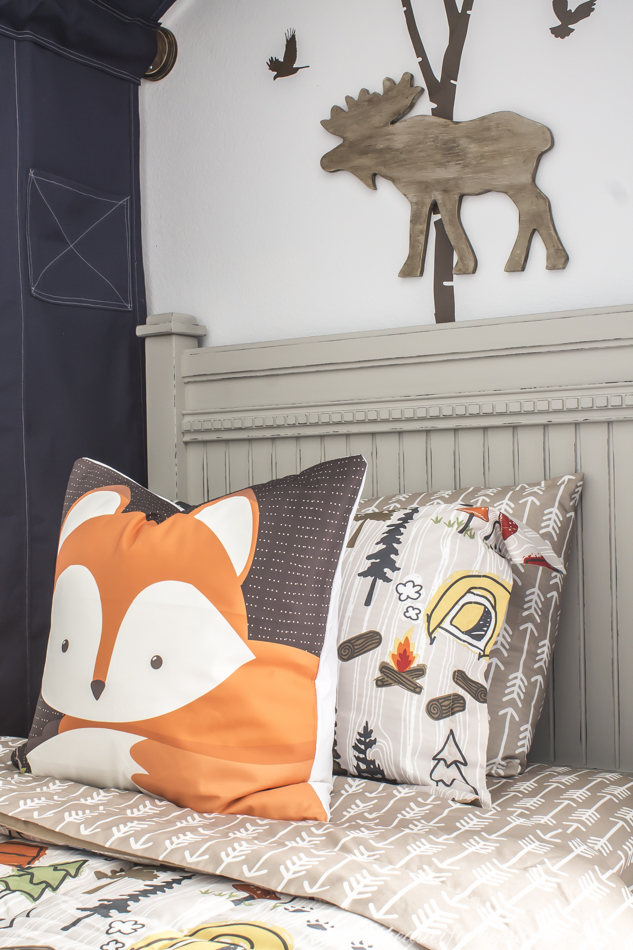
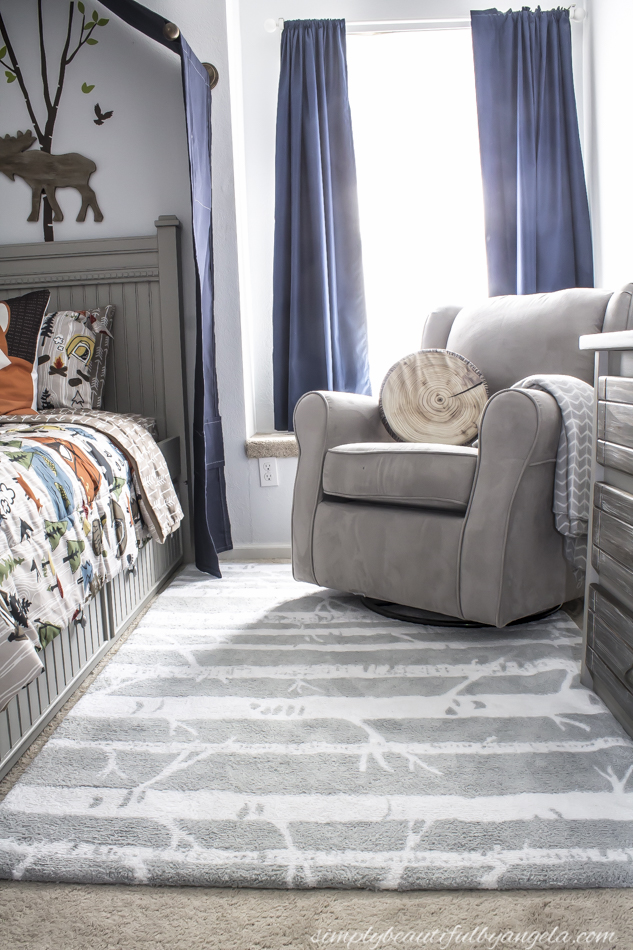
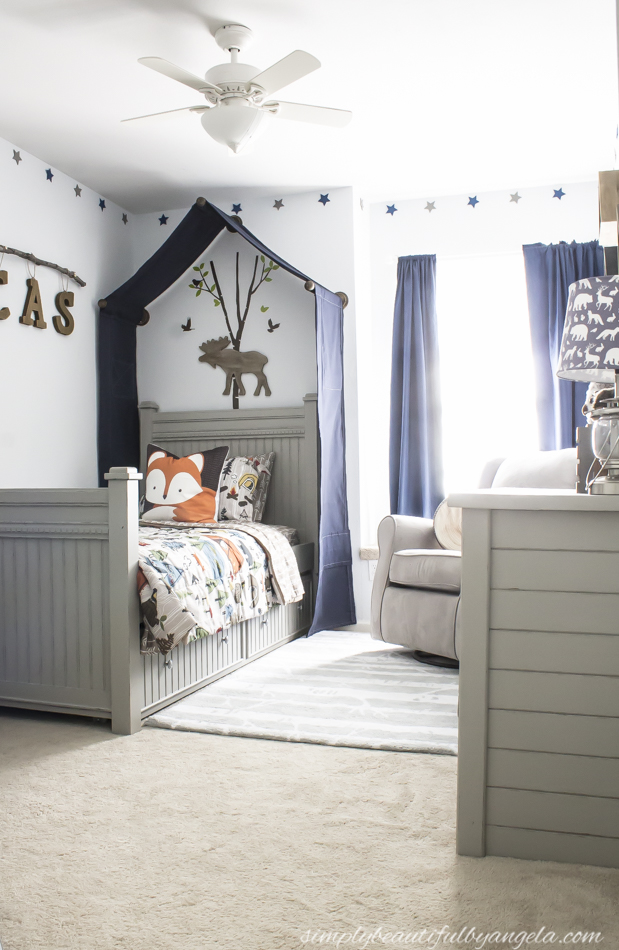
The trundle bed was an awesome find on Facebook Marketplace and originally had a chipped up navy blue finish. I painted it gray so that it didn’t feel quite so heavy and I knew that the gray would be ultra calming in this space.

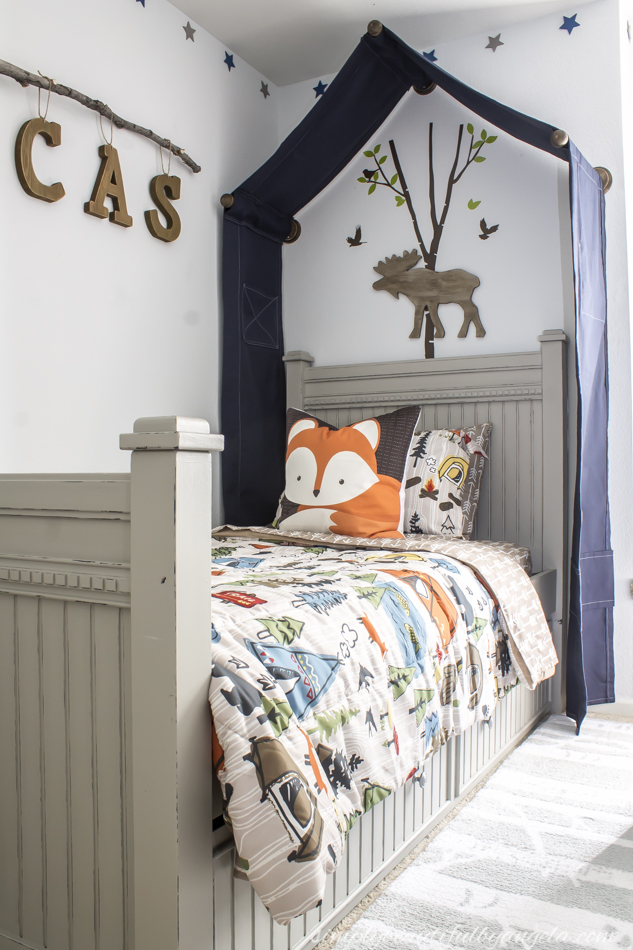
I lightly distressed it since I knew it would be taking a lot of hits from my wild toddler. I think that it brought out the details beautifully (tutorial here).

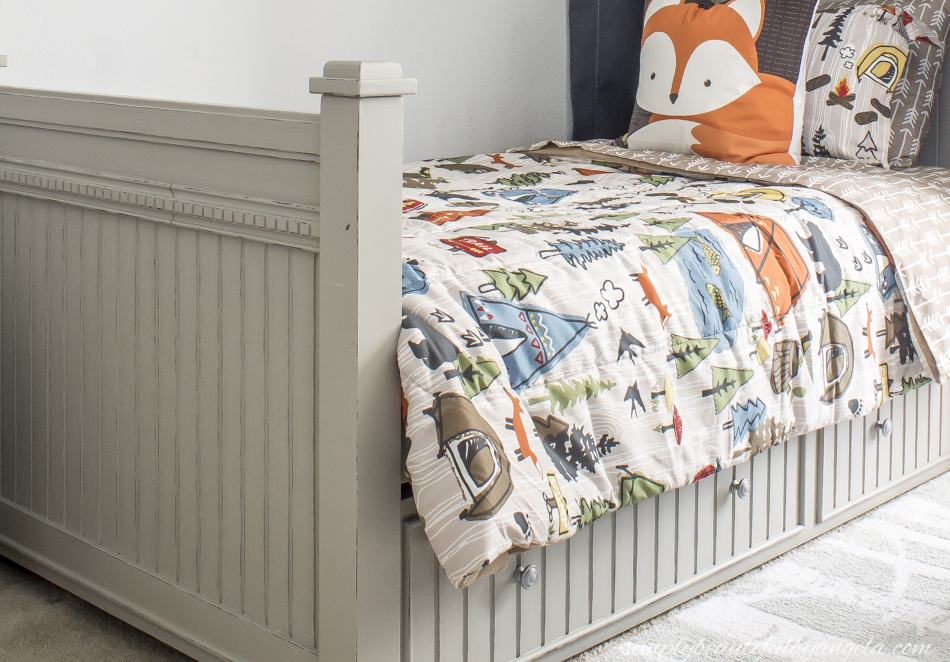
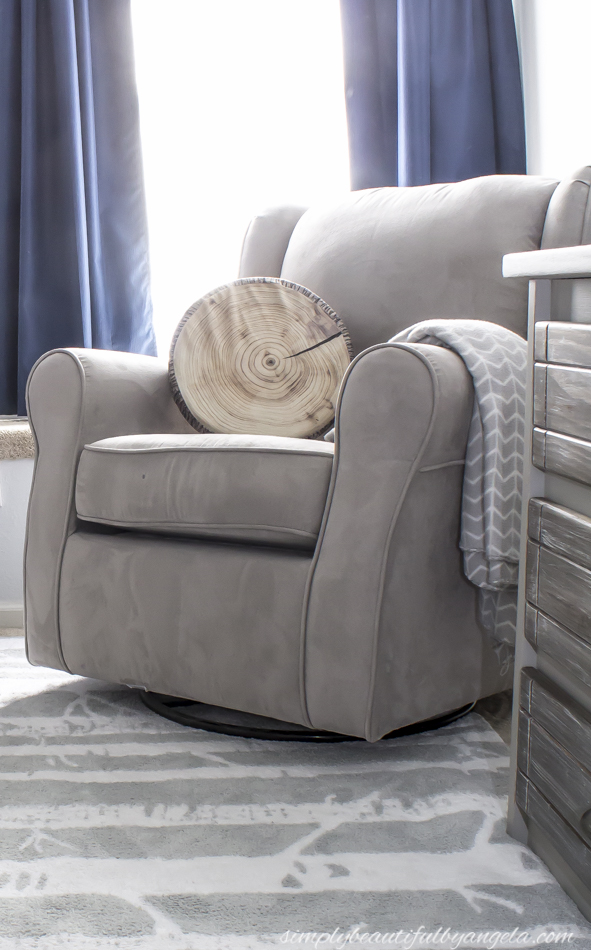
The fox pillow is cheerful and pairs perfectly with the affordable woodland themed bedding that I chose.

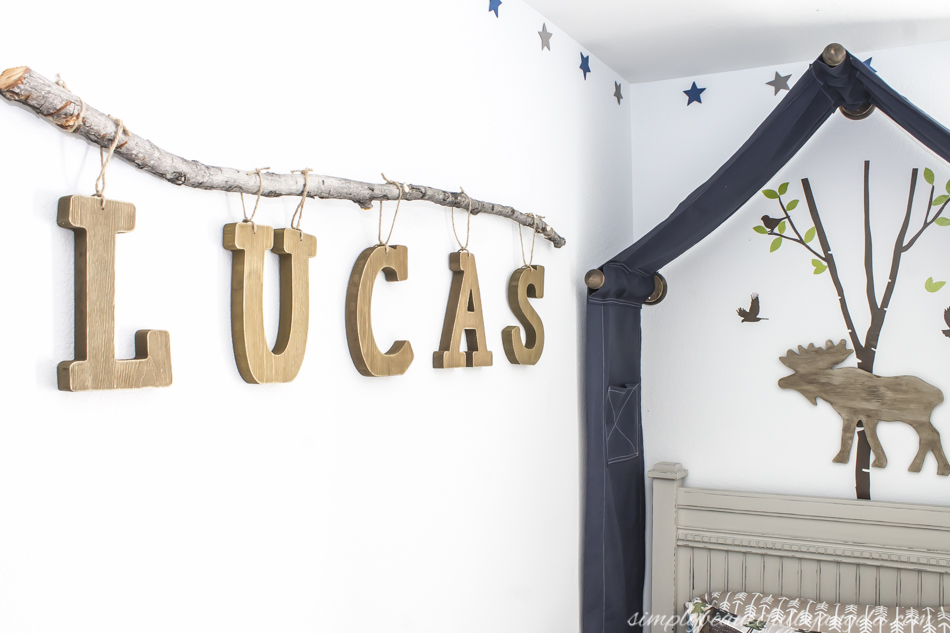
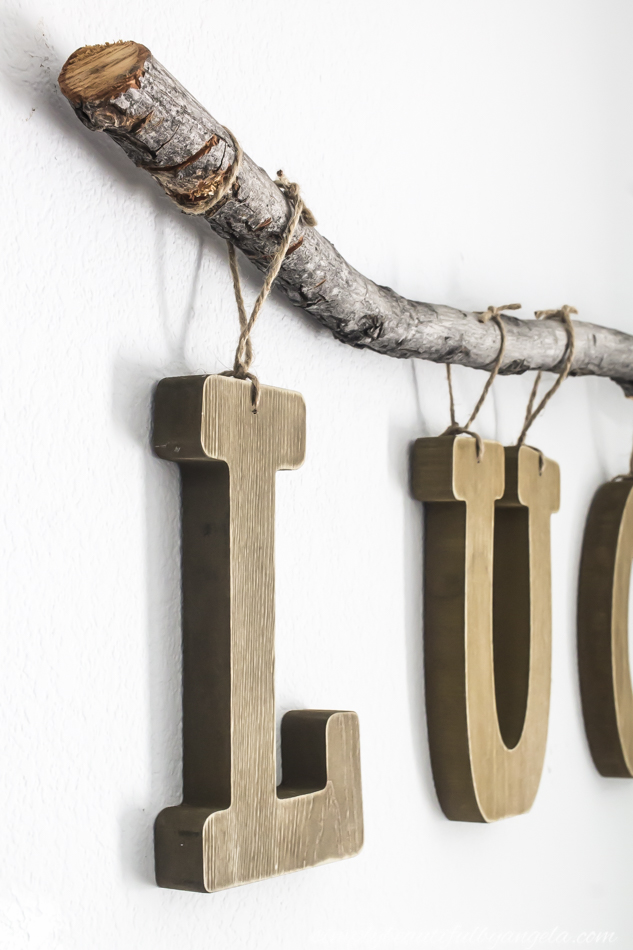
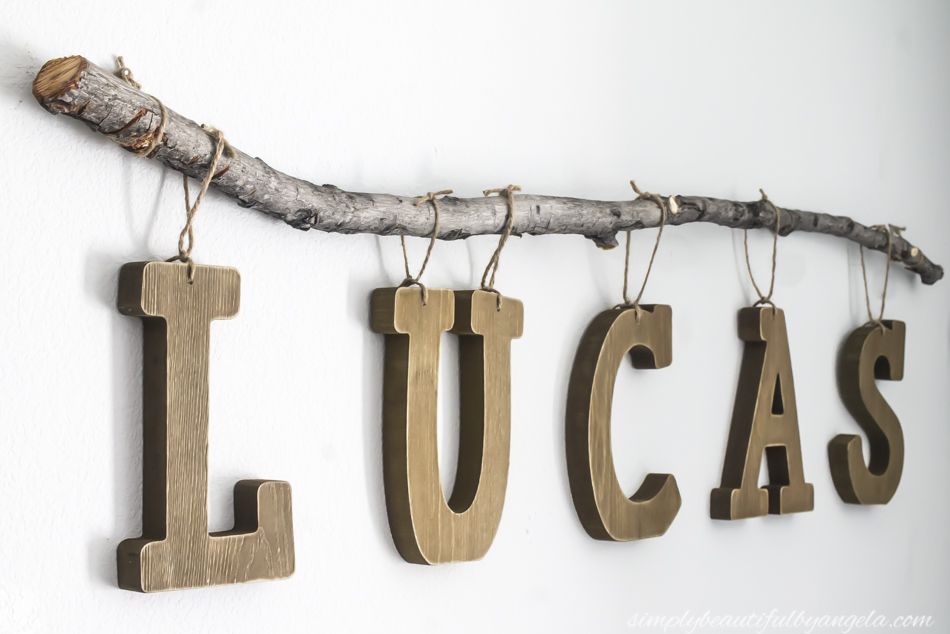
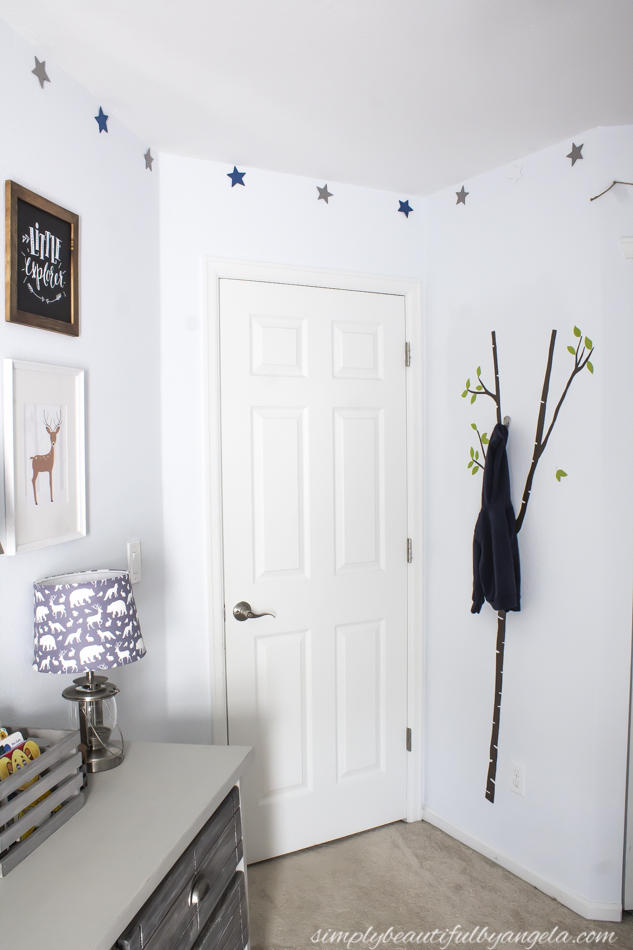
Right from the start I knew that I wanted wood letters for his name and I decided to hang them from a branch that my father in law had trimmed from their tree.

The letters are actually “faux hanging” because I first hung them up on the wall by the pre-drilled holes on the back before tying them to the branch that I secured to the wall with twin and nails.
Much easier than stressing about them hanging crooked, because that would have driven this perfection loving mama absolutely crazy!

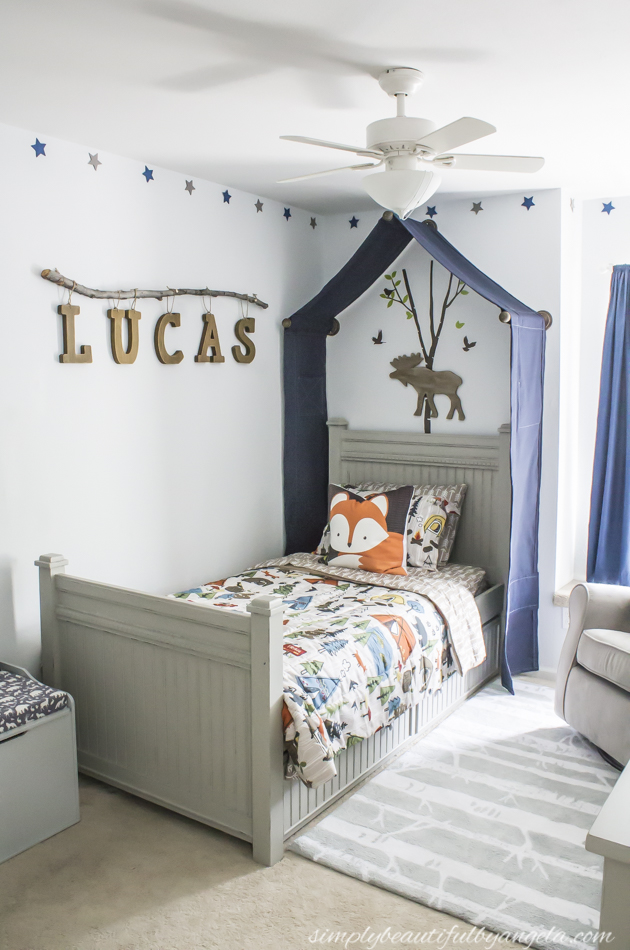
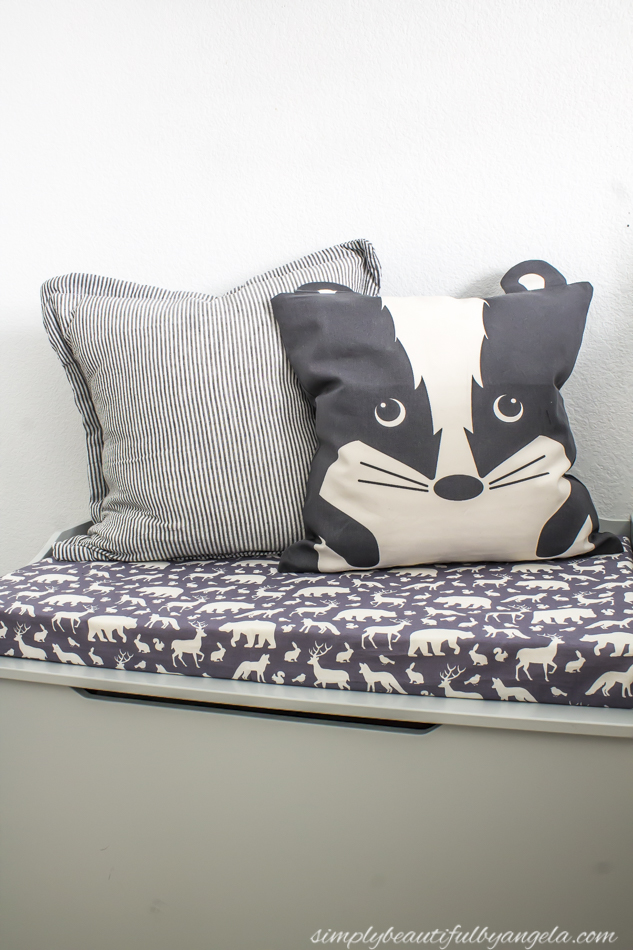
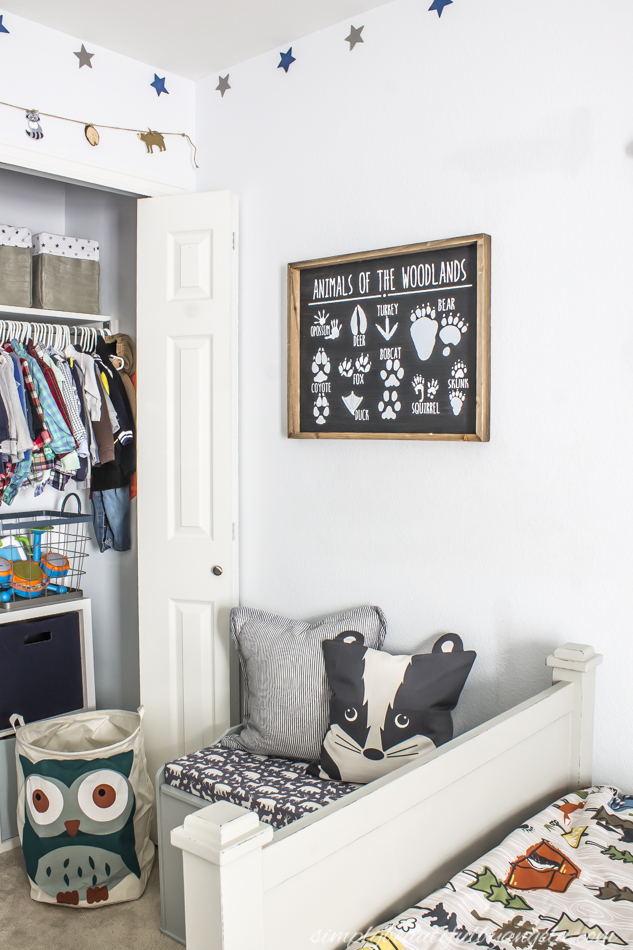
At the end of the bed I got this gray toybox and made a cushion for it using some woodland creature fabric.

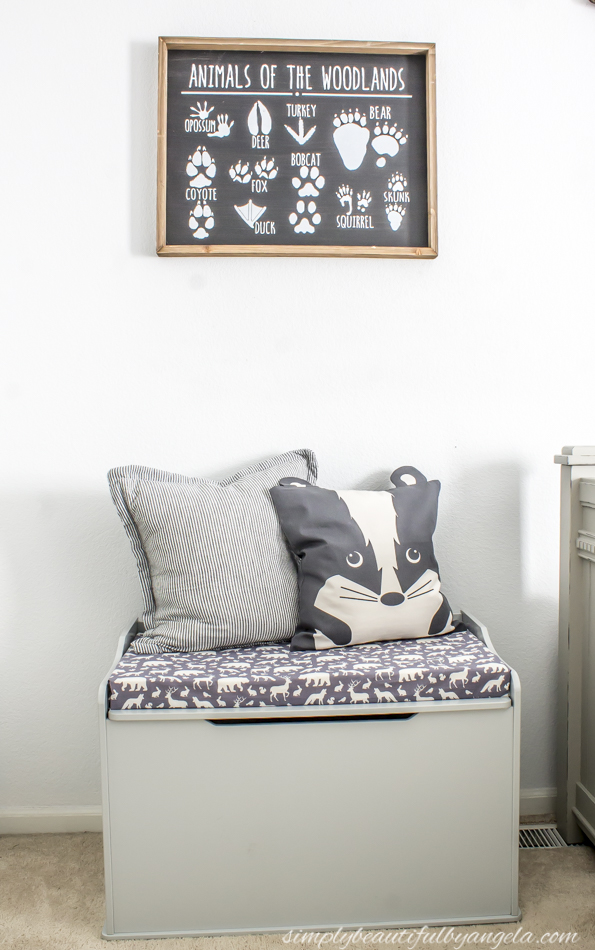
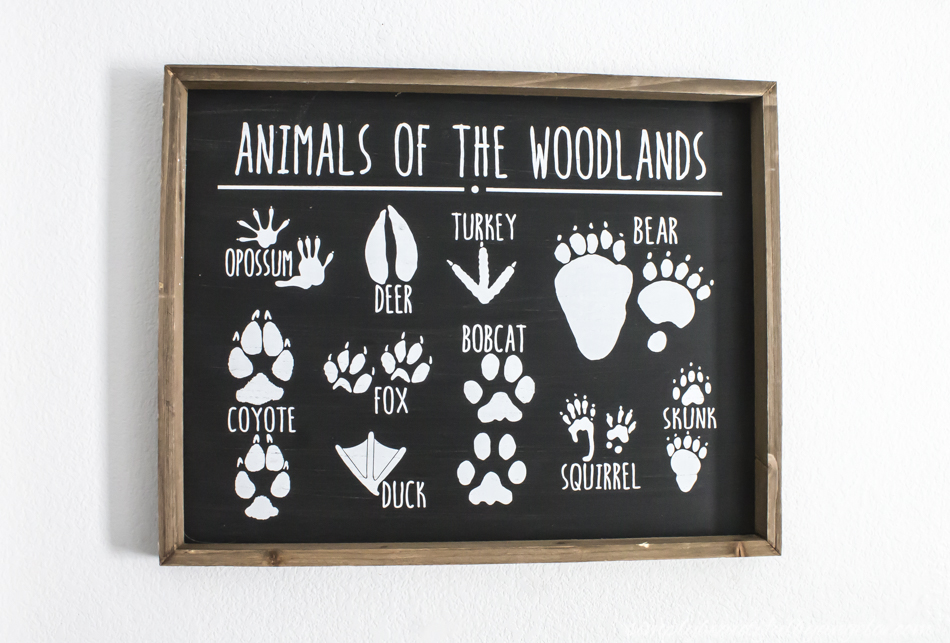
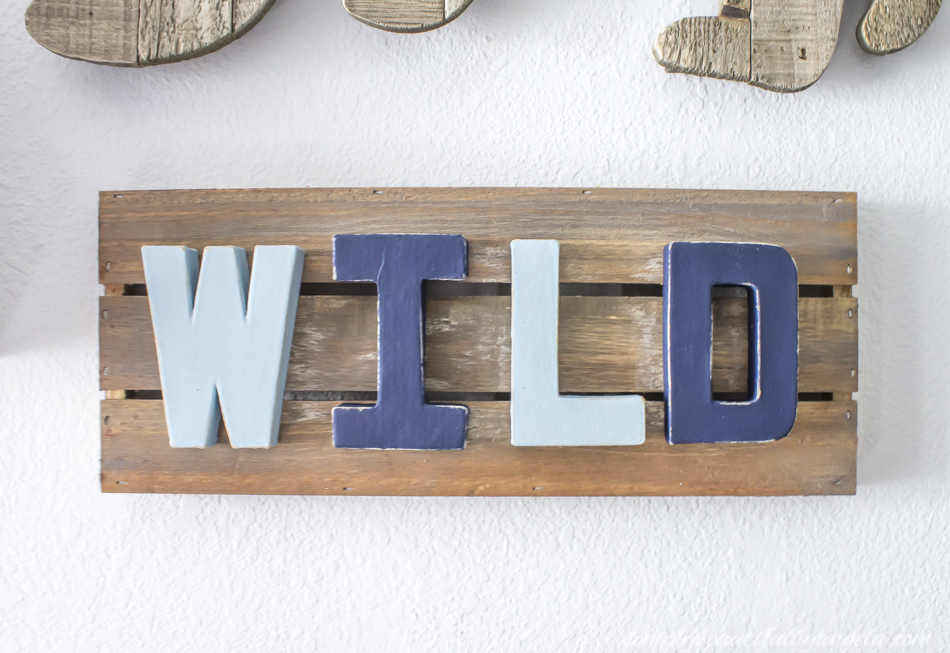
Above the toy box I hung up this adorable sign that I have had my eye on for awhile.

The skunk pillow sitting on top was a find from H&M that I picked up one day while I was browsing their home section on my lunch break.

Isn’t he cute?  Or is it a badger??  I’m not really sure…but he’s adorable!

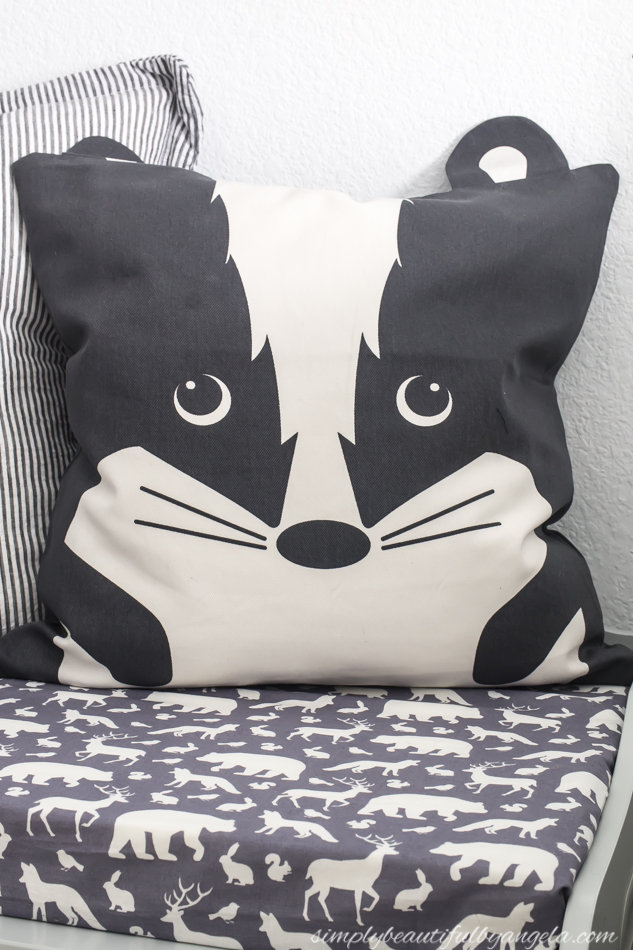
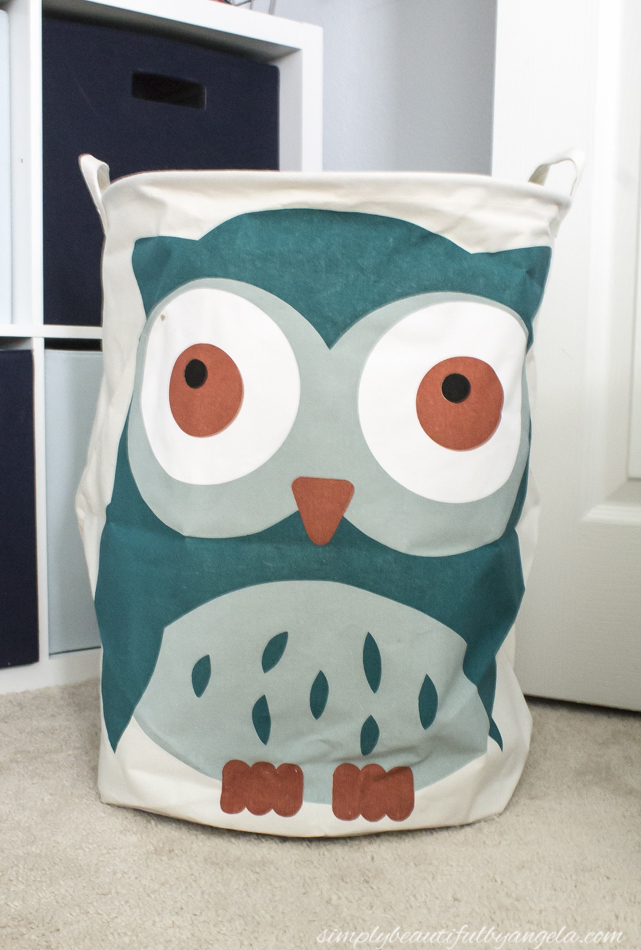
It’s become Lucas’ routine to use it as a stool to climb into bed.  Oh and see the owl hamper peeking out in front of his closet?

It took me awhile to decide on one and even though it’s a little smaller than his old one it makes up for it in cuteness!

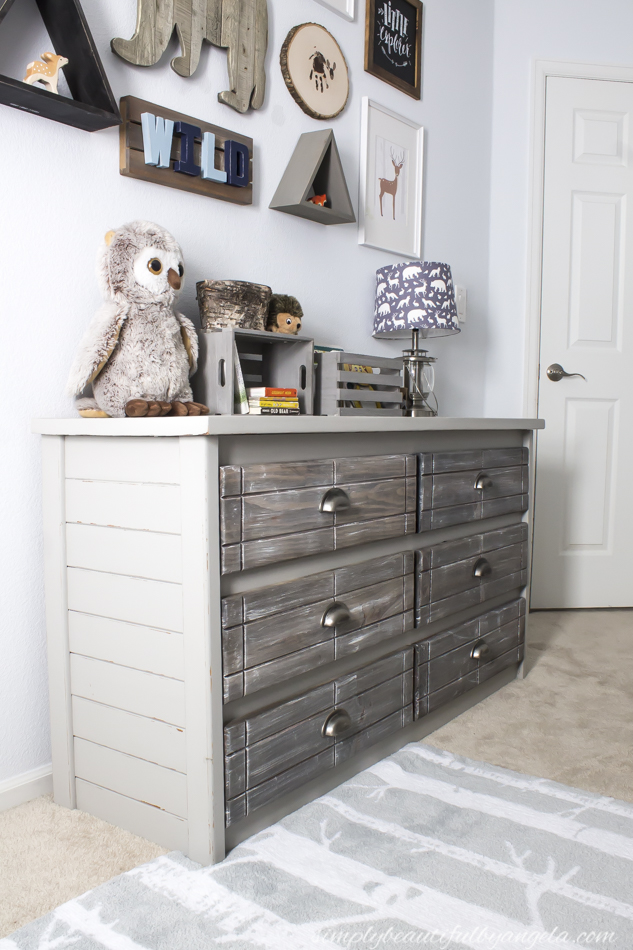
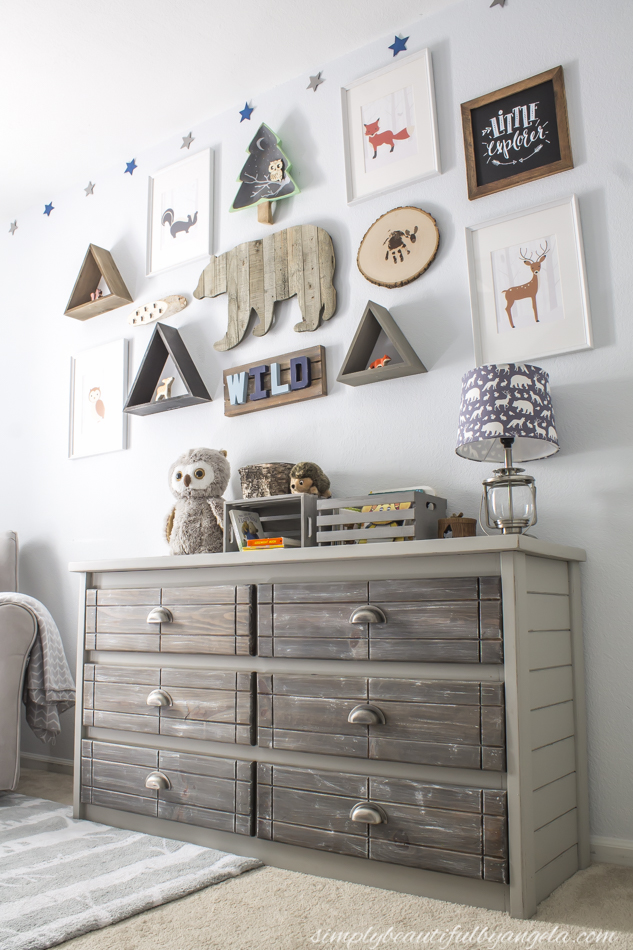
I feel like I’ve used the word cute too much!  Hmmm well let’s talk about the dresser. It isn’t necessarily cute, I like to think of it as “boyish”…

It was another Facebook Marketplace find (only 20 bucks!) that started out with an orange tone.  I painted the base the same gray that I used on the bed and then re-stained the drawers before adding new pulls (tutorial here).

When I purchased this lantern lamp it came with a white shade that I knew was too boring for a little boy. So I recovered it with new fabric and it sat it on the dresser to give us some nice dim lighting when we go in to get him ready in the morning.

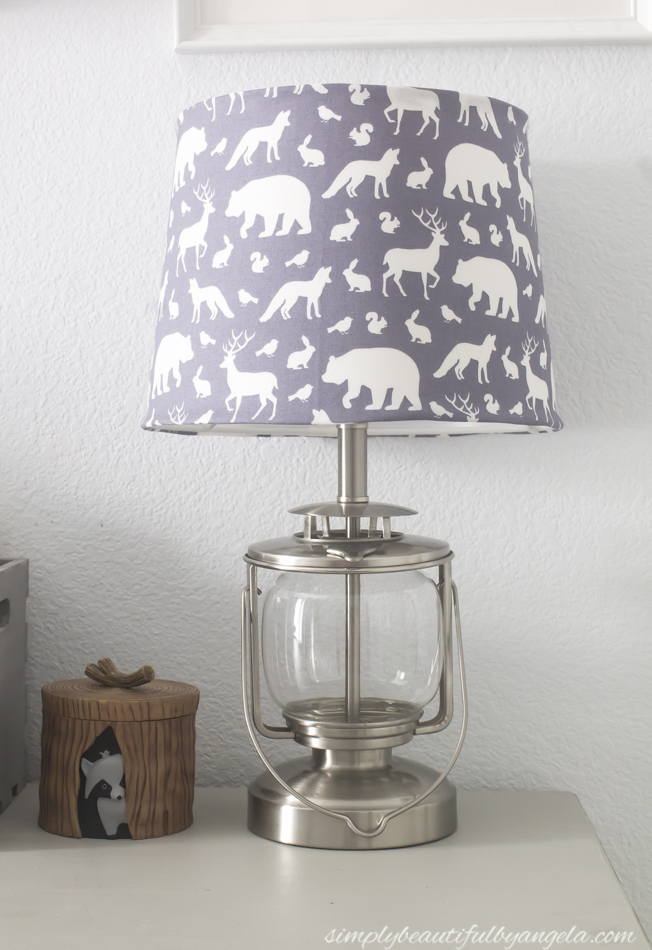
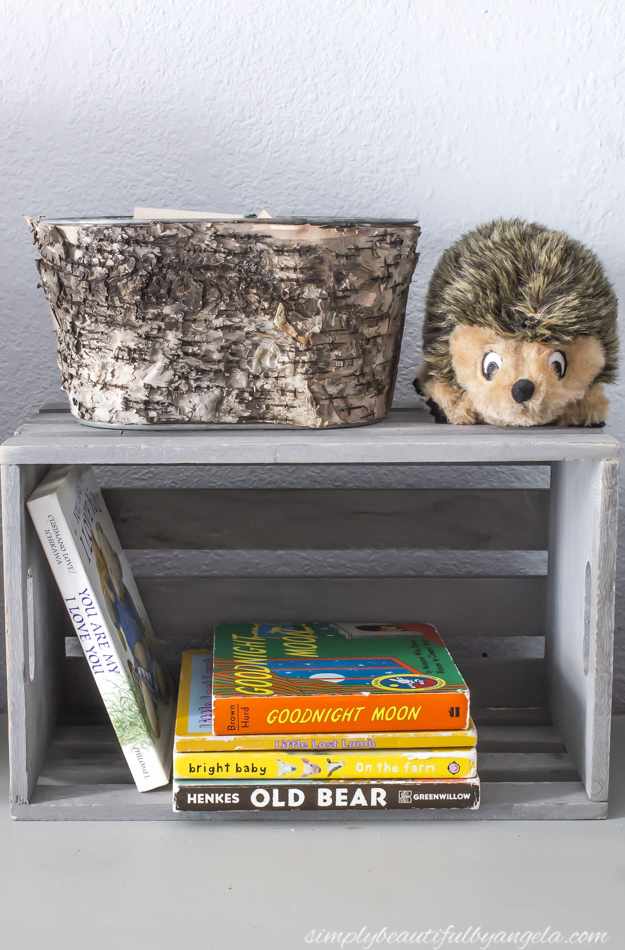
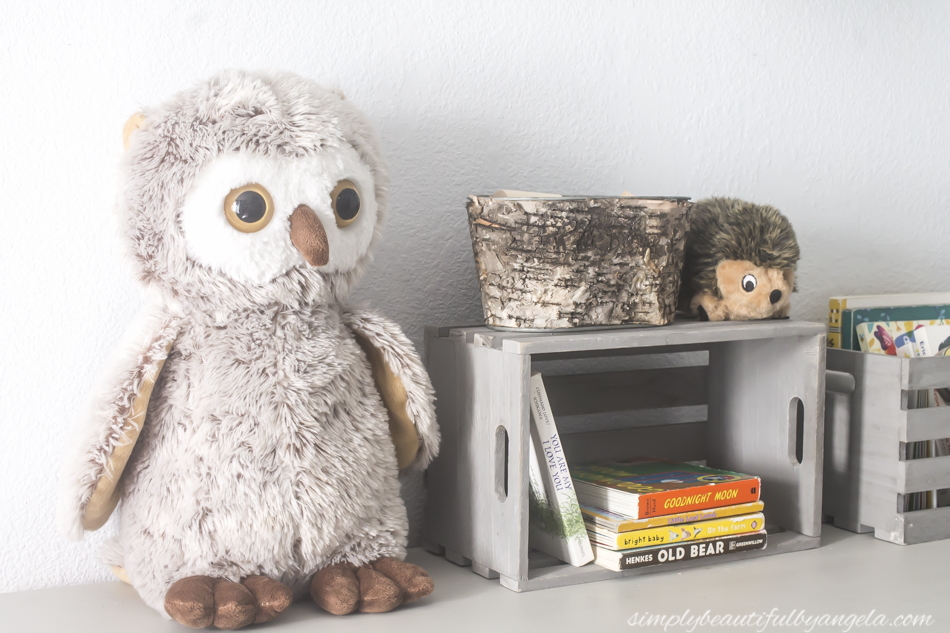
I kept the rest of the dresser top pretty simple with just a couple of crates filled with books, a bark wrapped container for blocks and a couple of stuffed animals.

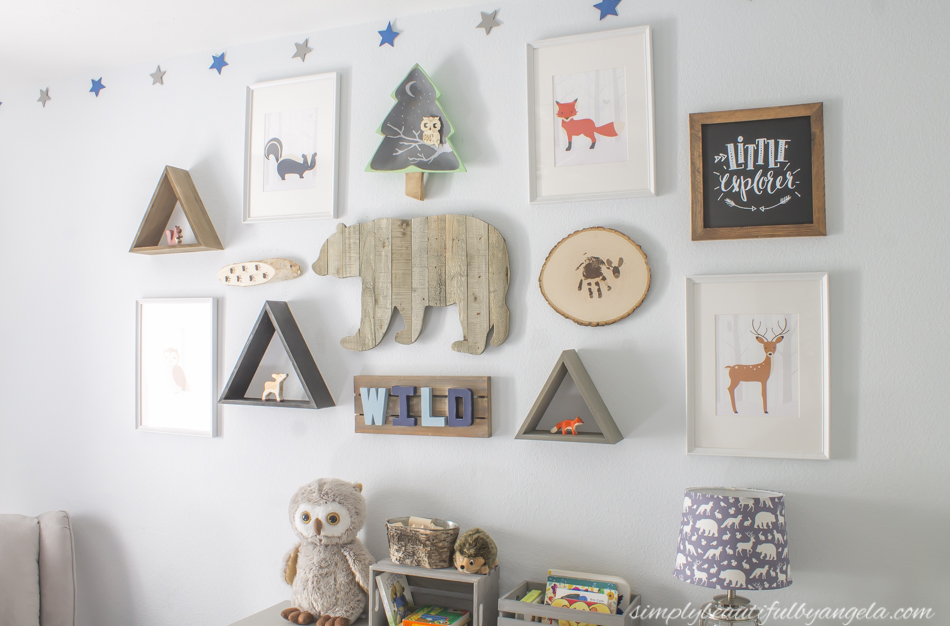
Above the dresser I created a fun gallery wall.

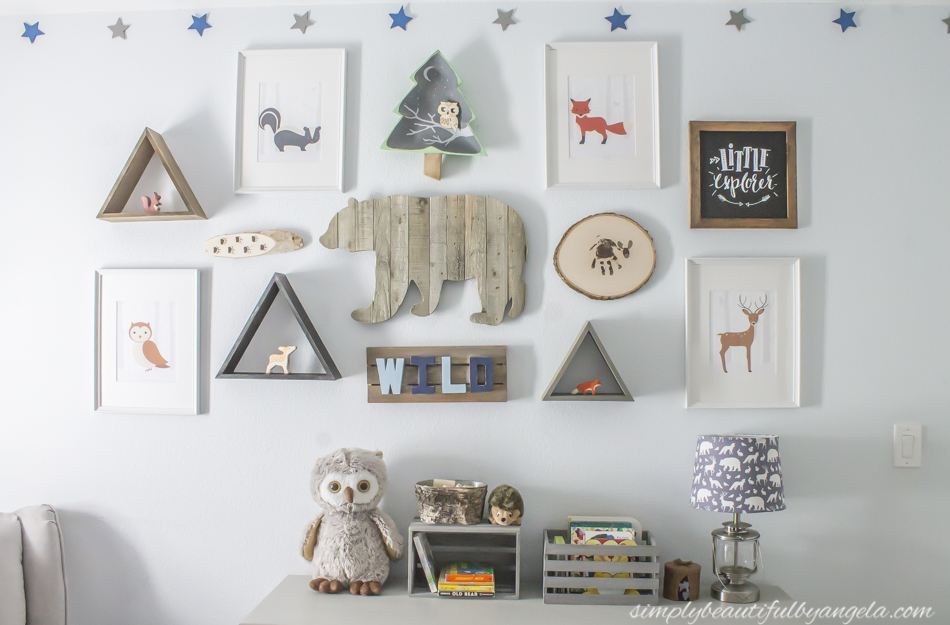
The central focus is this awesome planked bear wood that I found for only $12.50.

I then purchased some woodland animal prints from Esty and popped them in the IKEA frames that I used previously in his room.

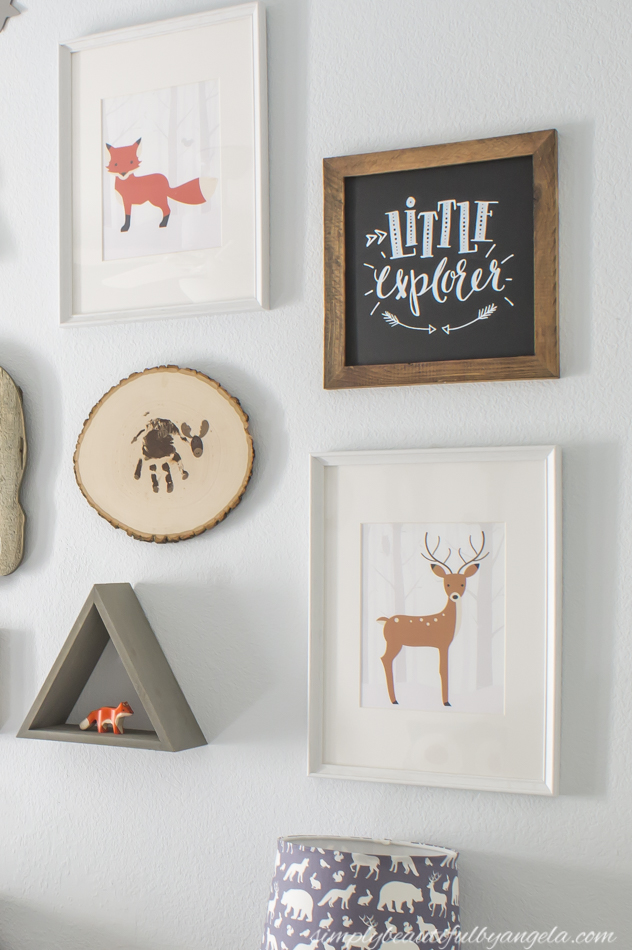
When I spotted the triangle shelves they reminded me of mountains and I knew they would be perfect on this wall.

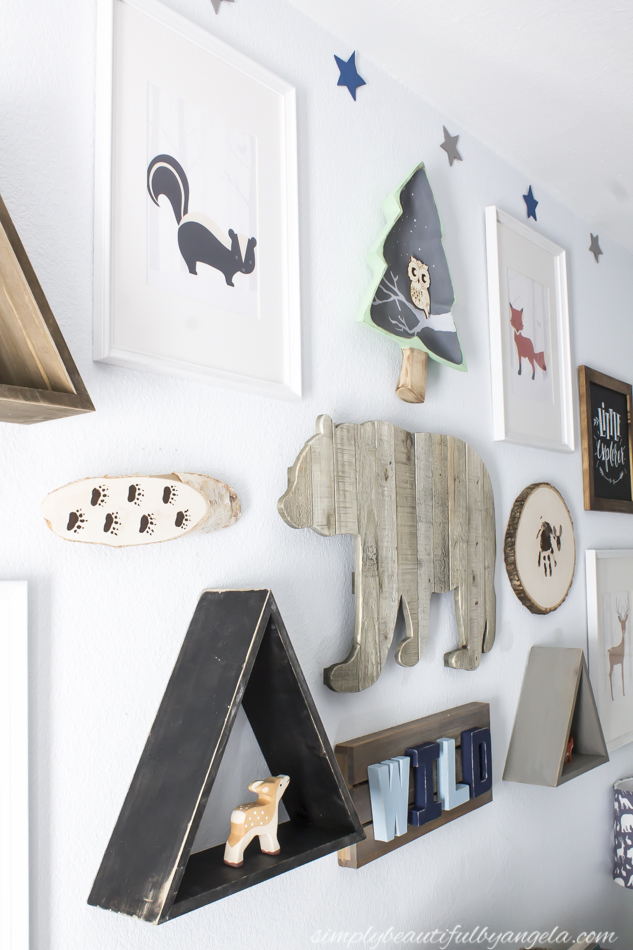
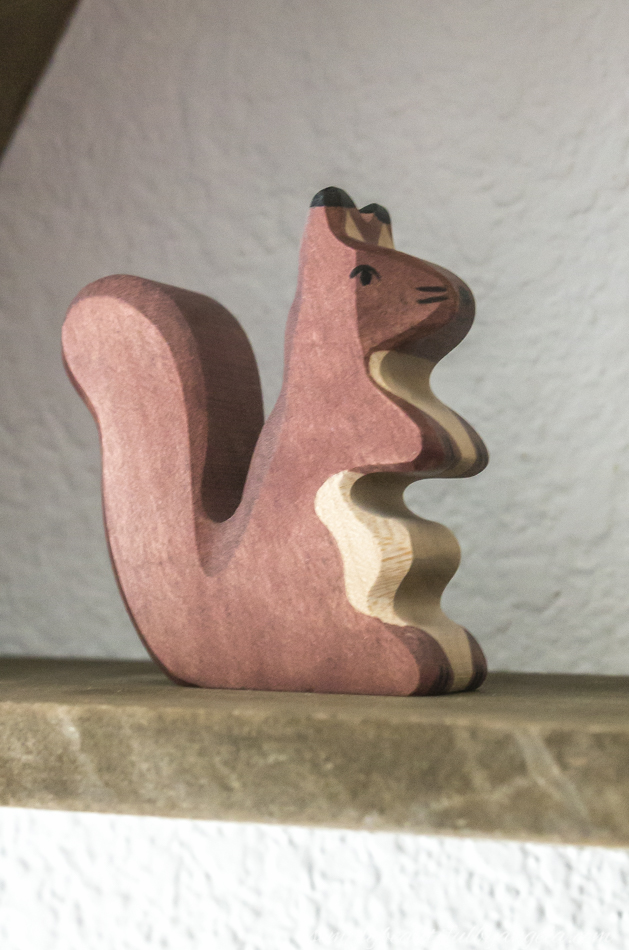
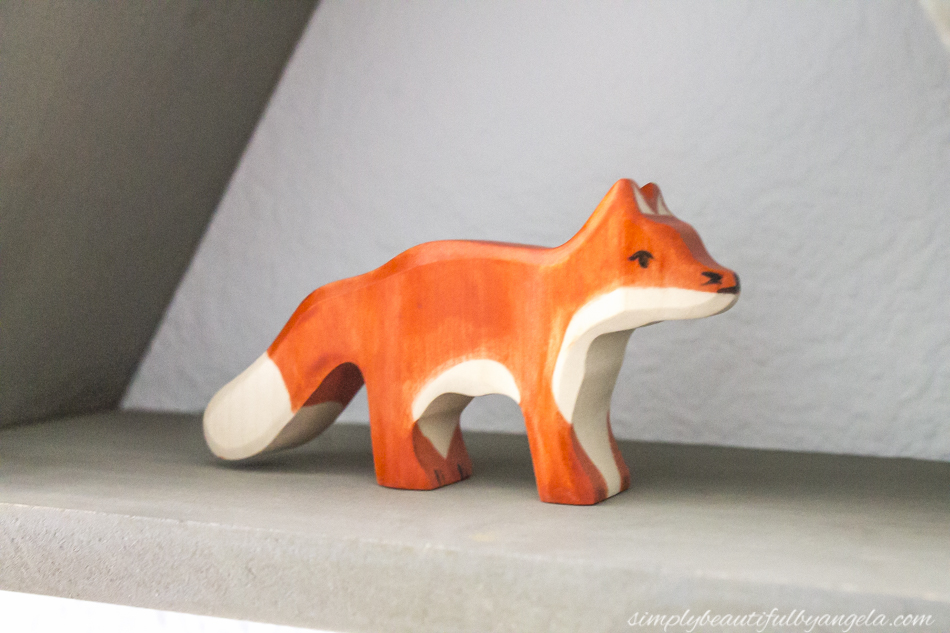
I struggled with what I should put on them but when I found these tiny wooden animals I knew that they would be perfect.

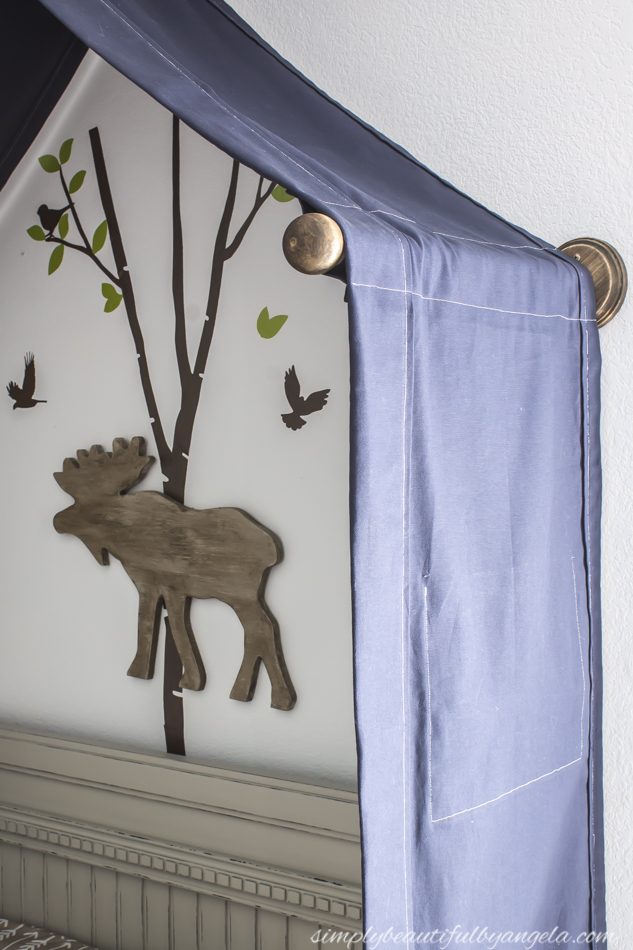
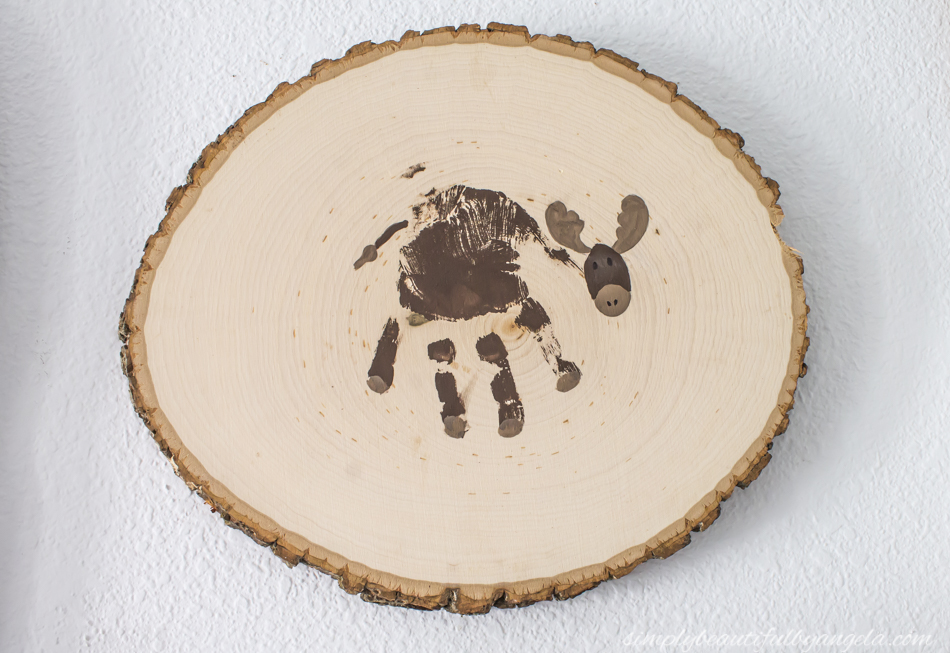
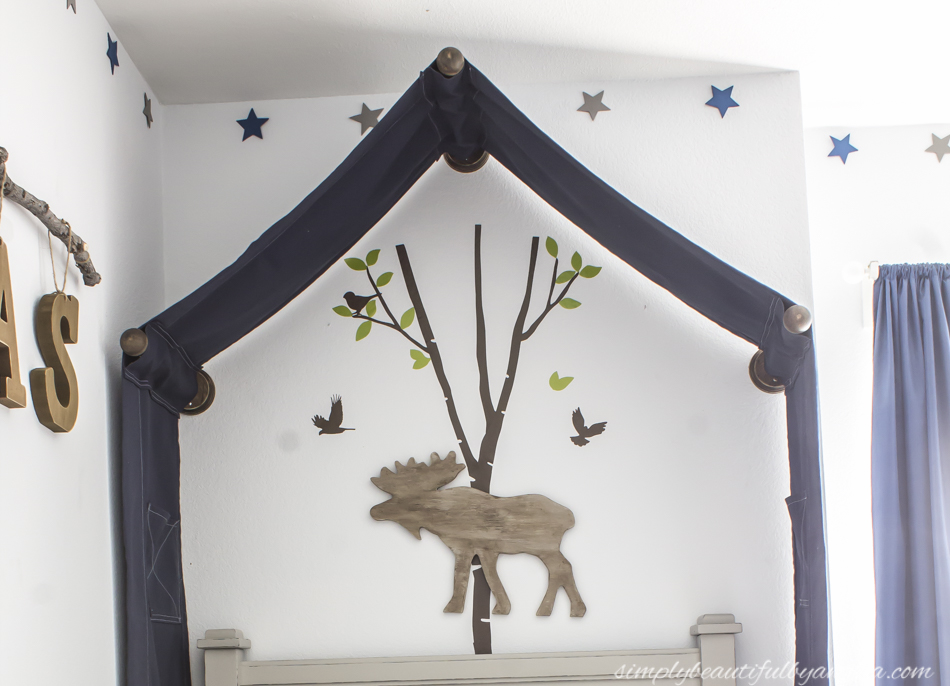
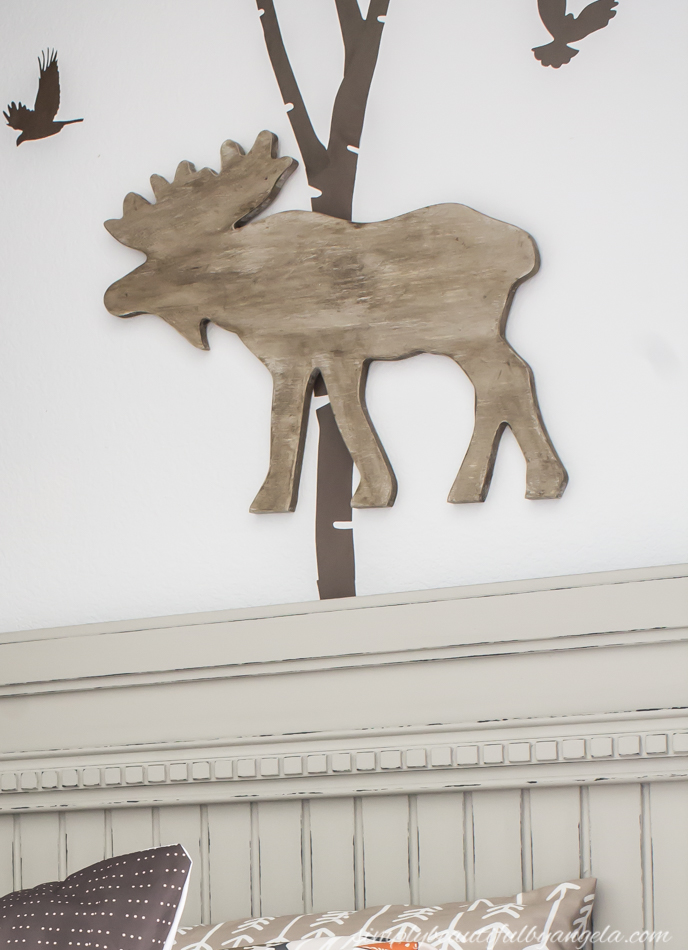
Lucas even chipped in and helped me create this moose handprint!  Yes I know, his hands are HUGE for a two year old haha.

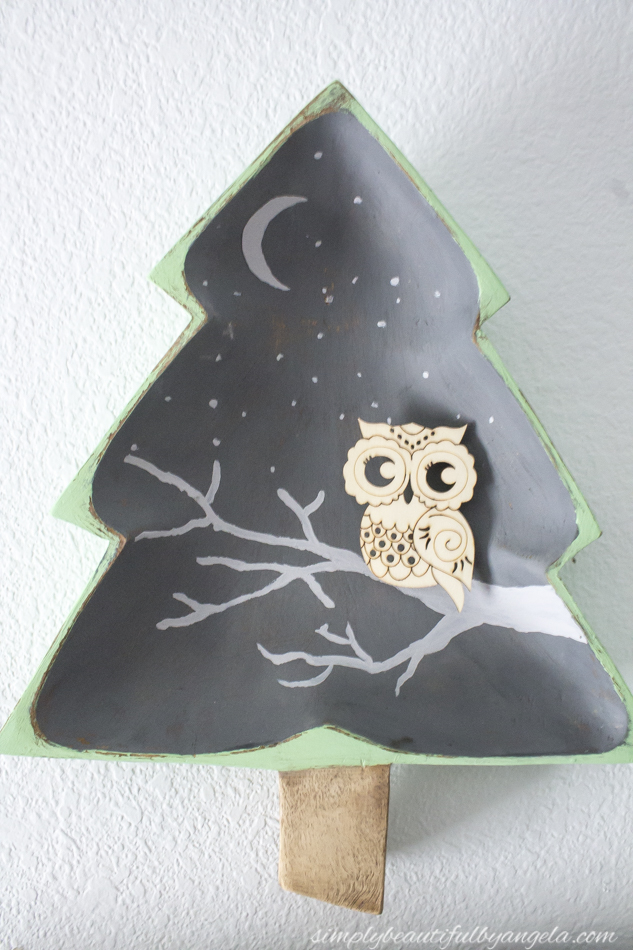
A couple of weeks ago I shared how I created this piece out of a thrift store Christmas tree dish (tutorial here).

I created this piece with a few paper mache letters and a pre-made wood planked plaque.
I also painted bear tracks on a small wood slice.

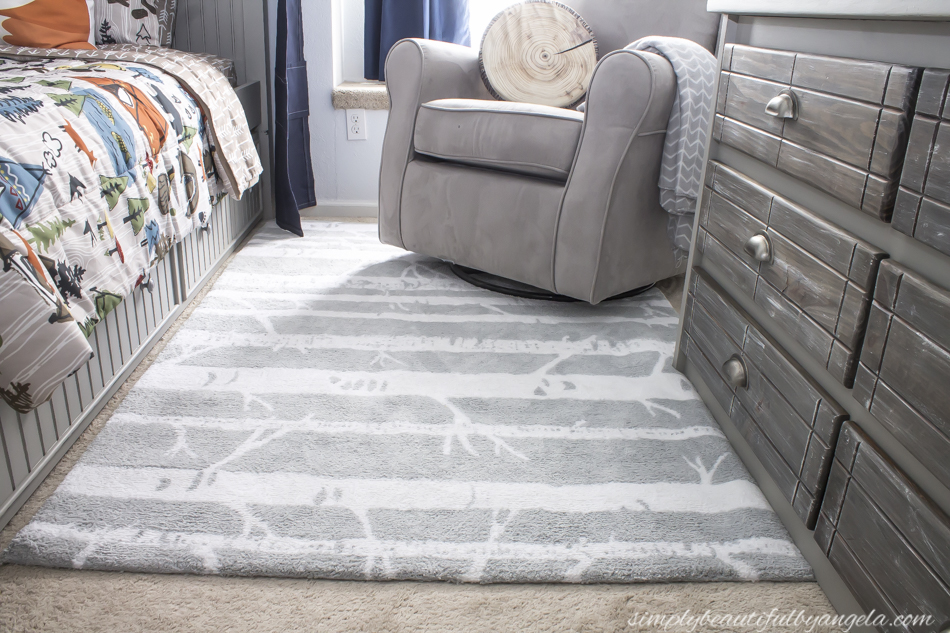
I purchased this pretty birch tree rug to bring in more of that woody feel, and although I had to play around with placement quite a bit due to it’s large size I finally found that it looks best tucked at the back of the room.

It’s soooo soft and I plan to Scotchguard it so that we can at least make an attempt at keeping it clean!
The tree stump pillow (I got the color icicle) that I ordered found its home sitting on the reading chair.
 It’s actually so much nicer than I thought it would be when I ordered it!
I purchased some birch tree decals and placed one behind his door where his jacket hook is and another on the bare space behind his bed.
The moose was originally red and black buffalo plaid when I first purchased it,but I made it look like wood using the same method that I did on my parents’ coffee table.
Overall I am totally smitten with how his room came together.  It’s crazy to think that in just a few short weeks I will be taking it all down and packing it up.  But his new room is slightly larger so I’m sure it will all look even better in there once we are done with it!
Source List and Budget Breakdown: (Affiliate links may be provided for convenience.  For more info, see my full disclosure here) 
 
Trundle Bed: $50 (tutorial here)
Bedding: $35
Fox Pillow: $10
Tent Canopy: $26 (tutorial soon to come!)
Toy Box: $80
Skunk Pillow: $16 (H&M)
Animals of the Woodlands Art: $17.50 (purchased while 50% off)
Glider Chair: $0 (already owned)
Tree Stump Pillow: $10
Dresser: $35 (tutorial here)
Lantern Lamp : $30 
Woodland Animal Fabric: $24 (2 yards to re-cover the lampshade and seat cushion)
Wooland Animal Prints: $13
Triangle Shelves: $27 (purchased while 50% off)
Wooden Animals: $34 for all 3 with shipping
Tree Art: $1 (tutorial here)
Planked Bear: $12.50 (purchased while 50% off)
Bear Track Log: $6 (used 40% coupon)
Little Explorer Sign: $7 (purchased while 50% off)
Woodslice Moose Handprint: $6
WILD Sign: $10 using supplies from Hobby Lobby
 
Birch Pattern Rug: $60
Birch Wall Decals: $20
Wood Moose: $7 (purchased while 50% off)
Be sure to swing by here to check out all of the other rooms in the challenge!  I can’t wait to get see them all myself.  Have a happy rest of the week my friends!
Linking up to these awesome parties!

· Labels: Uncategorized

Comments

  1. Cristina Garay says

    May 10, 2018 at 8:33 pm

    Absolutely beautiful!! I love the theme, the colors you used, the decals and that canopy. Every single detail in this room is perfection. Well done!

    • Angela says

      May 11, 2018 at 1:18 pm

      Thank you so much Cristina!! I almost didn't add the decals since I wasnt sure how well they would transfer to the new house but I decided to use half of the package and keep the other half just in case, and I'm so glad that I did because they really do add to the room nicely!

  2. Mother of 3 says

    May 10, 2018 at 8:49 pm

    Wow! This is such a beautiful room. I love the color scheme and… Oh, just everything.

    • Angela says

      May 11, 2018 at 1:19 pm

      Aww thank you!! I feel like it's a good mix of neutrals amd color and am so happy with how it turned out! 🙂

  3. Anonymous says

    May 10, 2018 at 9:59 pm

    Angela, this room is very lovely and has an overall happy vibe. 🙂 I love makeovers like this when one can tell how much time and love went into a room for ones child. If my son was younger, I would totally copy your room ideas. lol I bet your little guy is so thrilled for his new room! Even though you are moving soon, I look forward to seeing this room again in the new place.

    Because of you, I may even try chalk paint. How you transformed that moose (and your parents coffee table) is amazing! I may try chalk paint for a bathroom vanity…hmmm.

    High fives and a job well done! Have a wonderful Mother's Day weekend. 😀

    Julie

    • Angela says

      May 11, 2018 at 1:21 pm

      Thank you so much for the kind words Julie! I think the chalk paint the method on a bathroom vanity would look amazing, that's a wonderful idea and you should let me know how it turns out!

  4. Anonymous says

    May 10, 2018 at 10:03 pm

    Oh, and I love the stars! I am currently redoing my son's room and repainted the stars that have been in there since he was four. lol My son insisted on keeping the stars in his room as a border (similar to what you did). 🙂

    Julie

    • Angela says

      May 11, 2018 at 1:24 pm

      That's awesome haha. Yes Lucas loves his stars too, they've been around since his nursery so I figured that stars still went with the theme so I kept them and just switched out white for blue instead. They're actually cut out of craft foam sheets and taped up, so they'll be coming with us to the new house! 🙂

  5. Jenn says

    May 11, 2018 at 8:20 pm

    This is precious!! Love the colors too.

  6. Lindsey at HilltownHouse says

    May 12, 2018 at 2:48 am

    What an absolutely adorable Big Boy bedroom! I have to say my favorite part is that bed canopy too, followed very closely by that Moose Handprint. I hope your little man has many happy years in this fantastic room!

  7. Noting Grace says

    May 12, 2018 at 5:05 pm

    what an adorable room! I love the letters hanging from the branch! So cute! Congrats on an amazing reveal!

  8. Jodie | Sypsie Designs says

    May 14, 2018 at 1:31 pm

    Such a cute room! All of the little details and projects go so perfectly together! Amazing job!

  9. Melanie says

    May 16, 2018 at 6:25 pm

    I think I just pinned half your post. This is so cute I wish I had a little boy so I could do this to his room! I just love all the little details! So cute and so much thoughtful planning! =)

    Melanie || Toots + Dill Blog

Hello, I am so happy that you're here! My name is Angela and I love to create simple beauty in our home on a budget. Here you will find DIY decor and home projects, furniture flips and other home inspiration!

Never Miss a Post!


Diagonally Fluted Nightstands

Diagonally Fluted Nightstands

Hello! I’m really enjoying the extra daylight and the fact that it’s been paired with warm sunny weather this week has been icing on the cake. I’m trying to soak it all in before the next snowstorm! Today’s flip was from about a year ago and is still one of my favorite sets of nightstands…

Read More »

How to Update a Dresser with a Missing Drawer

How to Update a Dresser with a Missing Drawer

Hey friends, happy March! Even though I know we still have quite a bit of cold weather coming our way here in Colorado, it’s exciting to see these warmer days sprinkled in here and there. This week I am sharing how I saved an old IKEA dresser from ending up at the landfill! Supplies Used:(Affiliate…

Read More »

Vintage Ice Box Style Nightstands Makeover

Vintage Ice Box Style Nightstands Makeover

Hello friends! We just got back from our annual trip to the Great Wolf Lodge and it was fun times as always! Today I am sharing how I updated these fun vintage ice box style nightstands that I found on Marketplace! Supplies Used:(Affiliate links may be provided for convenience.  For more info, see my full disclosure here.) …

Read More »

Never Miss a Post!


GOOGLE 2

GOOGLE 3

GOOGLE 4

GOOGLE 5

GOOGLE 6

GOOGLE 7

Theme by 17th Avenue · Powered by WordPress & Genesis