Hello everyone and welcome to this month’s Thrift Store Challenge! On the 4th Thursday of each month I team up with my amazing blogging friends to share a thrifted item that we’ve upcycled.
This challenge kind of snuck up on me this month since we’ve been so busy preparing for our big move, but I still came through and can’t wait to show you what I created!

The Rules:
- Upcycle an item(s) from a thrift store, resale store, or garage sale into a new piece of decor.
- There’s no monthly theme.
- There’s no budget to stick to.
Meet the Hosts
Victoria | Dazzle While Frazzled – Yami | The Latina Next Door
Kathleen | Our Hopeful Home – Jennifer | Cookies Coffee and Crafts
Deborah | Salvage Sister & Mister – Jeanie | Create and Babble
Gail | Purple Hues and Me – Michelle | Our Crafty Mom
Denise | My Thrifty House – Sue | A Purdy Little House
Marie | The Inspiration Vault – Michelle | Michelle James Design
Debra | Shoppe No. 5
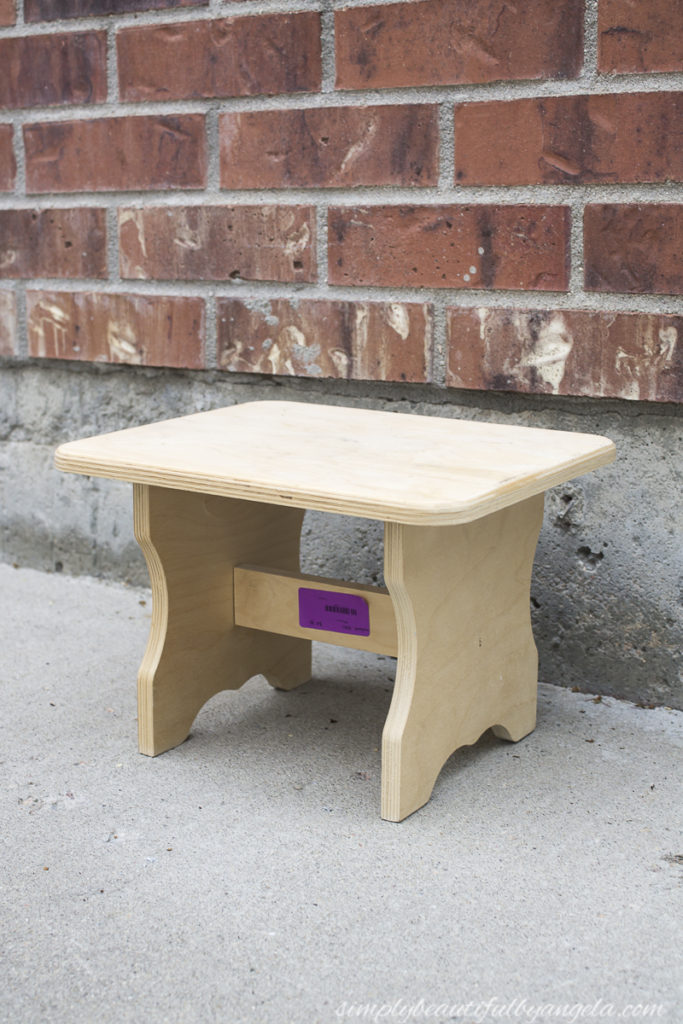
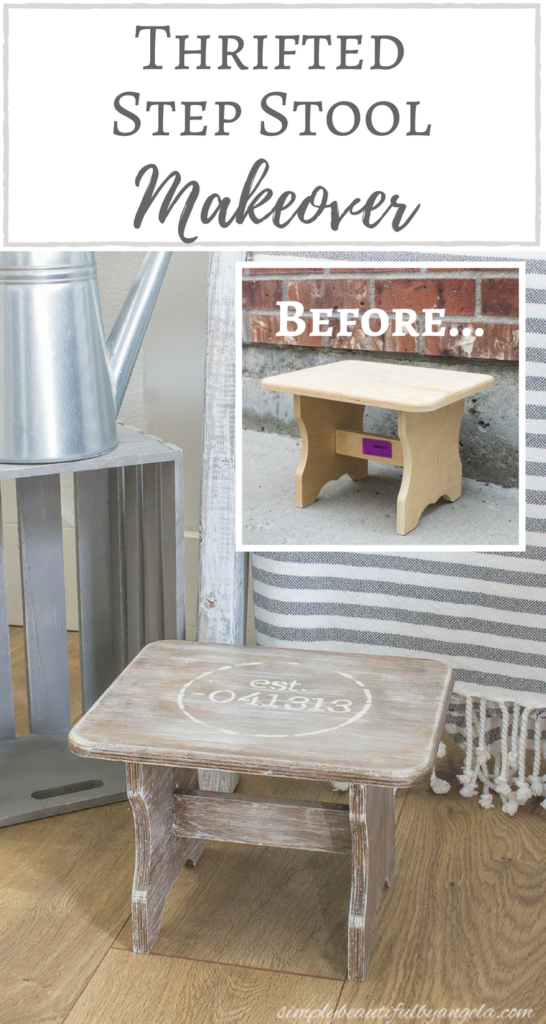
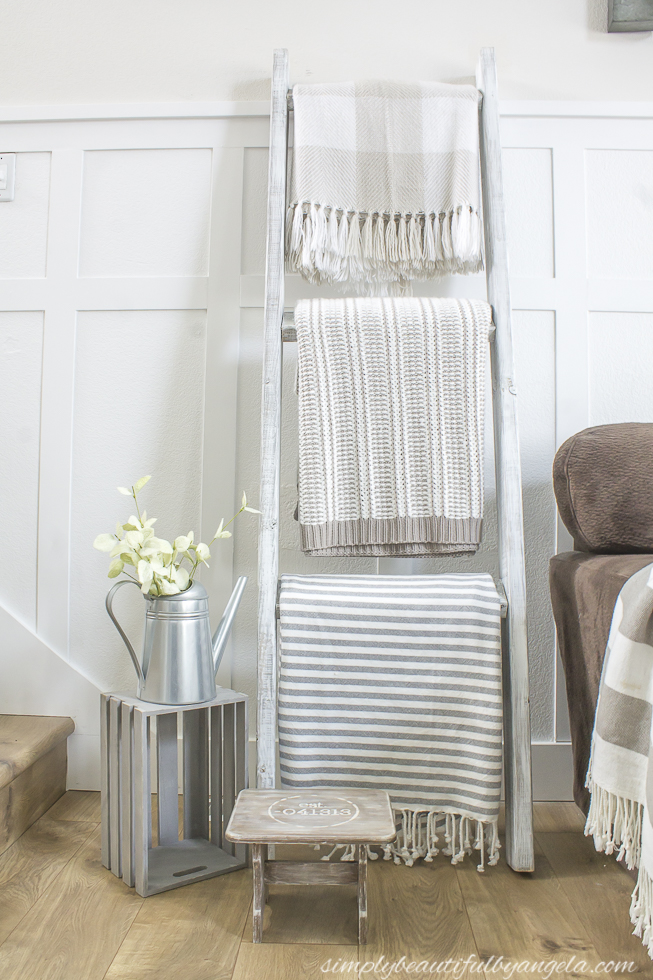
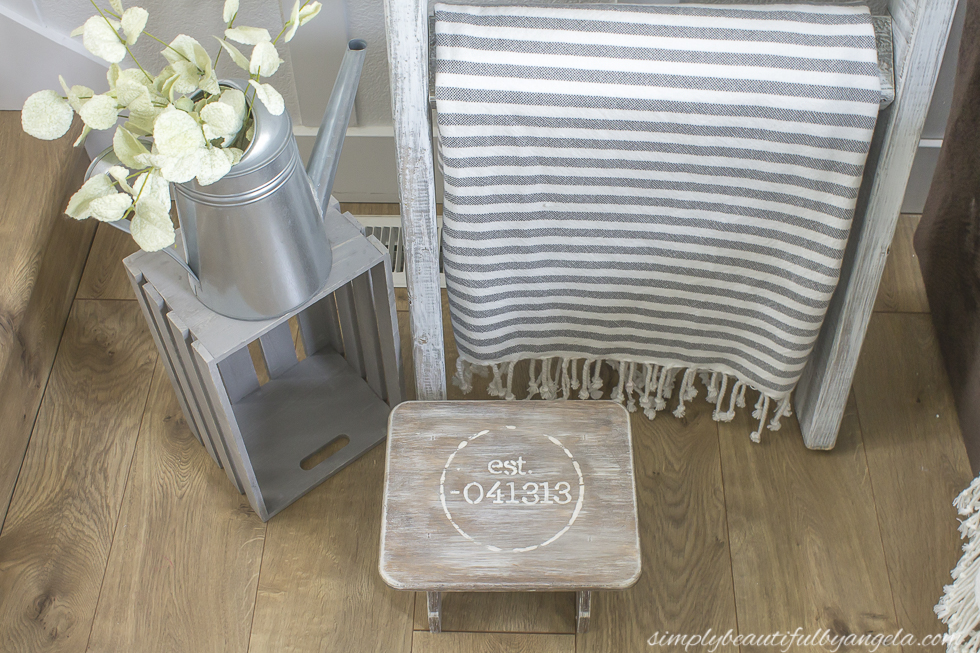
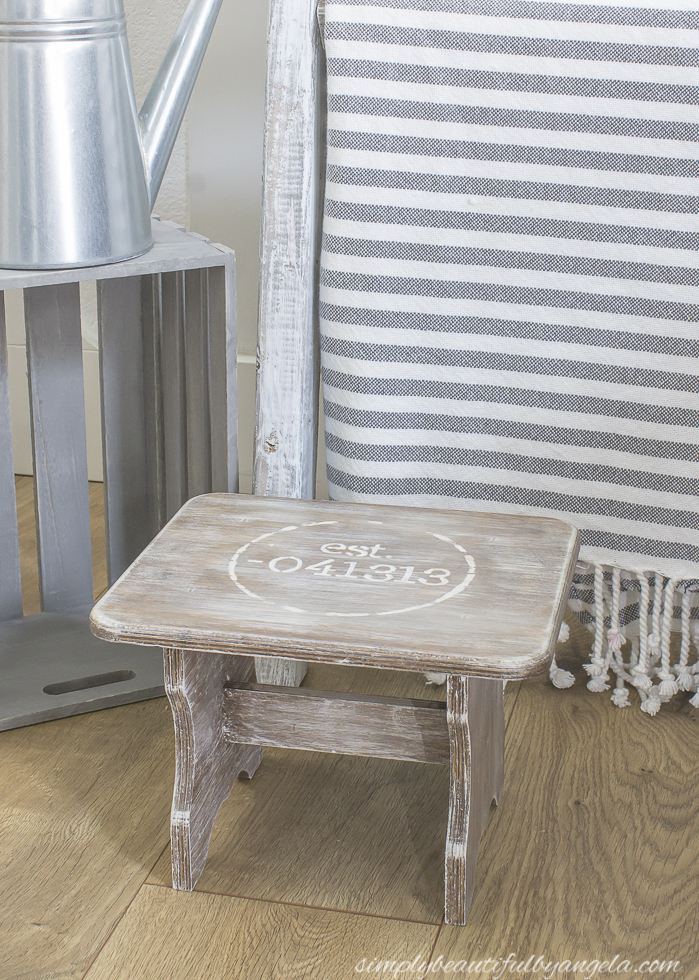
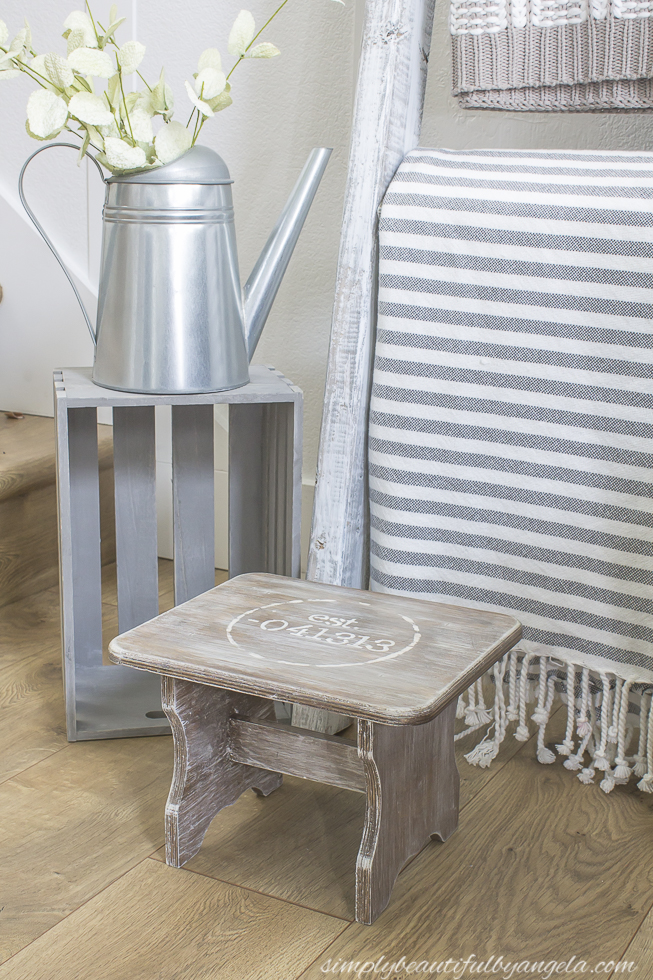
I’m constantly finding myself stealing the stool that we keep in the boys’ bathroom in order to reach the top shelves in our closet so the second that I spotted it I knew that it would be perfect to keep inside our closet.
It just needed to be dressed up a little bit!
Supplies Used: (Affiliate links may be provided for convenience. For more info, see my full disclosure here.)
- Joint Compound
- Medium Grit Sandpaper
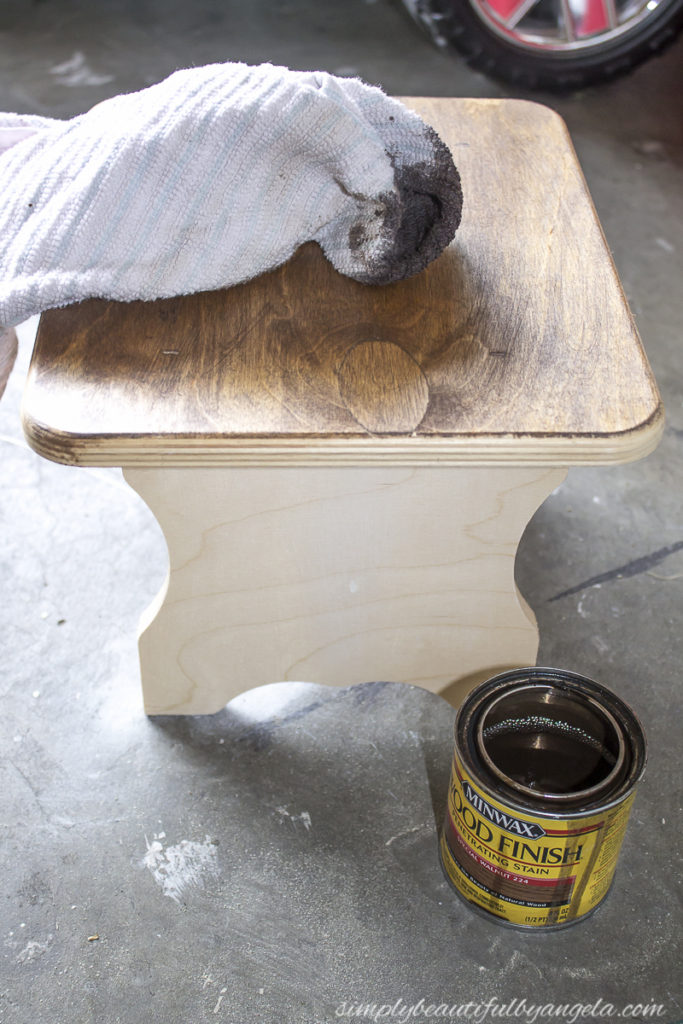
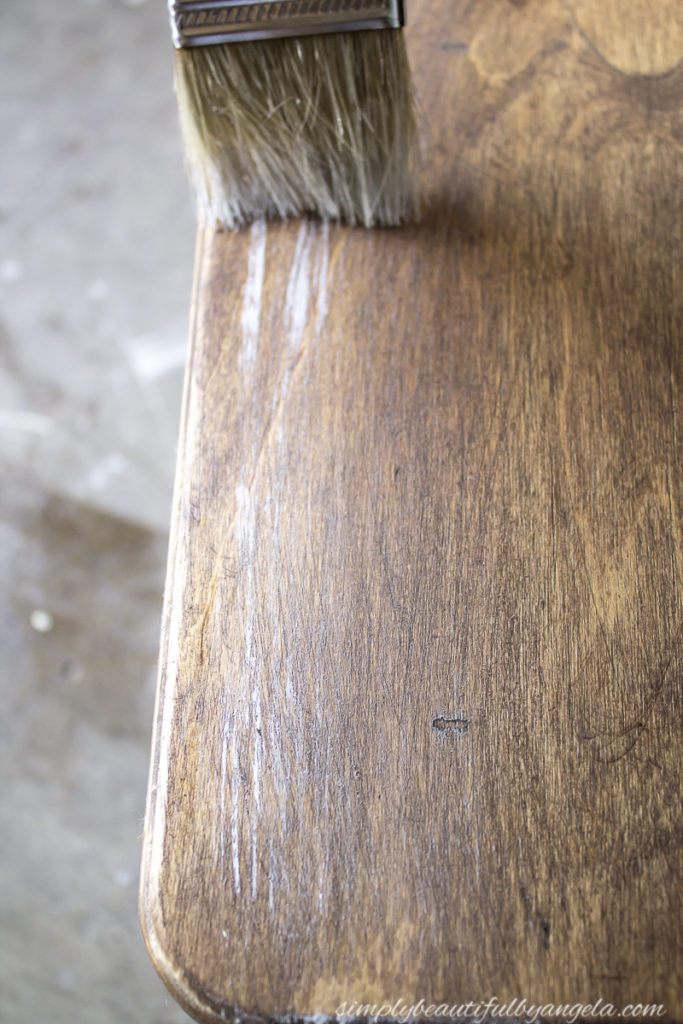
- Minwax Special Walnut
- Rag
- Chip Brush
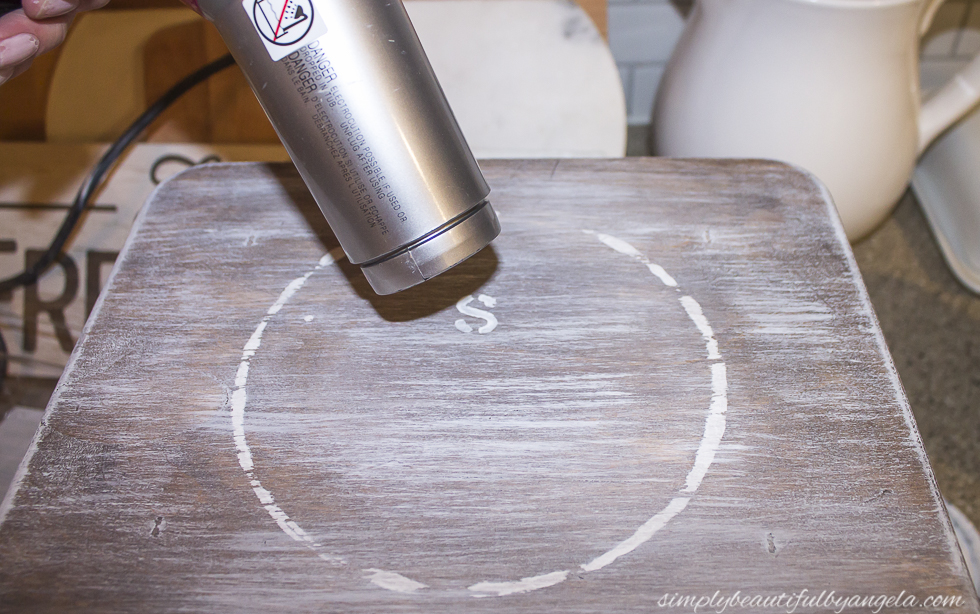
- White Paint
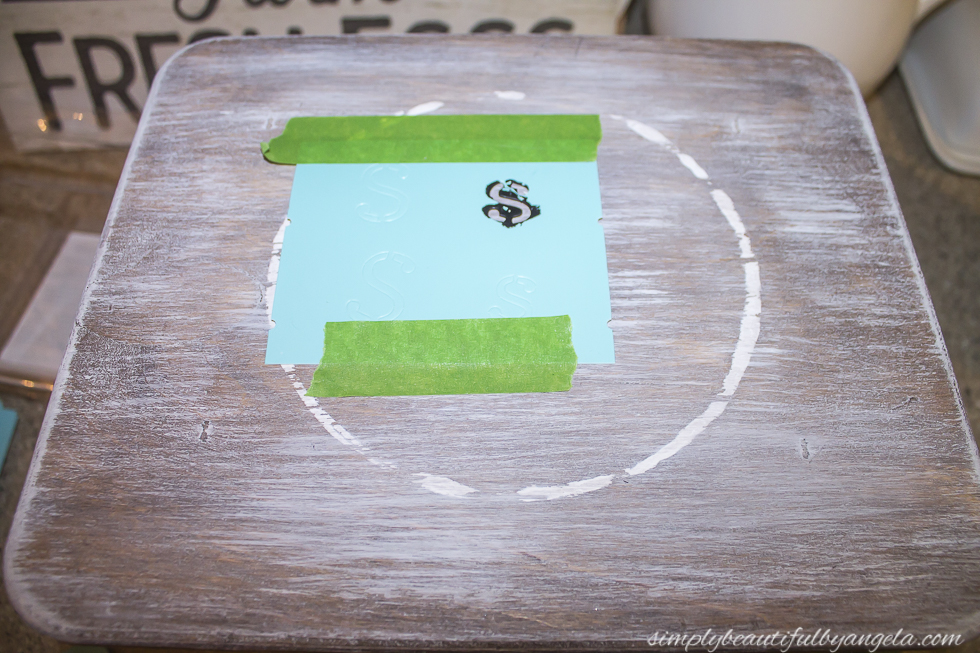
- Stencils
- Small Brush
- Frogtape
- Minwax Polycrylic
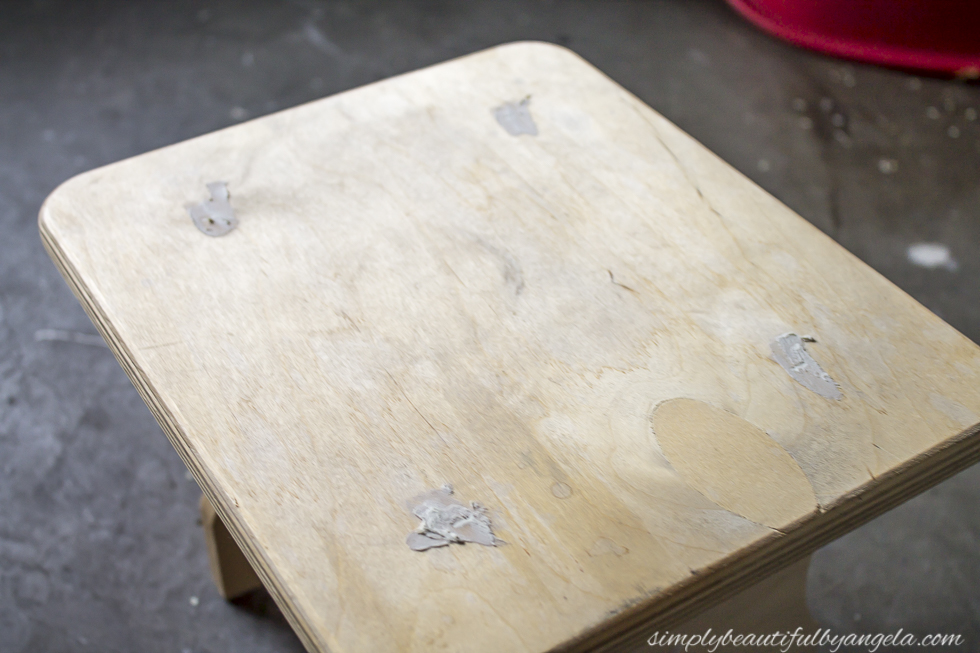
The first thing that I did was use a little bit of joint compound to fill the small staple holes that it had on the top and sides. Of course wood filler would be ideal, but I couldn’t find it in our tornado of a garage so this worked just as well!
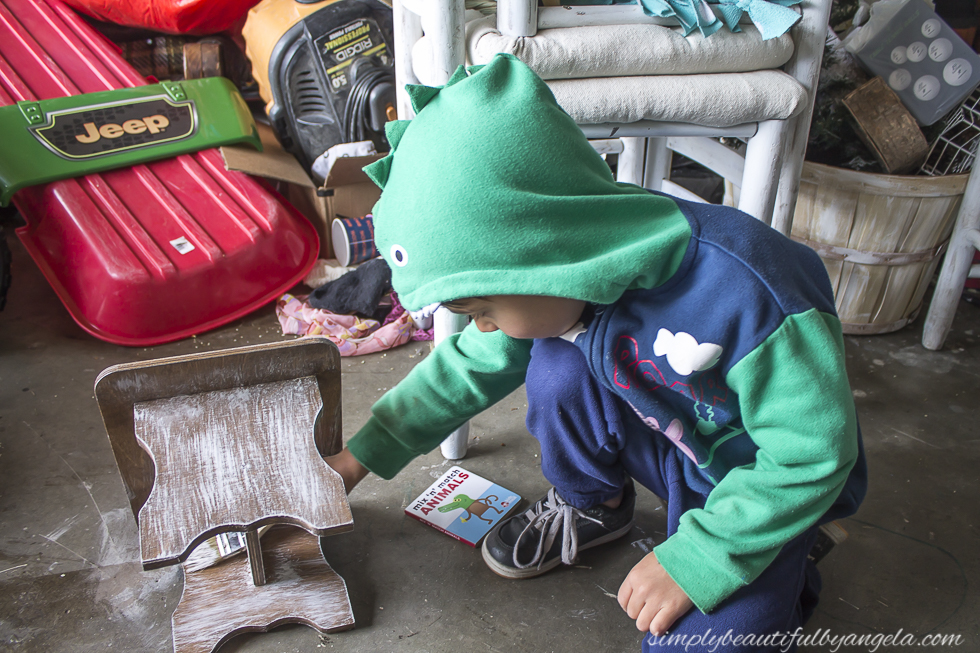
Dry brushing is so easy that even my 4 year old likes to jump in and help out! And what a fine little dry brusher he is!
I sanded the letters down just slightly and then gave it two coats of polycrylic to protect it.
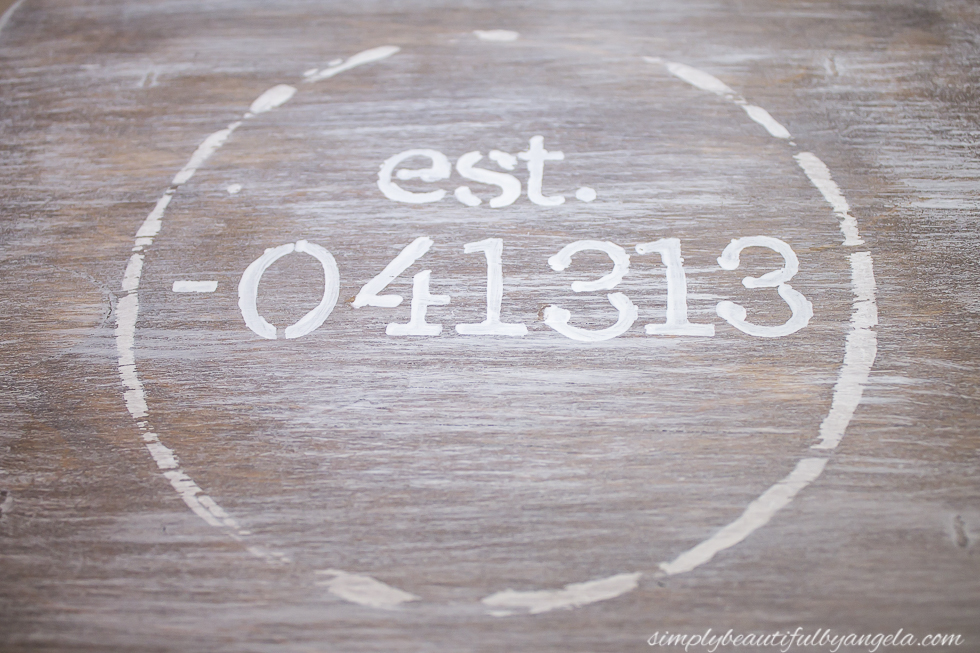
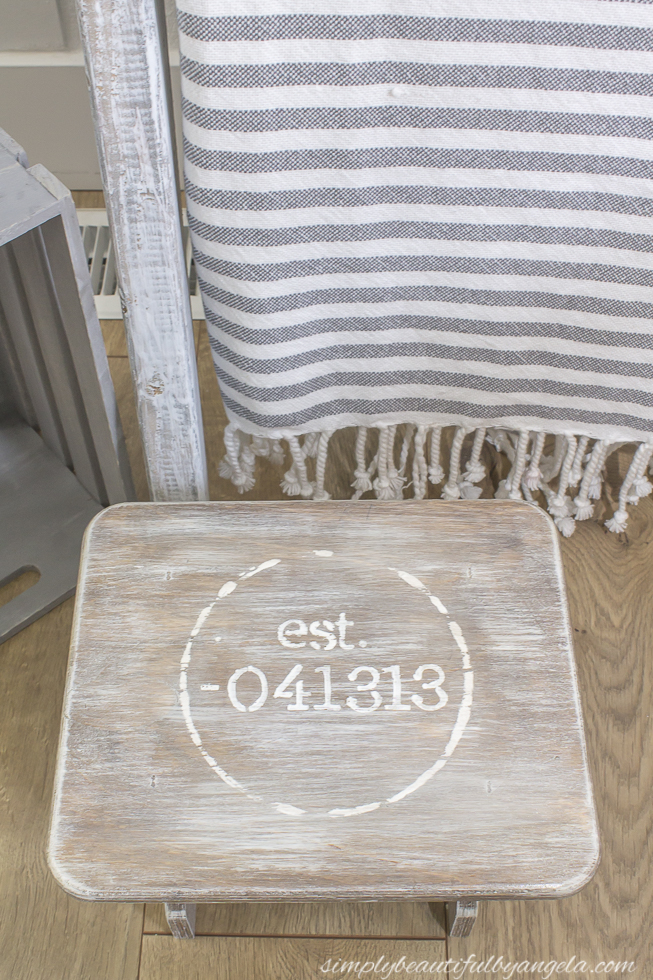
This is how it turned out!
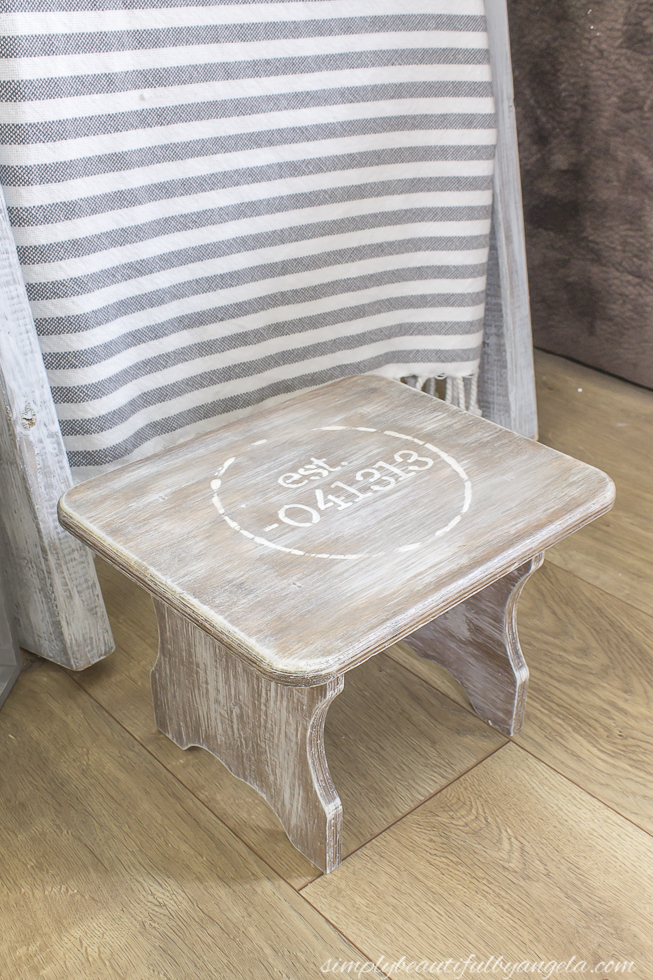
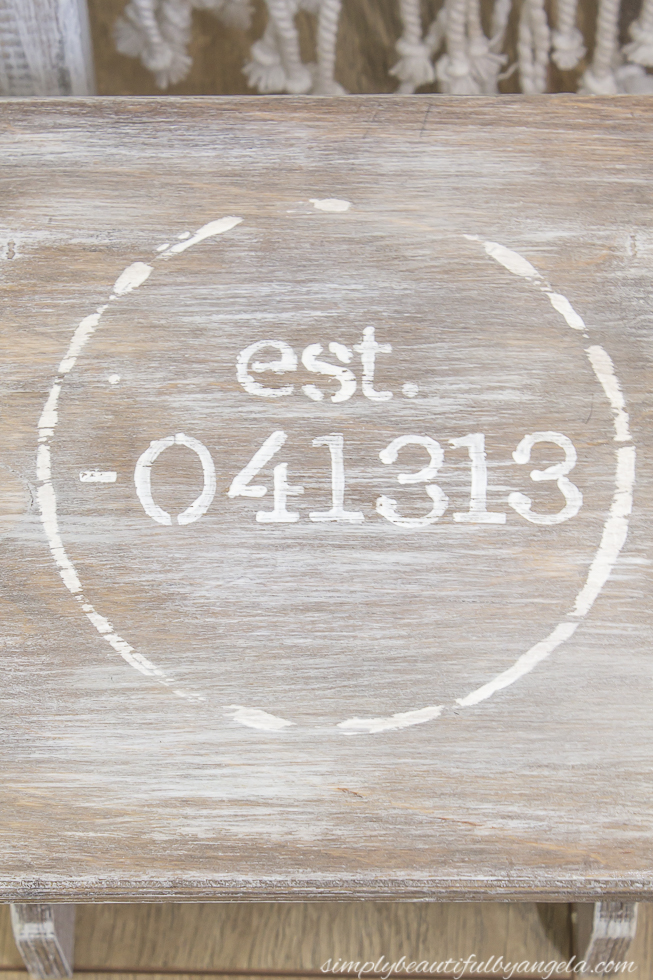
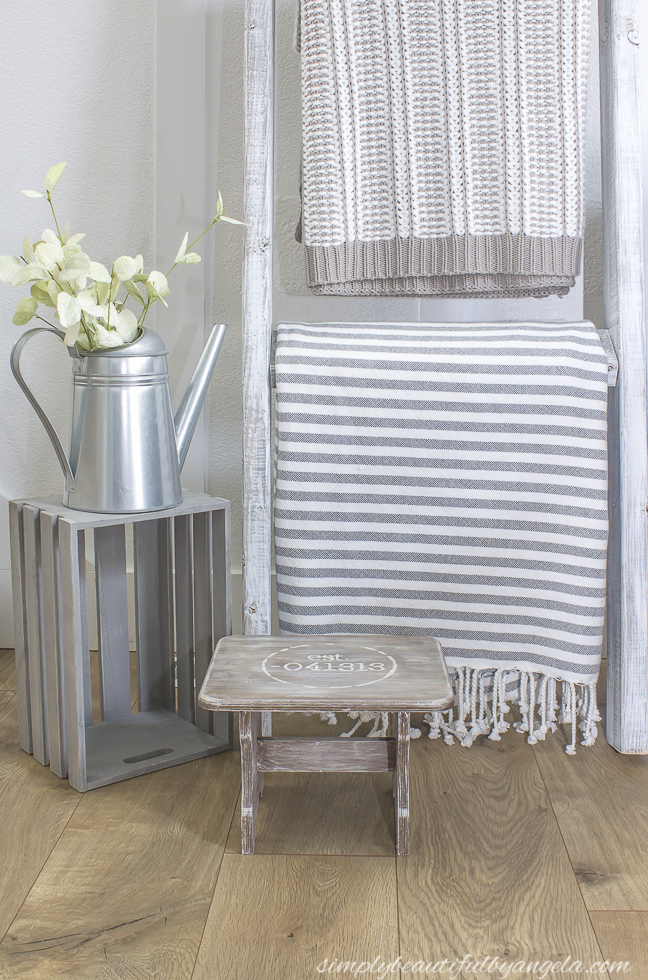
It’s looks like it’s been around for awhile and it’s hard to believe that it was just a plain pine colored stool before.

Since I had all of my supplies on hand the only cost for this project was the price of the stool which I scored for just 2 bucks!
And now for more thrifty goodness!
Check out what my fellow upcyclers created below!
Linking up to these awesome parties!

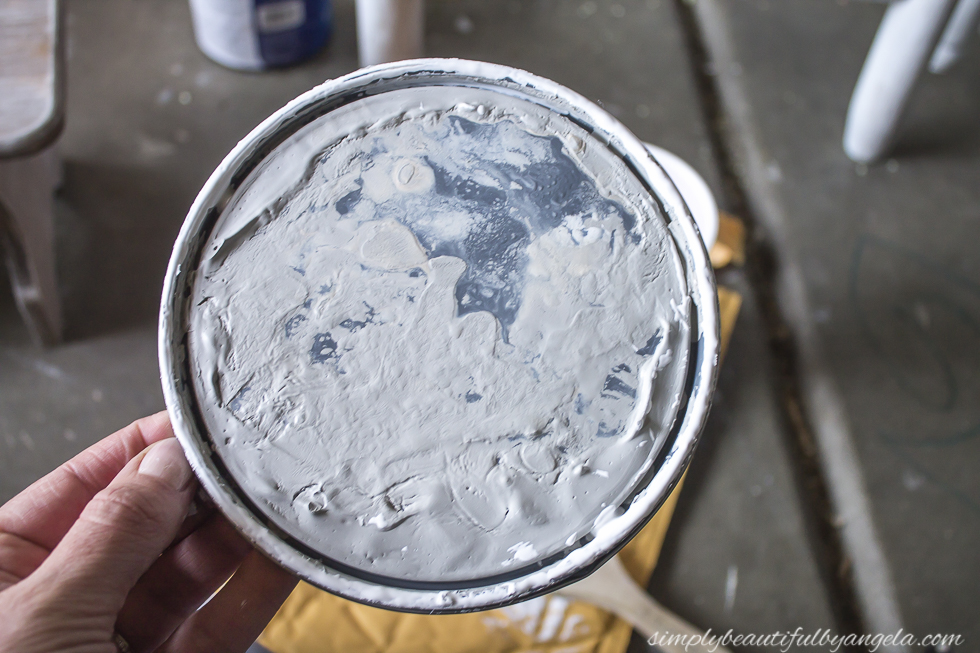
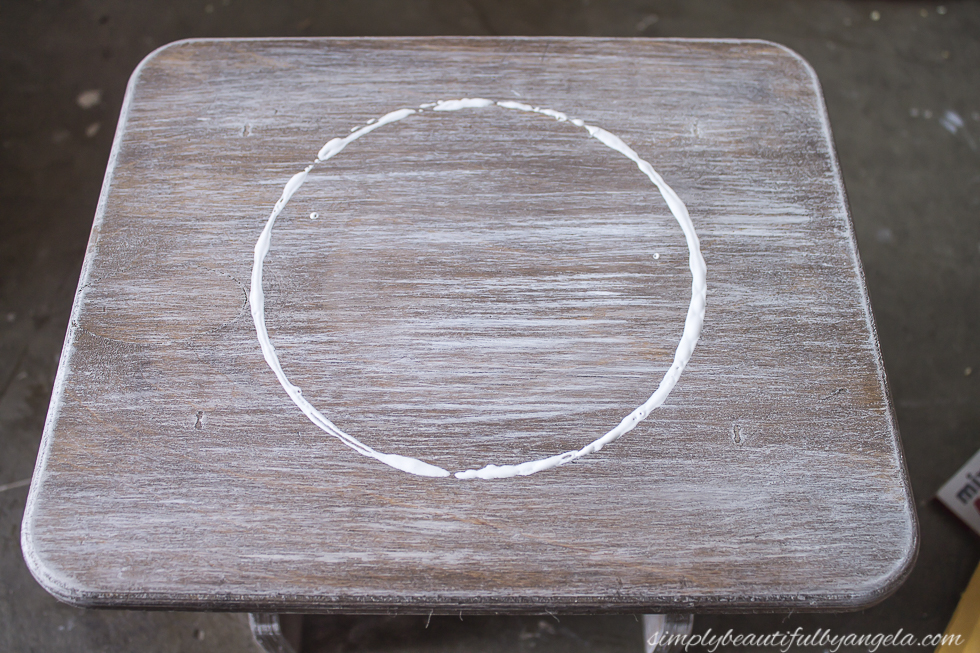
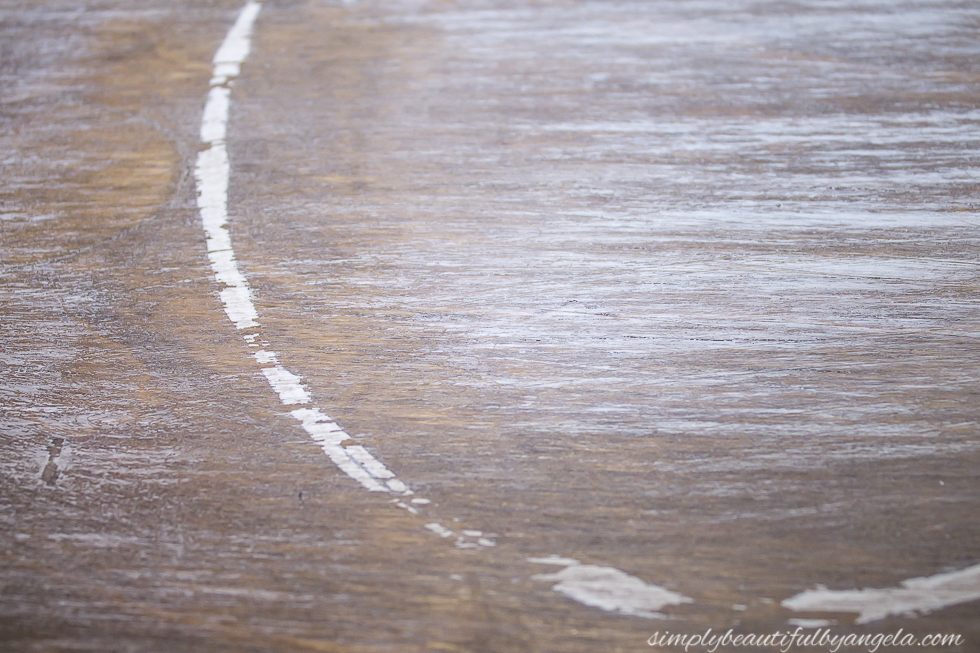
OKAY, That lid trick was ………………………….BRILLIANT!!!!!!! Nice job!
Now that is a great idea to use the lid for the circle. What a great makeover. The stool is so cute.
It looks great! Thanks for sharing at Thursday Favorite Things!
This is super cute. I would have snatched that up at the Goodwill too. Nice find. I love that your little boy like to dry brush. He is probably better at it than I am. LOL! It turned out really nice!
Back again to let you know I am featuring your adorable stool at TFT today! I hope you will join us again this week by linking up another great post! Thanks for linking up!
https://followtheyellowbrickhome.com/welcoming-summer-at-thursday-favorite-things/
Ha! That paint lid trick is so simple is it genius! Love how the step stool turned out and you make dry brushing look easy. Yes, I know it is, but i have a tendency to mess up stuff like that – unique talent, I guess. lol
Julie
Hey, Wow all the posts are very informative for the people who visit this site. Good work! We also have a Website. Please feel free to visit our site. Thank you for sharing.
Kitchen Tap
Keep Posting:)
Love this post! Your trick with the paint can lid is genius! Thanks for sharing!