Hello friends and sorry about the radio silence last week! After our most recent house misfortunes that I discussed two weeks ago, I decided that I needed a little break.
I think it’s really important to recognize that and it’s something that I honestly really struggle with sometimes. So even though I often find it hard to admit it, I am so glad that I did because I feel a little more recharged now.
Aaaand I’m super excited to be back because I have a fun reveal to share today!
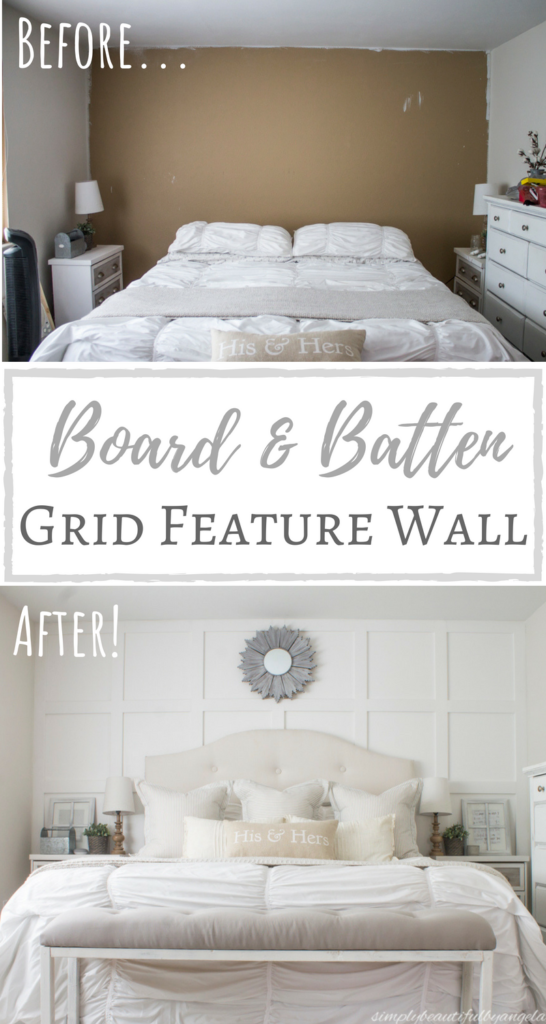
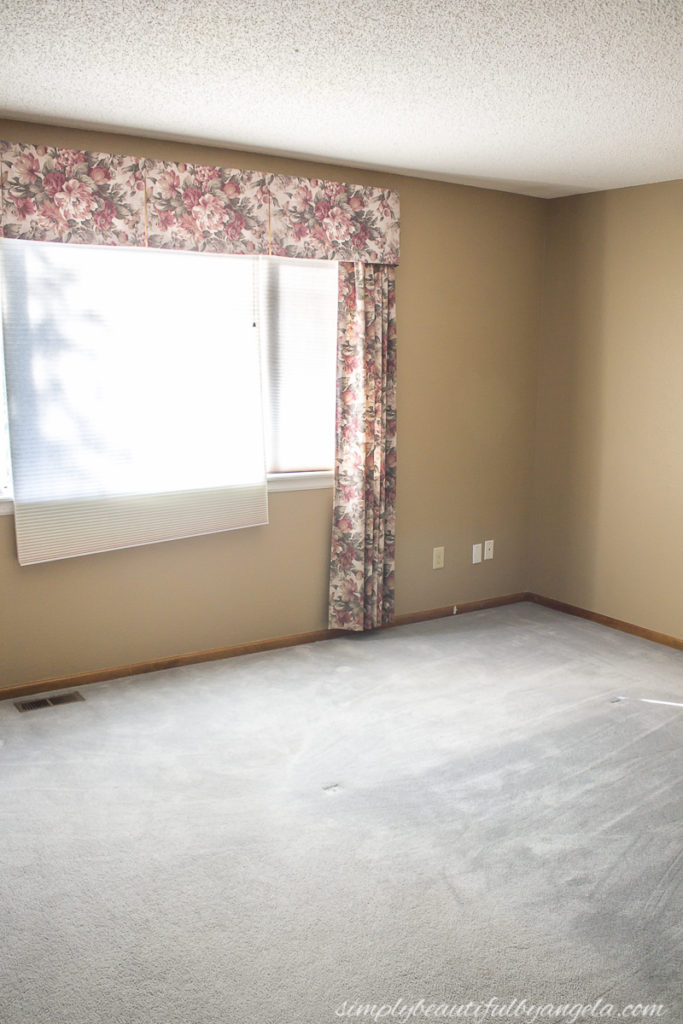
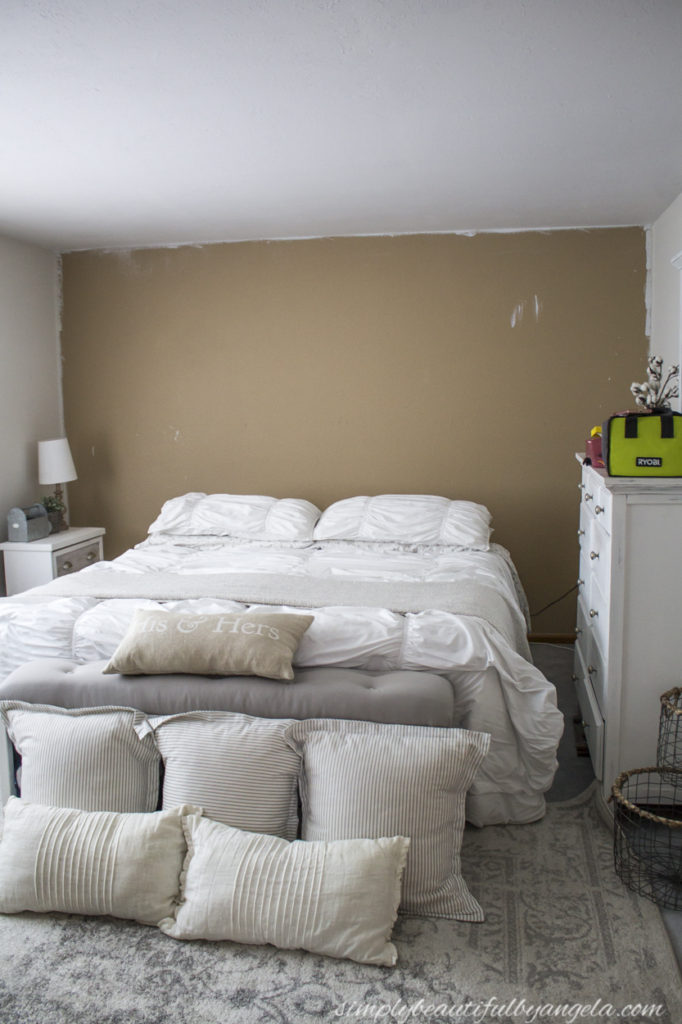
When we first purchased our new home, the master bedroom looked pretty dated and had a heavy brown color on the walls. As a result it felt like all all of the beautiful natural light that shines in from the open space behind us just got sucked right up.
We removed the popcorn ceiling before we moved in which helped a little, and then I began the tiresome search for the perfect light greige paint. After much debate I finally chose Sherwin Williams Basalt Powder and I was so excited to see how much it began lightening up the room once I started painting it on.
I stopped at the back wall though…

…but for good reason! I wanted to recreate the board and batten grid feature wall that I did in our last house since I loved it so much. I had a few improvements in mind for this time around though.
Supplies Used: (Affiliate links may be provided for convenience. For more info, see my full disclosure here.)
- 4′ x 8′ Hardboard Panels
- 1×4 MDF boards
- Stud Finder
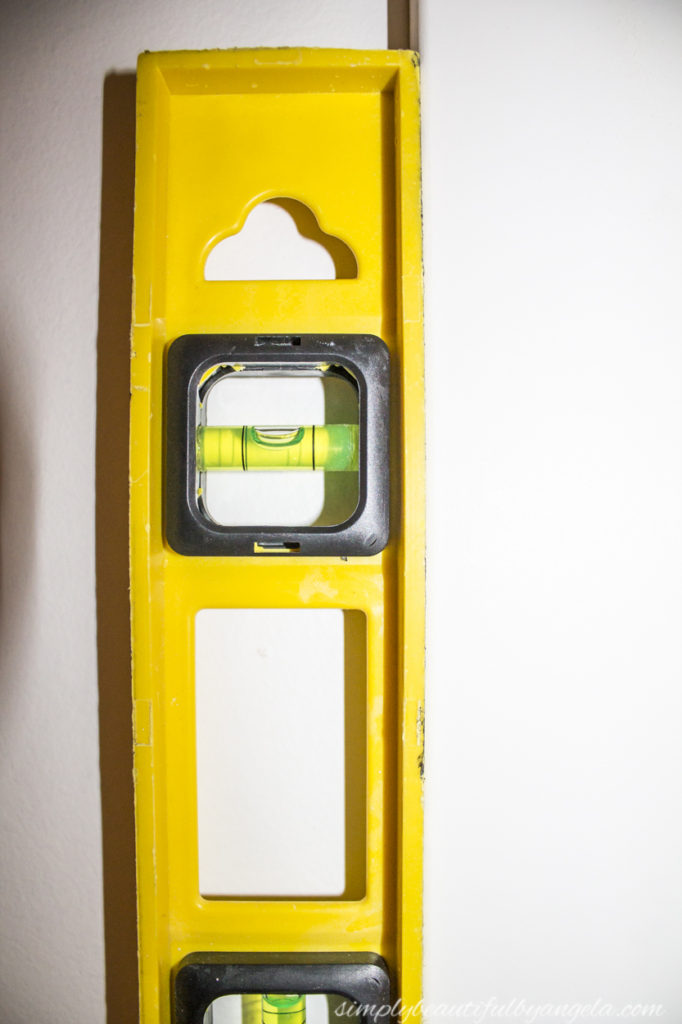
- Level
- Ryobi Cordless Brad Nailer
- Measuring Tape
- Miter Saw
- Speed Square
- Spackle
- Medium-Grit Sandpaper
- White Caulk
The first thing that I did differently was remove the existing baseboard. Instead of running my bottom row along the top of the baseboard like I did before, I decided that I wanted the bottom row to actually be the baseboard.
The hubby was quick to mention that nobody will ever notice this since most of it will be behind the bed and nightstands. But since I would know, it had to be done!
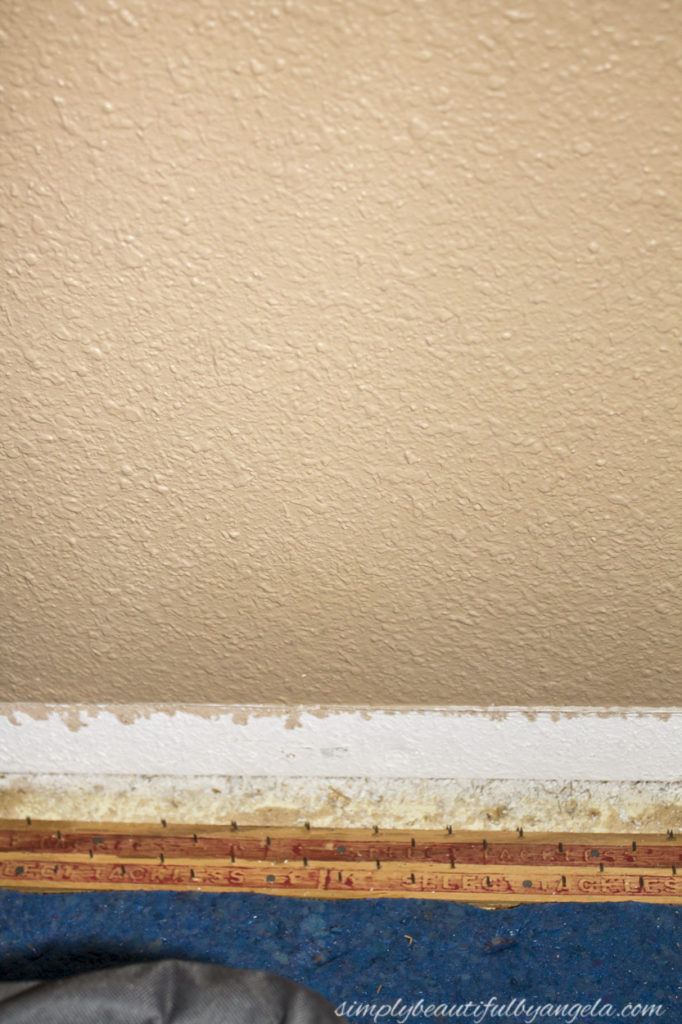
I ran a utility knife along the top to cut the caulking from the wall and then used a crow bar to pry the old baseboard off. I threw that baby in the trash since the baseboards will be replaced when we do the new flooring.
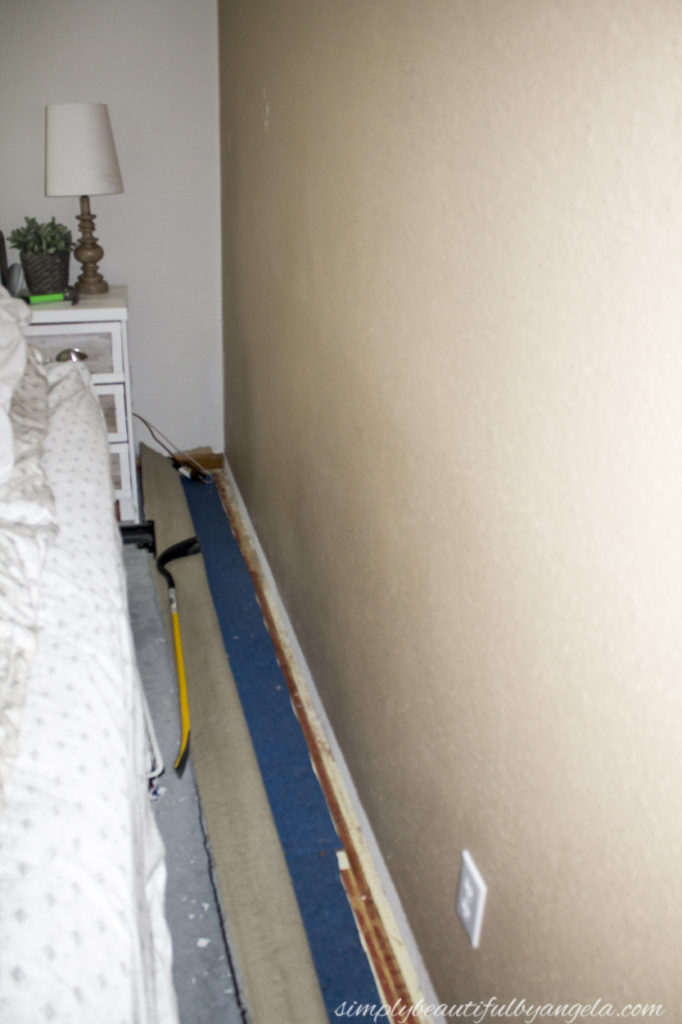
If you are going to be keeping your existing flooring you can just run your bottom row right where the old baseboard is. However since we plan on removing it later on, I pulled it back and measured approximately where the new floor will lay so that I could get the battens closer to where it will be.
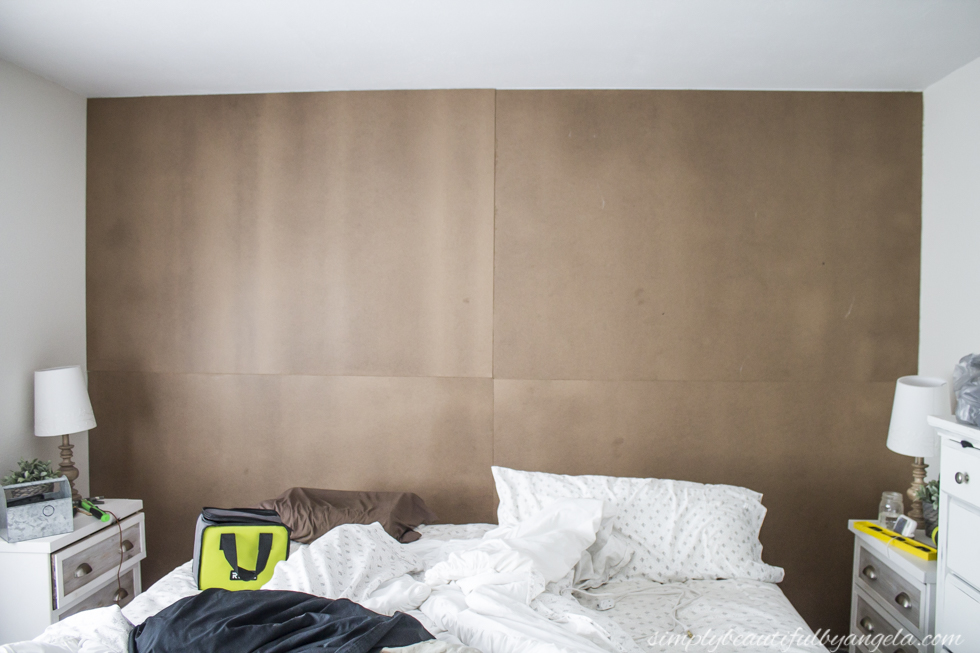
The next thing that I did different was add smooth hardboard to the wall instead of just painting it. I always thought that it would be really expensive or difficult so I always avoided it in my previous board and batten projects. Since we have a pretty heavy texture on the walls I decided to cover it and I was pleasantly surprised to find out that it was pretty cheap and simple to add the hardboard.
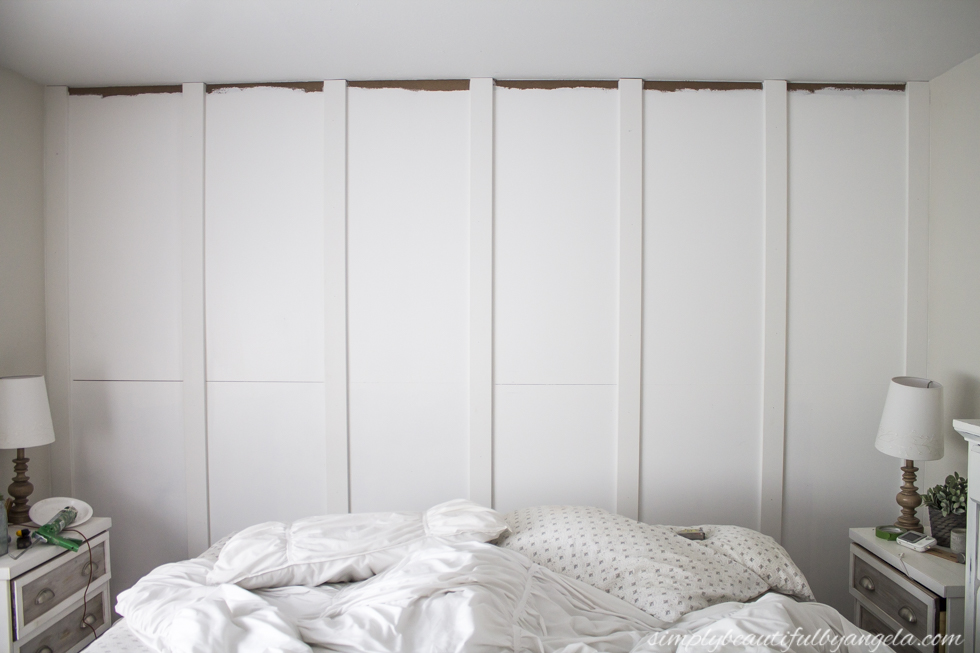
Sheets of 4′ x 8′ hardboard run around $8 bucks each. The wall height is 8′ so two stacked on top of one another made the perfect width. Our wall is 12′ long so I had them cut down to 6′. Doing it this way made all of the seams line up in the middle which were later hidden by the battens.
We began by using a stud finder to mark the studs.
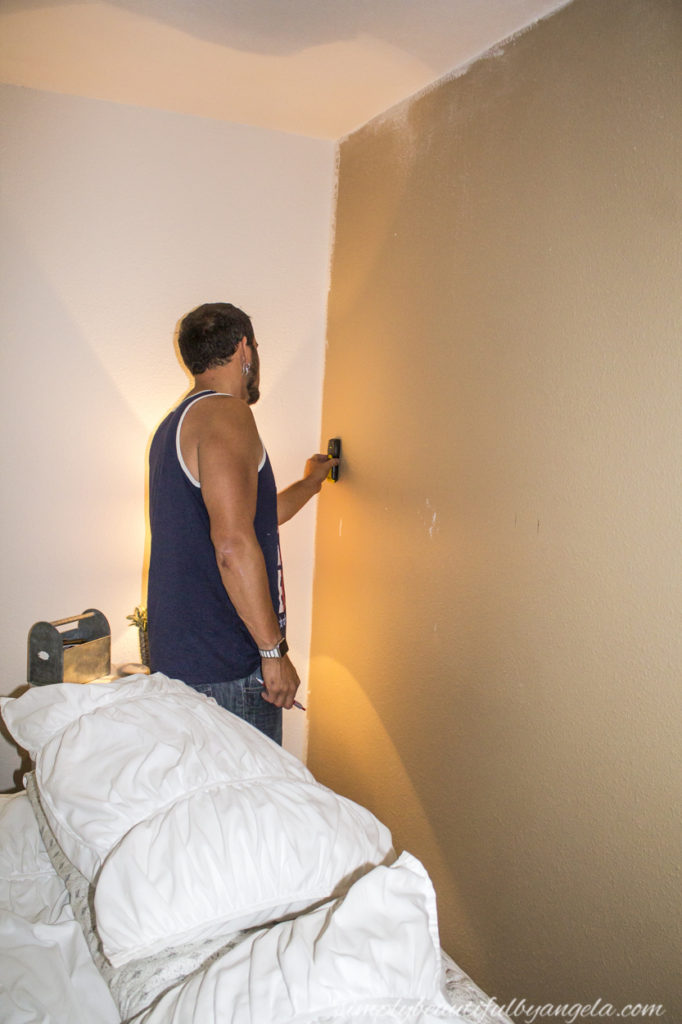
Then we busted out my favorite new tool from it’s box. I’ve dreamed of having a nail gun for a long time but always thought that you needed to have an air compressor. When I spotted this battery operated Ryobi Cordless Brad Nailer I was like a kid on Christmas and practically ran it up to the register!
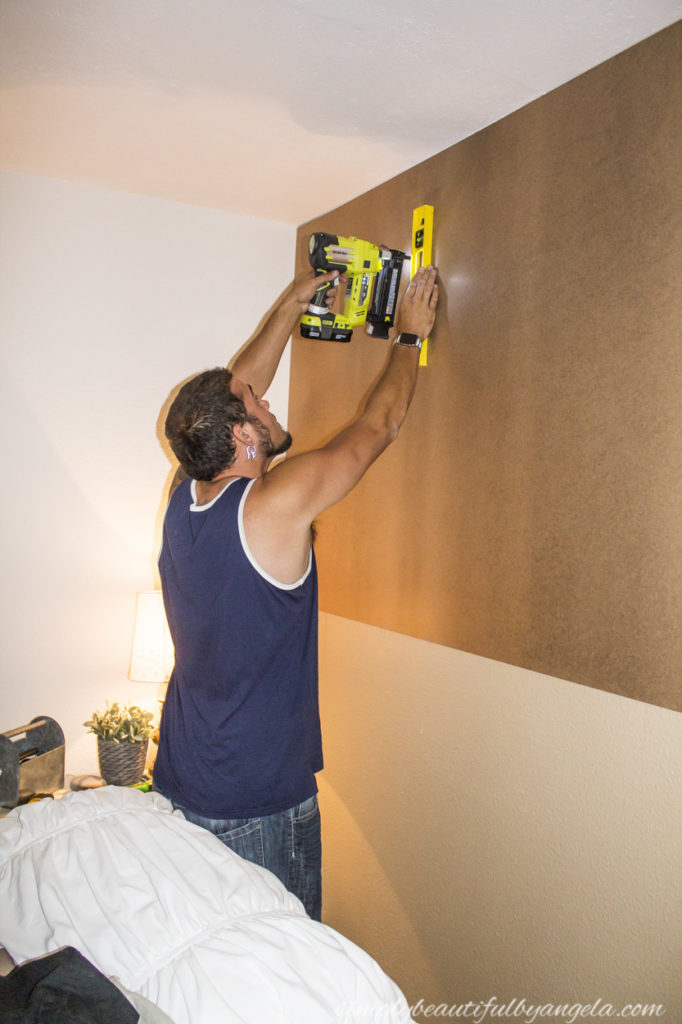
We used a level as we went down to make sure that we were nailing to the studs.
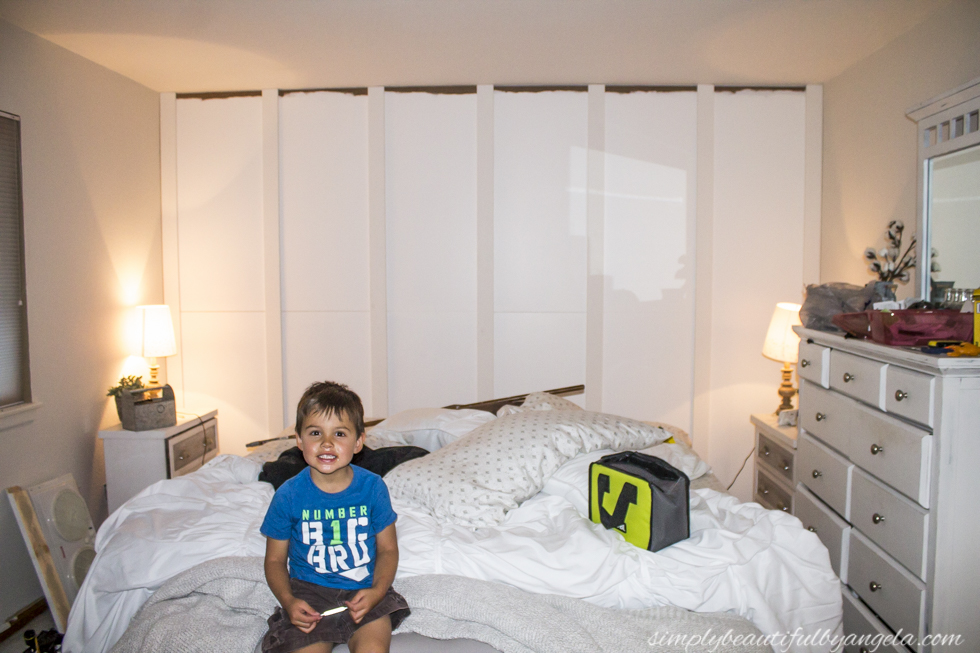
PSA: Please exuse the many messy bed pictures you are about to be exposed to. I’m a make-your-bed-every-morning type of person unless I’m doing a project next to it. Then all care goes out the window for the time being!
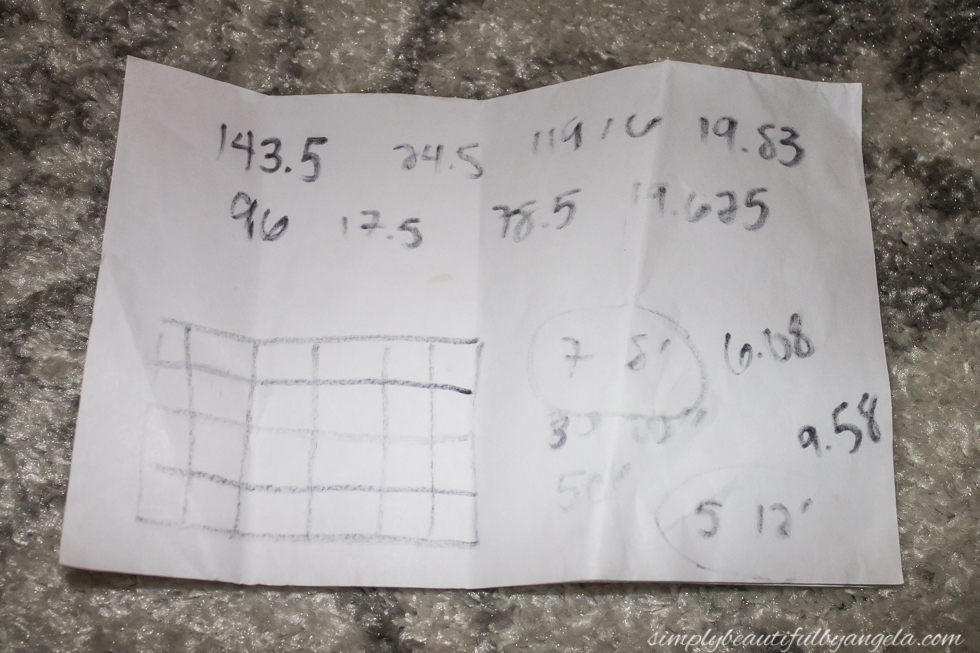
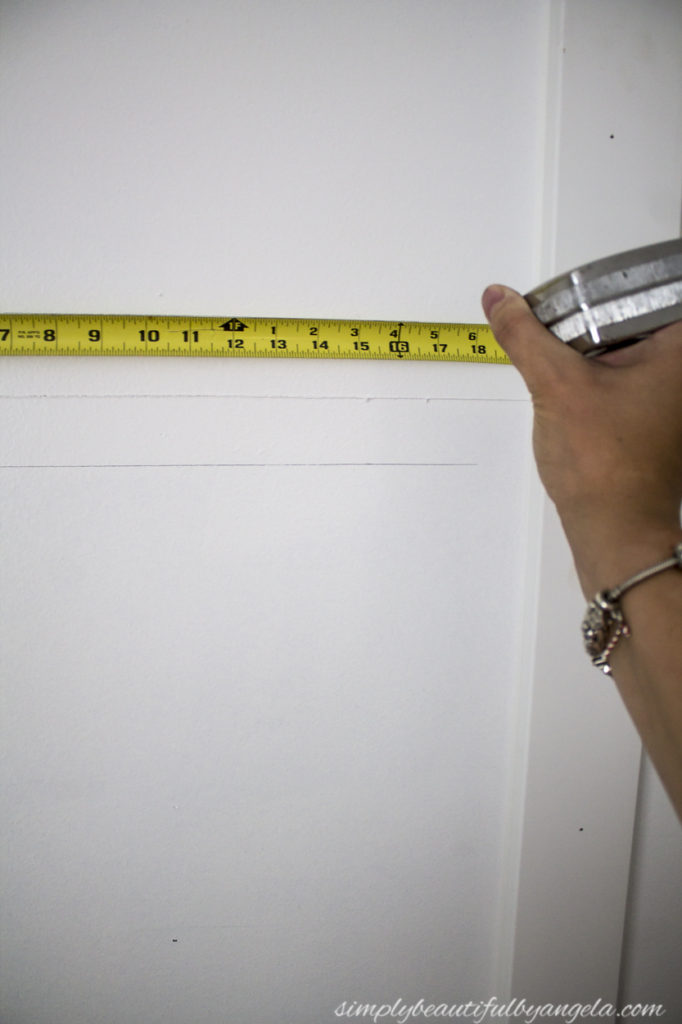
I planned out where to place my battens on a piece of paper before I went shopping for the 1×4 MDF boards. I took the wall length (143.5″) minus the number of vertical battens that I envisioned times their width (7 x 3.5″) and divided it by the number of spaces (6). I did the same for the horizontal battens and with a little trial and error finally decided what would give me the most evenly sized squares. I also calculated how many feet of MDF I would need.
It’s not the most glamorous drawing, but this was my final draft.
I didn’t get a picture but I rolled two coats of my satin white paint over the hardboard before I started attaching the battens to save myself from painting tight spaces at the end.
To make sure that my vertical battens were straight, I held up a level next to each one before nailing them in.
I have to brag, I had the most amazing little helper with me while I was doing this part!
The next morning I went over the sides of each board with some caulk to hide the small gap (or sometimes big because despite what you would think, all walls aren’t completely flat…) that existed between the batten and the board.
Next it was time to attach the horizontal battens. I began with the center one and used a level to draw a 3.5″ space since that’s how wide the MDF boards are.
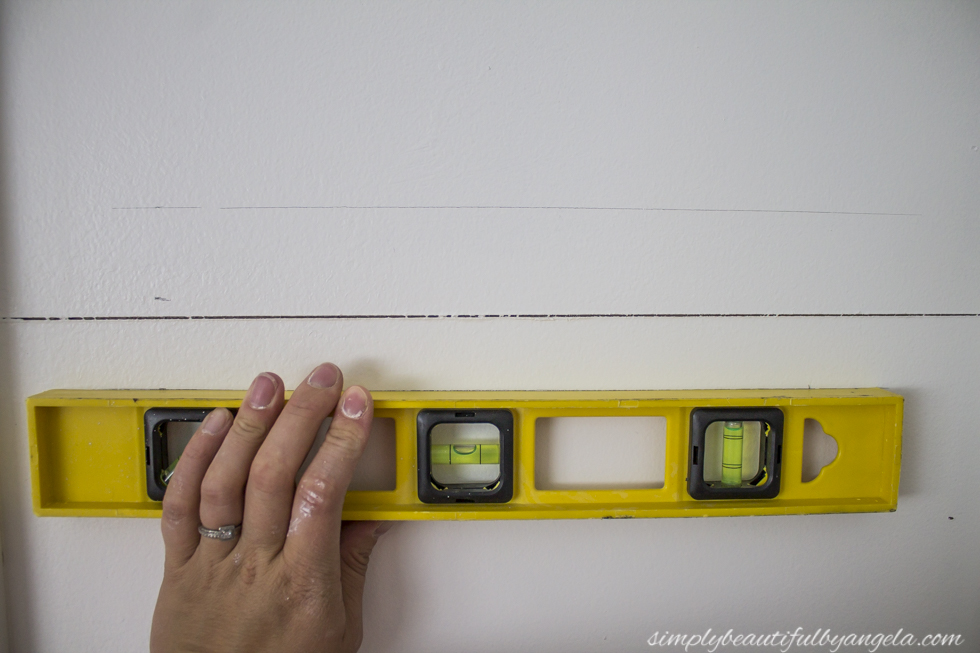
I held up my tape measure on this line and tried to be as precise as possible to get the most snug fit. On most of them I did pretty well but there were a few that I was way off on. Spackle came to the rescue at the end though!
I used my trusty speed square to make sure that I got a straight line before making my cut on the miter saw.
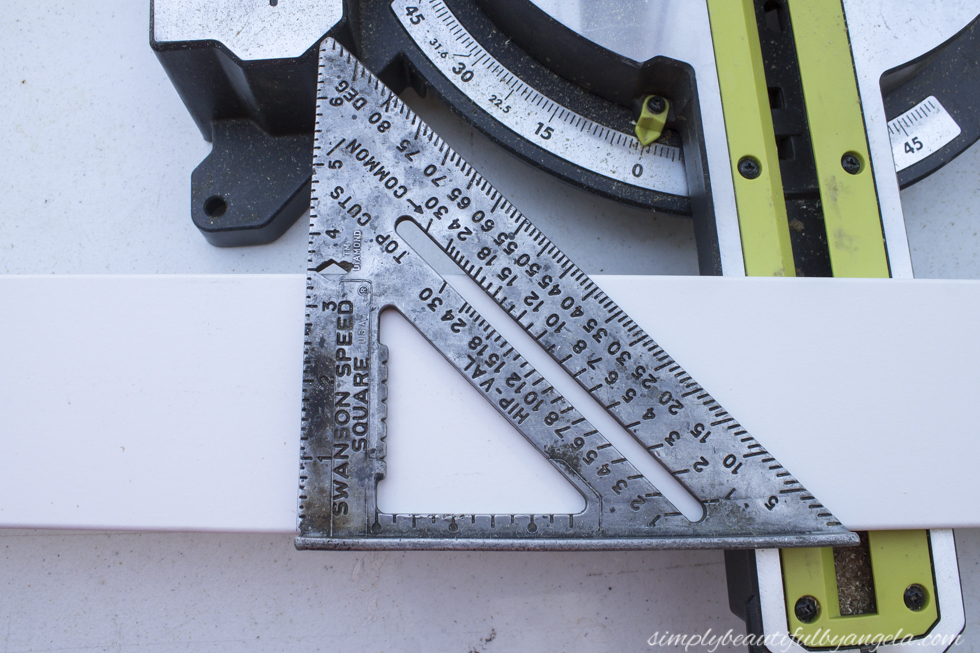
I measured out each one individually since they differed a little bit. It was somewhat of a pain, but totally necessary.
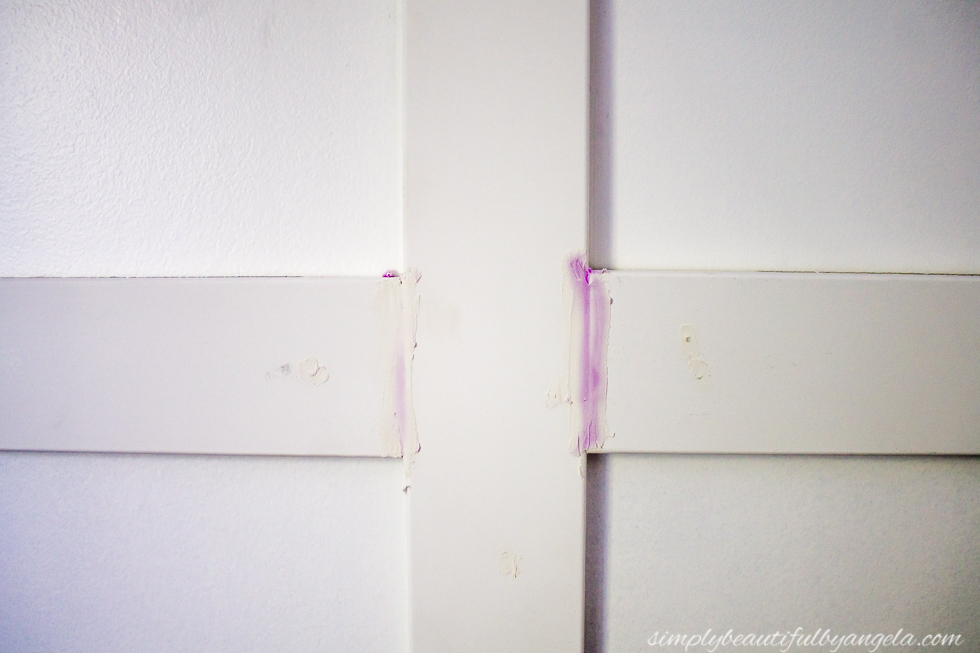
Remember that spackle that I previously mentioned? Once all of the battens were attached I went around and used it on all of the nail holes and seams between the battens. The kind that I bought starts off pink and then turns white when it’s dry so that you know when it’s ready to sand. Nifty, huh?
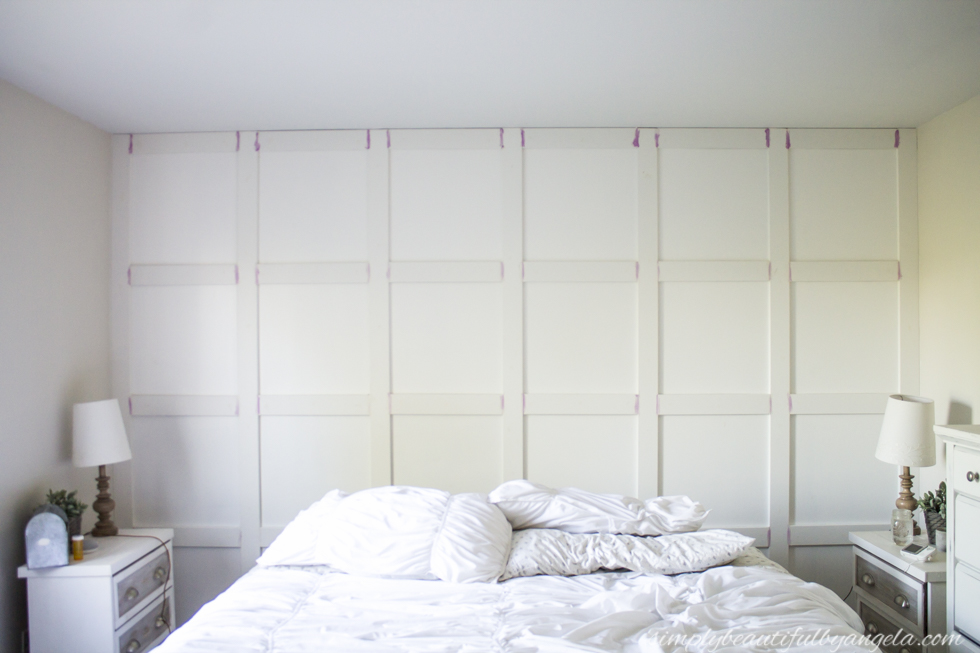
After the spackle was dry I sanded, sanded and sanded some more, caulked the horizontal battens where they met the wall, and finially rolled on a coat of white satin aint over the battens.
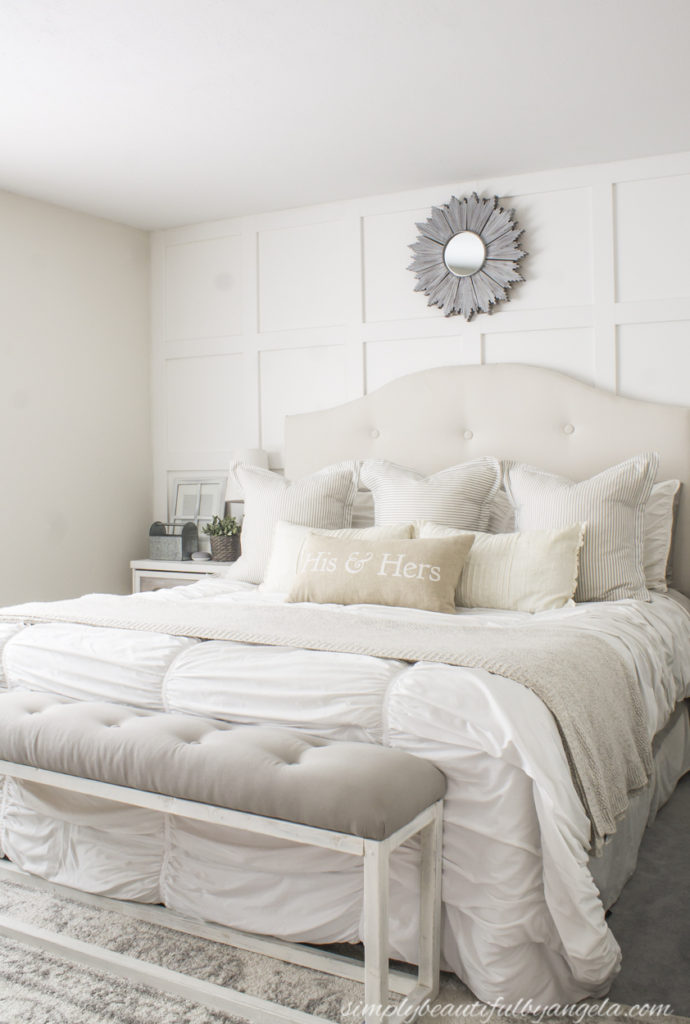
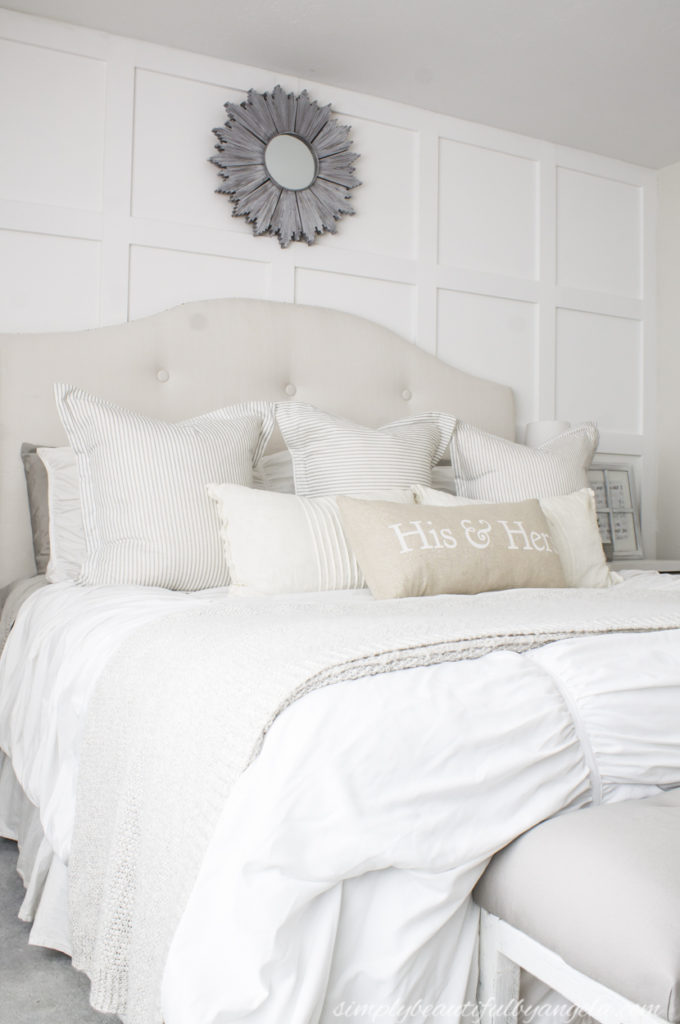
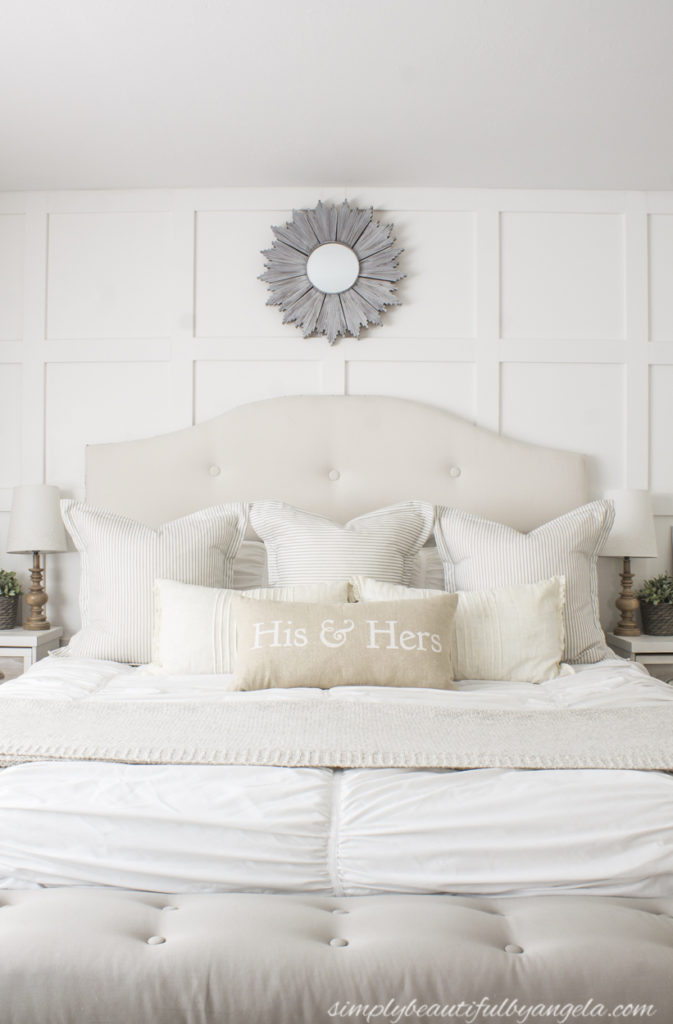
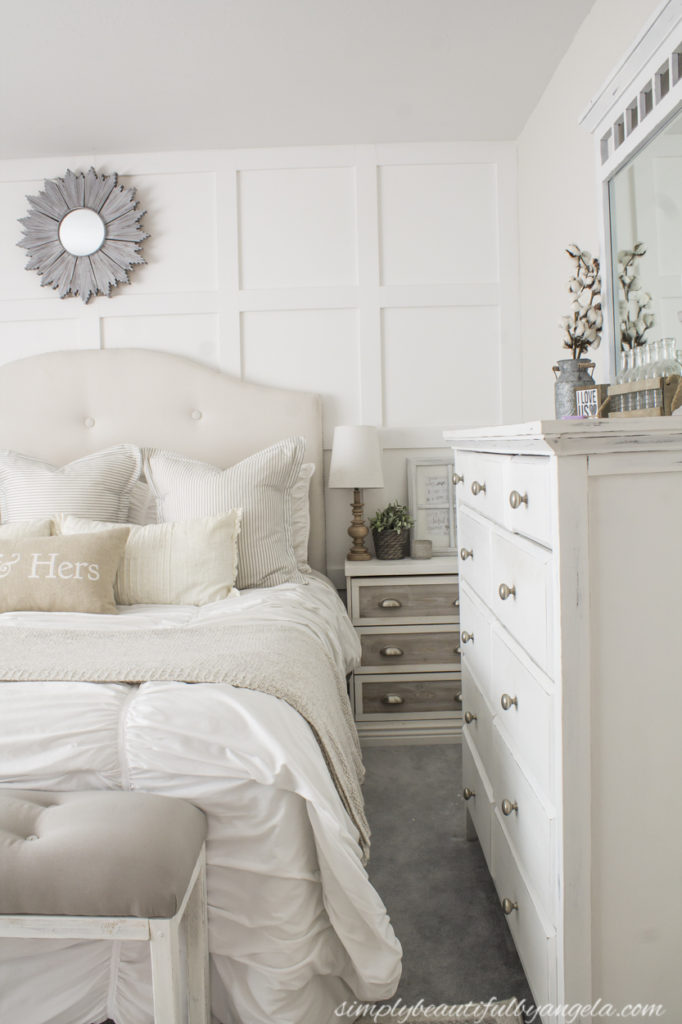
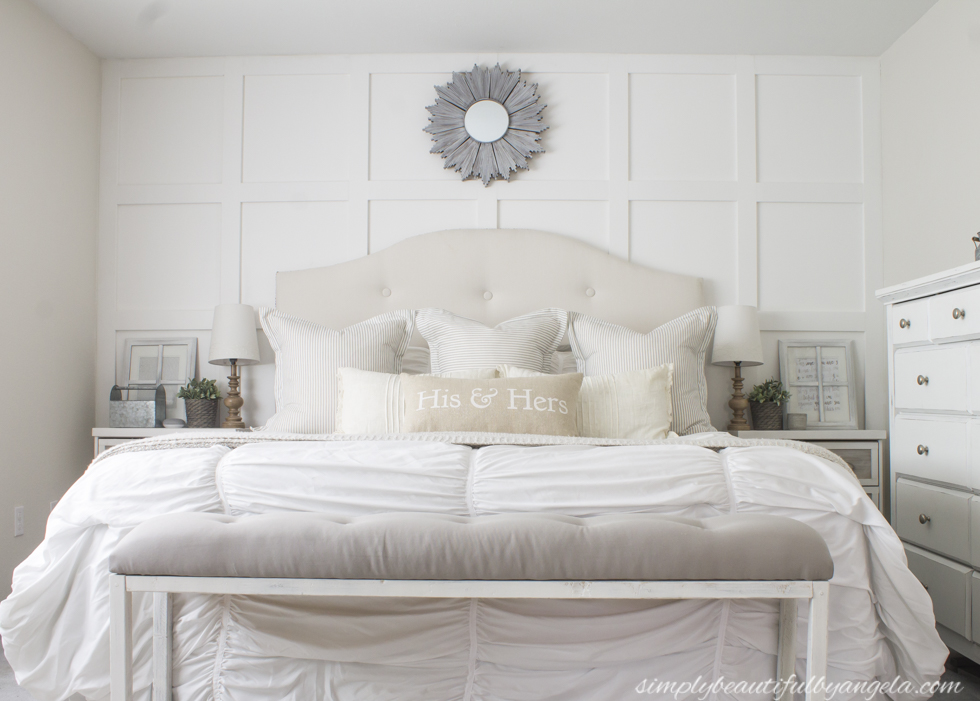
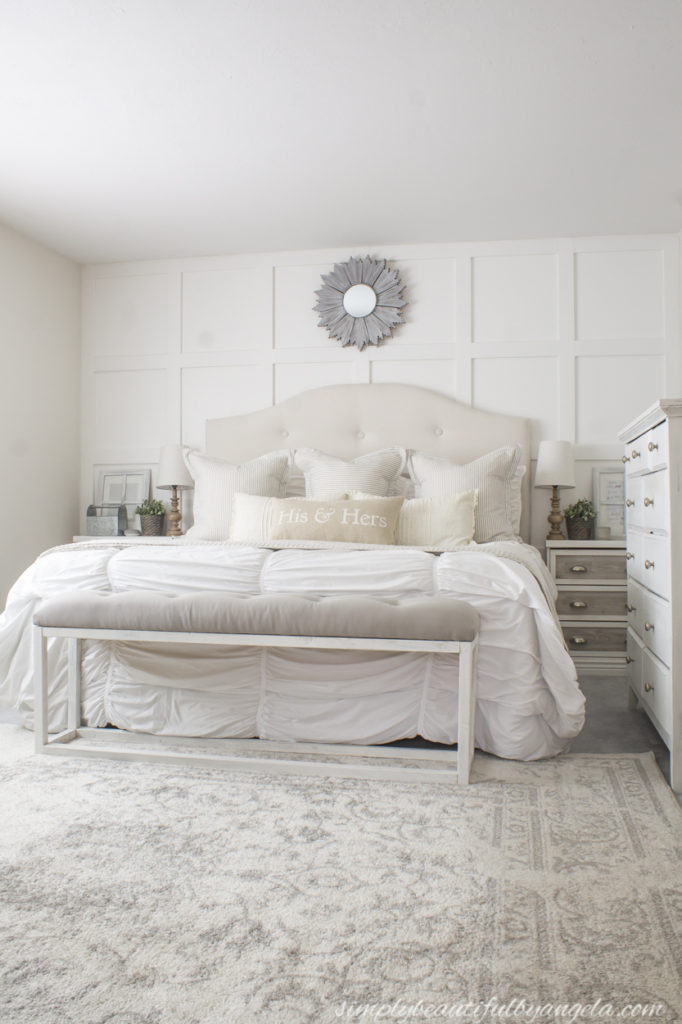
Here is how it turned out!
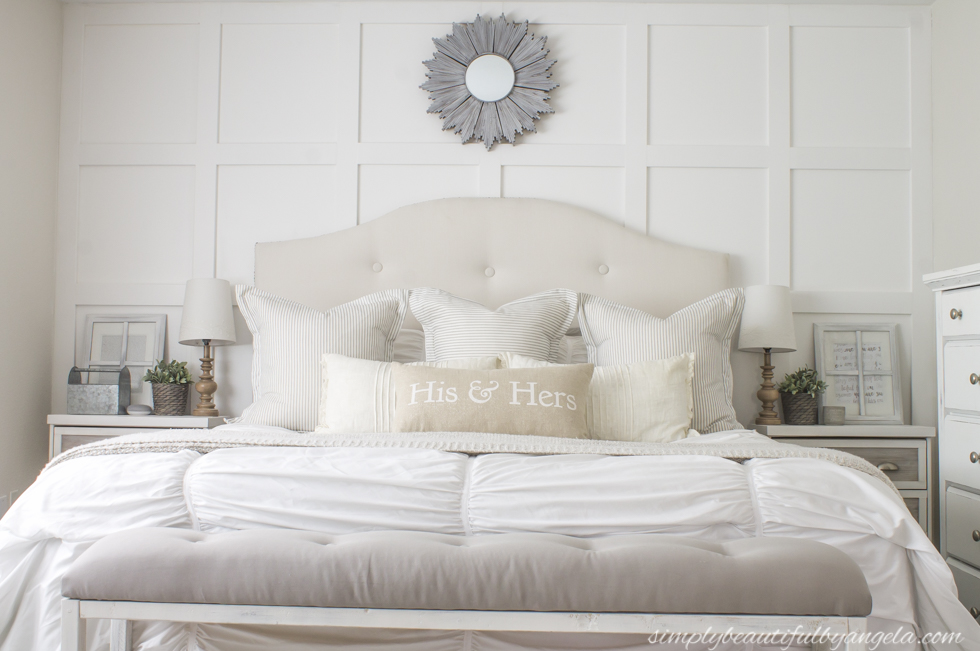
We hung my DIY sunburst mirror up right before taking these pictures. I centered with the top row of squares but now I am starting to wonder if it would look better centered between the headboard and ceiling. I can’t decide though, thoughts anyone?
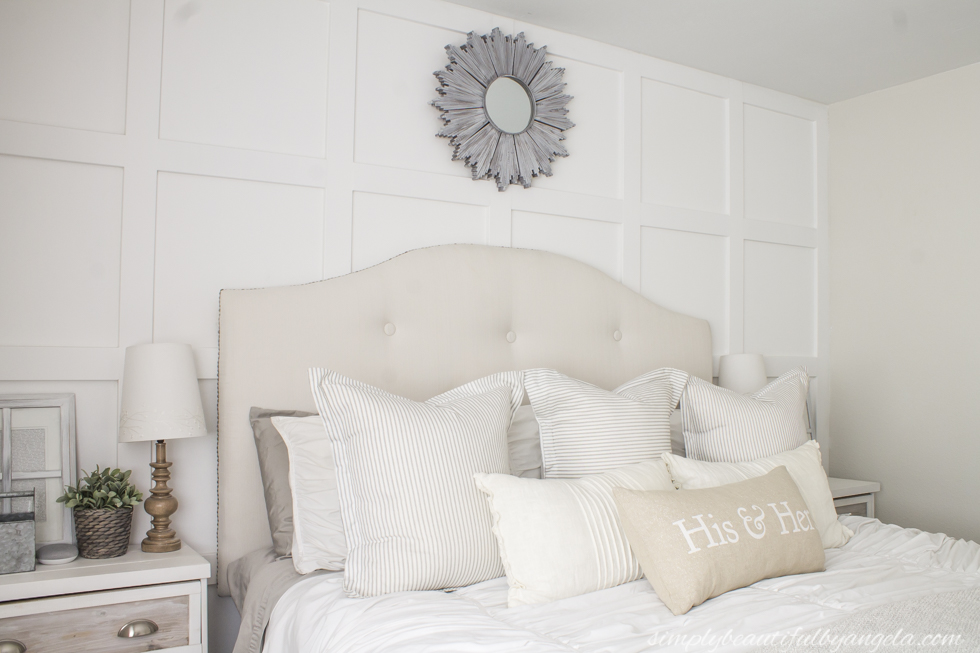
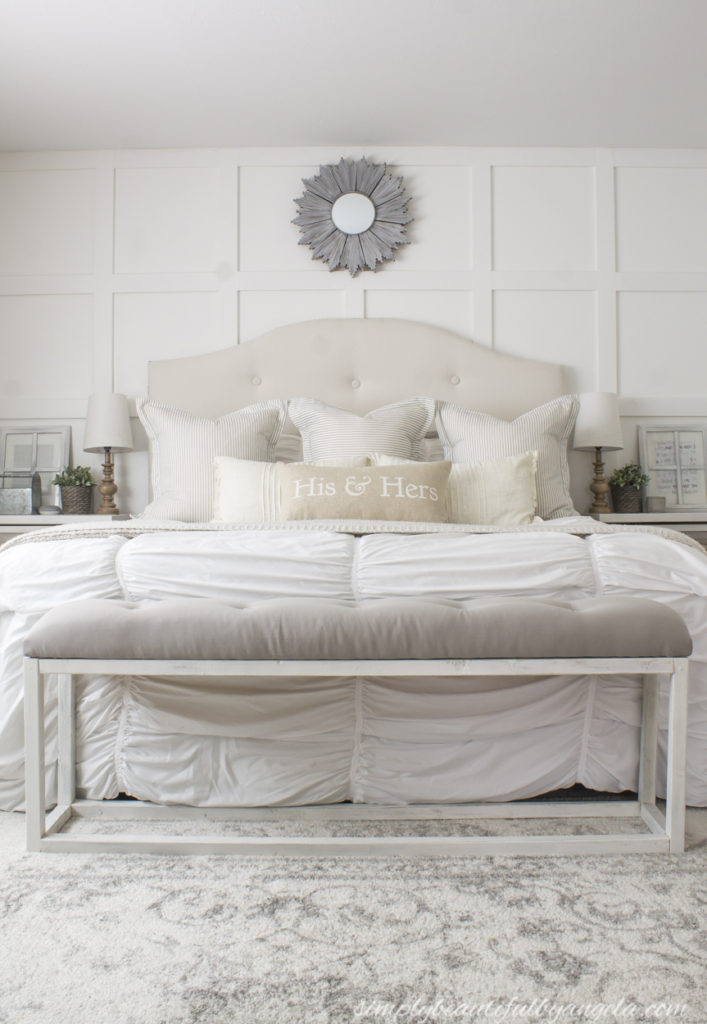
I’m really surprised how long our heardboard has held up in my world of constant decorating change ups! As you may recall I made this one myself (tutorial here) and wasn’t sure how long it was going to stick around but I actually still love it just as much as the day I finished it.
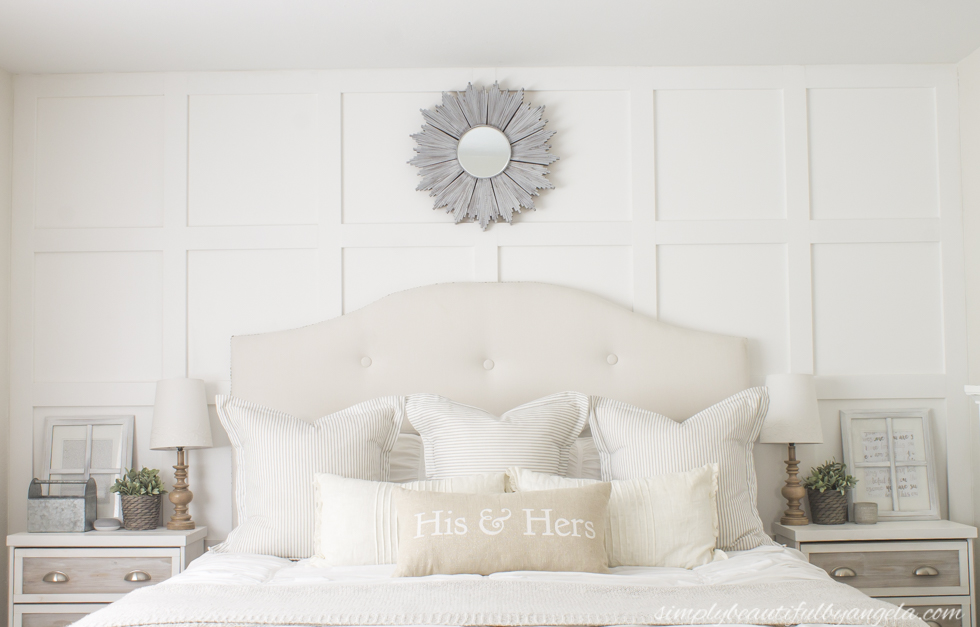
Try to ignore the gray/blue carpet peeking out next to the bed and instead focus on the pretty vintage distressed rug that I currently have trying to hide most of the room. Eventually I’ll slide it more under the bed once we get the hardwoods installed, but for now this helps me cope with the carpet.

I am over the moon excited that we finally have our room looking somewhat put together. The rest of the house may be a total mess but at least we have a pretty space to lay our heads down at the end of the day.


Let’s take one more glance at a couple of before and afters because that’s always the most fun part!

I hope you all have a fantastic rest of the week and a fun weekend. I’ll be back next week for this month’s Thrift Store Challenge. Holy moly– I can’t believe it’s already that time again! This summer is flying.
See you all then 🙂
Linking up to these awesome parties!

OMG! From ugly duckling to swan. What am amazing transformation! Great job. I am so happy I found your post on the link party today. I am inspired for sure. Our bedroom needs some update too.
الشركة الافضل فى الممكله فى خدمات مكافحة الحشرات ورش المبيدات نستخدم افضل المعدات لتخلص من الحشرات بجميع انواعها
شركة رش مبيدات بالخرج
شركة مكافحة حشرات بالخرج
شركة مكافحة النمل الابيض بالخرج
شركة رش مبيدات بأبها
شركة مكافحة حشرات بأبها
شركة مكافحة النمل الابيض بأبها
شركة رش مبيدات بنجران
شركة مكافحة حشرات بنجران
شركة مكافحة النمل الابيض بنجران
شركة رش مبيدات بالدوادمي
شركة مكافحة حشرات بالدوادمي
شركة معتمدة فى مجاال مكافحة الحشرات والنمل الابيض ورش المبيدات الحشريه نتمتلك جميع الامكانيات فى هذا الصدد من اجل اسره نقيه وحياة سعيدة ونتمني ان نكون عند حسن ظن العميل
شركة مكافحة النمل الابيض بالدوادمي
شركة رش مبيدات بينبع
شركة رش مبيدات بشقراء
شركة مكافحة حشرات بشقراء
شركة مكافحة النمل الابيض بشقراء
شركة رش مبيدات بخميس مشيط
شركة مكافحة حشرات بخميس مشيط
شركة رش مبيدات بالقصيم
شركة مكافحة حشرات بالقصيم
Your bedroom turned out spectacular. What a great idea. It is magazine worthy.
Janet
rosemary-thyme.blogspot.com
What a transformation and excellent instructions….! LOVE IT!
New to your blog. I came over from Savvy Southern Style. The room looks great. To answer your question, I think you should center the mirror.
This is such a great DIY. I love your back wall. Great focal point.