
Hello! I’m back this week to share a couple more DIY Fall décor tutorials, then I promise to move on to sharing Tristan’s big boy room. After months of working on it I’m so excited that it’s finally done and even more so that it turned out exactly as I pictured!
I’ve seen a few tutorials in blogland for making pumpkins out of scrap wood and they always turn out so cute! This year I decided to finally make one.
-
2×4
- 1×2 scrap (any small scrap piece would work)
- Orange Acrylic Paint
-
Foam brush
-
Rag
Using scrap wood from the garage I cut the following:
2 2×4 at 8″
2 2×4 at 6″
1 1×2 at 1″

Next, I painted each piece with orange acrylic paint. I only painted the areas that would be visible once the pieces were stacked.

Once the paint dried, I took some sandpaper and distressed various spots so that the natural wood came through (you’ll see why in the next step).

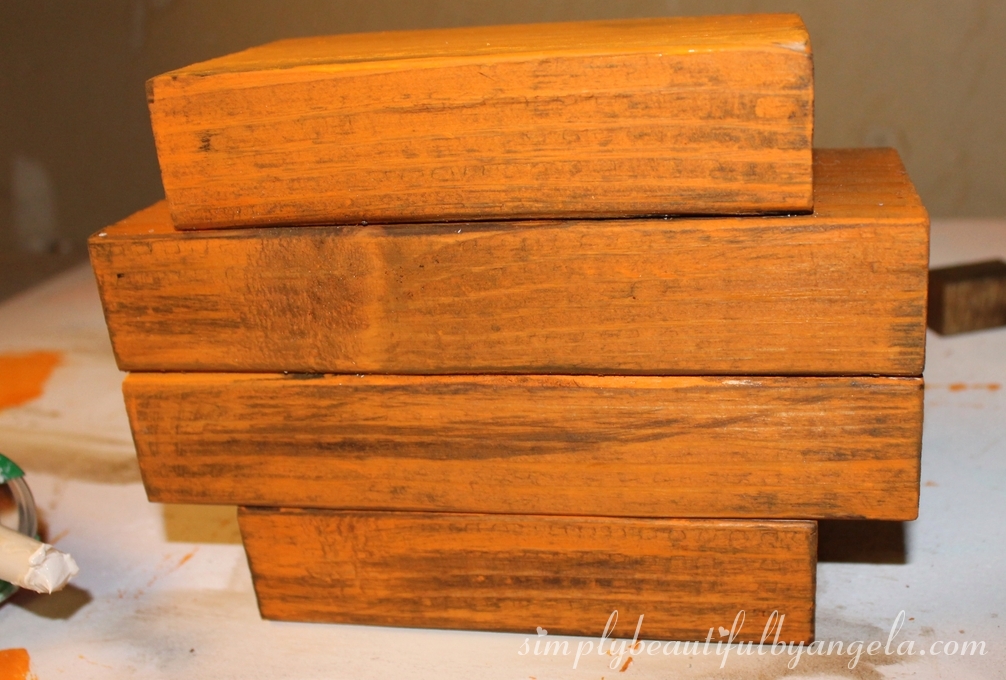
I then quickly applied my favorite dark wood stain (Provinical by Miniwax) and wiped it off right away.
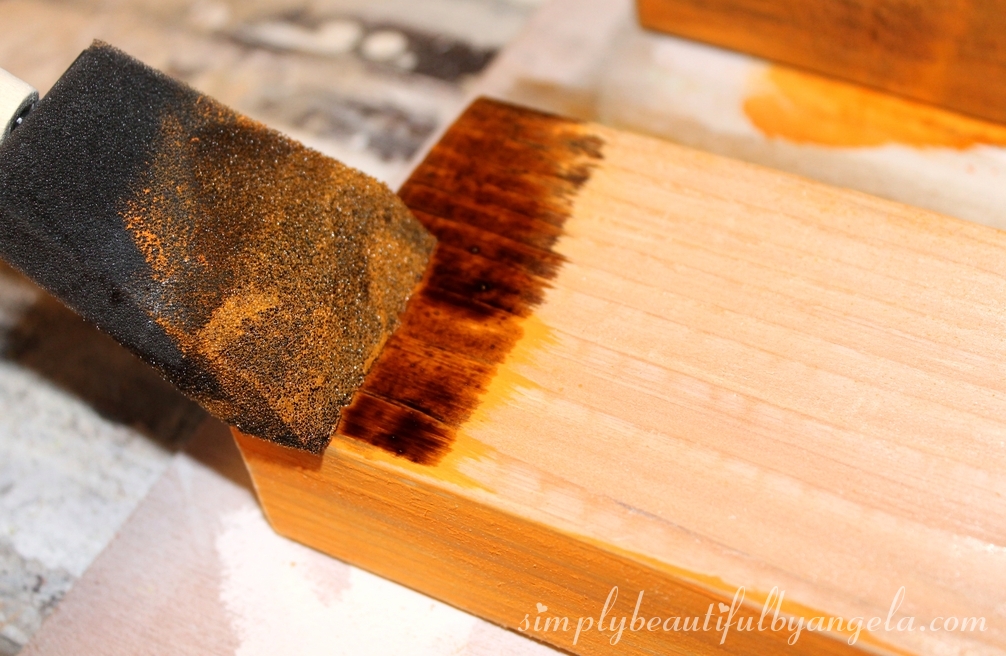
As you can see, it darkened the orange a bit and stained the spots where the natural wood was peeking through to give it a rustic look.

I also applied stain to the 1×2 but let it sit for about 5 minutes before wiping it off since I wanted the stem to have a richer brown stain.

Once everything was dry I stacked the pieces and secured them with liquid nails (wood glue would work too).

I tied a few pieces of twine around the stem and also rubbed on some white chalk to add a little interest.

It turned out perfectly and looks so cute sitting on our mantle!

It was so easy that I finished the whole thing within an hour (that’s with dry time). Next year I think I’ll make a few in different sizes with a topcoat so that I can put them out on the front porch!
Linking up to these awesome parties!

This post was featured on the Creative Spark Link Party hosted by My Paper Craze and Creative Ways Link Party hosted by Posed Perfection! Click on the images below to take you to the featured posts.
|

|

Love the pumpkin stain! Right in time for Halloween too. Have you ever tried a staining project with wooden wine crates? The add a cheateau-chic accent to kitchens, bathrooms or just about any other style décor.
If your looking for original wine boxes or crates visit Winepine – http://www.winepine.com
Thank you so much! Very cute crates, there's lot of things I think of making with those 🙂
Very cute, and made from practically nothing.
Thanks Mary K! I know, those are my favorite kinds of projects 🙂
so cute! I have a whole bunch of scrap wood that would be perfect for this project. Thanks!
Thank you Robin, glad I could help! 🙂
Found this on Creative Spark. Super cute and so simple! Pinning this. I'm imagining pumpkins of all sizes with this one. 🙂
Thank you Leilani! I am imagining the same, I think I'm going to fill up my porch next year haha
Very cute way to use up random bits of wood. I love staining over paint for an aged look.
Thanks Audra! This was my first time trying this technique and I was pleasantly surprised with how well it turned out 🙂
This is adorable! I'm loving how all things rustic are so "in" right now.
Thanks for linking up with The Alder Collective! Your post has been pinned to the party's group board, and we hope you'll join us again next Tuesday at 8 EST!
Thank you so much Abby, I really appreciate it!!
This is adorable! I'm loving how all things rustic are so "in" right now.
Thanks for linking up with The Alder Collective! Your post has been pinned to the party's group board, and we hope you'll join us again next Tuesday at 8 EST!
Hi there, this is just too cute! I would love for you to share at our Vintage Charm link party. It is open from Thursday morning-Monday morning! Blessings, Cecilia
So cute!! I could actually see myself making this one — THANKS for sharing! Cynthia
Thank you!! It was one of those projects that was so easy to make that I wanted to make more, but I think I'll hold off until next year! 🙂
So simple, but so cute! Thanks for sharing it with our readers at this month's <a href="http://www.11magnolialane.com/2015/10/15/the-october-pretty-preppy-party-link-up-your-projects/>Pretty Preppy Party</a>!
Thank you so much Christy!! 🙂
Great way to use up 2×4 pieces – I like all the finishing techniques you used.
Carole @ Garden Up Green
Thanks Carole, it really was! 🙂
I just ran across this on Pinterest and I am SO glad! Making this tomorrow and linking you on my blog!
I am a regular reader of your blog. As a profession I am a roofer but this post attracted me. This is really a great idea. I'll definitely try to make this.
So what does wood working comprise of? First allow me to briefly explain the basics of wood craft. screwdriver torque