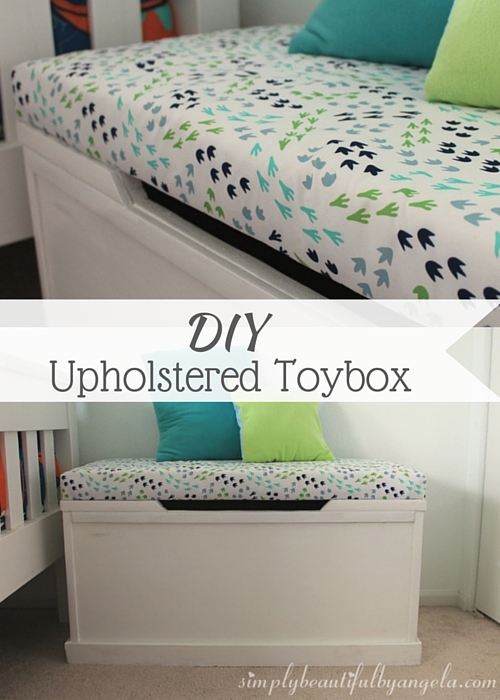
When I was designing Tristan’s room I was stuck on two things. First, there was an empty space at the bottom of the bed that I wasn’t sure what to do with. Second, I needed a place to store his big toys and stuffed animals.
Put these two problems together and you get–a toy box!
I searched online for an affordable one and quickly realized that if I wanted something large it was going to be at least $100. So I came up with plans to make my own!
Supplies Used: (Affiliate links may be provided for convenience. I only share products that I use and love. For more info, see my full disclosure here.)
- 4′ x 8′ sheet of particle board
- Wood screws
- Stanley Hardware 30″ Continuous Hinges in Nickel
- 2 10″ Lid Supports
- 8′ corner molding (corner trim)
- 8′ lattice molding (top trim)
- 10′ primed 1×3 mdf (bottom trim)
- Liquid nails and nails (to attach the trim)
- 3″ foam
- Quilt batting
- Bed sheet
- Staple gun
- Hot glue


It sounds like an extensive list, but luckily I had a lot of it already, so I spent about $65 total on this project.
I’ll be honest right away and admit that I didn’t take nearly enough pictures! Mainly because it ended up being a learn as you go process, but also because I thought I was going to give up on it at one point. However we kept tinkering with it and the final product turned out great.
I had the sheet of particle board cut down at Lowes when I picked it up. These are the measurments that I used to make a 18″ x 36″ box:
- 3 pieces at 18″ x 36″ (front, back and lid)
- 1 piece at 16.50″ x 36″ (bottom)
- 2 pieces at 16.50″ x 17.25″ (sides)
We began by attaching the front and back piece to the bottom using wood screws. We countersunk the screws so that the molding that we were going to use later would sit nice and flush.


We then attached the sides.

At this point I went ahead and rolled on one coat of primer and two coats of paint, sanding between coats. Then it was time to attach the lid. Buuuuut we ran into a problem. I originally picked out small hinges, putting one on each side.

However we quickly found out that since the particle board was so heavy, they were ripping right off. So while I was waiting on a trip back to Lowes for a bigger hinge, I began upholstering the lid.
I purchased some 3″ foam at Walmart and cut out the size that I needed from two pieces. I sprayed the particle board with spracy tacky before laying down the foam.

I then went around with my staple gun and attached a layer of quilt batting. When I got to the ends I tucked them in like I was wrapping a present.

I cut the excess off after the first tuck to make it as flat as possible.


I went back around and cut off the excess from the edges.

I followed the same steps with my bed sheet that I was using as the fabric, tucking the edge of the fabric under the batting.


For the new hinge, we purchased a sturdy 30″ stainless steel cabinet hinge and it worked great. The hubby just attached the screws right into the batting/fabric. Once I started attaching the molding I was figuring things out as I went, hence the lack of pictures!
I used 1×3 primed MDF for the base and mitered the corners. I was slightly off on my measurements so I freaked out for awhile, but a ton of caulk ended up saving me! I used polystyrene corner molding for the edges to hide the seams and screws on the sides, and matching polystyrene lattice molding for the top.

The hubby used a jigsaw to cut out a piece to use as a handle and air ventilation for saftey reasons. This was actually an afterthought after I already had my top molding attached, so we had to rip it off and reattach after the cut. I added the second row of lattice trim underneath because it looked funny just having it on the sides of the handle.


To hide the staples on the bottom of the lid I went back around and attached more fabric with hot glue.


We also added lid supports for saftey (can be found online here


If we had more room in the budget I definitely would have gone with a high quality wood as opposed to particle board, but once it’s painted it doesn’t look bad and it still serves it’s storage purpose! It’s just a little heavy 🙂
Linking up to these awesome parties!

This post was featured on Totally Terrific Tuesday hosted by Live Randomly Simple! Click on the image below to take you to the feature post.
|
