Hello friends! Today’s dresser makeover is a good one and I am so exited to share it with you all!
Supplies Used:(Affiliate links may be provided for convenience. For more info, see my full disclosure here.)
- Sander
- Nail Gun
- Jigsaw
- Spackle
- Bondo
- Miter Saw
- Paint Sprayer
- Enamel Paint
- Ultra Flat Polyacrylic
- 1x3s
- Kreg Jig
- 2×2
- Frog Tape
- Pulls
- Contact Paper
A very good friend gave me this beautiful but old dresser (along with the matching nightstand) and I knew that I could restore them both and give them a fun new look—however I wasn’t exactly sure what that new look would be! Sometimes I have an immediate vision, and other times I just kind of figure it out as I go like I did in this case.
I decided to start with the dresser. I removed the hardware then scrubbed it down with Simple Green.
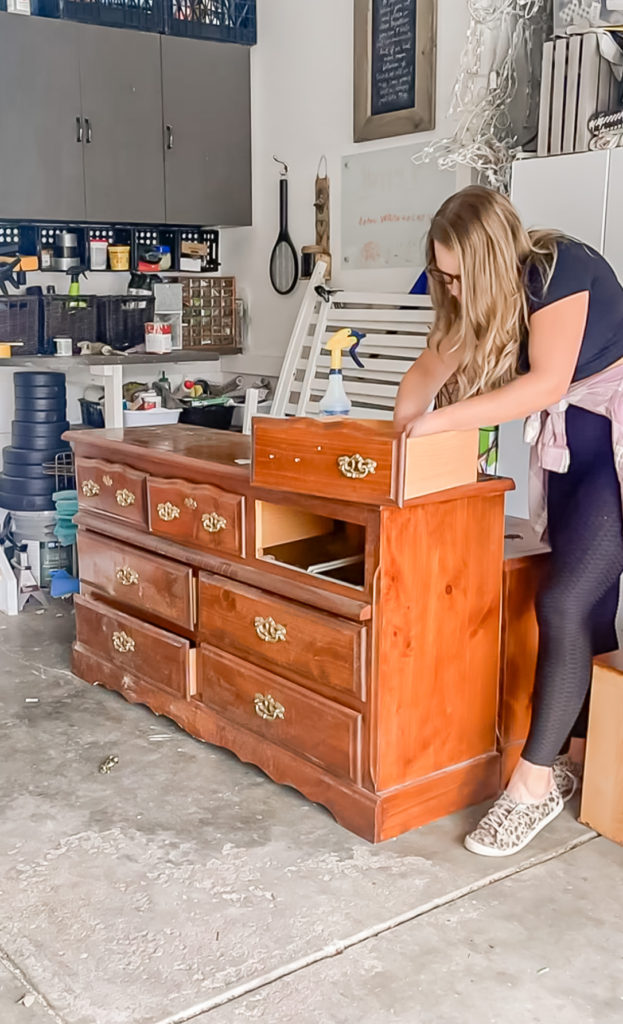
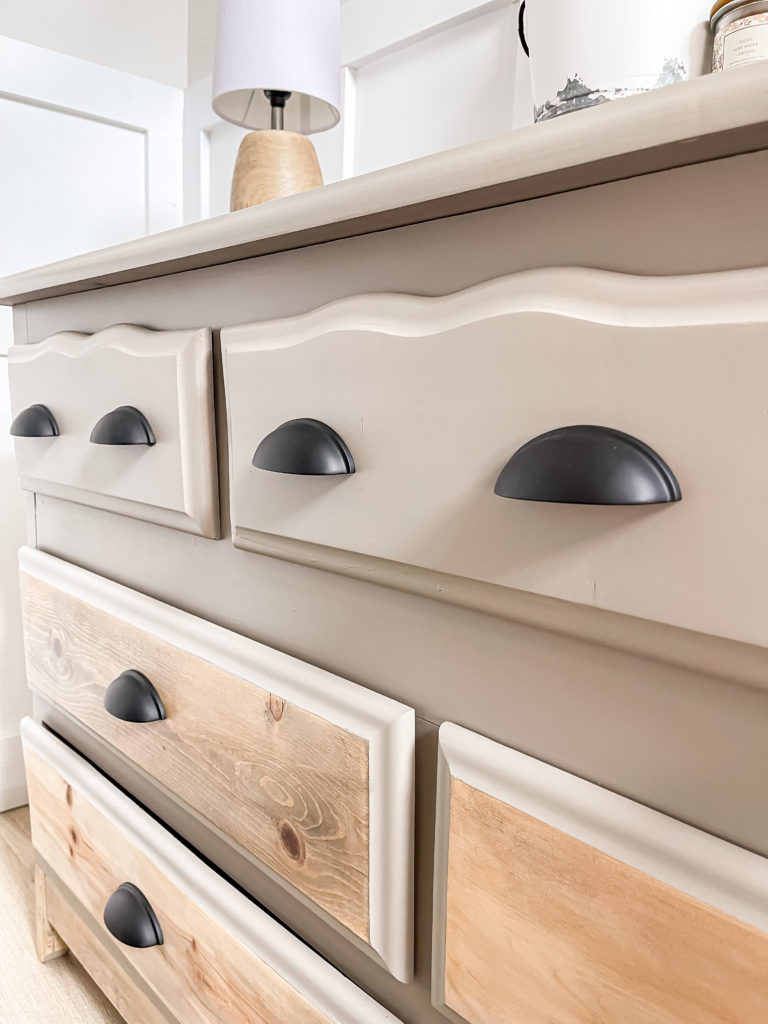
I then started sanding to see what kind of wood we were dealing with. I quickly found out that the top was a very thin veneer that sanded through easily, as were the drawers. I ultimately decided that we would paint everything except for the bottom four drawer fronts, so I carefully went ahead and sanded those all the way down.
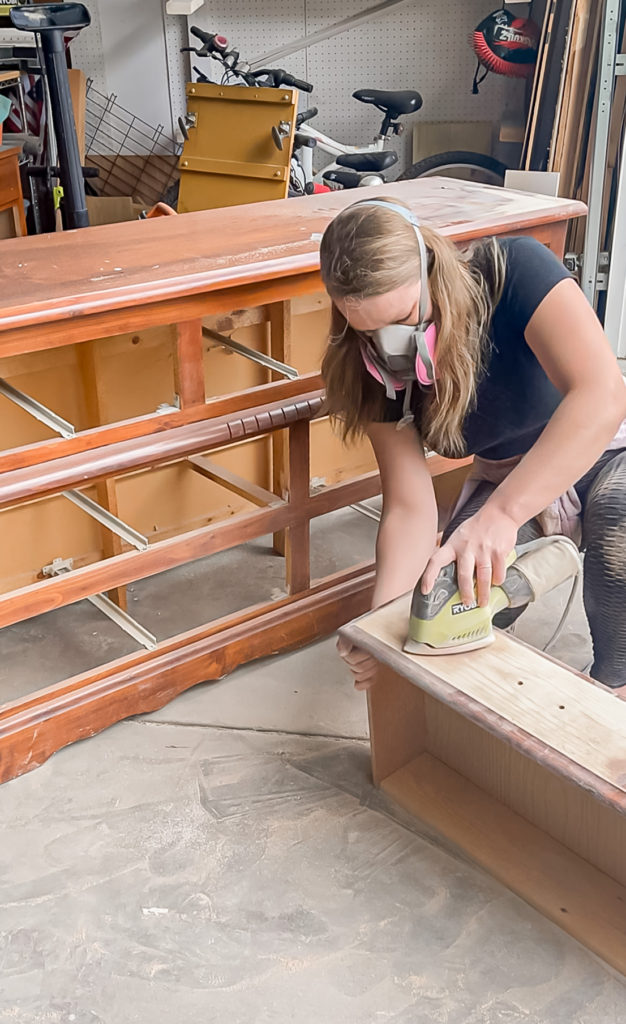
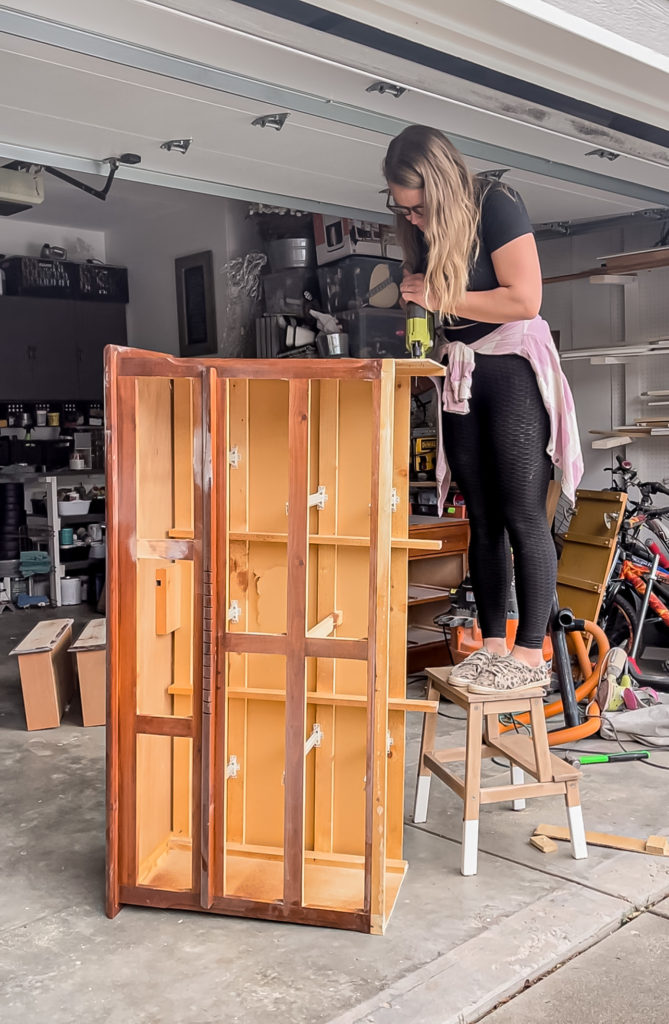
I knew that a new base would modernize this piece, so I used a hammer and a pry bar to remove the old trim piece. I think it is super pretty though, so I am hanging on to it for a future project!
I also removed the trim that ran across the bottom of the top drawers.
Next it was time to cut down the sides. I drew a straight line and then ran my jigsaw along it.
The next day I came back and scuff sanded the entire base and the top drawers to prep for paint.
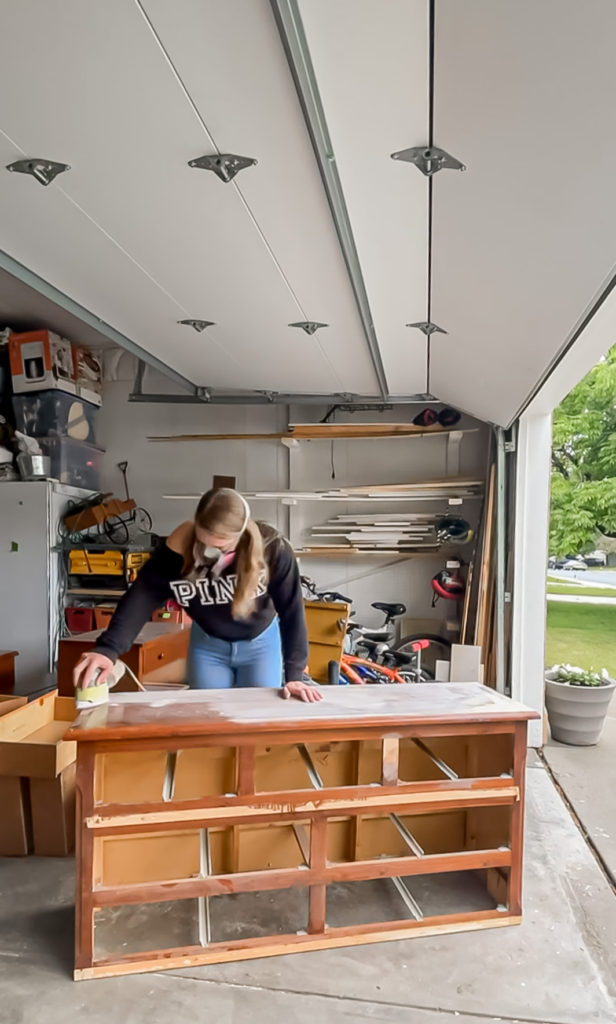
I had to use Bondo to repair a few areas and to fill the middle holes on the drawers that were left from the faux locks that were on there.
Once those areas were sanded smooth, I wiped everything down and taped off the wood drawer fronts before applying a coat of primer.
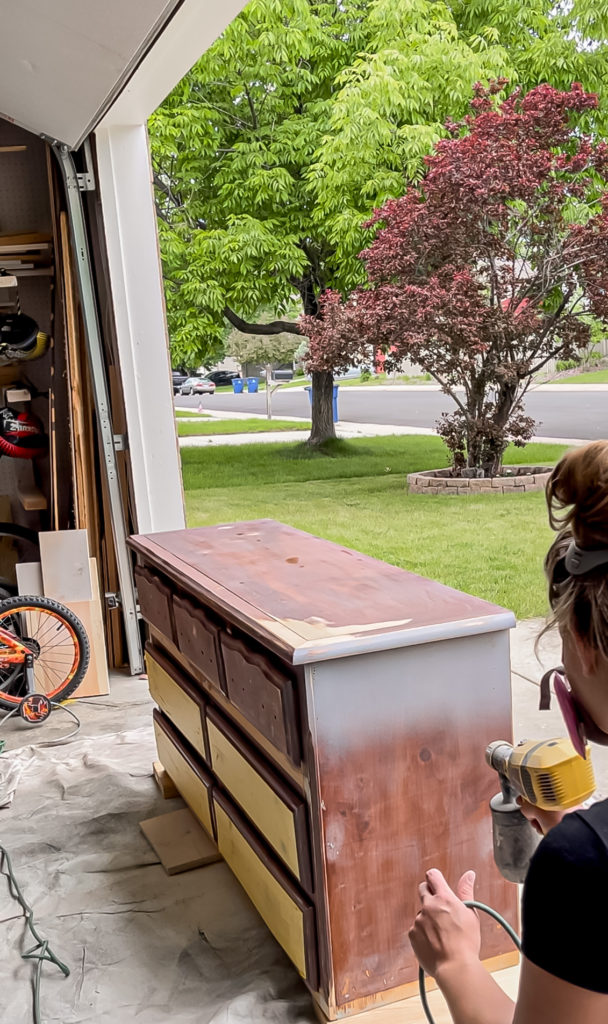
I then sanded with 400 grit to smooth, followed by the first coat of paint.
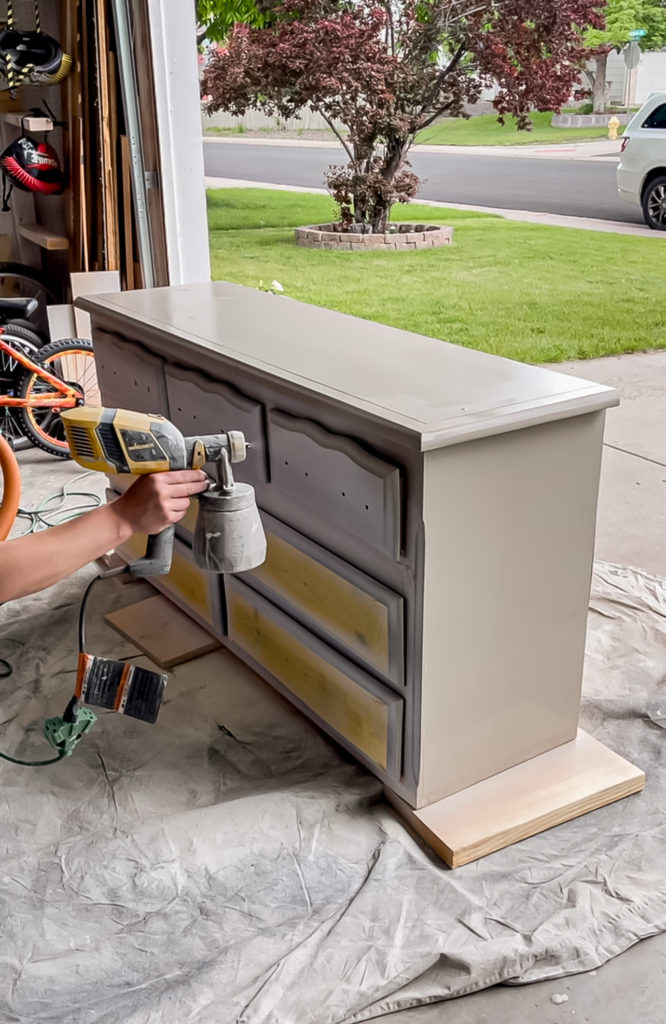
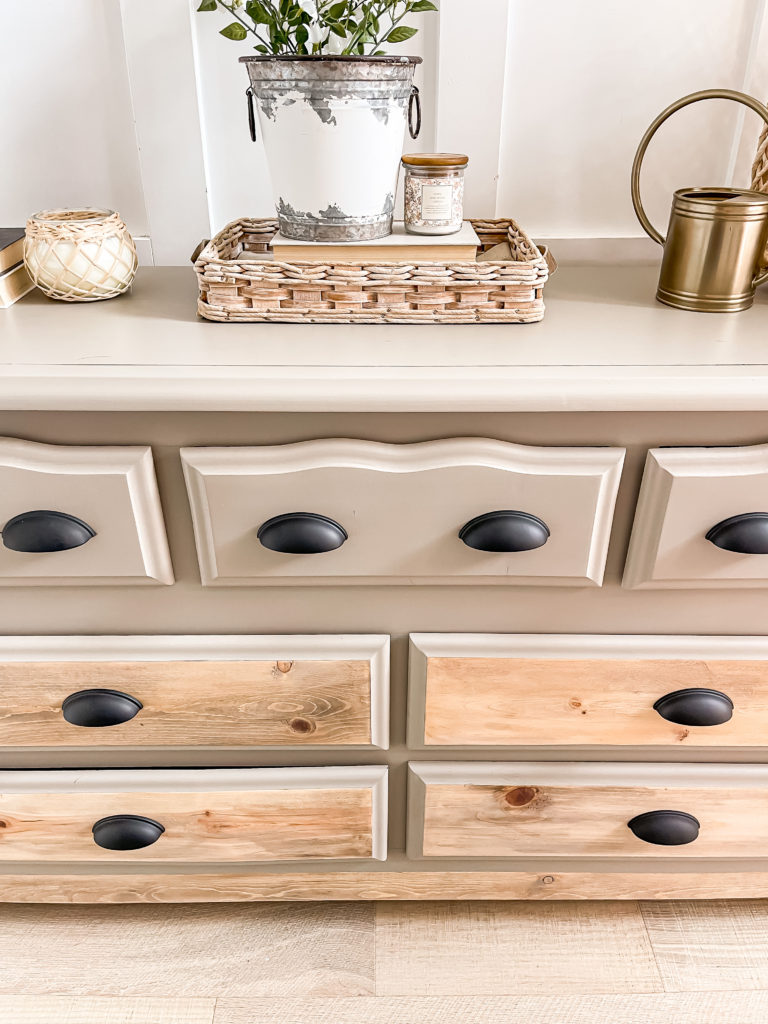
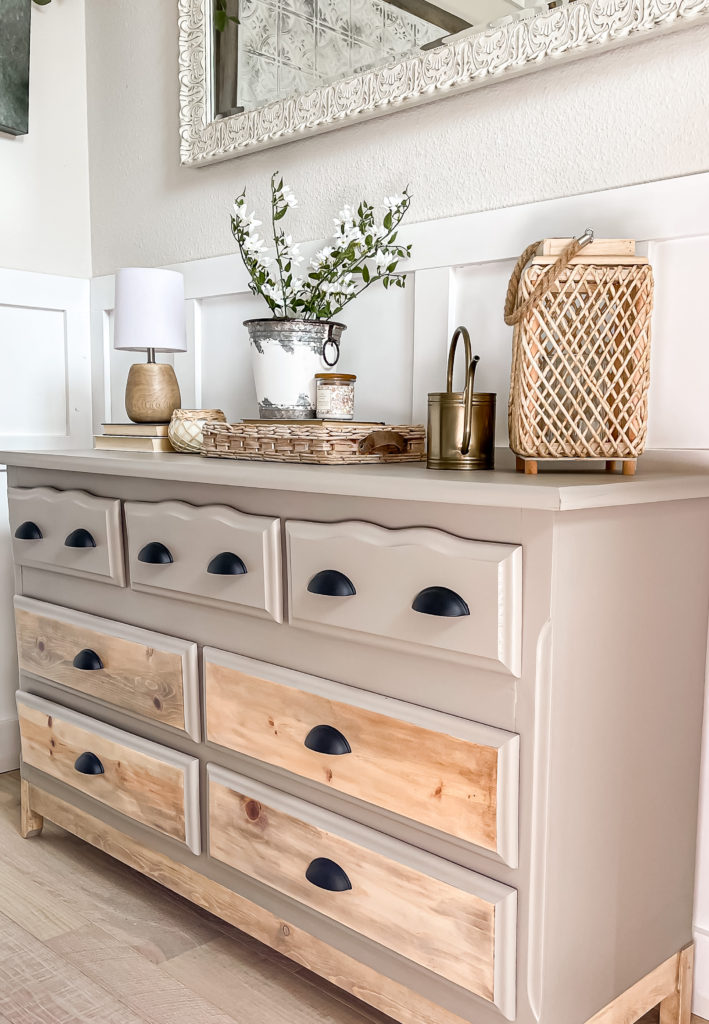
I used a combo white and Behr Stone Statue Enamel Paint and absolutely love how the color turned out!
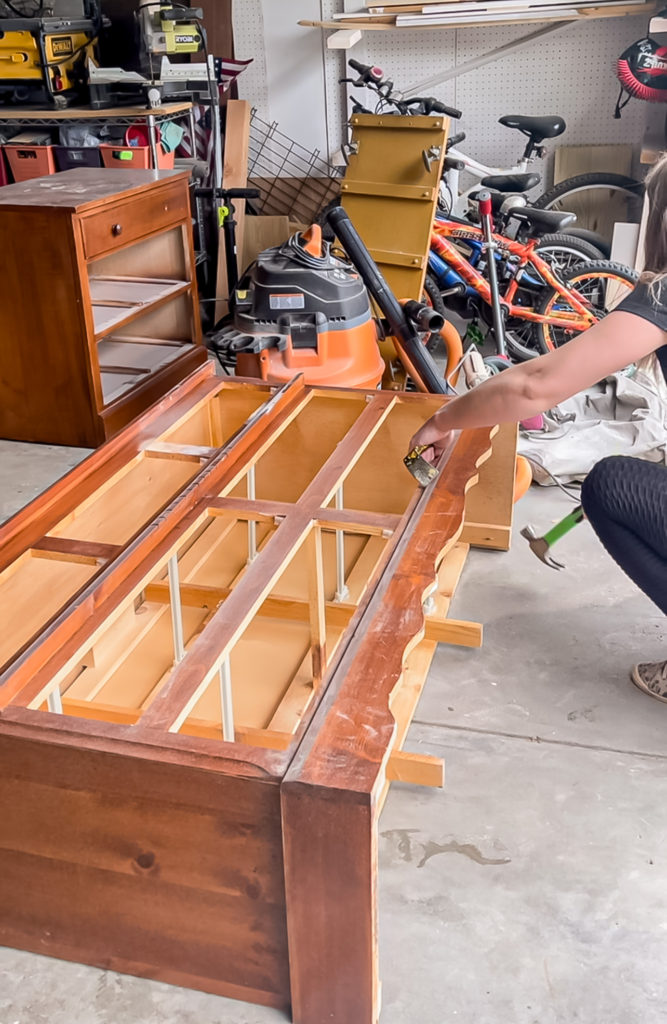
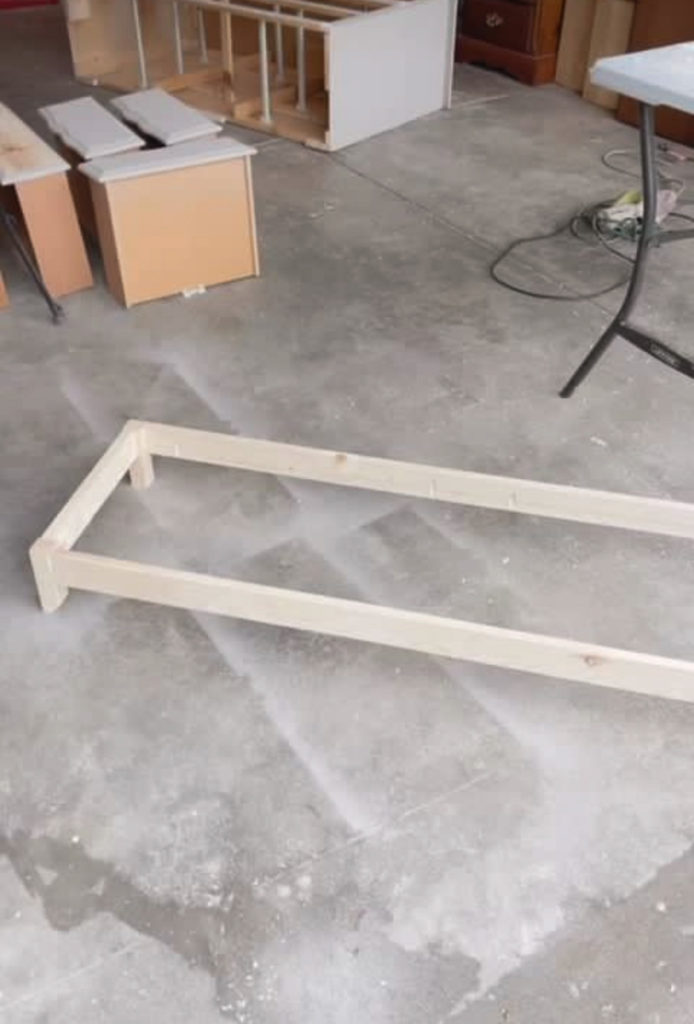
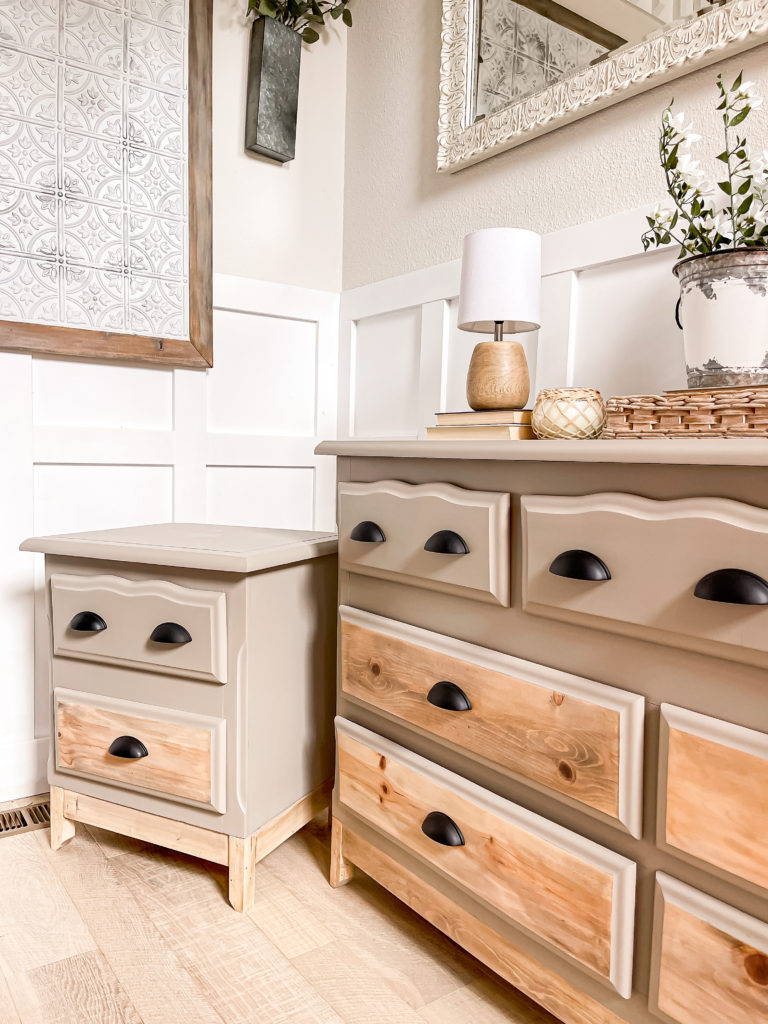
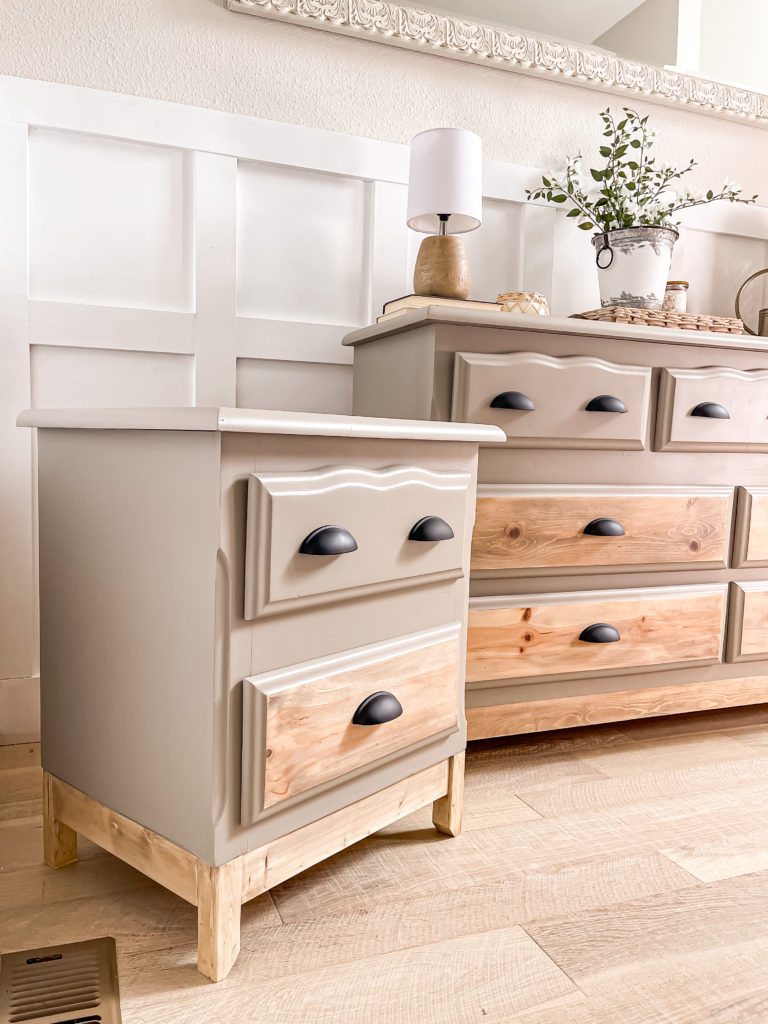
In between coats I started working on building the new base. I used 2x2s for the feet and 1x3s for the sides and attached them using Kreg pocket holes.
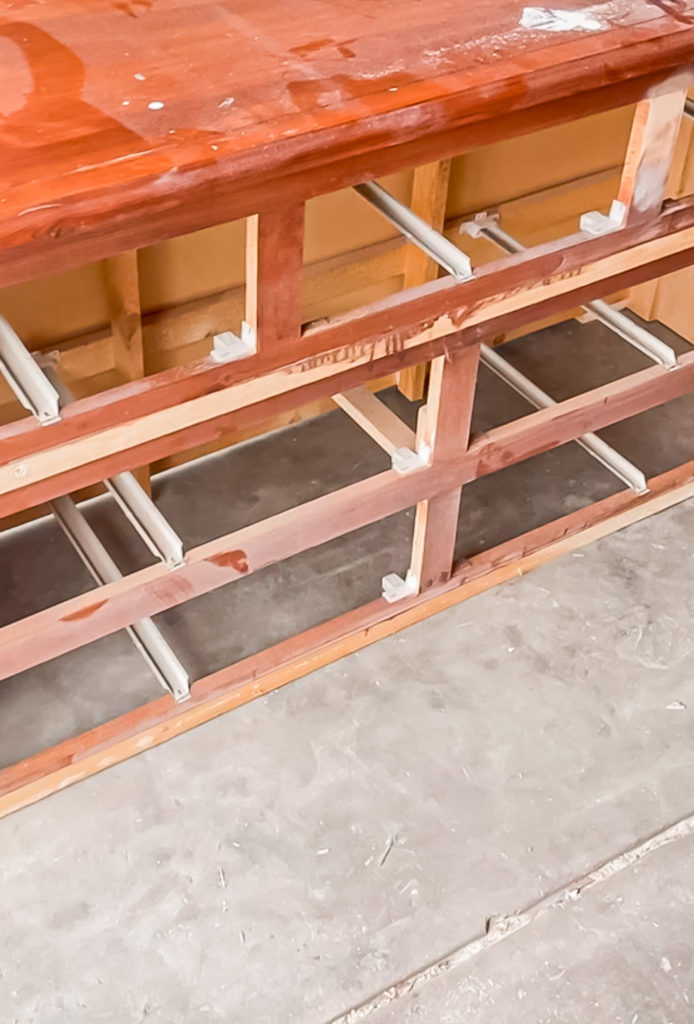
I stained both the base and the wood drawer fronts with dark wax followed by a white wash. I then sealed it all up with two coats of polyacrylic before attaching the new pulls.
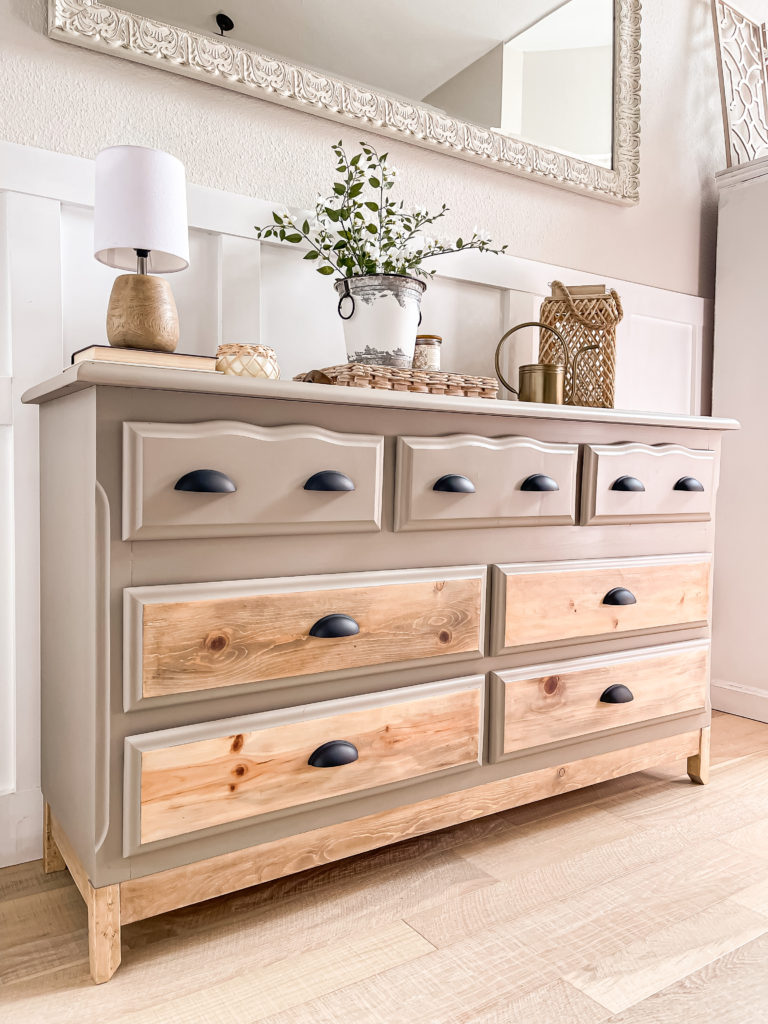
It hardly looks like the same dresser in my opinion!
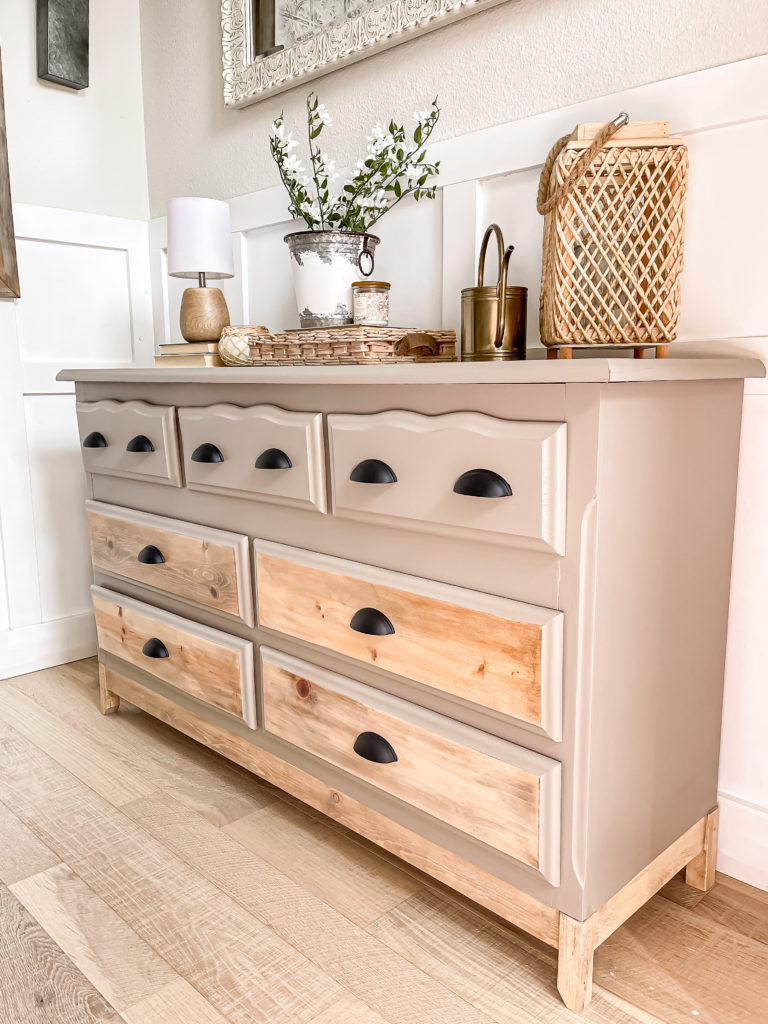
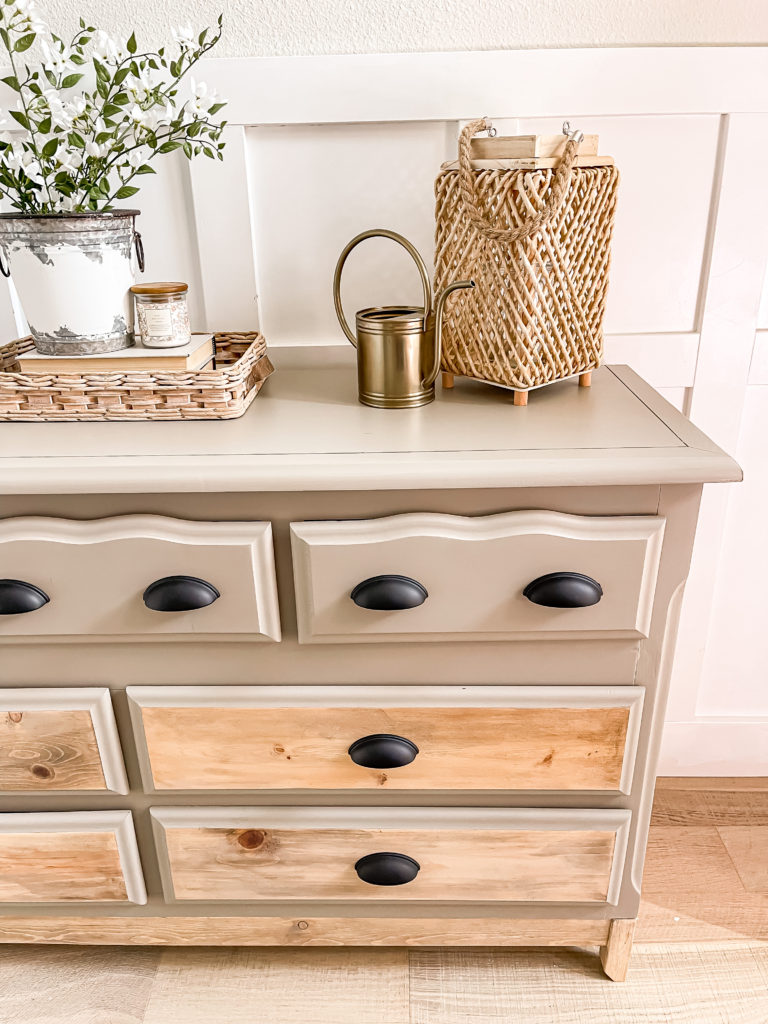
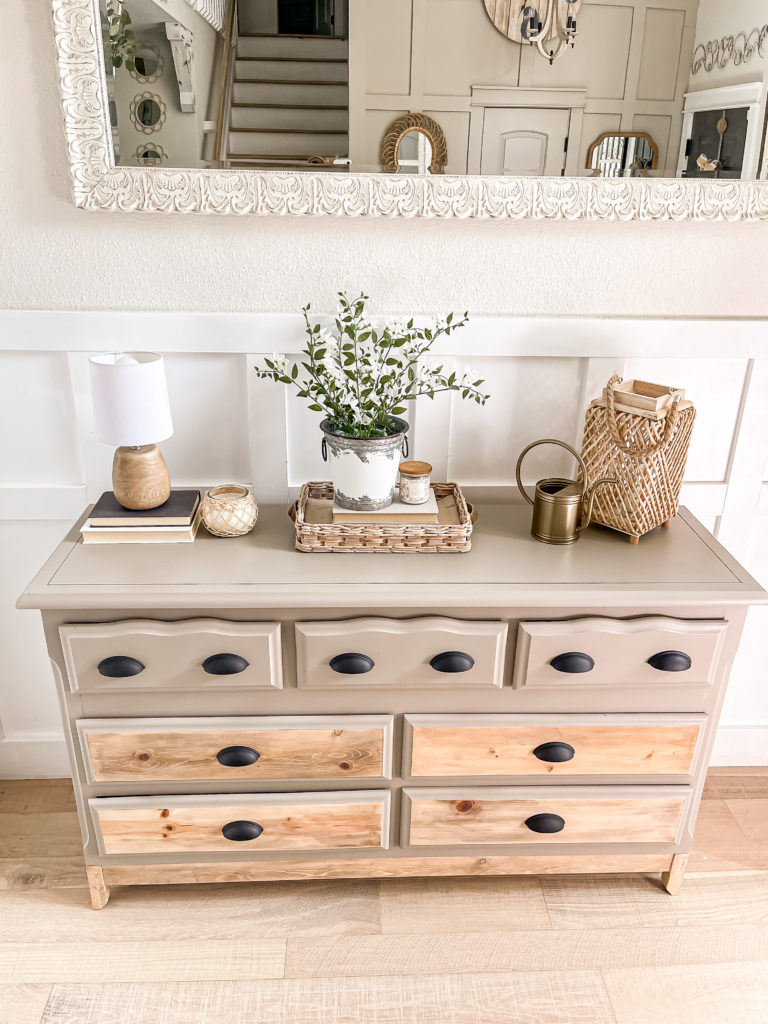
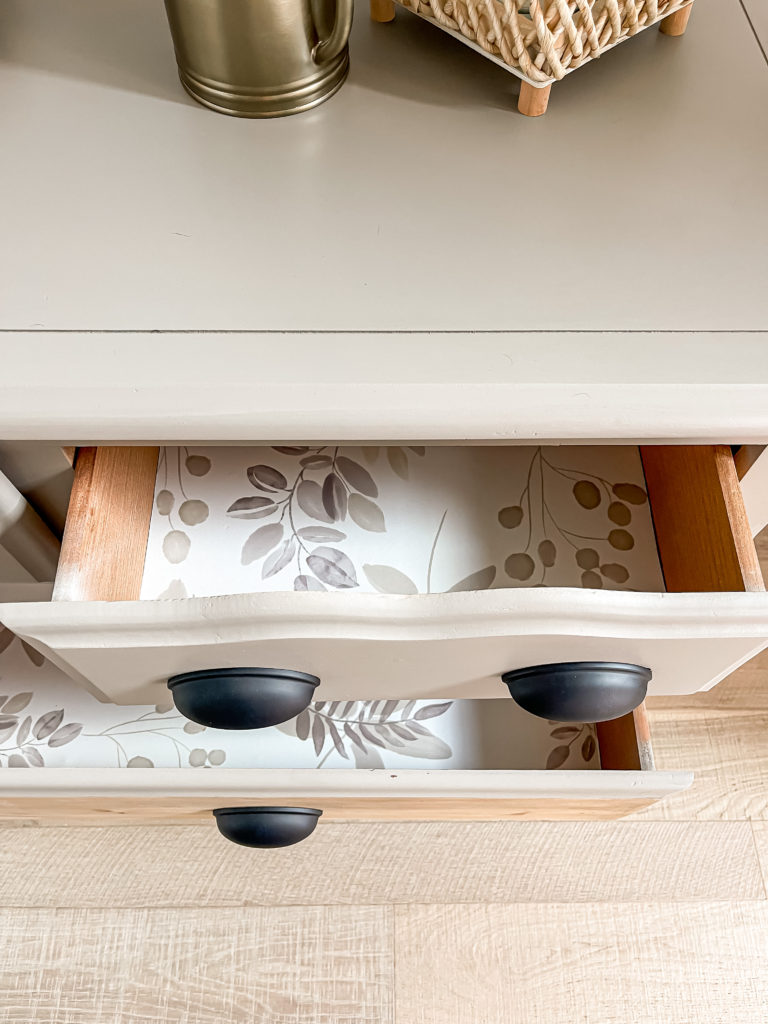
The paper that I found for the drawers was almost an exact color match and I love how the new matte black hardware pops.
The nightstand was refinished to match. I unfortunately didn’t end up getting anyone interested in the set but the dresser went to its new home already.
I think I may go back and change the nightstand up a little bit actually now that I am not trying to have it match the dresser.
Thank you for swinging by today, I hope you have a great weekend and I’ll catch up with you all next week!
Linking up to these awesome parties!
PIN FOR LATER!