Hello and happy Thrift Store Challenge day! I’m so glad that you could make it by today to catch this month’s challenge!

The Rules:
- Upcycle an item(s) from a thrift store, resale store, or garage sale into a new piece of decor.
- There’s no monthly theme.
- There’s no budget to stick to.
Meet the Hosts
Angela | Simply Beautiful By Angela – Gail | Purple Hues and Me – Carmen | Living Letter Home – Chas | Chas’ Crazy Creations – Jenny | Cookies Coffee and Crafts – Pili | My Sweet Things – Kathleen | Our Hopeful Home – Marie | DIY Adulation – Beverly | Across the Blvd – Michelle | Michelle James Designs – Molly | Just a Little Creativity
Make sure you follow our board on Pinterest for more upcycled decor inspiration!
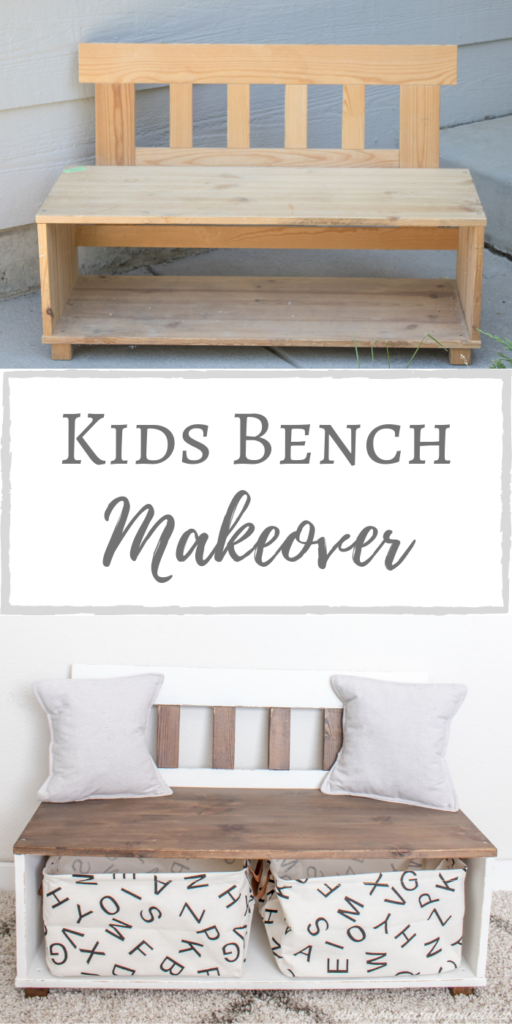
A few months ago the hubby spotted this gem at the Goodwill. I know, I’ve taught him well 😉
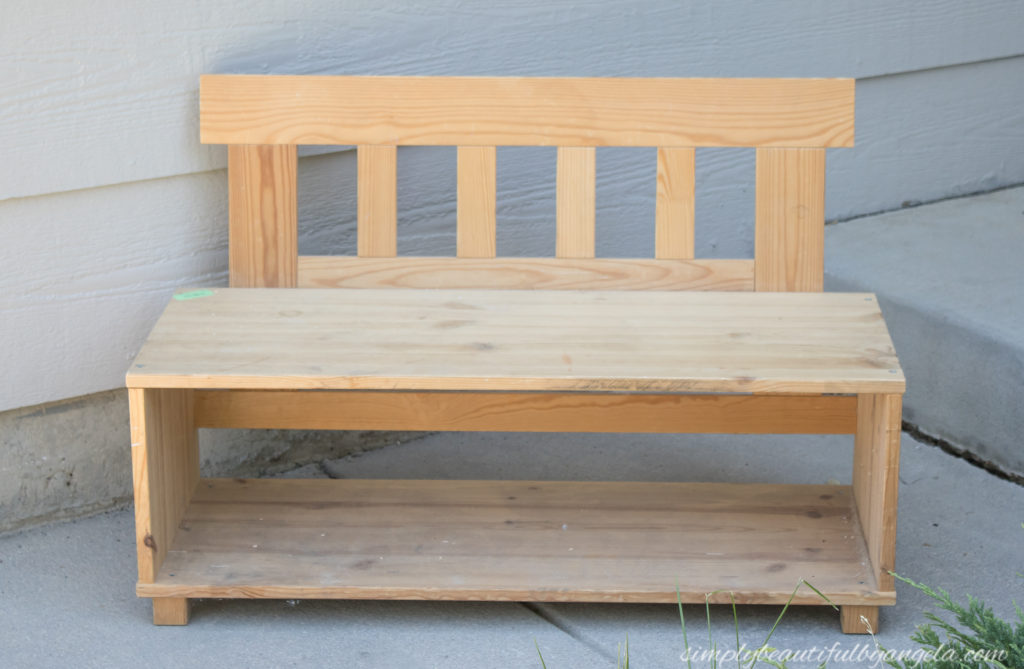
He had recently set up a gaming station in the playroom for the kids, and they were just using the wooden chairs from the art table whenever they played. When he spotted this little wooden bench, he suggested that it would be the perfect seating for gaming. I agreed, it just needed a little TLC!
Supplies Used:(Affiliate links may be provided for convenience. For more info, see my full disclosure here.)
- Minwax Dark Walnut
- Minwax Classic Gray
- FrogTape
- DIY Chalk Paint (1 cup latex paint + 1 teaspoon Plaster of Paris)
- Mini Foam Roller
- Angled Brush
- 220 Grit Sandpaper
Ready for one of the easiest tutorials ever?
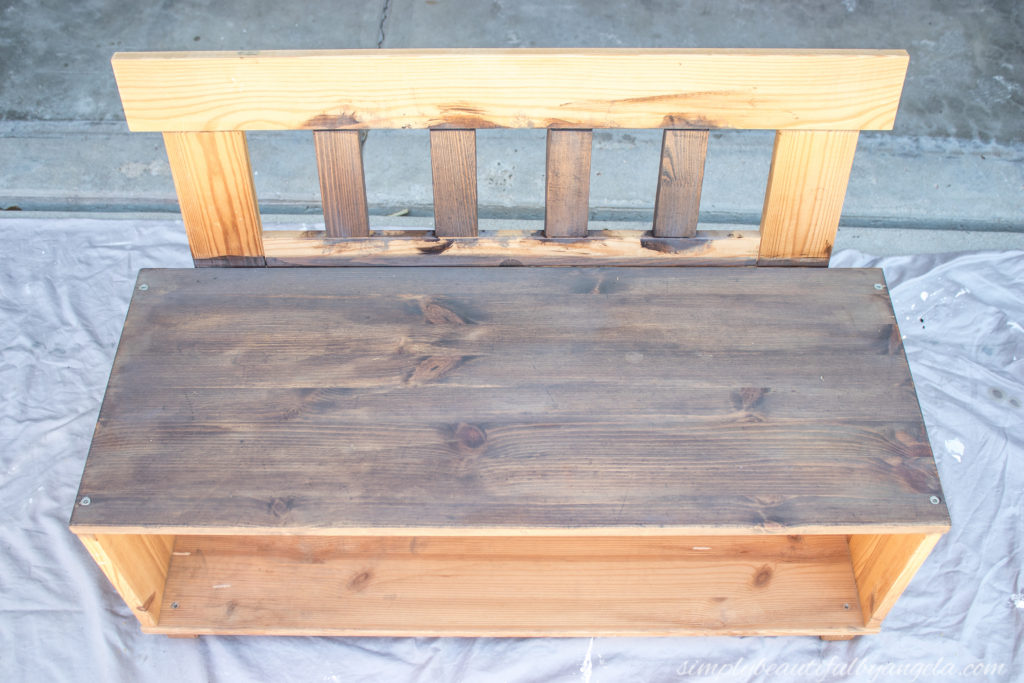
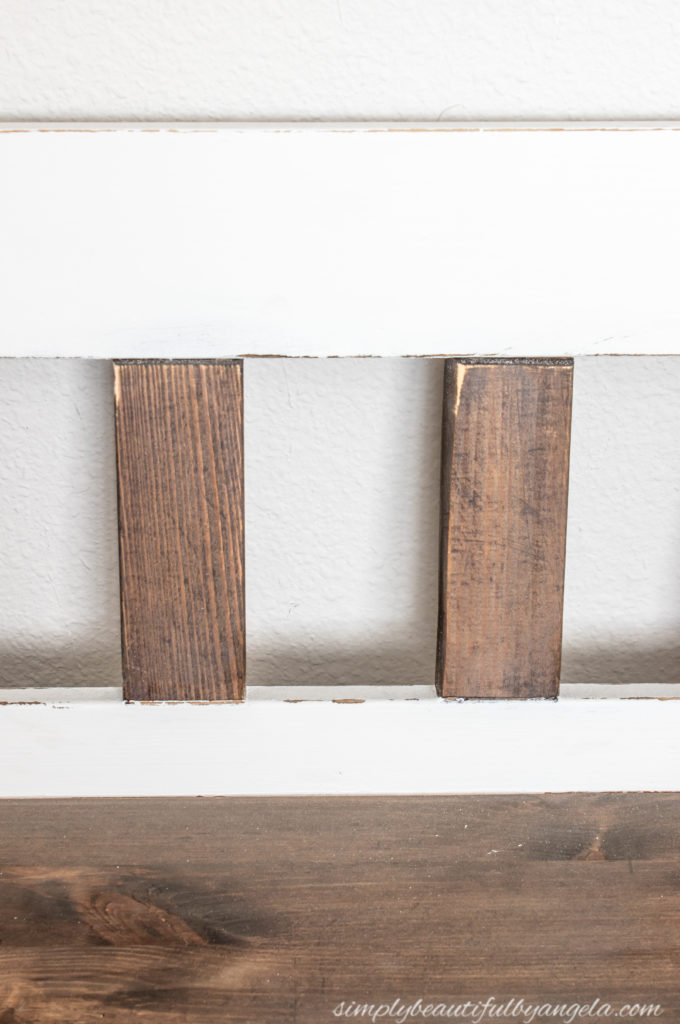
1. Stain
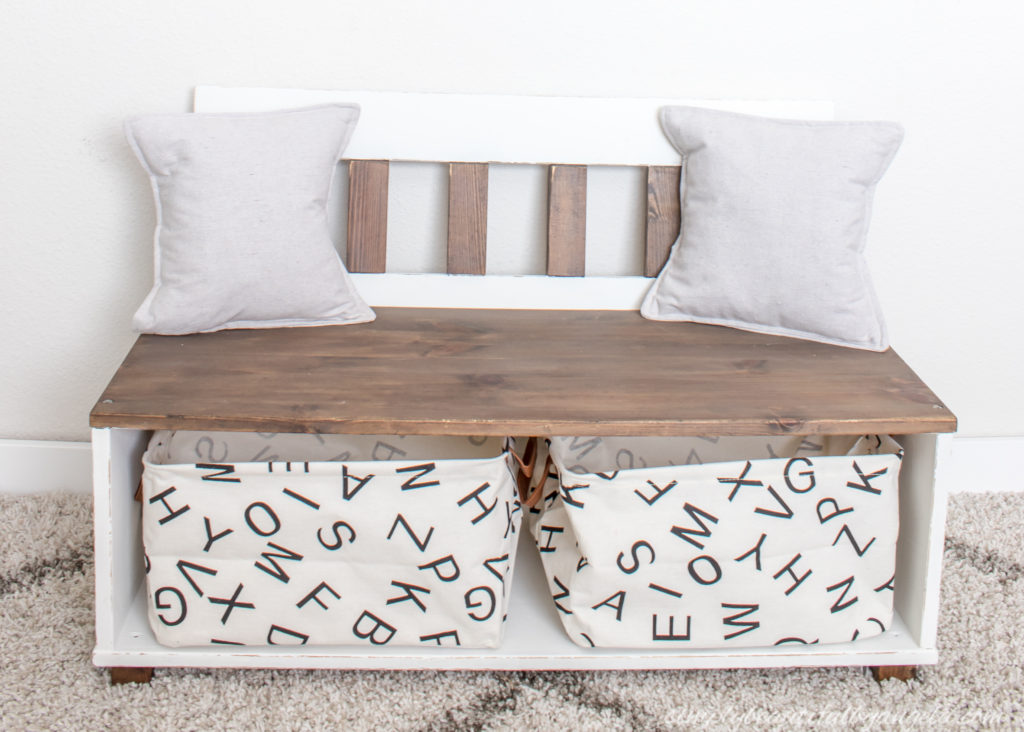
I used my favorite wood stain combo on both the bench top and the rails–Special Walnut followed by a coat of Classic Gray. I love the richness of the Special Walnut and how the Classic Gray gives it a slightly aged look.
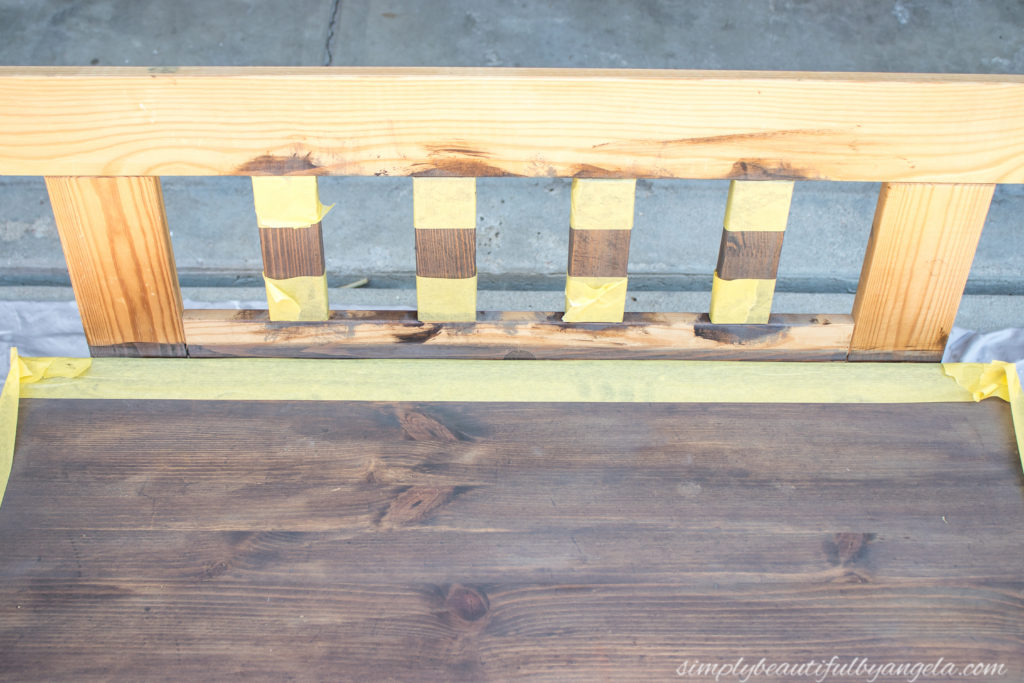
2. Tape
Next, I taped off both areas, making sure to press firmly on the tape so that I didn’t get any paint bleed through.
3. Paint
I didn’t get a picture of the last step, but I simply applied two coats of my DIY chalk paint using a small foam roller. For the tighter areas I used an angled brush. Then, once it was dry I used some sandpaper to distress it.
And that was it! This is how it turned out:
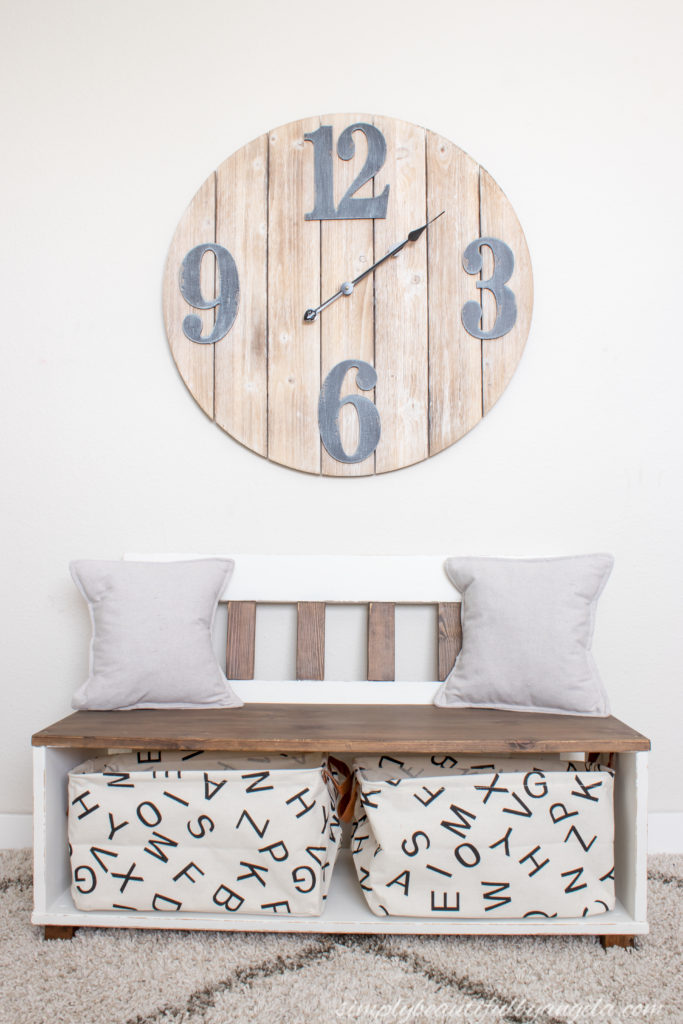
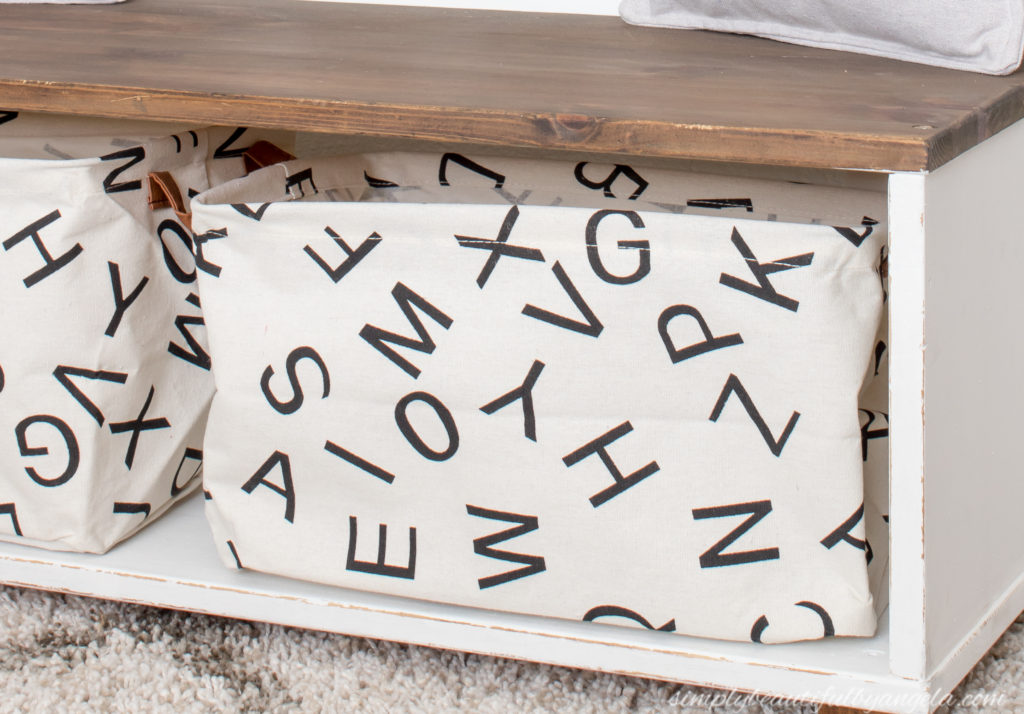
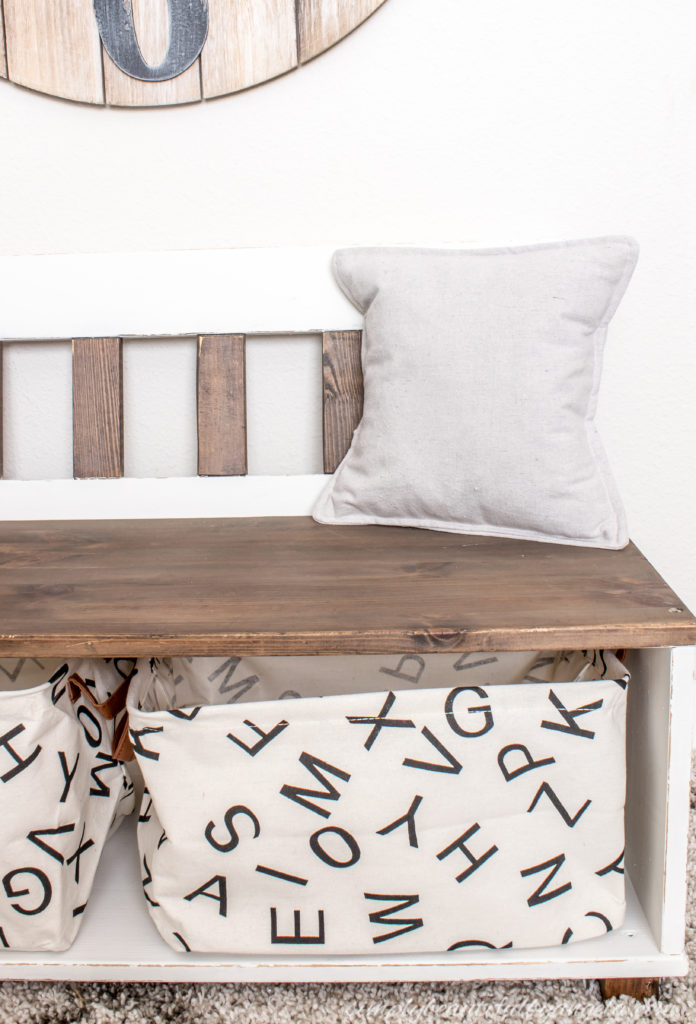
I found these cute alphabet canvas bins on Amazon for $10 to store games and extra controllers underneath.
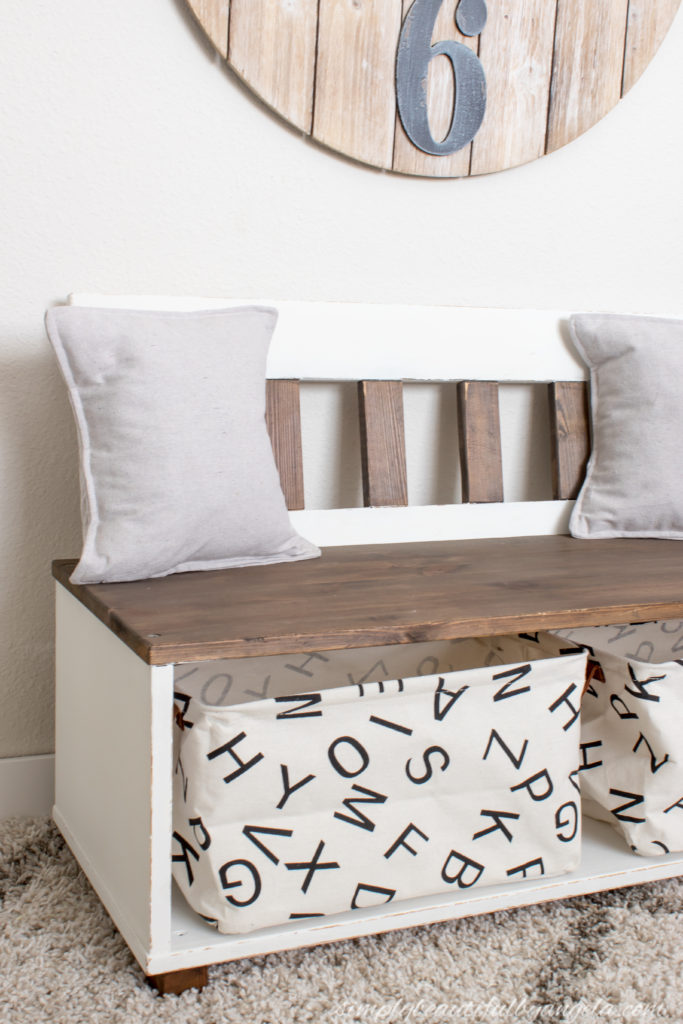
I used some drop cloth fabric to make covers for two mini pillows which made it a little more cozy.
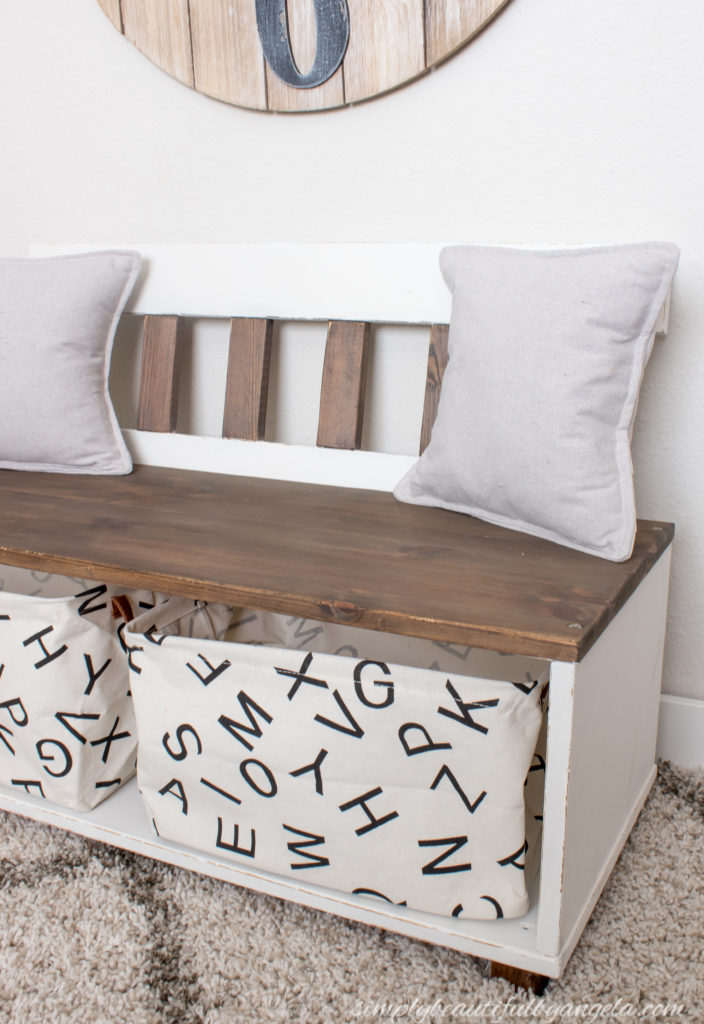
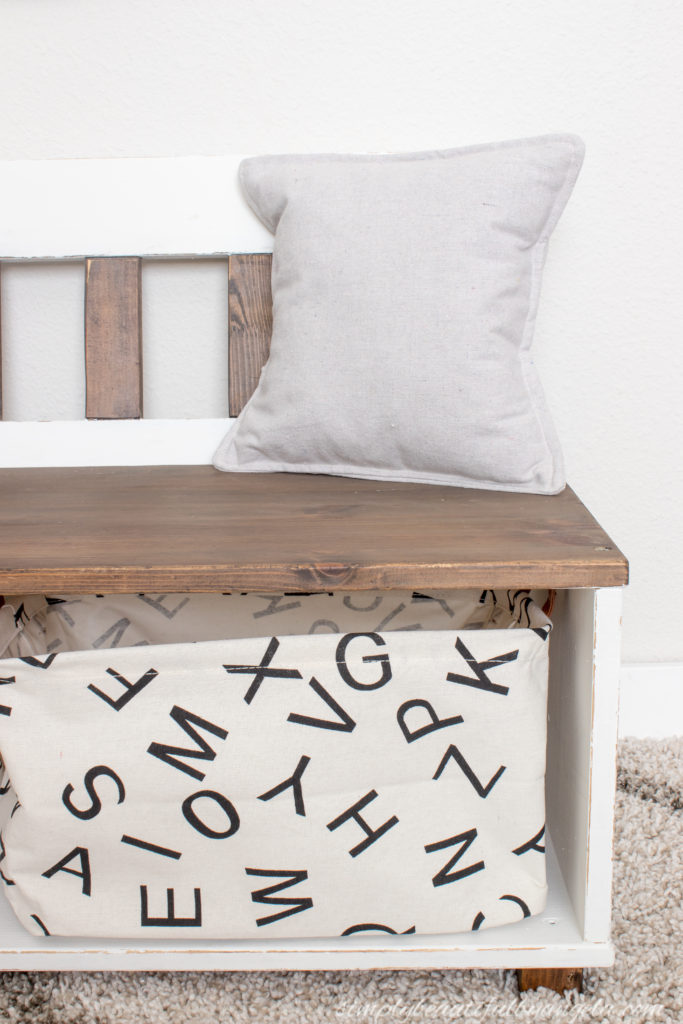
The distressed details make this piece feel like it’s been around for awhile and sort of gives it an old schoolhouse vibe.

I also stained the feet, although I was in a hurry to get this photographed so I totally forgot to do the Classic Gray. You can see how much the gray really does make a difference when you compare the feet to the other parts!
I didn’t bother putting a top coat on it since I know that it’s bound to end up getting a lot of wear and tear which will just add to the distressing!
Thanks for stopping by, I hope you all have a wonderful weekend! We’ll be heading out tomorrow for the kids’ first camping trip and I’m a bundle of nerves and excitement! I’ll let you all know how it goes next week 😉
And now for more thrifty goodness!
Linking up to these awesome parties!
That was a great thrift store find and it looks fabulous now! I love the combination of stain and paint.
Thank you so much Beverly! One of my favorite combos as well!!
What a lovely upcycle and how functional for your home. Wonderful work and thanks for sharing!
Thank you so much Chas!
This is absolutely beautiful! I love everything about it, from the stain and paint style to the awesome storage bins you added. I’m hunting down one of these at the thrift store for sure!
Thanks Marie!! Yes it was such a wonderful find and I’m so happy with it 🙂
You did a fantastic job, Well done! Pinned
Aww thanks Anita!!
That stain color is so pretty. It does give it a beautiful aged look. I”m going to use it for my next stain project. What a perfect bench for the kids stuff, those baskets are adorable.
Thank you so much Jenny! I’m glad I could inspire you on your next stain project 🙂
I love this bench especially the combo of stain and paint. Your farmhouse posts are all nice. You have a great blog.
Thank you so much Michelle, you are so sweet!
Nicely done! I love a thrift store transformation – your husband is a great thrifter! LOL
Thanks Sarah!! I know, I am so proud haha! 🙂
This is SO darling! Nicely done!
#madebyyoumondays
Thank you Jennifer 🙂
This is such a cute bench! And kuddos for teaching your hubby to find treasures at the thrift store!
Thank you Candice!! 🙂
That is adorable and I can not believe that you found such a pretty bench in such great shape like that!
Thank you! Yes it was a great find for sure!! 🙂
Beautiful makeover! Thanks for linking at You’re The Star Blog Hop!
Mel – Decor Craft Design
Oh my thank you so much!!! 🙂
Gorgeous makeover! Your husband is a total sweetie for grabbing that for you!
Thank you Audra! I know I am one lucky girl!! 🙂
This is so pretty, Angela! And you styled it so lovely! We’d love to have you back at Tuesday Turn About, if you have a moment to link up!
Thank you so much Julie!! Yes I will be back for sure 😀
Love this little bench, great upcycle! Thanks for sharing with To Grandma’s House We Go, I’ll be featuring you next week.
Awww thank you so much Chas, I really appreciate that!! 🙂