
Happy Tuesday everyone! I’m going to finally go over my experience with Rustoleum Transformations products, which is probably one of my favorite upgrades that we’ve done. All in all, I am pretty satisfied with both the cabinet and the countertop products but there are several things I wish someone would have told me about them beforehand. It would have saved a lot, and I mean A LOT of frustrations!! In this post I’ll go over the countertops.
Here is the after shot…
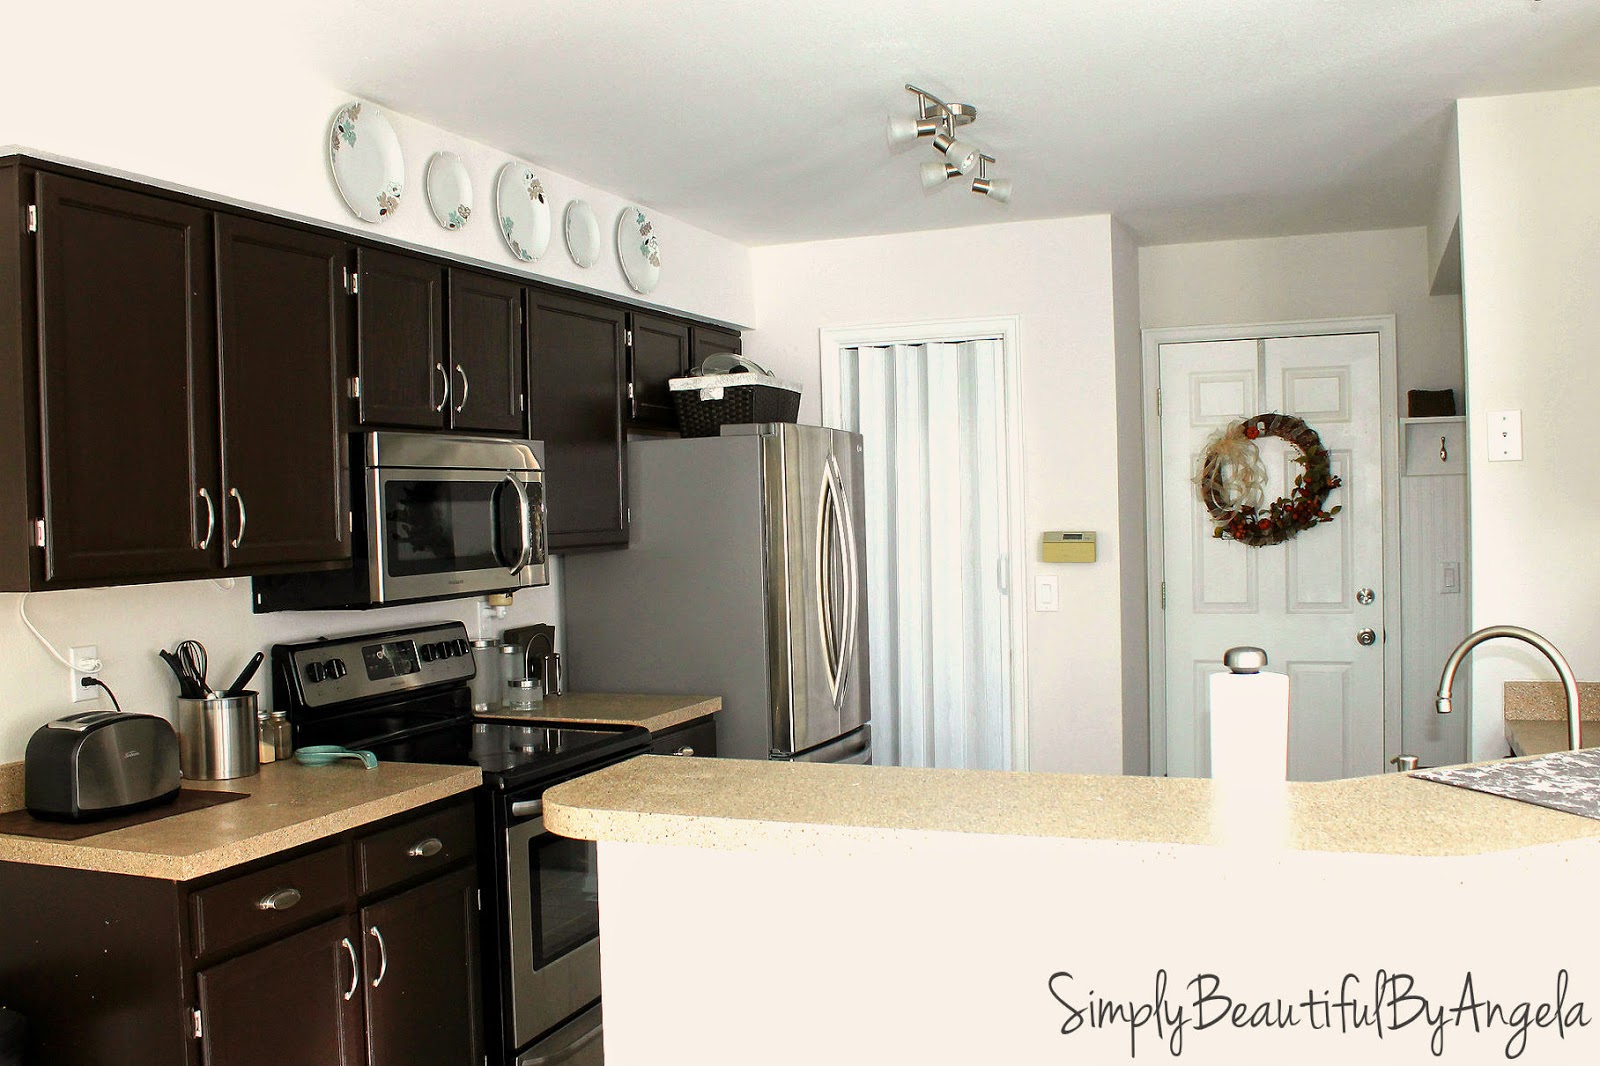
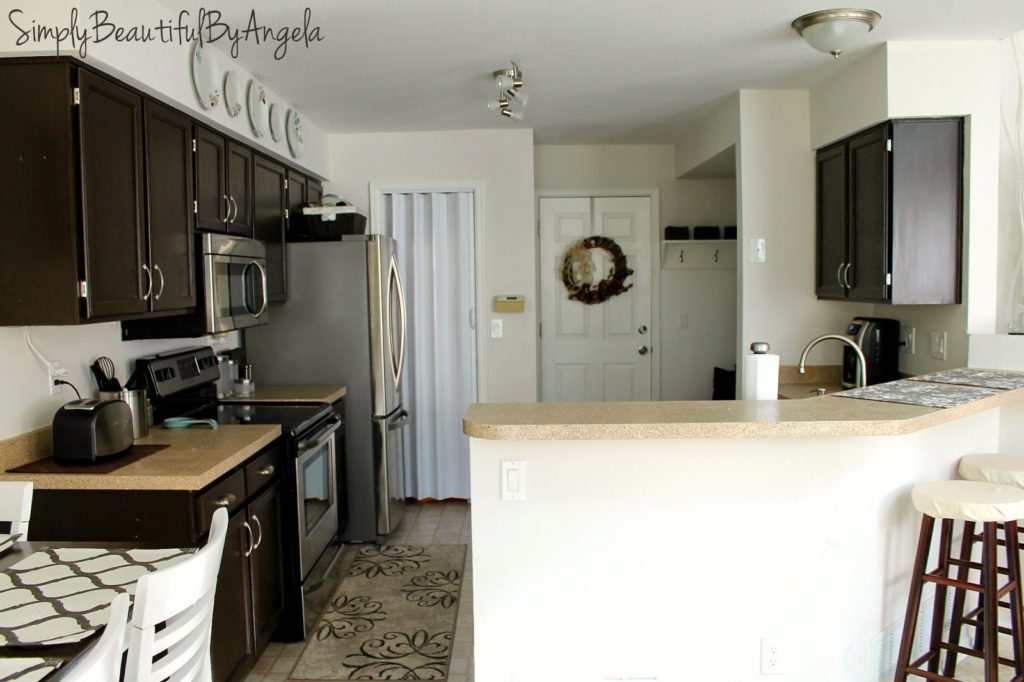
Makes a huge difference–right? It’s amazing what getting rid of 90’s oak and white laminate can really do! We still want to put in a tile backsplash, but Rustoleum definitely helped make my dream kitchen begin to come to life. And they were both a lot easier than I thought they would be.
The kit is somewhat expensive. I got the large kit for $250 because I wanted to do both bathroom vanities with it as well. The sanding is also physically exhausting. However, overall I’m thrilled with how they look. We went with the color desert sand. It comes in 4 steps and I completed one step a day, but that’s only because I was limited to evenings after my little bean went to bed. Sorry I don’t have many pics, this was before I thought about starting a blog!
Step 1
Sand! Sand sand sand. You need to completely rid the old laminate of its sheen so that the paint can properly adhere. It took me a little over an hour to do the kitchen and both bathroom vanities. I then brushed all of the sanding dust off with a broom and went over it several times with a wet rag.
You want to keep going over it with a rag until you can run your hand along it and it comes up clean with no dust.
Step 2
The next night I went back over it with a wet rag one final time to get any remaining dust up and dried it thoroughly.
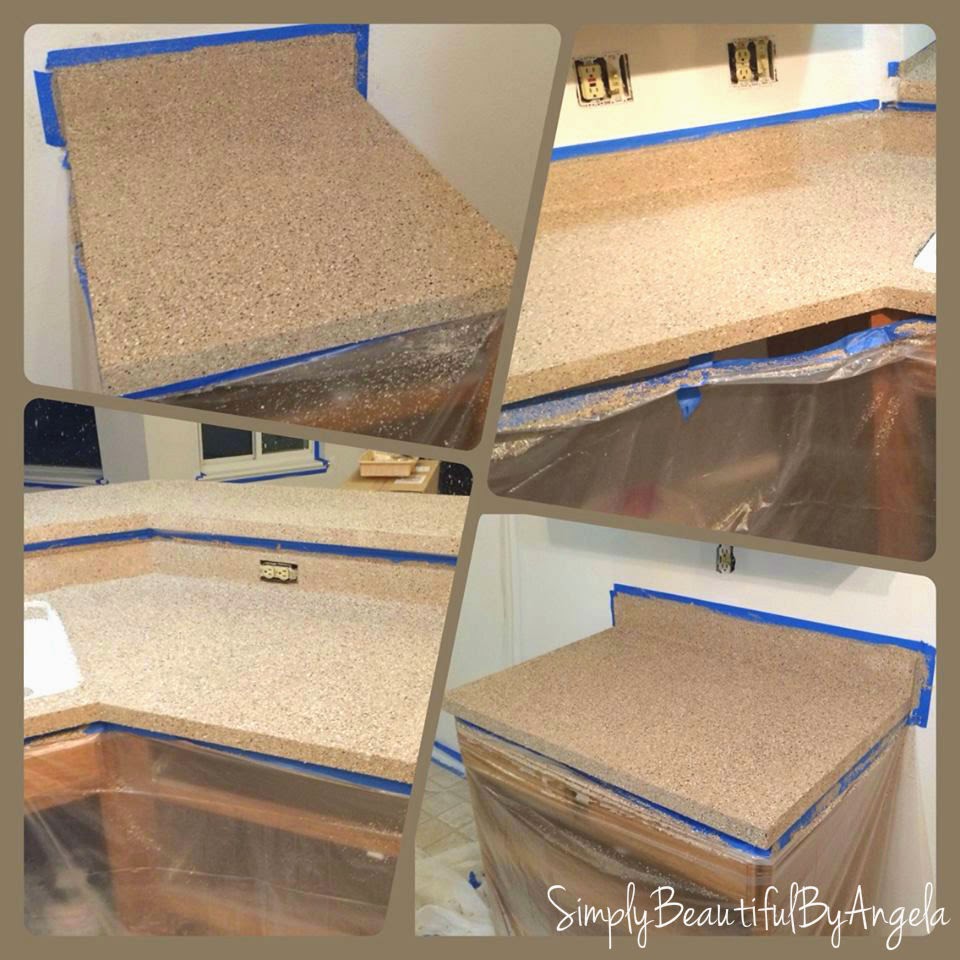
Next, I rolled on the base coat, which is the main countertop color. You have to work quickly and in sections because you only have 10 min to put on the chips. Even though it was stressul to be on a time crunch, I found it kind of fun! I also love weird challenges like that though haha!
They give you a wetting agent that needs to be sprayed on to help the chips stick and you apply it immediately before the chips. The chips were definitely fun to do! You basically load them in a plastic dispenser, turn a wheel and they spray EVERYWHERE!! Seriously, it was like confettii! So much fun! You will definitely want to have plastic laid out! It’s impossible to spray too many since you need to completely cover the coat of paint. If you accidentally rub against a spot (like I may or may not have done a few times….) you can just dab on the base coat with a sponge and then throw the chips on.
This is what it looked like after getting the chips on. I was soooooo excited because I could already see what a difference it made in the kitchen!
Step 3
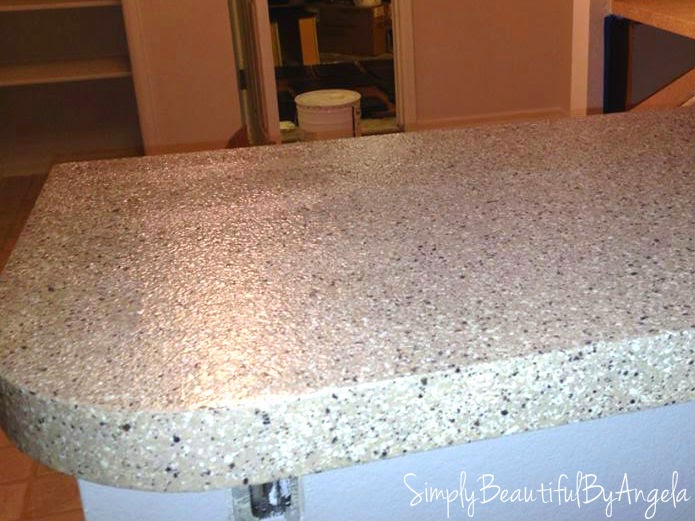
If you didn’t have enough fun sanding in Step 1 you will for sure get your fix in Step 3 which is sanding down the chips. After brushing all of the excess off you have to sand the chips down to a super smooth finish. They provide you a sample to show you how it should feel when you’re done but since we actually wanted a little bit of texture we didn’t sand down to match it exactly. This part was my least favorite, the sanding took forever and created sooo much dust!
Step 4
The last step is applying the top coat. This is the step I was not happy with. As a newbie painter I was completely oblivious to how easy it is to get roller marks with a roller. Since the coating was clear, I didn’t even see them while I was rolling it on, but as soon as I stood back to admire my beautiful new counters, the sun hit them just right and I saw them everywhere! And instead of getting better when they dried (like I thought they would…silly me…) they got worse! Ahhhhh!
I ended up buying a can of Rustoleum polyurethane in gloss and applying it with a brush in the opposite direction. This actually hid it the markes pretty well. It took a lot of twisting in funny directions to see what I was doing and to make sure I was covering the old roller marks. You can still see some of them, but with all of my stuff on the countertops now I honestly don’t notice them.


(source)
This is trying to get a pic of what the roller marks looked like, they aren’t super visible and it’s probably my just my perfectionism kicking in.

I’m suuuuuper glad that we decided to go this route rather than replacing the counters because we saved a ton of money AND I actually really enjoy the way this looks. There have been very few granite counters that I actually like and I love how this texture feels. Plus it doesn’t show dirt, like at all! I have to keep reminding myself that it’s probably time to clean the counters because you seriously can’t even see that they are dirty.
I’ll go over the cabinet transformation soo–that one had an awful surprise at the end, and that project actually ended up putting me in the urgent care for a night!! 😮
More to come on that!

Rustoleum Countertop Transformations can be purchased here (Affiliate provided for convenience. For more info, see my full disclosure here)

We additional required Rolex wallet wrist watches and also the replica watches sale into account. A lot of information arrived collectively, and much more compared to four hundred well-documented replica watches possess to date discovered their own method in to my personal data source. Present magazines concentrate nearly solely upon classic Panerai. Therefore, just about all rolex replica sale obtainable info help with up to now concerning the actions is actually missing as well as extremely imperfect. I wish to open the hublot replica actual area associated with eyesight as well as reveal a rolex replica sale brand new as well as clean watchpoint. Classic Panerai is really a big area. There can be just a few fake rolex sale referrals, however analyzing each and every watch may take a moment.
When you use a genuine service, you will be able to provide instructions, share materials and choose the formatting style. Best Portable Dishwashers