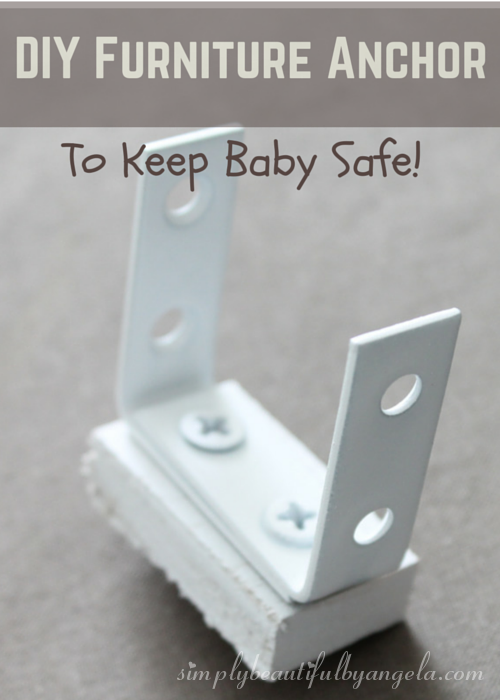
My little one is starting to get to the climbing stage and I’ve heard too many horror stories about furniture toppling over so we headed to Home Depot to find furniture anchors. They told us that they while they didn’t have any specifically made to anchor furniture, we could simply use a couple of L brackets to secure to the top of the furniture and then to the wall.
Of course I wasn’t happy with that solution, since I didn’t want an ugly metal bracket sitting on top of all of our furniture. So I came up with my own idea.
I’ve realized since then that Babies”R”Us sells actual furniture straps, but mine are really simple to make (and cheaper!).
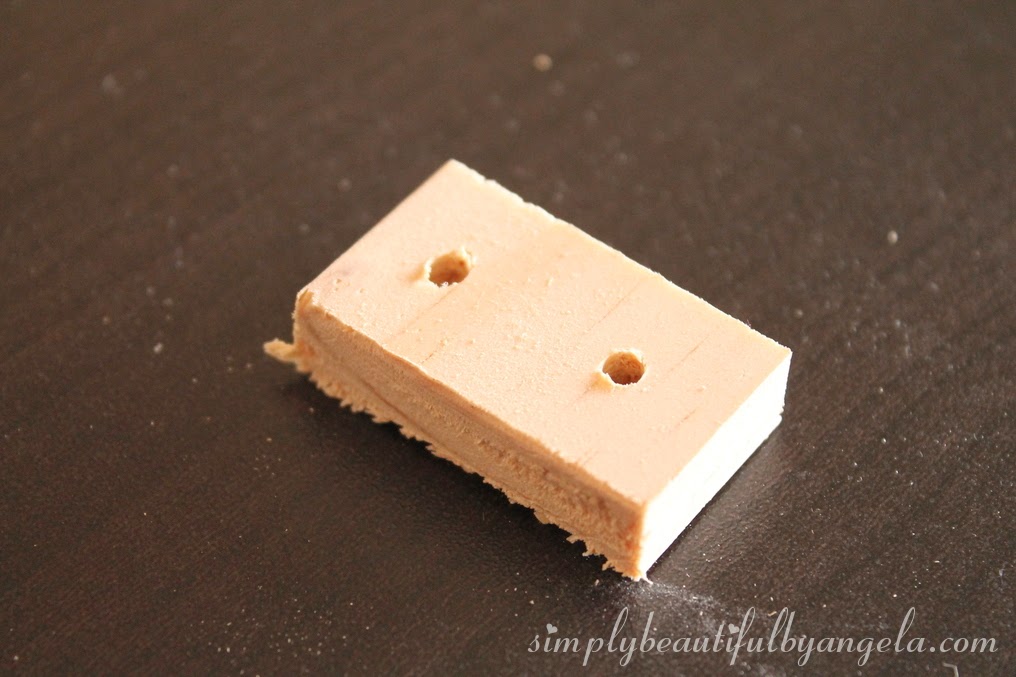
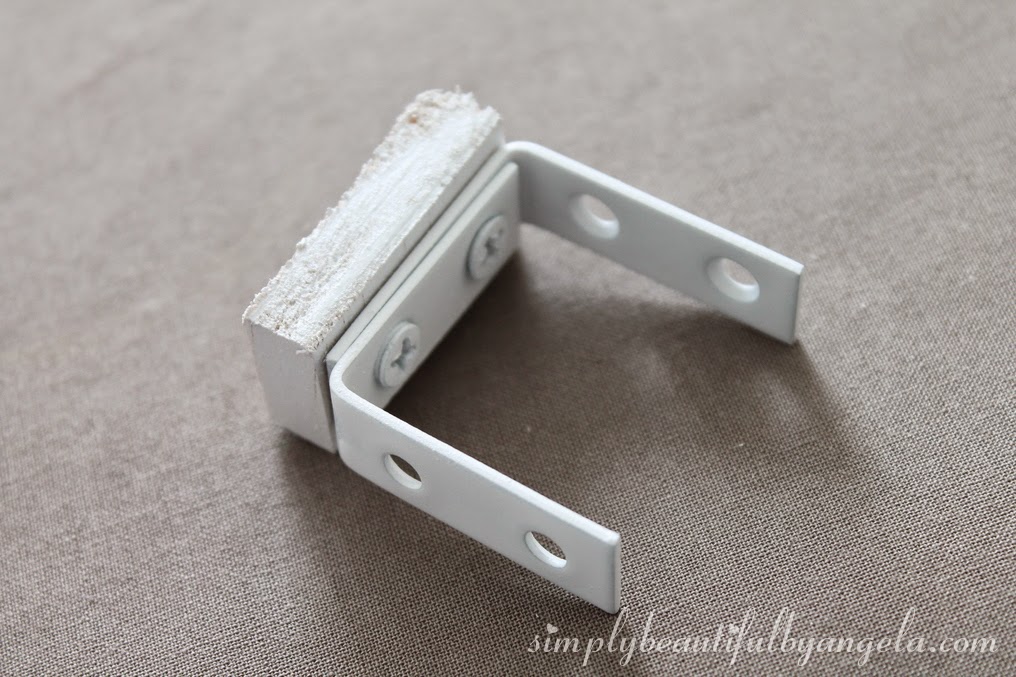
I started by cutting out small pieces of scrap wood and drilling two holes where the L brackets would go.
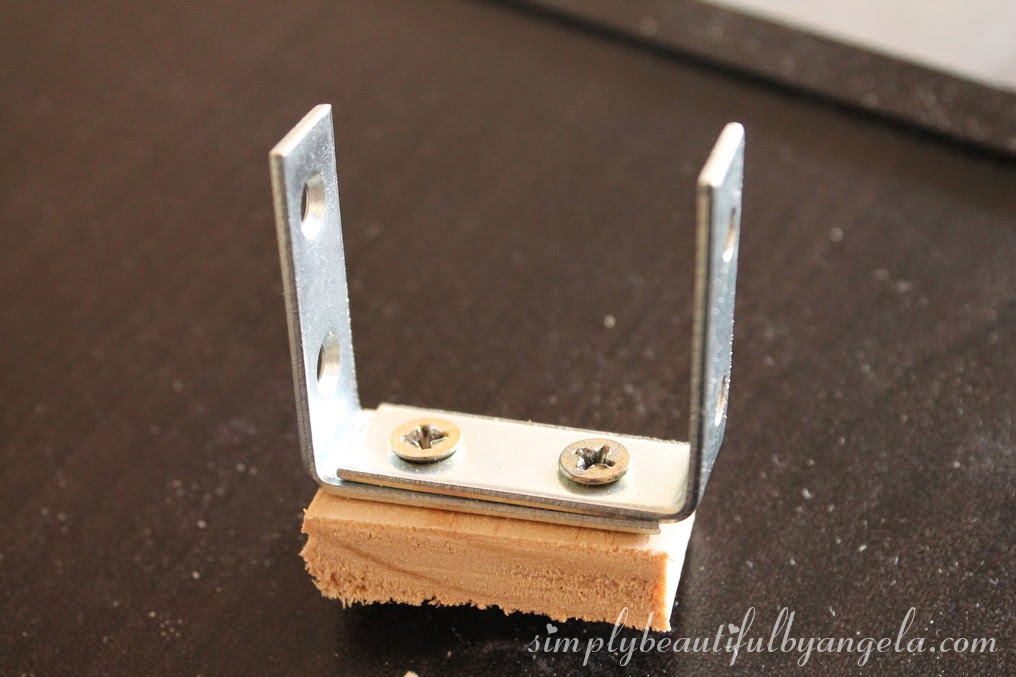
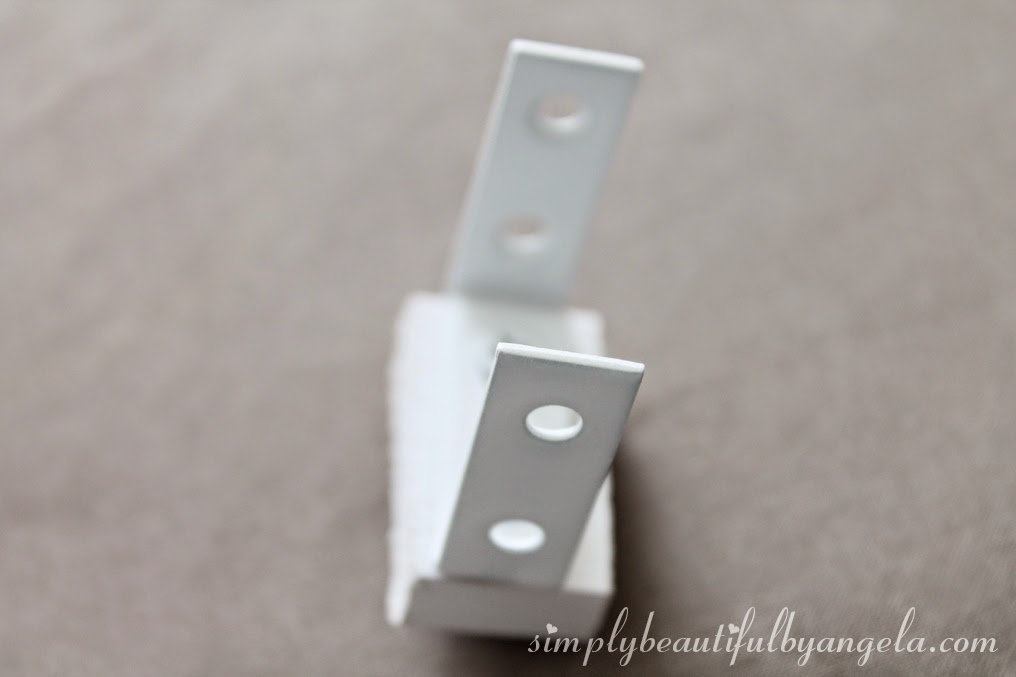
I then secured two L brackets to the wood, placing one on top of the other.
And even though these go behind the furniture, I spray painted them white in case they can still be seen. I know, I know it’s the perfectionist in me 🙂
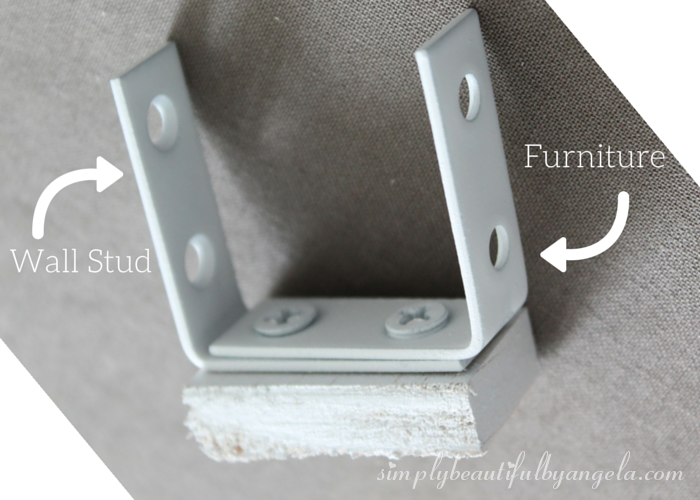
We haven’t installed them just yet (we’ve been busy working on our floating shelves!), but basically one side gets secured to the wall stud while the other is secured to the back of the furniture. Clever right?
Here’s Mr. Mischief himself veggin’ on some crunchies and watching the Teletubbies while Mama and Dada were hard at work. And yes that’s our big goofy dog patiently waiting for crumbs…

Now, of course in order to install these you have to take them apart (unless you feel like using a screwdriver at a suuuuper awkward angle).
Here’s what you would do:
1. Locate wall stud, hold the piece up and mark the holes on both the wall and the furniture.
2. Drill your pilot holes.
3. Take the piece apart and secure one L bracket to the wall and the other to the furniture.
4. Slide the furniture back to the wall so that the brackets meet and screw them back into the piece of scrap wood.
Simple right?
I hope everyone has a happy weekend! I’ll be back on Monday 🙂
If you like this, be sure to check out how I DIY’ed a baby gate for cheap in this post here!
Linking up to these awesome parties!

what a great idea and thanks for sharing now that our children are old enough to have their own I am always looking for great ideas to share with them
come see us at http://shopannies.blogspot.com
Thanks for stopping by! Glad I could help 🙂
Brilliant! And We're about to the climbing stage, too, so I'm going to get my hubby on this sooner than later. Thanks for sharing at Too Cute Tuesday. 🙂 I pinned for later!
Isn't it a scary stage?! Thanks for stopping by 🙂
Thank you for sharing, always good to learn something new and that can keep the kids safe. Please come link up and share this over at http://www.wrightsimply.com/2015/03/oh-my-heartsie-girls-wordless-wednesday.html
Have a wonderful weekend ahead!! xx Ashleigh @SimplyWright
Thanks Ashleigh! I'll add you to my party list 🙂
Great idea! These look much better than L brackets. It's hard to believe that sweet little angel chilling on the couch will be climbing all over the furniture, but it's good you're prepared! Thanks for linking this up at This Is How We Roll Thursday.
Thanks Corinne! I know, they grow up way too fast!!
I need this!! Such a great idea!
Thanks Marina! 🙂
Thank you… Thank you… I have been looking for U shaped brackets for ever!!! making my own today!
Thanks for stopping by Sandra! Glad I could help 🙂
clever clever clever!!! do it now friends!!! i will try this way. easy hah. tks your post!! happy weekend ^^!
great idea and thanks for sharing. i will try this way. Have a nice day !
you so smart, that's very good idea, i will try this, thanks!
Machine blades are commonly using for all kinds of machine based cutting and metal cutting also. Accuracy based cutting is also happening here and precise cutting ideas are also happening here and all of them are with intelligent views and applications also. Simply effective cutting ideas are related to these kinds of applications. check it out
Thanks for your great writeup.I'm sure it is probably the most important details for me.
Simply outstanding!I will try this
Discount furniture is not difficult to find, and if you carry out an internet search for furniture clearance offers you are sure to find some great deals. laywayback.com/recliners/best-flash-furniture-chair-reviews/
Is the entryway simple to work? The simplicity of task has a considerable measure to do with the entryway's safety. On the off chance that you experience serious difficulties working the door, it implies that you can't go through it conveying your kid or different things. Baby Gates Plus
You’ve got some interesting points in this article. I would have never considered any of these if I didn’t come across this. Thanks!.
Online home shopping site India