Happy Earth Day! I’m going to share a project that I’ve been meaning to do for a long time. It’s crazy that it took me so long because it literally took maybe a total of 30 minutes and 7 bucks to do.
Back when I shared the nightstand makeover in my step daughter’s room (yep, remember how long ago that was?!), I mentioned that the next thing to do in here was to update the desk stool.
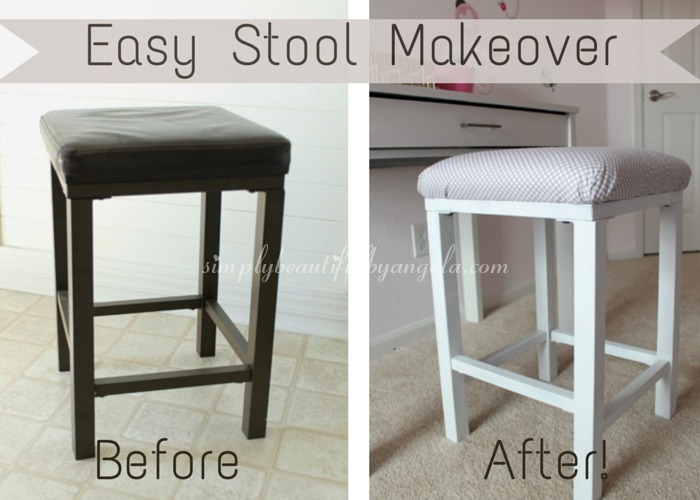
Here’s a glimpse of what it looked like in the room before.
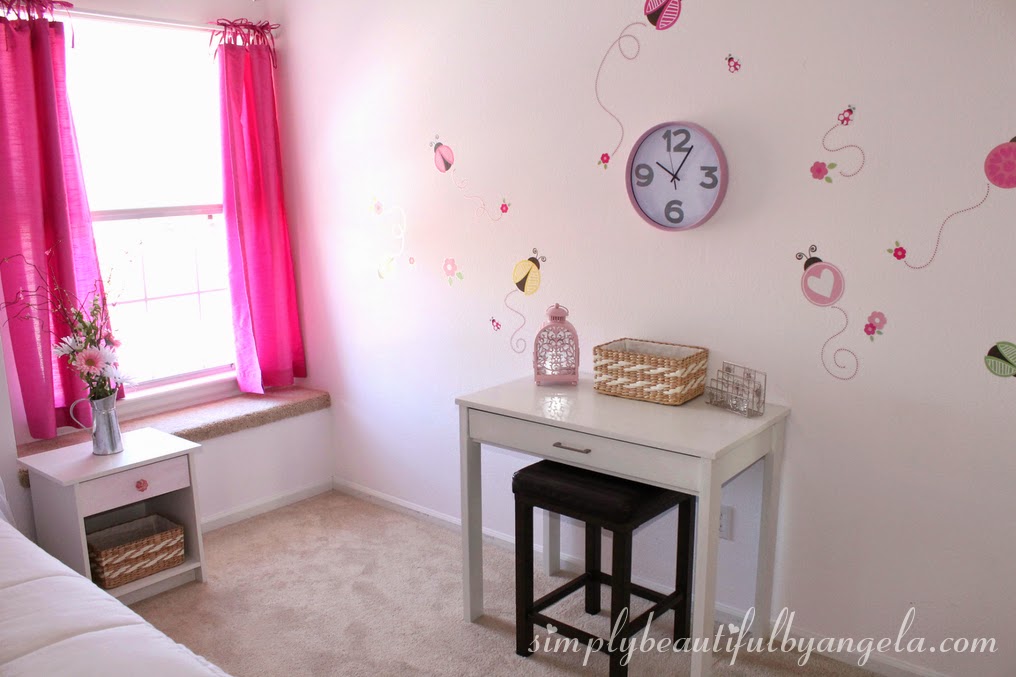
I have a few brown accents to match the ladybug wall decals and sheets, but the stool stuck out like a sore thumb.
Most people would probably just go buy a new desk chair and donate this poor little guy, but I saw his potential! (Not sure why it’s a “he” but that’s what I’m going with haha…)

I removed the seat and applied one light coat of Rustoleum spraypaint in white satin to the metal frame.

Okay, confession time. I have a lot to learn when it comes to spraypainting. After my first coat I was left with a lot of areas that looked like this.

The hubby came out and finished up the second coat for me and taught me that I need to apply it in strokes and not to linger in one spot for too long. I love my teacher, what would I do without him? 🙂
Once the second coat dried, I went back and sanded those rough patches with some fine sandpaper and applied one more thin coat over those areas to smooth it out.
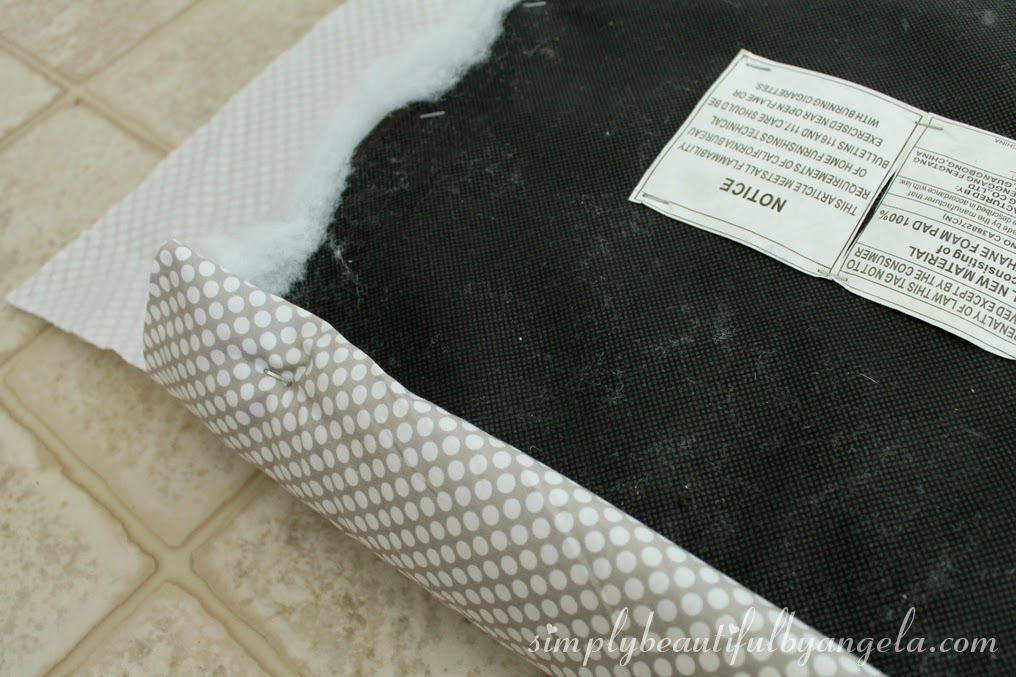
To recover the seat, I began by using a staple gun to attach a layer of quilt batting. This added a little extra cushion and since my fabric was light, it also kept the dark brown from showing through.


Once I stapled around the edges, I trimmed off all of the excess.

Before I began attaching the fabric, I cut out a square in each corner to make it a little easier.

As I went along the edge with the staple gun, I tucked the fabric under the batting to keep it nice and neat.
At the corners, I just tucked little creases as I stapled.

Isn’t he pretty now? 🙂


My indecisivness was in full force when I was trying to pick a fabric at the store. I wanted something girly but at the same time, I wanted something neutral in case we ever need it as an extra seat for a party.
When I found this greige (grayish beige and totally a word, spell check!) and white polka dot print, I was sold.

It looks so much better in this room now, like it actually belongs! Imagine that.
Oh and that desk used be be espresso and was actually my first furniture painting project. It looks pretty good until you look up close!


What about you, have you ever done a makeover on a piece so that it fits better in a room?
Have a great day everyone, I’m going to take a few days off so that I can put the finishing touches on the backsplash project and enjoy my birthday which is next Tuesday. I’ll hopefully have the big reveal on the backsplash ready for you on Wednesday! 🙂
Linking up to these awesome parties!

I'm always amazed what paint can do to something that is "tired" I too love giving pieces a fresh look. Look terrific
Thank you Mary! I agree, I'm so glad I stumbled up this trick 🙂
I adore the fabric you picked for the top!
Thank you Cami! It was a tough decision for sure 🙂
Wow, this is so cute! Great choice of fabric and finishes the room off nicely. I really want to try some up-cycling projects.
Thanks Kate! The fabric choice was a tough one for me so I really appreciate that. Up-cycling is so much fun and super rewarding 🙂
Wow. It is amazing that you made that stool go from a few bucks to a few hundred bucks with a little creativity.
Thanks Jessica, you're so sweet! Thanks for stopping by 🙂
This turned out amazing! I always get nervous when doing a reupholstered piece! Great job! Pinned!!
Thanks for linking up at Totally Terrific Tuesday! Party is now live, hope you make it back 🙂
Jess
LiveRandomlySimple