I have a confession to make. I have recently developed a new obsession–curb furniture. I find myself eyeing curb furniture everywhere I go! It’s kind of like seeing a stray pet that I want to pick up and take home haha. Unfortunately I don’t have the space to bring them all home or the time to work on all of them, so I have to pick and choose. But almost everything I see sitting out on the curb I find myself slowing down and thinking “wow, what could I do with that???”
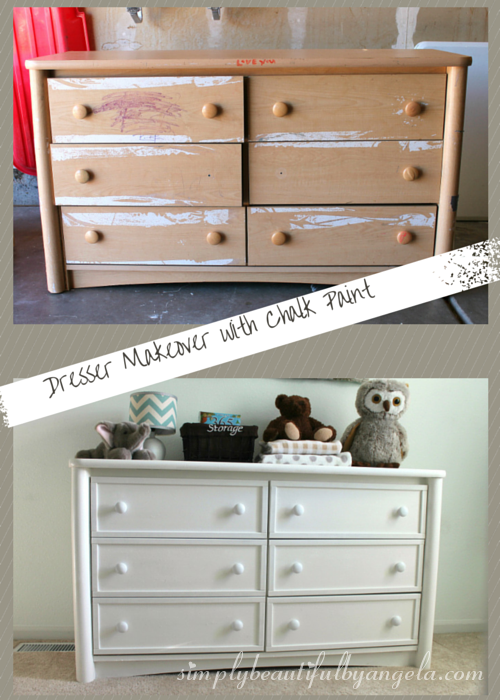
A few weeks ago I spotted this poor abused dresser.
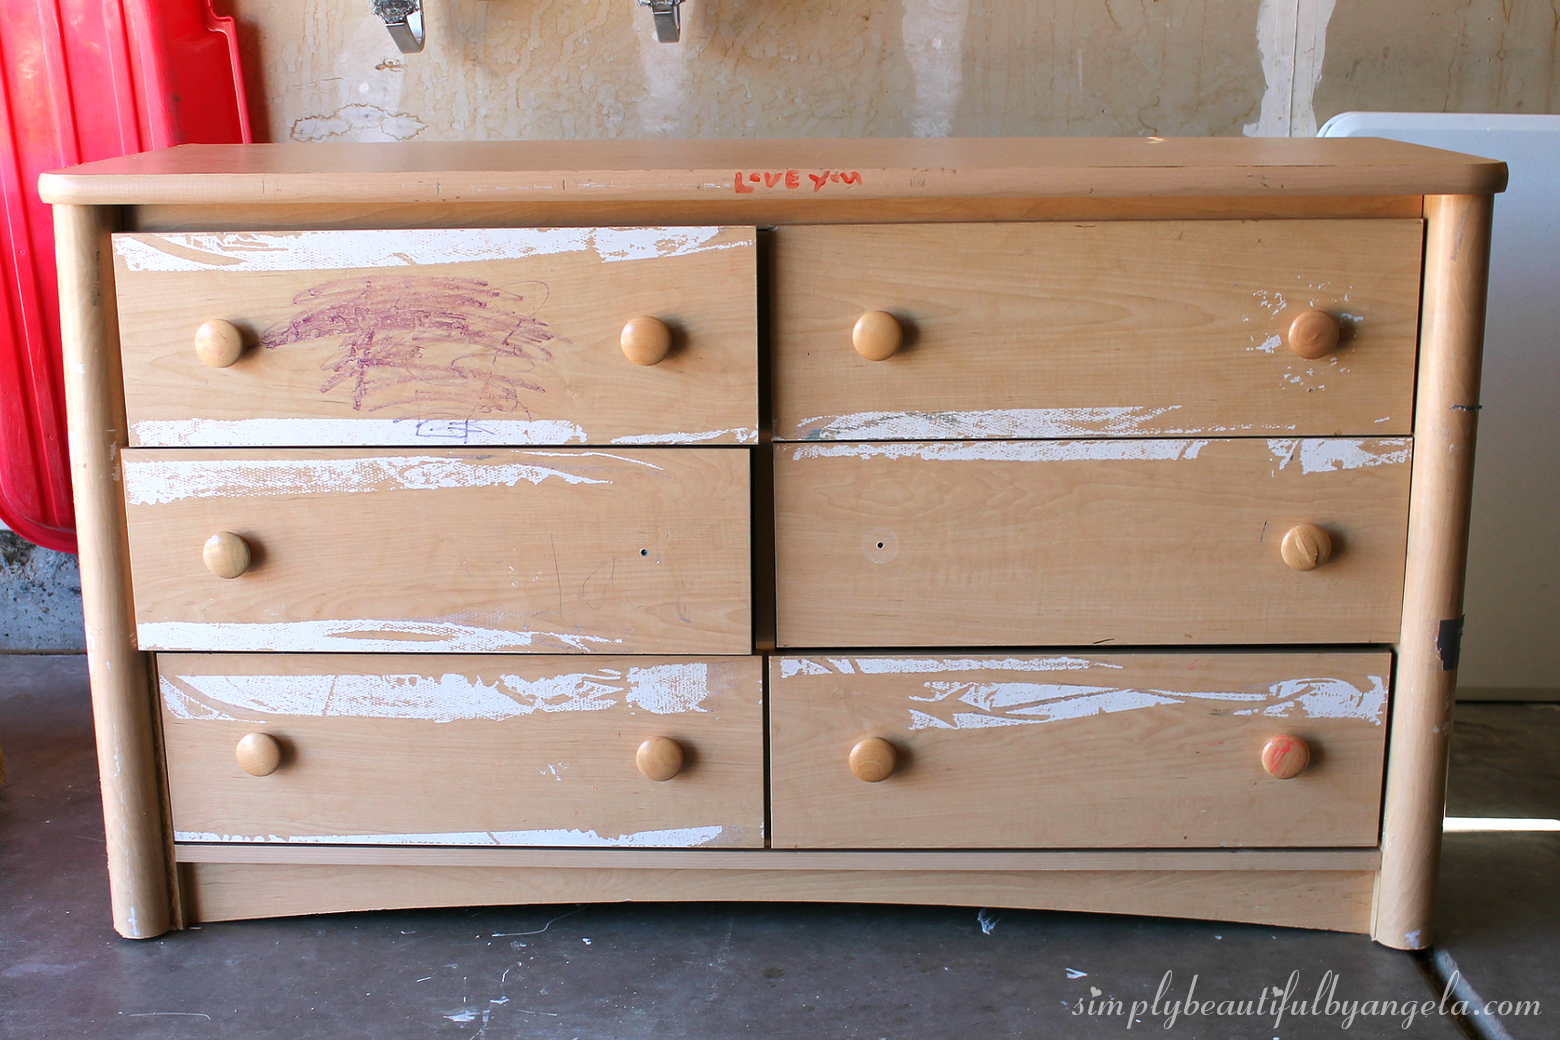
I immediately thought, “that would look awesome in a kids room!” I’m pretty sure the hubby had a hard time seeing past the marker and duct tape damage, but he loaded it up for me anyways.
It’s really sturdy and the inside of the drawers are near pristine. But I think it had been left outside because one side was truly disgusting. Besides being somewhat warped from water damage, it had hard black spots that were as hard as rocks. I’m also paranoid about mold, so I didn’t want to take any chances.

Ick!!
So Anthony ripped that piece out and we replaced it with a new piece of MDF from Lowes. We got a 2′ x 4′ sheet for less than $7 and had them cut it to size in the store.
(Oh, can you see my next project peeking out on the left? It’s a cute little night stand that I couldn’t pass up! Found curb side of course…)

With chalk paint you don’t really need to sand, but since it had all of that yucky duct tape residue I gave the entire thing a light sanding.
I then applied 3 coats of my DIY chalk paint using a foam roller and sanding lightly between coats. It probably would have been good with 2, but since it was such an easy piece to roll paint on (very few tricky spots) I did a third for good measure.
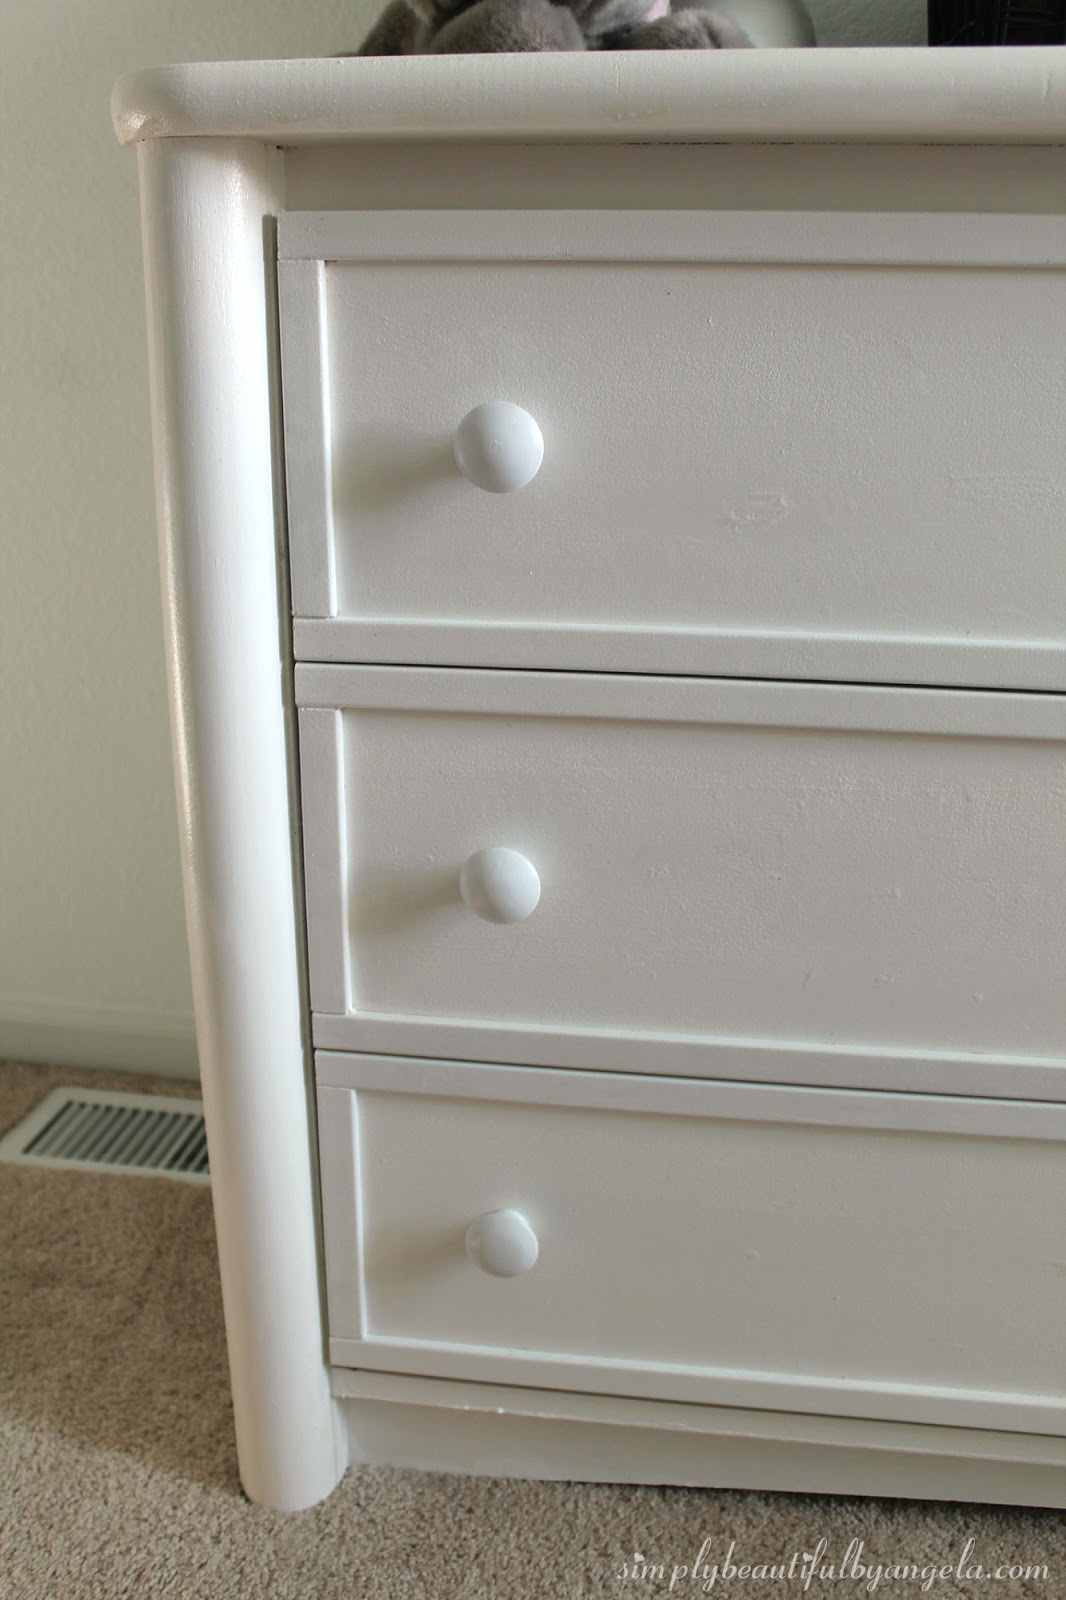
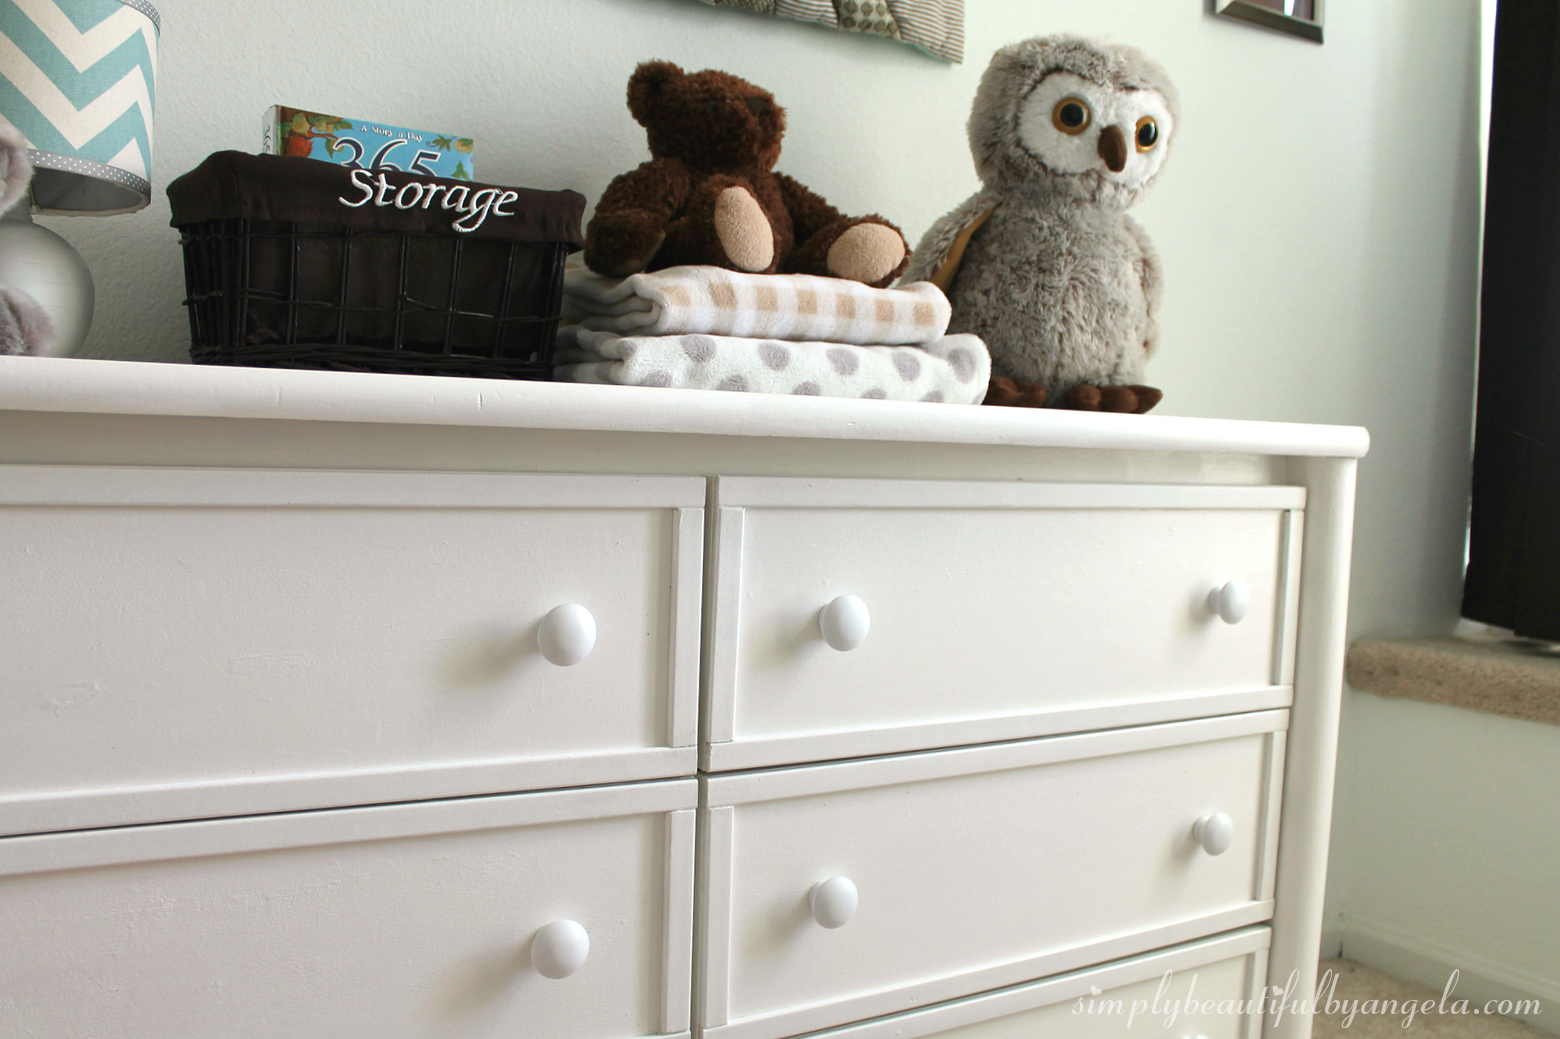
Here are the pretty new drawers.

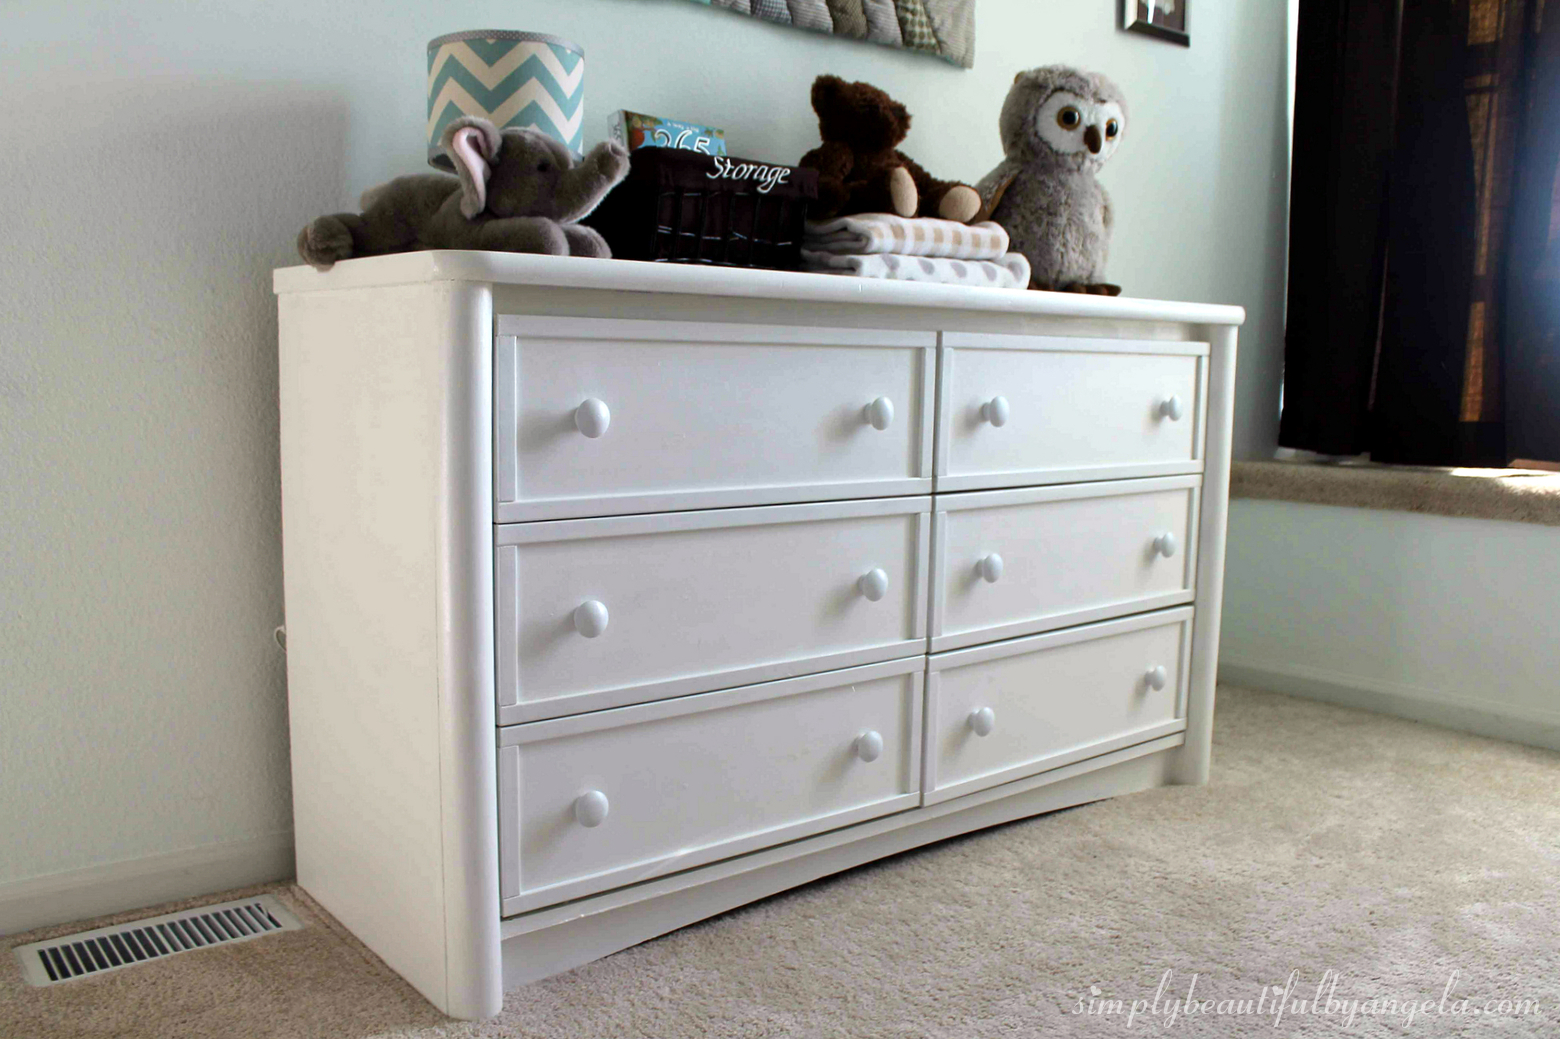
Most of the old knobs were either missing or broken, so I purchased some new wooden ones from Walmart and spray painted them white. I also felt like the dresser needed something extra, so I framed each drawer with some inexpensive molding (around $2 for 8′ at Lowes).

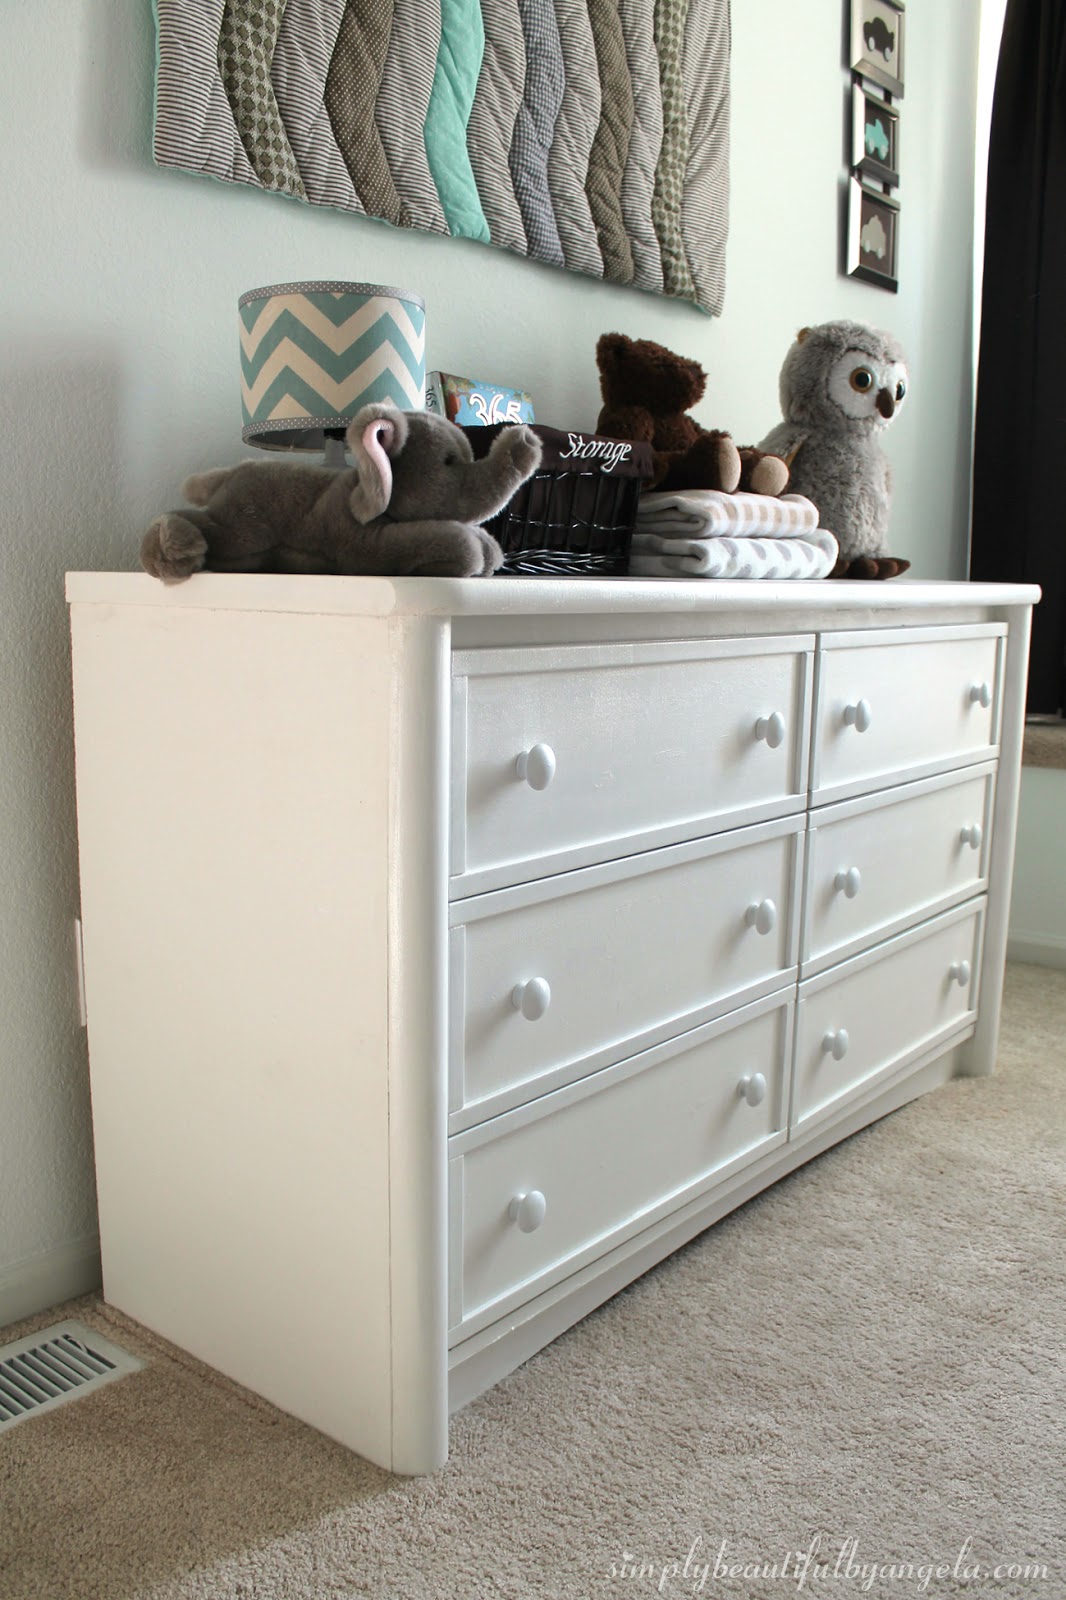
I used some caulk in spots that had little gaps, including where the molding pieces met and I gave the entire dresser 2 coats of Miniwax polycrylic. For the knobs I used spray acrylic sealer.
I was originally going to use it as a changing table for the new baby, but it’s a little short. And with the pretty rounded sides, I couldn’t really envision adding feet. So instead I gave it to Tristan while I use his current one for his little brother. I like that it has more storage for his clothes that seem to be getting bigger and bigger each season (*tear!*)
We’re getting closer and closer to getting his big boy room set up. We got most of the bed built last weekend and I am now working on sanding it down and painting it (fun times I tell ya!) I’m a little sad but also excited to be letting his baby room go!
Have a great rest of the week everyone!
Linking up to these awesome parties!

OK, so this is amazing! Completely transformed! The moulding really brings it up a notch and makes the whole dresser!
Thanks Samantha, I couldn't agree more on the molding! I couldn't stop admiring it when I first put the molding on because it made such a huge difference 🙂
I agree with Samantha — so smart to add the molding! Real trash to treasure!!
Thank you! I love trash to treasure because not only is it free, it's a real challenge haha!
Beautiful results love it!
Thank you so much Mari!
Can't even tell that it was the same dresser! It's gorgeous!!
liz jo @ sundays with sophie
Thanks Liz, that makes me so happy to hear that 🙂
This looks amazing! I love how versatile it is, it will really grow with your little one as he gets bigger!
Thank you Falon! I was going to get cutesy with the knobs but I'm glad I didn't for this very reason 🙂
Love! I did my dresser not too long ago…I'm thinking of redoing it into a lighter color though! I love this!
Thanks Meagan! I love the way light colors make a room feel, I bet it will look great! 🙂
Great job, love it and I also break for free furniture!!, welcome to the club. Hahahaha
Thank you! Haha it's a blessing and a curse!
oy. yes, you have definitely given it new life! enjoy.
b
Thank you so much!
You did a very nice job on this dresser! Thank you for sharing with us on Idea Box!
Thank you! And thanks for hosting 🙂
This is great upcycle!!! Love it!
Thank you Mary K, I appreciate it! 🙂
Amazing job! Fabtastic upcycle. You must be so happy with how it turned out.
Visiting from Too cute Tuesday
Thanks Kate, I truly am!!
You definitely gave it new life!! Looks fabulous!
Thank you very much Julie, it's hard to believe this thing was going to the trash!
That is an amazing transformation. I too, eye furniture on the side of the road. However, my driving paths apparently don't take me past very many rich sources. Recently I found a desk in my neighborhood, which is now installed in my son's room.
Thanks for sharing!
Thanks Kelly! I know what you mean about driving paths, but every now and then I really luck out!
Absolutely stunning transformation. It is surprising how much a lick of paint can do! Thank you for sharing with OMHG Wordless Wednesday Link Party. Co-host Evija, From Evija with Love xx
Thank you so much Evija! And thanks for hosting a fantastic party 🙂
Chainsaw sharpener are still an essential element of raising the life span of a chainsaw. You are able to elect for stihl two in 1 chainsaw sharpener since it's best. Timberline chainsaw sharpener is a great alternate. You can watch for a Lot More choices from this elaborated guide:Chainsaw Sharpeners
Chainsaw Sharpener