
Hello friends! I can hardly believe that Christmas is later this week because I am so focused on the fact that I’m having a baby in one week! Lucas is still in breech position so I am scheduled for a C-section next Tuesday. Not going to lie, I am utterly terrified. But I am very excited to meet him and finally see his sweet face. 🙂
With that being said, I’m going to finish up the last tutorial for the nursery today and share the room on Wednesday. Not sure when I’ll be back after that, but once I muster up the energy I promise to post some cute baby pics!
I needed some storage bins for the closet shelf but as usual, didn’t want to spend much. I’ve seen the idea of burlap covered boxes before so I knew this would be the perfect solution for this space. Since there is no brown in his room you can imagine how super excited I became when I found out that Hobby Lobby sold gray burlap.
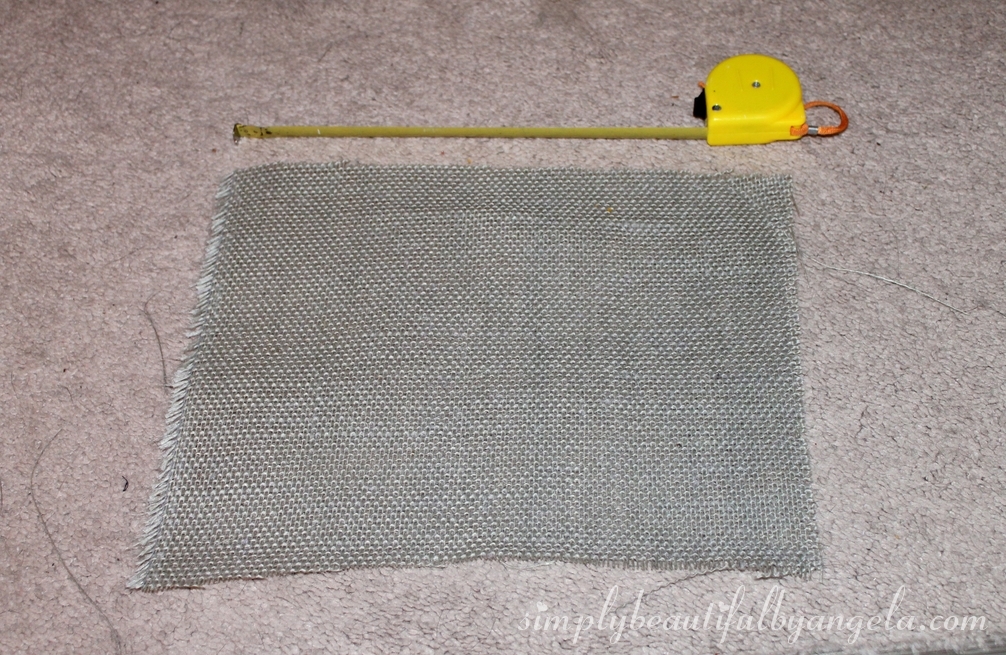
I found this nifty tutorial and began by measuring and cutting out the burlap. She starts by adding the height times 2 plus the width of each side. So for my boxes that were 11″ x 8.5″ x 9.75″ my measurments were (9.75″ + 9.75″ + 11″ = 30″) and (9.75″ + 9.75″ + 8.5″ = 28″). She then adds 2.5″ to each side, so my final cut was 32.5″ x 30.5.”
Next I cut a 9.75″ x 9.75″ square (the height) from each side.

Maybe it was because my cuts weren’t straight or maybe my measurments were just super off, but I was mortified when I hot glued my first side on and it was too short!
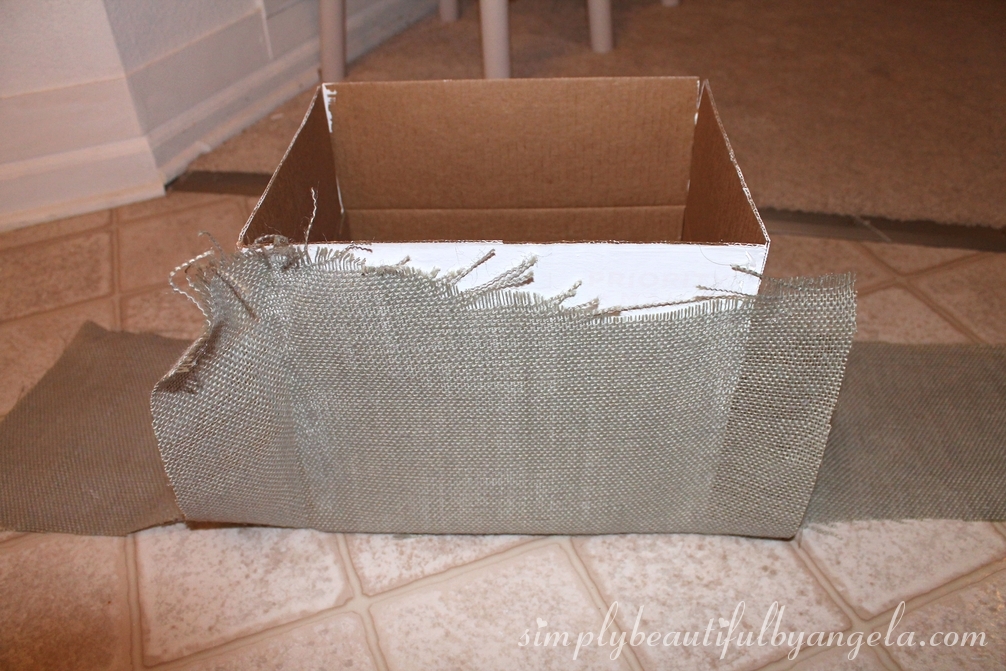
But then an awesome idea dawned on me and you’ll see what it was in a bit 😉 After gluing both long sides on, I flipped to each side and glued the flaps down.

Then pulled the sides up and glued those.

Here are my 5 boxes, looking pretty sad compared to those ones you see on Pinterest!

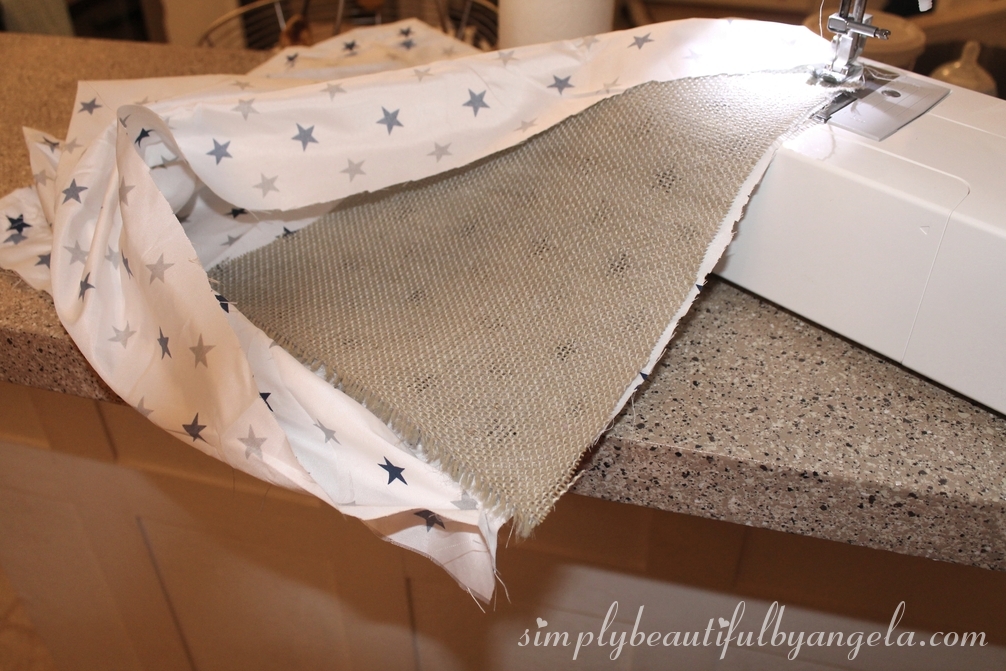
So here is what I did to fix them. I had a piece of this bedsheet left over from the DIY hanging hamper that I made for the room (you can read the tutorial for the one I made for Tristan here). I cut a rectangle that measured the box perimeter ( 11″ + 11″ + 8.5″ + 8.5″ = 39″ plus 1″ seam allowance so 40″) on one side and the height (9.75″ + 4.25″ = 14″) on the other.

I folded this piece in half with the print facing inside and sewed a seam along the open edge. Since I was using a bedsheet I didn’t need to hem the top since it was so nicely done for me already, but if you’re using regualr fabric you will want to do this first.

Next I cut out the bottom of the liner. I knew I wasn’t going to have enough bedsheet so I used more burlap. I measured out the box bottom plus 1″ on each side for seam allowance–so 12″ x 9.5.”
I then sewed it to the bottom of my previous piece.

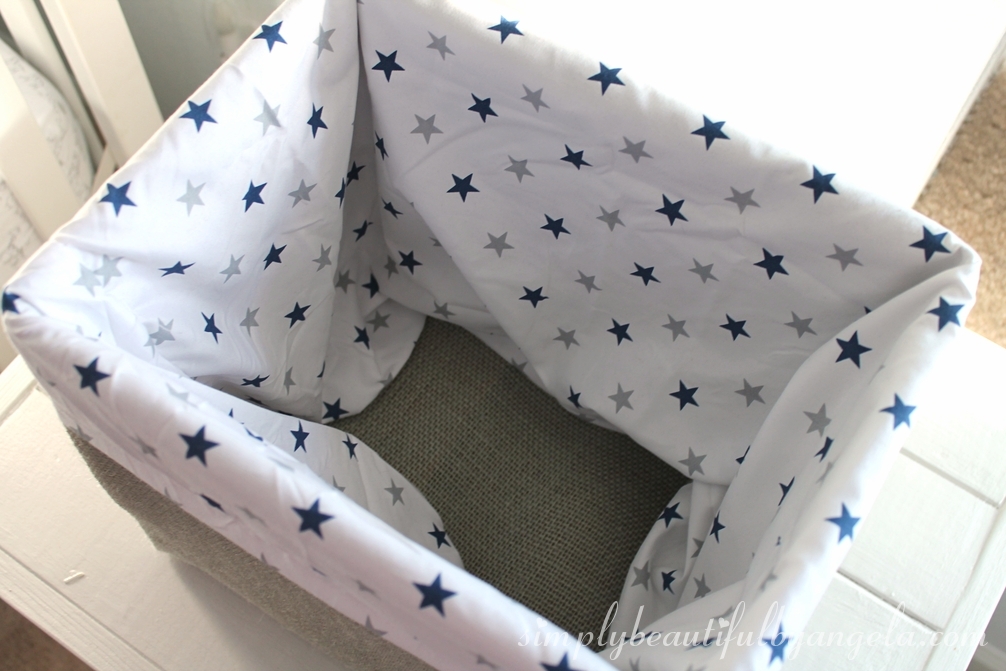
I made one for each box, then popped them in and pulled the edge over the top.

And you would never guess how ugly the tops looked before!

I’m glad I messed up on my cuts initally, because the liners weren’t originally planned, but it turns out that they really make the boxes look complete.
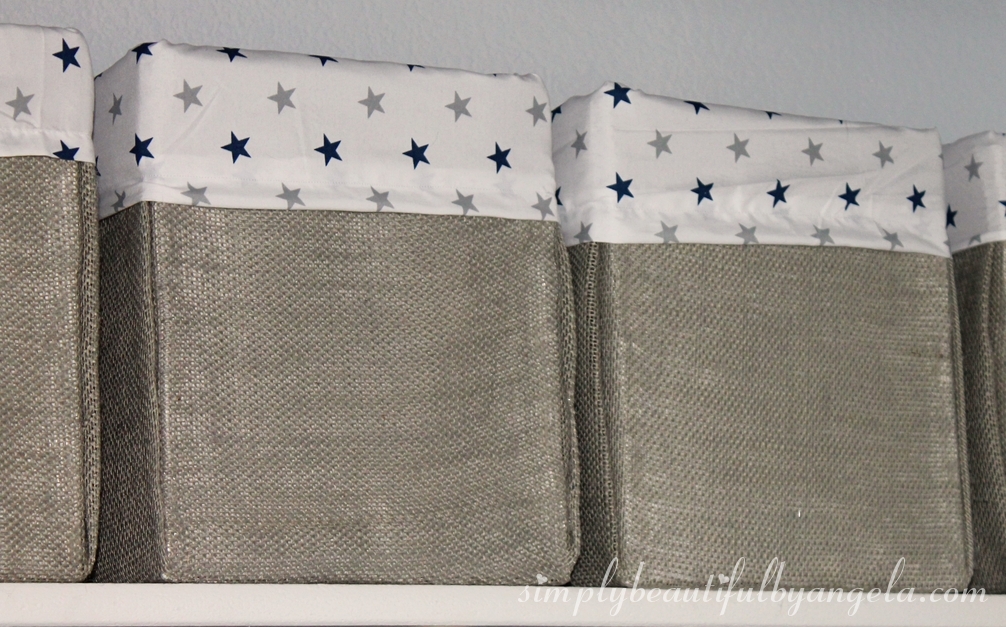
And since it covers up the inside it’s hard to tell that these are even boxes at all!

I should also mention that before gluing on the burlap I painted each box with white paint to hide the writing and labeling that was on them before.

They are the perfect way to add cheap and functional storage to this closet shelf and I’m so happy with how they turned out!
Linking up to these awesome parties!

These are so cute! The liners add such a custom touch. You're amazing … One week before little one arrives and you're creating such cute and useful containers. Wow! Wishing you and your new little one all the best!!
Thanks Carolyn haha! Got to do something to pass the time 🙂
These are perfect! And if you were to go to the store to buy one of these you'd have to pay too much for some cardboard and fabric. Good for you making them yourself! Merry Christmas to you and yours Angela!
This thing is fast and quite a budget option. This box will fit perfectly in different interior. Its manufacturing should not take long.