
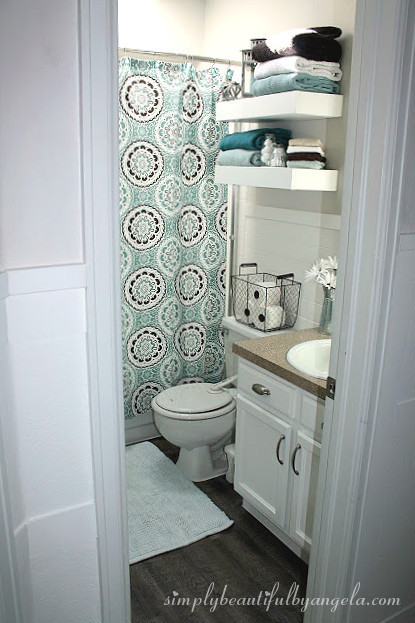
Well hello everyone! I am so excited to share our new hall bathroom with you all today!
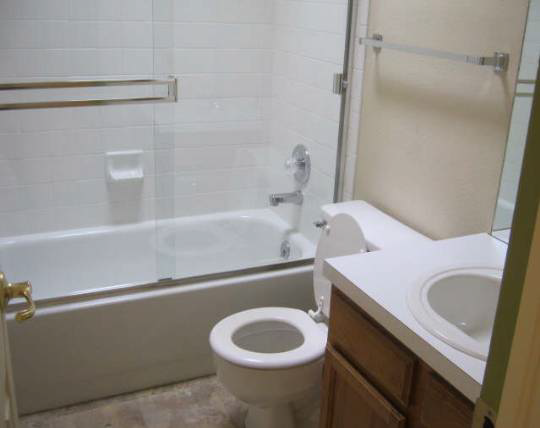
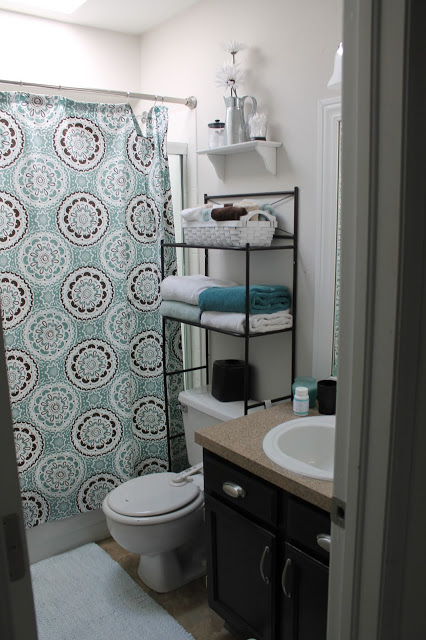
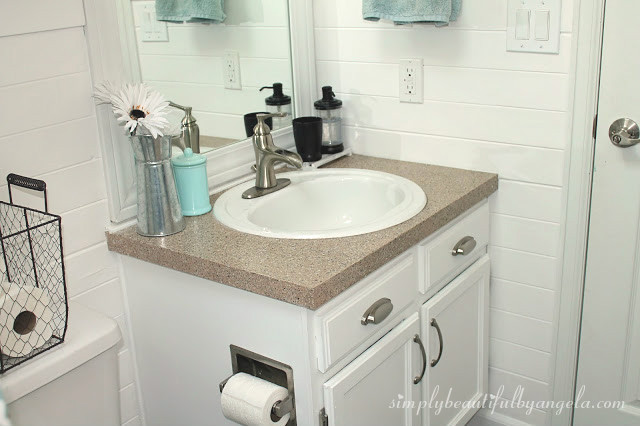
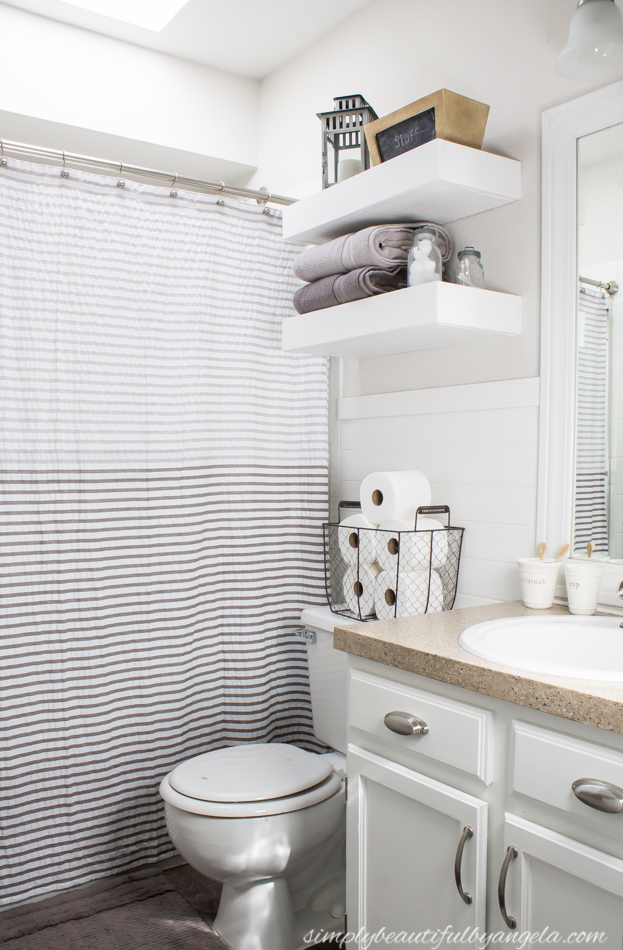
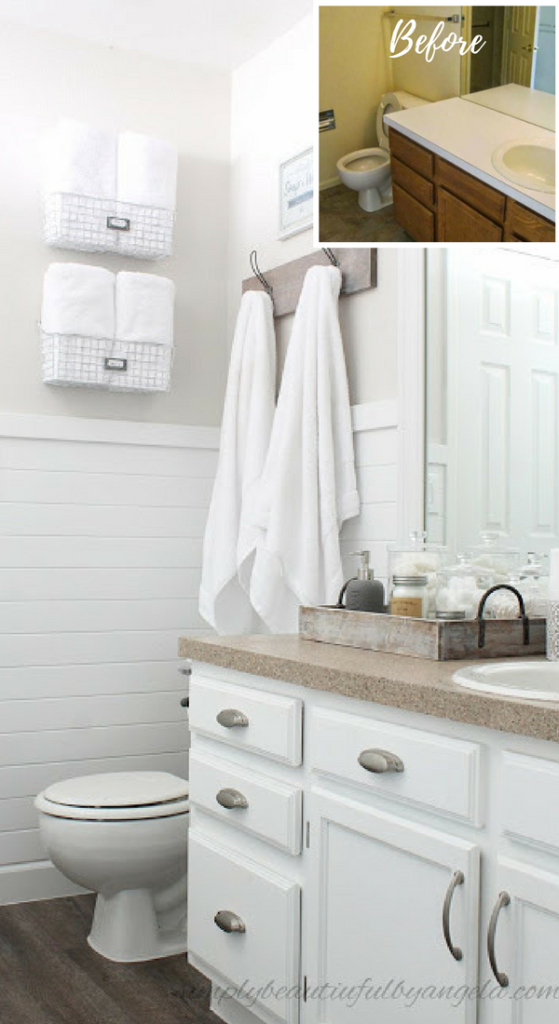
A couple of weeks ago I got an itch to give our hall bathroom a mini makeover. Even though it’s really small, I love this space because it gets a ton of natural light from the skylight that’s in here. When we first moved in it looked like this…

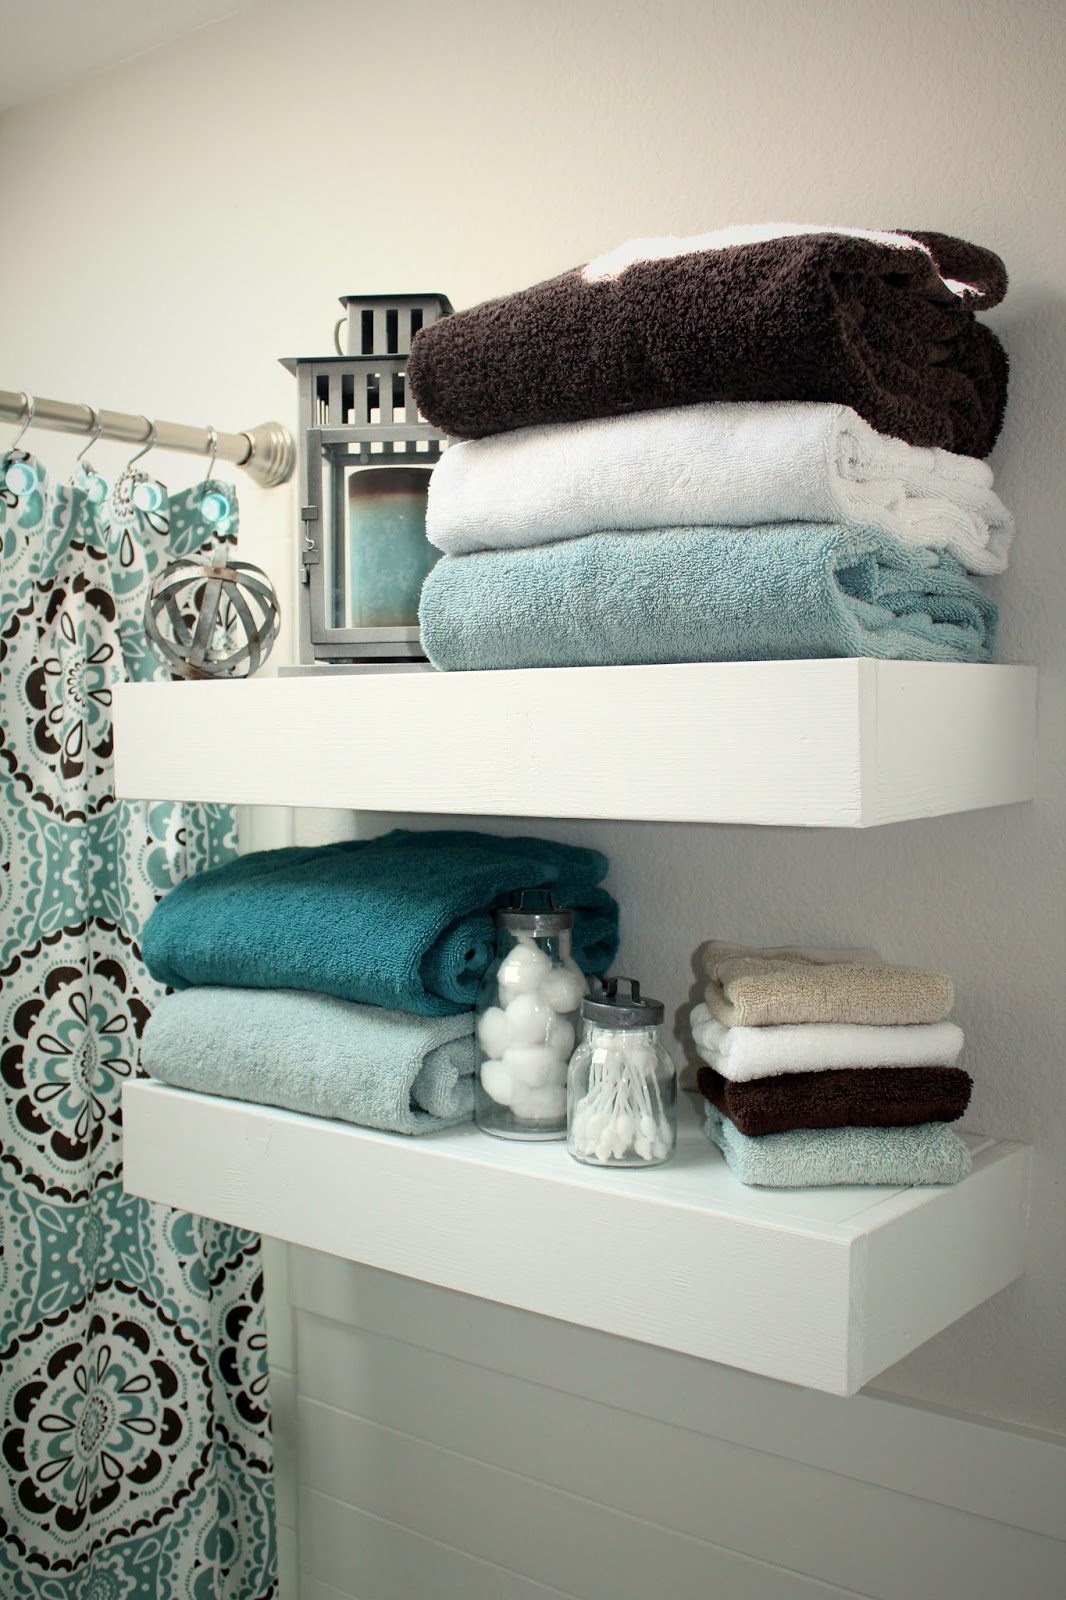
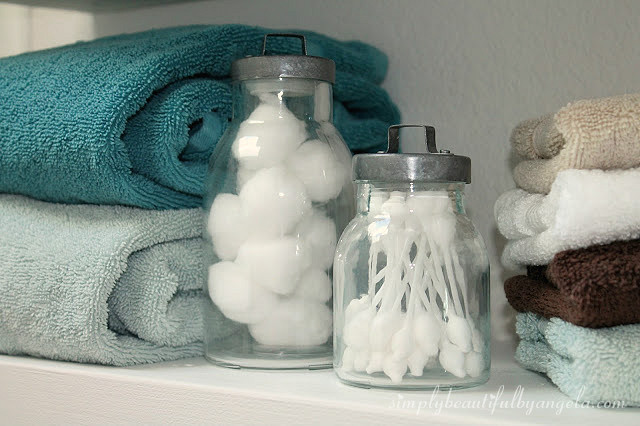
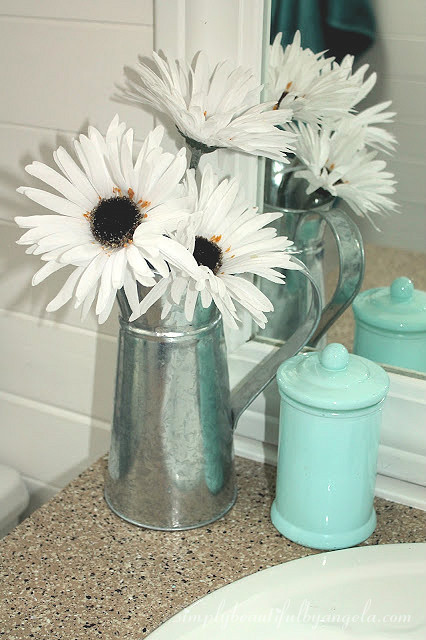
These cute little jars are from the glass aisle at Hobby Lobby. The lids were originally a strange light metal but I spray painted them with Rust-Oleum Antique Pewter and it took them from cheap to fancy.
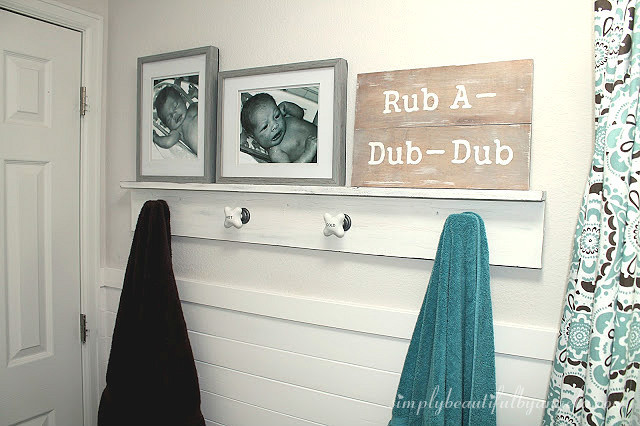

This is the hall bathroom so it’s the one that our guests normally use, but I also consider it the boys’ bathroom since it’s right outside of their rooms. I wanted to make it meaningful for them, so I put pictures of each of them getting their first bath.

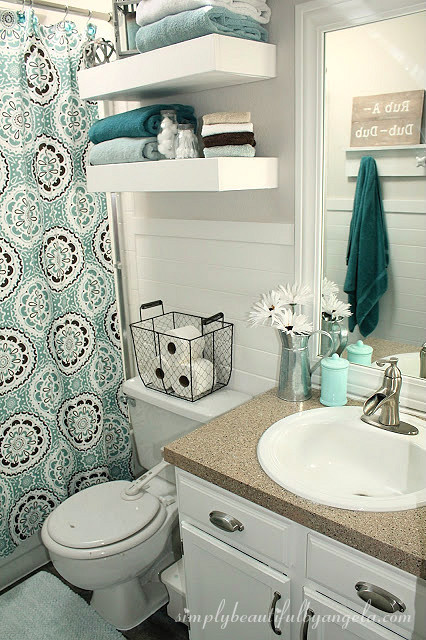
Then I whipped up this cute little sign with some scrap wood.
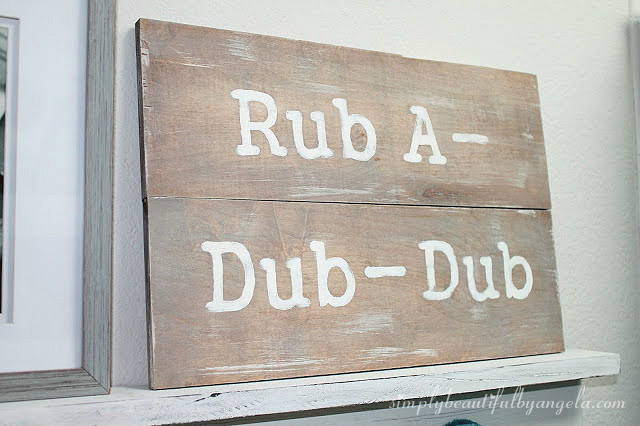
When Tristan was little I would always sing “Rub-a-dub-dub, Tristan in the tub!” and he would get the biggest kick out of it. I do it for Lucas now too, so this sign is a cute little reminder of their baby days.
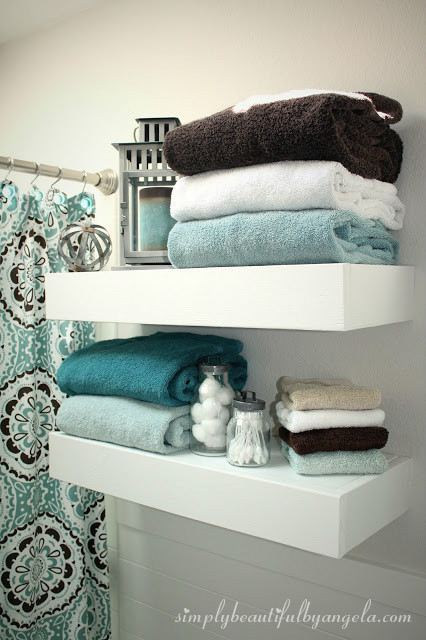
I should mention that the 1×2 does hold these items nicely, but I have them attached to the wall with picture hangers and twine to make sure that they don’t fall down.
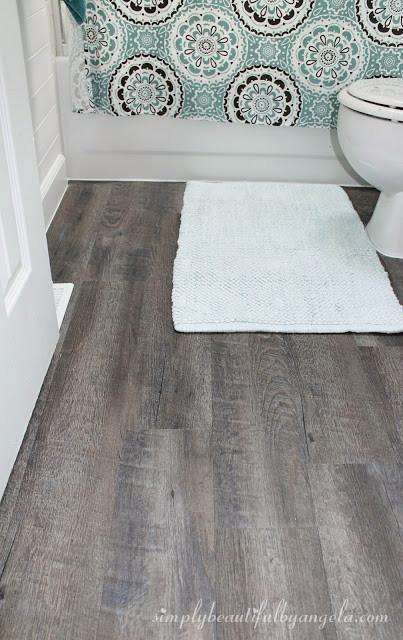
Oh and check out our new wood floors!
-
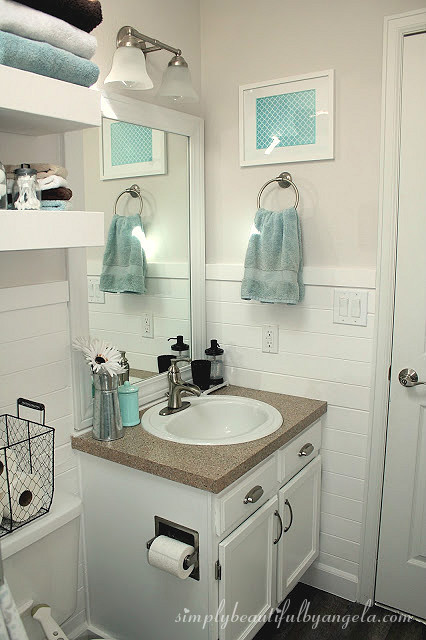
Vanity–$0 (already owned the paint which was Behr in Polar Bear semi-gloss)
-
Shiplap–$33 (tutorial here) 3 packs of Evertrue V-groove wall planks from Lowes plus 1×3 MDF for the top)
-
New baseboards–$17
-
Wood-look vinyl plank flooring–$20 (tutorial here)
-
Floating shelves–$5 (cost of a 1×4 since we already had the 2x3s and particle board laying around)
-
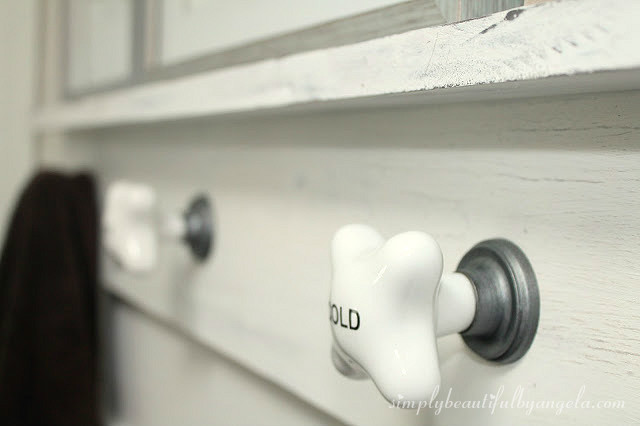
Towel hanger–$27 (cost of wood and these knobs from Hobby Lobby. I waited until knobs were 50% off so each one was only $4). (These ones
would also work nicely!)
-
Picture frames–$26 (a total Homegoods splurge but they were too perfect to pass up! Similar ones found here
.)
-
Rub-a-dub-dub sign–$0 (scrap wood)
-
Metal sphere–$4 (from Hobby Lobby in store, similar one online found here
-
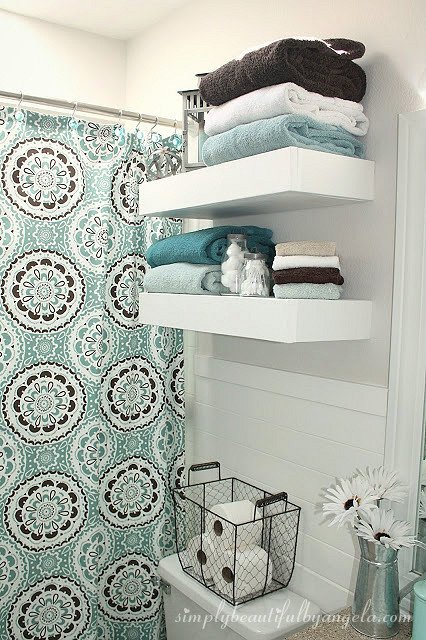
Chicken wire basket–$5 (from Ross, similar one online found here
)
-
Glass jars–$6 (from hobby Lobby in store, similar ones online found here
)
-
Shower curtain–$0 (already owned)
Immediately after finishing this bathroom I wanted to move on to our master bathroom. Buuuut I decided to start working on the yard instead! Haha story of my life, I have a hard time deciding what I want to work on and when. There truly aren’t enough hours in the day!
I’ll be back to share tutorials on the planks and the vinyl floors soon–I promise I’ll try to not drop off for a month this time 😉
Also check out how I updated our builder grade master bathroom for around $500 HERE!
Linking up to these awesome parties!

Beautiful! So many great DIY ideas, too! The colors you chose are wonderful … Really loving your shower curtain. Thank you for sharing!!
Thank you Carolyn! I got the shower curtain at Target a couple of years ago and don't think I'll ever part with it because I love it so much haha! 🙂
Wow!!! You did a fantastic job! You made that bathroom look bigger than what it is. Job well done! Thanks for the inspirations! 🙂
Gorgeous! I love everything you did to create such a bright and happy space.
Thanks Cristina! 🙂
Angela, your link at the Craft Frenzy party caught my eye because you and I have the exact same bathroom footprint and I have been pondering ways to lighten and add character to ours. You've given me loads of inspiration here! Love the shiplap walls, the towel hook bar, and floating shelves. Pinning to share and to bookmark for myself.
Marie, The Interior Frugalista
Thank you Marie, I am so happy to hear that I could help! 🙂
What a great re-do! Love using creativity instead of tons of money… 😉
Thank you Liz, me too! It's a total thrill for me–I'm such a dork haha!
Very nicely done! Such a happy space.
Thank you Tammy, I appreciate that!
The flooring really does look like real wood! I love how bright the white makes the room:)
I'd love it if you shared this at my link party!
http://www.twentysomethinginthe2010s.com/peace-love-linkup-002/
Thanks Ashleigh, it's amazing isn't it? I'll have to stop by, thanks for the invite!
Angela this is a totally different bathroom! I love what you did with it. From the plank walls to all the special little details. I have to admit my favorite is the towel hooks with the little faucet knobs. Angela I'm hosting a new link party with some friends and would love it if you linked up your post to Sweet Inspirations. It runs from Friday to Tuesday.
Thank you Mary! I will stop by, thanks for the invite!
Nicely done! I especially like the color palette you chose. It's pretty and soothing. Now I have to look up vinyl flooring like yours!
Thanks Ann! The flooring was a huge debate, I was originally going to pay to have someone come tile it but after pricing it out I decided to just to this in the meantime. I actually like how it looks so much that I'll probably keep it for awhile!
Love your color choices, it is so bright and cheery now!
Thank you so much!
LOVE the colours. It looks fabulous. 🙂
Thank you so much Tracey! The bathroom is one place I love using color since most of my home is just neutrals 🙂
I absolutely love how your bathroom turned out – it's exactly the look I am going for in my own bath redo! I was hesitant about the vinyl flooring which is why I am so looking forward to your post on it. I also love the planking and am definitely going to check out the product you used. Thank you so much for sharing this remodel – you have helped me TREMENDOUSLY!!!!!!
Thanks Lala! I should have that tutorial up on Friday, I am totally smitten with how nicely they turned out.
You did such a good job! Looking forward to your tutorials!
Thank you so much! 🙂
What a fun, bright transformation! Love the knobs you found and the new color on the cabinets. It really makes me want to re-do our bathrooms now!
Thank you Leslie! The knobs definitely do add a nice special touch 🙂
I love your bathroom makeover. You used my favorite colors! It looks so bright and airy now.
Thank you Vineta! Yes it is so much brighter than it was before 🙂
Great job!
Thank you so much Diana!
Looks lovely. I've been painting our powder bathroom the past day or so, too.
Thanks Kiki! It's tiresome but so worth it in the end! 🙂
Hey nice design and post too. If you are thinking about getting the bathroom flooring work done in your house, then visit @Corkfloorsales once. you will get great service there. Thanks for the post.
Love this! Choosing it as my feature this week 🙂 Thanks for linking up with the Alder Collective!
Thank you so much Kelsie, much appreciated 🙂
What great changes Angela! Beatiful. Thanks for sharing at You're Gonna Love it. Pinning!
Thank you! 🙂
This is absolutely fantastic. So much bang for so few bucks! You've done a great job, and what a blessing it must be to have this wonderful "new" room in your house!
Thanks for joining the Grace at Home party at Imparting Grace. I'm featuring you this week!
Beautiful combo of colors and I LOVE the flooring!
I love the bathroom! Where did you get the shower curtain?
Thank you so much! I got it at Target, it's actually on sale right now 🙂
http://m.target.com/p/threshold-medallion-shower-curtain/-/A-16505090
What paint color did you use?
Hi Jana! It's called Polished Smoky Pear by Glidden and I believe is only in Walmart stores
Are you sure that's the exact name? I cannot find it on internet search or in Glidden paints. Thanks
Yes, it's not online but I had another reader go into a Walmart a little bit ago and she said it is still sold there. I also noticed a typo above–it's "pearl" not pear haha. Sorry about that!
Thank you Angela. My son jusy moved out. The hall bath has been black and great for years. I was looking for inspiration and youve given it to me. Love it!!!
Thank you Tracy! I'm glad I could inspire you, I'm sure it will turn out great 🙂
Love the way this turned out! Can you tell me the Brand and color of the Vinyl floor you used?
Thank you! The floors are Driftwood by Style Selections. You can read all about them in this post:
http://www.simplybeautifulbyangela.com/2016/04/peel-and-stick-vinyl-flooring.html?m=1
I love this so much I am in the process of copying it! Got my Driftwood tiles, shower curtain from Target,shelves and paint! They say imitation is the sincerest for of flattery! I just hope mine turns out half as nice as yours!
Thank you for Laura for the amazing compliment. I bet it will look fantastic and would love to see some pics when you're all done! 🙂
The layout of your bathroom is identical to my guest bathroom – and I've been eyeing the same Target shower curtain for a long time, but wasn't sure if how to decorate around it! The only difference is that there is no window, so it doesn't receive any natural light. You've inspired me tackle this bathroom!
Very beautiful bathroom! I have the same layout in my new home. I'm unable to find the plank walls. Is there another name for it? Tia!
Some accessories are able to transform the bathroom into a large extent. They also create more comfort throughout the premises.
Thank you! Here is the post that goes over the walls 🙂
http://www.simplybeautifulbyangela.com/2016/04/shiplap-in-bathroom.html?m=1
The principle point of this article is to contact the general population to make them understand the significance and administrations rendered by the washroom rebuild, chesterfield and kitchen redesign, Chester. Look At This
Your bathroom makeover information on budget is so good and informative for me.I really like it. keep it up please.
Bathroom makeovers on a budget
If you're going traditional with your bathroom design, brushed nickel, when used aptly, can be perfect as well. It offers the widest range of matching your decor. best shower head
The western bathroom decor is in fact very popular and involves adding scenery as well as settings depicting the Wild West and which includes accessories that were used by cowboys as well as cowgirls from times gone by. Jessica
I did was build some floating shelves above the toilet to replace the flimsy metal stand that I had there previously. Awesome Remodeling Company in Knoxville, TN
Bathroom renovations may require extra aesthetic value like inclusion of chest of drawers, which may not necessarily be used for storage purposes but to enhance the bathroom design.http://www.easeofmobility.com/best-mobility-ramp-guide/
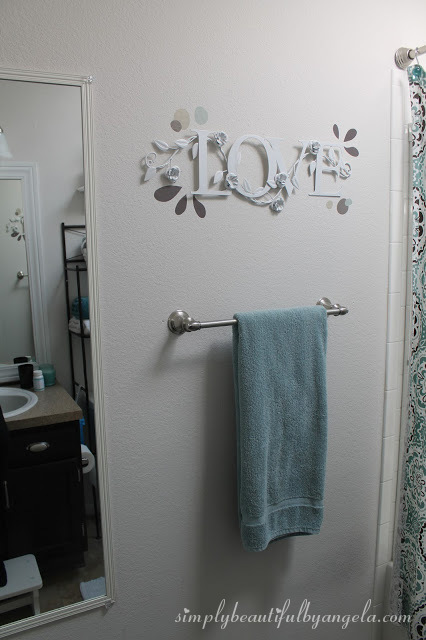
My bathroom is set up exactly the same as yours, but I never knew what I could do to make it look better until now!! The floor is even the same type wood look laminate!! There is no natural light, tho, so that's a drawback!! I know what I will be doing as soon as I decide on colors for the vanity. I want to go with cream, pink and sage green or maybe a light turquoise, but I looked on the Rust-oleum website and they don't have pastels for the counter top. Do you know if I could use regular paint, or what else I could do??? Also, I would love to know where you got the Love sign. Thank you for such wonderful inspiration!! I'm rarin' to go!!!
Thank you Jerry, that is exciting I'm sure your bathroom will turn out great! Not sure if regular paint would hold up as well, but if you put a good top coat on it just might! The Love sign was from Ross several years ago. I hope that helps, would love to see pictures when you're done! 🙂
I did was build some floating shelves above the toilet to replace the flimsy metal stand that I had there previously. Have more success in your journey. photoshop online cool math games
Very Nice !! Keep Updating Article like this !! Wonderful content i got from this website.
sadsada
sadsa
Excellent information on your blog, thank you for taking the time to share with us. Amazing insight you have on this, it's nice to find a website that details so much information about different artists. contractor los angeles
If you will be looking for something in specific, for example tips on the way to install new bathroom cabinets, you might perhaps want to tailor your web seek out to bathroom cabinet installations and so on. Calabasas bathroom remodel
Nice blog, thanks for sharing the information. I will come to look for update. Keep up the good work. http://www.harneymfg.com/bathroom-accessories-fittings/shower-head/
A rare gem of an old slipper bath or rusty traditional faucet may be found at a scrap yard or in a skip, but thankfully manufacturers are keeping up with demand with skillfully crafted traditional bathroom products.cheap inflatable tub
a pride for me to be able to discuss on a quality website because I just learned to make an article on
No matter what bathtub design you select, it should match your budget and your family's needs.http://tubhq.com/buying-guide
An imperative factor to consider while choosing your fan is the span of your bathroom. The greater your bathroom, the all the more intense your fan ought to be. This is estimated as far as rate of extraction, how much air the fan can move. If you want to know more, Please check out here: http://bathroomventilation.net
Look at the Oxygenics TriSpa Series Multi Function Water Saving Showerhead or the Delta Leland Monitor 17 Series Shower Trim Kit for good illustrations.shower filter reviews
Here we look at the five most popular styles of bathroom designs. Traditional, Country, Shabby chic, Contemporary and Fantasy.
Bathroom fitters London
For example, if you are going to replace an existing tub and wall tile, plumbing work will need done, but having a carpenter handy for installing modern drywall will need to be done first.bathrooms
Nice post. I was checking constantly this blog and I’m impressed! Extremely useful info specially the last part I care for such information a lot. I was seeking this certain info for a long time.
Stone Basin
Thank you and good luck.
Hi! I just love your bathroom redo! I am going to do something very similar! 🙂
I love the bathroom paint color you have and couldn't find it in your post. Do you mind sharing the name of the color? It's perfect!
Thanks,
Ashley
The Baracuda has a diaphragm, as the water passes through the diaphragm it expands and contracts professor amos cleaner review
Ice Cream can be used to make sandwiches or entire cakes, or just eaten as a scoop all on its own. Ice Cream Day celebrates this delicious treat and all the …
The hammer action propels the Kreepy forward. It really does make some noise as the flapper moves back and forth green gobbler in toilet
This is a beautiful bathroom that looks very well built. I am vaguely familiar with programs like this, but am surprised to hear about this bathroom make on a over-budget. If you wanna construct the bathroom with under-budget then Gordon Rutty can help you.
I think that thanks for the valuabe information and insights you have so provided here. showerredefined