Simply Beautiful By Angela

creating simple beauty on a budget

  • Home Tours
  • Projects
  • Legal
  • Link Parties
  • Let’s Chat!
  • About Me

DIY Stocking Embroidery

December 9, 2016

Hello friends and happy Friday!  This weekend we are going to enjoy our town’s annual Christmas Carriage Parade and then hopefully start to wrap up our shopping.  Kew word is hopefully haha.

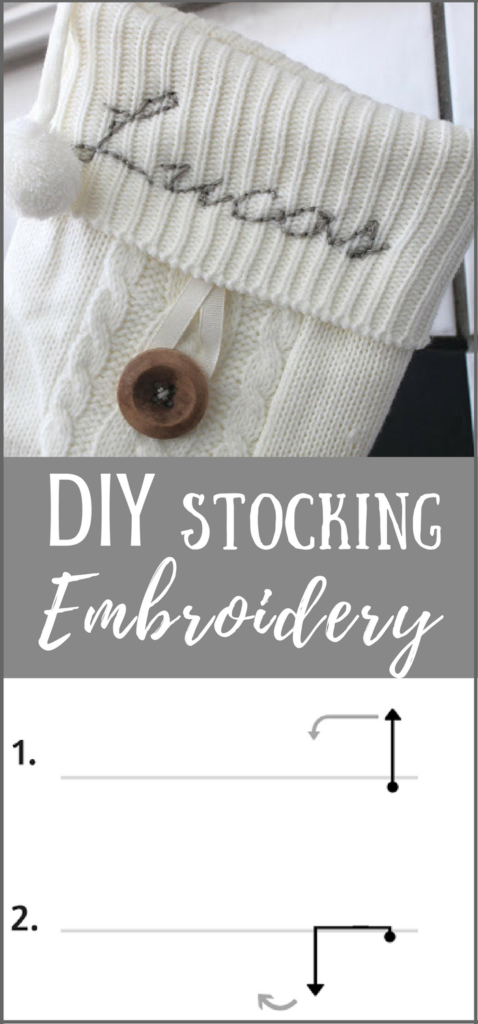
A couple of years ago I shared how I made DIY Sweater Stockings for the kids. 

Although I liked the idea behind them it ended up bothering me that they didn’t match. And since Lucas is a new addition this Christmas I decided it was time for 3 matching ones.  I happened to find some pretty white cable knit ones at Hobby Lobby for only $5 each which ended up being cheaper than buying a couple of sweaters to make them.  Yay!!
I love having stockings personalized so I went back and forth trying to figure out the best way to do it on these.  Finally I decided that an embroidered stitch would look best. 
Supplies Used: (Affiliate links may be provided for convenience.  For more info, see my full disclosure here.) 
  • Six Stranded Cotton Embroidery Floss
  • Embroidery Hand Needle
  • Tissue paper
  • Sharpie

For the record–I am NOT an expert at this kind of thing. I think my Grandma showed me how to embroider some towels once when I was like 8, but I have absolutely no recollection of how to do it.  I honestly just kind of winged it and luckily they turned out!  So trust me when I say that if I can do this, anyone can!

Originally I thought I would try to eyeball the lettering.  But I have terrible penmanship as it is, so I decided that this probably wasn’t the best idea.

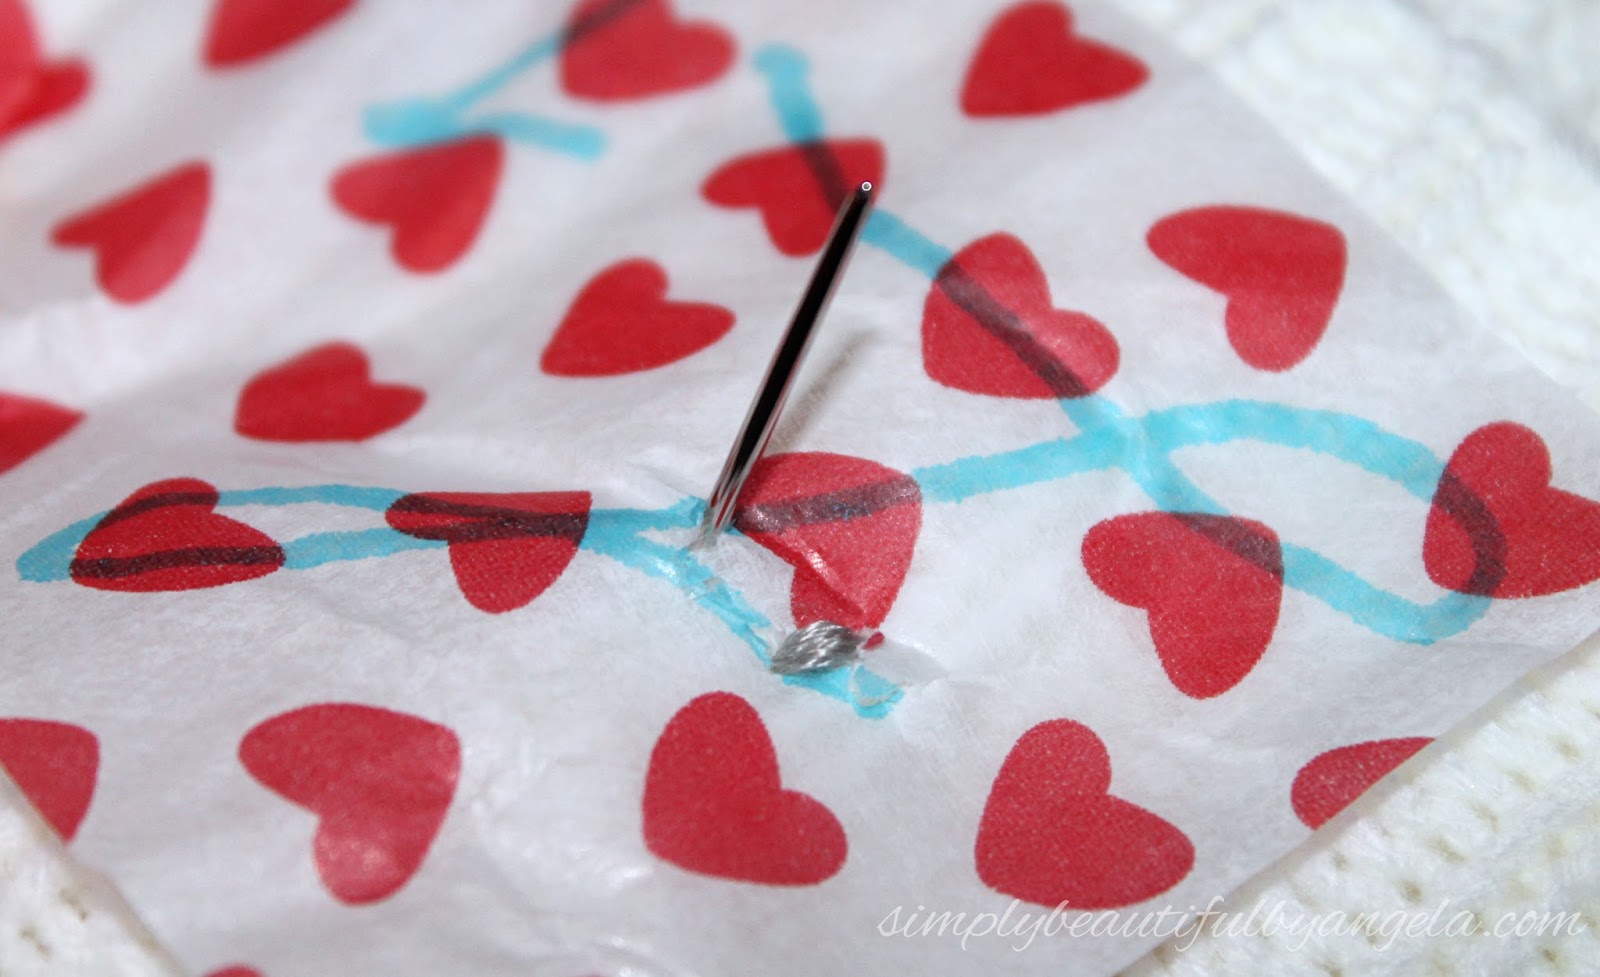
So I printed out the names on some computer paper. But  sewing through computer paper didn’t sound like much fun so I decided to trace the names on to some tissue paper using a sharpie.

(please excuse my Valentine’s printed tissue it’s all I had on hand! haha)
I then pinned my template to the stocking making sure that it was centered and straight.

To make the stitches I double threaded my embroidery needle and first pulled it through so that my knot was on the inside.  Then I pushed it back through following the pattern on my tissue paper.


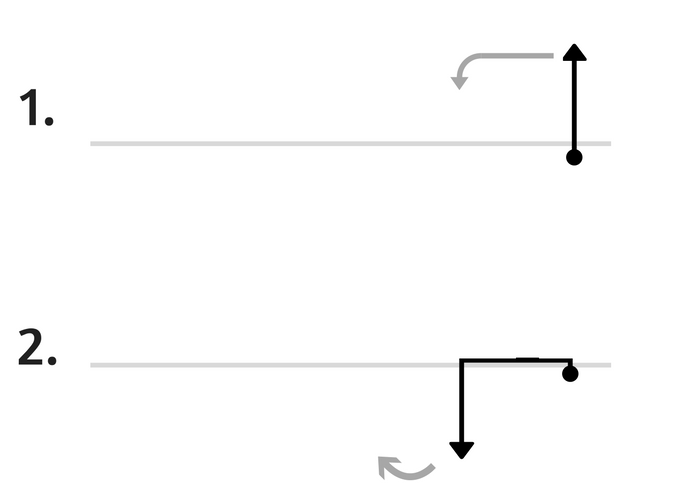
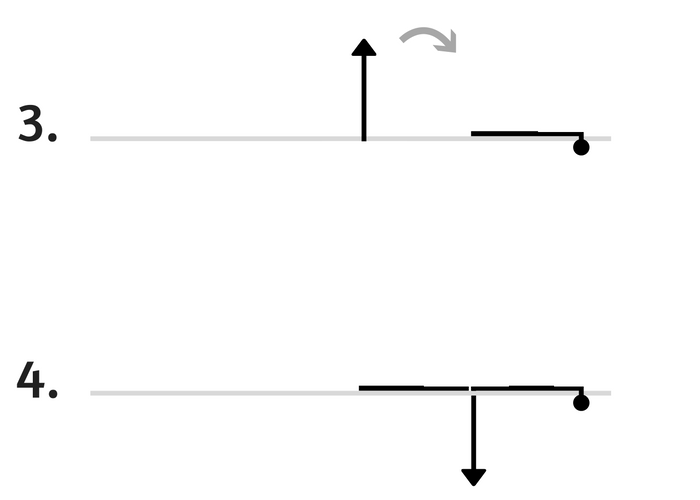
Once it was through the top, I pushed it back through at the end of my previous stitch.  You want to try to get it as close to that stitch as possible so that there are no gaps between your stitches.

 Here is what it looked like in real life (this is step 3 where I am coming back up and will be going back down next to my previous stitch).

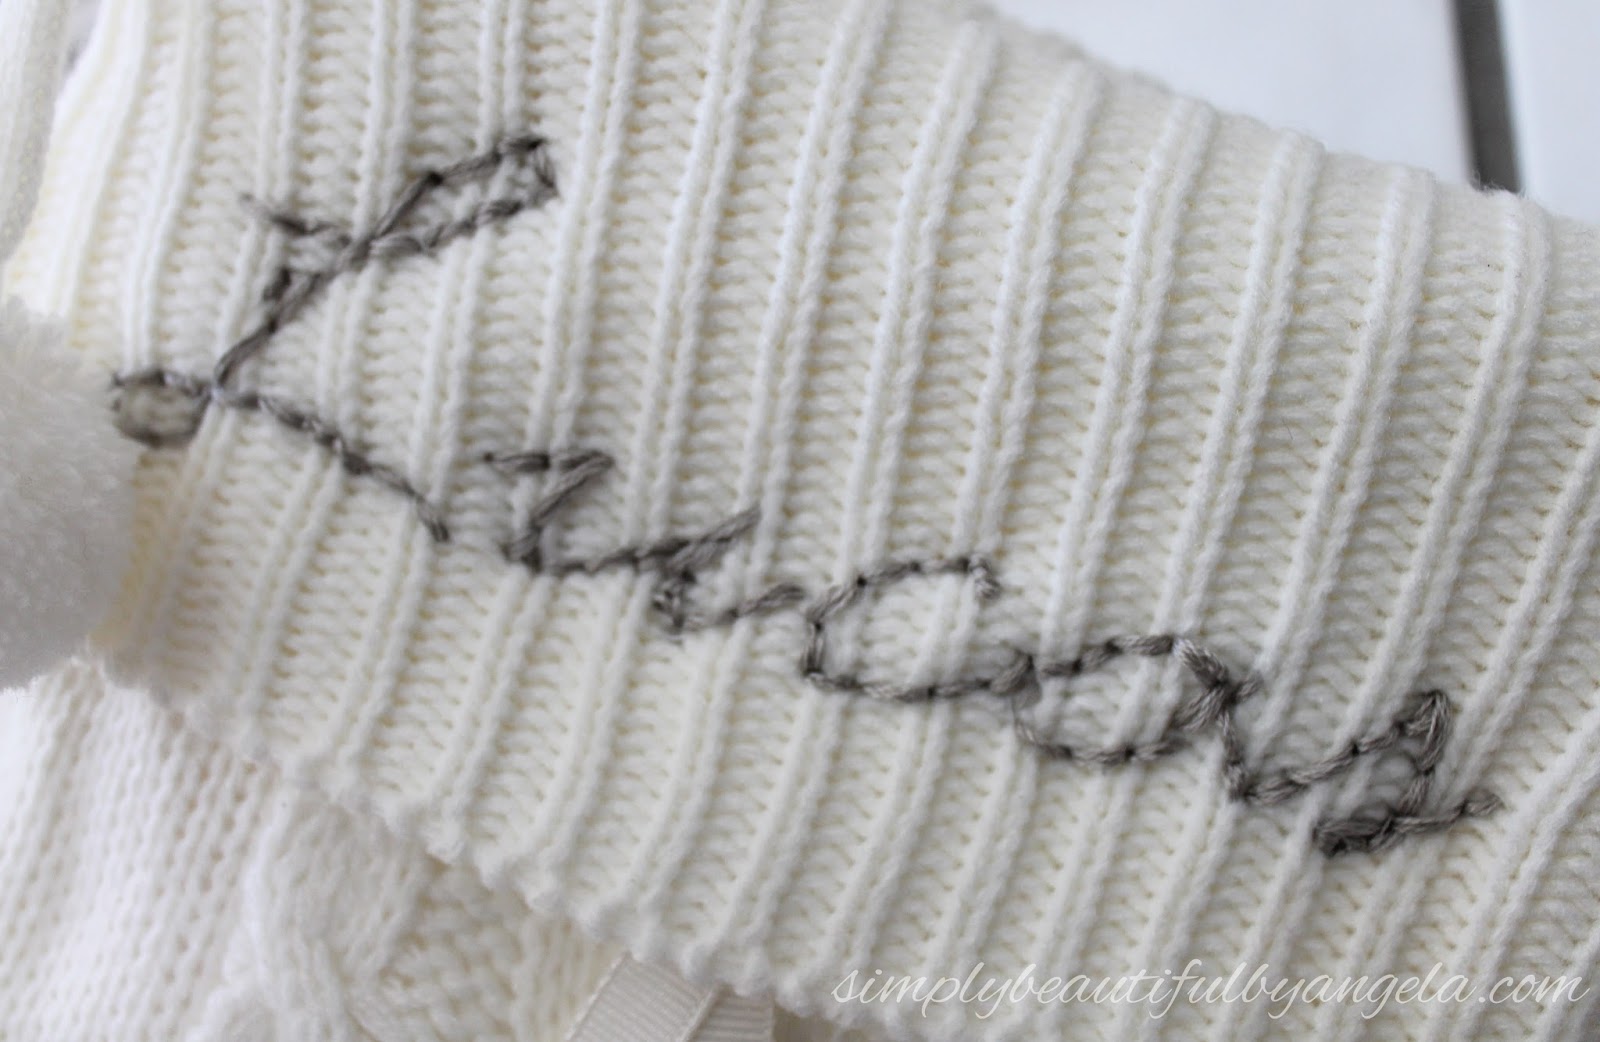
Once I was done I pulled the tissue paper away.  It slid out pretty easily for the most part but there were a few stubborn spots that I had to use tweezers on to get all of the paper out.

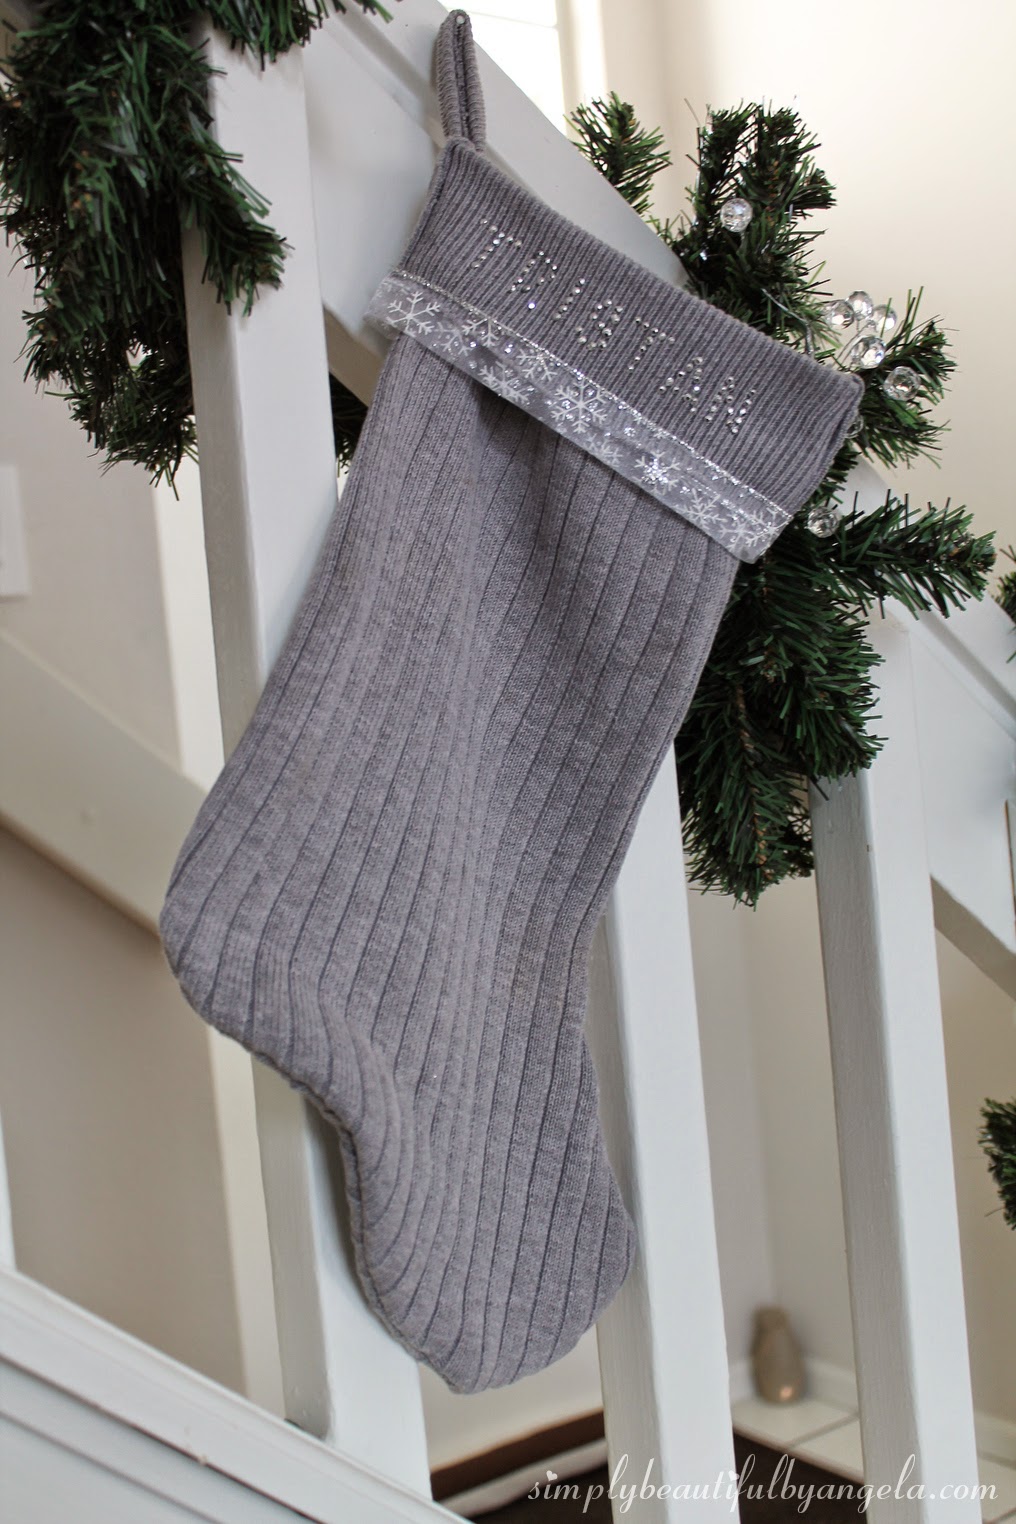
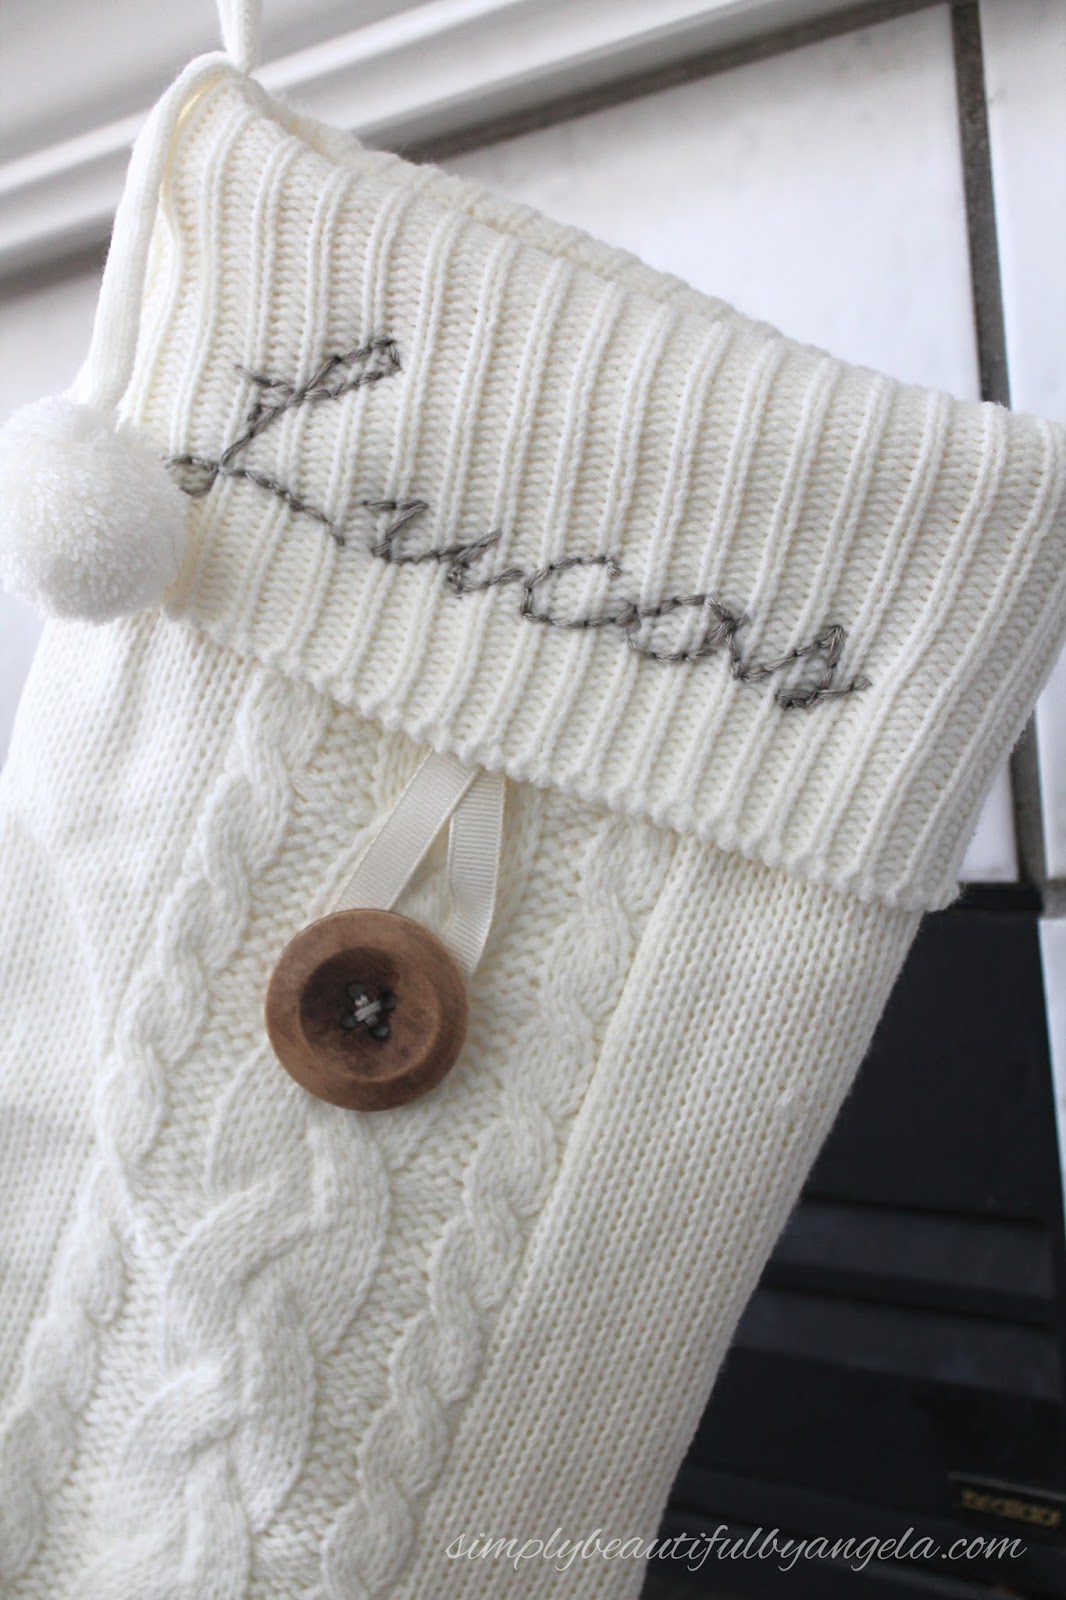
I also added a wood button and some ribbon to each to dress them up a little.

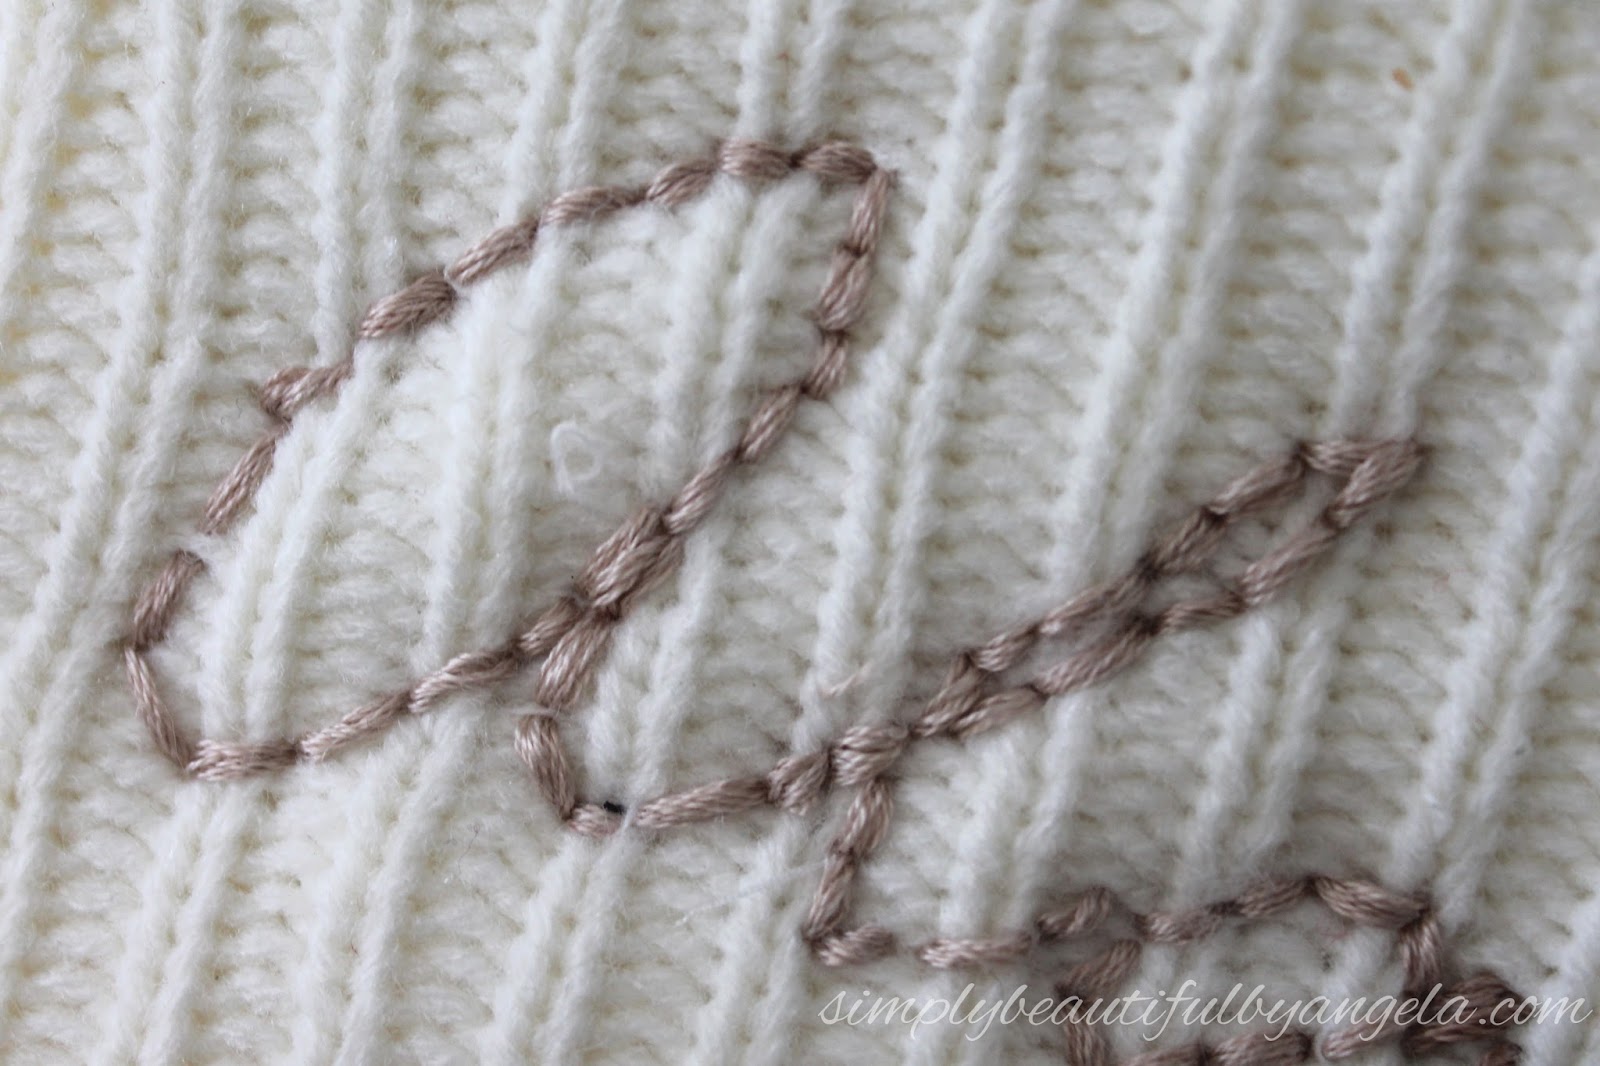
I kept my stitches pretty big but you could go even smaller for a more intricate look

They look so cozy hung up over the fireplace and even though they aren’t perfect, I hope the kids are able to hang on to these for years to come and remember the hand stitched love that went into these!

I just finished up the final touches of our Christmas décor this week (I’m a little behind this year!) so I will be snapping some photos this weekend and sharing a Christmas home tour next week.  See you all then!

Linking up to these awesome parties

    · Labels: Uncategorized

    Comments

    1. Lindsey @roofing contractors maryland says

      December 10, 2016 at 6:19 am

      This really something unique and looking very cute. I would like to try this at my home in this Christmas.

    2. Love Create Celebrate says

      December 18, 2016 at 7:56 pm

      Love this tutorial! I need to do this with my stockings 🙂 Thank you for sharing! I'll be featuring the tutorial at the Creative Gallery tonight!

    Hello, I am so happy that you're here! My name is Angela and I love to create simple beauty in our home on a budget. Here you will find DIY decor and home projects, furniture flips and other home inspiration!

    Never Miss a Post!


    Diagonally Fluted Nightstands

    Diagonally Fluted Nightstands

    Hello! I’m really enjoying the extra daylight and the fact that it’s been paired with warm sunny weather this week has been icing on the cake. I’m trying to soak it all in before the next snowstorm! Today’s flip was from about a year ago and is still one of my favorite sets of nightstands…

    Read More »

    How to Update a Dresser with a Missing Drawer

    How to Update a Dresser with a Missing Drawer

    Hey friends, happy March! Even though I know we still have quite a bit of cold weather coming our way here in Colorado, it’s exciting to see these warmer days sprinkled in here and there. This week I am sharing how I saved an old IKEA dresser from ending up at the landfill! Supplies Used:(Affiliate…

    Read More »

    Vintage Ice Box Style Nightstands Makeover

    Vintage Ice Box Style Nightstands Makeover

    Hello friends! We just got back from our annual trip to the Great Wolf Lodge and it was fun times as always! Today I am sharing how I updated these fun vintage ice box style nightstands that I found on Marketplace! Supplies Used:(Affiliate links may be provided for convenience.  For more info, see my full disclosure here.) …

    Read More »

    Never Miss a Post!


    GOOGLE 2

    GOOGLE 3

    GOOGLE 4

    GOOGLE 5

    GOOGLE 6

    GOOGLE 7

    Theme by 17th Avenue · Powered by WordPress & Genesis