Hello and happy New Year everyone!
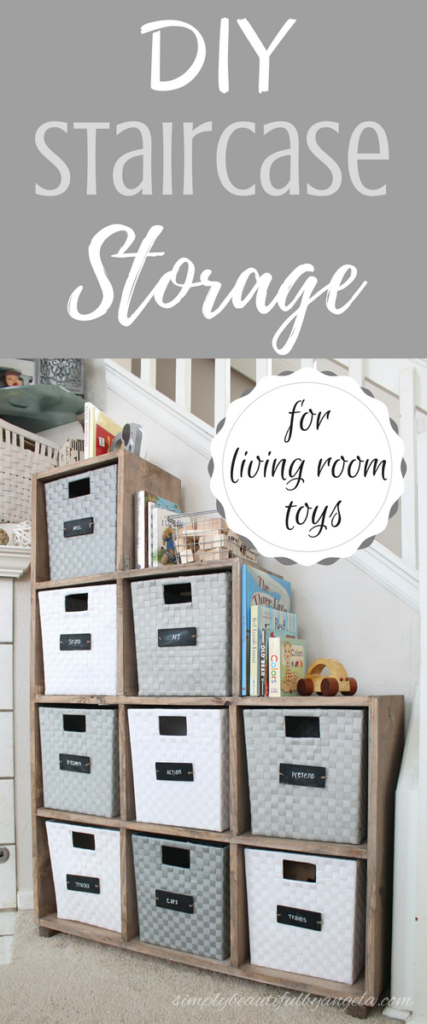
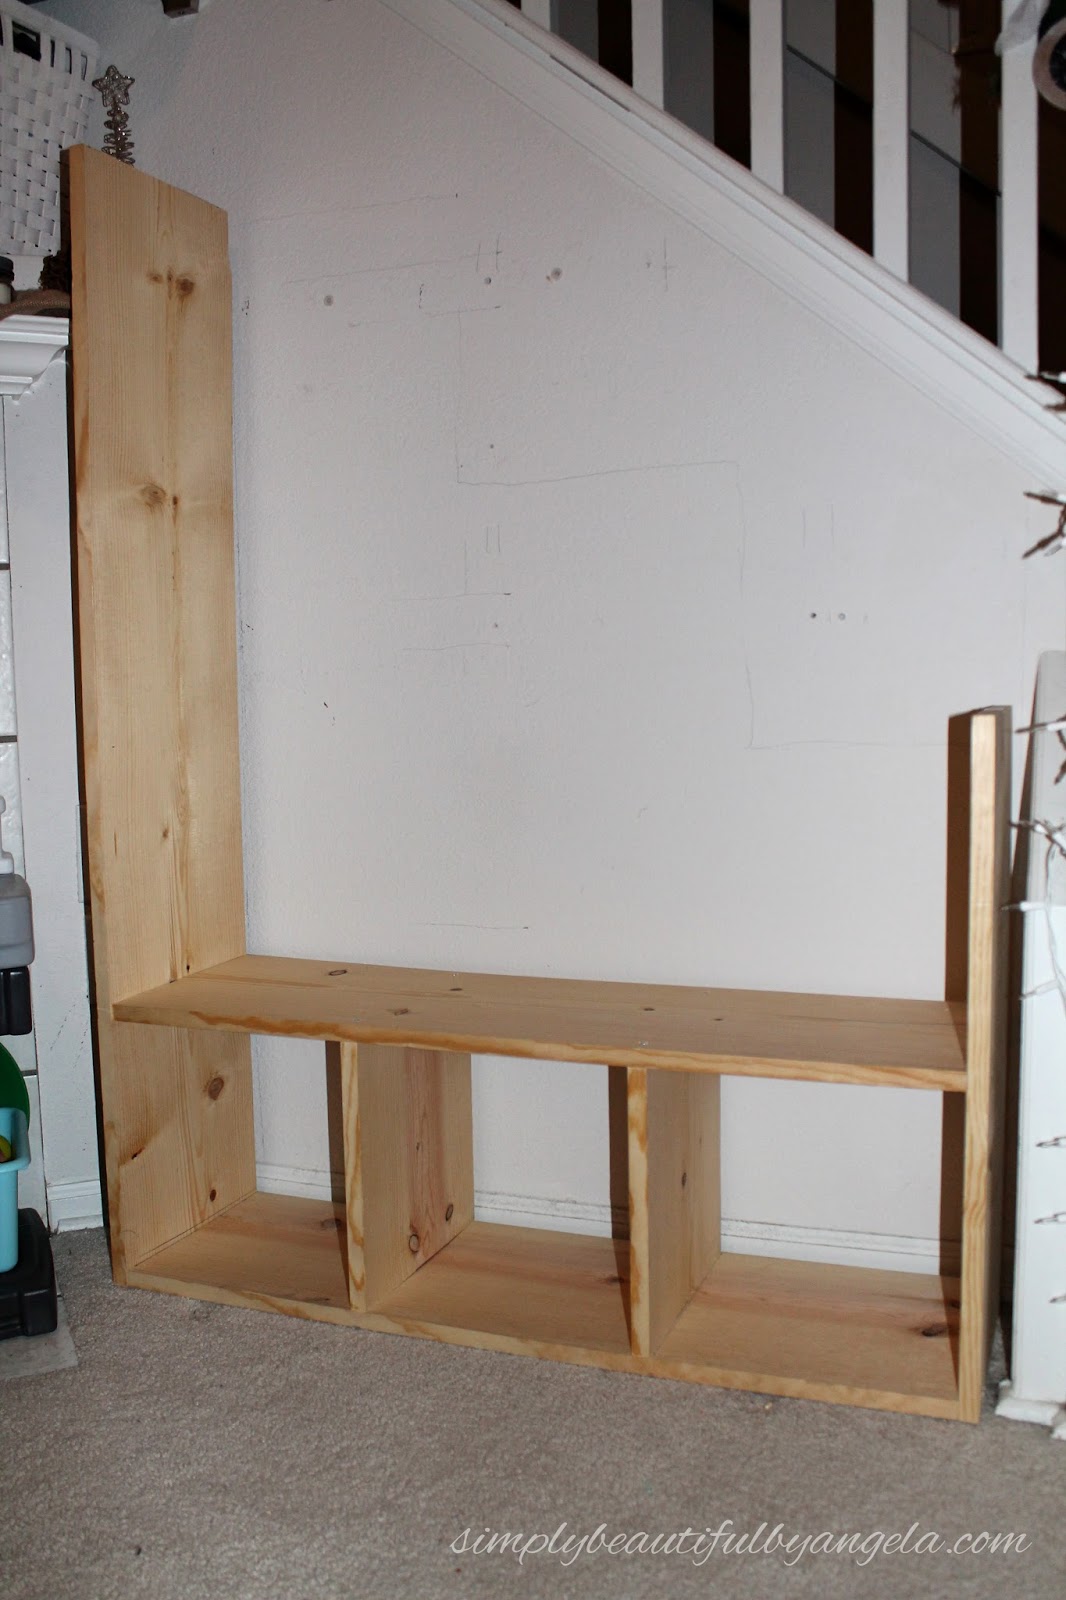
Sorry for the long stretch of silence, I’ve spent the last couple of weeks putting all of my time and effort into Lucas’ first birthday party. It was well worth it because it turned out beautifully and Lucas had such a great time. I will share the pictures and details with you all later this week. But first, I am excited to show you our new living room toy storage unit!
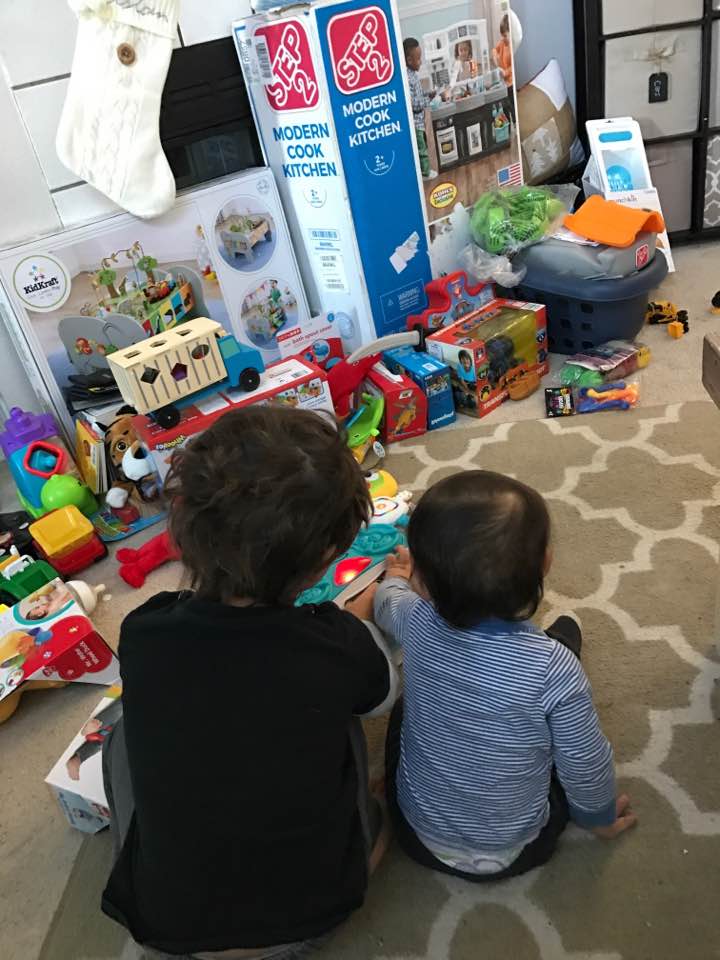
The day after Christmas as the boys sat playing happily in front of their mountain of new toys that they received, I had a minor freak out moment. I started wondering how in the world I was going to organize this mess in our small house.
- 1-10ft 1×12 board
- 2-8ft 1×12 boards
- Wood Screws
- Drill
Liquid Nails
- Corner Braces
(aka L-brackets)
- Wood filler
- Orbital Sander
- Minwax Wood Stain in Provincial
- White paint
Cut List:
10’ Board–
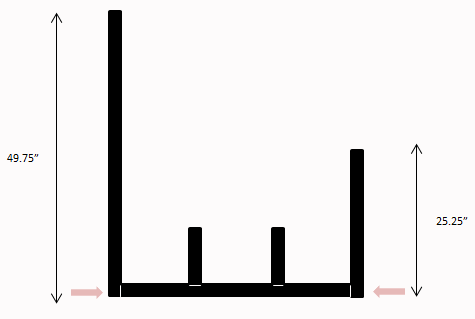
- 49.75″
- 23.75″
- 12.25″ (x2)
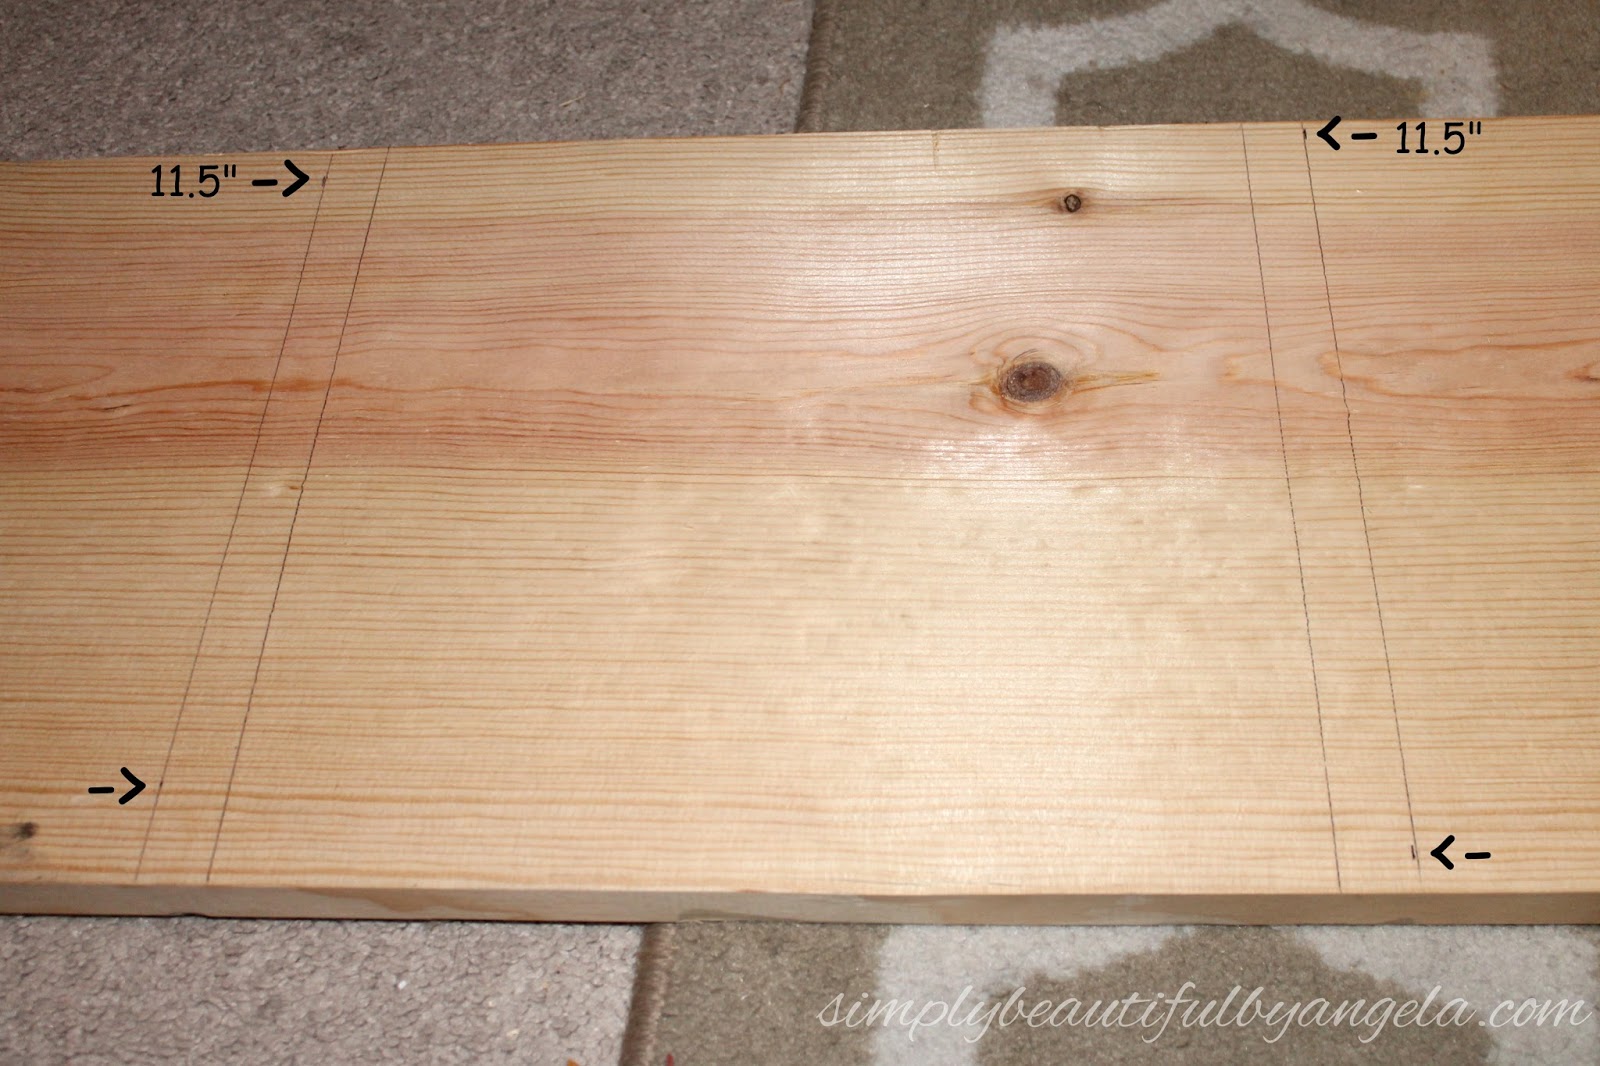
- 11.5″
8′ Board #1–
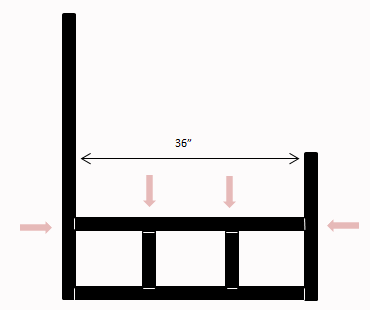
- 36″ (x2)
- 11.5″ (x2)
8′ Board #2–
- 36″
- 11.5″ (x3)
- 25.25″
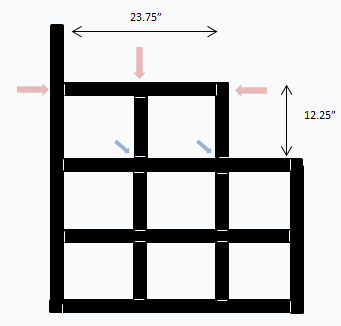
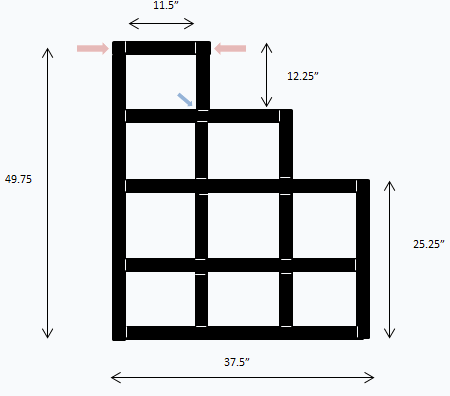
This was definitely my most complicated design yet, so to make it easier I designed it all in a Word document prior to beginning so that I could work out the measurements and visualize the steps. I’ve included these to use as a reference below–they aren’t perfect but hopefully they help you see the steps a little better than my rushed photos that I took as we scrambled to get this thing together!
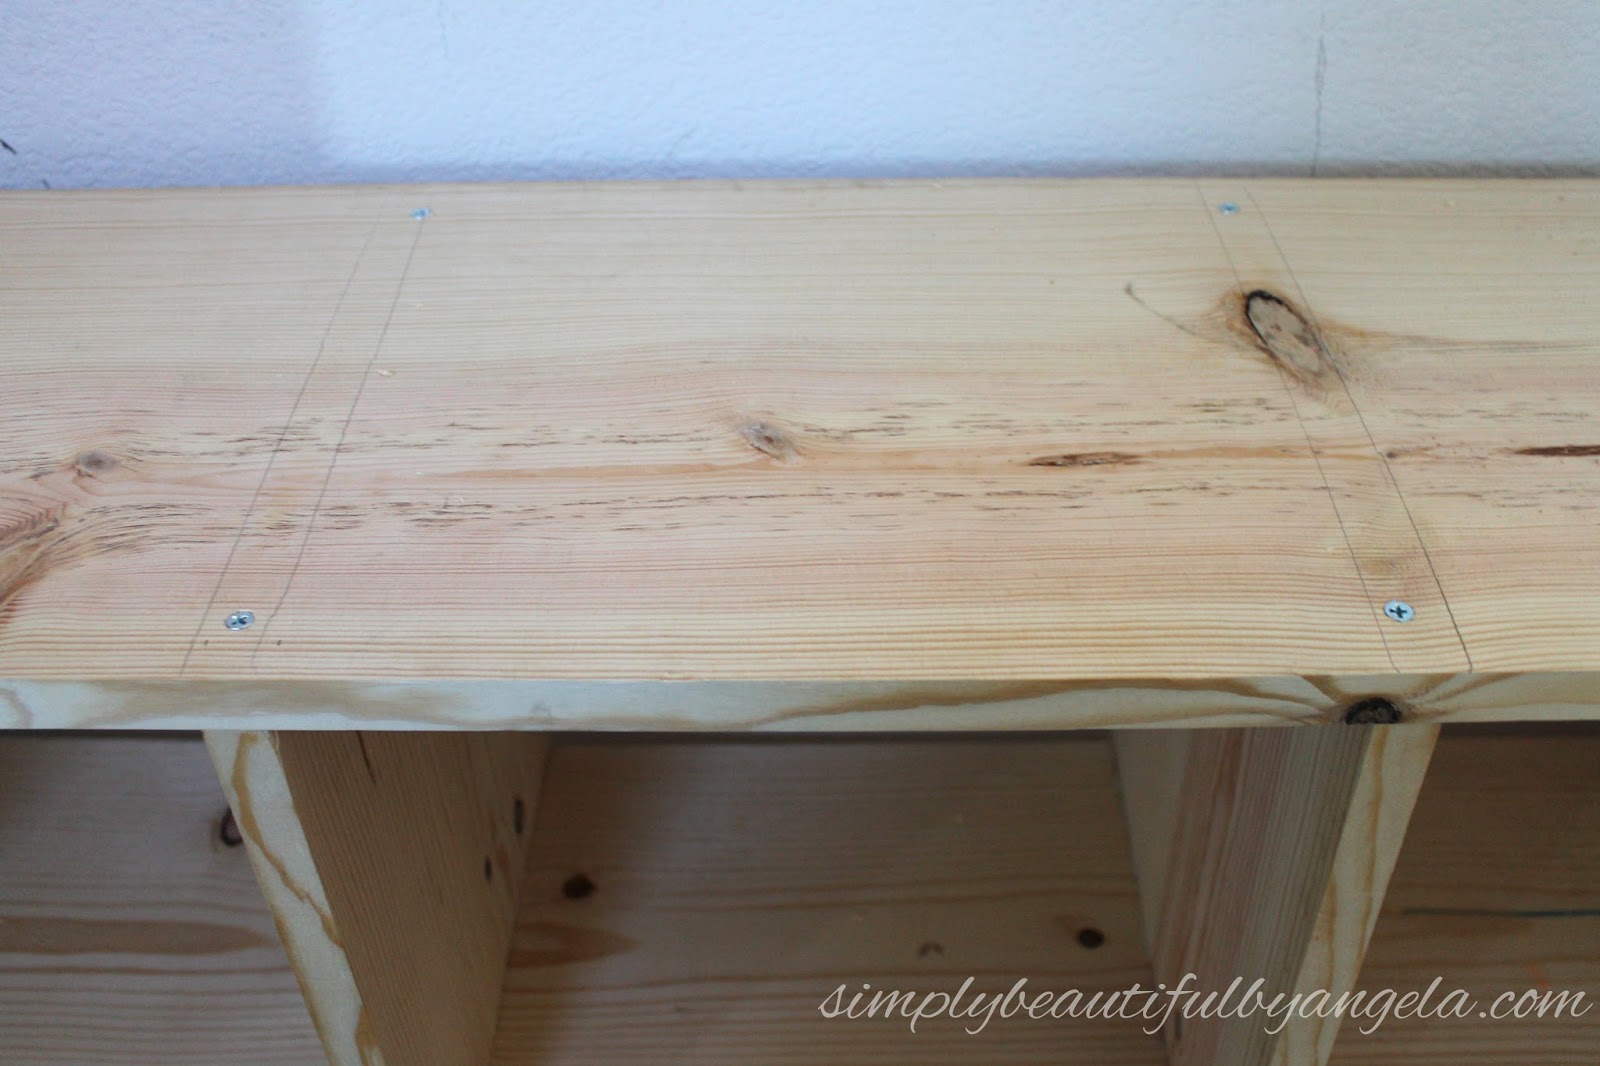
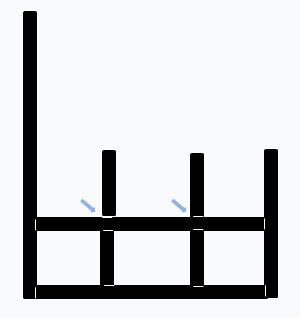
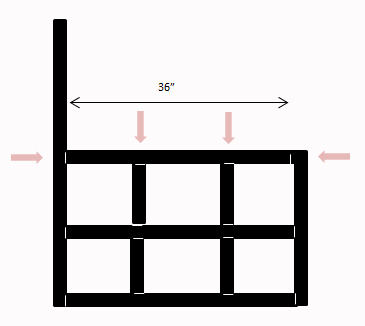
**Screws are indicated by pink arrows and liquid nails by blue arrows**
Step 1.
Using wood screws, attach two 11.5″ boards to a 36″ board. I measured and marked 11.5″ from each side. Then, I placed the board down and traced it so that I had a visual of where it needed to be placed.
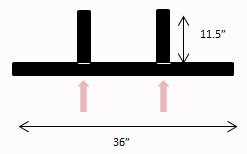

Step 2.
Attach the 49.75″ board to one side of the 36″ board and the 25.25″ board to the other side.
Step 3.
Attach a 36″ board on top of the 11.5″ boards by securing from the sides and through the tops of the 11.5″ boards.
Step 4.
This is where a Kreg Jig would come in very handy. But since I don’t have one, I just attached my next two 11.5″ boards with liquid nails and held them in place with bricks over night.

Step 5.
The next morning we attached another 36″ board on top, again securing from the sides and through the tops of the 11.5″ boards.
Step 6.

Step 7.
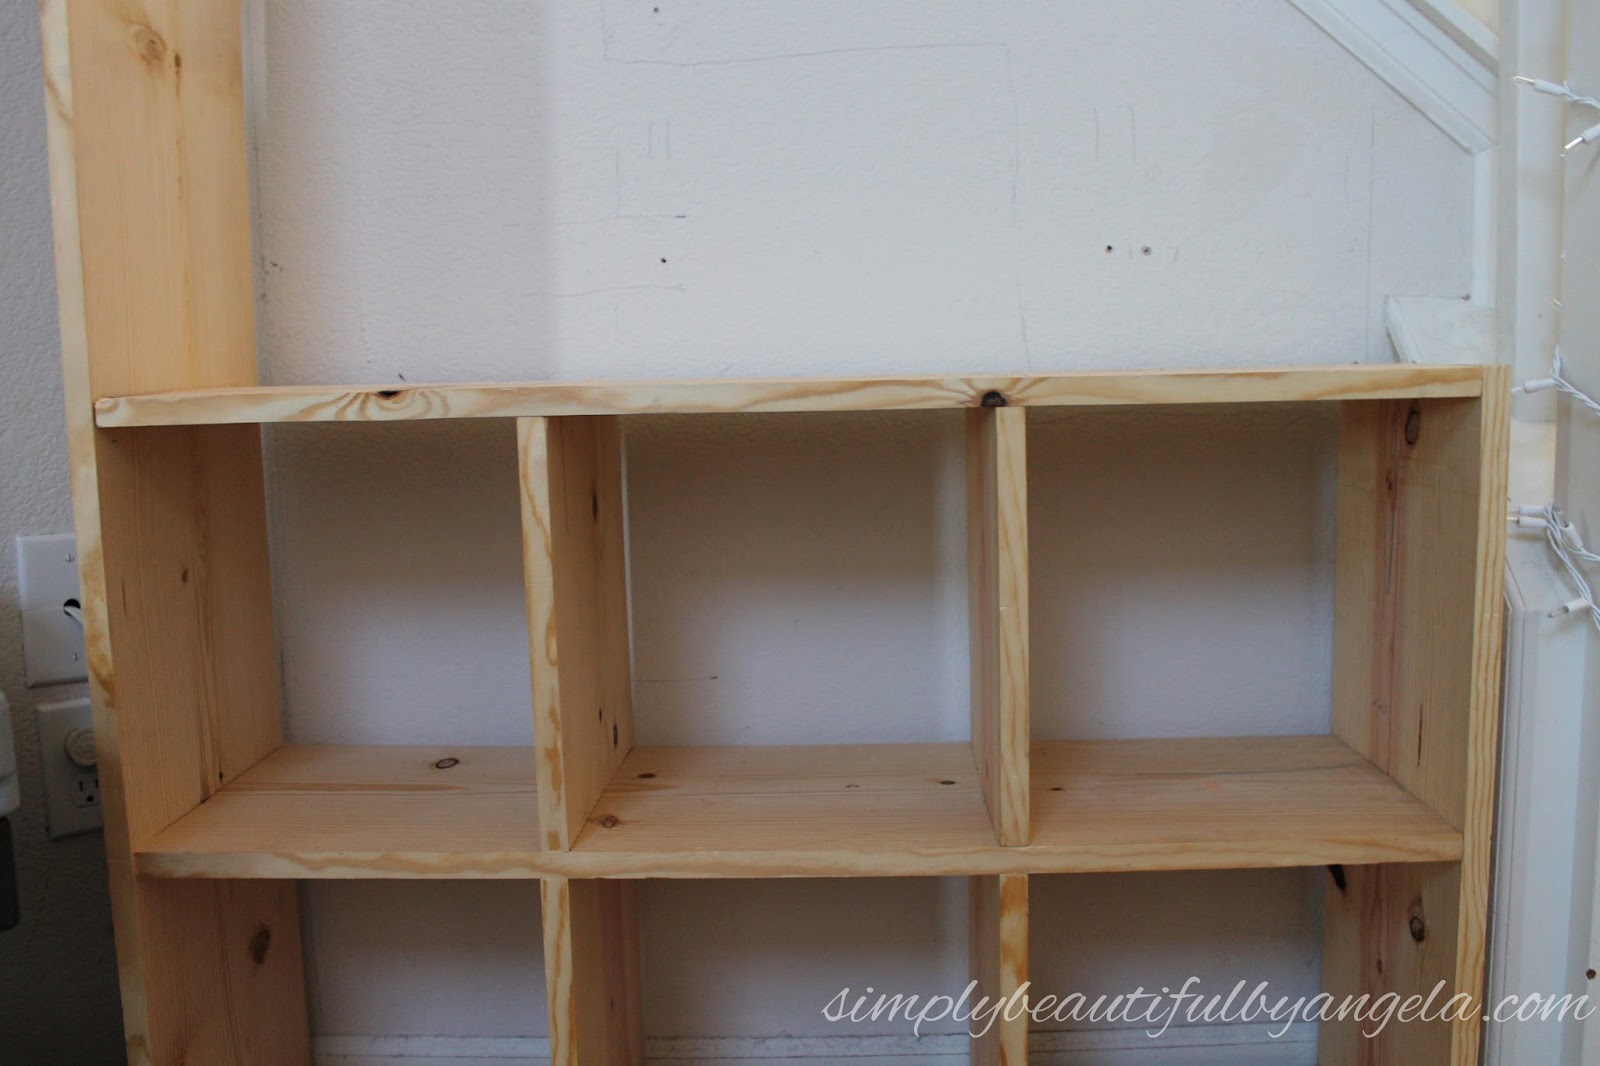
Finish off the top with a 12.25″ board and a 11.5″ board.
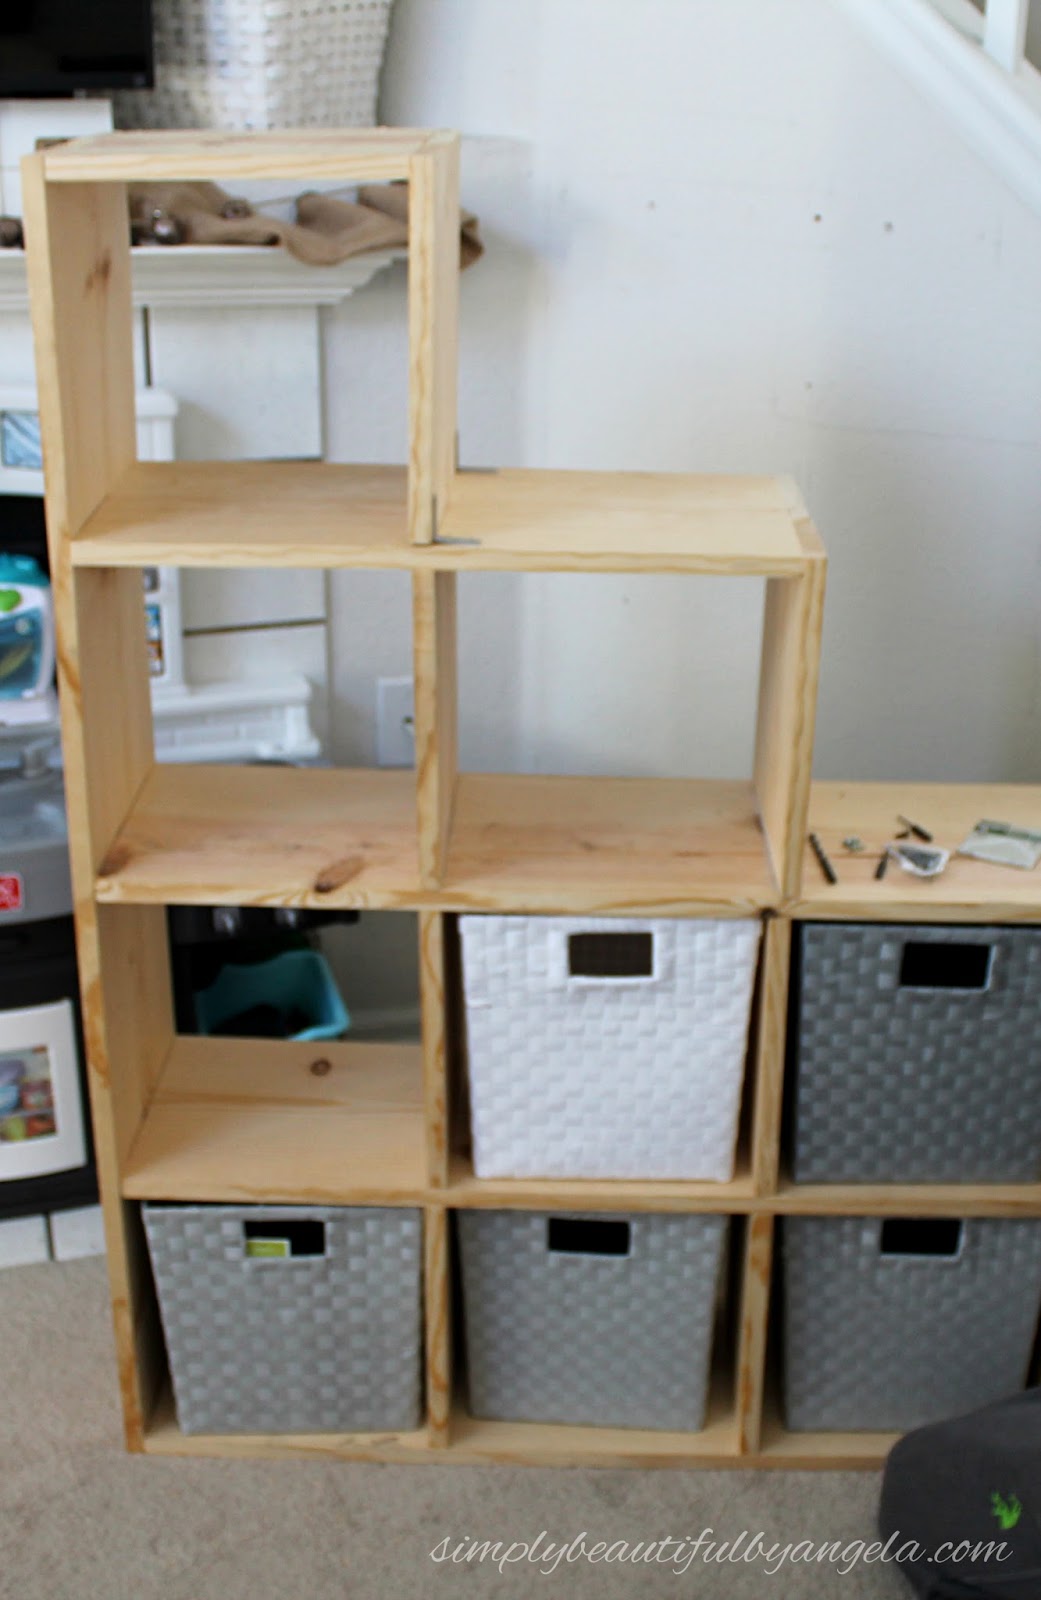
We ran into issues with board warping so the hubby added L-brackets to the outside of the top cube to get it into the right place.
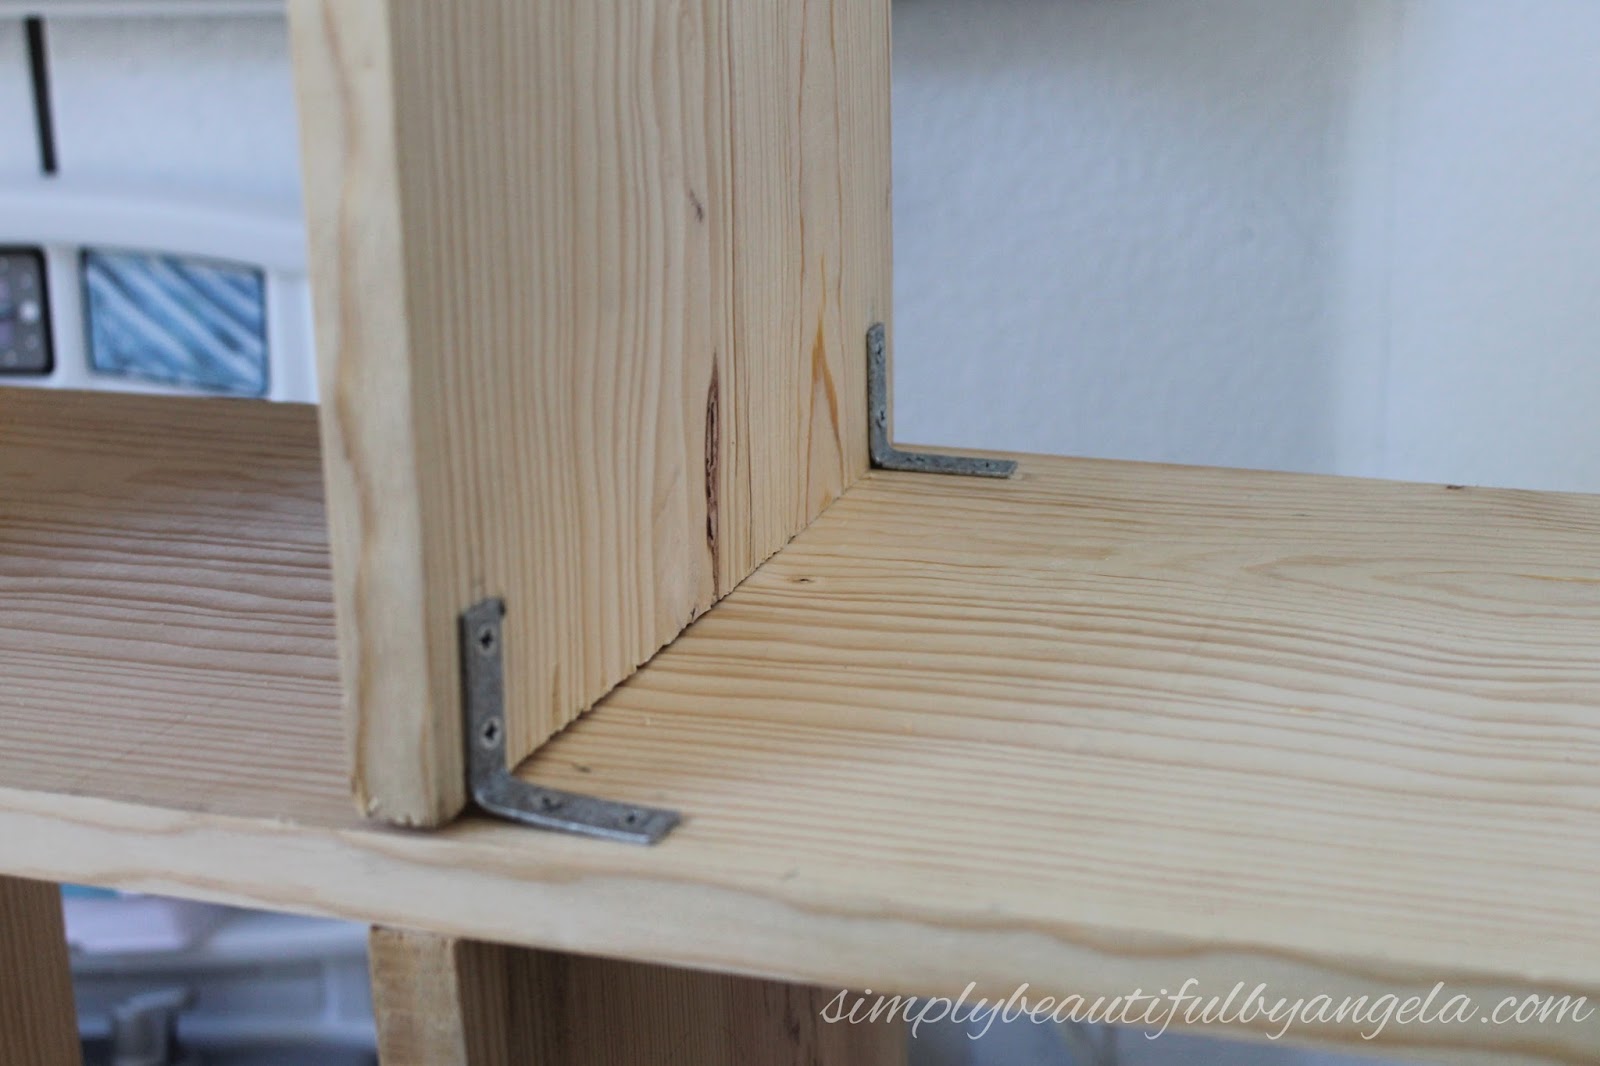
I ended up liking the industrial feel that they added so I had him put some on the second row as well.
We countersank the screws so that I could go back and fill them with wood filler and sanded the whole unit to remove any rough edges.
I almost painted it my go-to white, but ultimately decided to give it a coat of my favorite stain, Minwax Wood Stain in Provincial followed by a couple coats of whitewash.
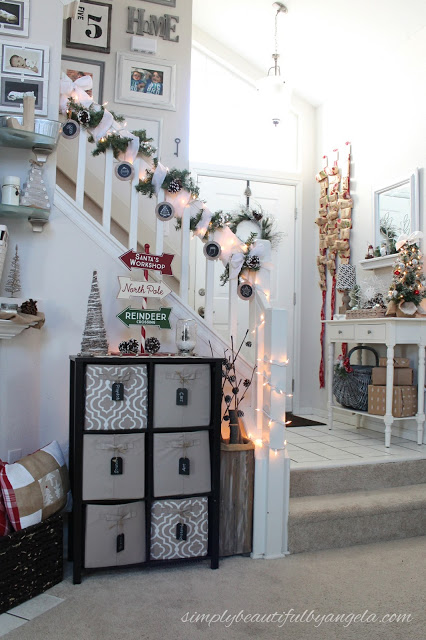
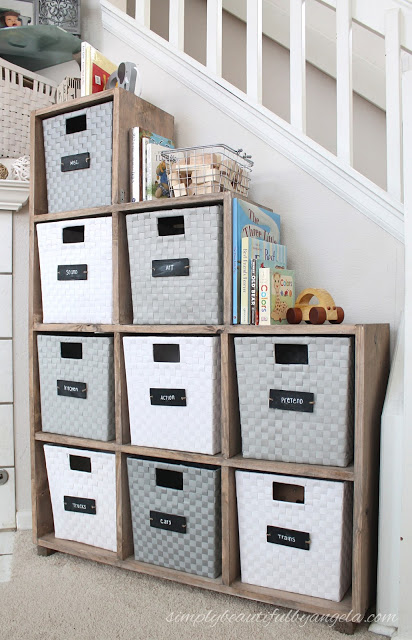
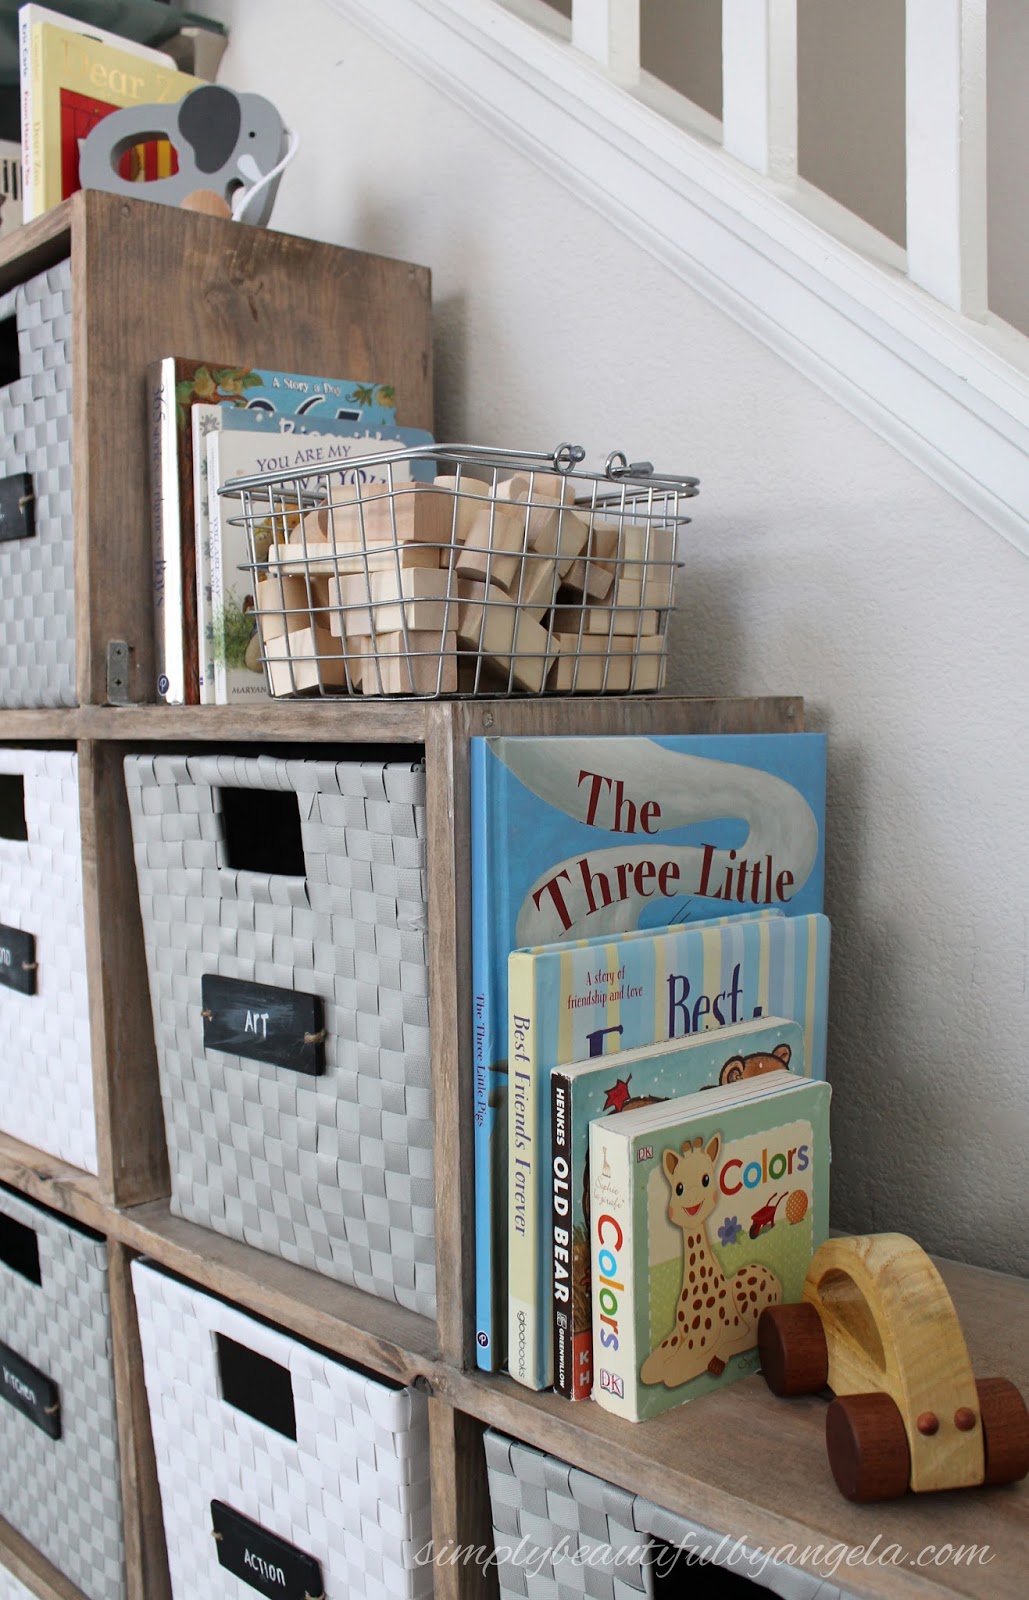
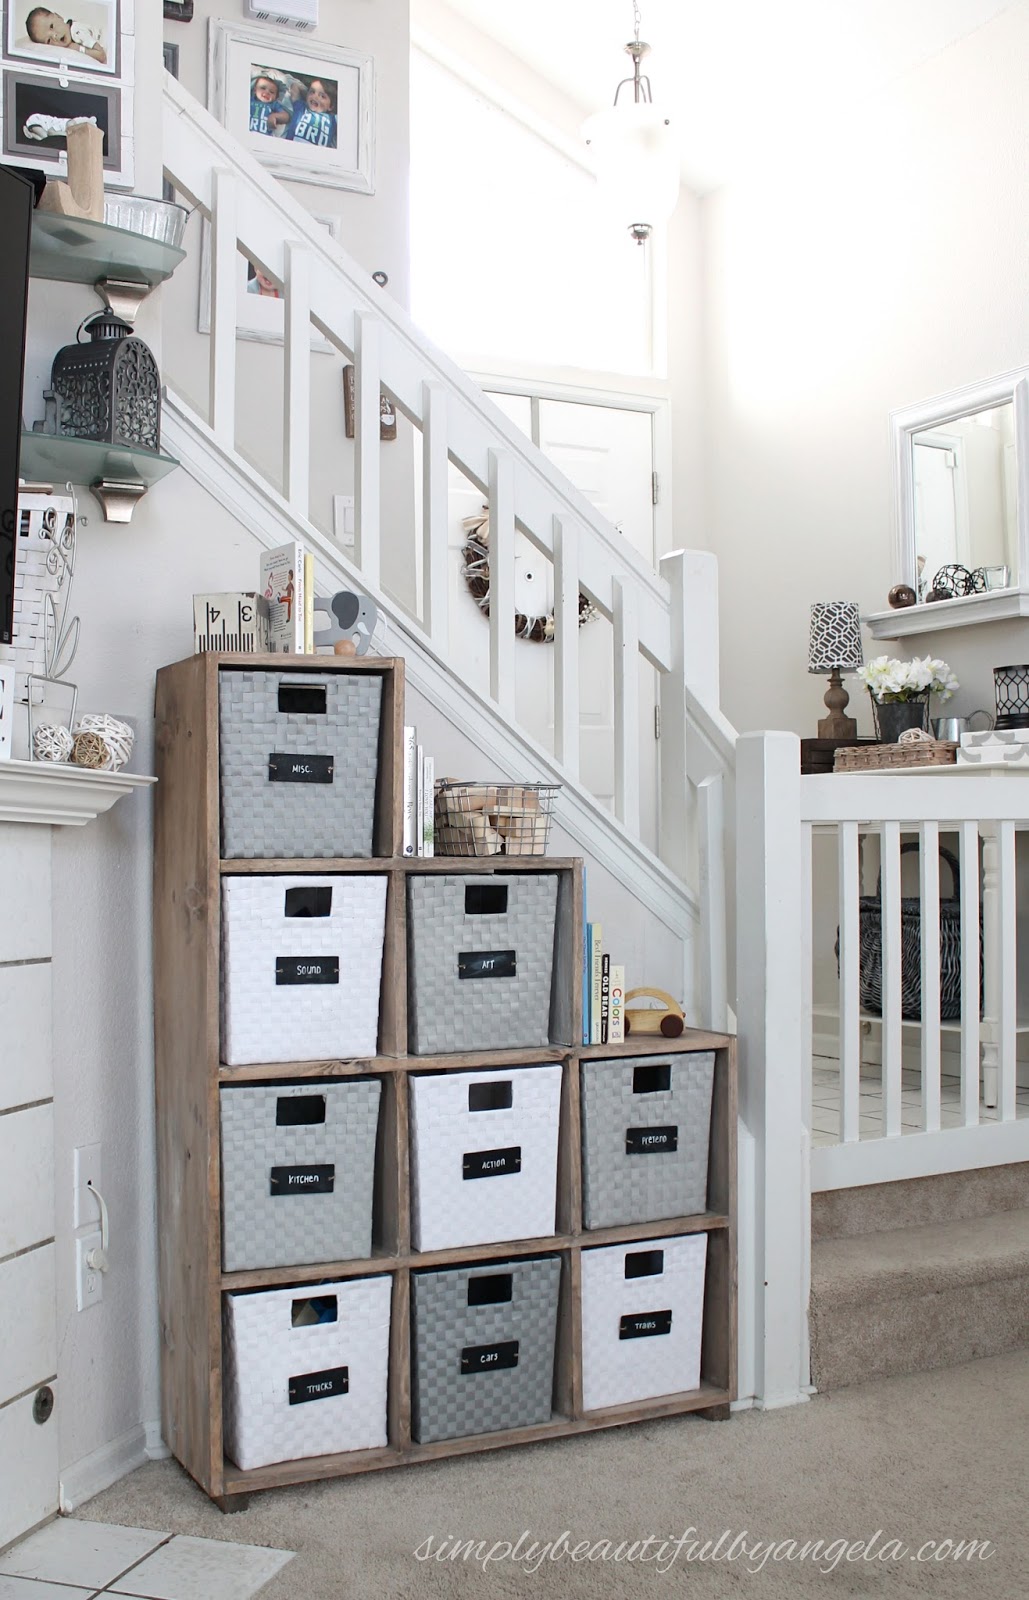
And here it is today!
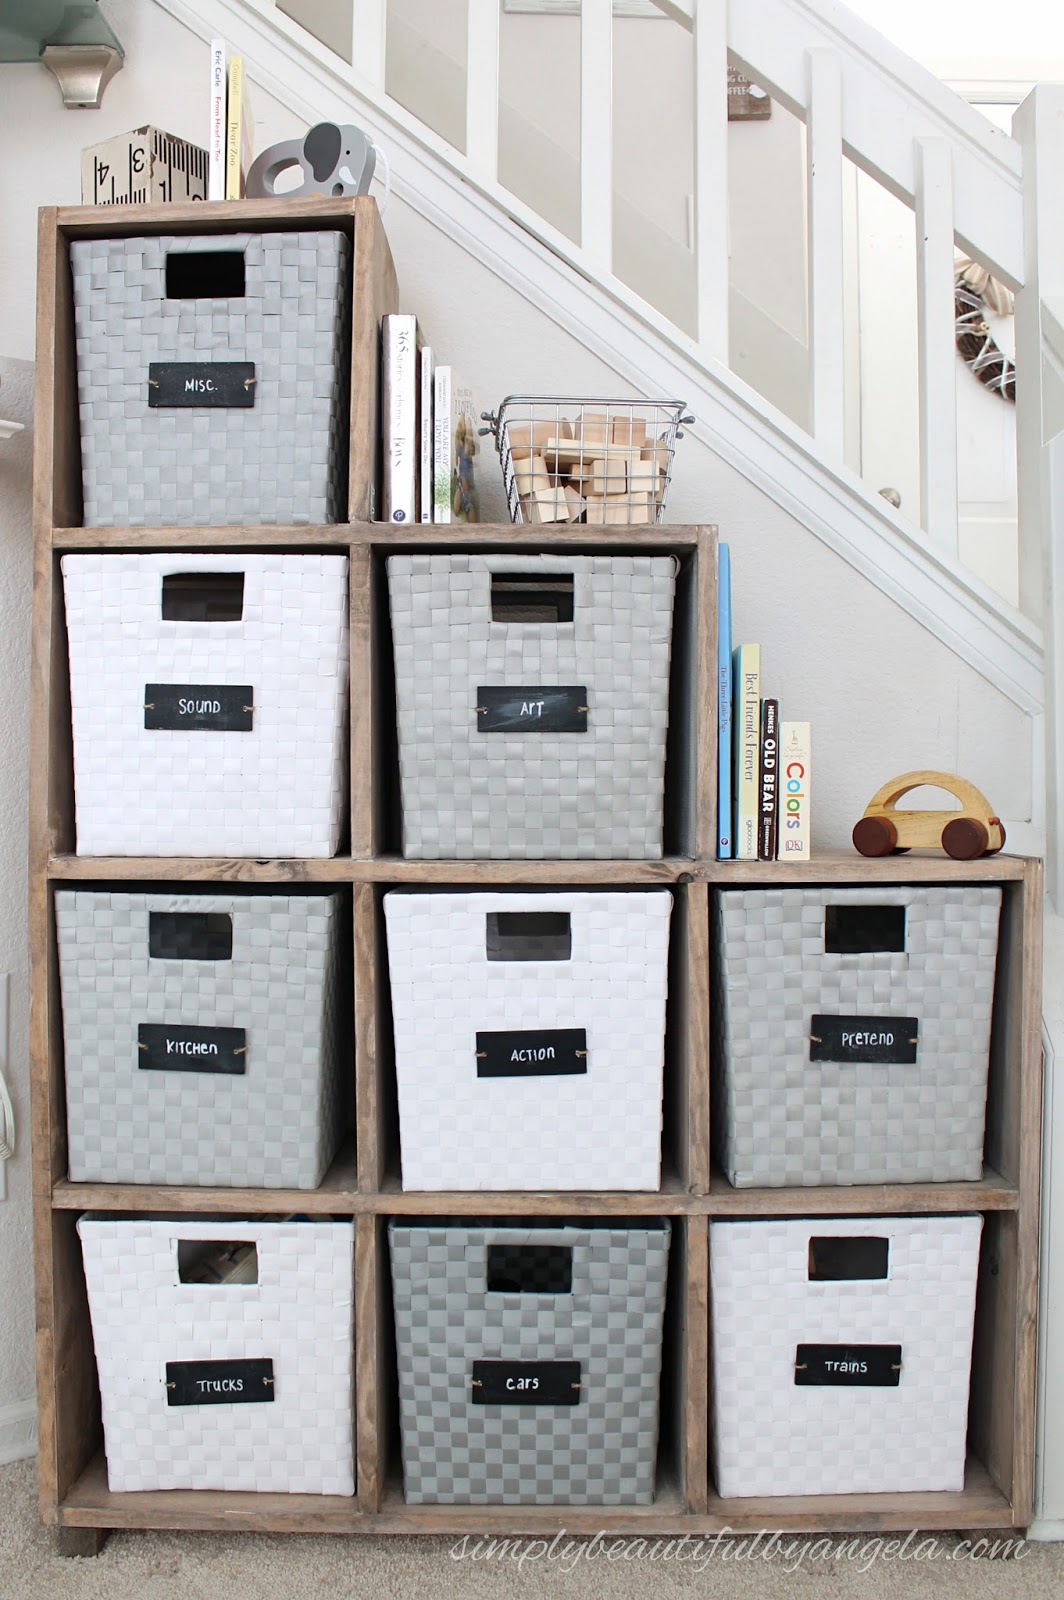
I added a couple of 2x2s to the bottom to serve as feet. (Also make sure that you anchor any furniture to the wall to prevent tipping!)

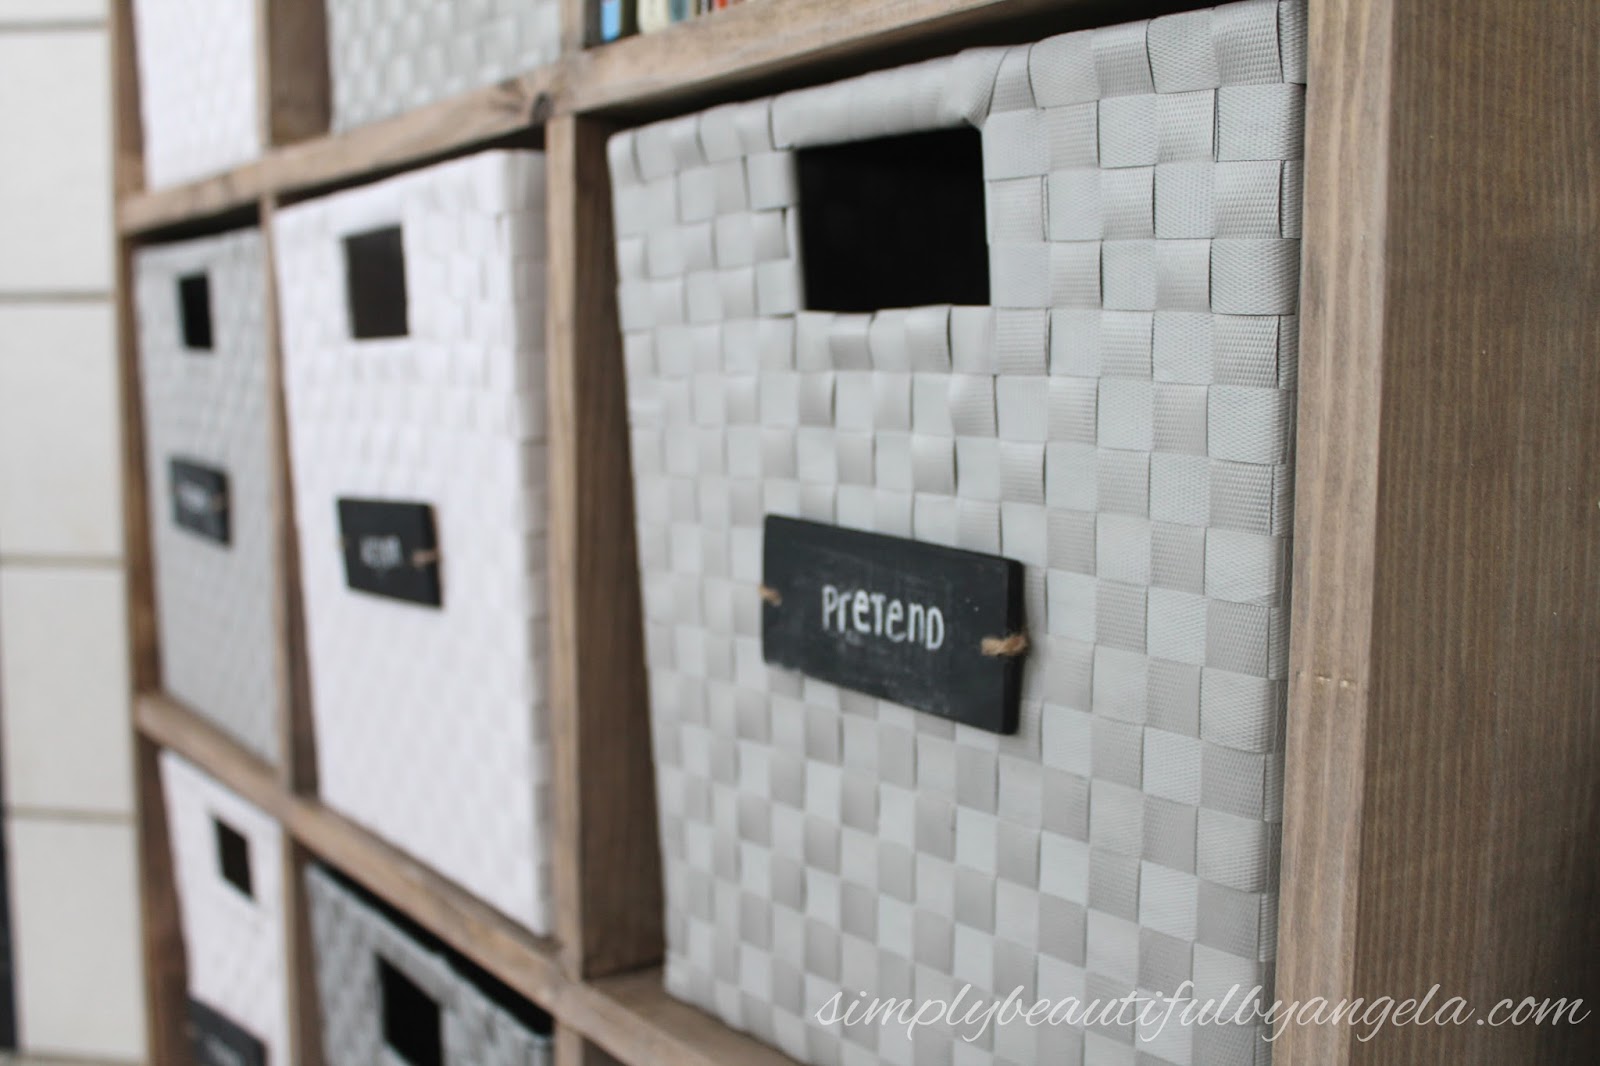
I used woven bins from Target that I already had on hand, but any 11″ bins would work.


Beautiful piece! My daughter are both outgrowing their bookshelves, and I think something like this would be a perfect, space-saving solution. Blessings, from your neighbor at the Friendship Friday link up.
Megs
Thank you so much Meg! Going vertical with storage is definitely a great way to save on space 🙂
Lovely idea. It turned out really nice. Shared. Thanks for joining us at the Inspiration Spotlight party.
Thank you Theresa!
It looks great! I like how it echoes the line of the stairs!
Looked Wonderful!! Professionally I am a home improvement contractor. I just loved the idea of your home decoration. Your house is looking beautiful and beautifully decorated.