Hello and happy Monday everyone! I hope you all had a great weekend.
This week I will be wrapping up the last two tutorials that were a part of our Master Bedroom Makeover. I know, I know–I only completed it nearly SIX months ago and I’m just now finishing these up! But in my defense first the holidays came and then Lucas’ first birthday followed right after, so it’s taken me a little while to get through all of them!
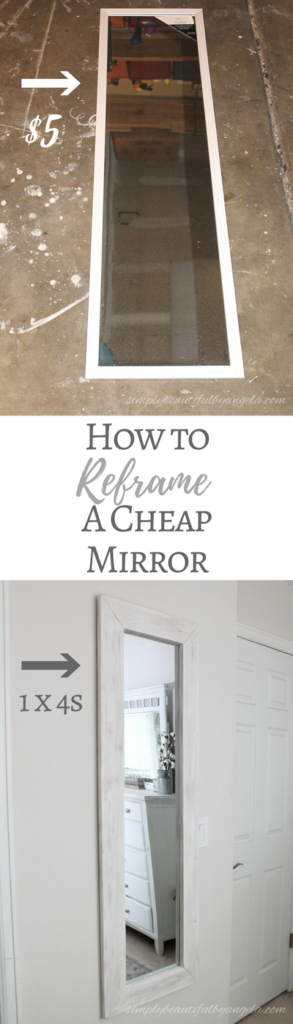
Today I am going to show you how I took a cheap door mirror and prettied it up for our new bedroom.
- Door mirror
- Acetone
- Utility Knife
- Approximately 11ft of 1x4s
- Wood Glue
- Staple Gun
- Paint
- Medium-Grit Sandpaper
- Loctite Mirror Adhesive
- 1/4″ Mirror Offset Clips
- D Rings
I picked up this door mirror at Walmart for just $5.

I began by removing the plastic frame from the mirror. I will tell you guys this right of the bat–these things are super flimsy. I actually did a similar project a few months ago and I broke a total of three! Good thing I’m not too superstitious, geesh. I finally got a good method down though, so now I consider myself somewhat of a mirror-demo master haha.
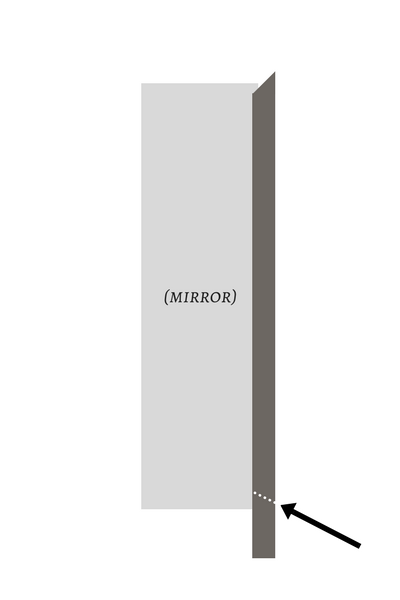
After removing the paper backing I put some acetone on a cotton ball and used it to soak the glue around the edge.

It won’t look like it it’s doing anything because the glue is so thick, but trust me–it weakens it and makes it SO much easier to cut through with a utility knife. Just keep scoring again and again and be patient!

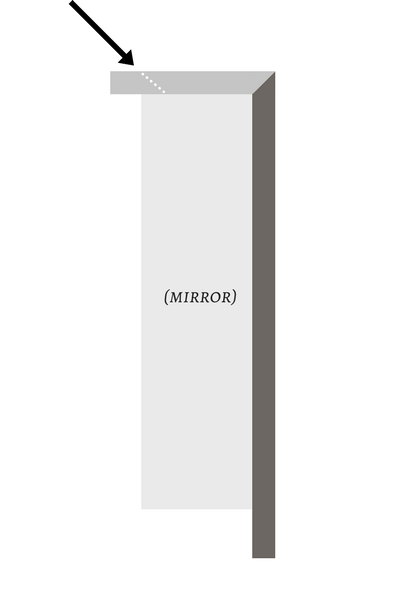
This next part is extremely important and is why I broke so many mirrors before. You must pull the frame straight out from the side of the mirror. I originally was pulling the frame towards me and that is what kept making the mirror crack.

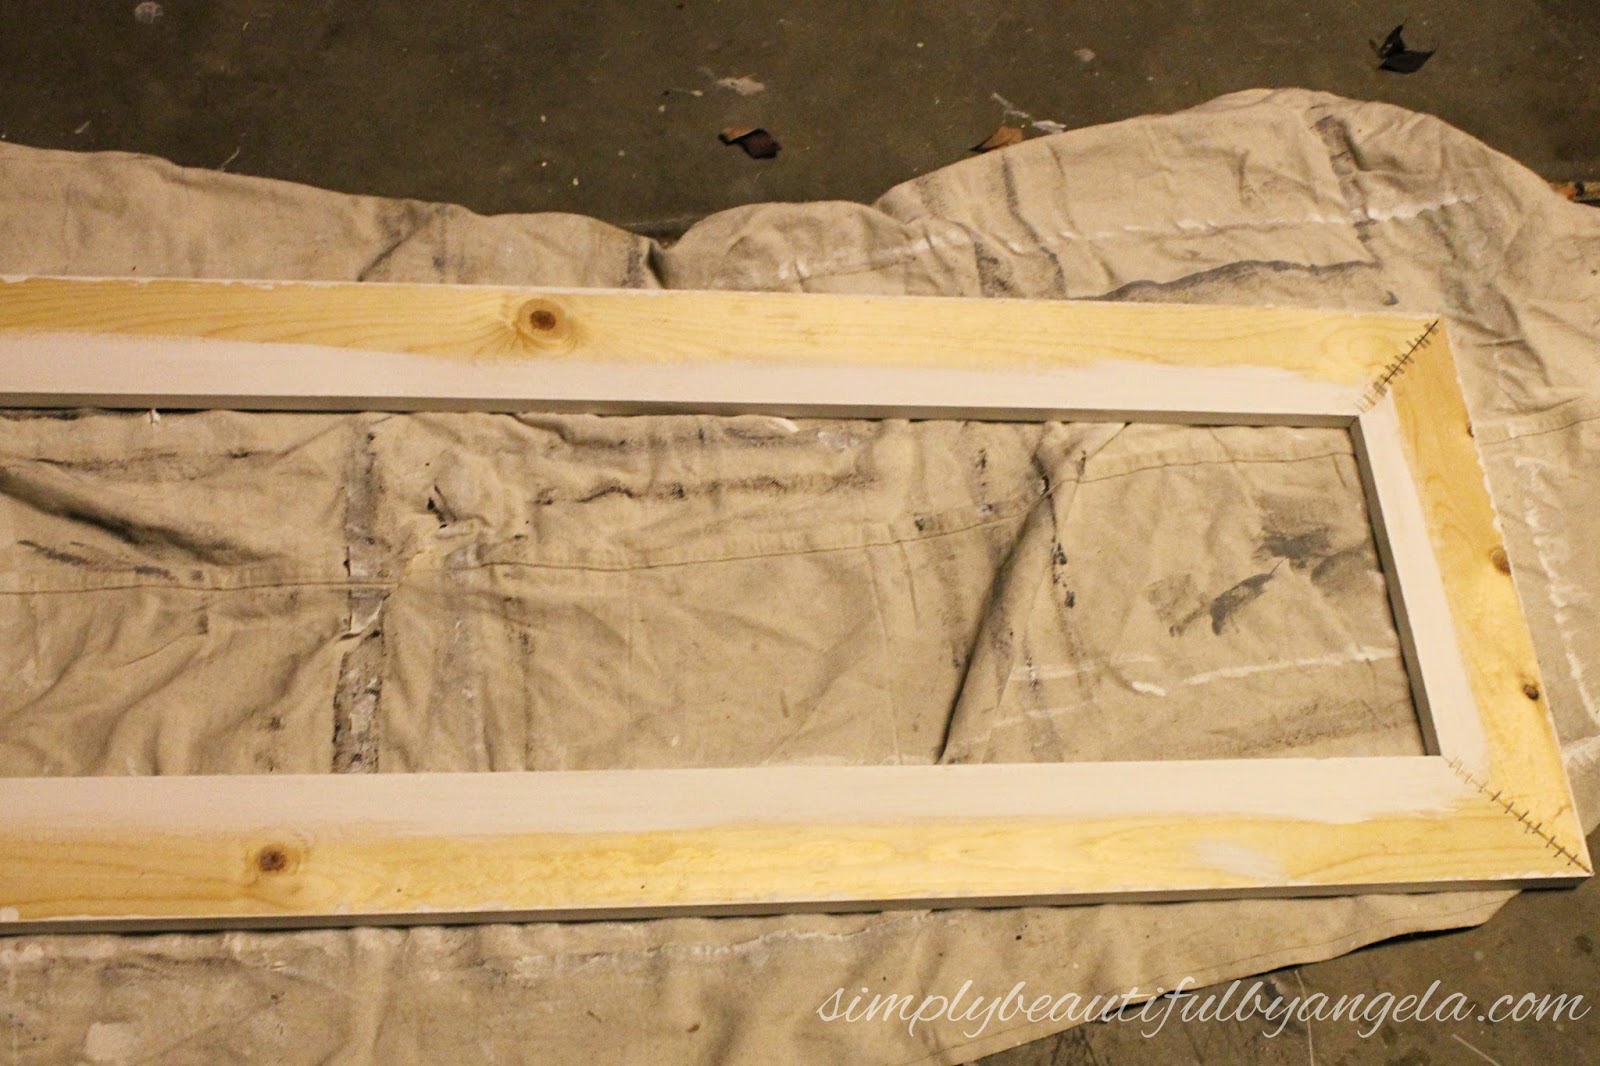
Next it was time to build the new frame. I didn’t get any pictures of this process but I basically cut one end of a 1×4 at 45 degrees on the miter saw and laid it on the long edge of the mirror so that about 1″ of the wood sat on top of the mirror. From here I was able to mark where the other end needed to be cut.


Don’t worry if your boards are a little warped, mine were and it still came out okay. However try to pick the straightest ones that you can!
I painted the front white and also made sure to paint the edges of the back since they will reflect a little in the mirror.
To attach my mirror I ran some Loctite Mirror Adhesive along the edges and laid my mirror down very carefully on top. Make sure that you keep the adhesive about a half inch away from the edge and that you don’t use too much because you don’t want it to seep through to the front.

I added some 1/4″ Mirror Offset Clips to each side and along the bottom just in case my glue decides to give out one day! I also added some D rings so that we could hang it on the wall.


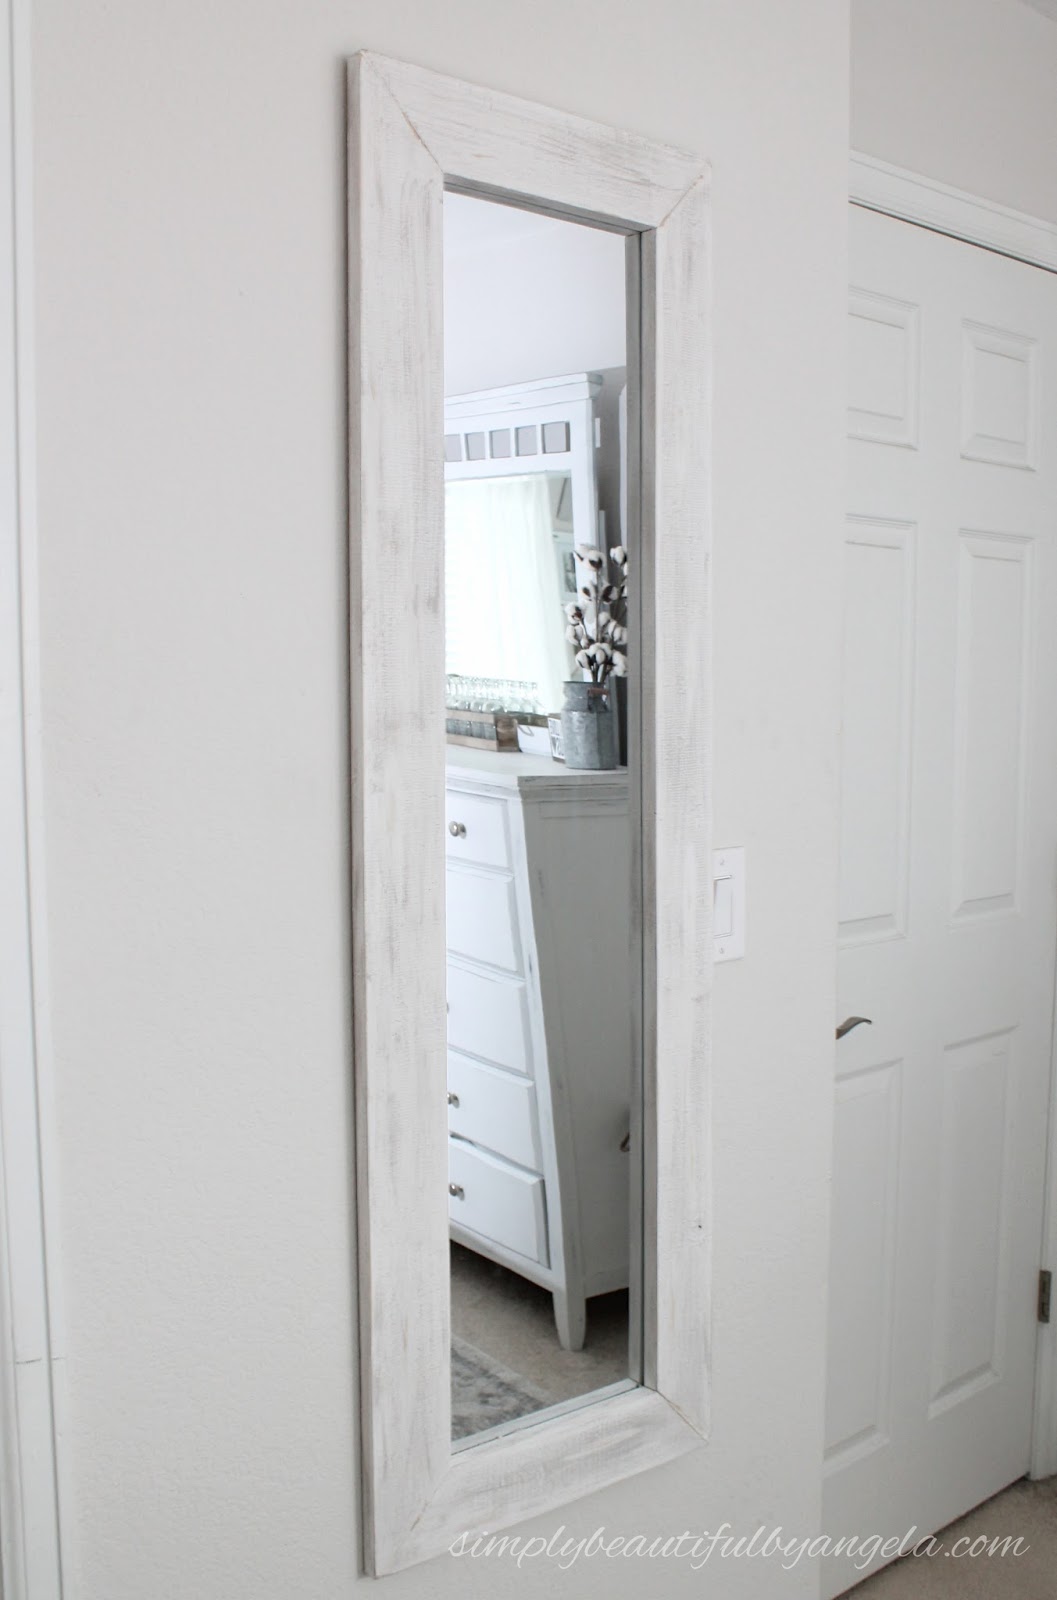
You guys. It has been soooo nice having a mirror on this wall. We have one on the back of our closet door which is in our bathroom but sometimes it gets a little crowded if we are both getting ready at the same time. Having another mirror nearby has been a total game changer!


I like that it reflects the light from the windows and makes our room even brighter.

Since I had everything on hand except the mirror, wood and the mirror clips it only cost me about $17 to make this beauty.

Great idea! Looks wonderful and the white with dry brushed distressing is very nice. Awesome way to upgrade! 🙂
Thank you so much Carolyn! I am really glad I went with the dry brush too 🙂
This is simply and sleek idea for all who are looking for re-generate their mirror in to new look. I also have one mirror who is no more in usage but really wanted to try your idea.
Thanks Lindsey!
Great look! Good tutorial too
Thanks Carol!
What a great idea!! I really like how your mirror turned out.
Thank you! 🙂
We've done a similar project with an inexpensive mirror. Nice tutorial. I love how yours turned out. We made ours for our teen. Thanks for sharing at the Inspiration Spotlight Party. Pinned & shared.
Thanks Theresa! It's such a nice inexpensive little addition isn't it? 🙂
Okay, this is amazing! I LOVE big, chunky mirrors, but they're so expensive. What you've created looks awesome, and I love that it's such an affordable project!
Thanks so much for joining the Grace at Home party at Imparting Grace. I'm featuring you this week!
Thank you Richella! I've admired chunky mirrors for so long too and am so happy I was able to recreate one for a fraction of the cost. Thanks for the feature 🙂
This came out great. I have this mirror that never had a frame, so I'm going to try to create one because it's pretty ugly freestanding. 🙂
keren dan menarik nih
The larger concern again is not the sheer availability of Breitling, but rather the unknowing consumer accidentally buying one Breitling watches,eBay in the past was littered with, but that is no longer the case. There are probably Replica Valentino Handbagsmasquerading as the real thing in eBay's auction listings from time to time, but they are less common than they used to be. Above I mentioned that in virtually all instances you won't find Valentino handbags sold via legitimate bags retailers.
ayam bangkok petarung
adu jago