Hello and happy Tuesday friends! I hope you are all having a great week so far.
Today I am going to share a super simple tutorial that turned out to look so CUTE in our new master bathroom! I’m sorry–I shouldn’t say that it’s “cute” because in reality it’s one of the only “manly” things that we have in this bathroom according to the hubby!
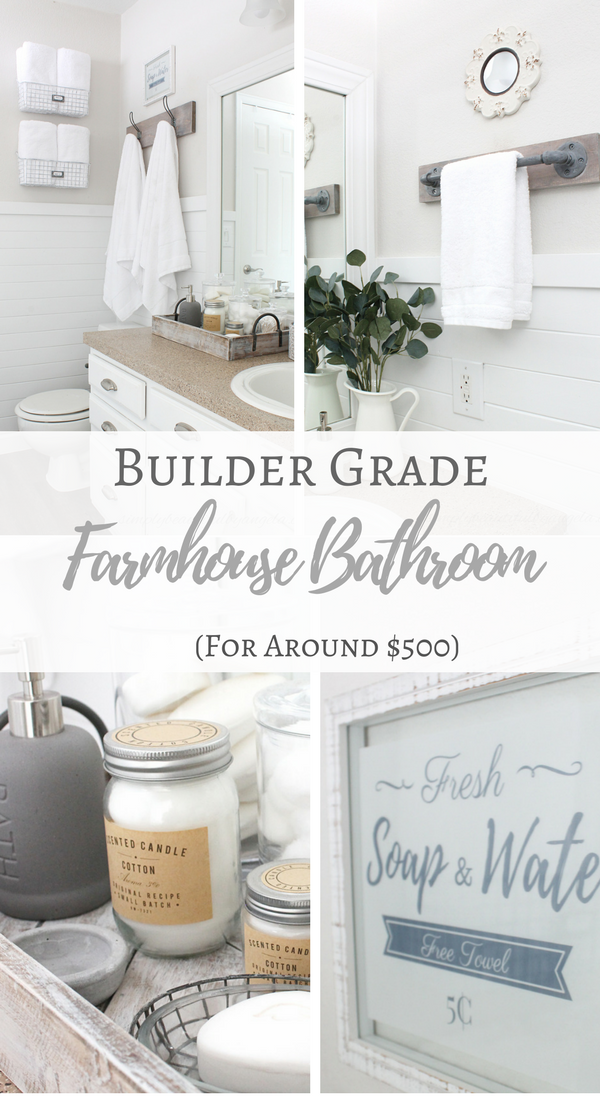
So when I was shopping for accessories to put in our bathroom I found this way awesome towel bar (affiliate link).

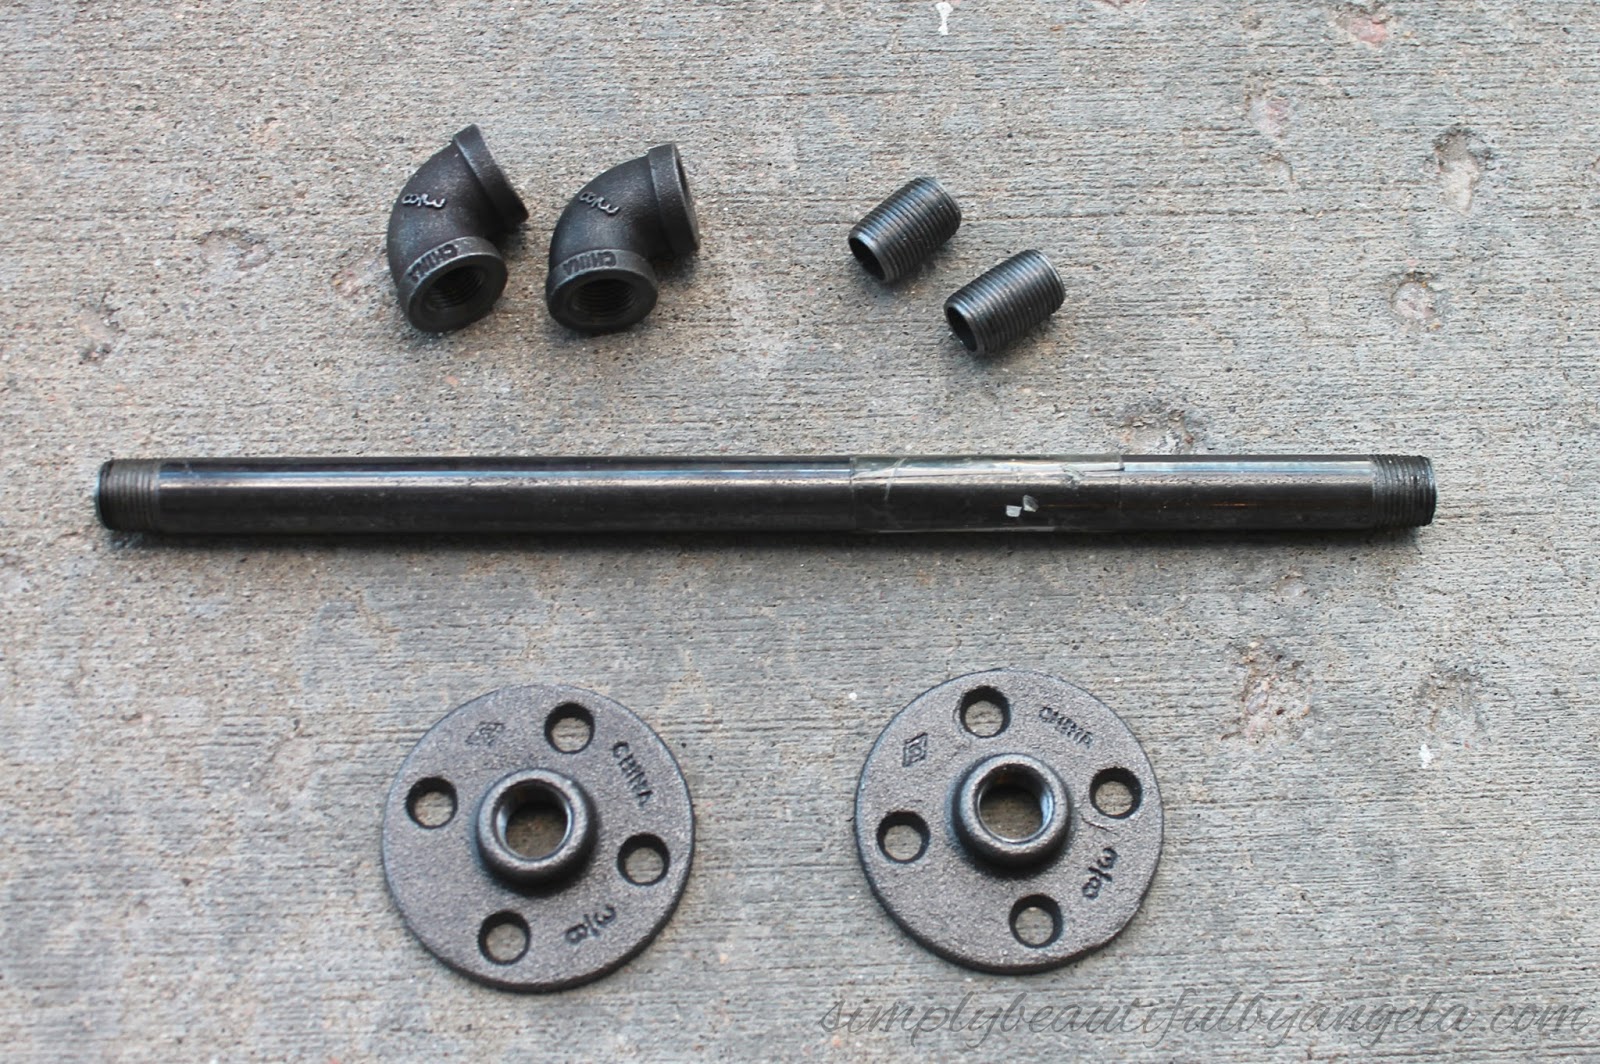
Supplies Used: (Affiliate links may be provided for convenience. For more info, see my full disclosure here.)
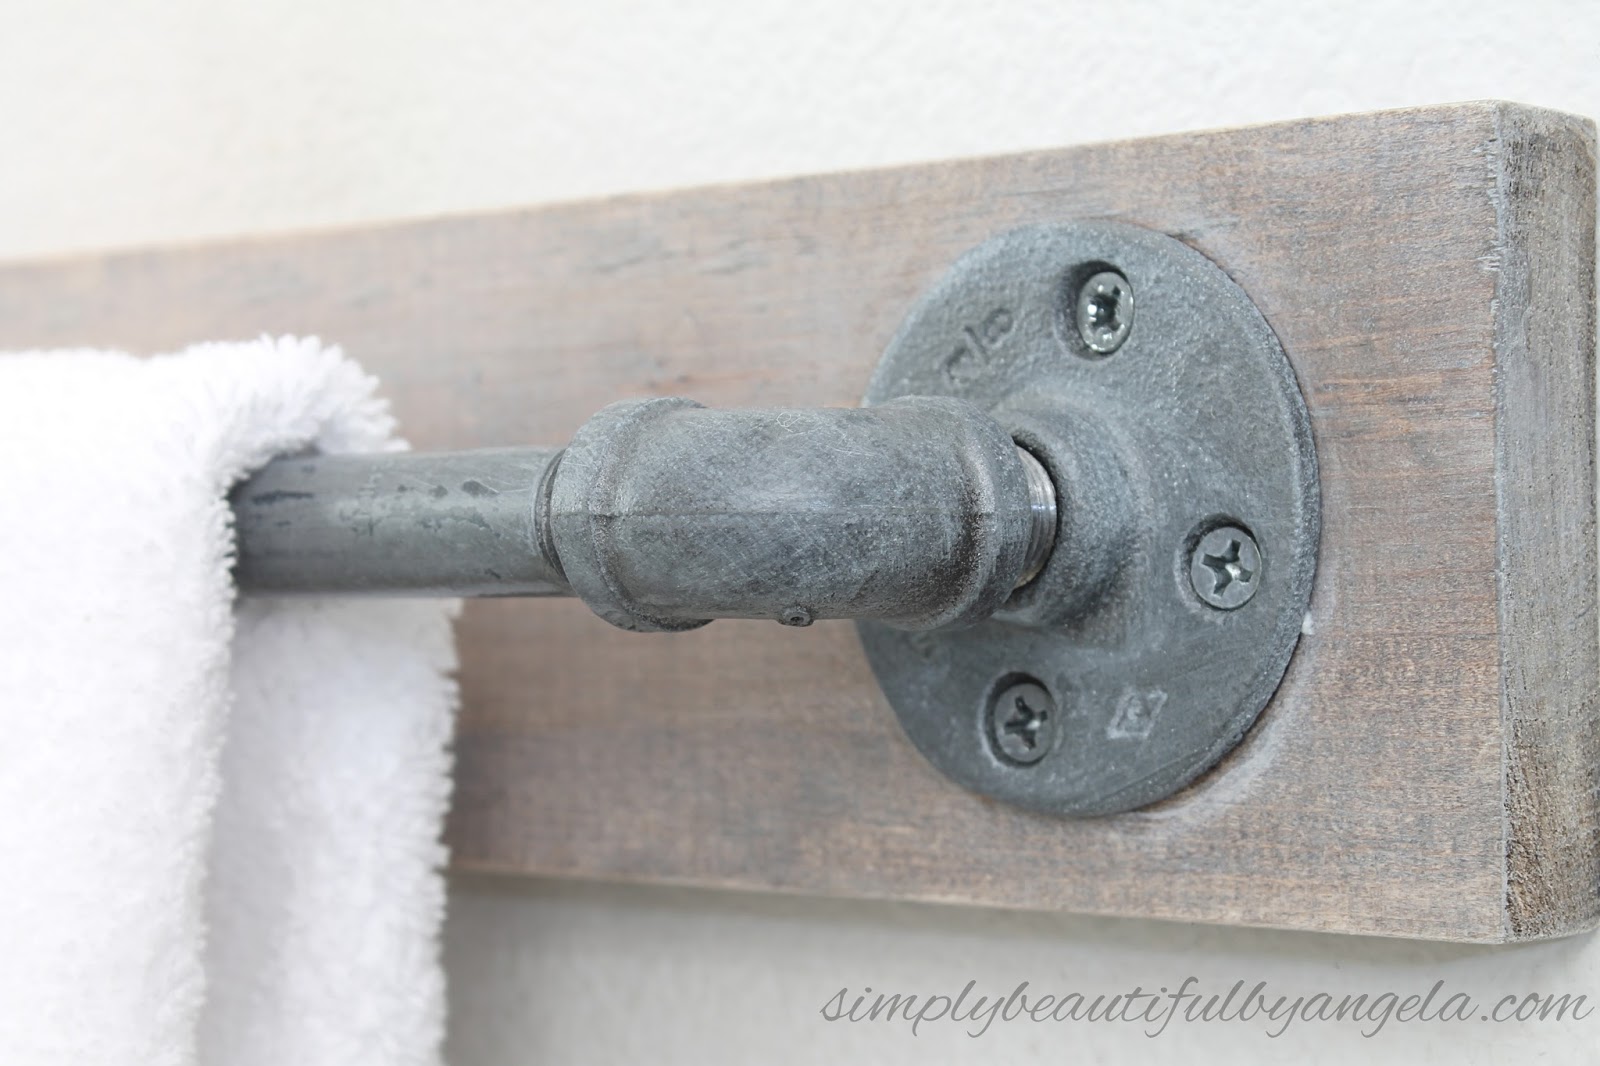
- 1-12in 3/8″ Nipple Fitting
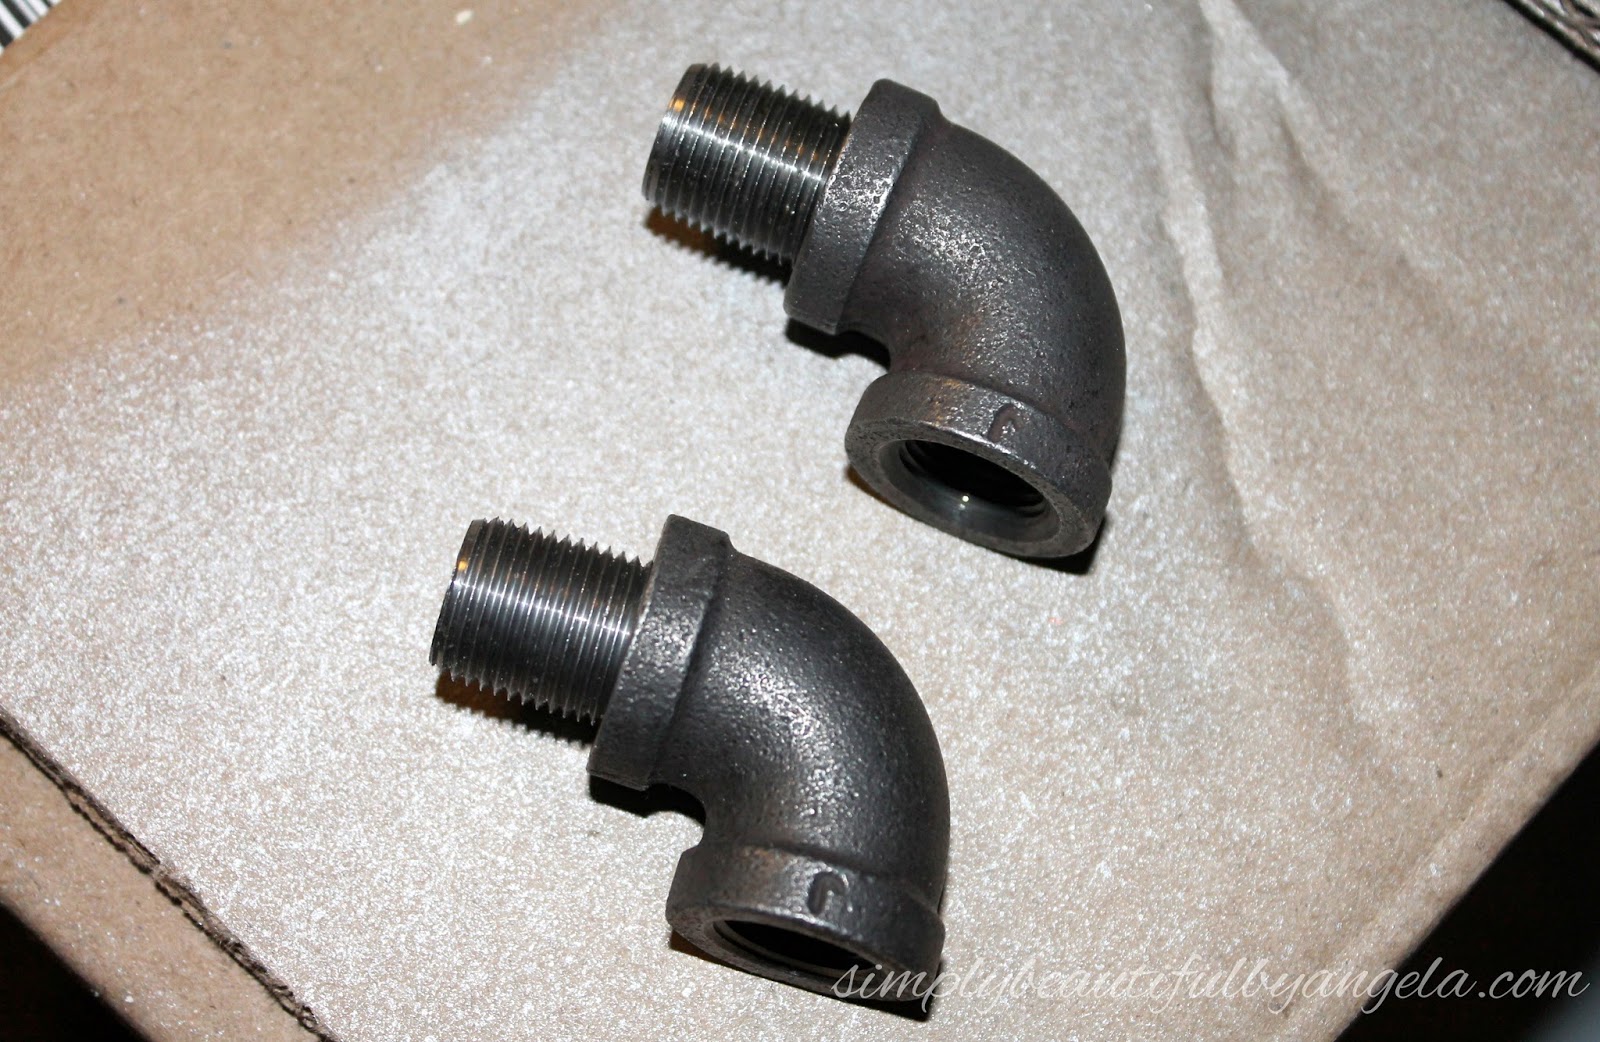
- 2-3/8″ 90 Degree Elbow Fittings
- 2-1in 3/8″ Nipple Fitting
- 2-3/8″ Floor Flange Fittings
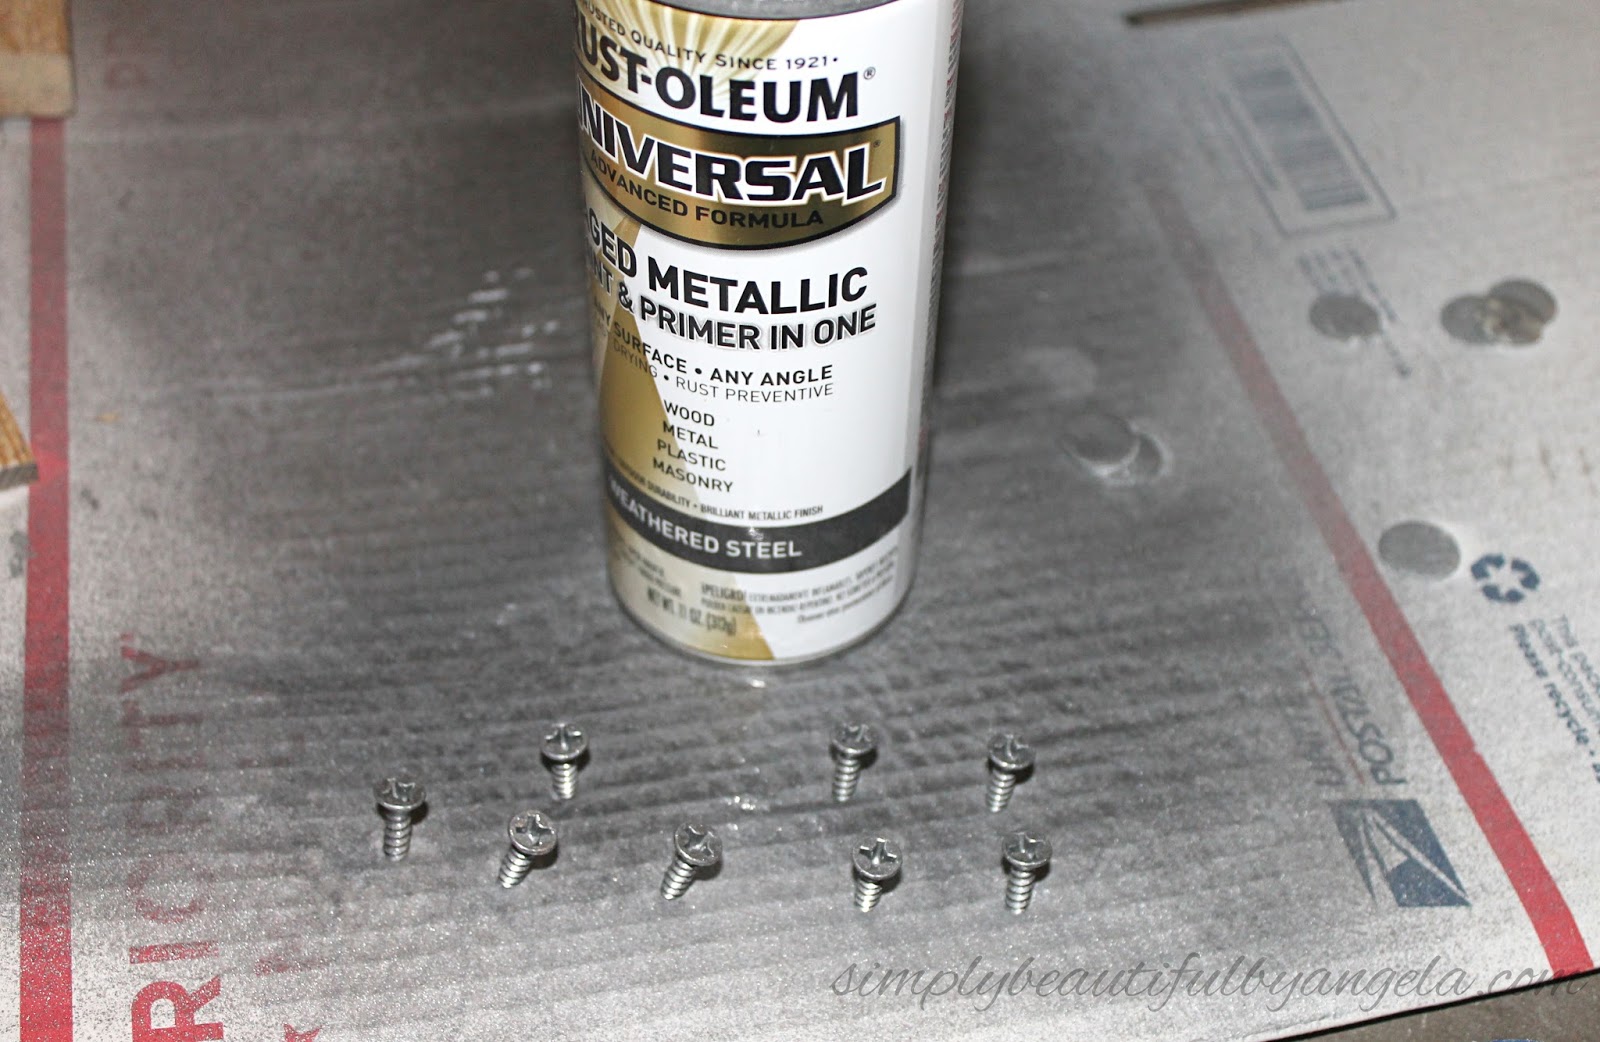
- Rust-Oleum Spray Paint in Weathered Steel
- Krylon Crystal Clear Acrylic Spray
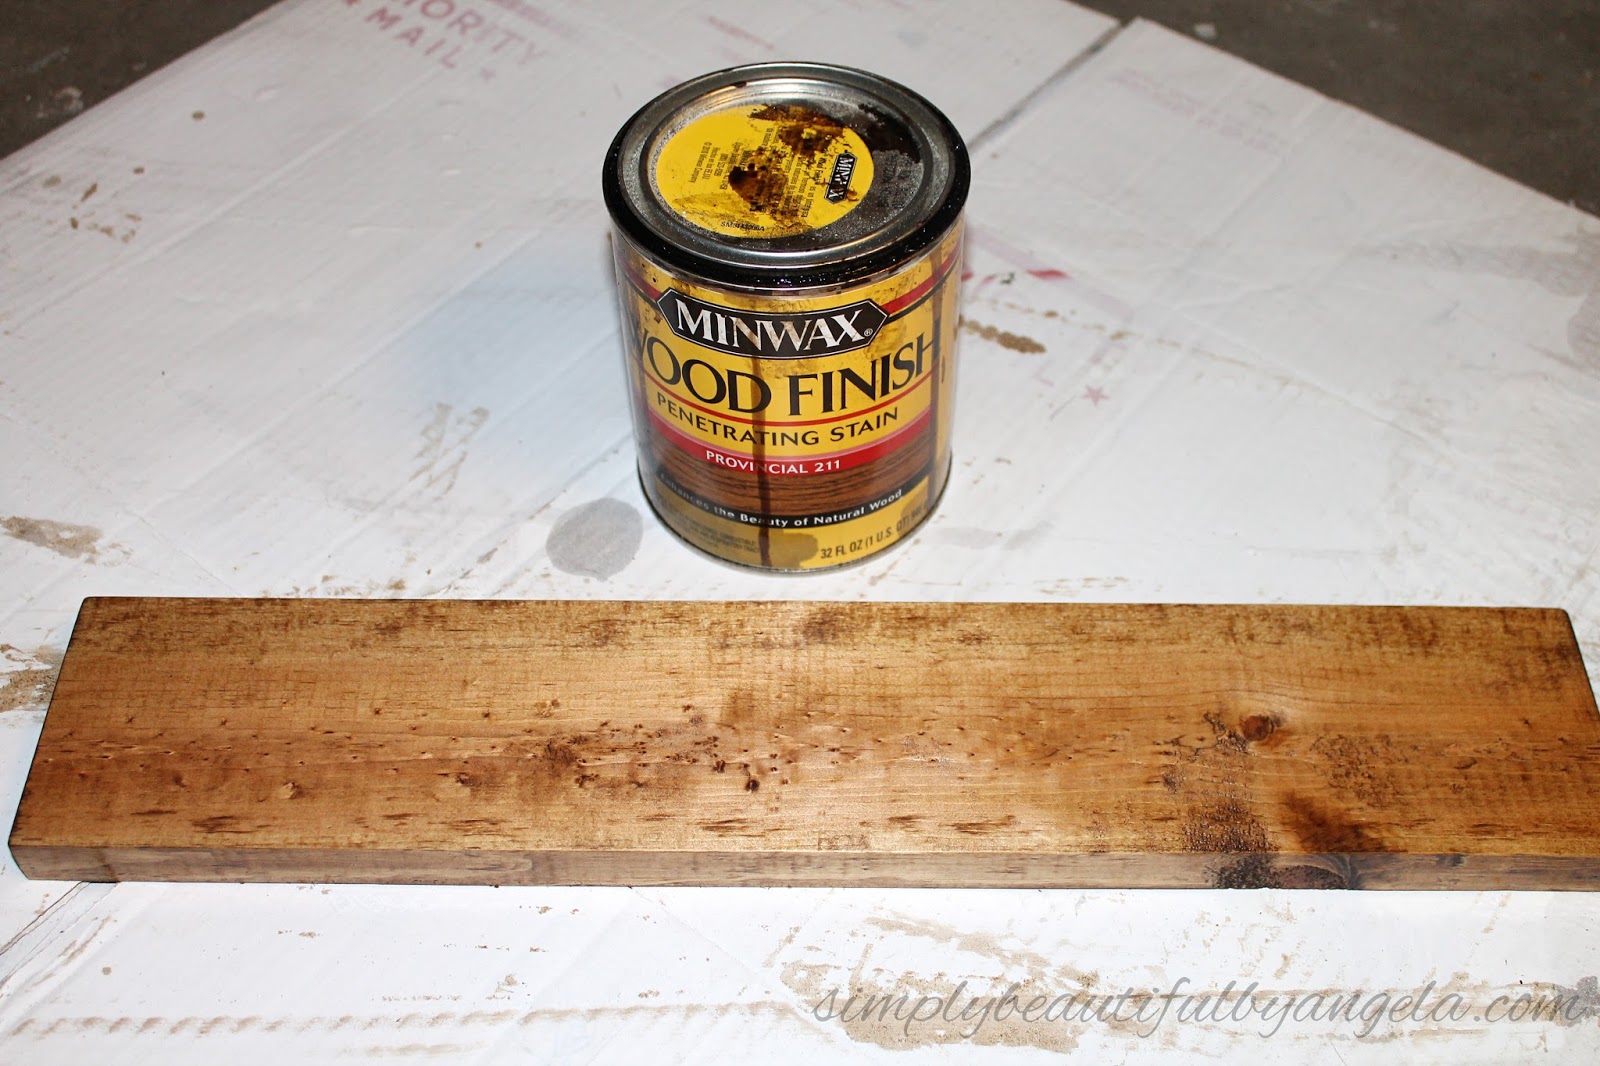
- 1×4
- Minwax Wood Stain in Provincial
- Paint
- Screws
- Self-Drilling Drywall Anchors
I spent a little over $23 on my pipe pieces at Lowes. I ultimately went with the 3/8″ diameter because I wanted it to be thin like the one I saw on Amazon but the 1/2″ diameter would look good too if you want it to be a little beefier.
If you happen to not have a Lowes/Home Depot near you they can also be purchased on Amazon.
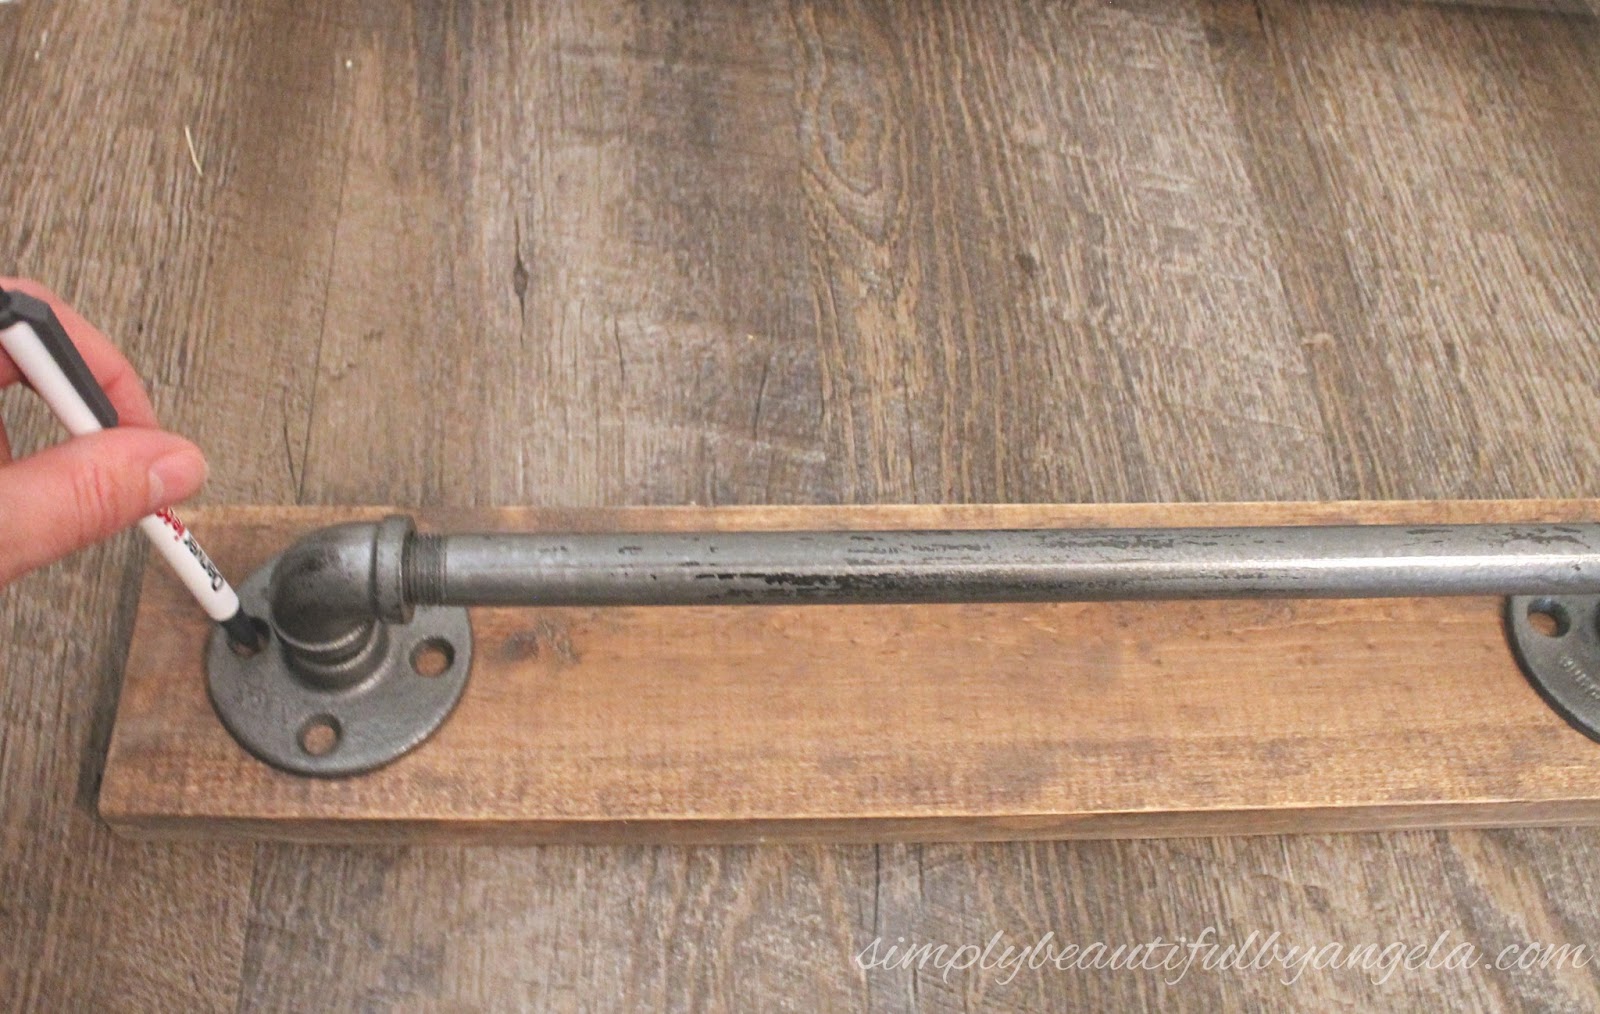
Assembly of the pipes is easy peasy–no special tools required! I first attached the 90 degree elbows to a 1 inch nipple fitting.
I then attached each one to a floor flange.

Finally I connected the two with the 12 inch nipple fitting.

So easy that my 3 year old could do it! Oh I almost forgot–make sure that you clean the oil coating off with some dish soap first.
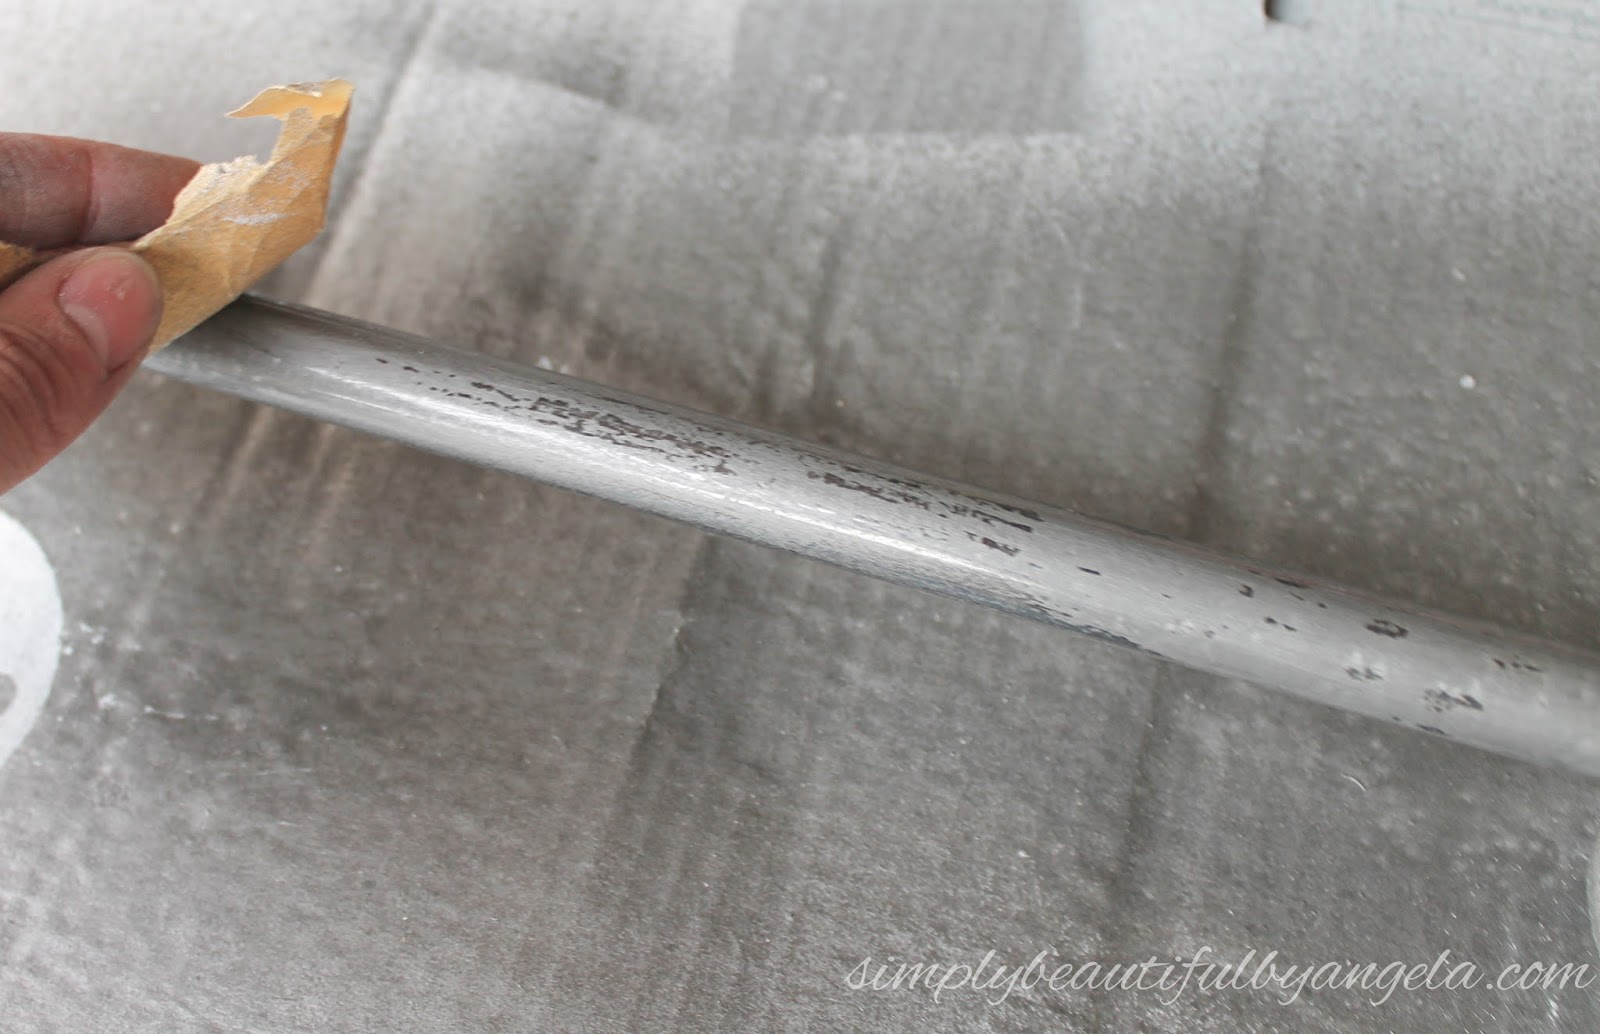
Once my pipes were assembled I painted it with Rust-Oleum Spray Paint in Weathered Steel. Once it was dry I scuffed it with a little bit of sandpaper to pull out the black iron to make it look more worn and industrial.
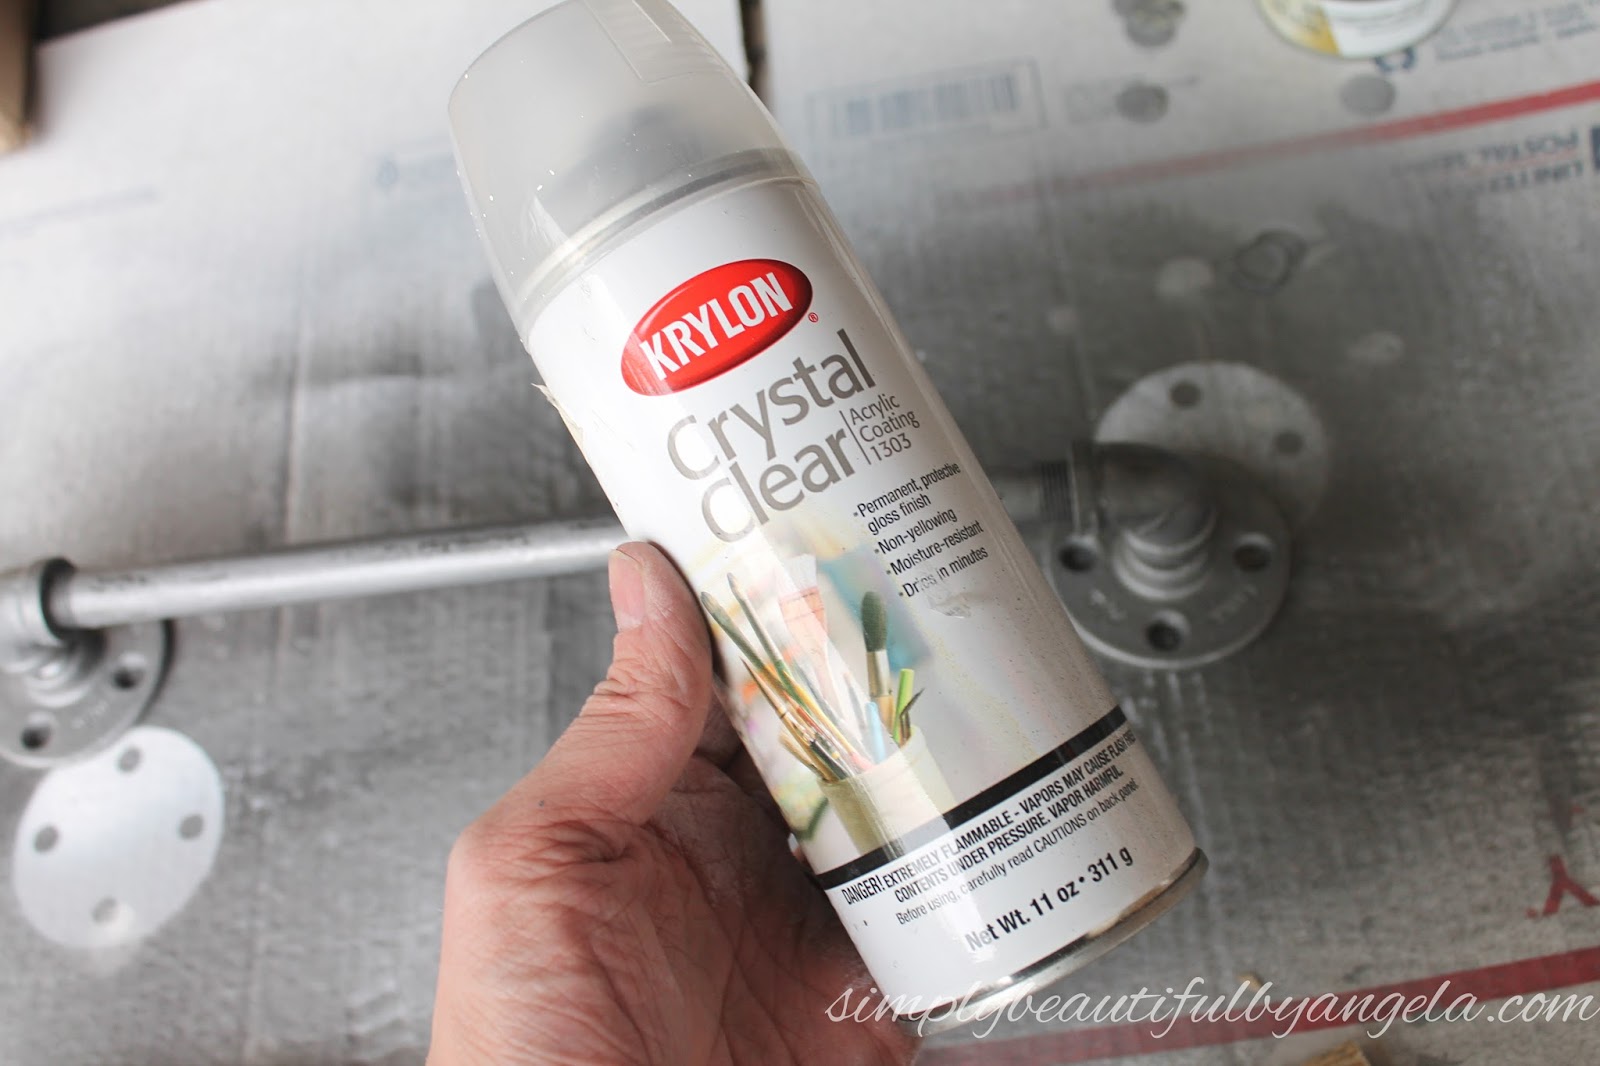
Since this was going to be holding towels that are (a.) WHITE and (b.) OFTEN WET I protected it with a coat of Krylon Crystal Clear Acrylic Spray.
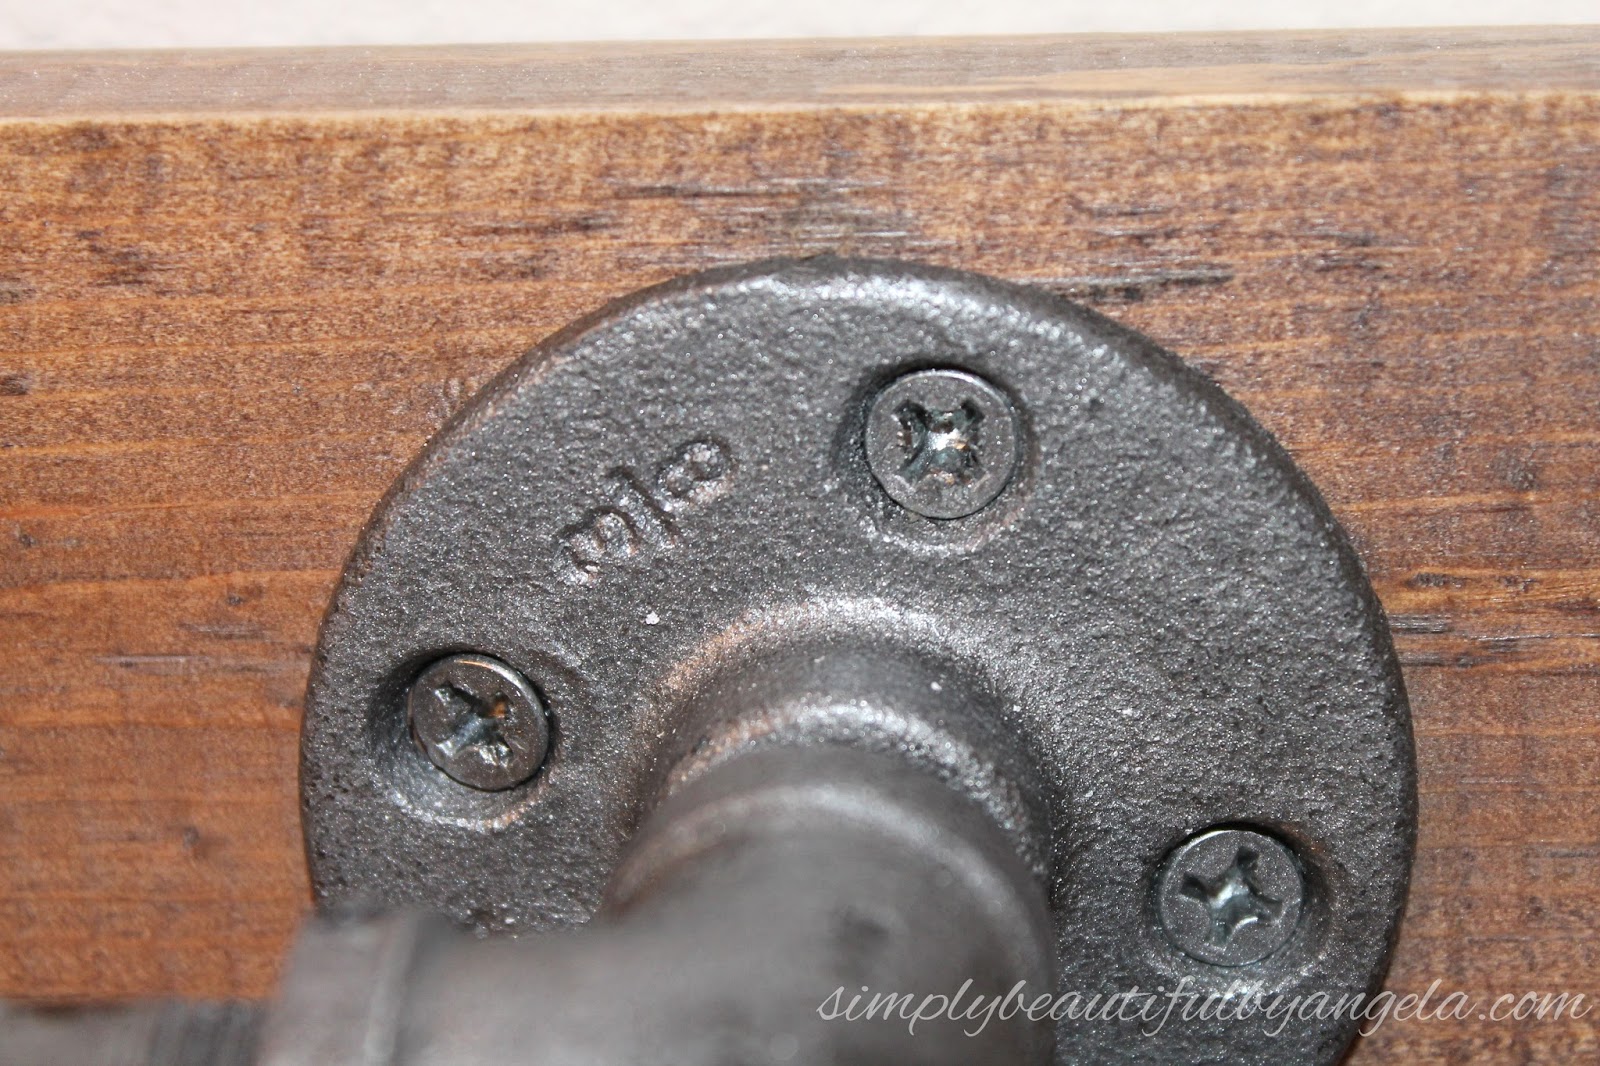
I also painted the screws that I was using for the floor flanges so that they would match.
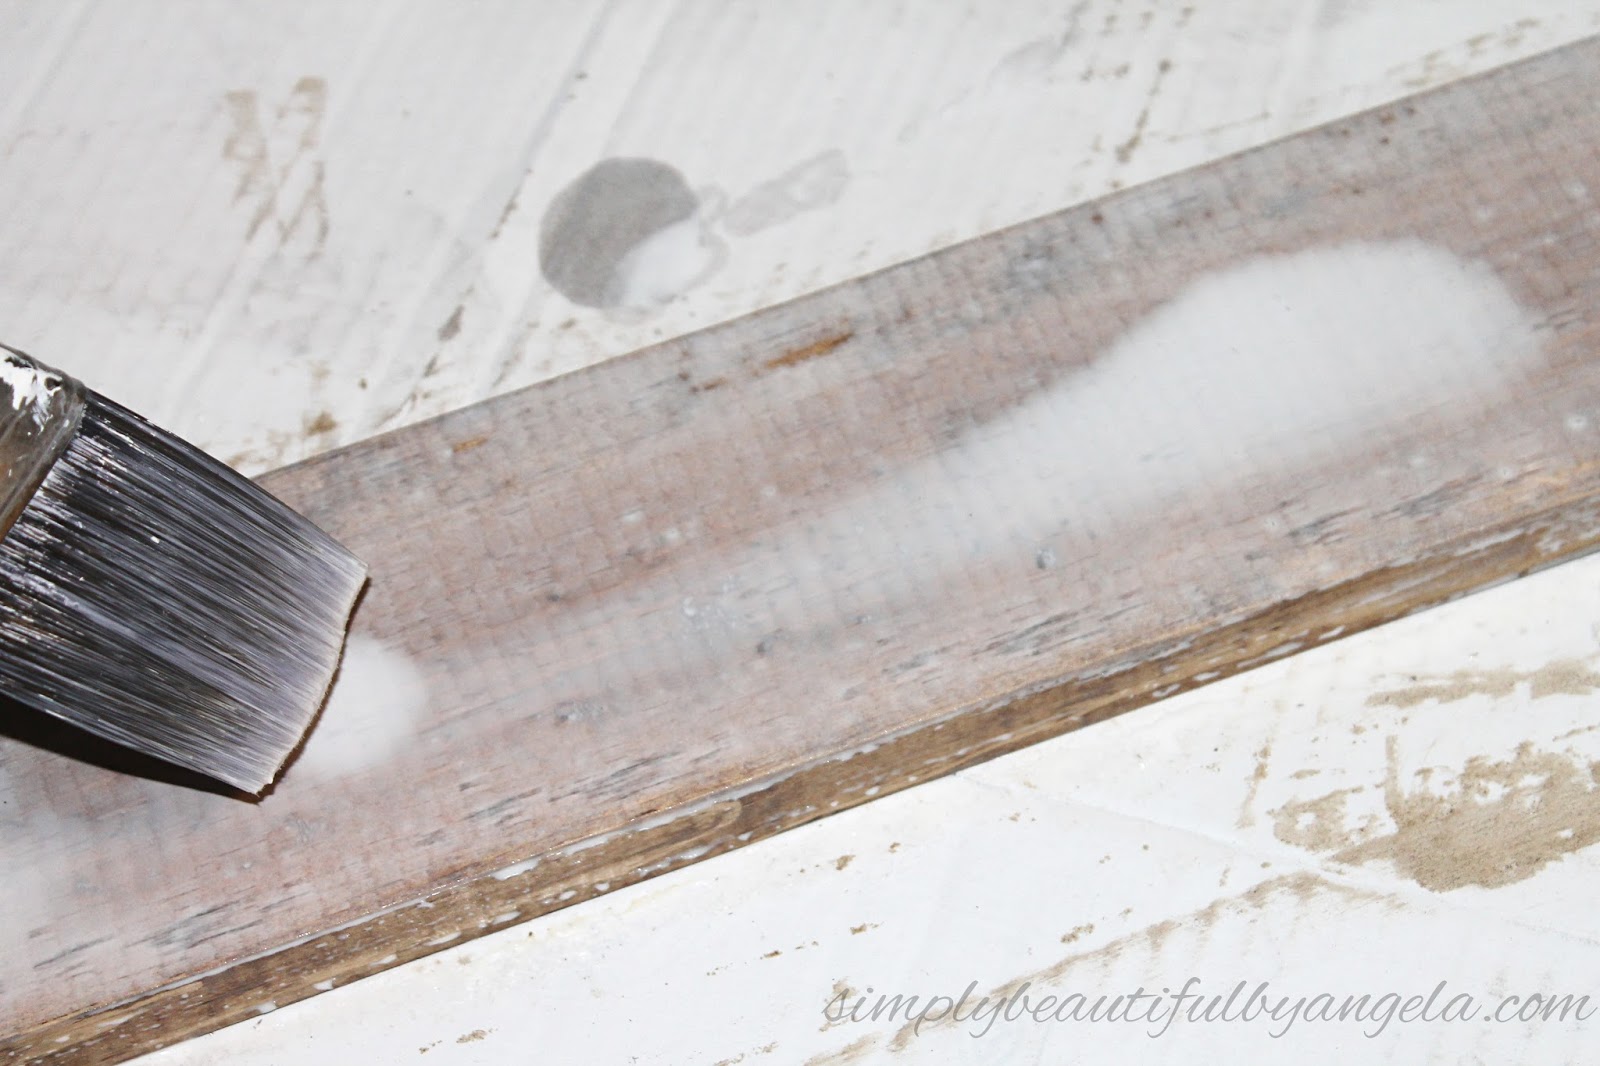
Next, I cut down a 1×4 and stained it with Minwax Wood Stain in Provincial. I also went back over it with a couple coats of white wash (watered down wet paint).
I should note that I rubbed the white wash in with a rag after painting it on with the brush which helped it absorb into the wood better and achieve the gray color.
Finally we were ready to get this baby on the wall!
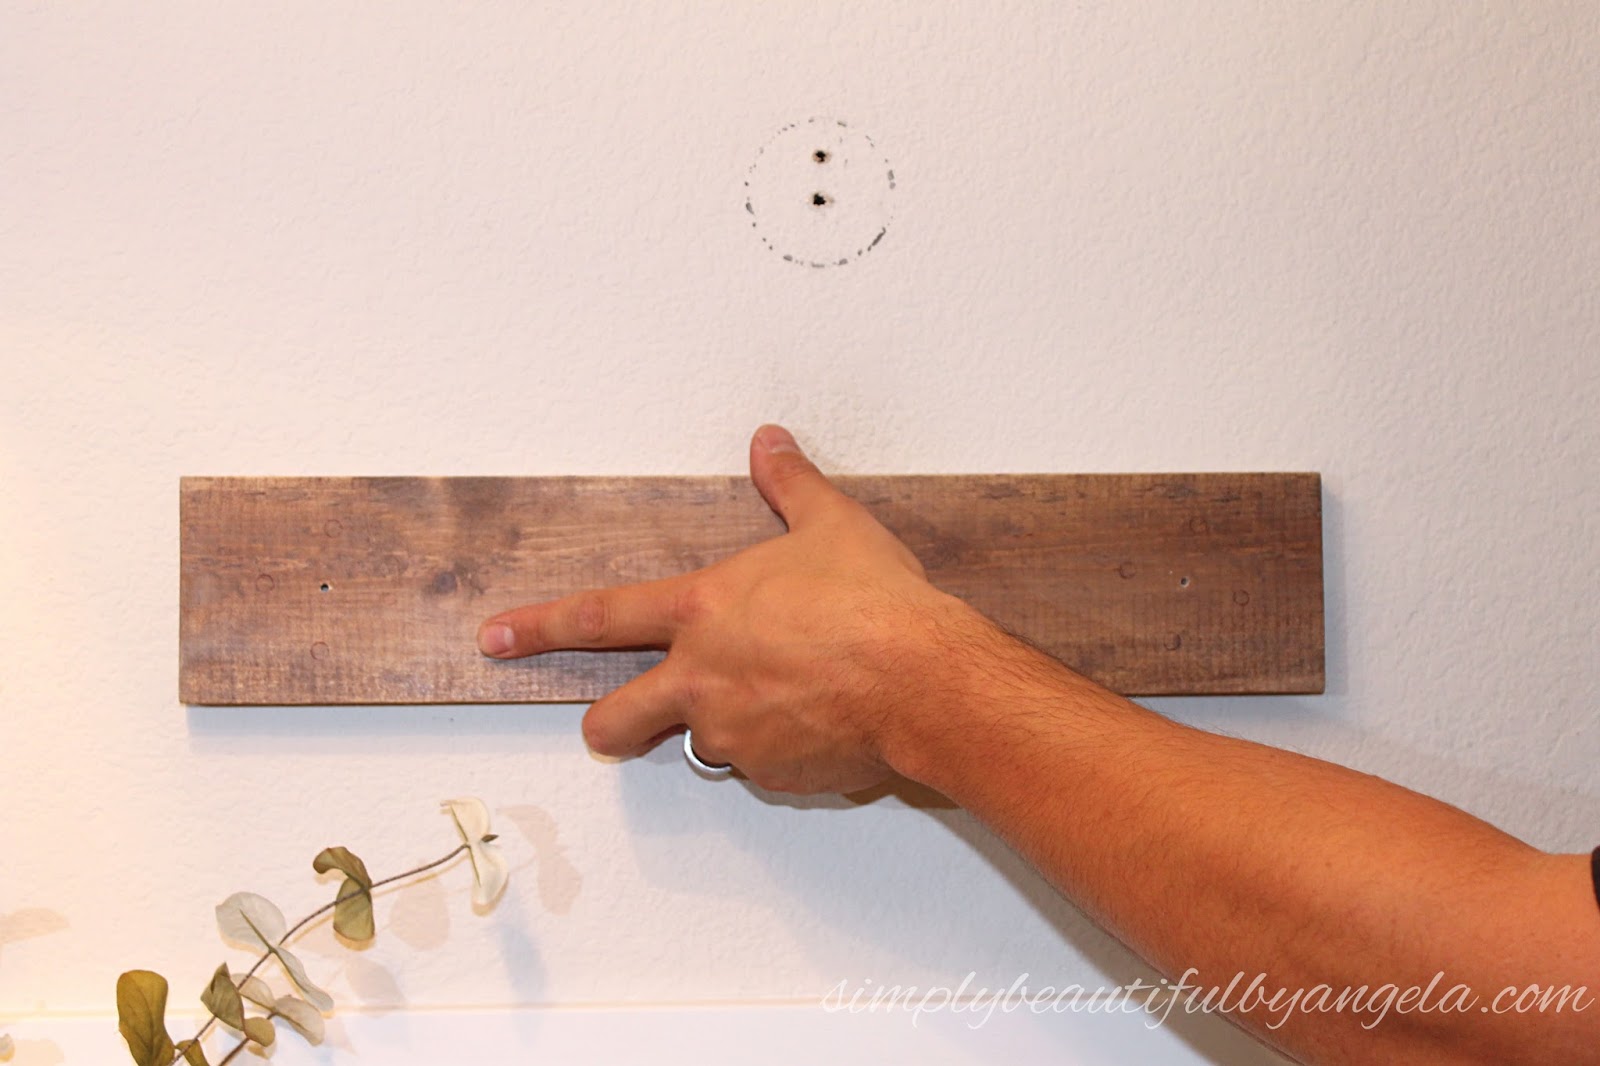
The first thing that I did was lay my bar on the board so that I could mark where it would be attached.
We attached the 1×4 to the wall using drywall anchors. If you miraculously have studs where you are placing it then you don’t need anchors but let’s be honest what are the real chances of that happening?
We measured out where the center of the flange would be placed and drilled pilot holes in these spots so that the screws would be hidden once the bar was attached. We placed it on the wall where we wanted it, marked it and put the drywall anchors in those spots.
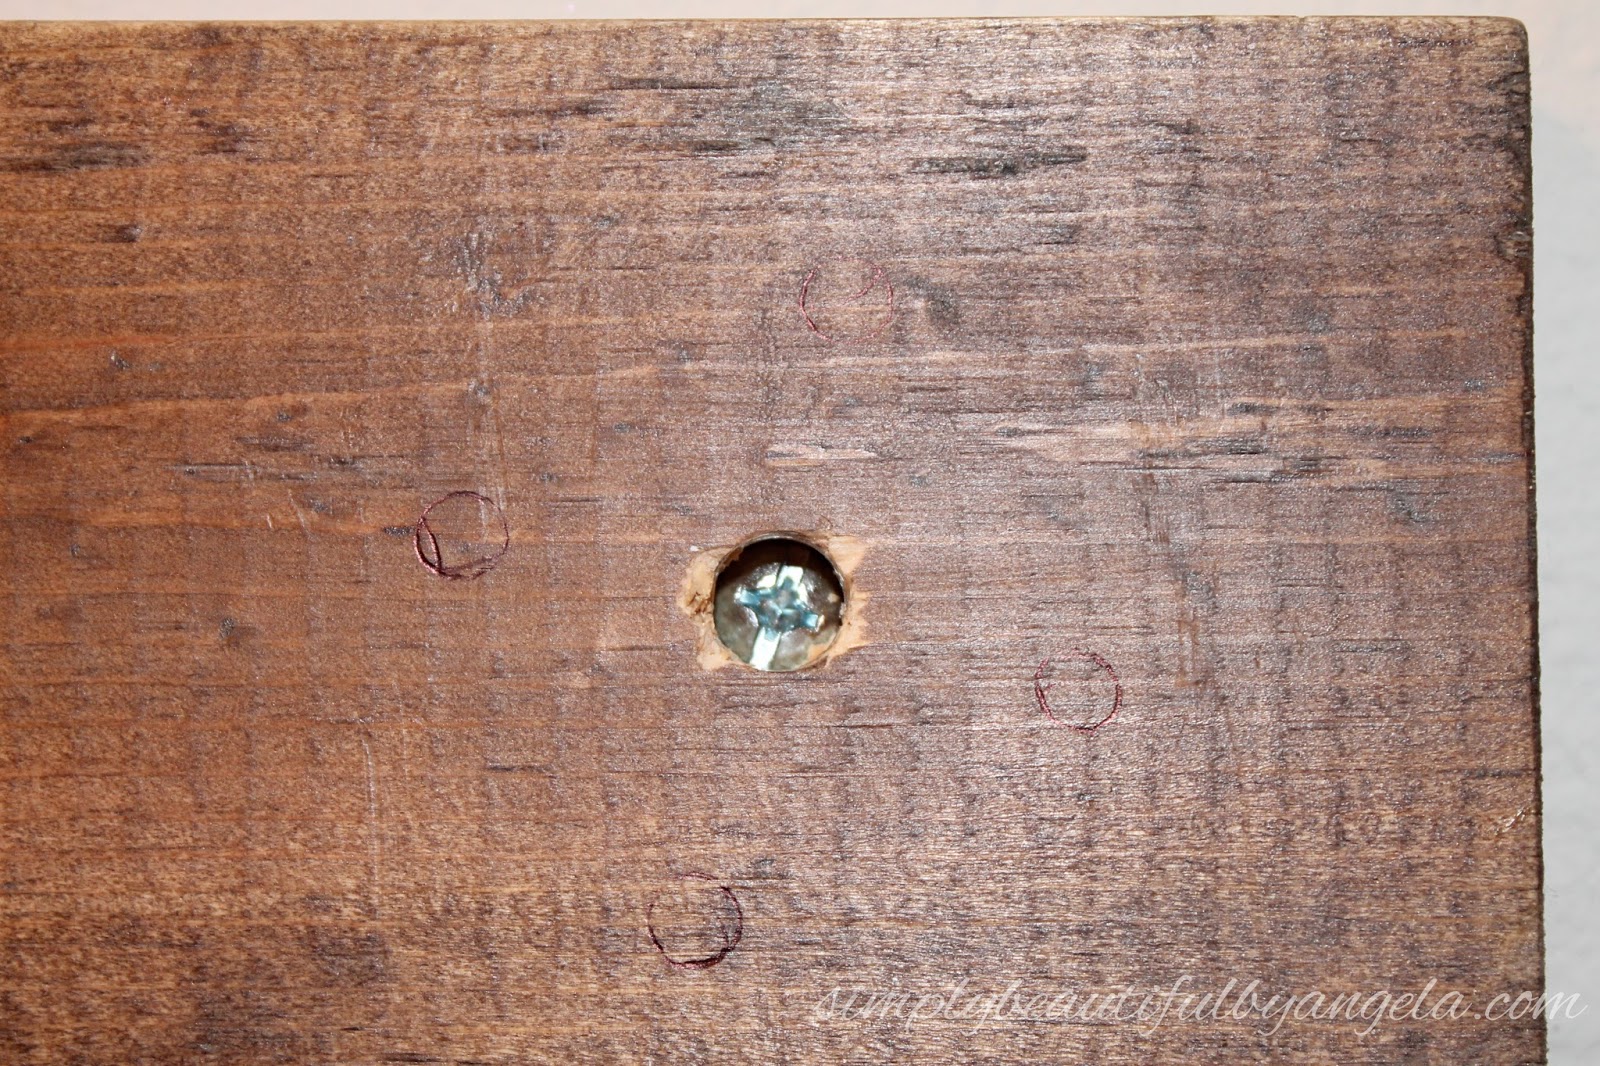
We also countersunk the screws so that the flanges could sit on top of the wood nice and flush.
Once the board was secure on the wall we attached the flanges.
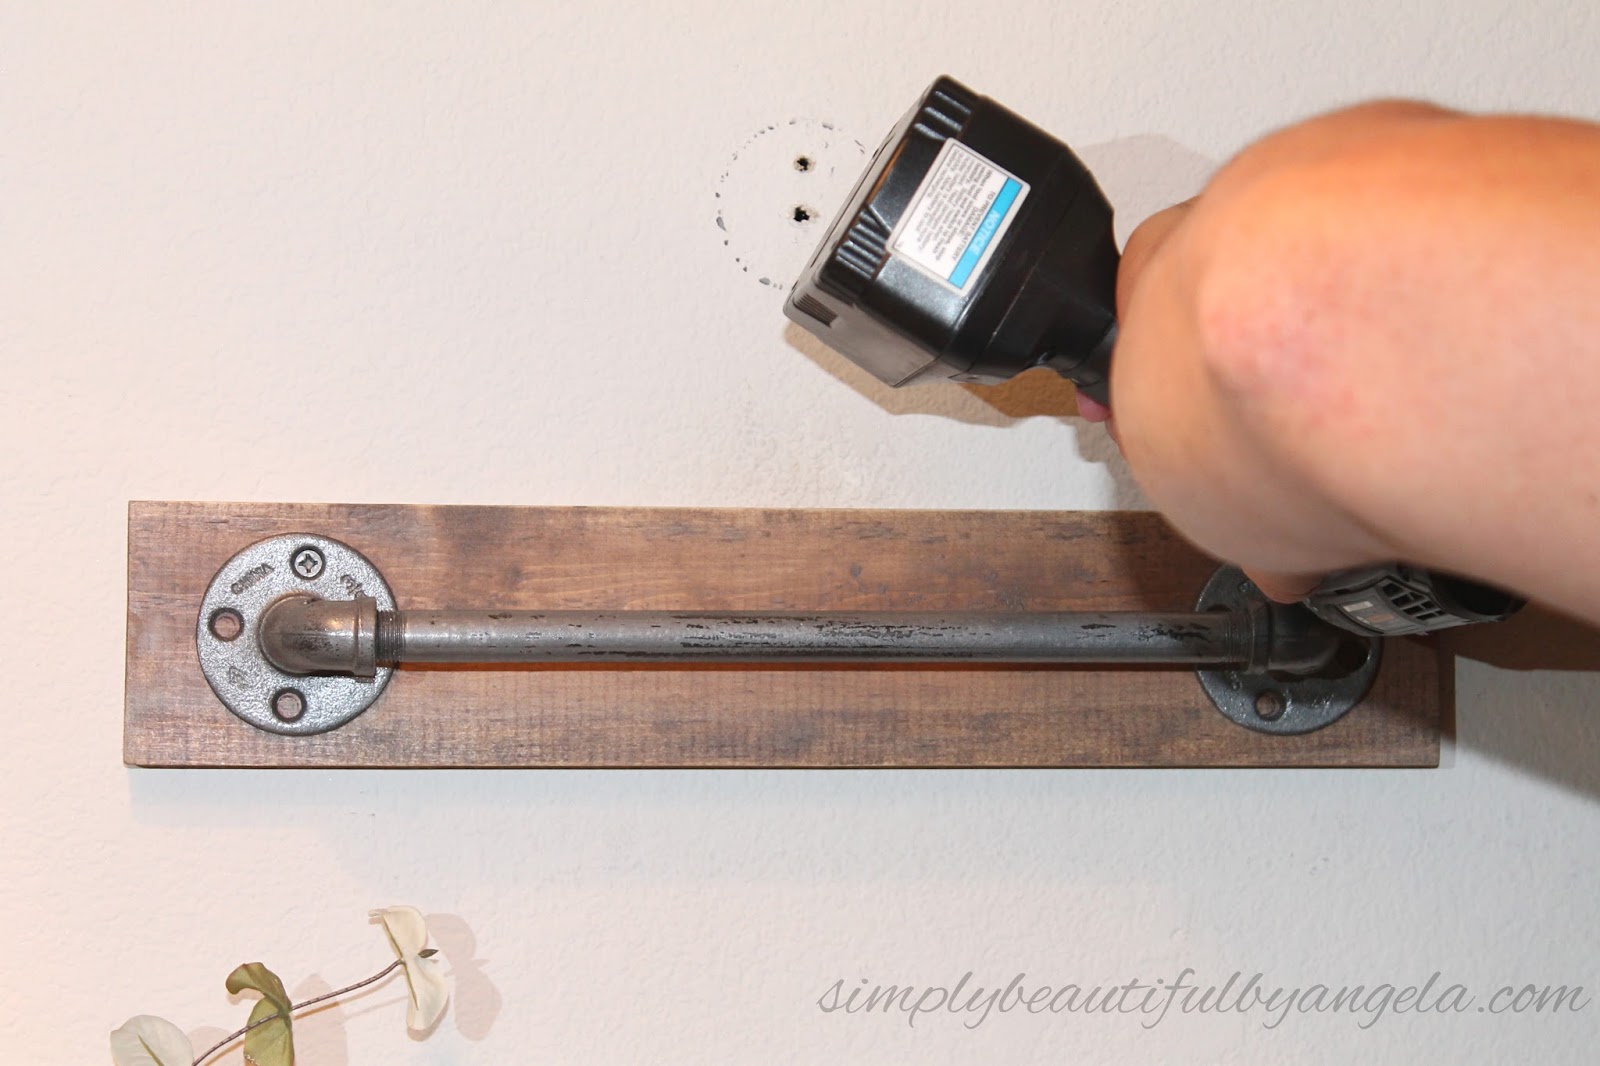
We had to put the screw behind the bar in at an angle because the bar was in the way. You could always unscrew the pipes if it bothers you but it really isn’t noticeable.
After getting it installed on the wall I decided that the wood was still not the right shade so I did another coat of whitewash on it and some of it got on the pipes. It was a happy accident because I ended up liking the aged look!
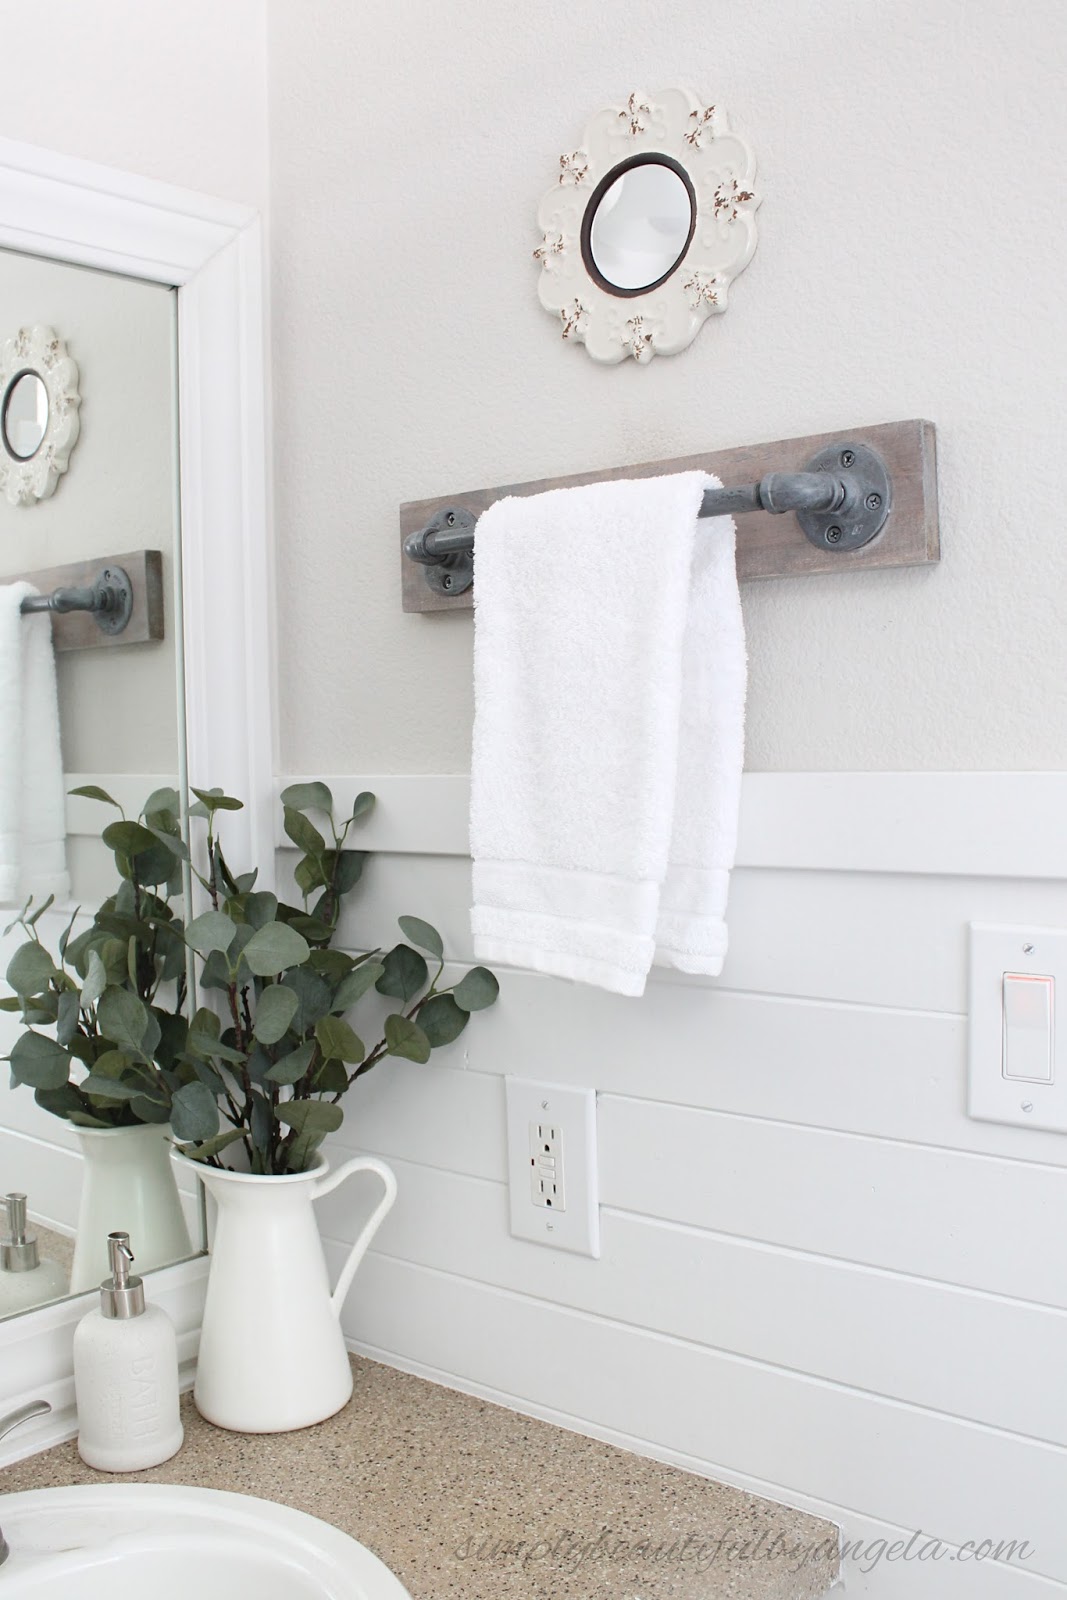
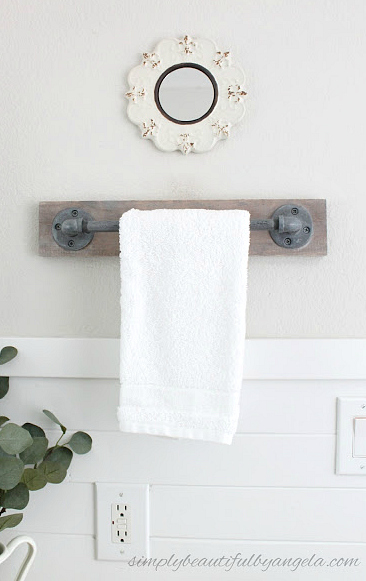

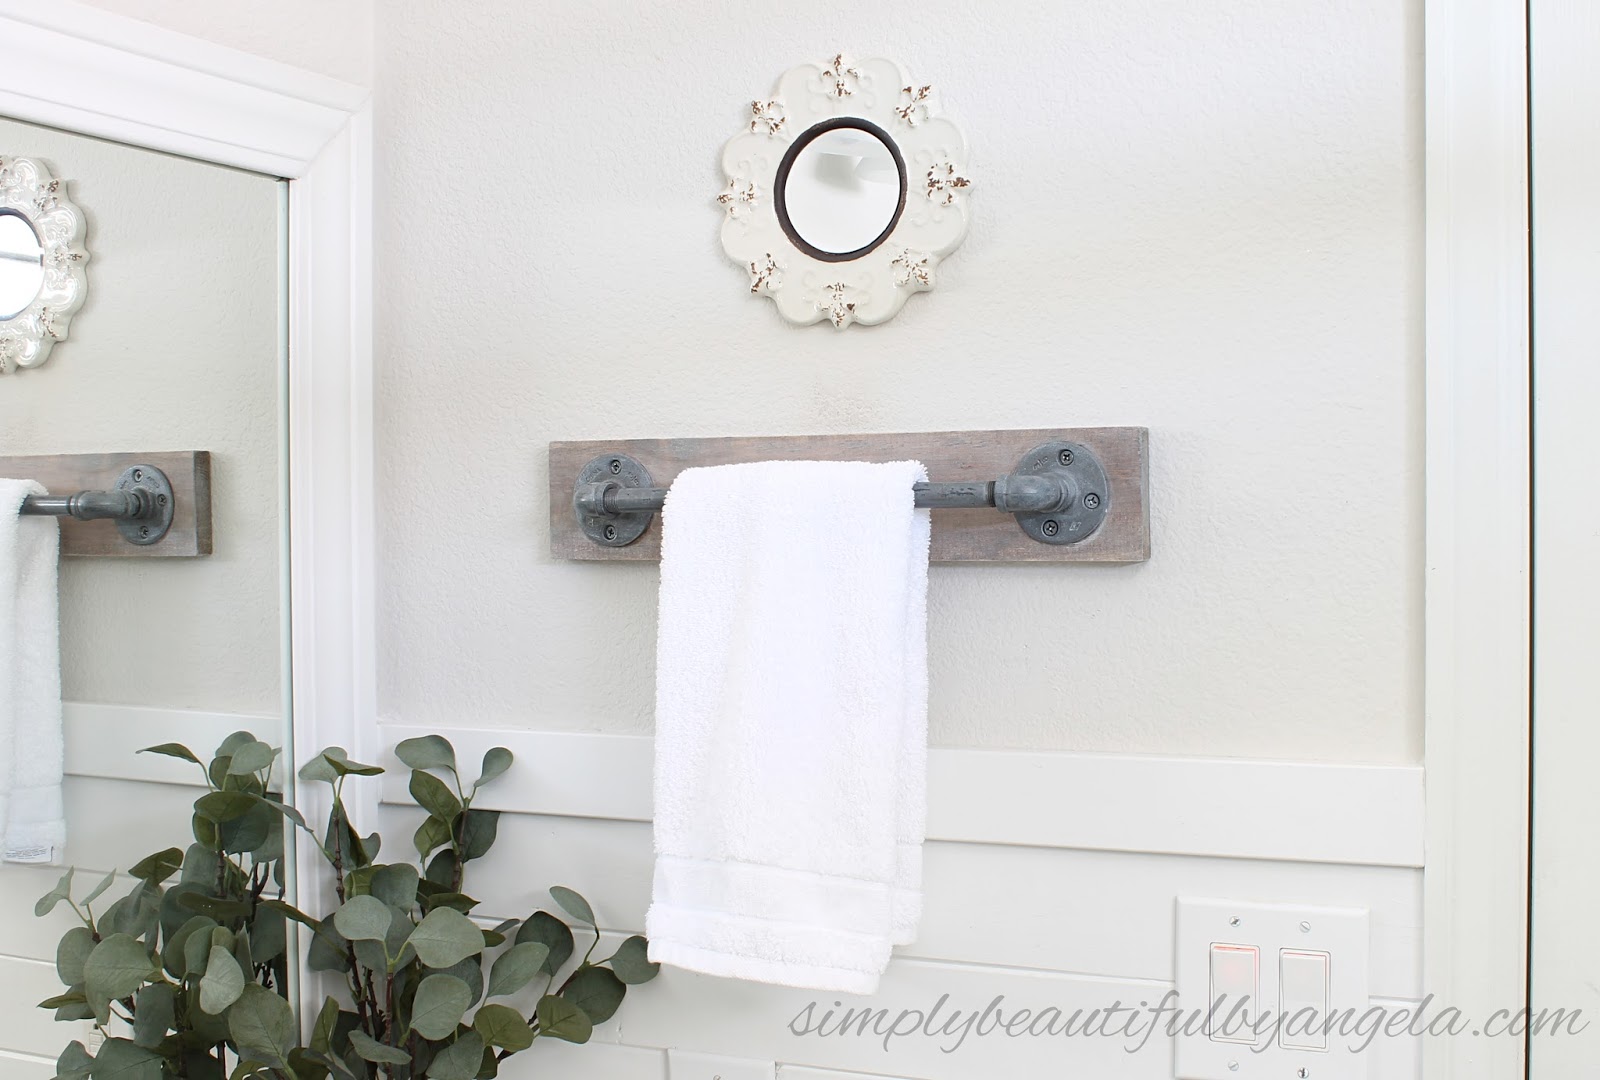


It's true that it adds the perfect amount of industrial farmhouse charm to our bathroom and balances out my ruffled shower curtain perfectly. Very informative post.
Found this on the DIYed That Link Party! Great tutorial. We've used those pipes before and weren't to happy with the residue. I never thought to paint them! Great idea. Love that whole look.
Thanks Cindy! It seems to be the perfect solution because it keeps my white towels free from any pipe grime haha 🙂
I want to make one of these soooo bad! Great tutorial- thanks for posting.
You totally should I promise you won't be disappointed!
I LOVE this! Definitely adding it to my pinterest board to make next week!
Is effective, however the o-ring where the magic wand screws shattered through the 2nd make use of. Not a problem, but caused dripping and squirting from the link; Changed the actual o-ring having a universal in the hardware store and back in motion; Great pressure along with a variety of tips to select from. It does a fantastic job and that he is very happy with this CLICK HERE.
I love this! I am totally going to make one! I love your shiplap below the towel rack too! Super cute!
This is a great inspiring article.I am pretty much pleased with your good work.You put really very helpful information… Bed liner sprayer
I have e a quick question I am making these an am having issues with the paint orange peeling? Any ideas how to make it not do that?
I top coated mine with some clear spray acrylic (found at Hobby Lobby) and have had no peeling 🙂
This element of construction industry arrangements enables you to dispense, save and issue stock to a particular contract.
Corrosion prevention
Great tutorial. Think i could have a try for this DIY towel bar. This one looks so easy t have a try.
I love all of your posts…so many ideas! I want to do all of the projects when I have my own house! I love all of the great photos that you use to show the ideas.
thanks for sharingCrack Software