Well hello there! I hope you all are having a good week so far. We took the kids on their first official vacation last week to an indoor water park resort and although it was an absolute blast I feel like we still haven’t completely caught up on rest just yet. Needless to say, the past few days have been filled with loads of coffee!
Anyways I’m excited to share today’s project with you guys because not only was it super cheap and simple to put together, it’s also functional and cute!
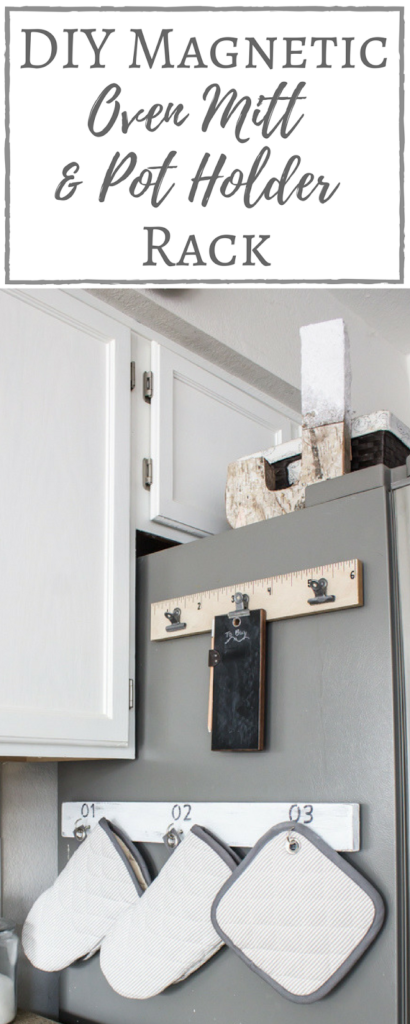
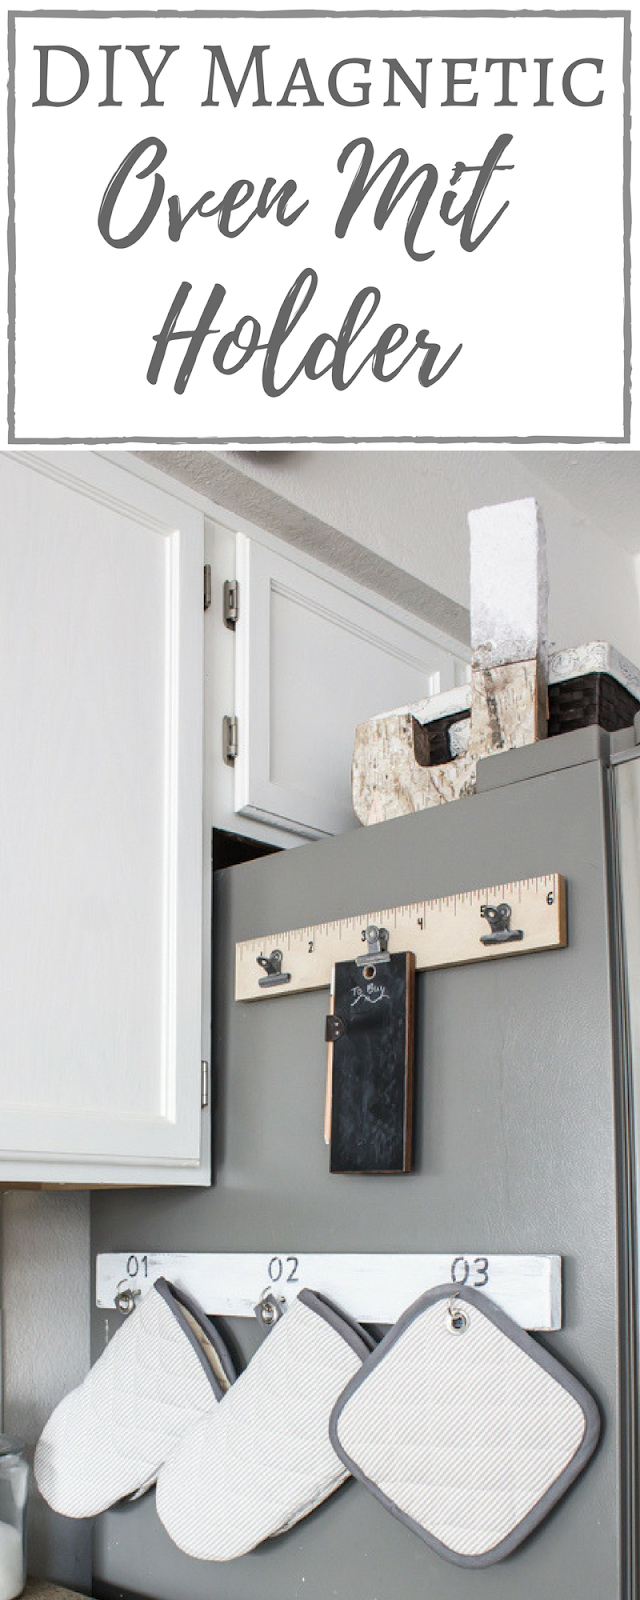
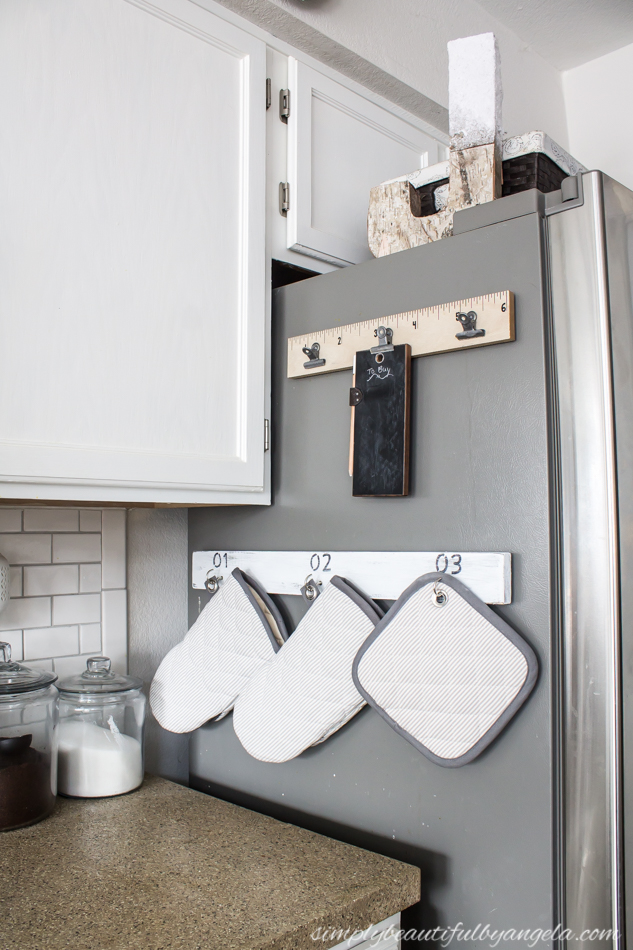
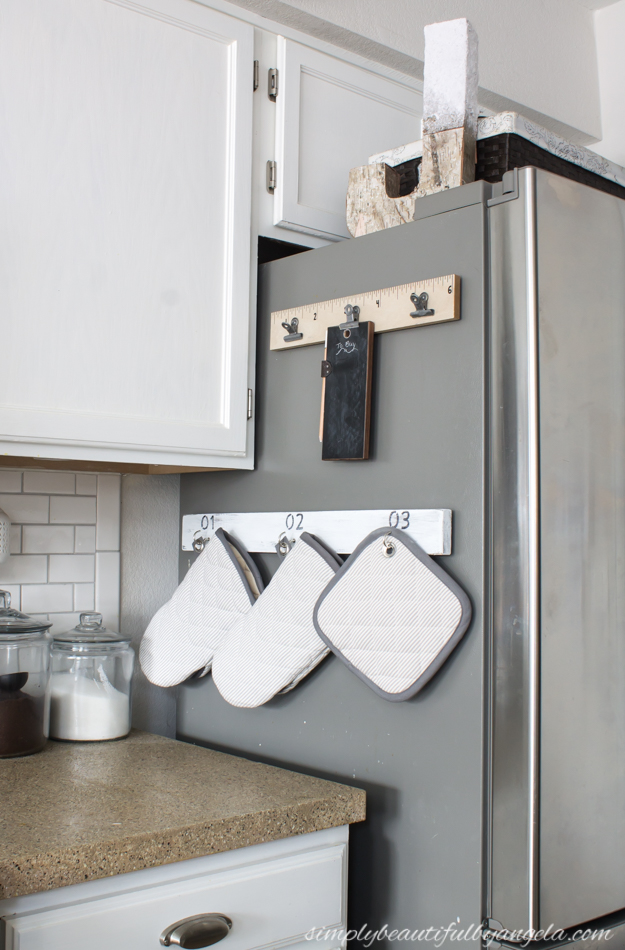
So we used to keep the oven mitts hidden away in a lower cabinet because they were pretty ugly and I didn’t want them out for the world to see. It was always a frantic race to track them down once the oven timer was going off because they usually slid down behind a bunch of junk.
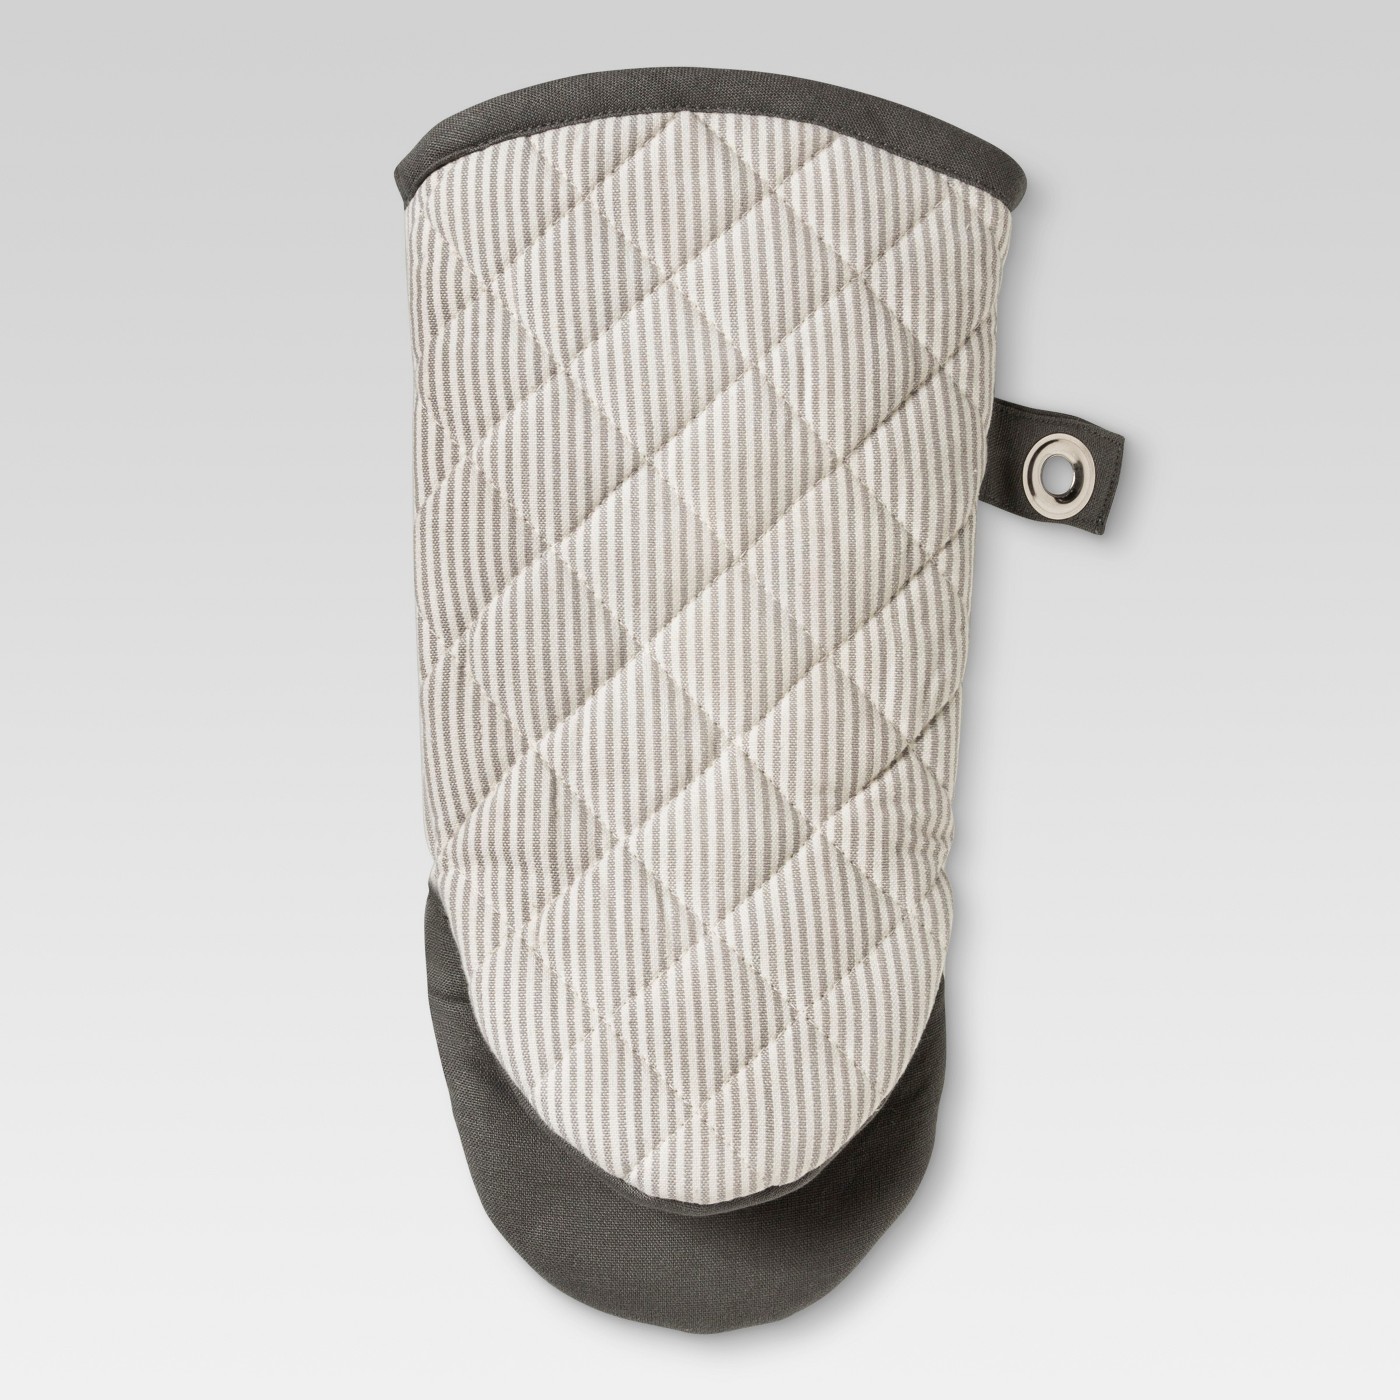
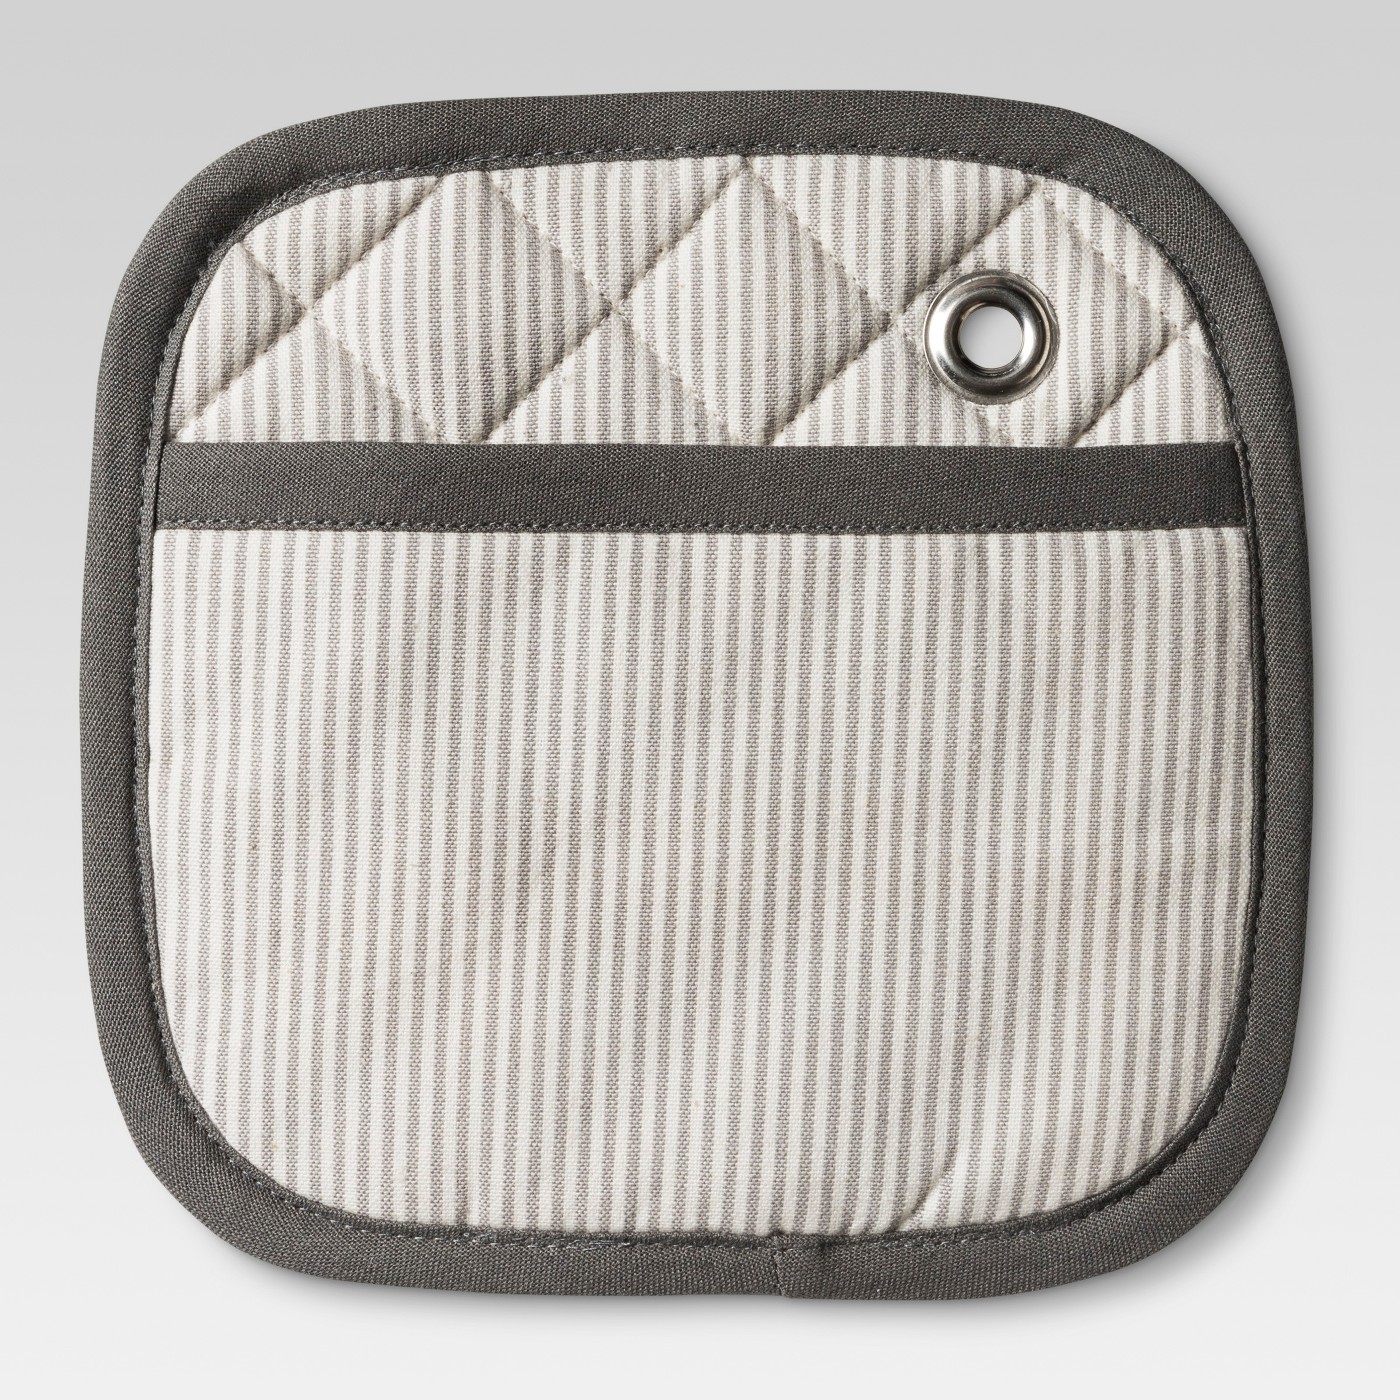
One day at Target I spotted these pretty gray and white striped oven mitts and pot holders and couldn’t help but imagine how cute they would look in our farmhouse themed kitchen.
But I thought that if I bought them I couldn’t just hide them away in our black hole of a cabinet! Nope, these babies needed something to hang from so that they could be shown off!
Supplies Used: (Affiliate links may be provided for convenience. For more info, see my full disclosure here.)
- 1×3
- Minwax Wood Stain in Jacobean
- Waverly Inspirations Chalk Paint in Snow White
- Measuring Tape
- Pencil
- Pen
- SHARPIE
- Round Base Magnets
- Wood Screws
- Medium Grit Sandpaper
- Metal Cup Hooks
- Painter’s Tape
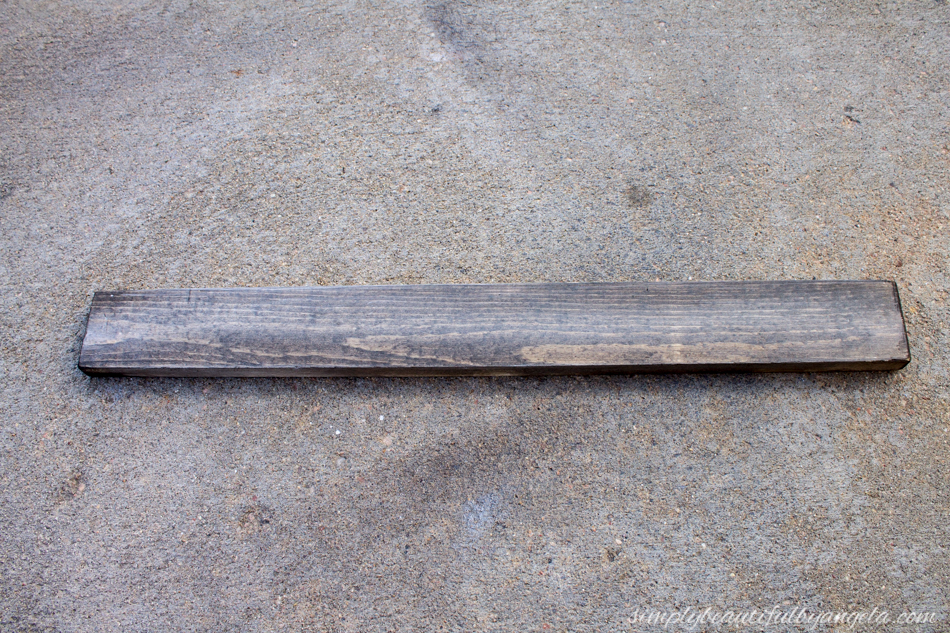
I started with a piece of 1×3 that I had in the garage. It had previously been stained with Miniwax Jacobean and white washed and I dry brushed some white paint on it to lighten it up a little. As you’ll see later, I actually ended up painting it completely white since it ended up being too dark and blended in with the fridge too much.
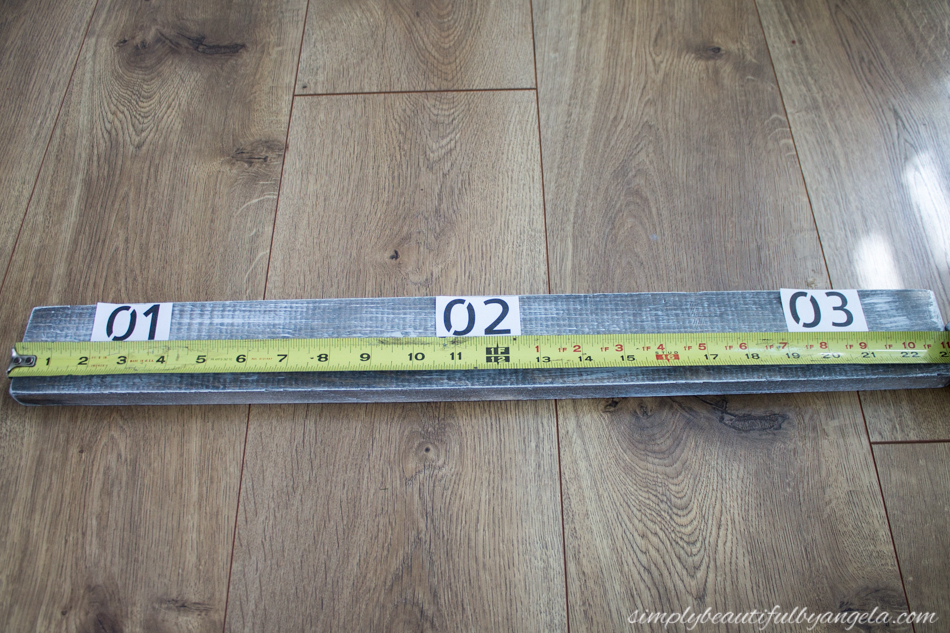
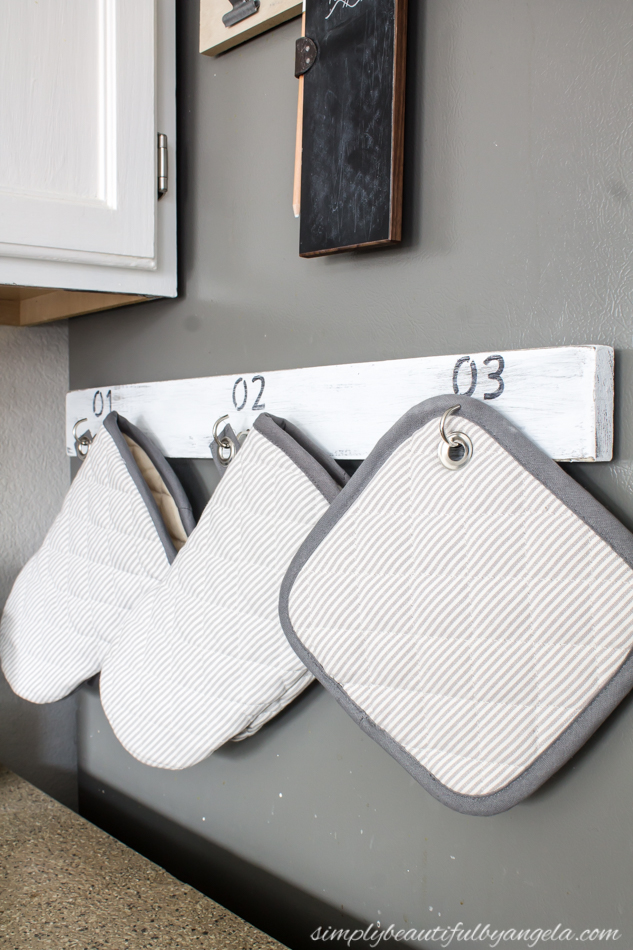
While it was drying I printed some numbers off in a stencil style font. My board measured 23” long so I centered the number 2 at the halfway point of 11.5” and then placed the other numbers in 3 inches from either side.
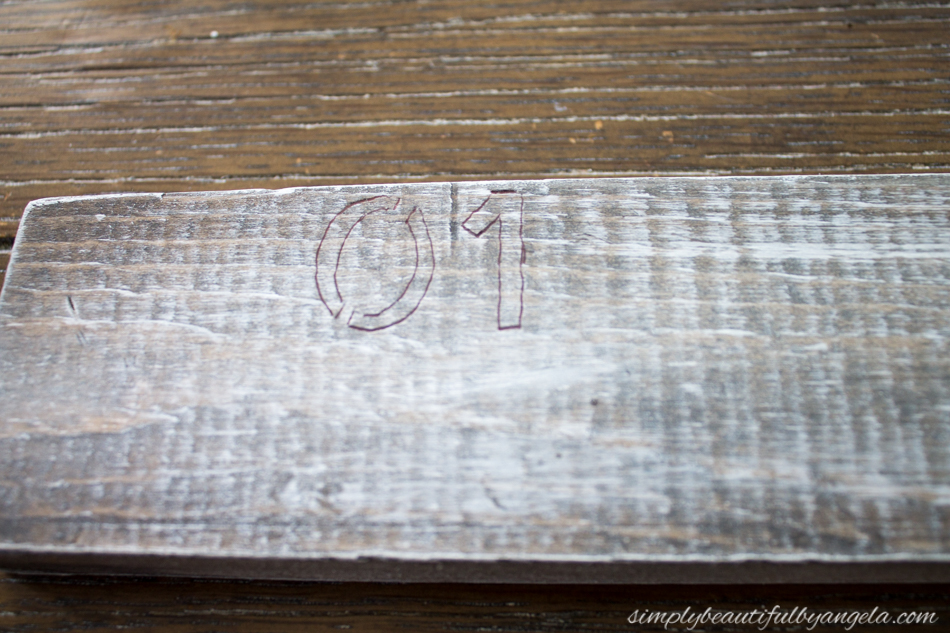
Using a pencil I firmly traced each number to create an impression in the wood that I then went back over and traced with a pen. It helps to use a phone flashlight to see the impression if you’re having trouble seeing it!
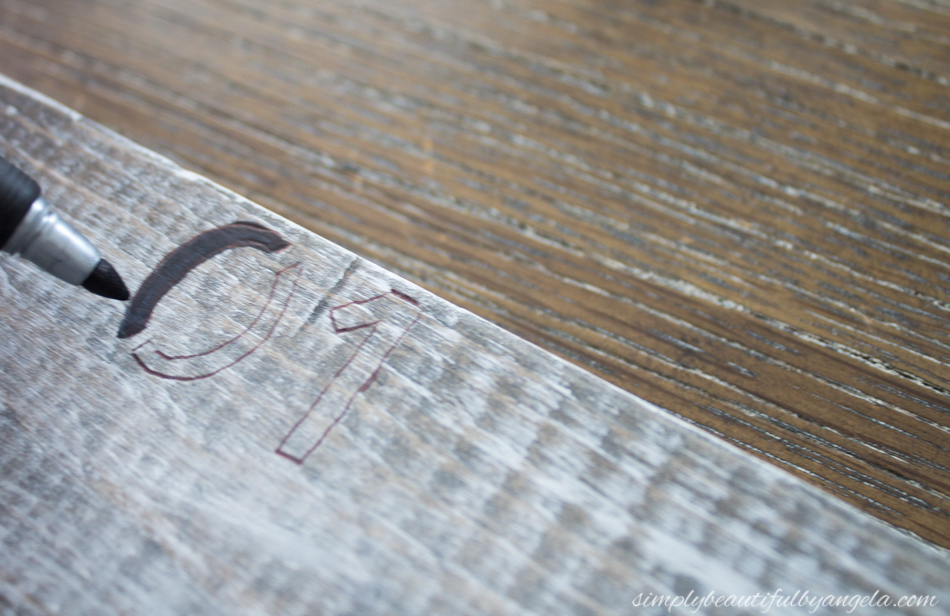
Next I used a black sharpie to fill each number in.
I recently discovered these cool magnets that have a hole in the center of them so that it can be screwed into wood. How awesome is that? Maybe I’ve been living under a rock, but I was SUPER excited when I found out that these existed!
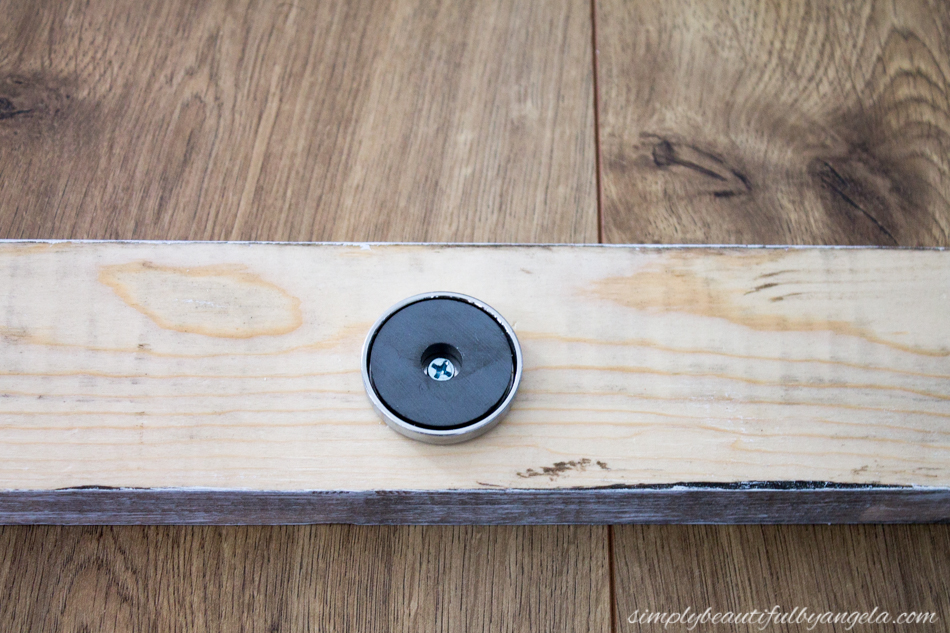
I attached 4 to the back of the wood, screwed my cup hooks in and just like that I had a nice spot to put my new oven mitts and pot holder!
I found that even though the magnets are super strong it was sliding all over the place when I first put it on the fridge. I was feeling mighty frustrated and was about to throw the towel in on this idea before my super smart hubby gave me a mini physics session and explained that since they are both slick surfaces I should try placing a rolled up piece of painters tape on each magnet.
I laughed and didn’t believe him but sure enough it worked perfectly and this thing doesn’t budge once it’s up!

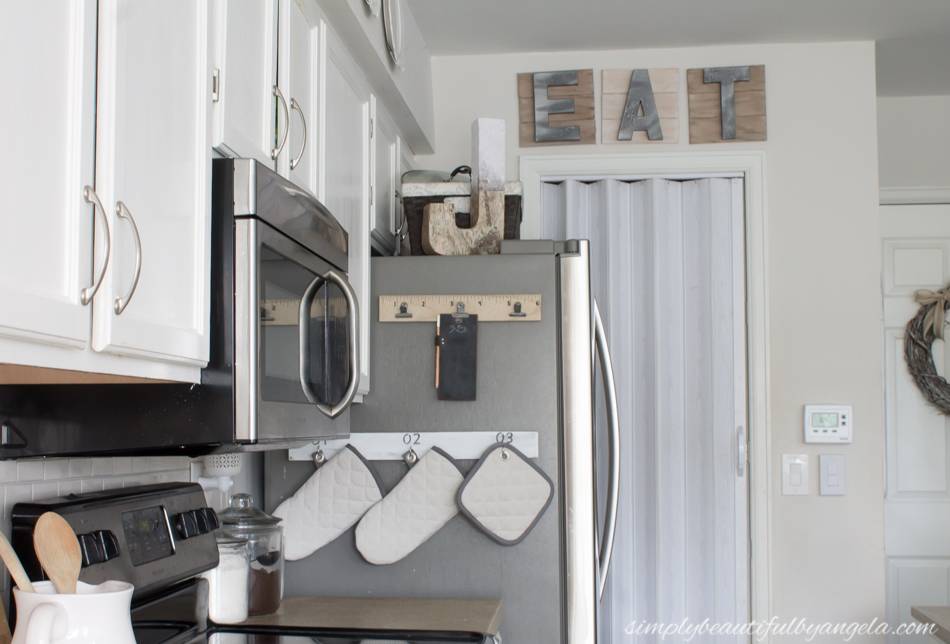
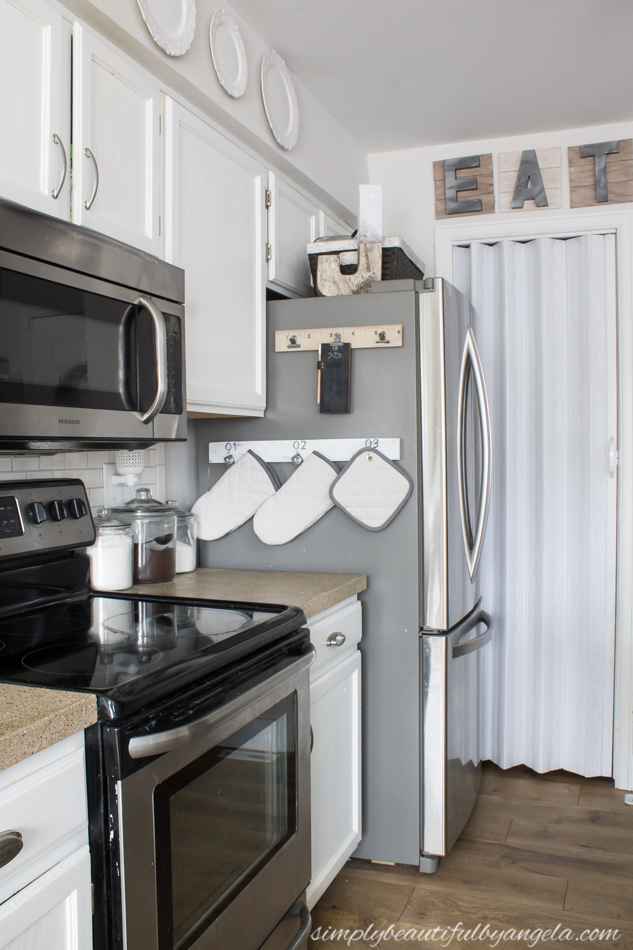
I love that it fills that empty spot on the side of the fridge perfectly and it’s been super convenient having them there to quickly grab. No more ultra crispy cookies over here! And even better, no more burnt fingers from using a dish towel when I couldn’t find the mitts!
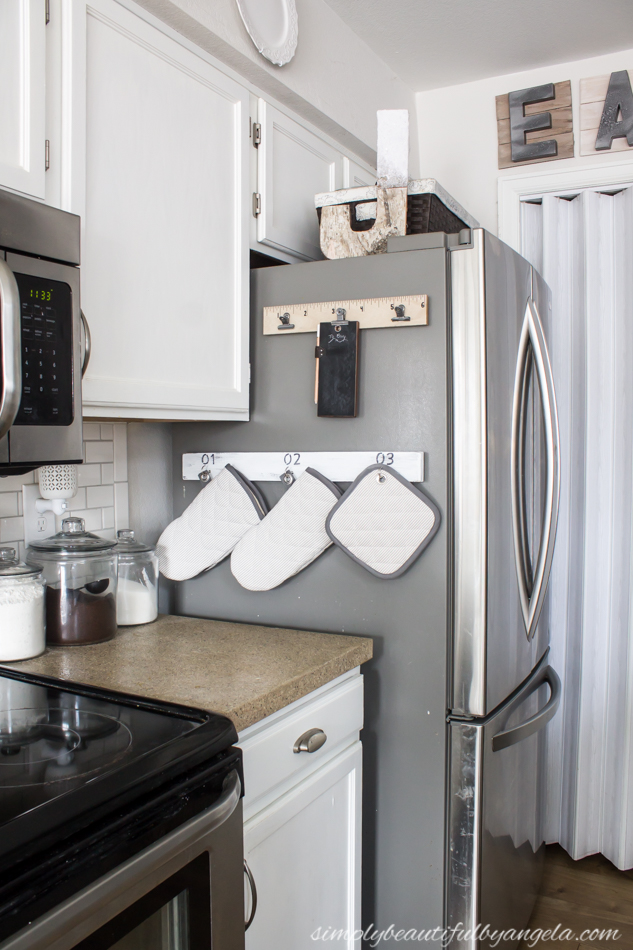
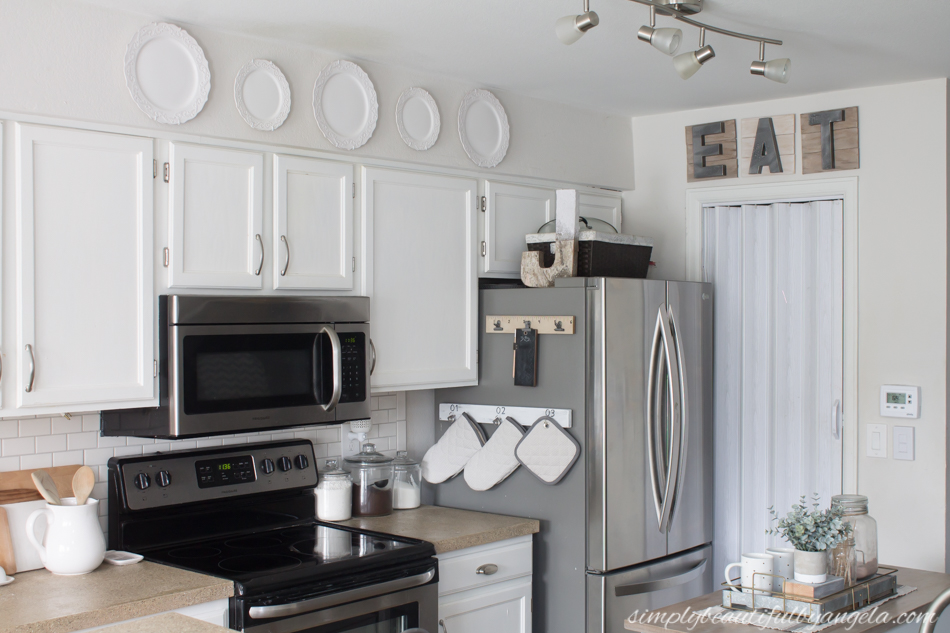
I still want to paint the cup hooks oil rubbed bronze but have been lazy and haven’t gotten around to it just yet.

Now if we could only do something about the eyesore accordion pantry door! Baby steps though, we will get to that one day!
Linking up to these awesome parties!

It's the kitchen I want. Future i need this.
bacc1688
Thank you!!
I love all the reclaimed wood pieces in your kitchen! Super cute!
Aww thanks Audra! It's a slight addiction I must admit haha!
I think it is another good idea to follow. And do as much. Thanks for the info
Gclub
There are some interesting points in time in this article but I don't know if I see all of them center to heart. There is some validity but I will take hold opinion until I look into it further. Good article , thanks and we want more! Added to Feed Burner as well.
pandorasuggests.info