Simply Beautiful By Angela

creating simple beauty on a budget

  • Home Tours
  • Projects
  • Legal
  • Link Parties
  • Let’s Chat!
  • About Me

Flower Market Inspired Wall Decor From A Thrift Store Find

February 22, 2018

Hello and happy Friday Eve everyone! I’m so glad that you popped in today for this month’s Thrift Store Decor Upcycle Challenge. Each month I team up with my super talented bloggers friends to give a thrifted item a little bit of love.

The Rules:

  • Upcycle an item(s) from a thrift store, resale store, or garage sale into a new piece of decor.
  • There’s no monthly theme.
  • There’s no budget to stick to.

Meet the Hosts

Amanda | Domestically Creative Angela | Simply Beautiful by Angela  –  Jeanie | Create and Babble Molly | Just a Little Creativity  –  Victoria | Dazzle While Frazzled Marie | The Inspiration Vault  –  Michelle | Michelle James Designs Shirley | Intelligent Domestications  –   Gail | Purple Hues and Me Jennifer | Cookies Coffee and Crafts  –   Ann | Duct Tape and Denim Michelle | Our Crafty Mom  –  Debra | Shoppe No. 5 Denise | My Thrifty House  –  Chelsea | Making Manzanita Deborah | Salvage Sister & Mister – Habiba | Craftify My Love
Make sure you follow our board on Pinterest for more upcycled decor inspiration!

As always it helps get me motivated to put my crafty hat on and I absolutely love seeing what everyone comes up with each month!
For this month’s challenge I picked up this guy for 3 bucks at Goodwill even though I truly had no idea what to do with it.

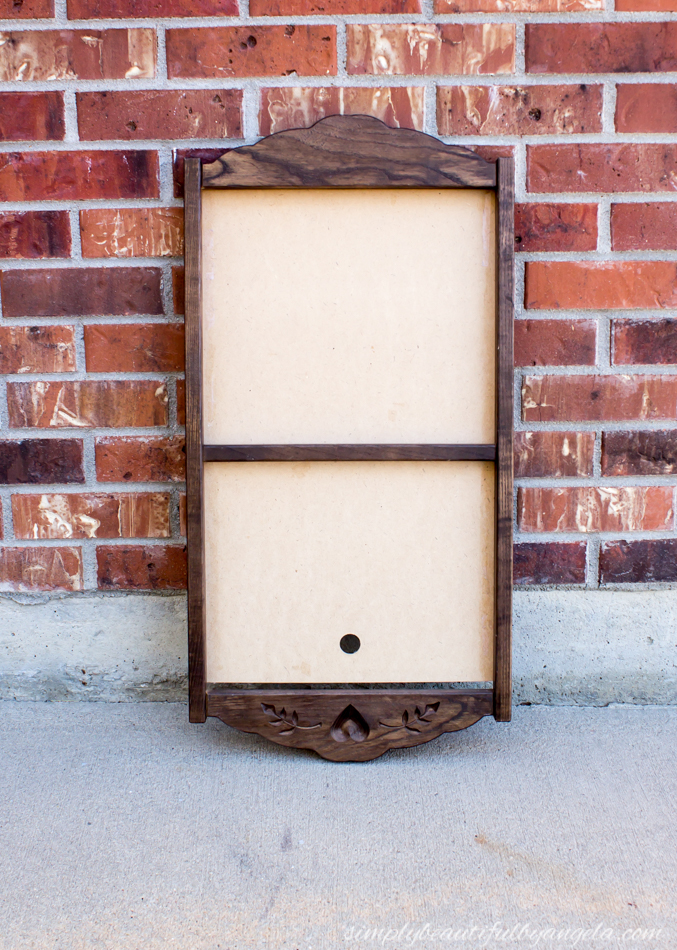
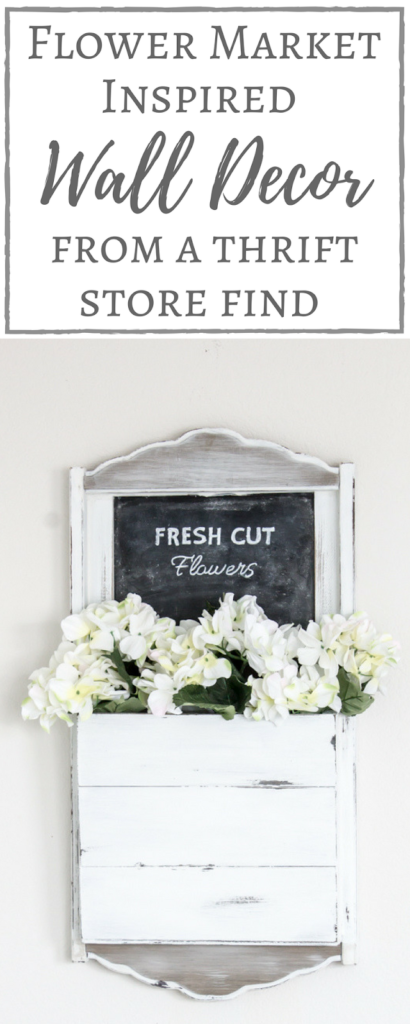
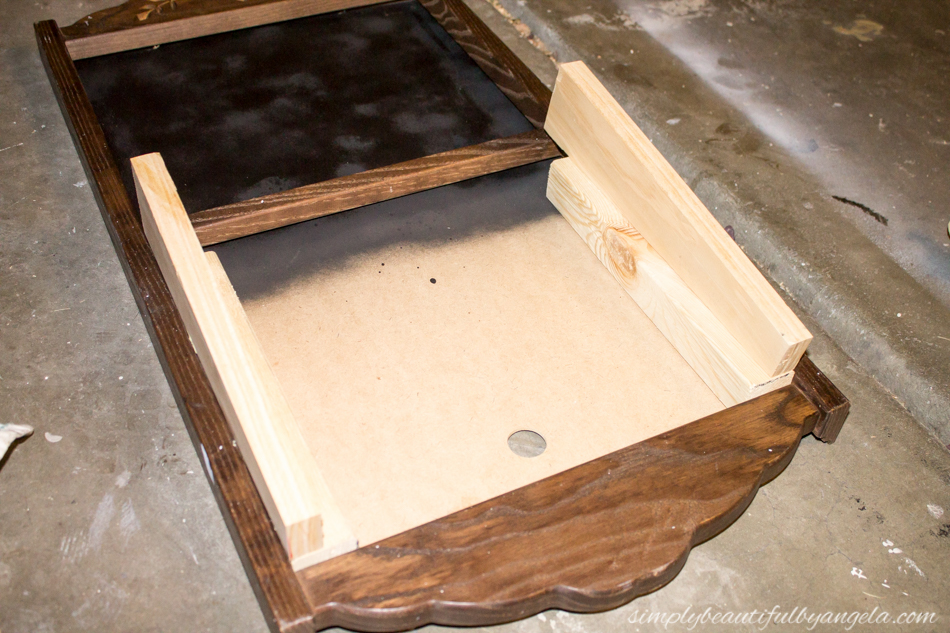
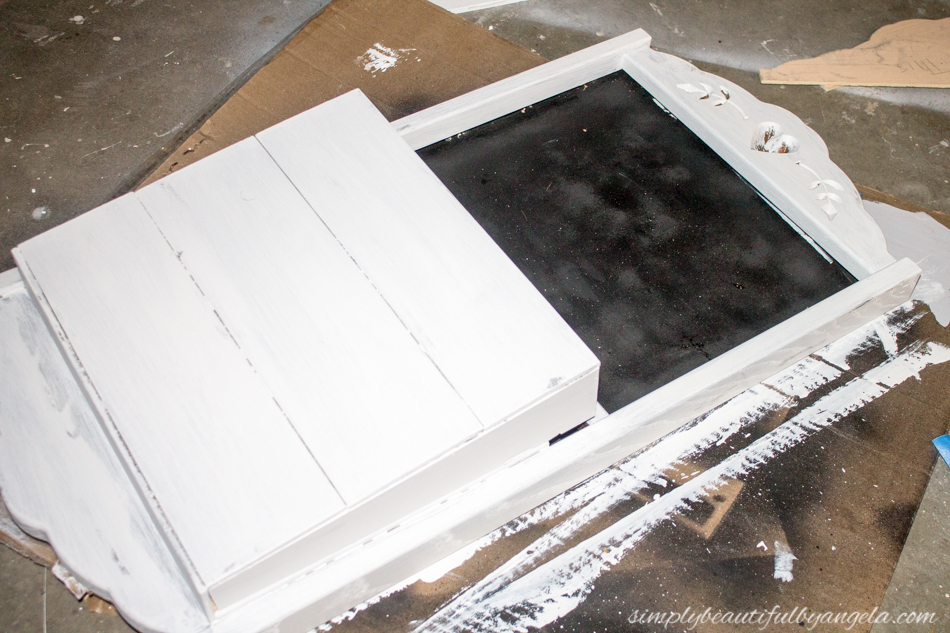
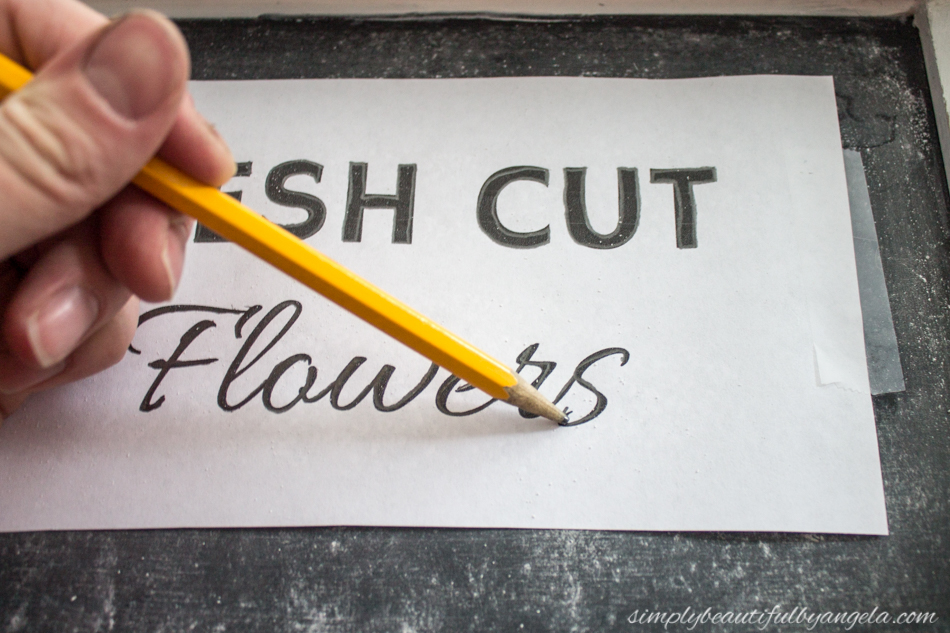
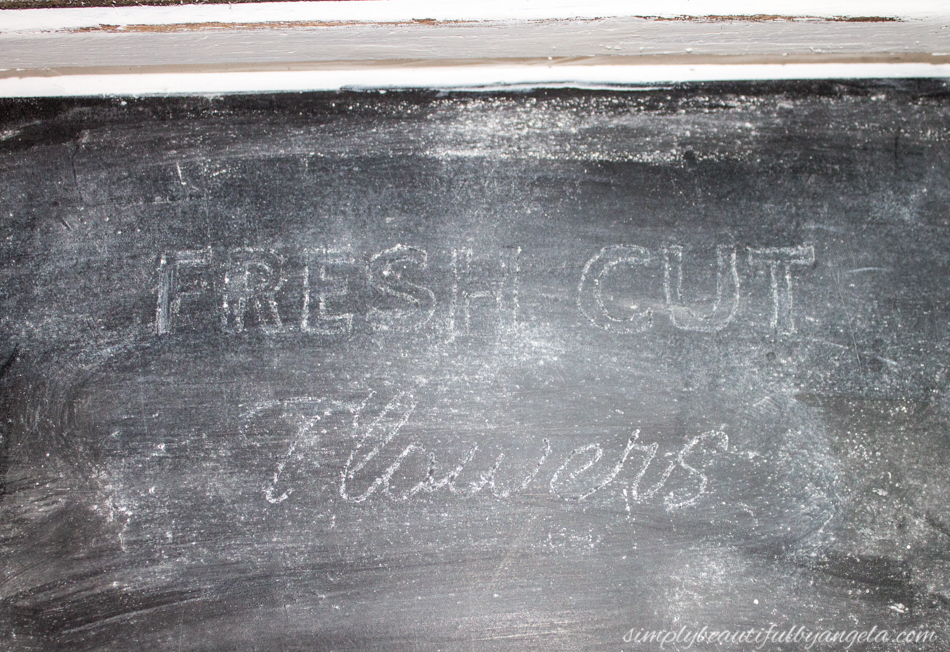
I’m not really sure what it was used for at one time–a memo board of some sort maybe? I liked the shape and knew there just had to be something that I could make with it.

My first instinct was to make it something functional like a chalkboard or a mail sorter. Then I thought about making it a tray. I was totally stuck. And to be completely honest with you guys I actually just kind of got started one day and made it up as I went. As some of you may know, sometimes those projects can turn out to be absolutely disastrous.  But I lucked out because it actually turned out pretty cool!
Ok let’s get to the fun details of how this piece (whatever it may have been…) became a beautiful flower market inspired piece of décor.

Supplies Used: (Affiliate links may be provided for convenience.  For more info, see my full disclosure here.) 
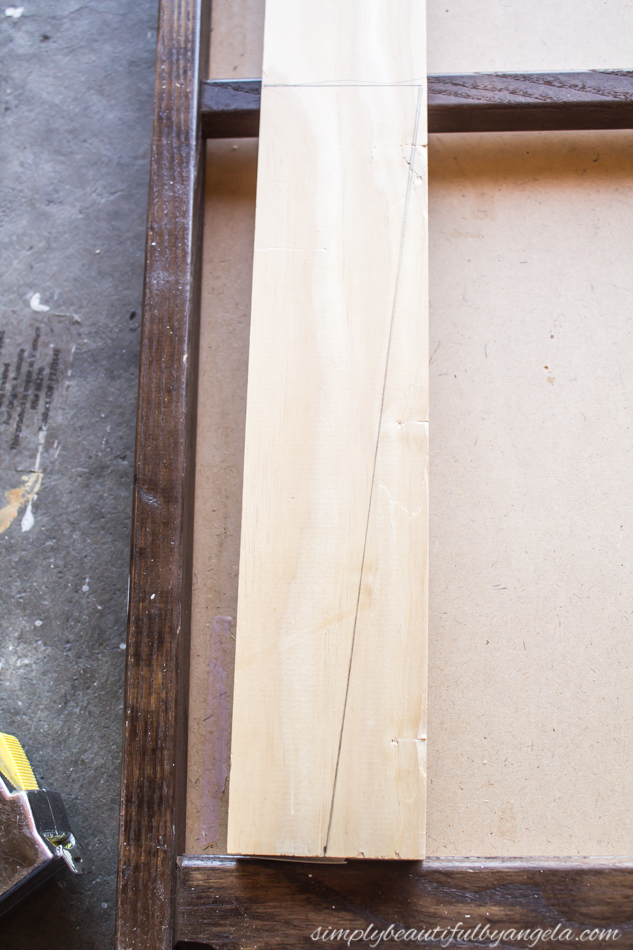
  • 1×3
  • 2×2
  • 1/4″ plywood
  • Lattice trim
  • Compound Miter Saw
  • Jig Saw
  • Medium Grit Sandpaper
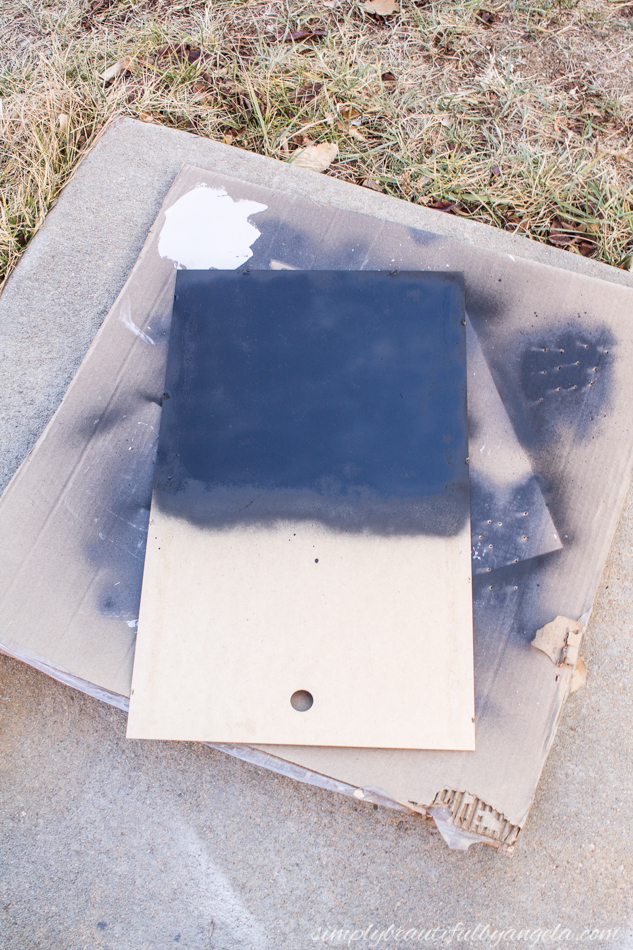
  • Chalkboard Spraypaint
  • Liquid Nails
  • Minwax Wood Stain in Jacobean
  • Vaseline
  • White Paint
  • Caulk
  • Chalk Pencils
To create the sides of the pocket I took a 1×3 and made a mark at about 1.25″ at the bottom.  I then made a second mark at the height that I wanted it to be. Finally, I used a straight edge to draw a line between these two marks. The hubby cut it on the miter saw and we simply traced it to create a second one.
While he was cutting those I popped the back off and used some chalkboard paint on half of it. It came out a little splotchy since I was at the end of the can but after I rubbed some chalk on later you can’t even tell.

Once it was dry I reattached it and used liquid nails to attach two 2x2s to either side to build the pocket out a little bit.
We cut strips of 1/4″ plywood to create the front. I couldn’t find a big enough scrap piece to make one full piece but in the end the planked look is actually one of my favorite features of this piece!
I cut another strip of plywood to glue to the bottom.

Once the liquid nails had dried I stained the wood and it just so happened that the Jacobean color was pretty close to frame. Score!

I added a little but of Vaseline to the edges and various spots that I wanted to look distressed before adding two coats of white paint. I also used some caulk to hide that gap that was showing on the sides of the pocket.

When the paint dried I went over it with some sandpaper and the spots with Vaseline melted off perfectly to make it look like it had been naturally weathered and around for a long time.

I noticed that there was a slight gap where the back met the chalkboard so I added a piece of lattice trim to either side to hide it. I also wanted to get rid of the heart embossment so I traced the top on to a piece of plywood and cut it out with a jigsaw. To add interest I stained it and then later dry brushed some white paint on it.

At last it was time for the finishing touch which was putting my words on the chalkboard.  To prep the chalkboard I rubbed chalk on the surface and then wiped it off with a dry rag. 

I created my wording on Canva and then rubbed chalk on the back of the paper before taping it down.

Using a pencil I firmly traced the letters and when I removed the paper I was left with a nice outline to go back over and fill in.
A cool tip for getting really sharp and bright lettering with chalk is to use a chalk pencil dipped in water. 
After popping some hydrangeas inside the pocket my masterpiece was complete!

As you can see I also added a piece of plywood to the bottom because it looked off balance with just the one on the top.

I can’t decide if I want the lettering to be bigger or not. The nice thing about chalk though is that it’s easy to wash off and do again!

I originally hung it in our bedroom because it’s such a nicely lit room and was perfect for photographing on a snowy dreary day. However after I took the pictures I decided that I actually kind of love it here so for now this is where it lives!

I used hydrangeas because it’s what I had on hand but eventually I would like to replace them with different types and colors for a true flower market feeling.

Since I used supplies that I already had on hand the total cost of this project cost me a grand total of………….$3 which was what I paid for the original piece at the thrift store!

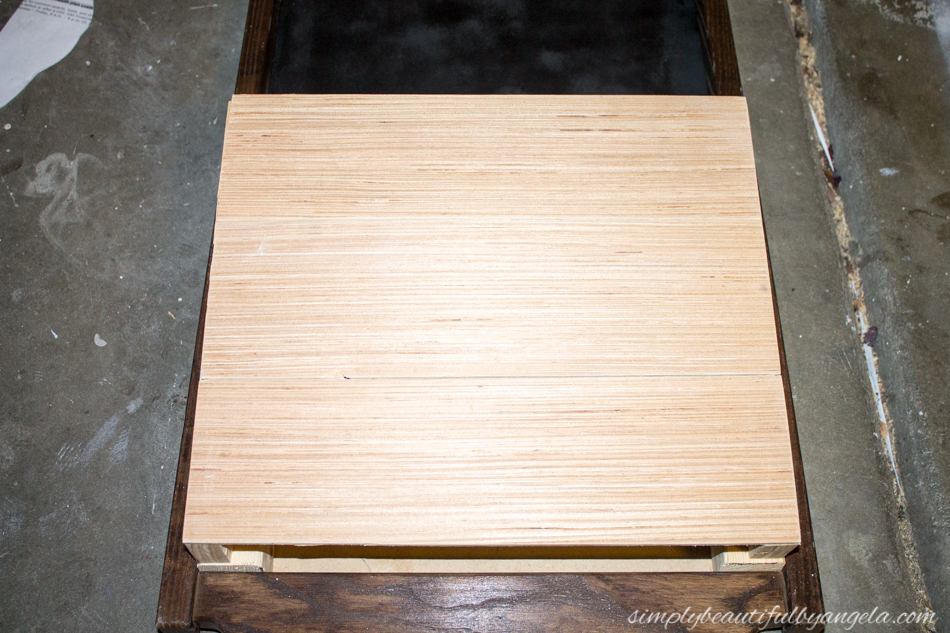
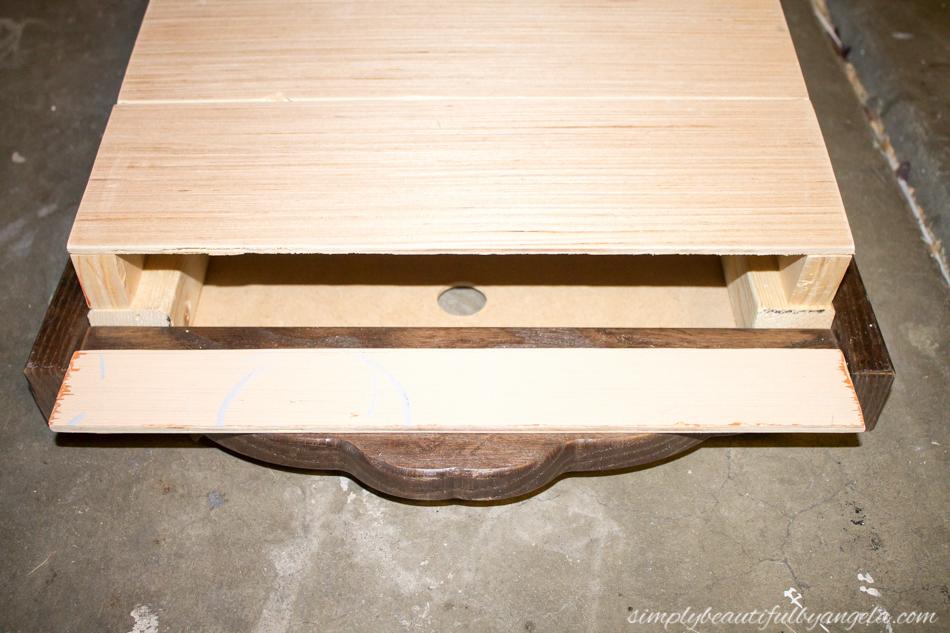
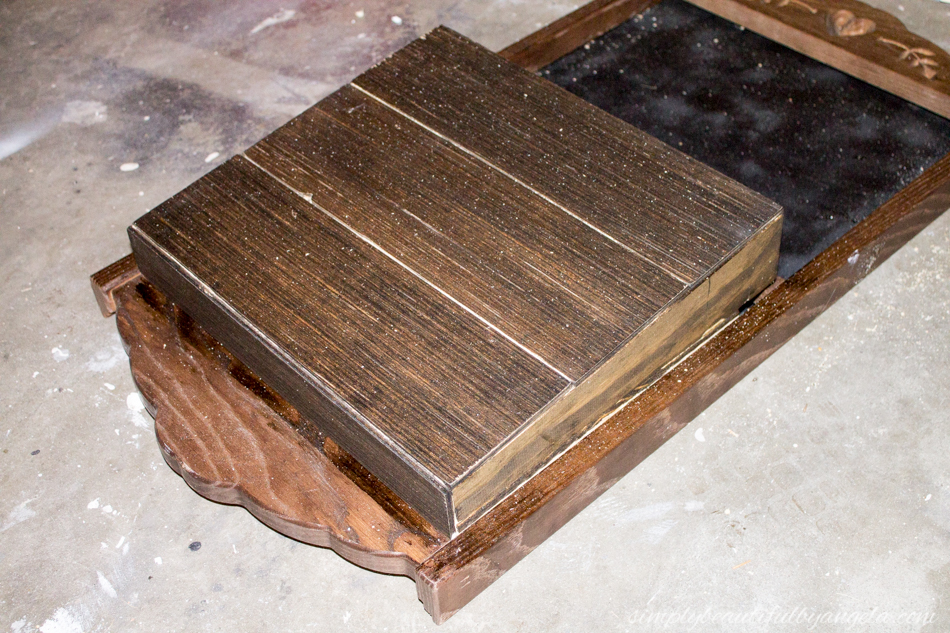
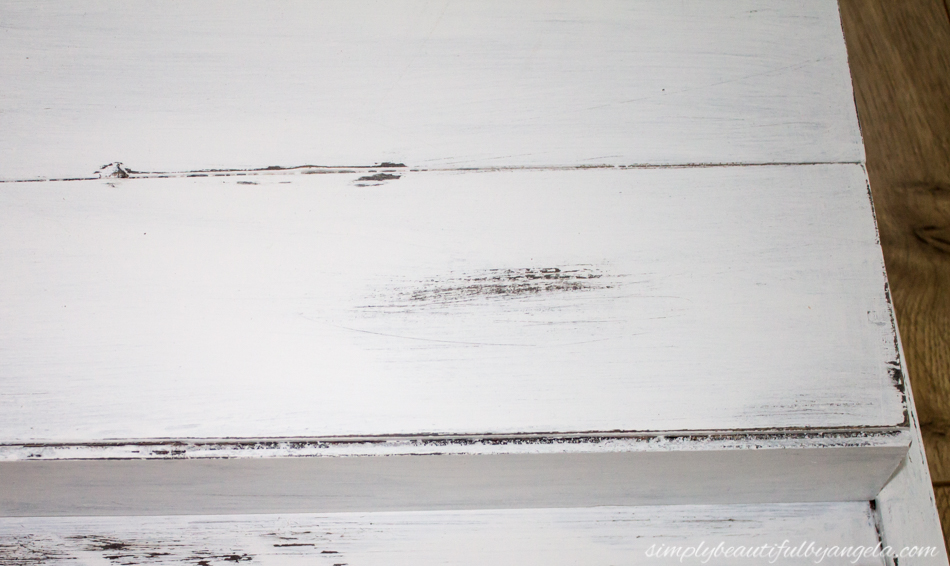
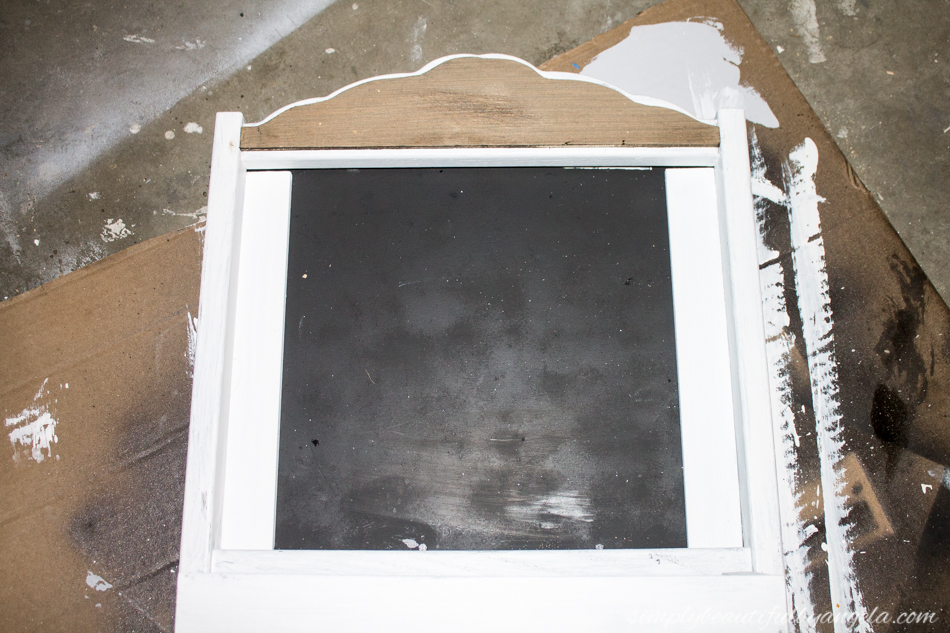
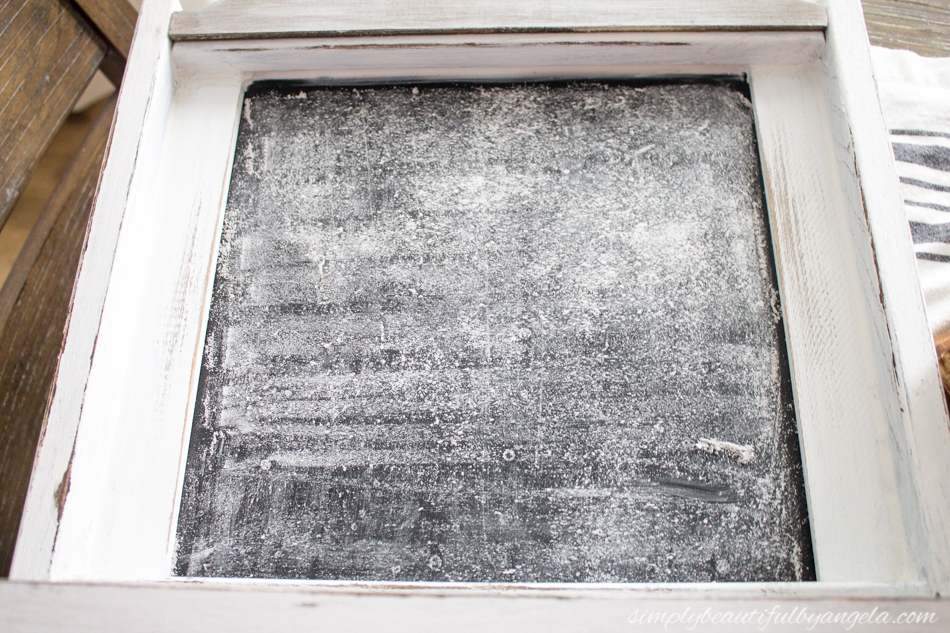
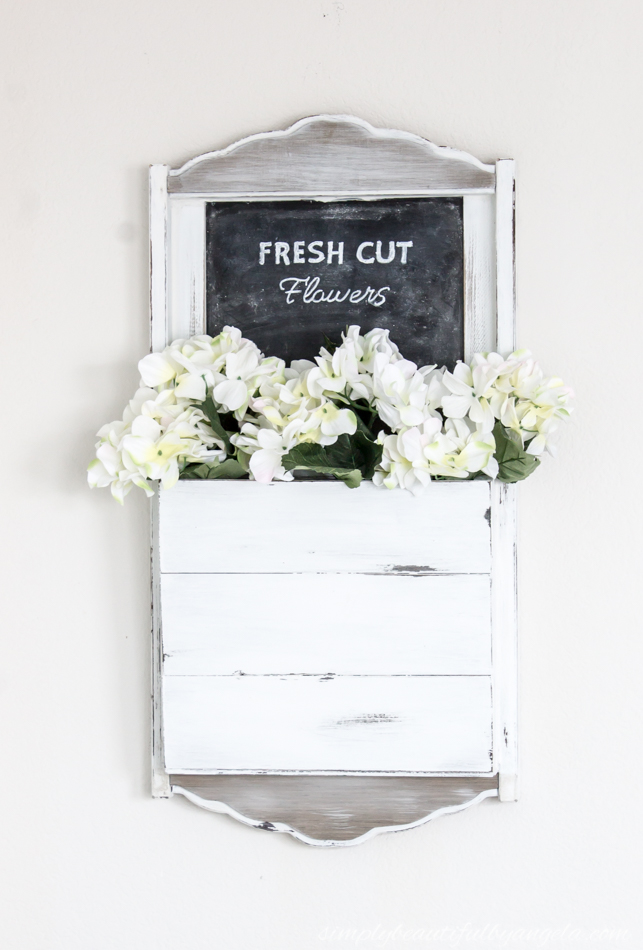
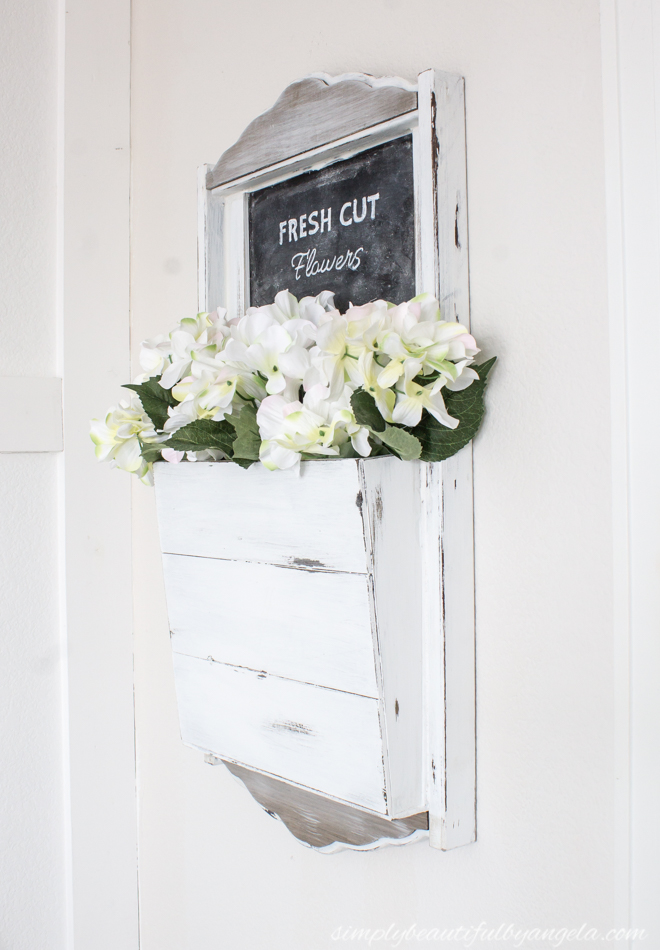
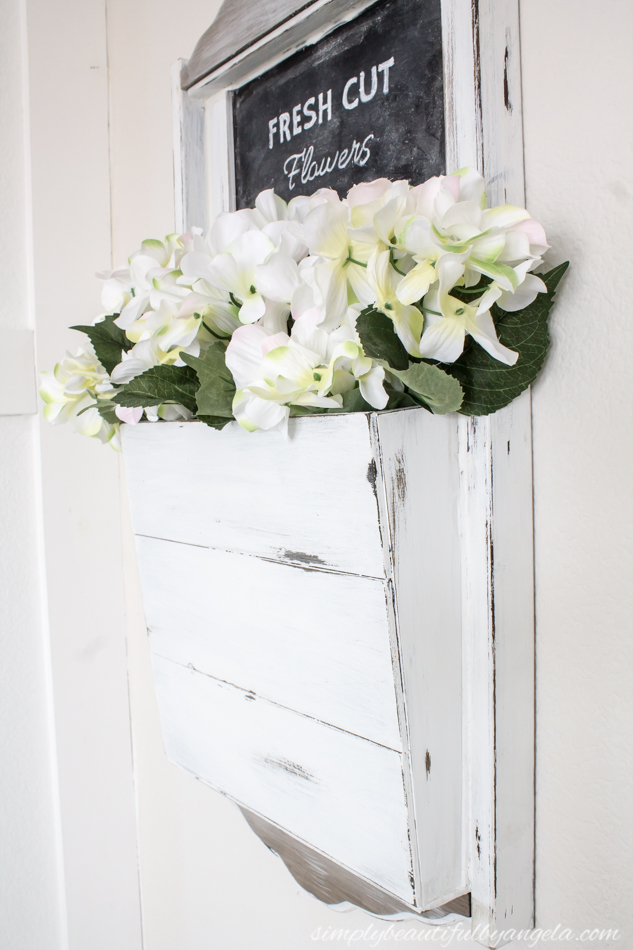
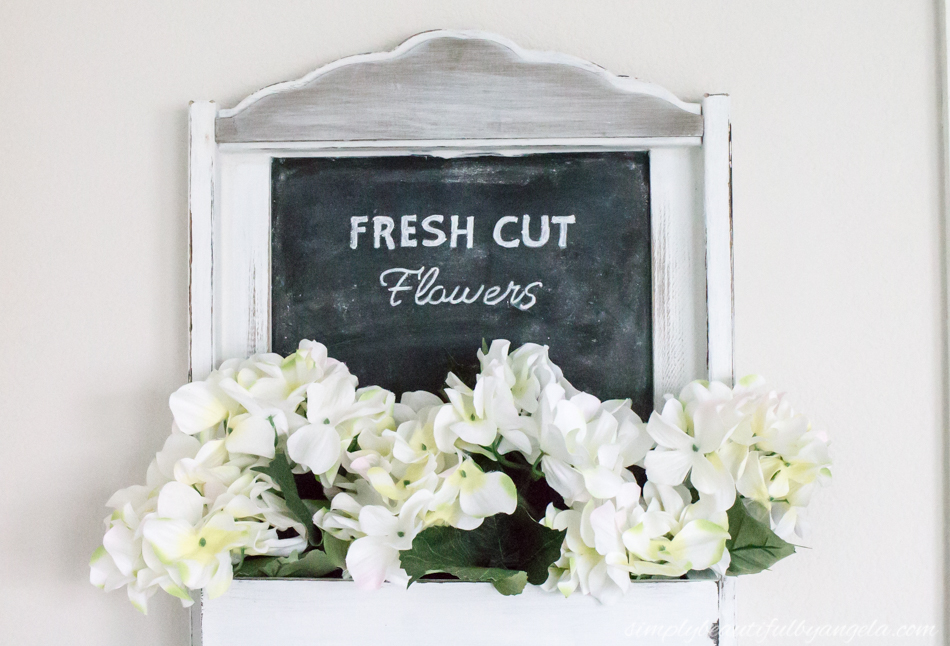
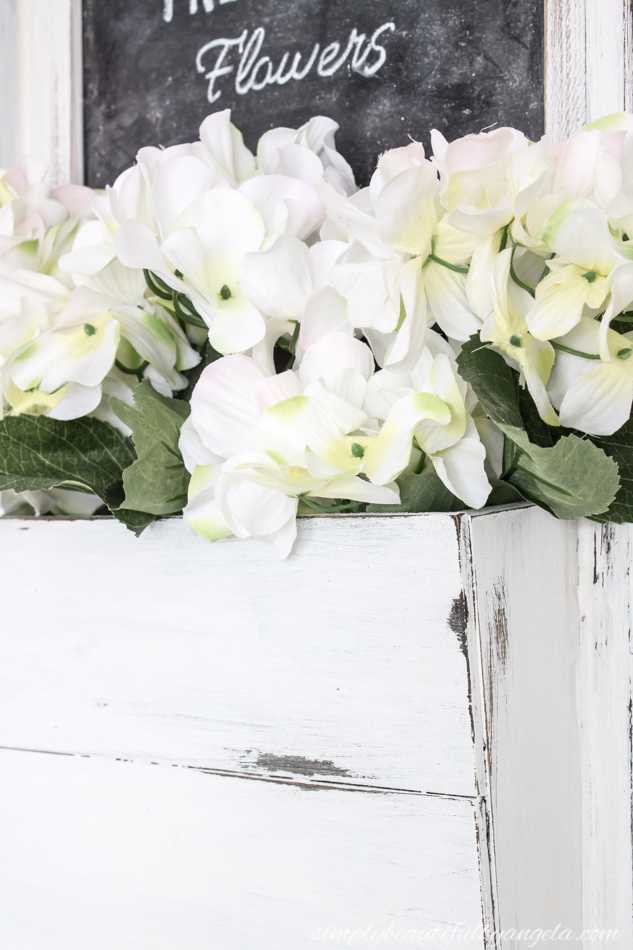
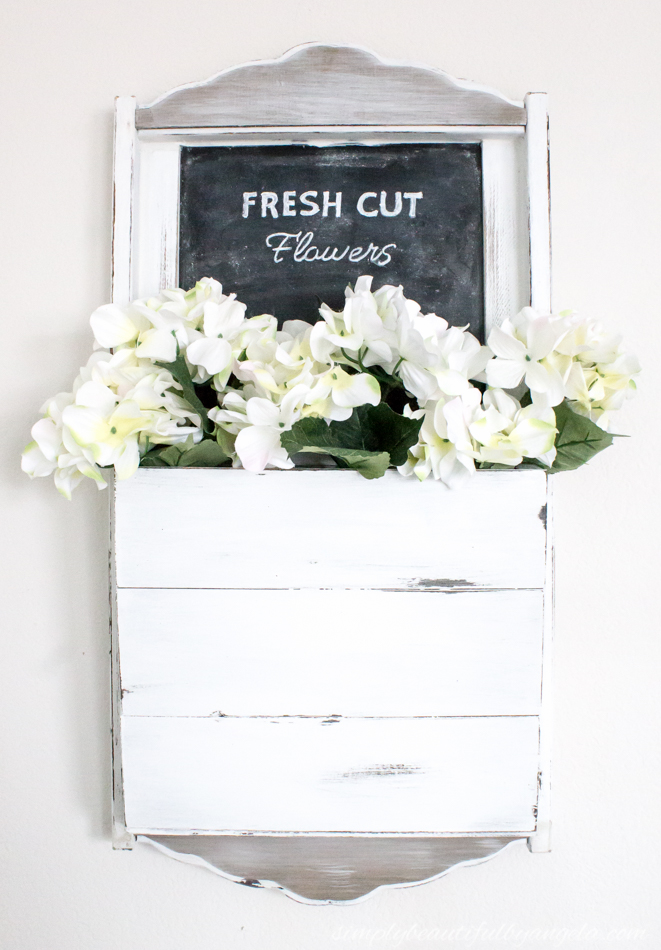
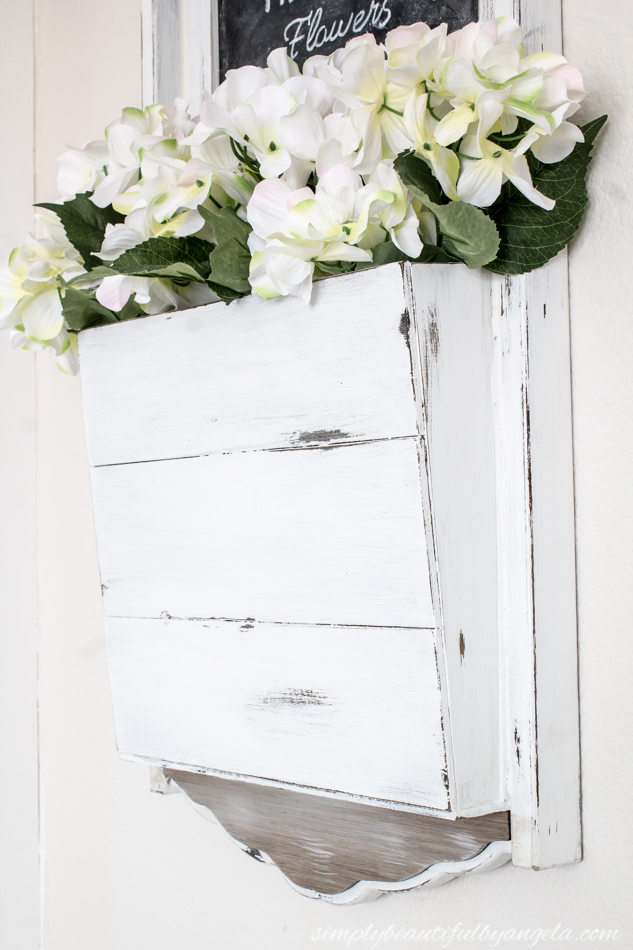
This piece turned out better than I could have imagined and I’m so happy with it!

I hope you all have a fantastic weekend.  We are headed out this morning to take the kids on their first official vacation at an indoor water part resort.  We’re only staying for one night but we are through the roof excited about it!  See you all next week 🙂

And now for more thrifty goodness!

Check out what my fellow upcyclers created below!

An InLinkz Link-up

Linking up to these awesome parties!

· Labels: Uncategorized

Comments

  1. Shirley Wood says

    February 22, 2018 at 3:24 pm

    It turned out really pretty. You cannot beat $3 for pretty home decor. So fun that you took that unusual piece and completely transformed it into something new. Love your choice of paint colors.

    • Angela says

      February 26, 2018 at 9:26 pm

      Thank you so much Shirley! I completely agree, $3 decor is pretty awesome 🙂

  2. Gail @Purple Hues and Me says

    February 22, 2018 at 11:59 pm

    This looks awesome, Angela! What a great idea to turn whatever it was into a lovely piece to display all kinds of seasonal flowers throughout the year!

    • Angela says

      February 26, 2018 at 9:27 pm

      Thanks Gail! I am definitely excited to switch out the flowers every now and then to keep it interesting 🙂

  3. Michelle James says

    February 24, 2018 at 12:59 pm

    I love everything about this. You transformed it into the perfect piece and it looks so good in your room.

    • Angela says

      February 26, 2018 at 9:28 pm

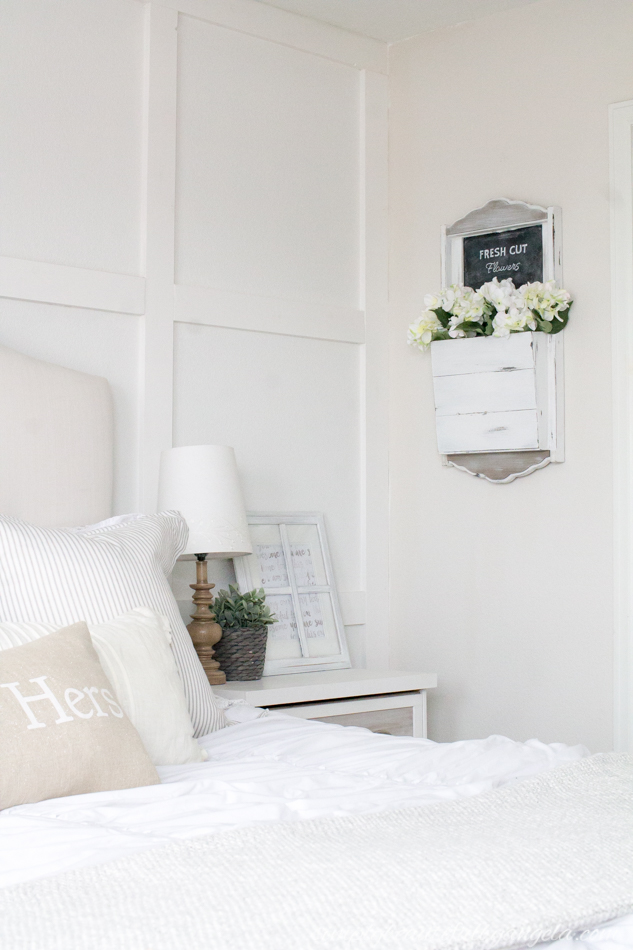
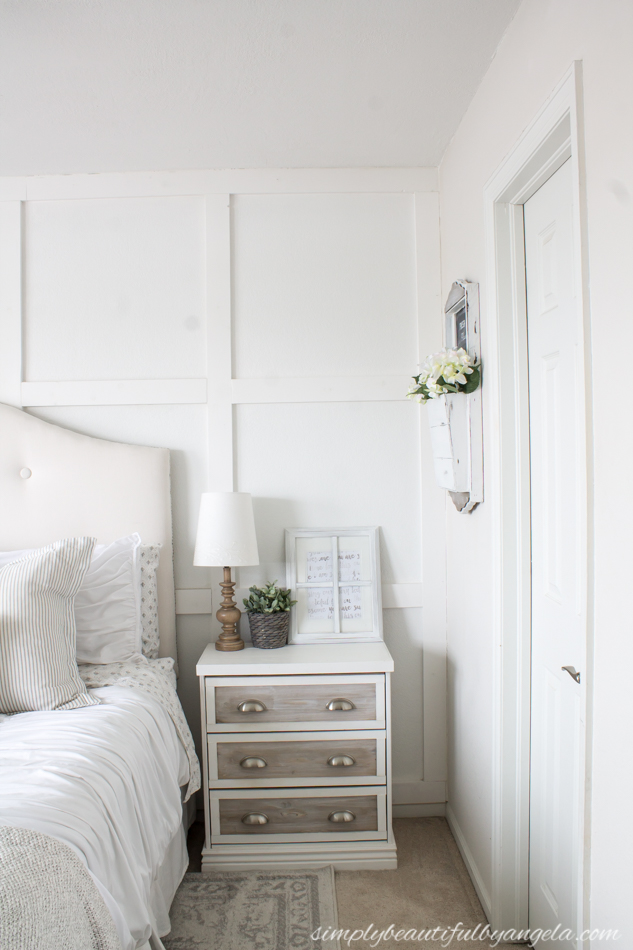
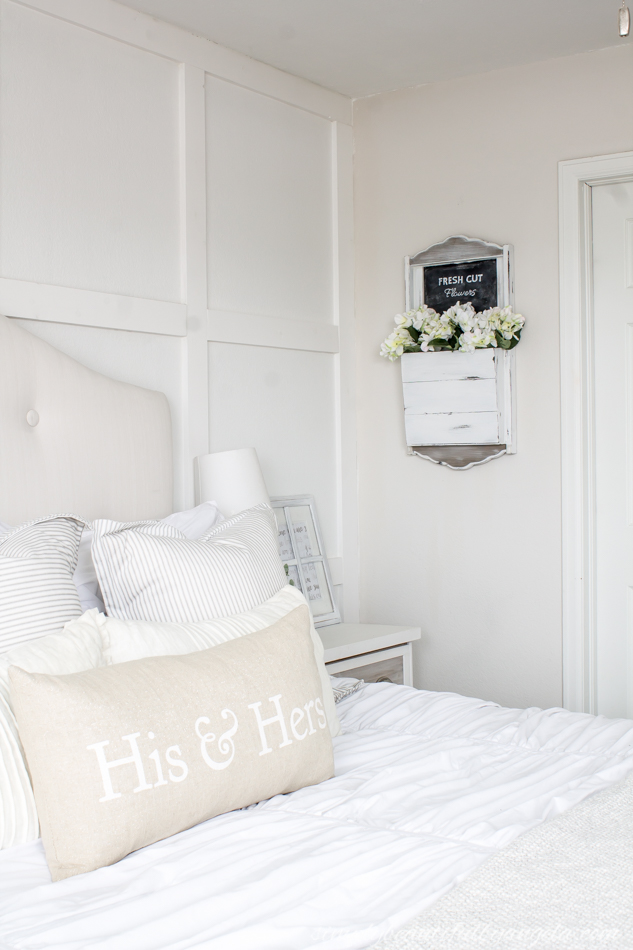
      Thank you Michelle! I am loving how cheerful it is in our room and it's so funny because while I was working on it I would have never imagined it ending up in there!

  4. Jenny Sparmo says

    February 25, 2018 at 2:00 pm

    This looks beautiful! Sometimes once you get started, inspiration comes. It's a great piece of wall decor.

    • Angela says

      February 26, 2018 at 9:29 pm

      Thanks Jenny! That is so true, I love it when it works out 🙂

  5. Michelle James says

    February 25, 2018 at 2:53 pm

    This is gorgeous!I have one of these in my basement. It is used to hold a Lang calendar and they were very popular years ago. You motivated me to dig mine out to see what I can use it for!

    • Angela says

      February 26, 2018 at 9:30 pm

      Oh wow thank you for letting me know what it is Michelle! I had no idea but I can see that now haha!

  6. Debra Pashkowsky says

    February 26, 2018 at 1:12 am

    This is so lovely. You did a beautiful job redoing this.

    • Angela says

      February 26, 2018 at 9:30 pm

      Thank you Debra I really appreciate it! 🙂

  7. Cherryl Ehlenburg says

    March 1, 2018 at 3:31 am

    You are very creative! I will be saving this in the hopes that I can find a similar piece!

  8. lifeonkayderosscreek.com says

    March 1, 2018 at 5:59 pm

    It's absolutely adorable and a great upcycle!

  9. Victoria @DazzleWhileFrazzled says

    March 1, 2018 at 8:18 pm

    Very pretty! It looks so nice on your wall in your room.

  10. llค่ล้O lล่u says

    March 2, 2018 at 2:26 pm

    I like friday Because the next day, I would stop working and go to a friend.

    holiday palace

Hello, I am so happy that you're here! My name is Angela and I love to create simple beauty in our home on a budget. Here you will find DIY decor and home projects, furniture flips and other home inspiration!

Never Miss a Post!


Diagonally Fluted Nightstands

Diagonally Fluted Nightstands

Hello! I’m really enjoying the extra daylight and the fact that it’s been paired with warm sunny weather this week has been icing on the cake. I’m trying to soak it all in before the next snowstorm! Today’s flip was from about a year ago and is still one of my favorite sets of nightstands…

Read More »

How to Update a Dresser with a Missing Drawer

How to Update a Dresser with a Missing Drawer

Hey friends, happy March! Even though I know we still have quite a bit of cold weather coming our way here in Colorado, it’s exciting to see these warmer days sprinkled in here and there. This week I am sharing how I saved an old IKEA dresser from ending up at the landfill! Supplies Used:(Affiliate…

Read More »

Vintage Ice Box Style Nightstands Makeover

Vintage Ice Box Style Nightstands Makeover

Hello friends! We just got back from our annual trip to the Great Wolf Lodge and it was fun times as always! Today I am sharing how I updated these fun vintage ice box style nightstands that I found on Marketplace! Supplies Used:(Affiliate links may be provided for convenience.  For more info, see my full disclosure here.) …

Read More »

Never Miss a Post!


GOOGLE 2

GOOGLE 3

GOOGLE 4

GOOGLE 5

GOOGLE 6

GOOGLE 7

Theme by 17th Avenue · Powered by WordPress & Genesis