
Hello and welcome to my favorite Thursday of the month!

The Rules:
- Upcycle an item(s) from a thrift store, resale store, or garage sale into a new piece of decor.
- There’s no monthly theme.
- There’s no budget to stick to.
Meet the Hosts
Pili | My Sweet Things – Jennifer | Cookies Coffee and Crafts
Maureen | Red Cottage Chronicles – Victoria | Dazzle While Frazzled
Deborah – Salvage Sister and Mister Marie | The Inspiration Vault
Debra | Shoppe No. 5 – Habiba | Craftify My Love
Michelle | Our Crafty Mom
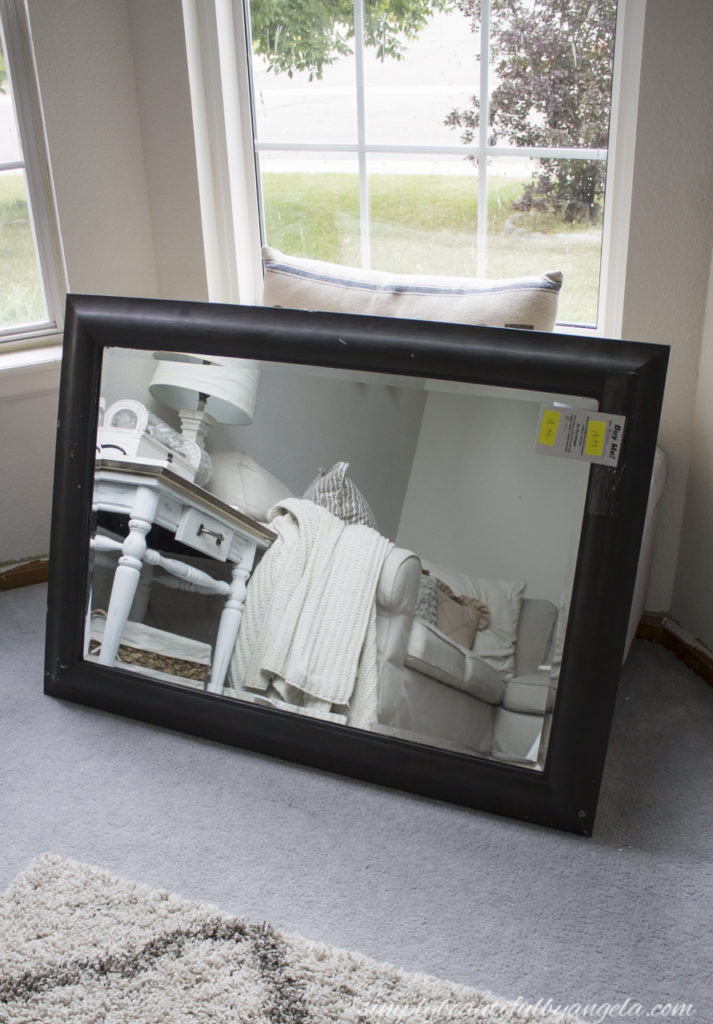
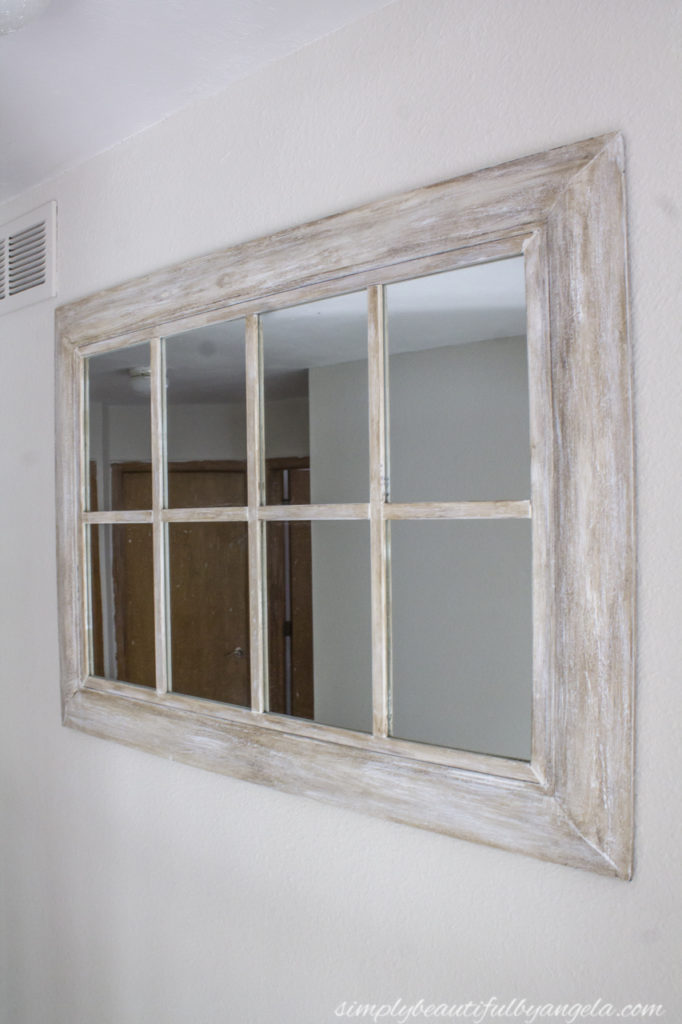
I’ll be completely honest with you guys, I usually don’t have a clue what I’m looking for when I visit a thrift store. I just kind of wait for something to pop out at me and then let the creativity flow from there. However this time I knew exactly where to head–the mirror section!
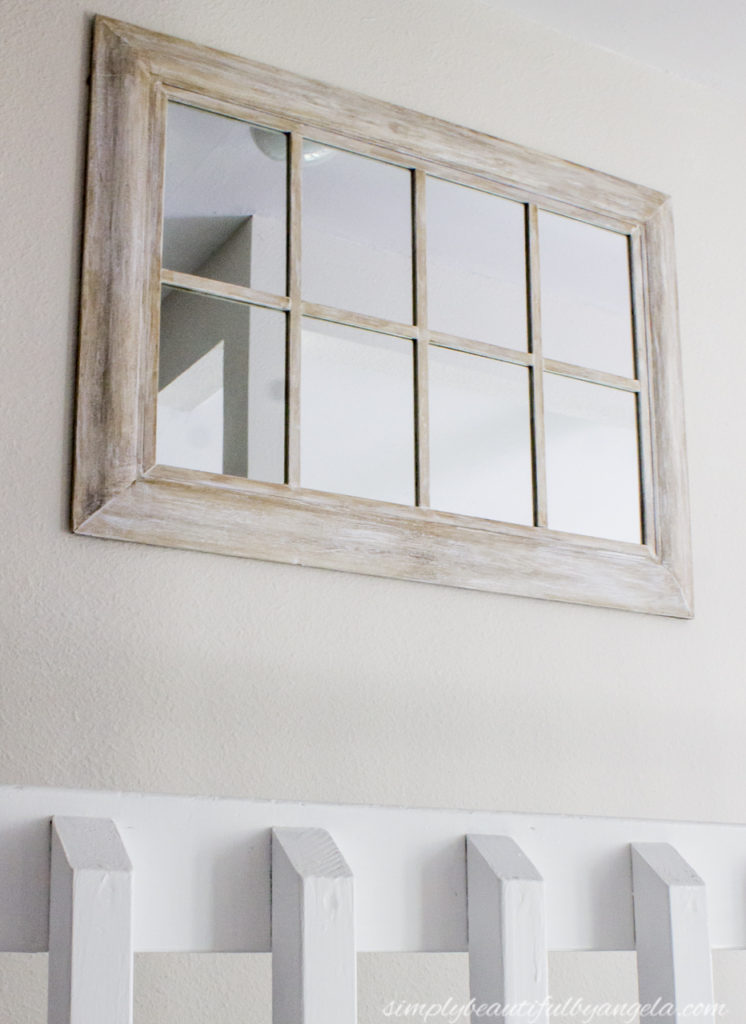
After painting the hallway upstairs I became inspired to spruce it up a little and envisioned a large pretty mirror in the center. I browsed my favorite stores but just couldn’t justify spending so much money when I knew that I could probably find one at a thrift store.
Supplies Used: (Affiliate links may be provided for convenience. For more info, see my full disclosure here.)
- White Latex Paint
- Plaster of Paris
- Valspar Dark Sealing Wax
- Medium Grit Sandpaper
- Frogtape
- Small Lattice
- Spackle
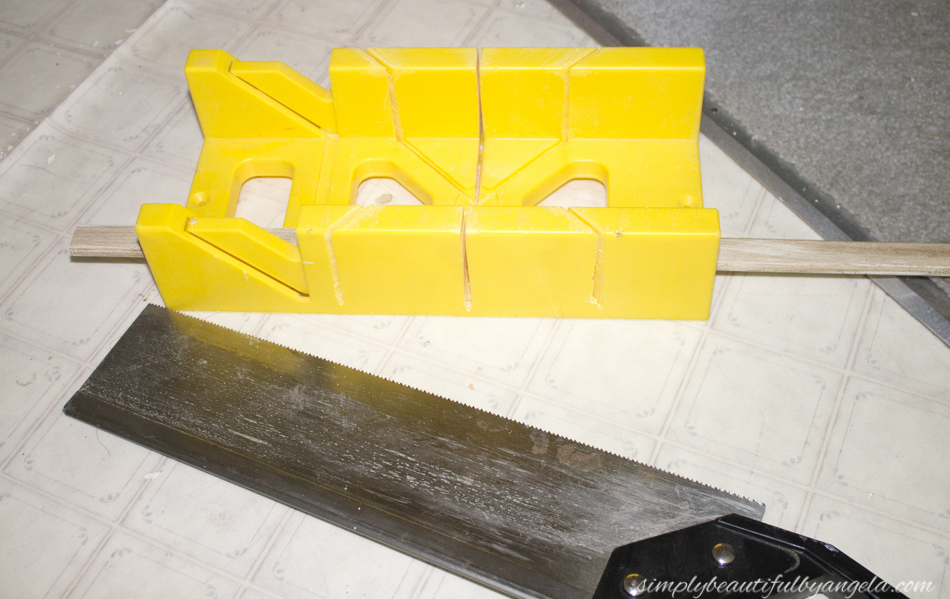
- Mitre Box with Saw
- Hot Glue Gun
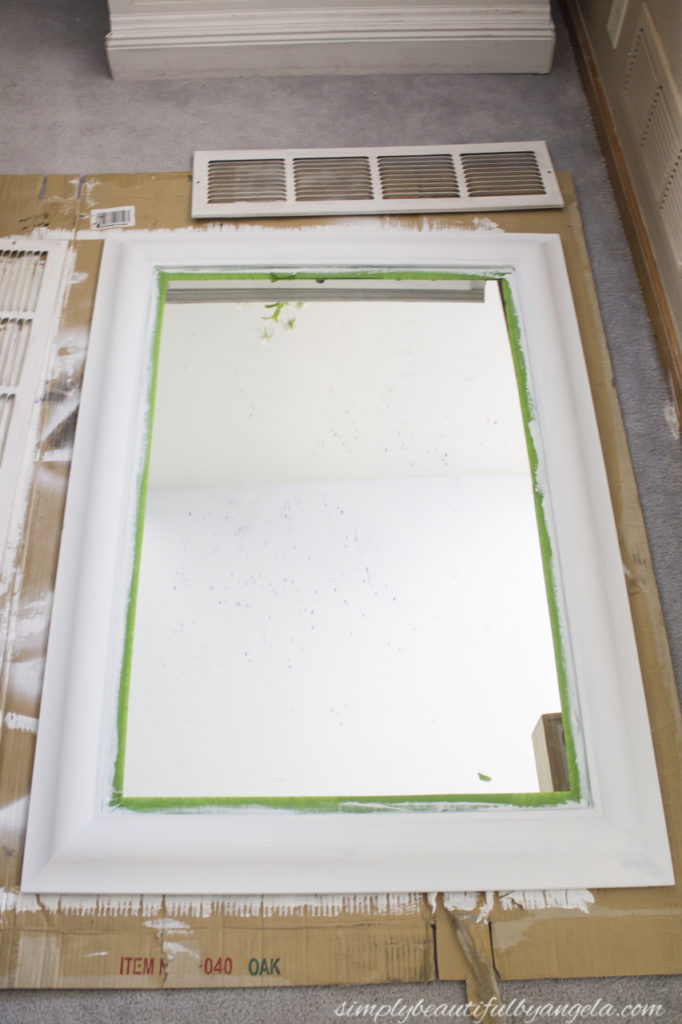
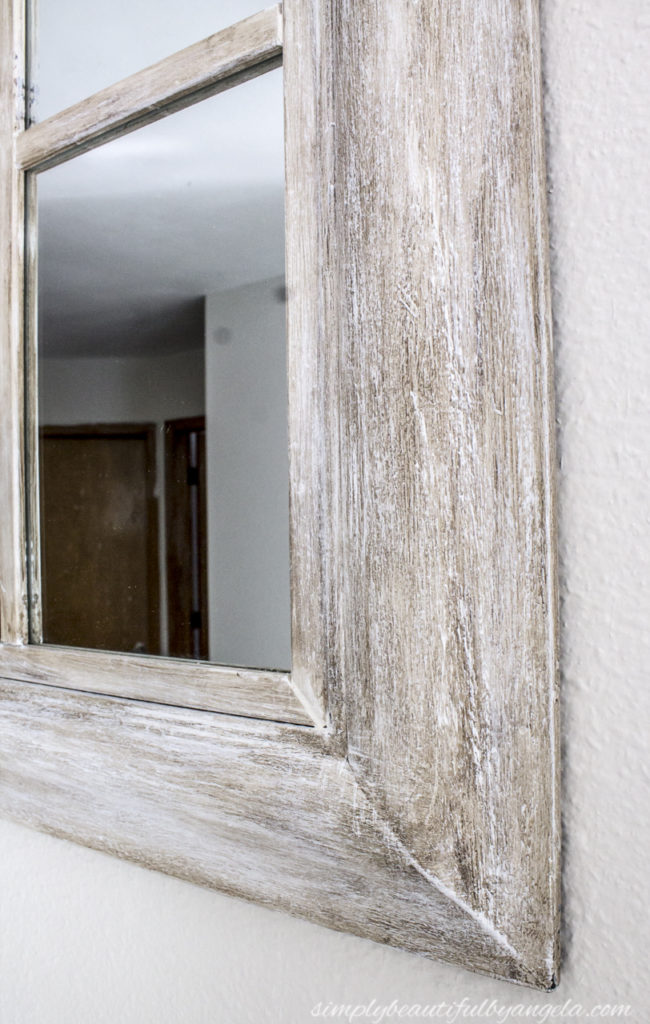
The first thing that I did was give it a light sanding to clean some of the gunk off and to scuff it up a little so that my new paint would stick better. I then turned it around and used a staple gun to secure the backing that was starting to peel off on the corners.

and gave the frame two coats. I used Frogtape to tape off the edges of the mirror, even though it totally wasn’t necessary since I ended up deciding to cover them later on.
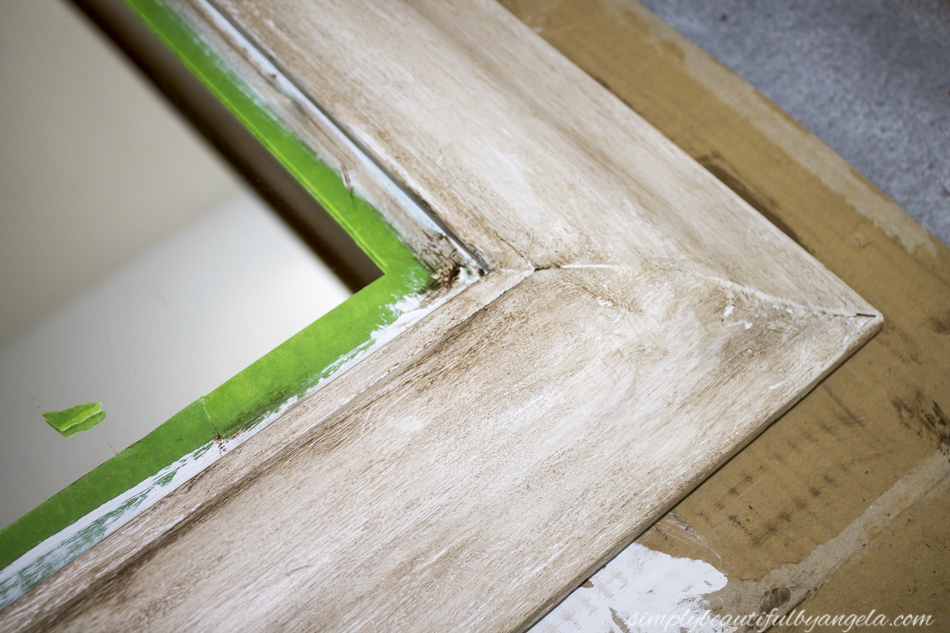
So I headed to Lowes and purchased 3 pieces of small lattice molding. Once I got home I gave them the same treatment (chalk paint followed by the wax) and let them dry for about 30 minutes.
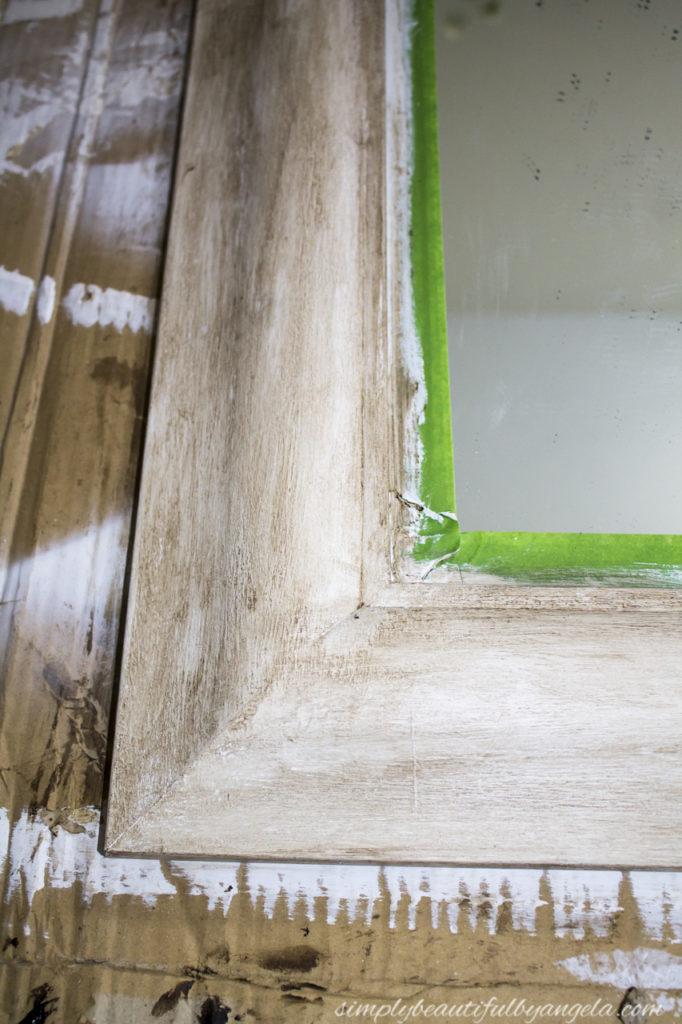
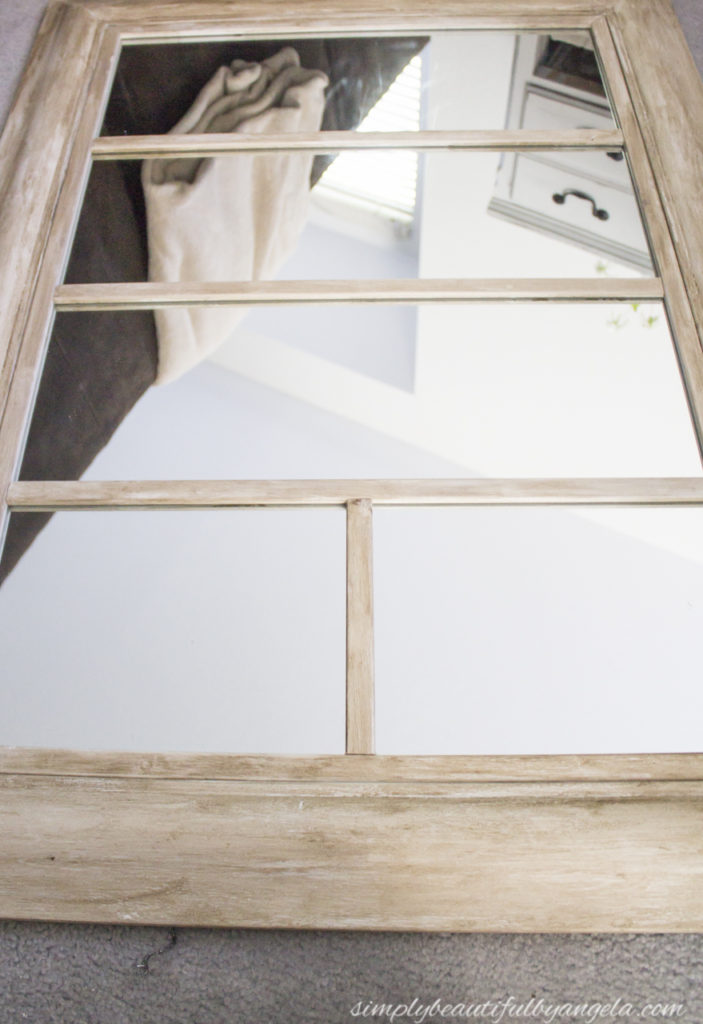
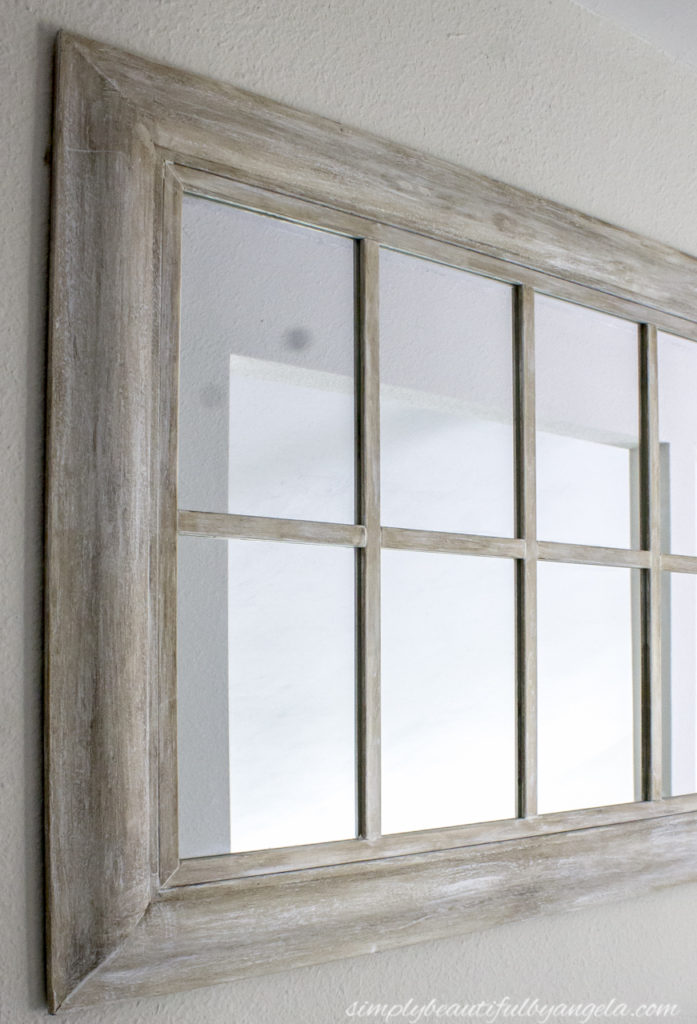
I first measured the edges of the mirror and framed it out with the molding. Not only did it keep me from having to clean up the messy paint job from it’s previous owner, I think it also makes it feel more complete and window-like.
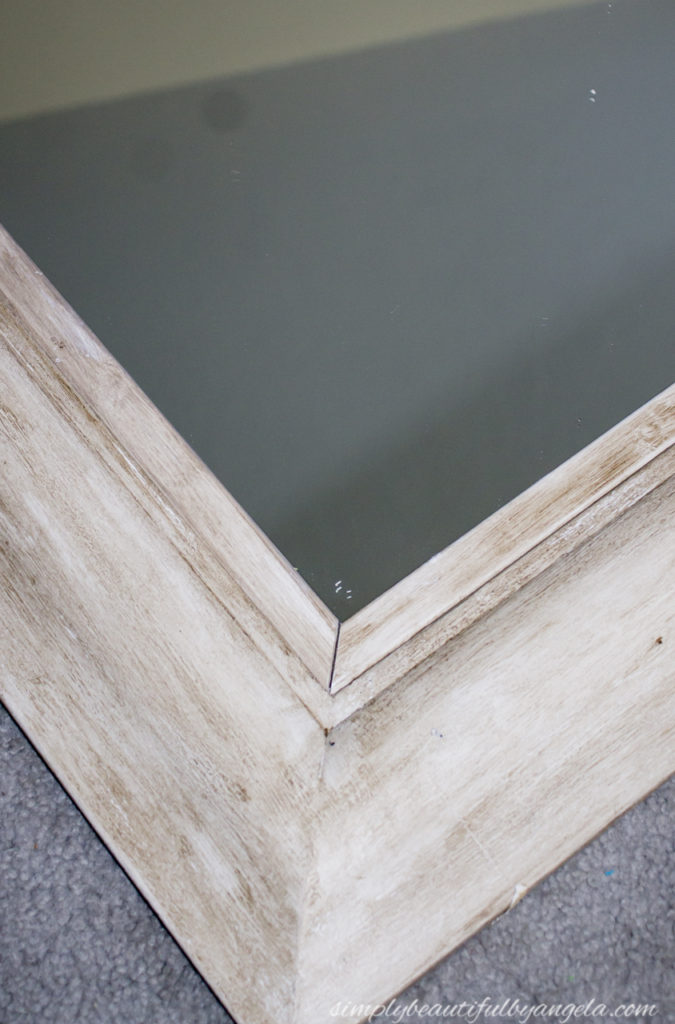
I didn’t stress over imperfect miter cuts. My mitered cuts are never perfect and this time was no exception. I simply went over them with a little bit of spackle later on and it disguised them perfectly.

I cut four more pieces of molding for the cross pieces and glued them on at the center point.
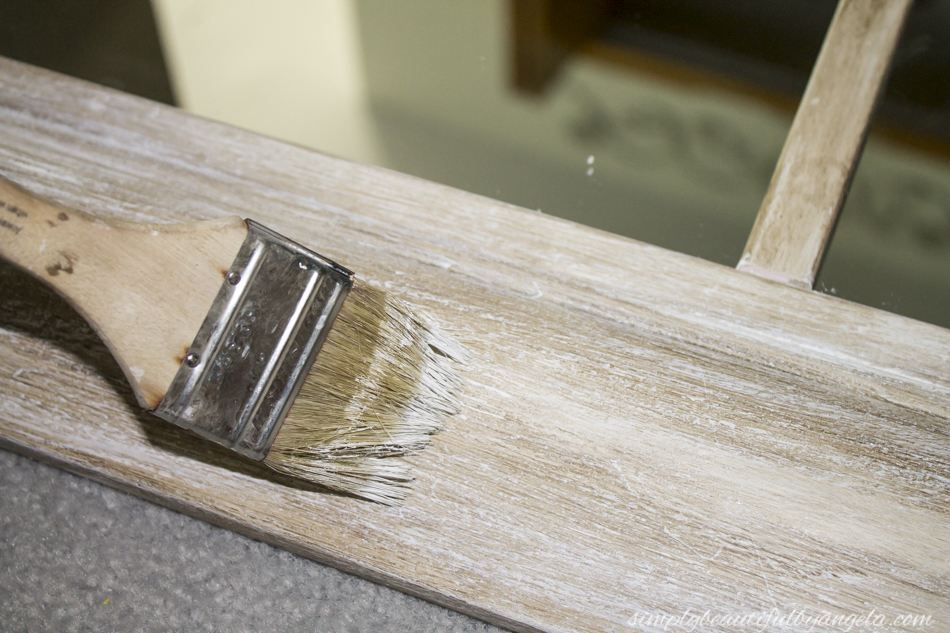
As the finishing step I grabbed a chip brush and some white paint and dry brushed the whole piece to make it look more like weathered wood.

This hallway is extremely narrow and the sunlight it receives makes it super challenging to photograph, so please excuse the wonky angles and lighting haha.
Check out what my fellow upcyclers created below!
Linking up to these awesome parties!

Angela that is one gorgeous $7 mirror! Great tip on using brush strokes to create a wood grain effect. Definitely tucking that idea away for future use!
Thank you Maurer! Yes it's definitely one of my favorite tips ever! 🙂
I've been on the hunt for a windowpane mirror for a while, thanks for the inspiration because I find mirrors curbside all the time! Love the technique you used, it really seems wood.
Thank you Pili! I'm glad I helped inspire you, it was much cheaper to make my own because those windowpane mirrors can sure get pricey!
Great job! I love how the combination of paint and wax turned out. I am pinning this for future reference.
Thank you so much, I really appreciate that!
This is amazing! I can’t believe it only cost $7! Great upcycle!