Hello everyone! I hope you all had a great weekend. We took a little mini family vacation down to the Great Wolf Lodge last Thursday and it was an absolute blast. It’s a large indoor water park resort and last year was the first time that we visited. We enjoyed it so much that we turned it into a yearly tradition.


This year was just as much fun as last–if not more, and we are already looking forward to going back again next year!
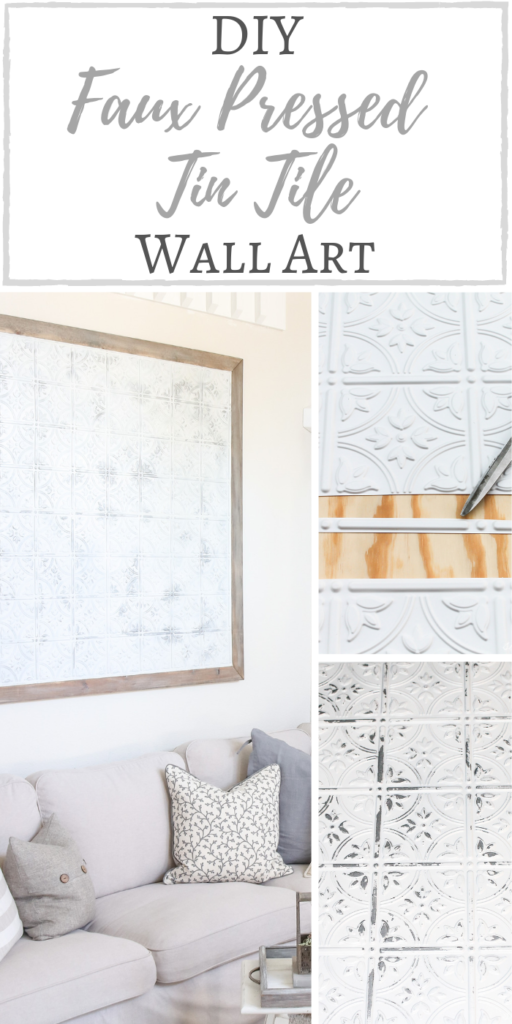
Anyways, this week I have an oldie but goodie to share with you guys! When I worked on our living room makeover at the old house I needed a large scale piece of wall decor for the big space next to our vaulted ceiling. I love the distressed tile art that I’ve seen in the stores, but they are really pricey! Since the budget was tight, I bought some faux pressed tin tile sheets on Amazon and created my own. I realized that I actually never shared the tutorial on it, soooooo–almost a year and a half later—here it is!
Supplies Used:(Affiliate links may be provided for convenience. For more info, see my full disclosure here.)
- 2 2’x4′ Faux Tin Tile Sheets
- 1/2″ plywood
- Liquid Nails
- Rust-Oleum Hammered Spray Paint
- Vaseline
- Rust-Oleum Spray Paint in Satin White
- 1x3s
- Compound Miter Saw
- Minwax Pre-Stain Wood Conditioner
- Minwax Dark Walnut
- T Braces
- Mending Plates
- Drill
- Painters Tape
- White Caulk
- D Ring Picture Hangers
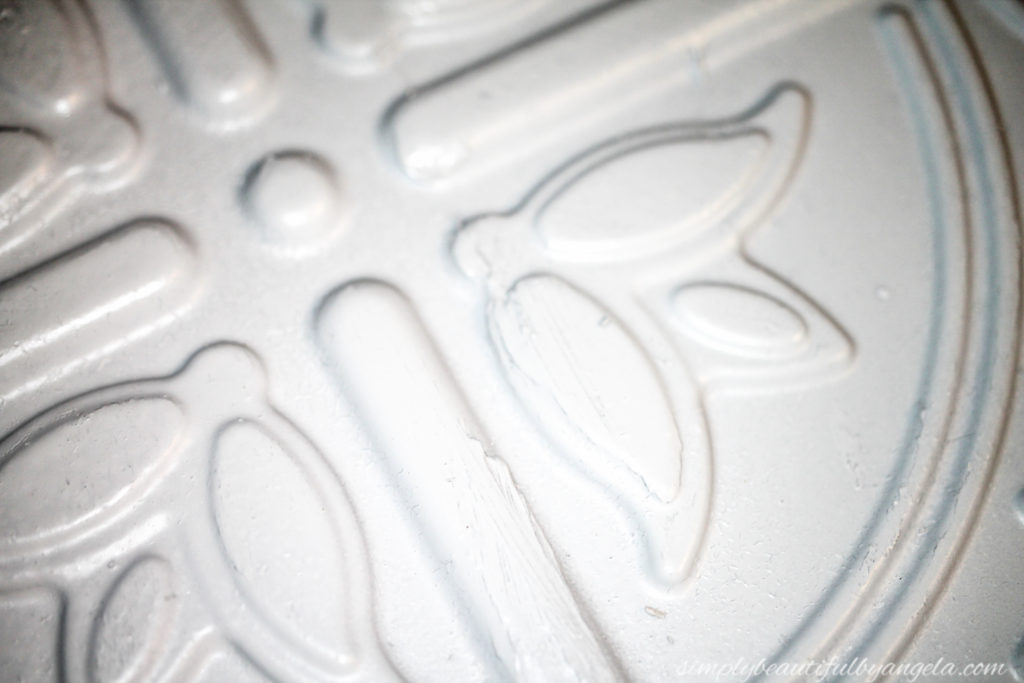
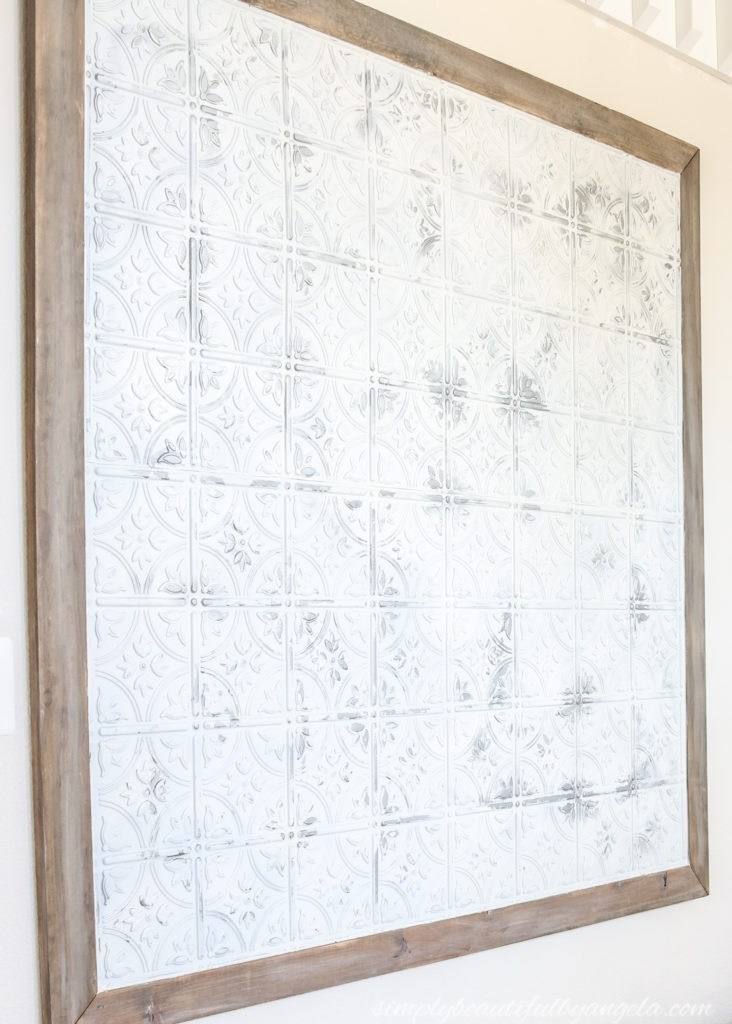
I was a little skeptical when I ordered my 2’x4′ faux tin tile sheets, but was totally amazed when they arrived. They are made out of PVC so they are really light weight but also look very realistic.
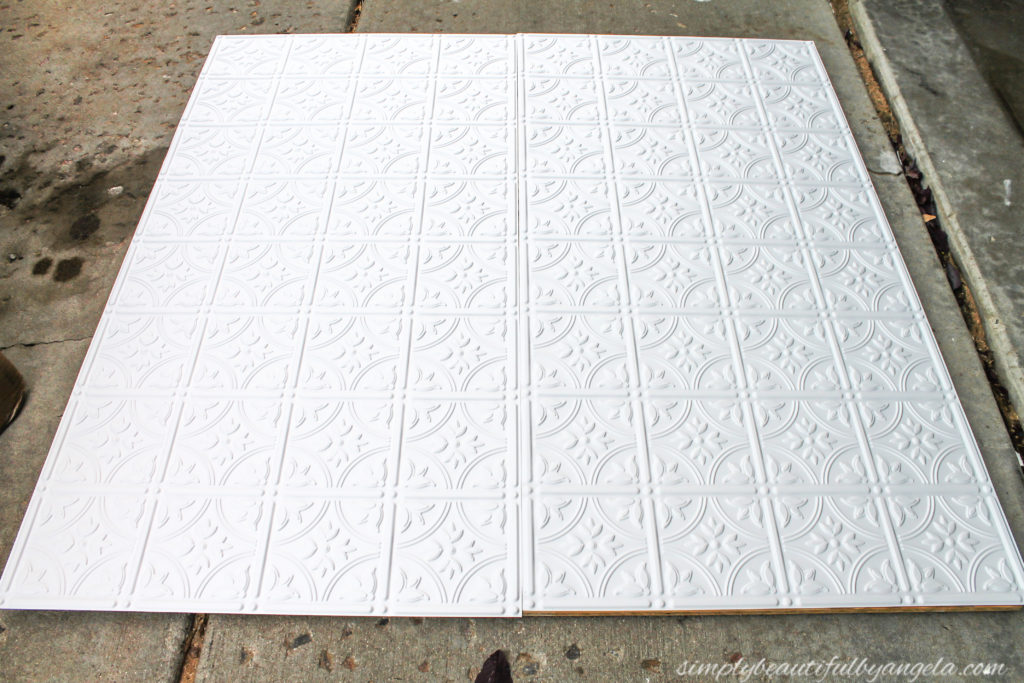
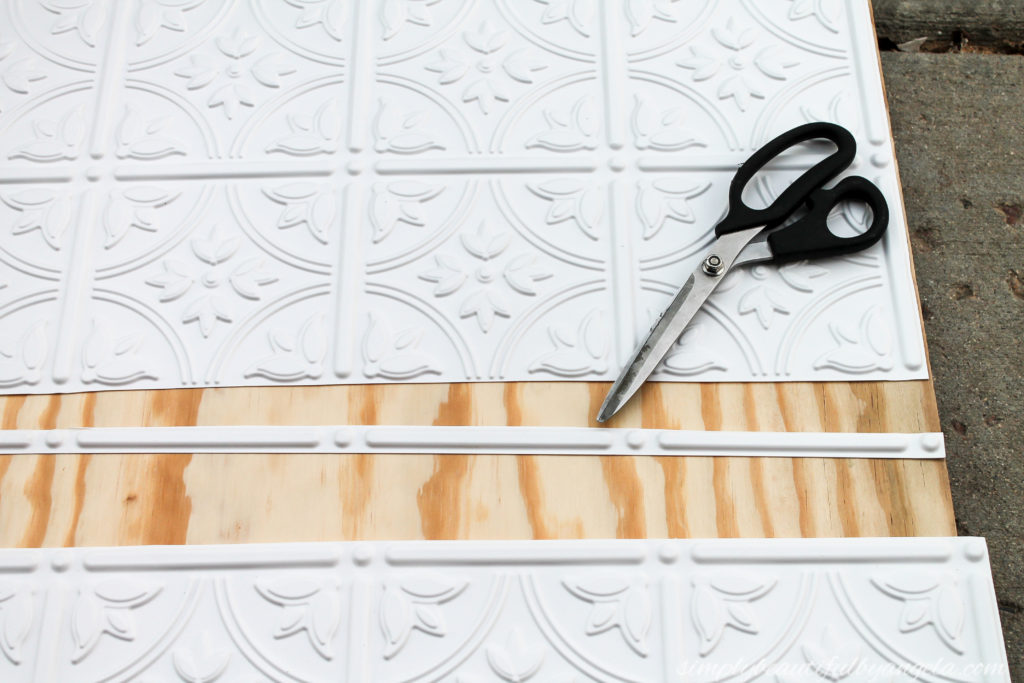
When I placed the two sheets next to each other I realized that the ends doubled up the pattern which of course doesn’t look right.

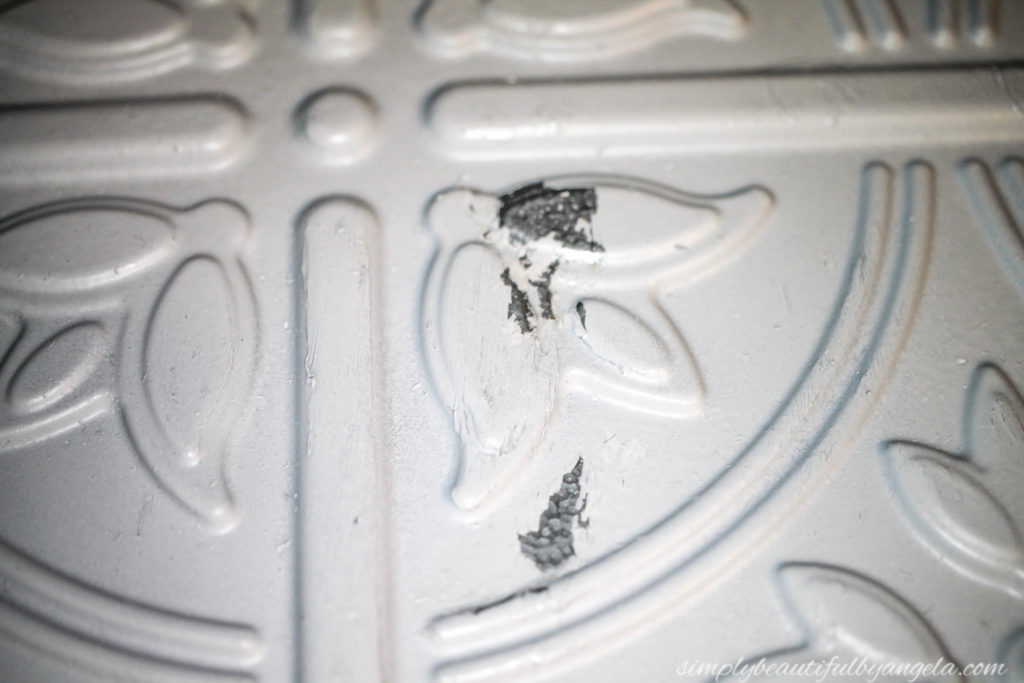
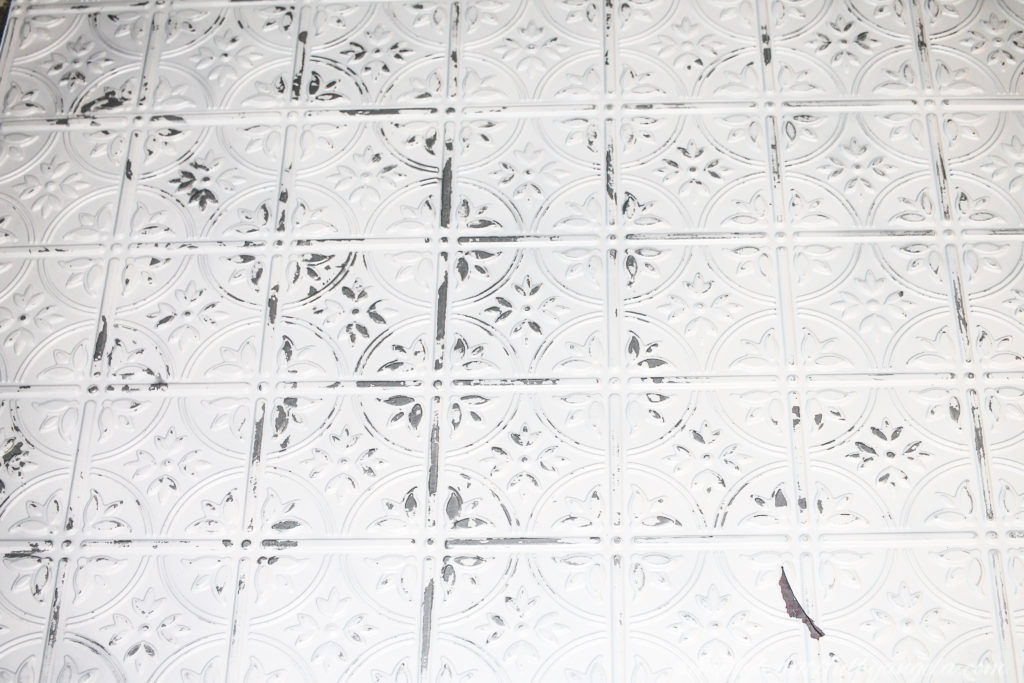
So I used scissors to carefully trim one of them down and created a continuous pattern.
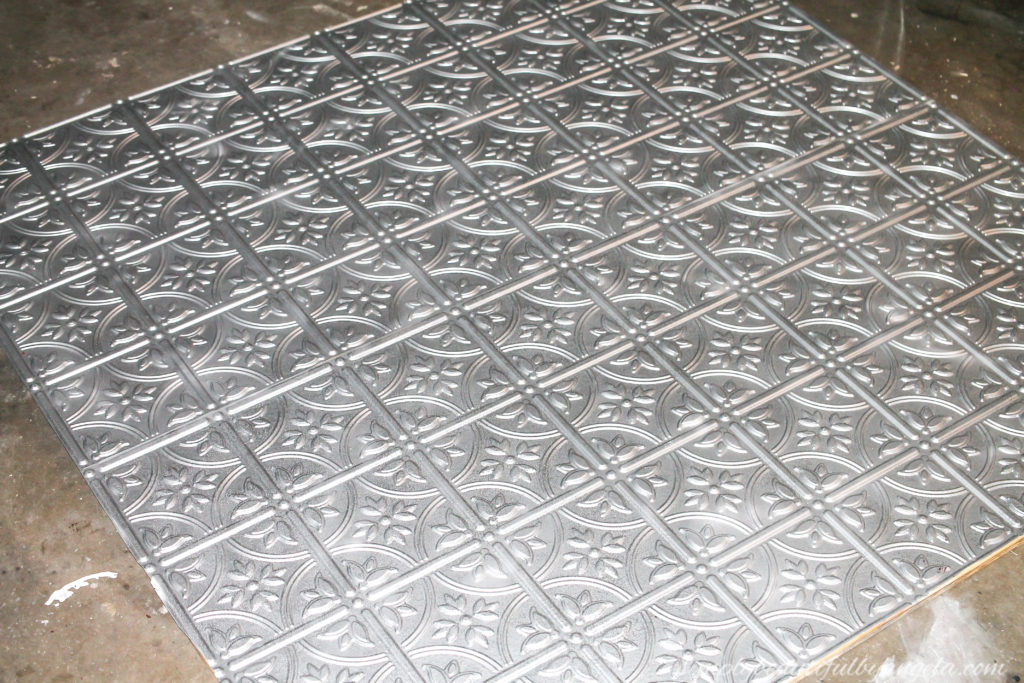
I then used liquid nails to attach the panels to a sheet of plywood and spray painted them with hammered silver spray paint.
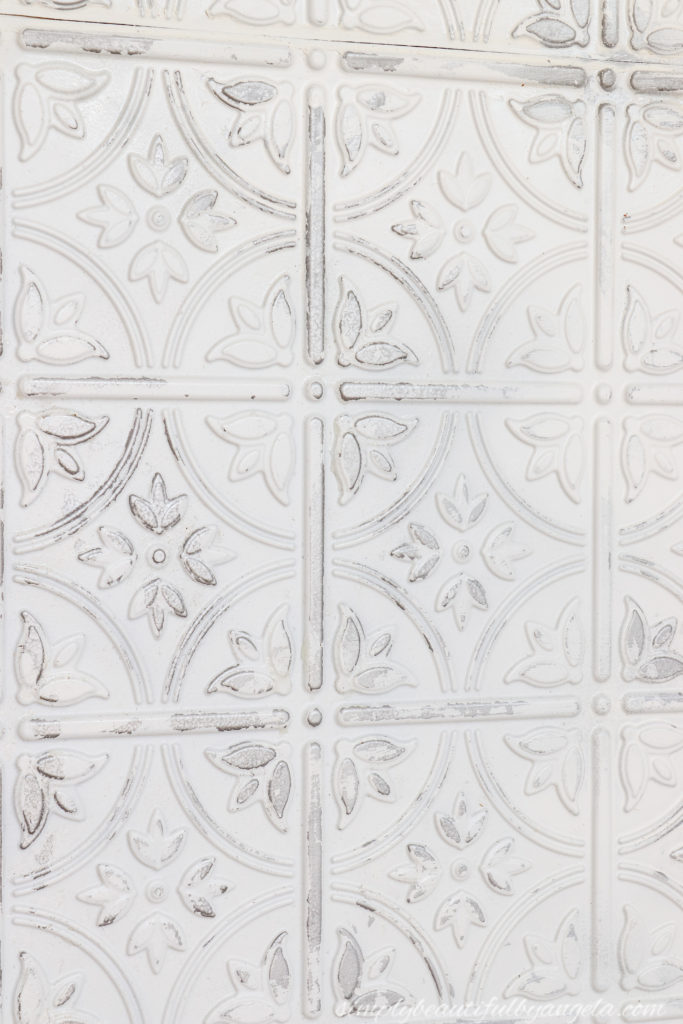
Once it was dry, I went around and swiped some Vaseline on in various spots before spray painting the panels white.
Once the white paint was dry, I went over with a rag and all of the spots that had Vaseline on them peeled off effortlessly to create the perfect aged look.
It was actually quite a lot of fun!
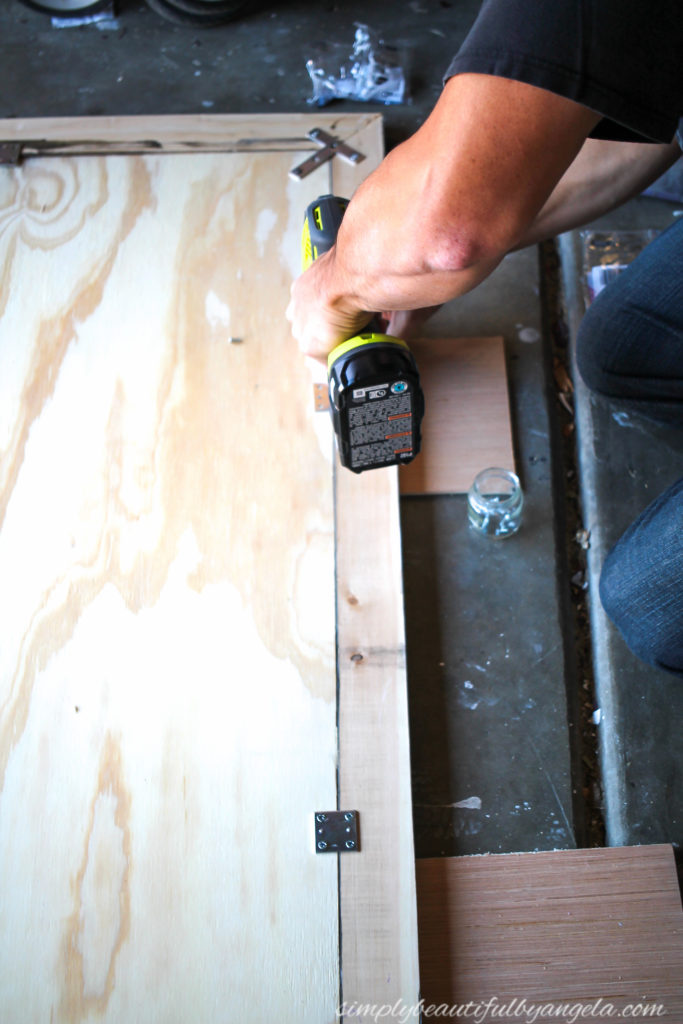
Next it was time to create a frame for my masterpiece. I first finished a couple of 1x3s with Miniwax Dark Walnut stain followed by a whitewash. Once they were dry I measured the lengths needed and mitered the corners. I then flipped the plywood over and placed the 1x3s at the sides. I slid pieces of 1/4″ plywood underneath to make it flush.
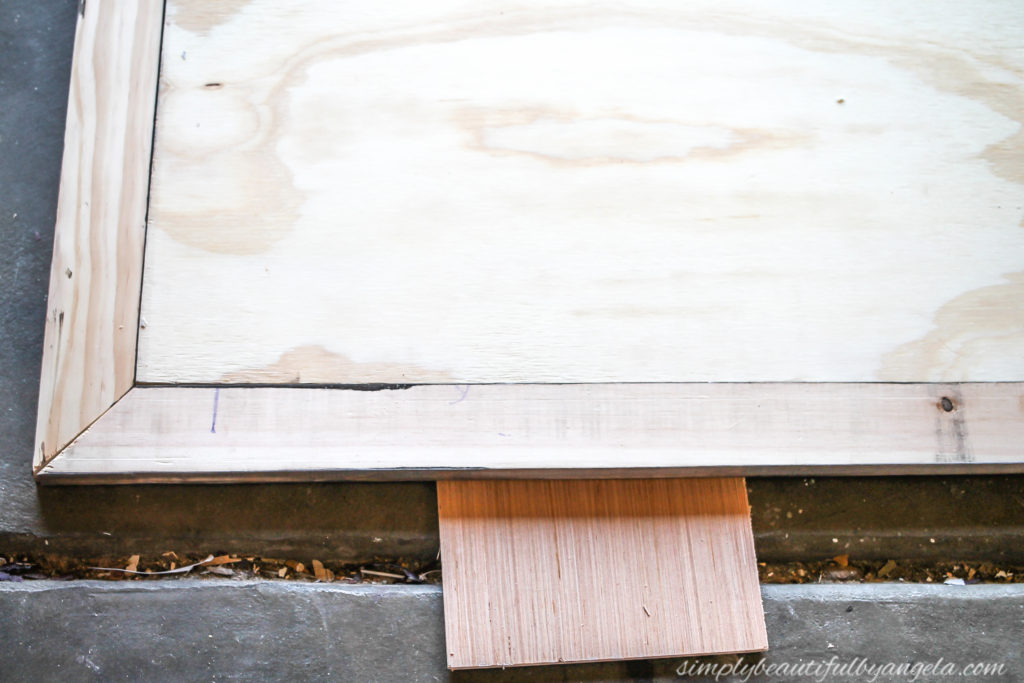
The hubby used T-Braces to secure the frame to the plywood at each corner.
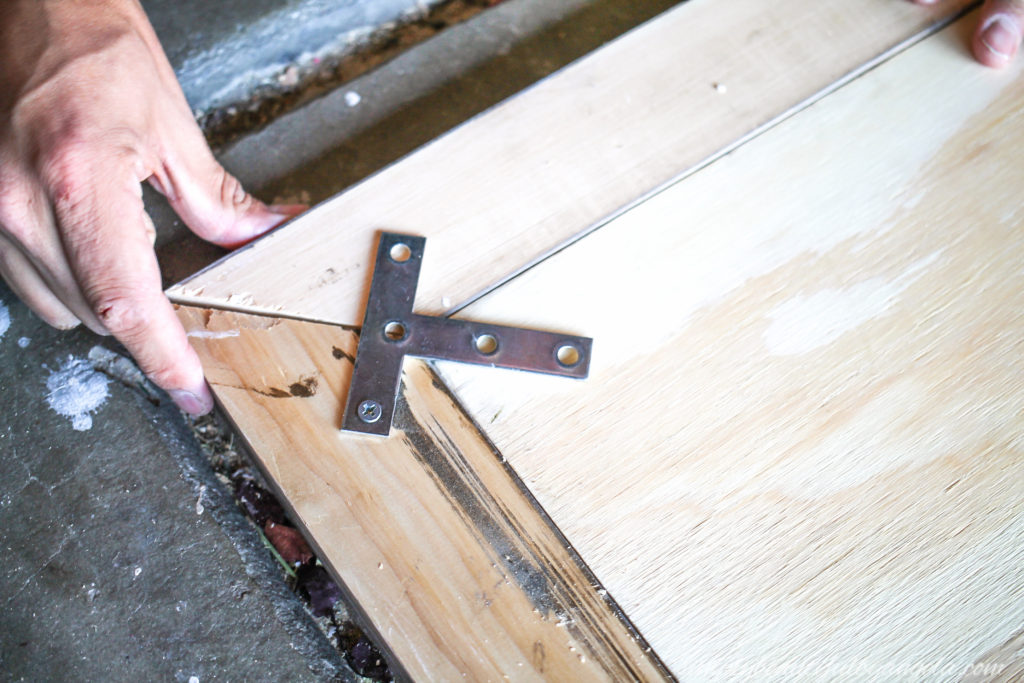
He also added two mending plates to each side to make it nice and secure and added D rings to either side to hang it.
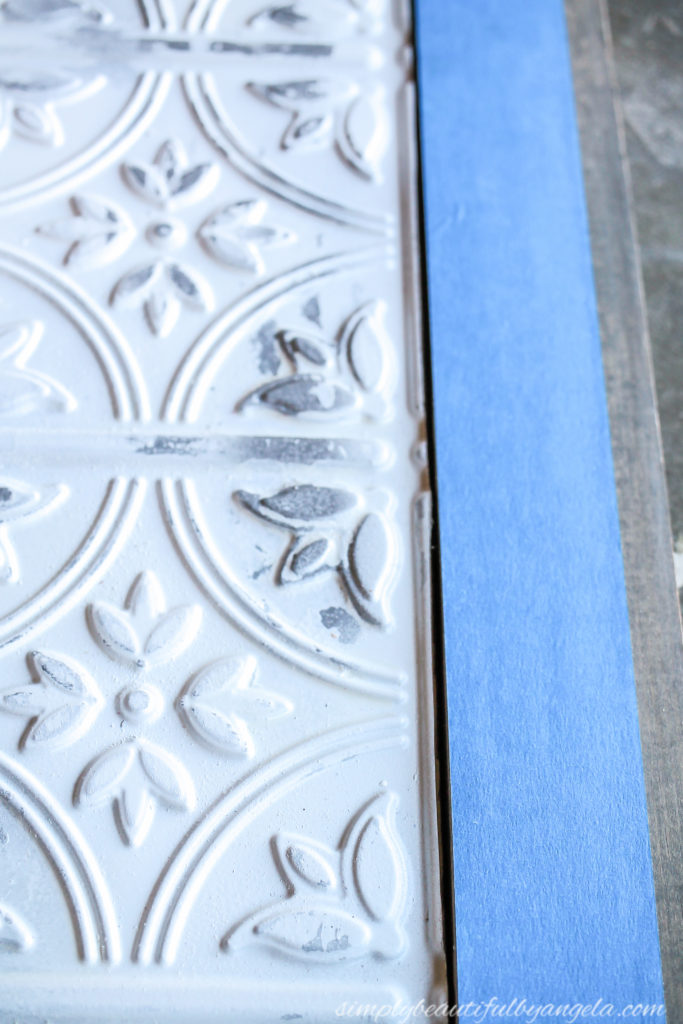
To finish it up, I taped off the frame and applied a line of caulk around the edges to hide the gap between the panels and the wood. The key is to remove the tape while the caulk is still wet–trust me I learned the hard way on this once before!
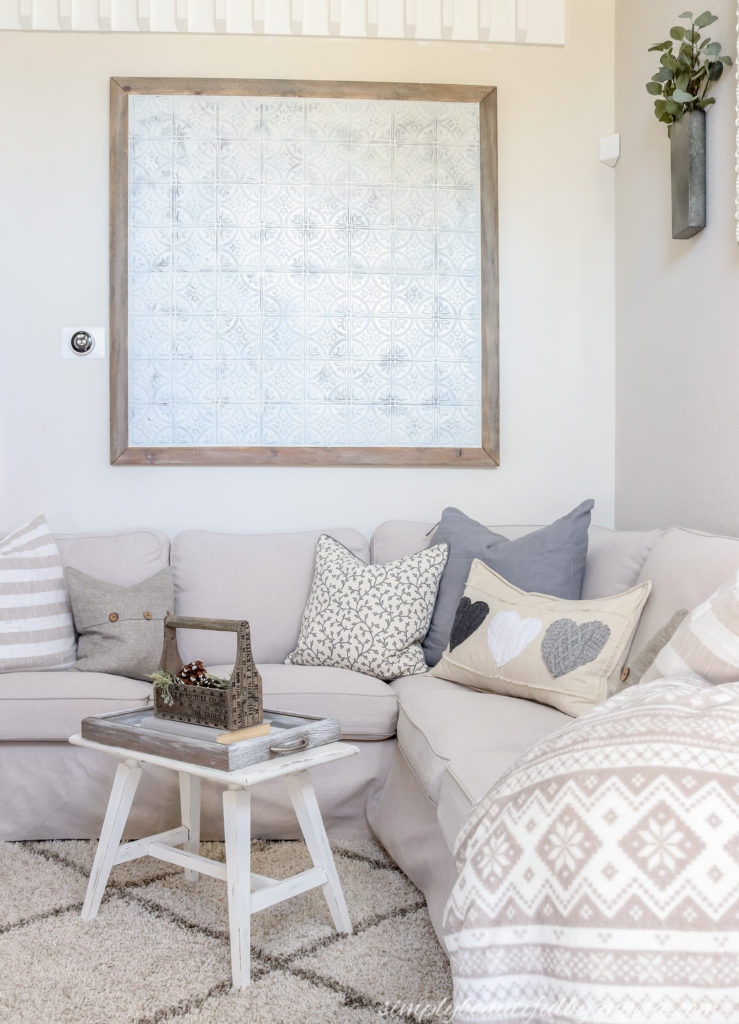
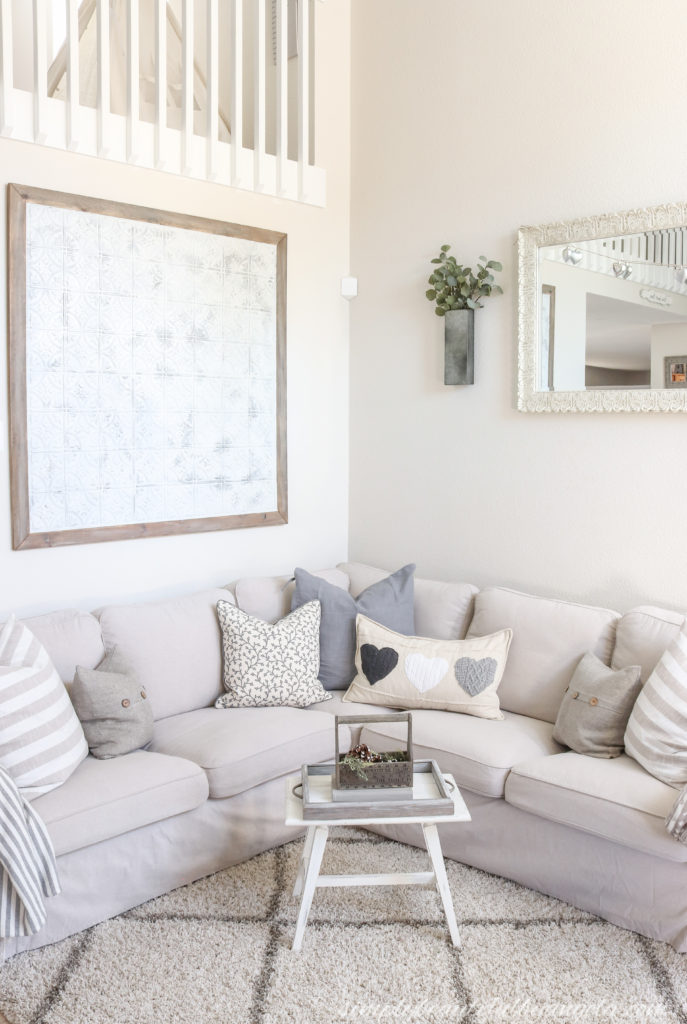
It worked perfectly on the wall that I created it for and filled out the space just as I had hoped.
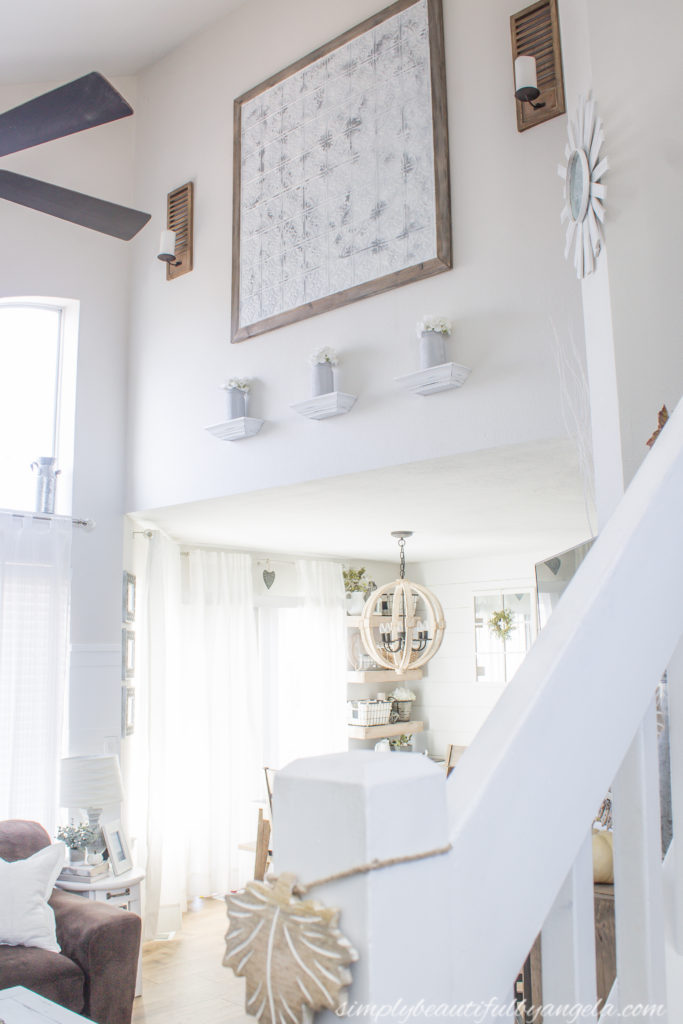
When we moved, it sat in the garage for a long time since I didn’t know where to put it in the new house because it is sooo massive! Finally I realized that what I had originally hung in our front room was kind of small, so I tried switching it out with this and am absolutely thrilled with how it looks here.
I eventually plan to shiplap this wall and I imagine it will look even more beautiful when I do.
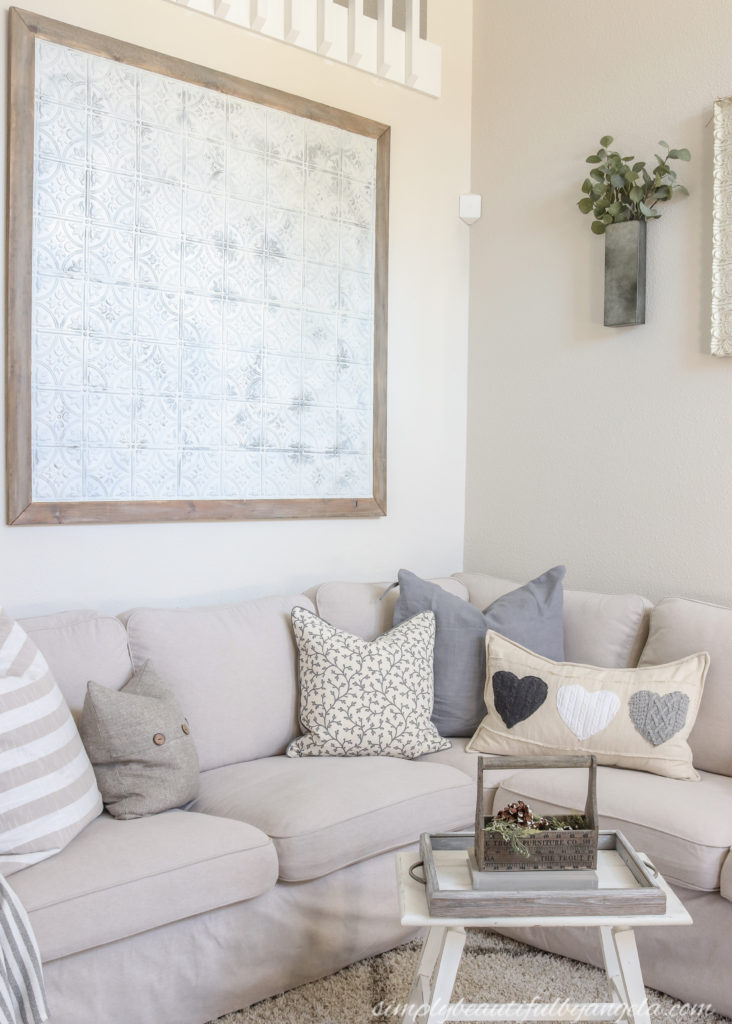
It’s simple but elegant at the same time.
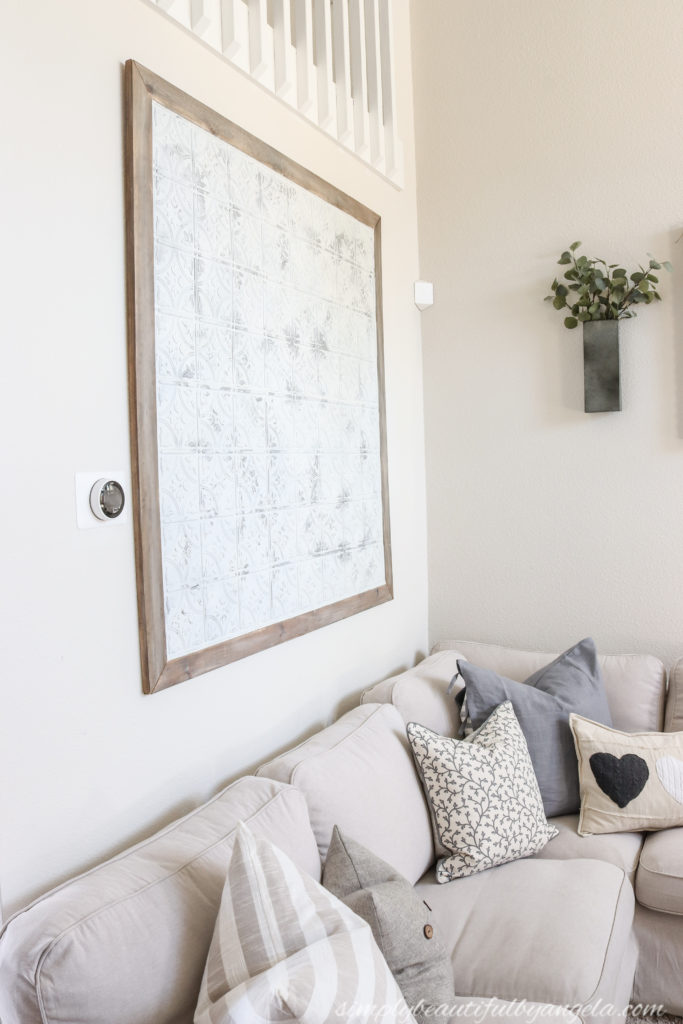
This is the first wall that you see when you walk through the front door, so I feel like it really sets the tone for the rest of the house.
I’m glad that I finally got to share this with you guys! While I was digging through old memory cards to find the pictures for this tutorial, I ran accross a few other projects that I never shared! The goal is to hopefully get to them all one day.
I hope you all have a wonderful rest of the week and a very happy Valentine’s Day. See you all next week!
Linking up to these awesome parties!
That’s really beautiful. I will be featuring this tonight at my Winter Blues Wednesday party that opens at 8pm EST. Please stop by and pick up an I’ve Been Featured button. Thanks. http://diybydesign.blogspot.com
Aww thank you so much Judy! I really appreciate that 🙂
Wow! What a great idea! I love the way it turned out. Thanks for sharing at Sweet Inspiration!