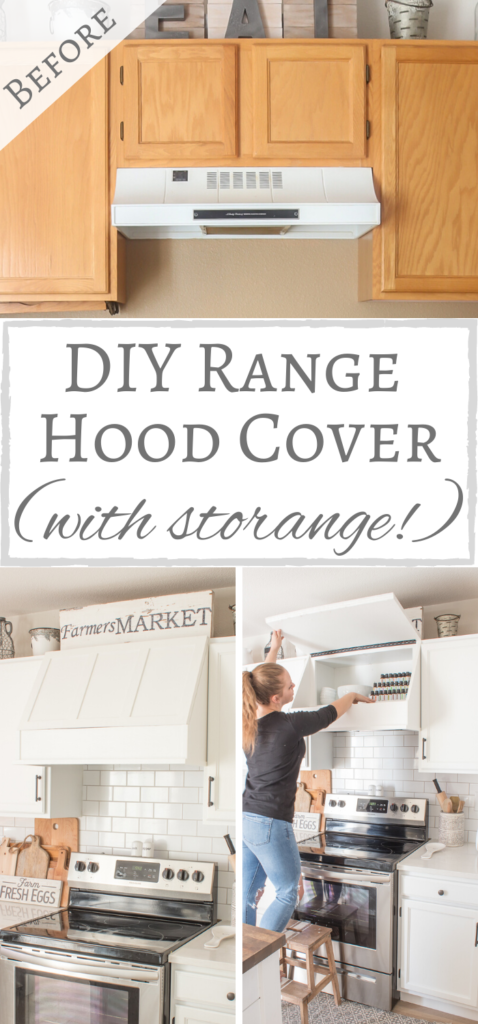
Hey everyone! So I have a confession to make. Ever since completing the kitchen makeover last November I have been stuck in a major rut. Explains why it’s been pretty quiet around here and why there haven’t been many new projects for me to share. It happens to me occasionally and while it’s never a fun place to be, I find that when I do start to get back in to the game I come out with a ton of motivation and ready to take on my biggest projects. Aaaaand I’m happy to admit that I am starting to feel that coming on!
This past weekend I remembered that I never shared a tutorial on how we assembled our vent hood cover. We worked on it the very last weekend of the One Room Challenge, so I didn’t paint the inside of the cabinet since I was short on time. I kept putting it on my mental “to-do” list, but never got around to it. Since I knew that some inside pictures would be a must for this tutorial, I busted out the paint can, grabbed my roller and got to work. Low and behold, I found that it was actually very therapeutic for me and helped me start to feel a little more like myself. (It even gave me the little push that I’ve been searching for to start on our stairs makeover which I’ll share with you guys soon!)
Okay, enough with the rambling…let’s talk about this range hood cover!
For years I’ve been swooning over pretty custom vent hoods. When I started planning out our kitchen makeover I knew that it wasn’t in the budget to have an actual one installed, so faux would be the way to go!
Supplies Used:(Affiliate links may be provided for convenience. For more info, see my full disclosure here.)
- 3/4″ Plywood
- 1×2
- Table Saw
- Compound Miter Saw
- Corner Molding
- Lattice Molding
- Paint Sprayer
- Continuous Hinge
1. Replace Range Hood
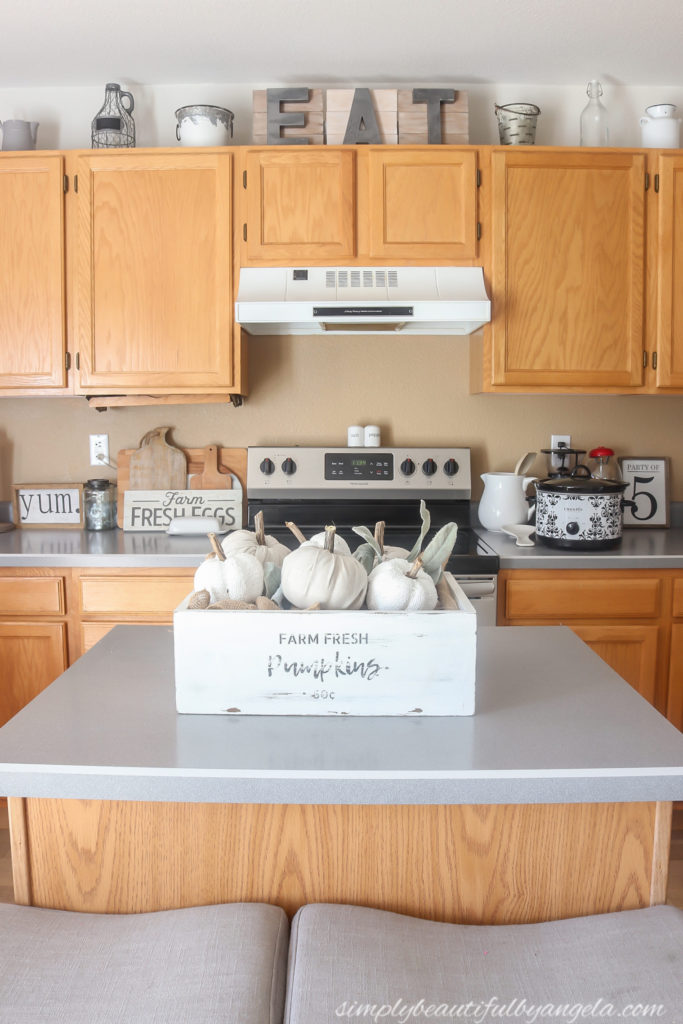
In order for my idea to work, I realized that the old range hood had to go because we needed to have access to the switches from the bottom as opposed to the front. Our existing one was also original with the house (aka nearly 30 years old) so we were definitely due for an upgrade!
I can’t find a link for the one we purchased exactly, but it is very similar in style and price to this NuTone Osmos Convertible Range Hood from Home Depot.
Ours doesn’t vent outdoors, so it was pretty simple to install. We simply turned off the power, unscrewed the old one and hooked up the new one.
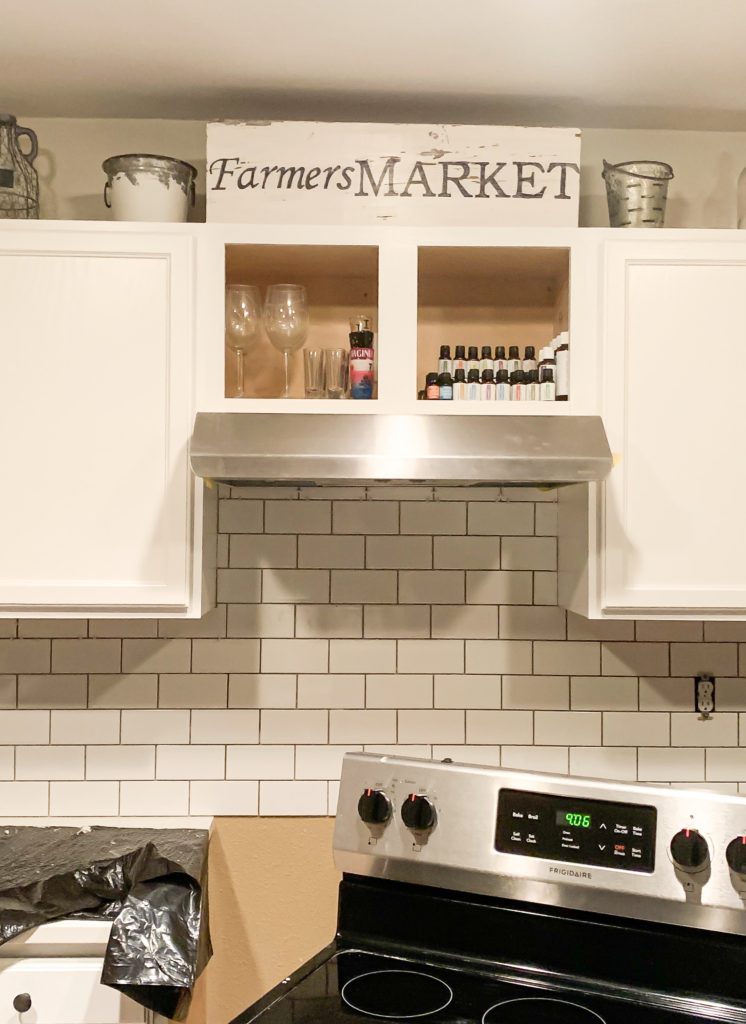
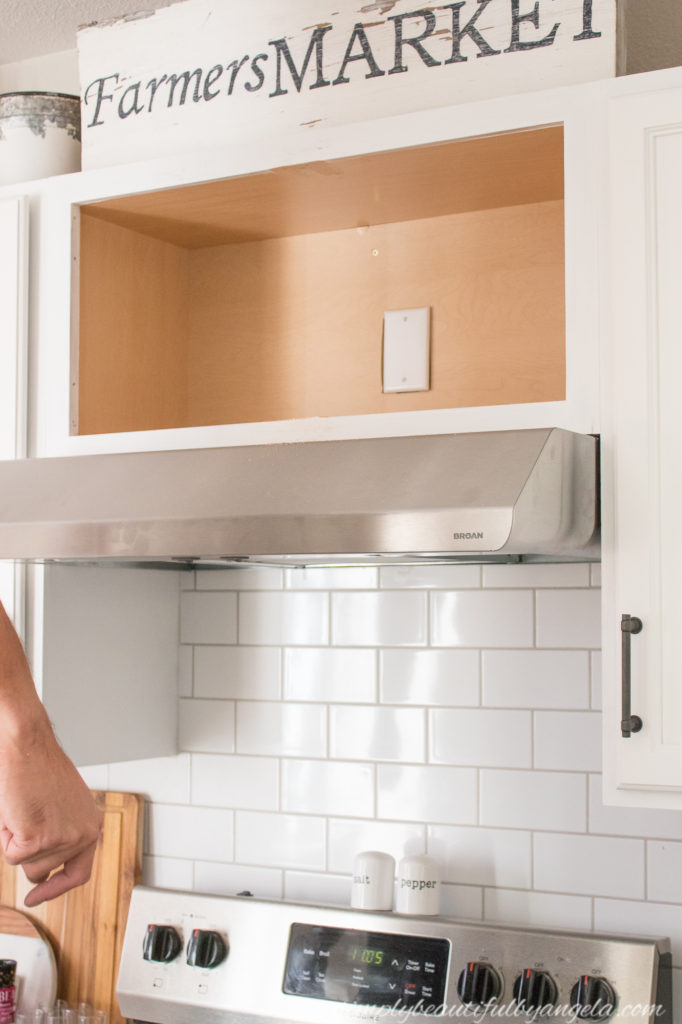
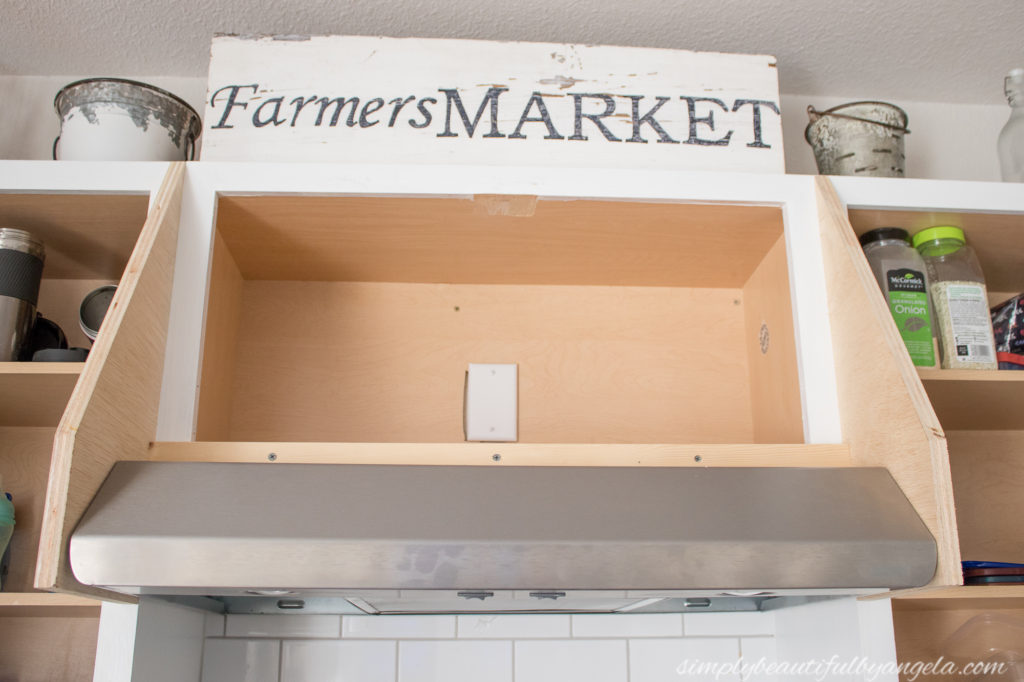
2. Cut Cabinet Divider
We began by using a jigsaw to cut the divider that sat between the cabinets. This is of course totally optional, but we wanted to have one nice big open storage space so decided to take it out.
2. Measure Sides
In order to measure the sides we found that drawing a picture really helped! We measured three places:
- From the top of the cabinet to the bottom of the range hood
- From the front of the cabinet to the front of the range hood
- From top to bottom of the range hood
We then used a straight edge to draw the final side.

3. Create Template for Sides
We drew the measurements out on a piece of cardboard to create a test template.
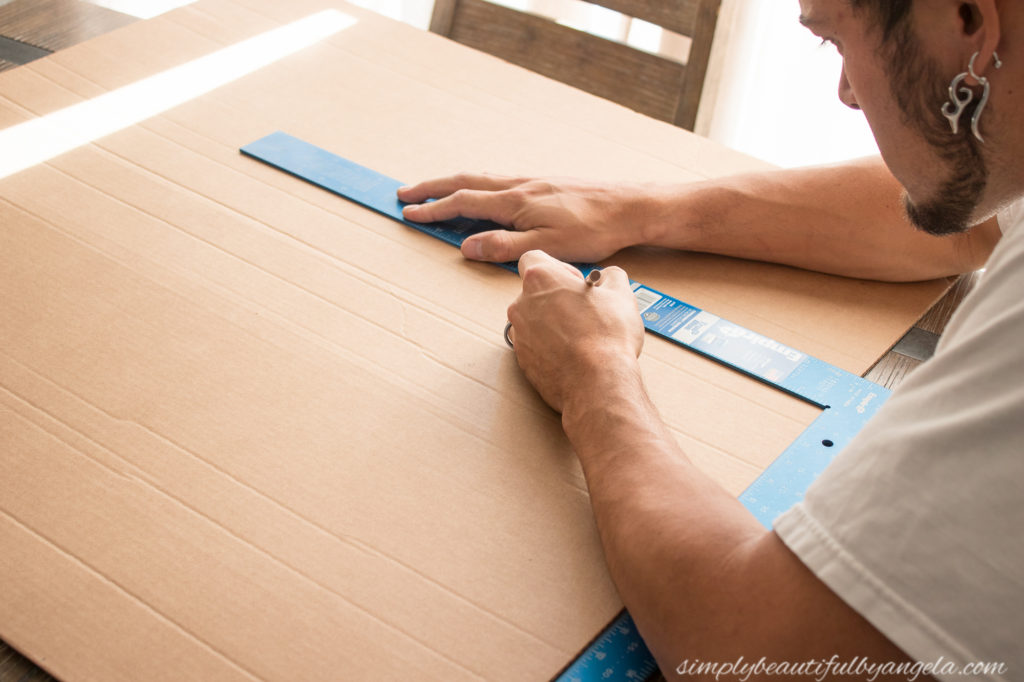
It was a perfect fit so we went ahead and transferred those measurements to some 3/4″ plywood and cut them on the table saw.
4.Attach Cross Support and Sides
We attached each side to a 1×2 that we had secured along the bottom of the cabinets.
5. Attach Front
We then measured the distance between the two sides to get the measurement of the front. Once it was cut, we screwed it in to the sides. I failed to grab a picture, so you’ll have to use your imagination here and picture the front already attached!
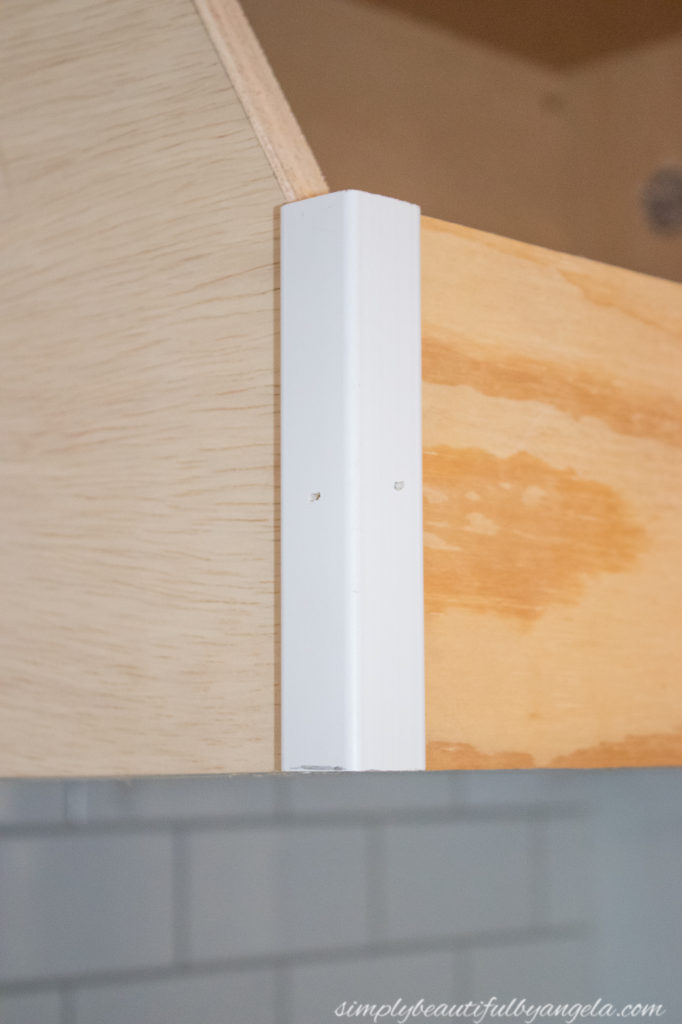
6. Attach Trim
For visual interest and to hide the sides of the plywood, I added some trim.
Where sides met the front, I attached small pieces of corner molding with the nail gun.
And for the bottom I nailed in pieces of 1x2s that I mitered at the corner.
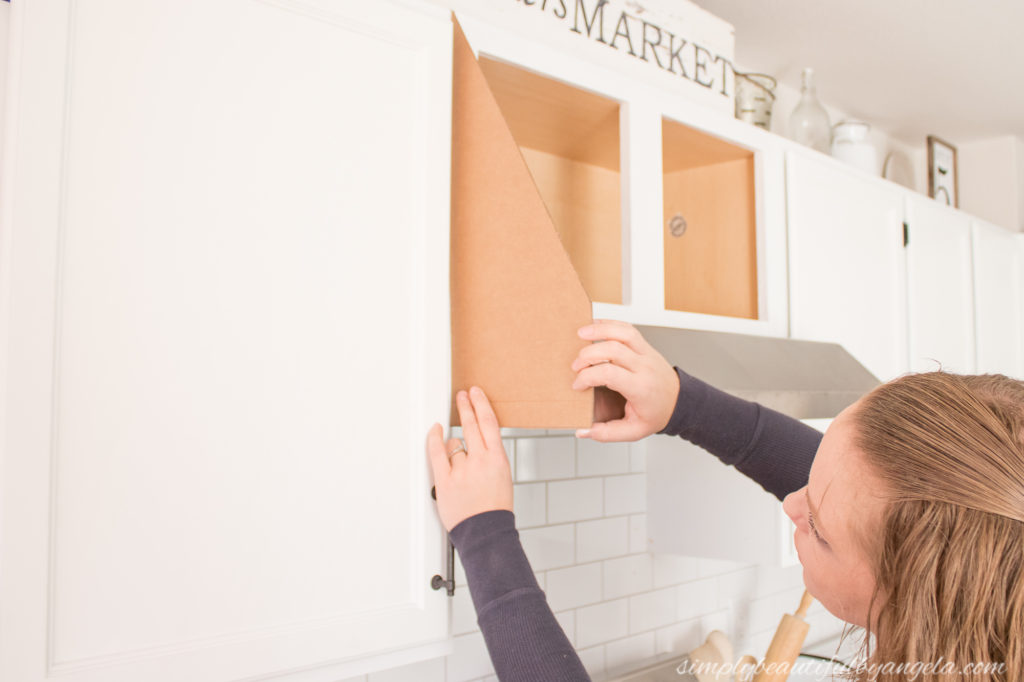
7. Build Door
I totally failed to take a picture of building the door. Luckily it was super simple! After we cut our piece of 3/4″ plywood to the proper width and length, the hubby ran the top and bottom of it through the compound miter saw at an angle so that it would sit flush.
I wish I could give you a better answer for how he got the angle, but when I asked him he told me that “he just kind of eyeballed it.” I would probably have bent some cardboard to find the angle and then transfer that over to the plywood.
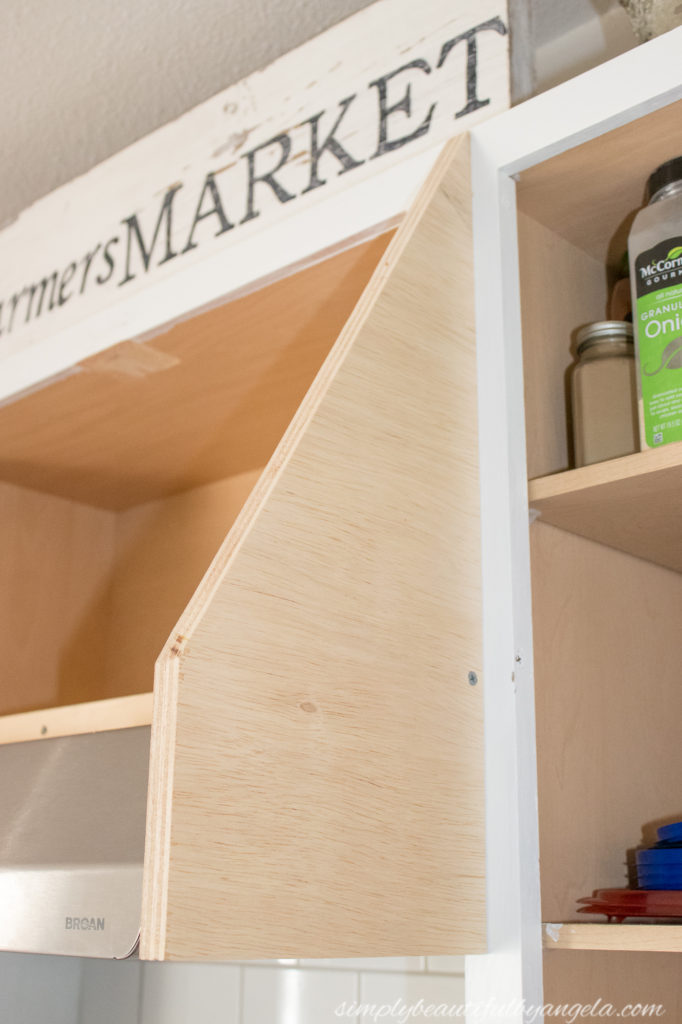
I used wood glue and the nail gun to secure lattice trim on the front. I did set the bottom piece of lattice trim about an eighth of an inch off of the plywood to hide the slight gap at the bottom of the door. If you look really closely at the picture above you can hopefully see what I’m talking about.
I filled the holes and seams with spackle and sanded them smooth once dry. I then gave both sides a coat of primer and paint using my trusty paint sprayer. I used Benjamin Moore Advanced in Snowfall White which is the same paint that I used on the cabinets. I love how quick and easy the sprayer was as opposed to using a brush to get around all of the trim. Not to mention the super smooth finish that it gave it!
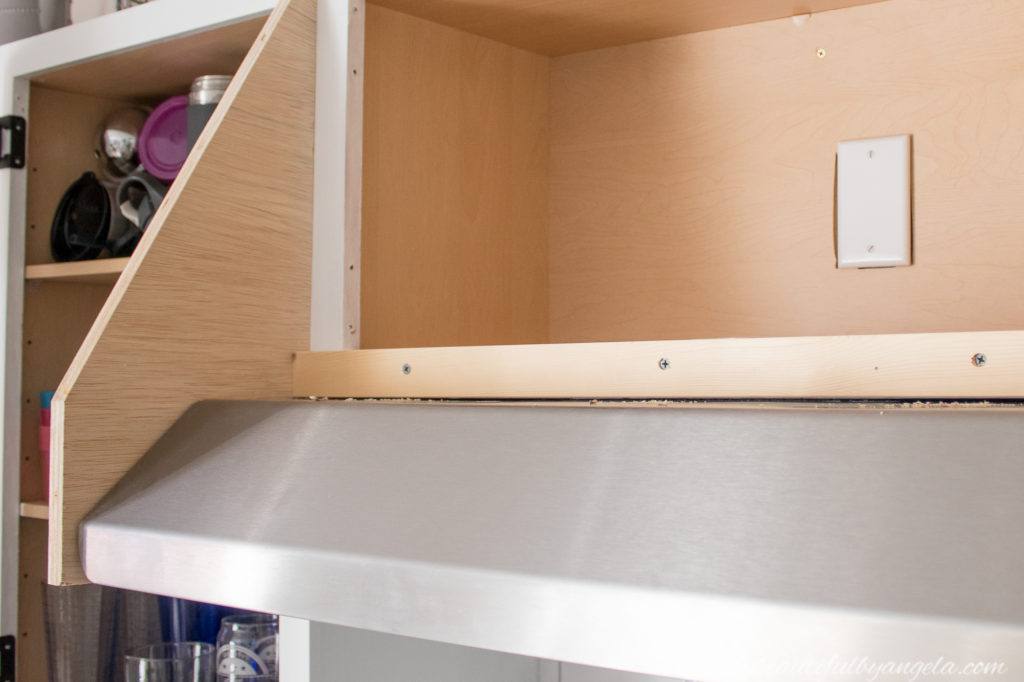
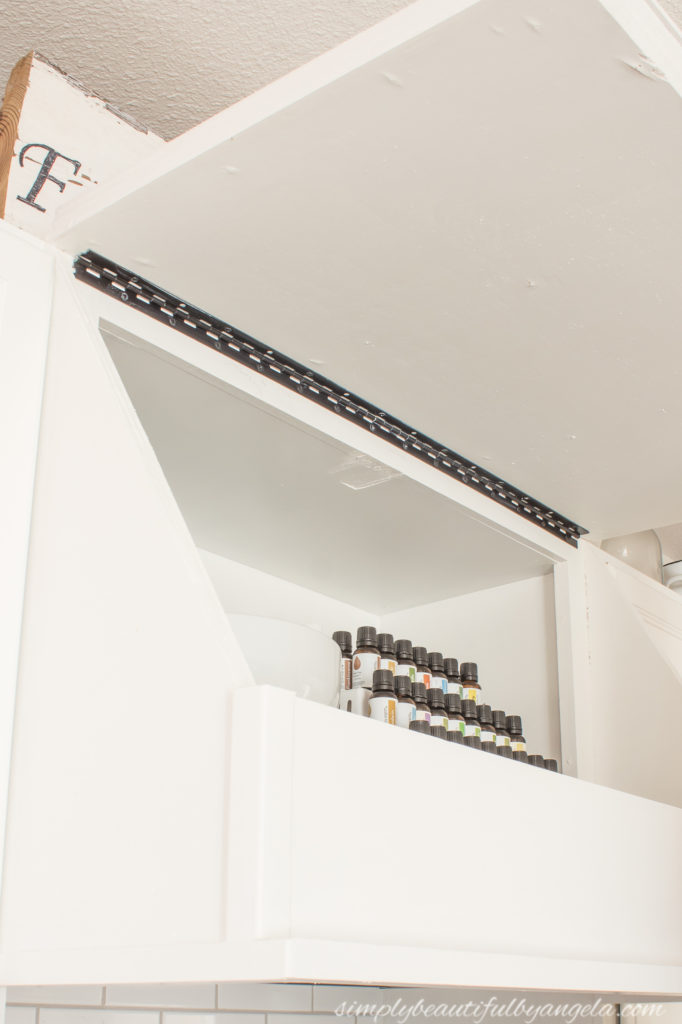
8. Attach Hinge
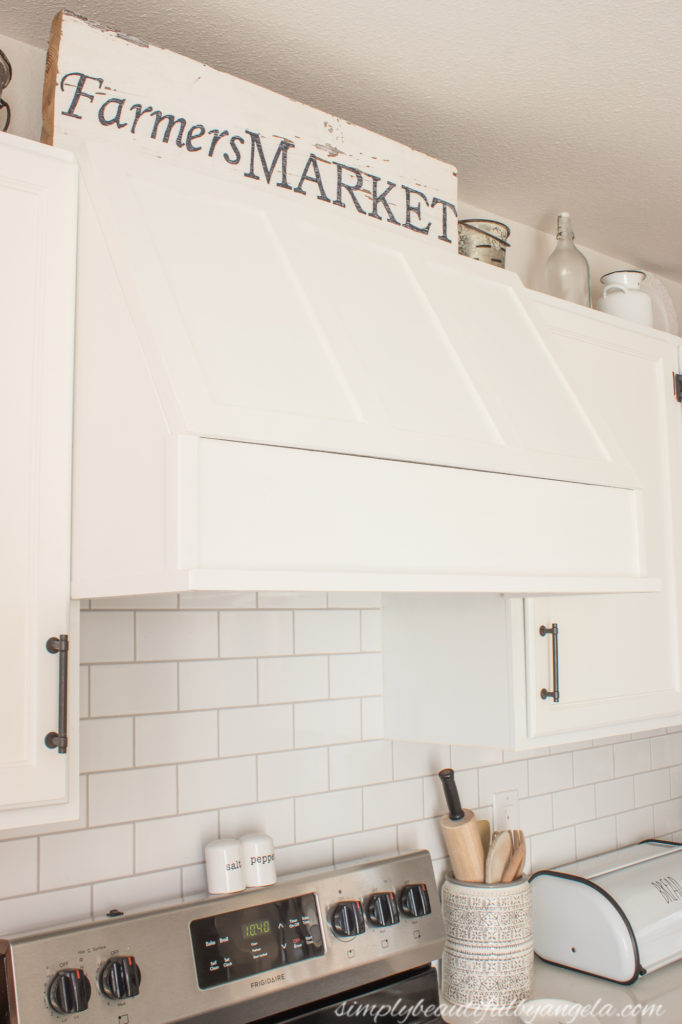
I originally purchased hidden hinges and had planned on routing the door to fit them, but the hubby suggested that we just use a long continuous hinge instead. It was soooo much easier to install and it’s totally hidden from view since nobody is going to be looking at it from the top.
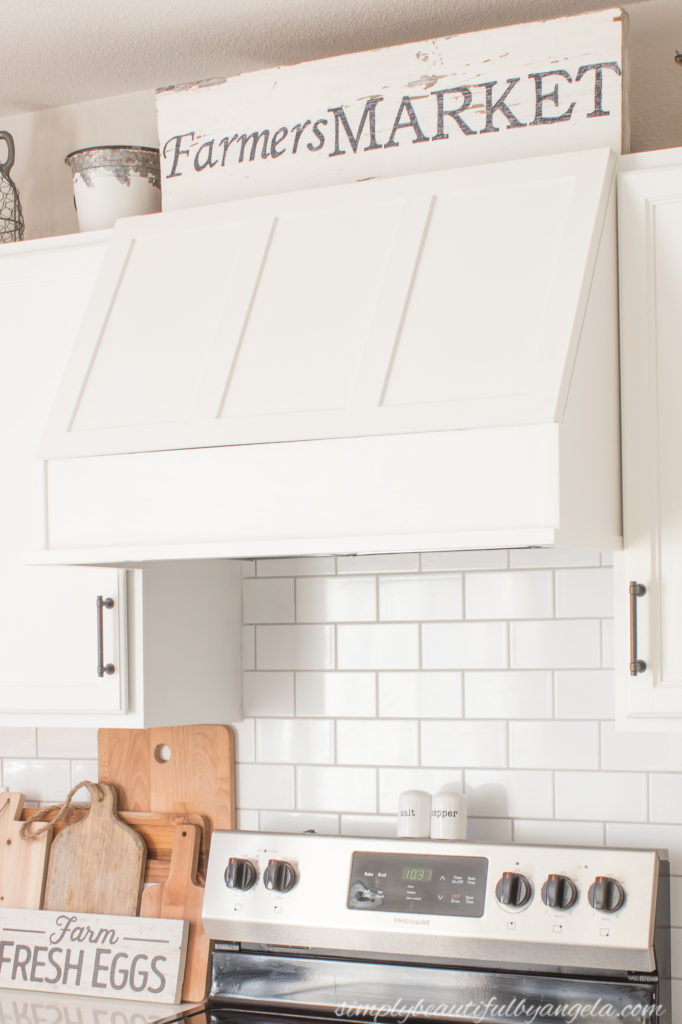
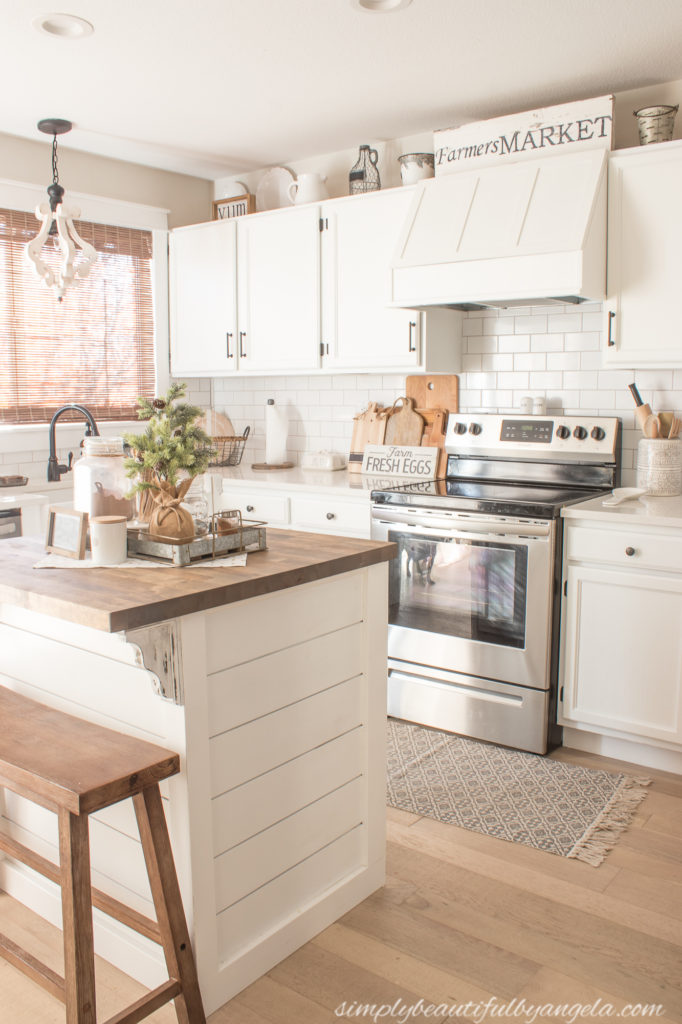
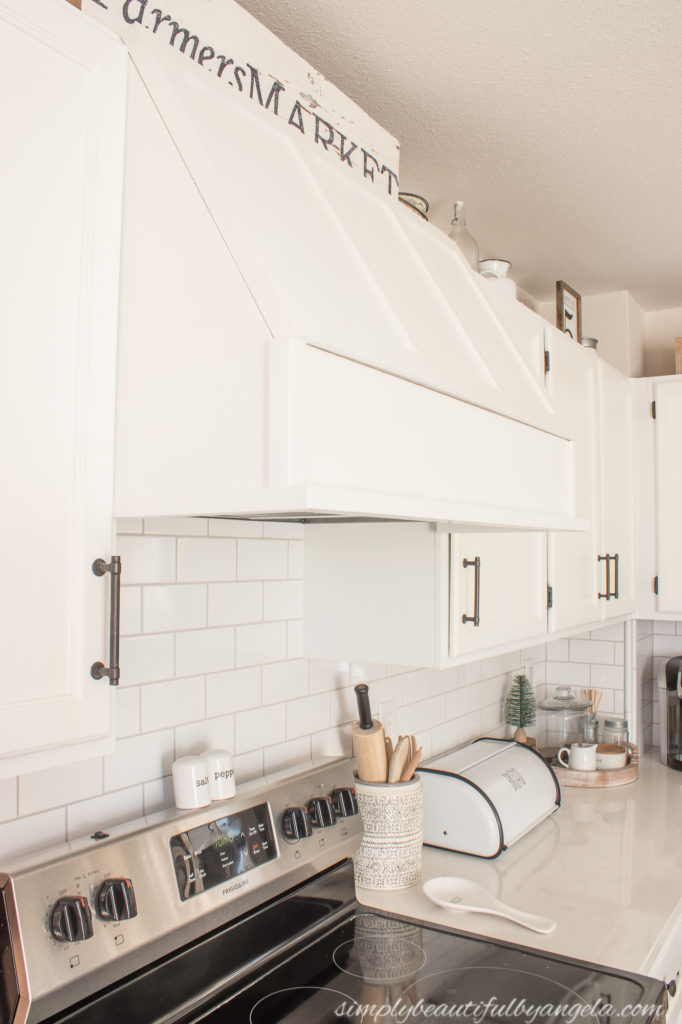
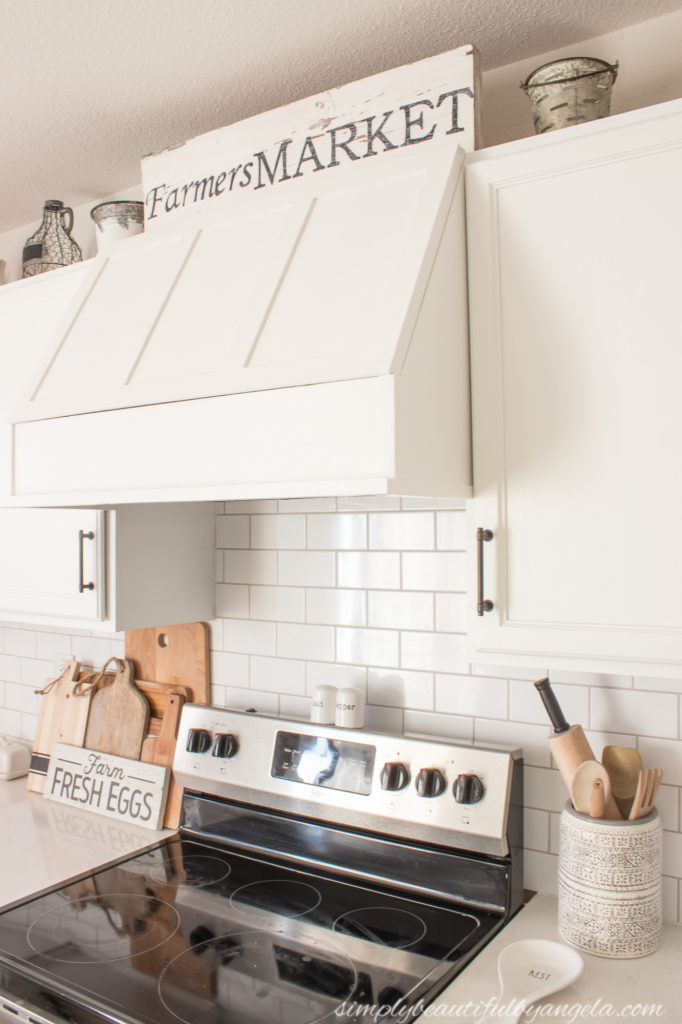
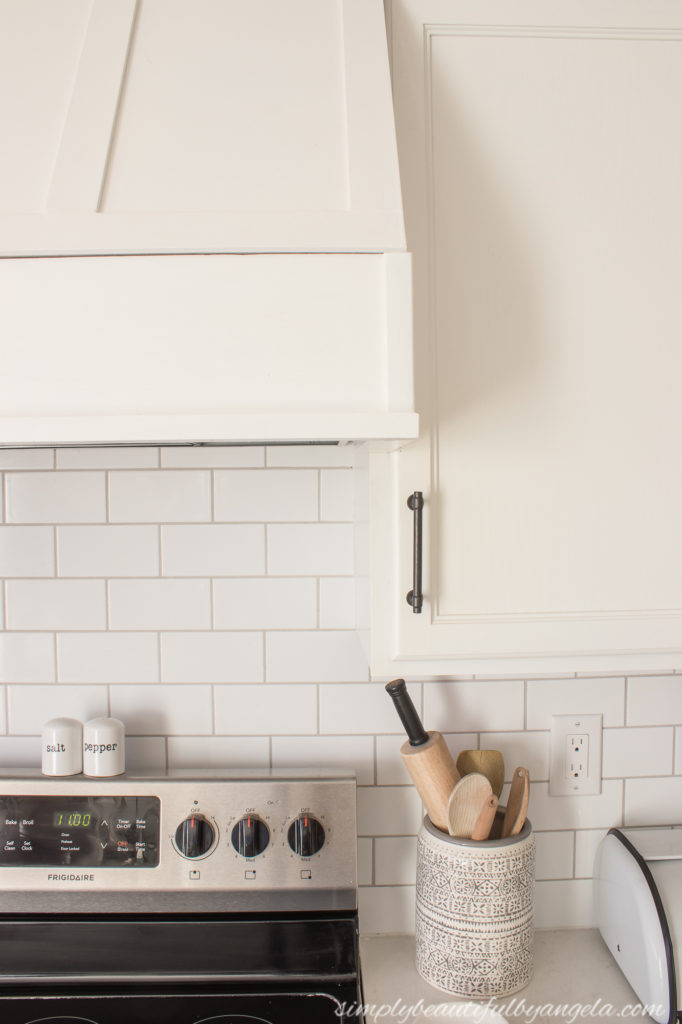
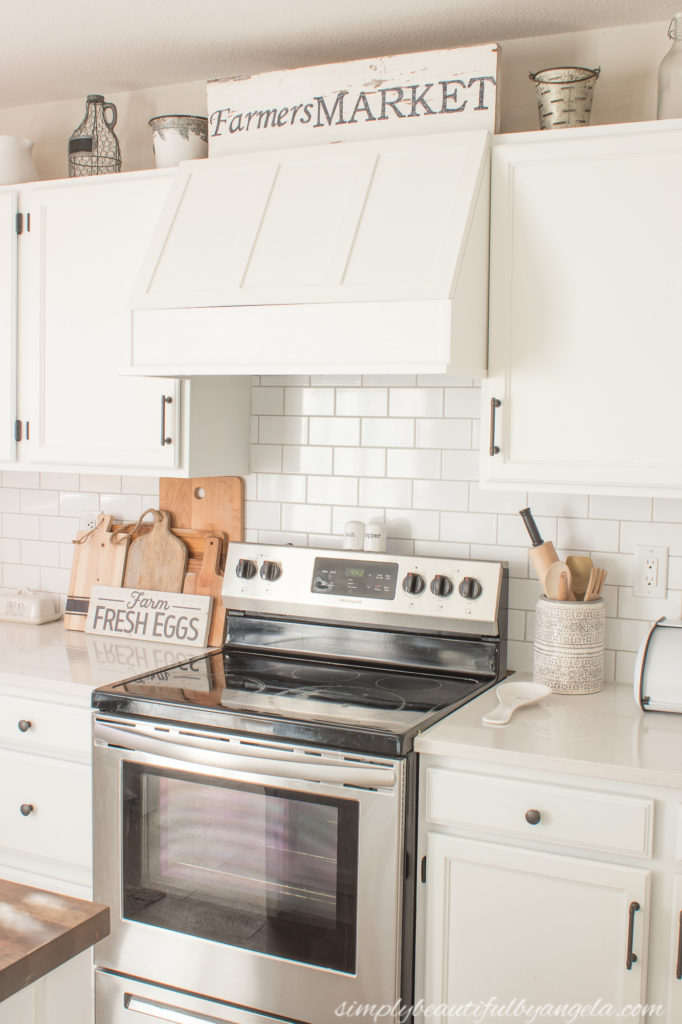
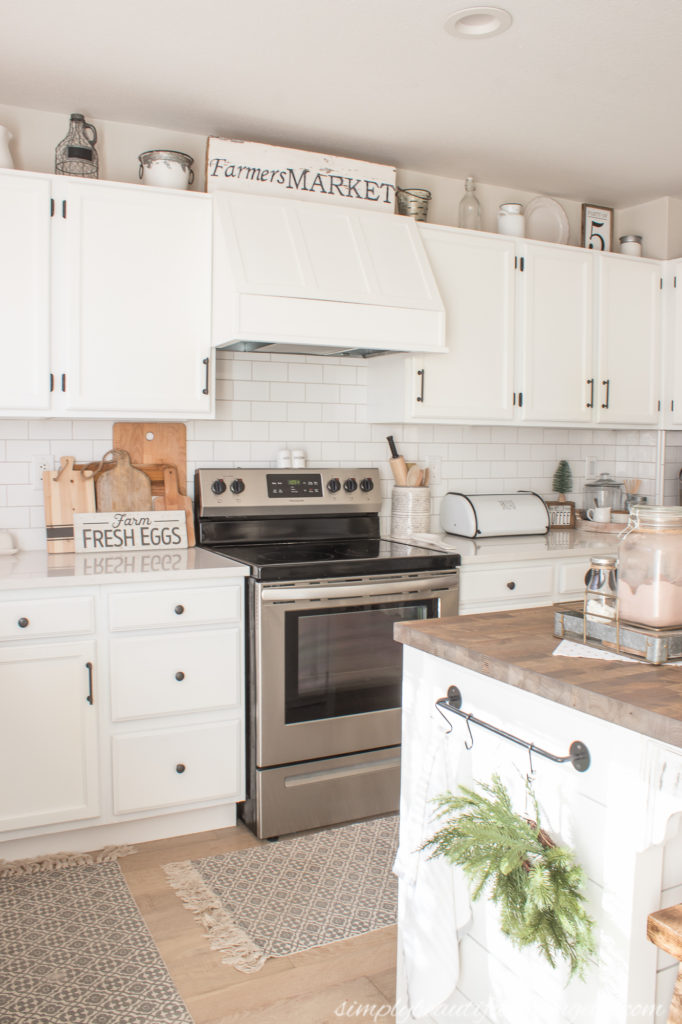
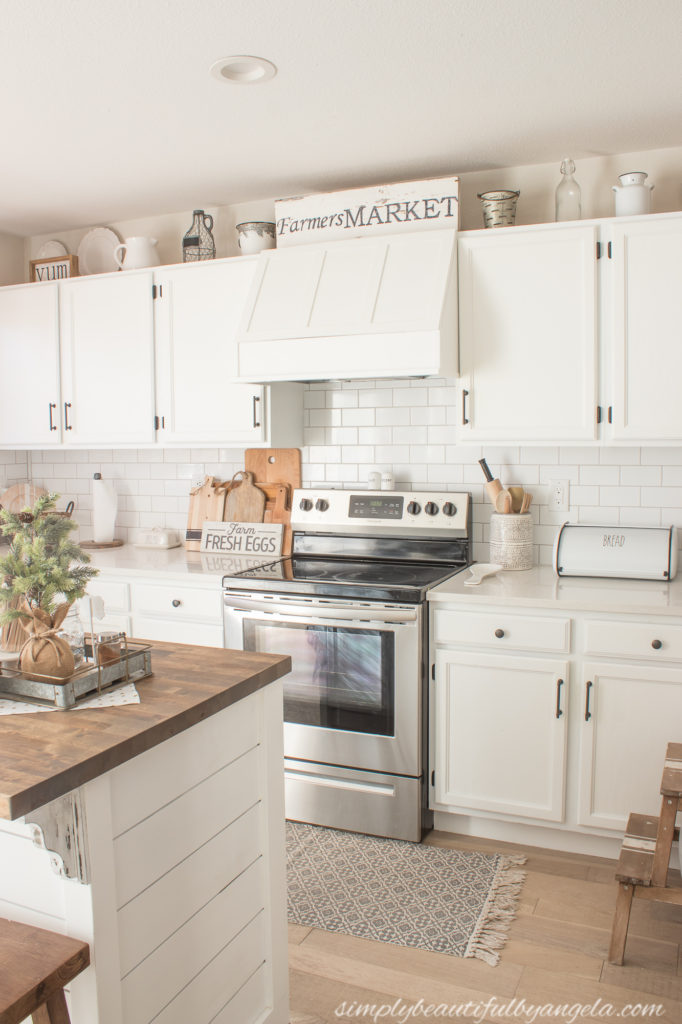
Here is how it turned out!
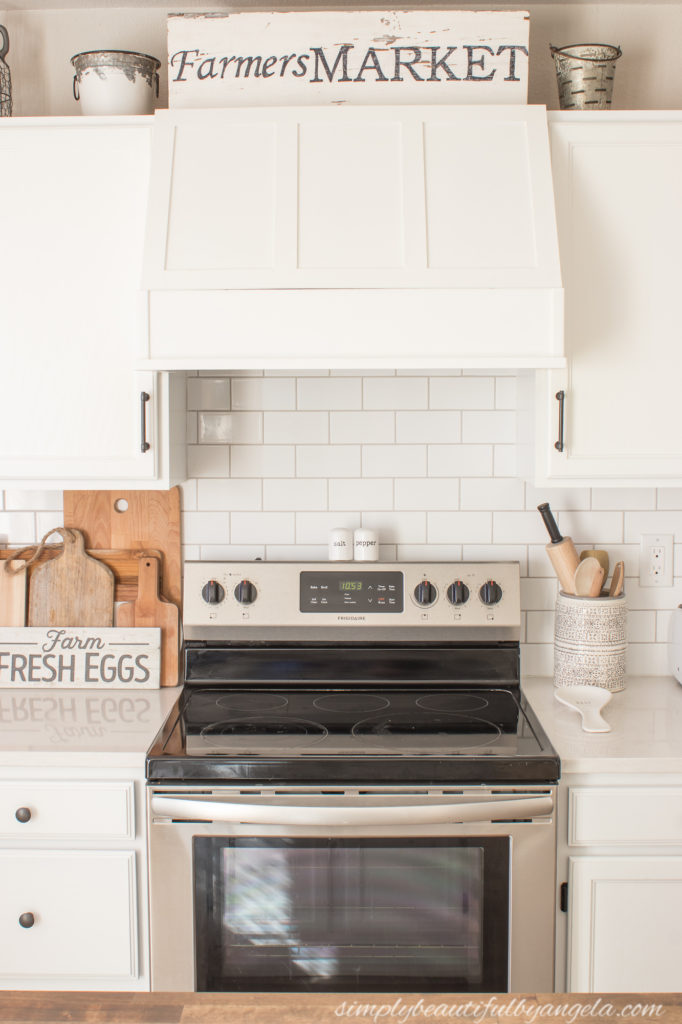
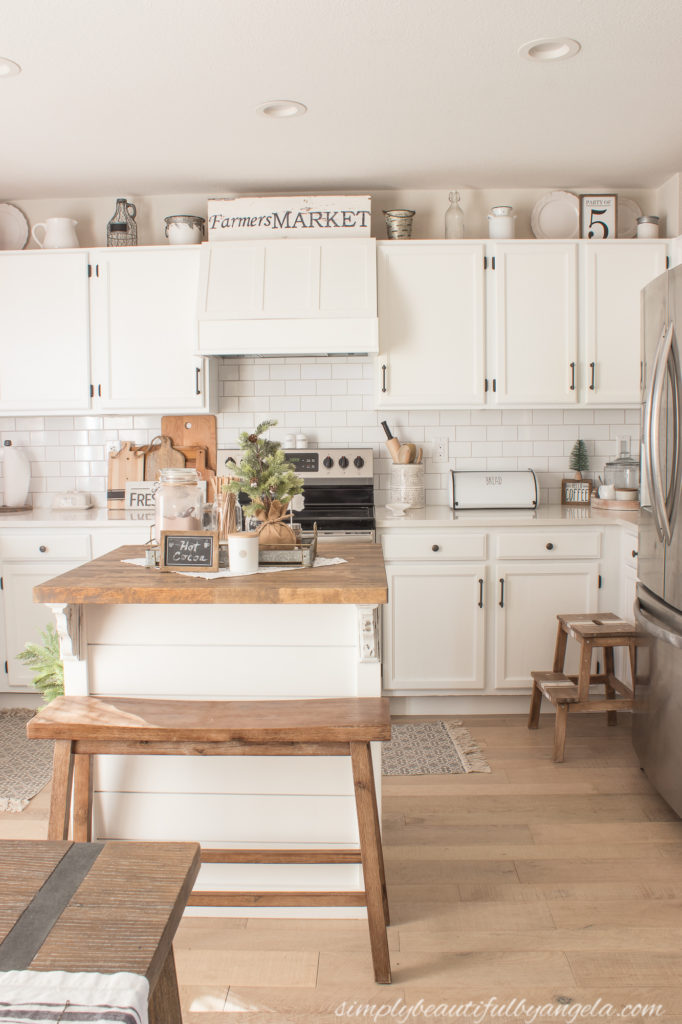
I feel like it’s one of the main focal points of the entire space.
I almost forgot to mention that I added a good amount of spackle to the exposed plywood on the sides of the door. It sat like that up until this past weekend when I finally sanded and painted them.
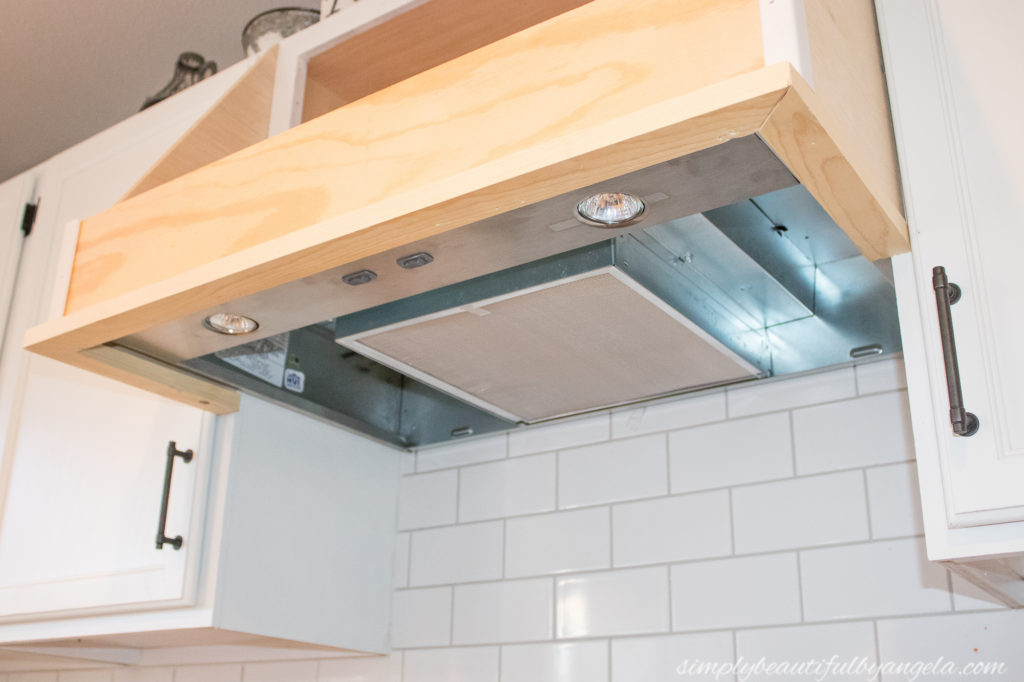
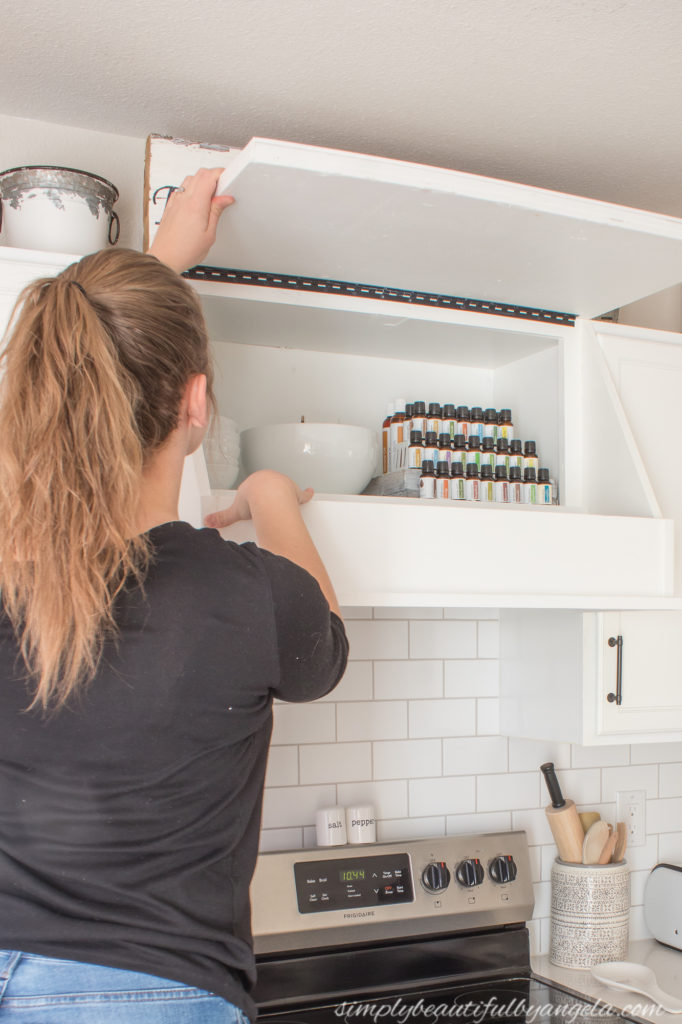
Here is what it looks like from underneath.
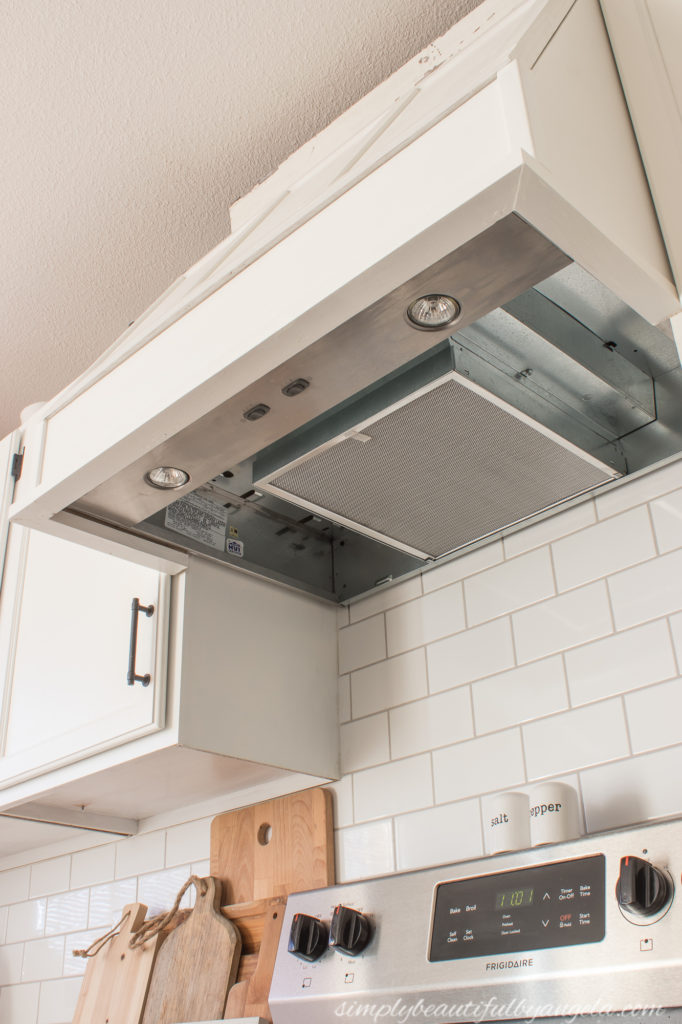
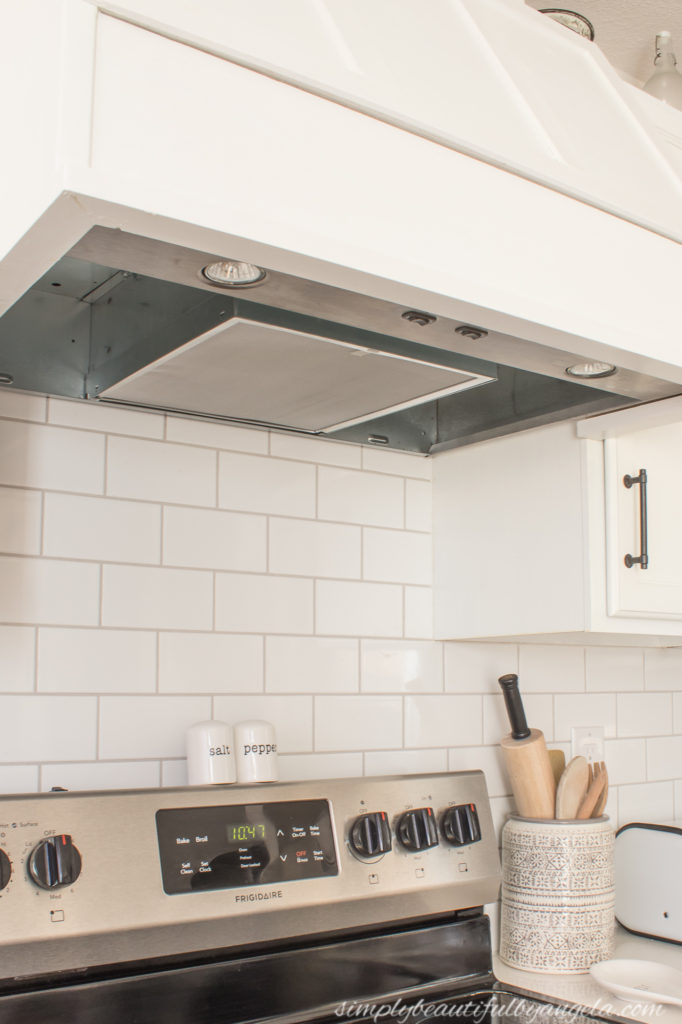
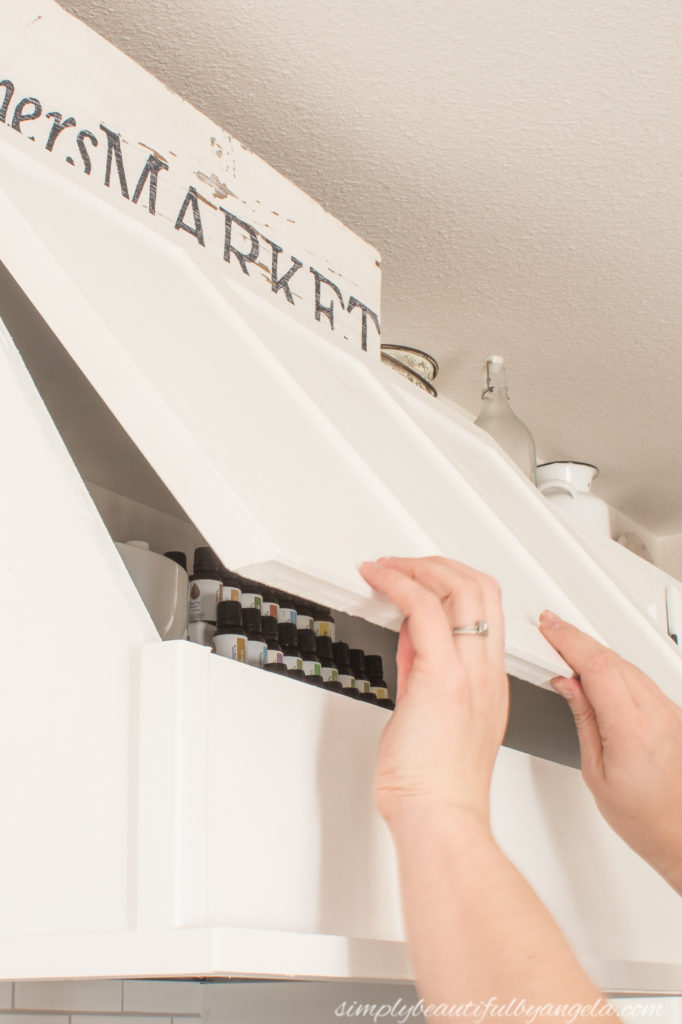
The slight gap that the door leaves is hardly noticeable and the fact that we still have access to our storage makes it totally worth it!
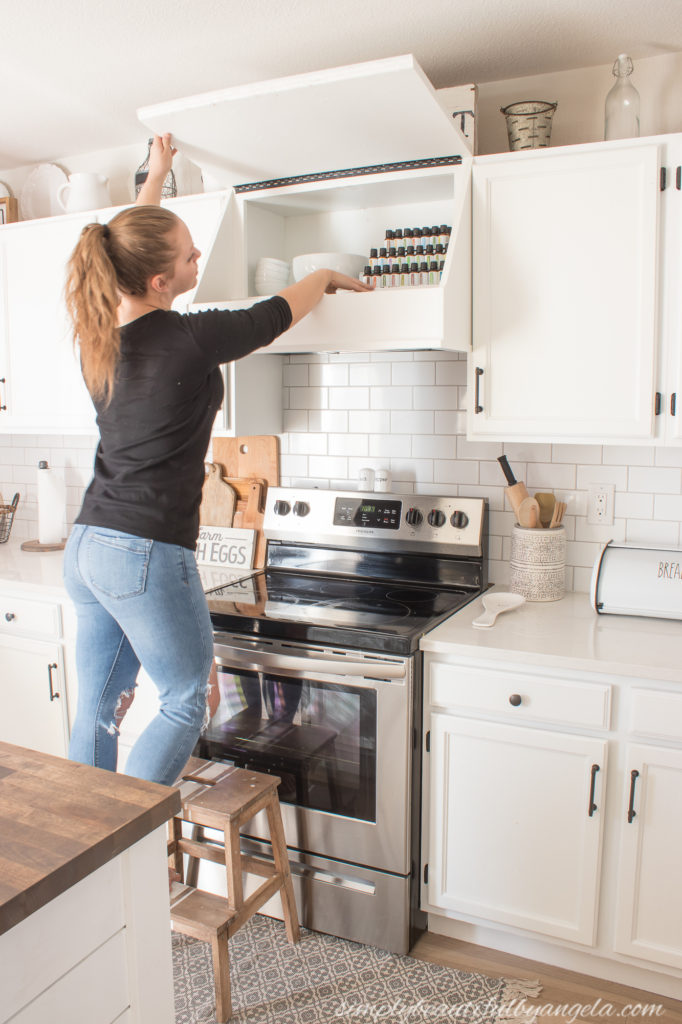
I like to keep all of my essential oils inside, along with extra serving bowls. Eventually I may add some sort of lid support to keep it open, but for now I just bring a stool over anytime I need up there!
I honestly came super close to staining it, but in the end I’m happy that I went with white because I like the clean and bright look that it gives the kitchen.
Also, I’m happy to report that cleaning grease off of it has been a total breeze using a magic eraser.
I feel like I’ve been out of practice for writing tutorials so I hope that made some sort of sense! I believe I only have one tutorial for the kitchen makeover left which is painting the cabinets. I’ll try to have that up for you guys very soon!
Linking up to these awesome parties!
What a clever idea. I love the extra storage space!
Thank you so much Jo! Yes, you can never have enough!
Wow! That is an amazing transformation and I love that it is still a functioning space. Very well done!!
Thank you Sarah!
Your kitchen was already awesome, I love how you have decorated, but the addition of creating more storage turned out great. Thank you for sharing on #omhgww last week, this week your post is being featured and was Chosen by Co-host Indah // My Purple World!!
I hope you will stop by again and share your latest updates!
Wishing you a great week and Happy Valentines!
Thank you sooooo much Karren, I really appreciate it! 🙂
You guys did a wonderful job on this. I love the idea of keeping the storage. Great job. Visiting from Tuesday at our home.
Thank you so much Tina!
Love how it has the look of a farmhouse range cover but the function of a cupboard – brilliant idea!
Thank you Marie!! Best of both worlds right? 🙂
Clever use of space, very creative.
Thank you Anita!!