Happy Friday and happy St. Patrick’s Day everyone! As promised, I am back today to share another fun furniture flip that I finished last week. I had a wild vision for this one and I honestly wasn’t sure if it was going to turn out or not, but I am so glad that it did!
Supplies Used:(Affiliate links may be provided for convenience. For more info, see my full disclosure here.)
This little accent table was given to me by a friend years ago. I had painted it and we enjoyed it in our front room for a few years, however the paint had started to chip away in some areas so it was time to fix it up so that I could sell it. The hubby and I took turns sanding it smooth. We started with 80 grit followed by 150 grit. As you can see this poor thing had endured multiple layers of paint over the years!
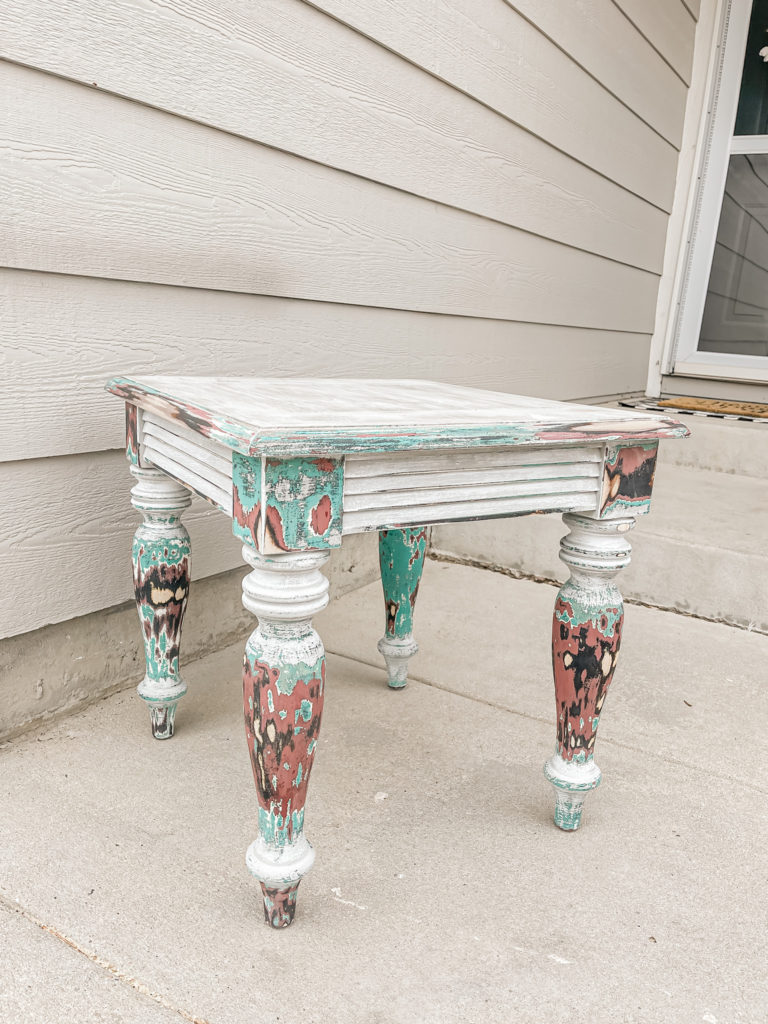
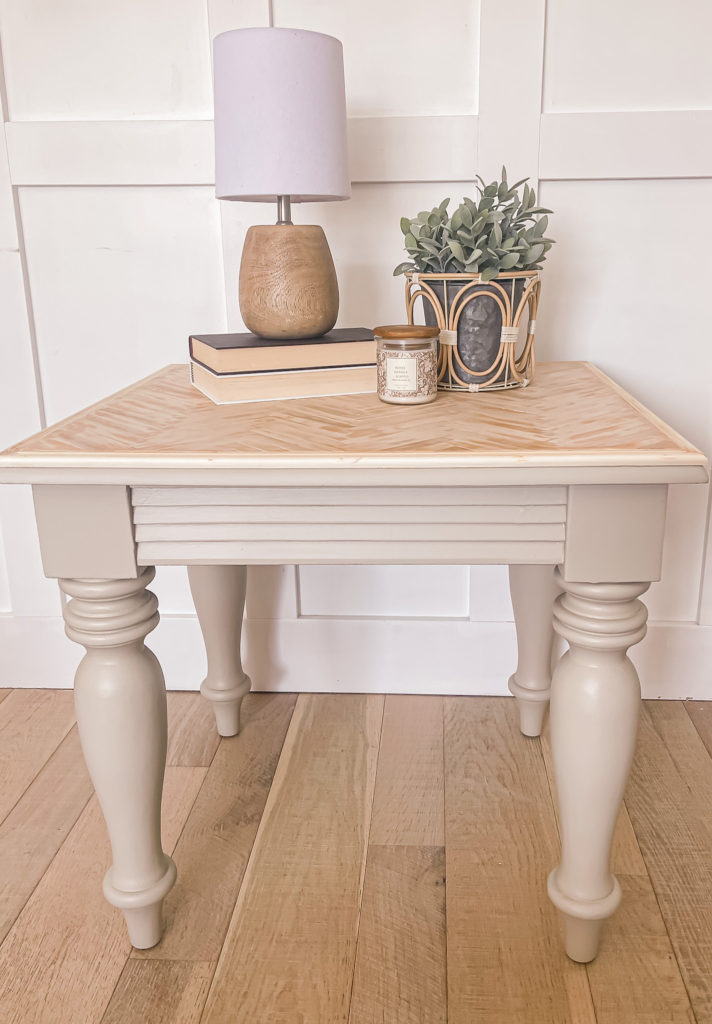
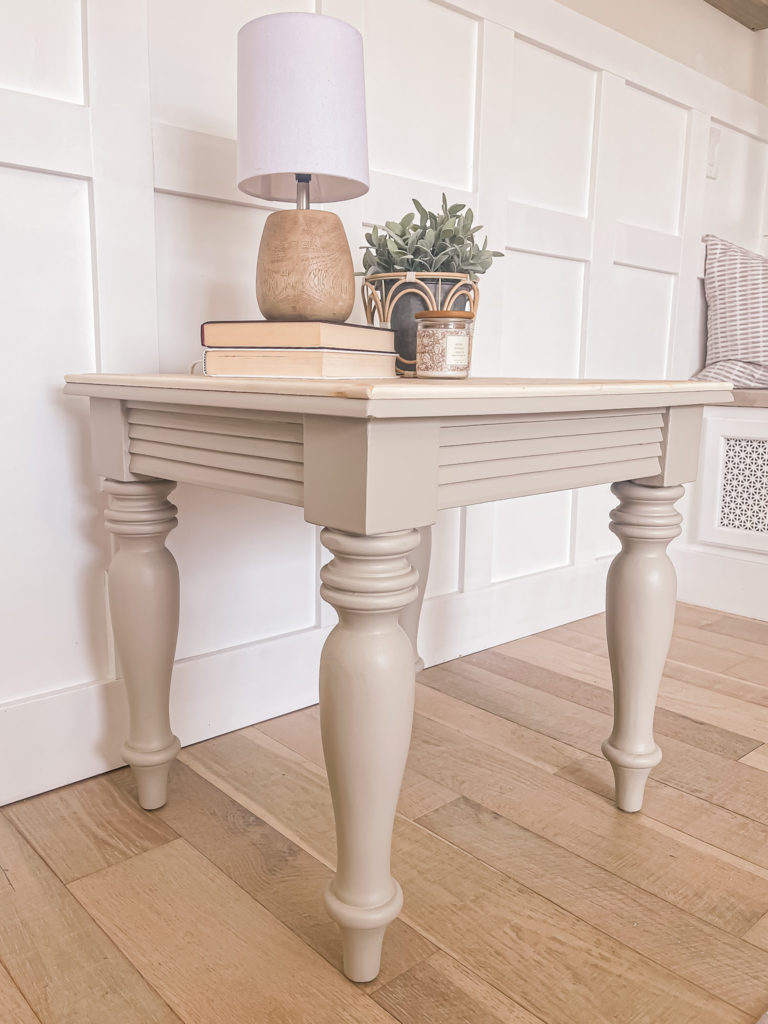
The goal wasn’t to strip it entirely since I knew that I was repainting, but we wanted it smoothed out enough for the new coat of paint to go on nicely. I used my paint sprayer to add a couple coats of Benjamin Moore Pashmina to the base.
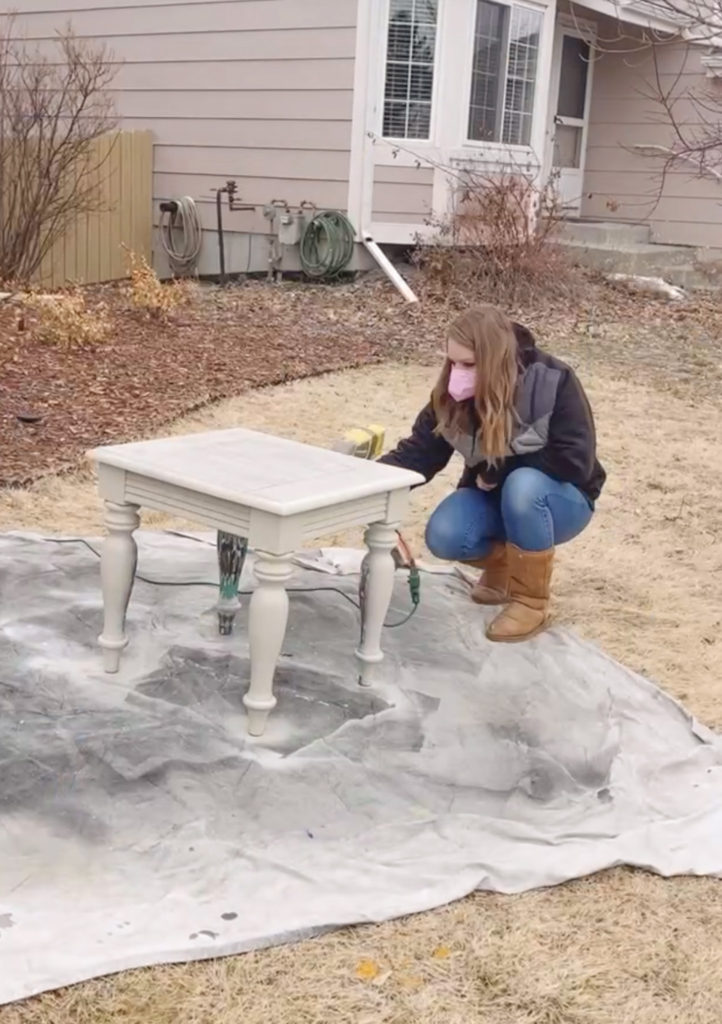
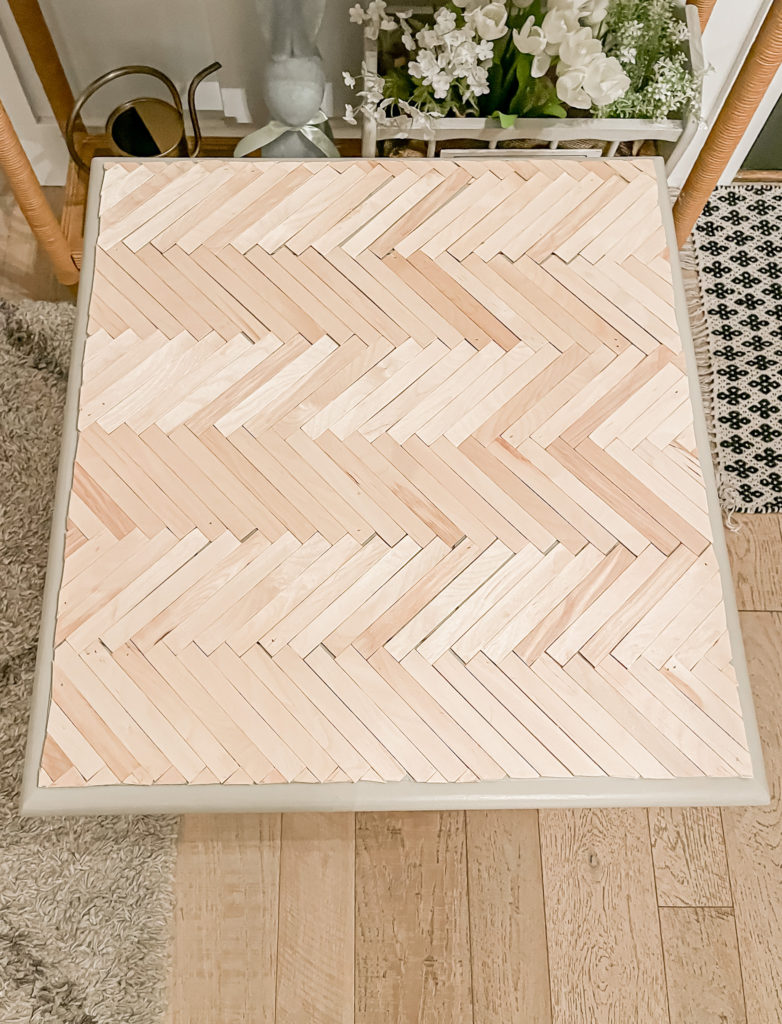
Once it was dry, I brought it inside for the fun part! I wanted to create a fun look on the top so I grabbed some wood glue, a foam brush and a bunch of jumbo craft sticks.
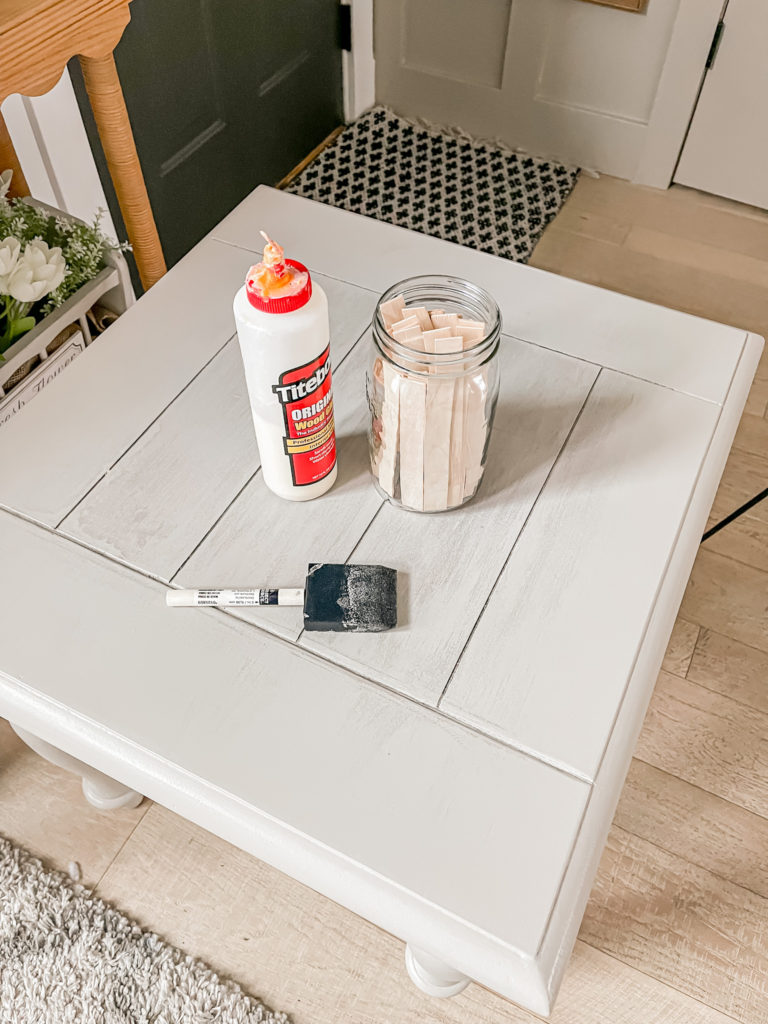
I used scissors to chop the rounded edges off of the sticks before beginning, and brushed on wood glue to small areas at a time. I then pressed the sticks on to the glue in a herringbone pattern.
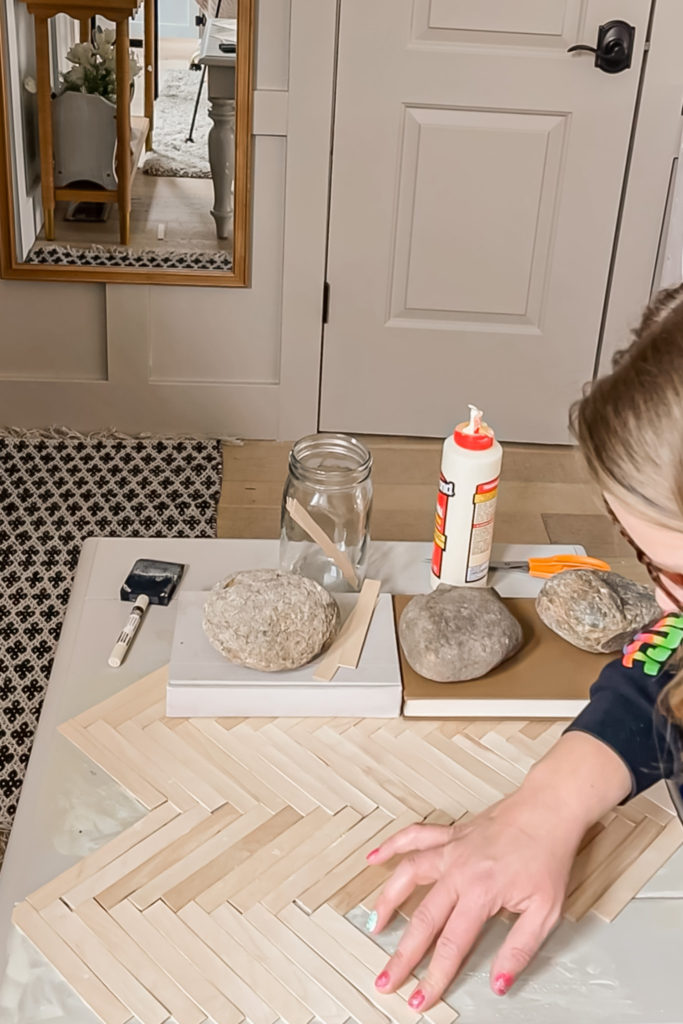
I set books and rocks on top of the sticks to keep the ends pressed down as I went.
I didn’t end up with perfect spacing and I wondered if it had something to do with not measuring out each stick before chopping the ends.
Thankfully wood filler made it not noticeable, but I would be interested to try measuring them out next time I do something like this to see if it makes a difference. I kept going until all of the surface was covered.
I let it dry for a couple of hours, and then went back and filled it all in with wood putty.
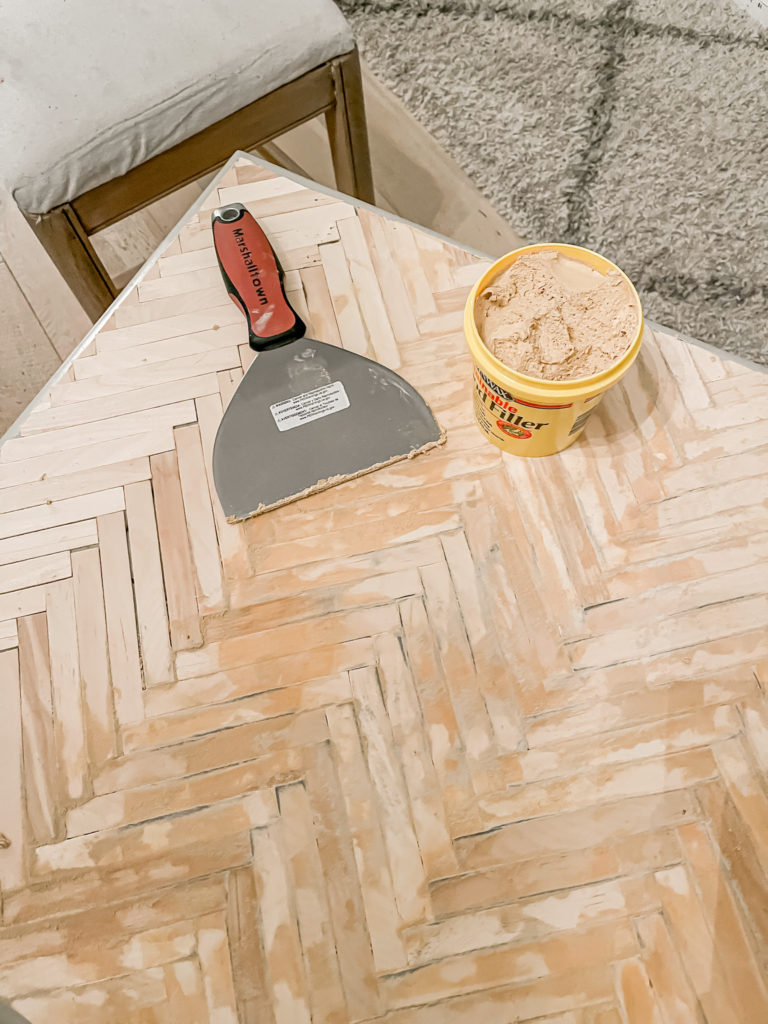
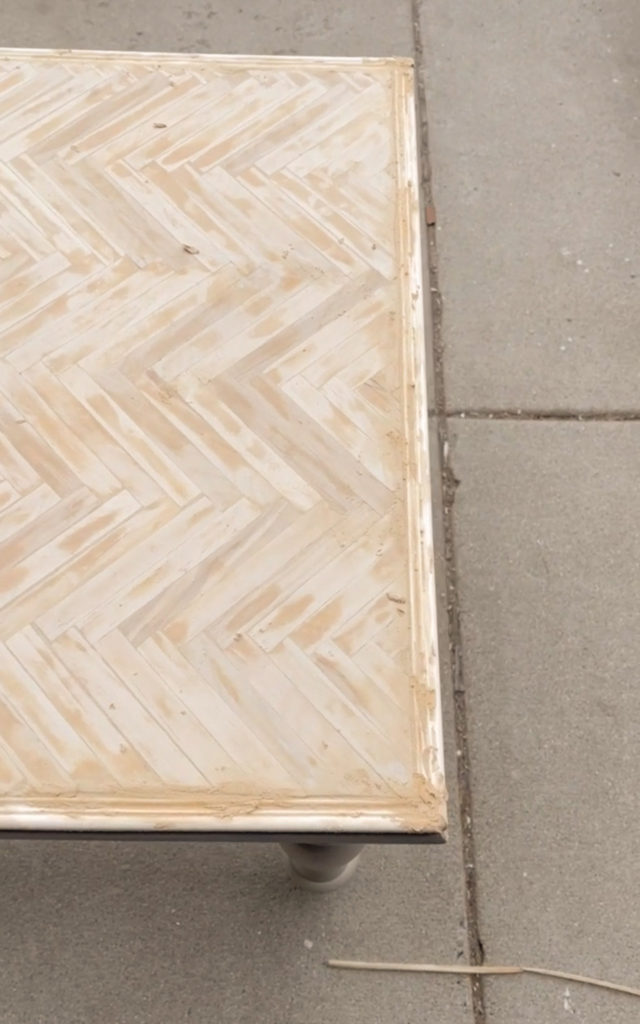
I let it dry overnight, then used my electric sander the next day to smooth it. I found a few areas that needed a second coat and I also ran into a few sticks that weren’t laying completely flat so I used a nail gun to secure them.
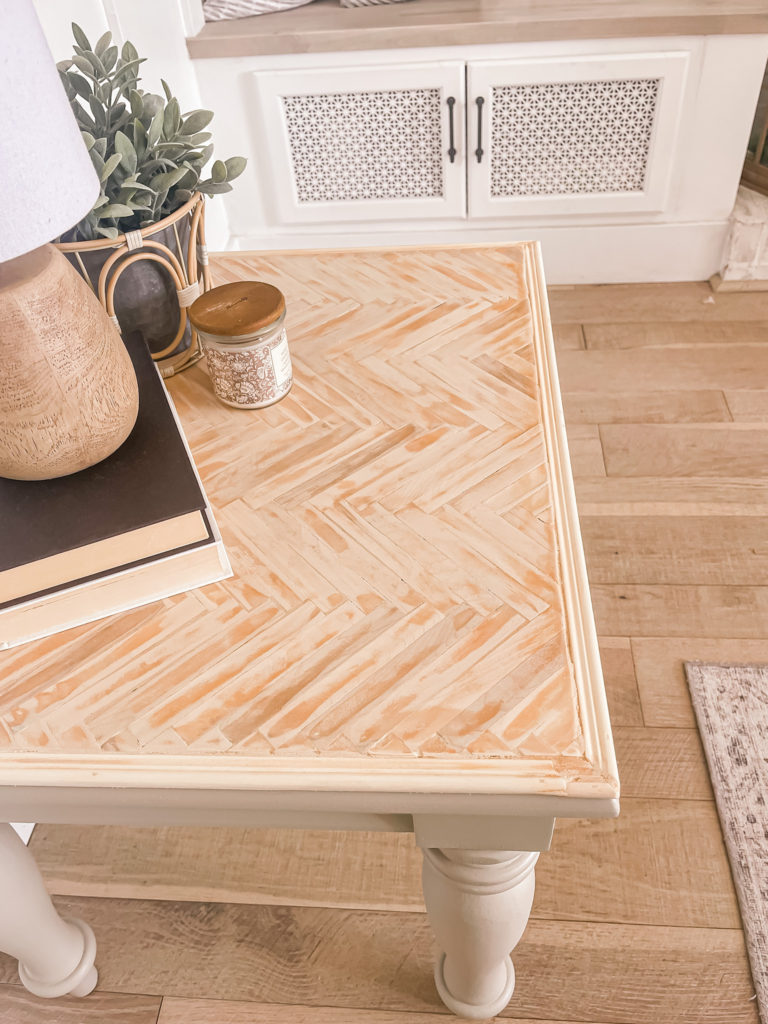
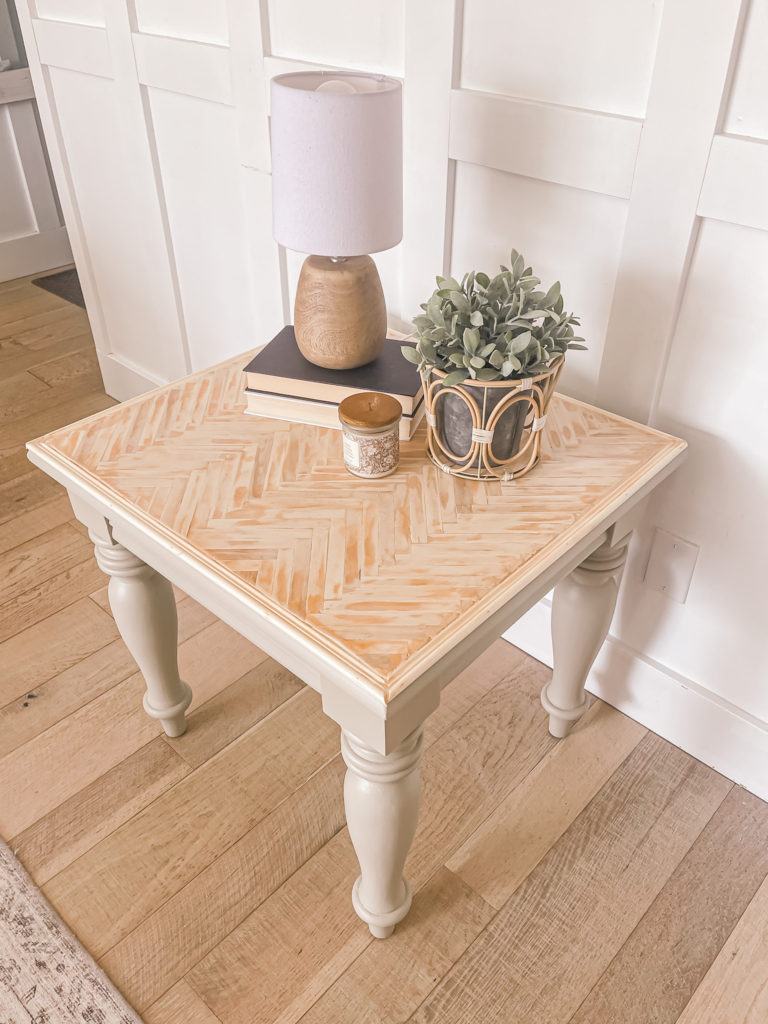
I also decided to add some wood trim around the edges to make it look more clean.
I went over the wood with some white wax before sealing the whole table with two coats of polyacrylic using the sprayer and this is how it turned out!
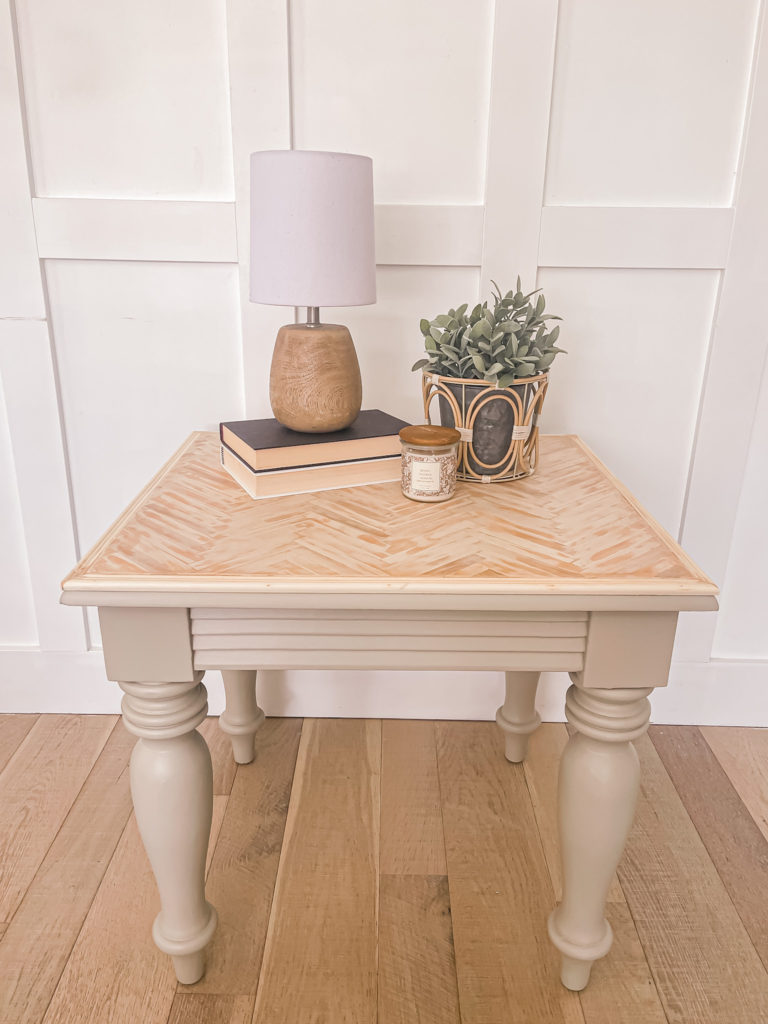
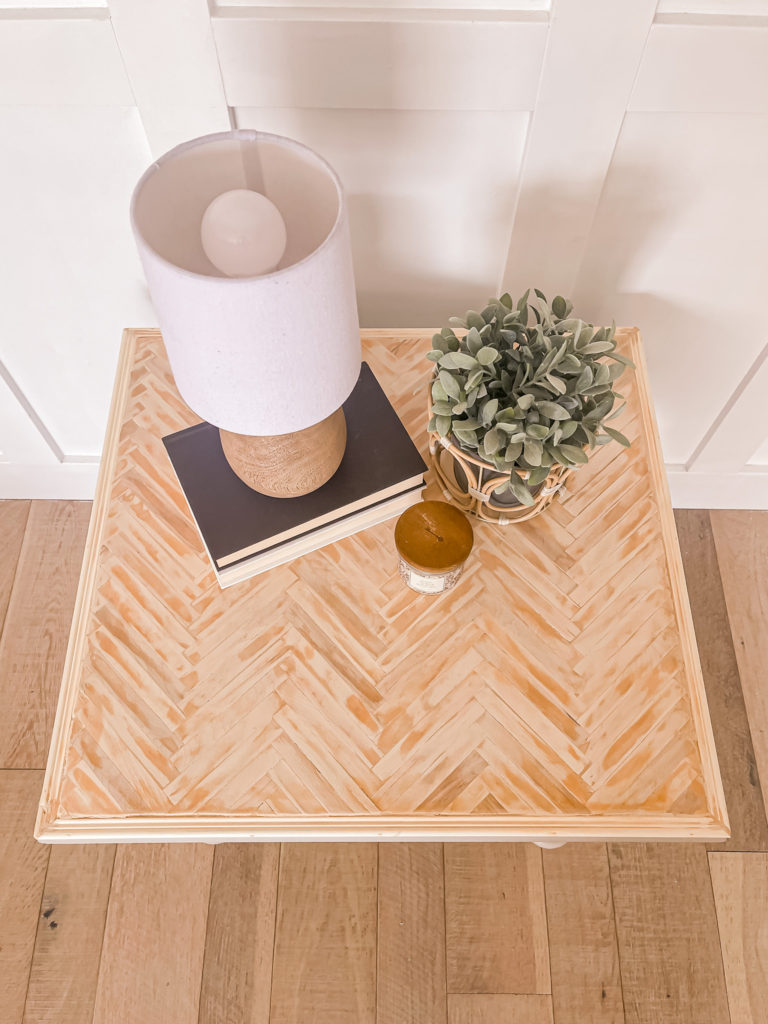
It’s such a fun and unique look and it turned out even prettier than I had imagined it would!
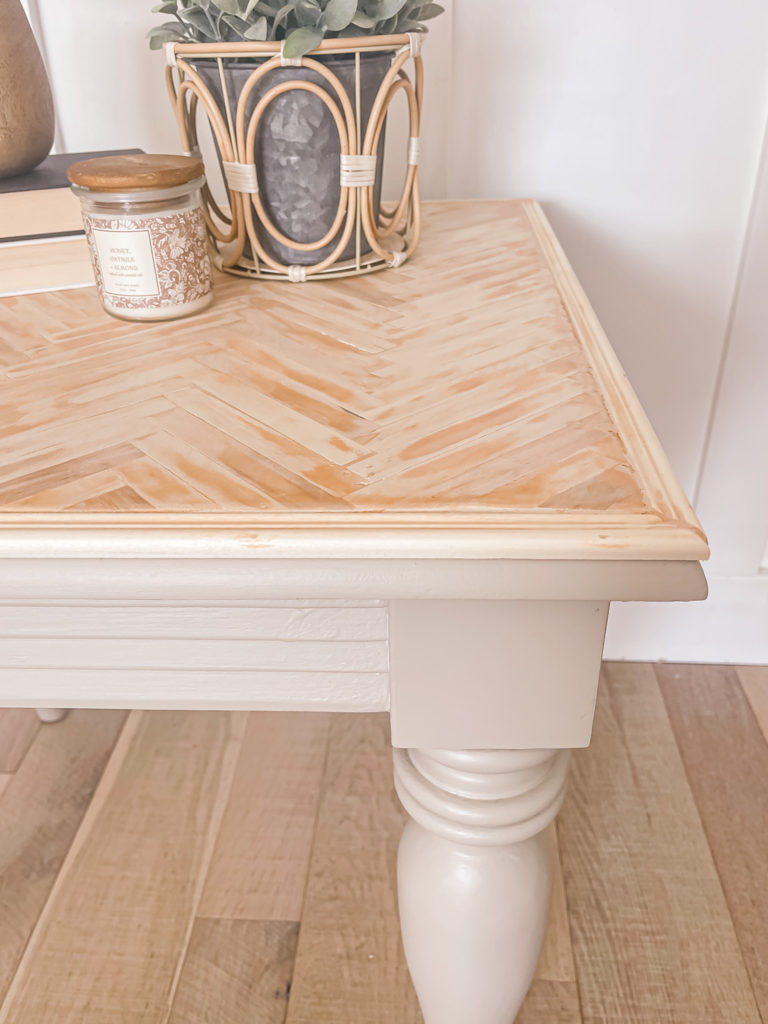
I love how the sticks each have their own variation in colors.
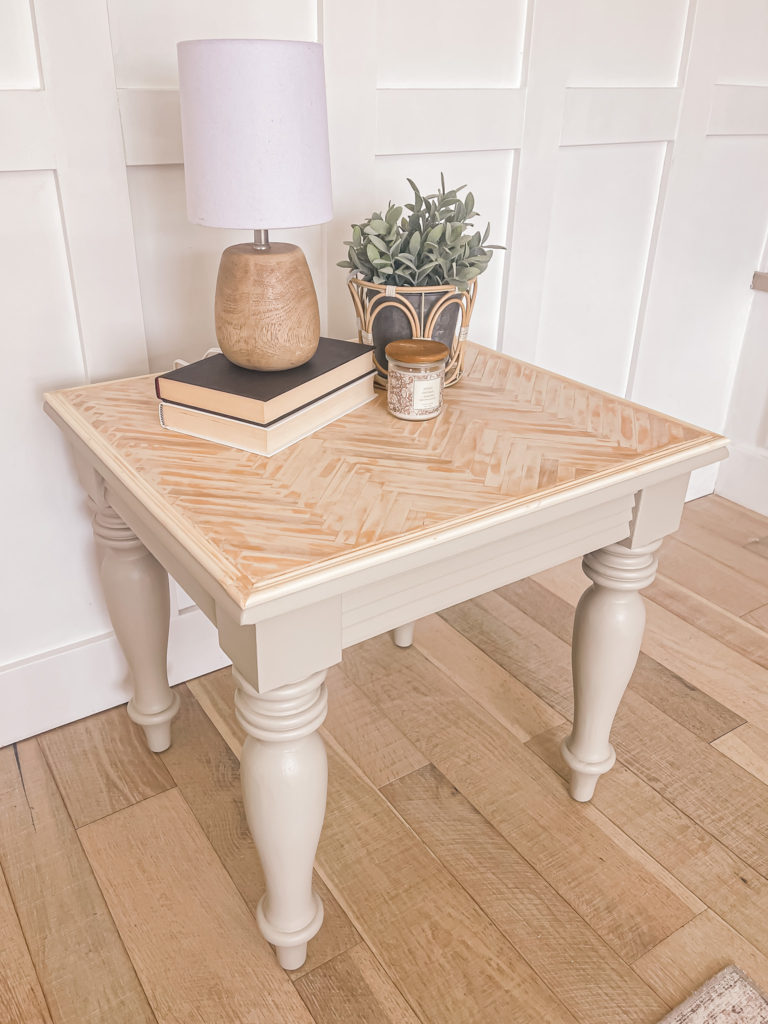
The color of the natural wood pairs so beautifully with the legs and I hope that this little beauty can find a perfect spot in its new home!
I hope you all have a safe and happy weekend, I’ll see you back here next week for the spring home tour!
Linking up to these awesome parties
PIN FOR LATER!

This table turned out amazing! I’m loving the colors and that fun top!