Hello and happy Friday friends! Today I am super excited to share my favorite furniture flip from the month of March with you guys!
When the hubby first unloaded this for me in our garage, I was honestly thinking that this may be the first piece of furniture to defeat me.
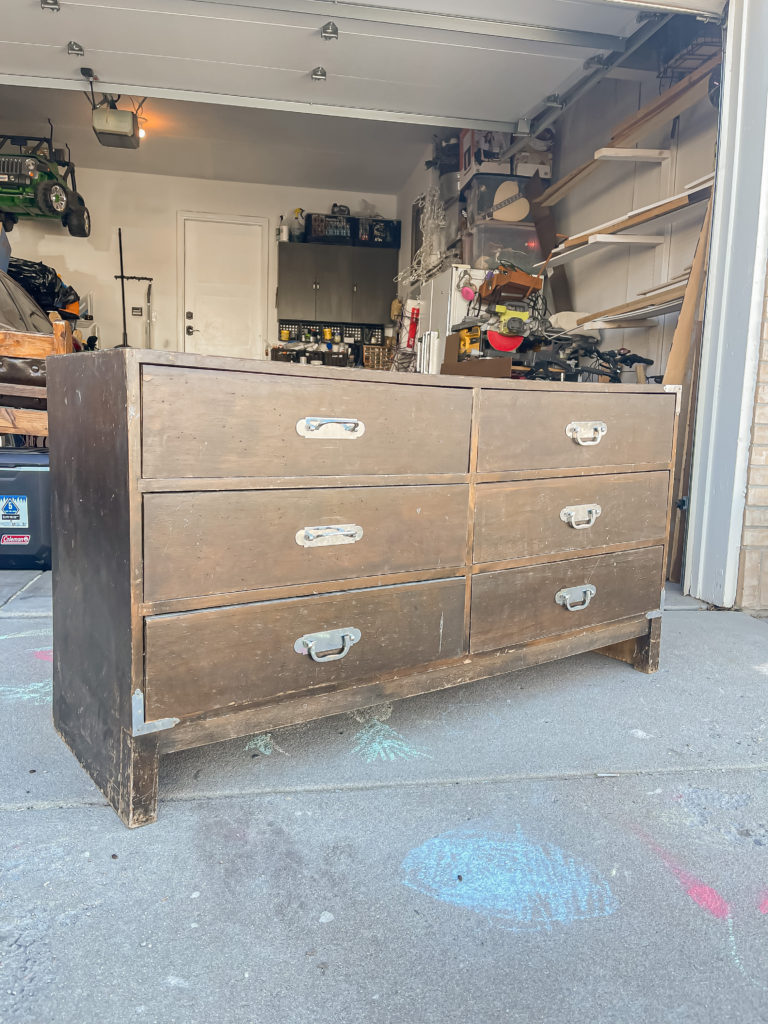
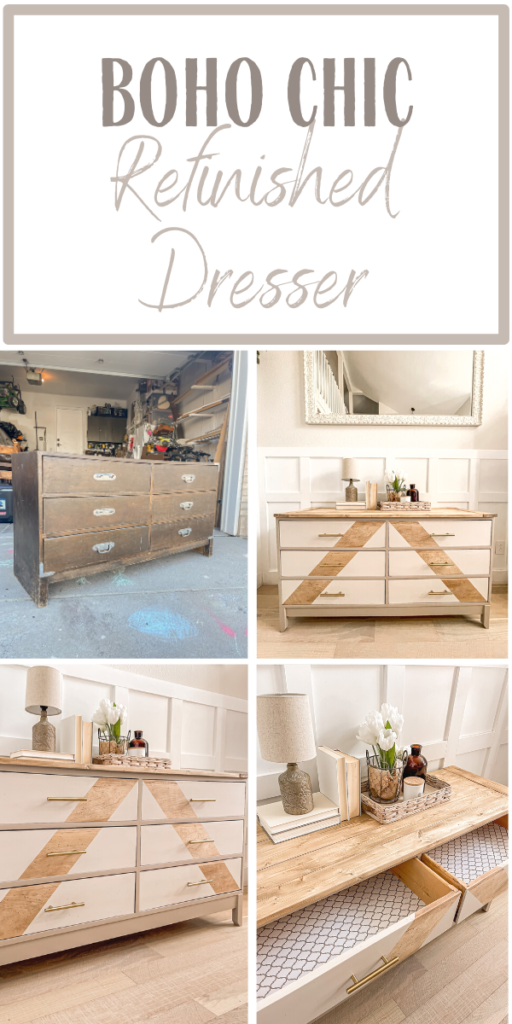
Although it looked good in the Marketplace photo, I realized that both the top and bottom had a ton of sag–which is not something that I’ve ever dealt with before. But I decided to give it a shot and I am so happy that I did because it turned to be one of my favorites!
Supplies Used:(Affiliate links may be provided for convenience. For more info, see my full disclosure here.)
- Sander
- Nail Gun
- Jigsaw
- Spackle
- Bondo
- Miter Saw
- Paint Sprayer
- Ultra Flat Polyacrylic
- Kreg Jig
- 1x3s
- 2×2
- Frog Tape
- Pulls
- Contact Paper
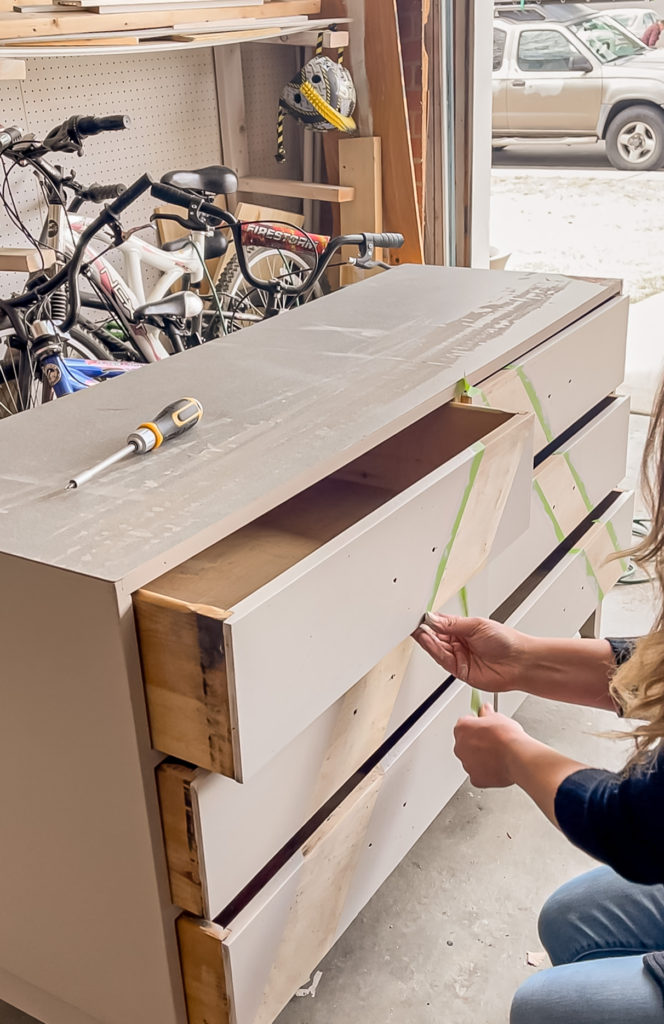
After giving the entire piece a good clean (it was so nasty!) I unscrewed the bottom and hammered it off.
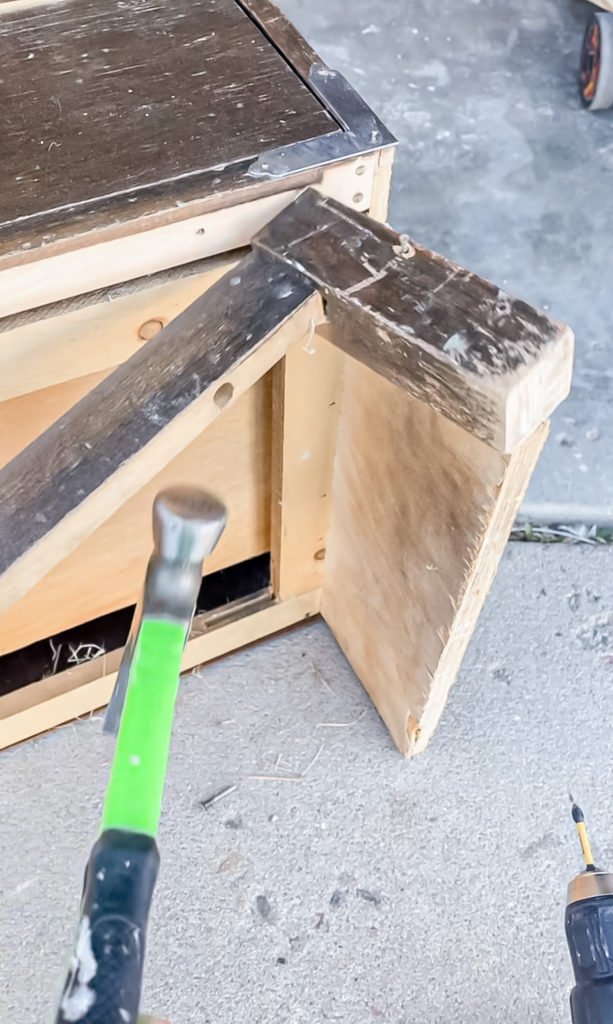
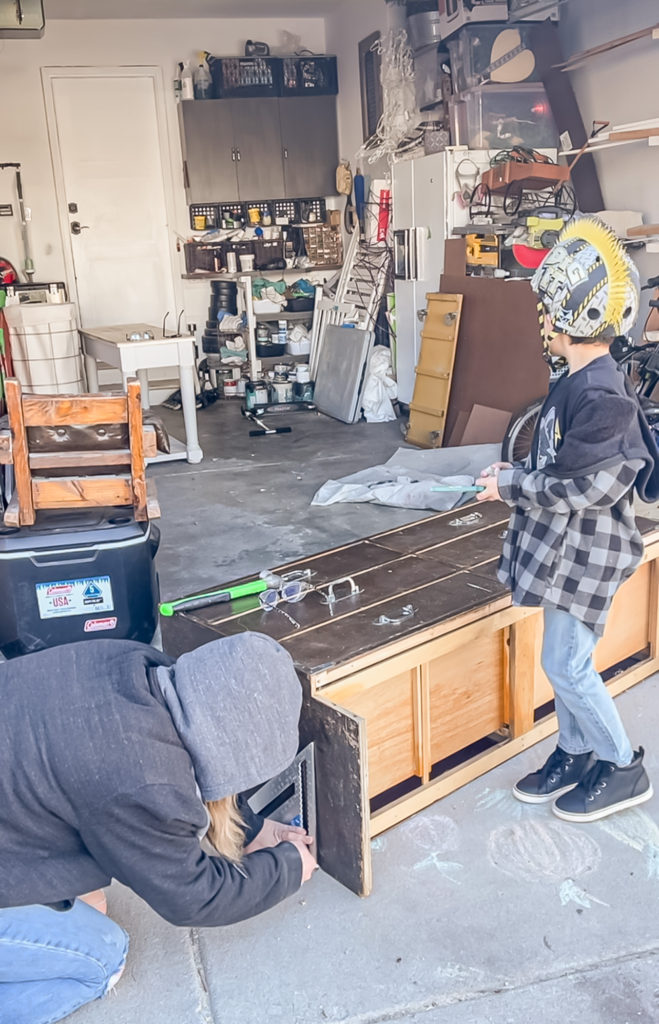
I then used a speed square to draw a nice straight line along the bottom–with my trusty assistant by my side.
I then stood it on it’s side and used the jigsaw to cut along the line.
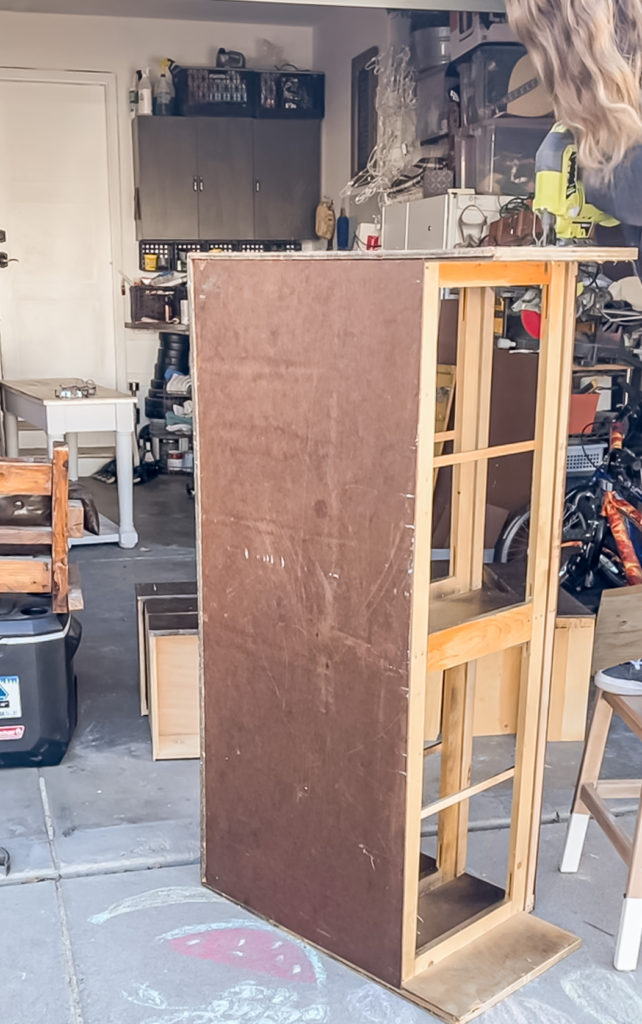
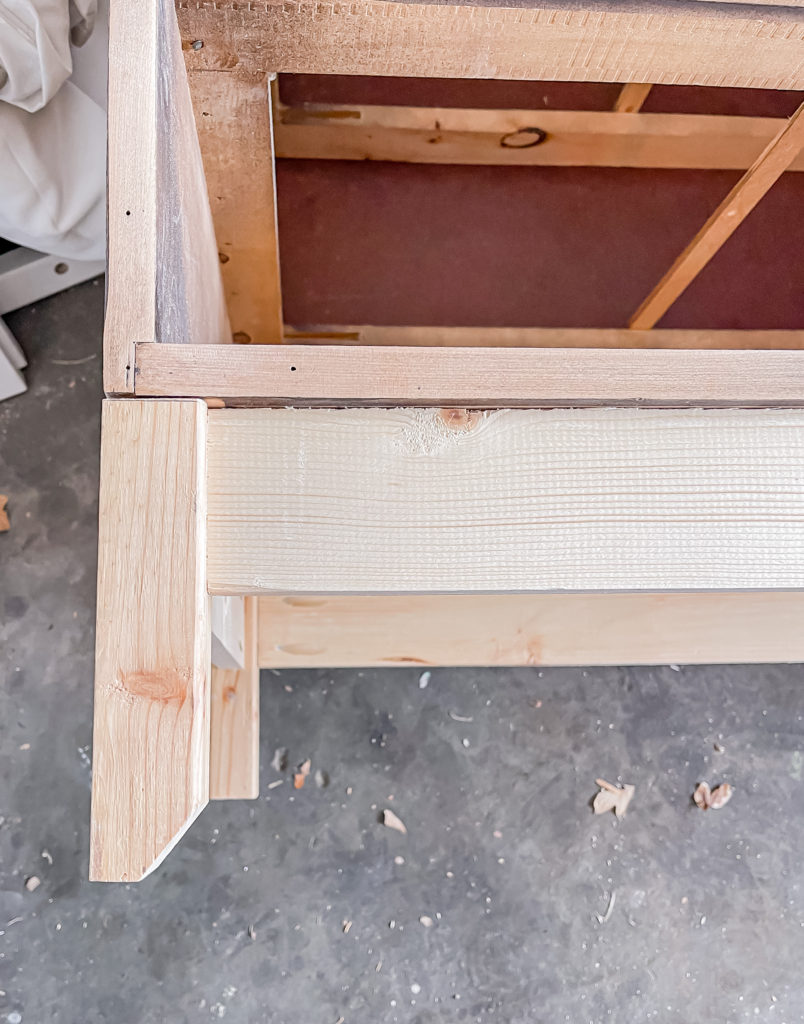
It was now ready for a new base! This was my first time building my own base and it actually was not quite as difficult as I thought that it would be. It did take some precise measuring and patience though! I essentially cut down four feet out of a 2×2 (angling the fronts) and used the Kreg to secure them to 1x3s on the sides with pocket holes.
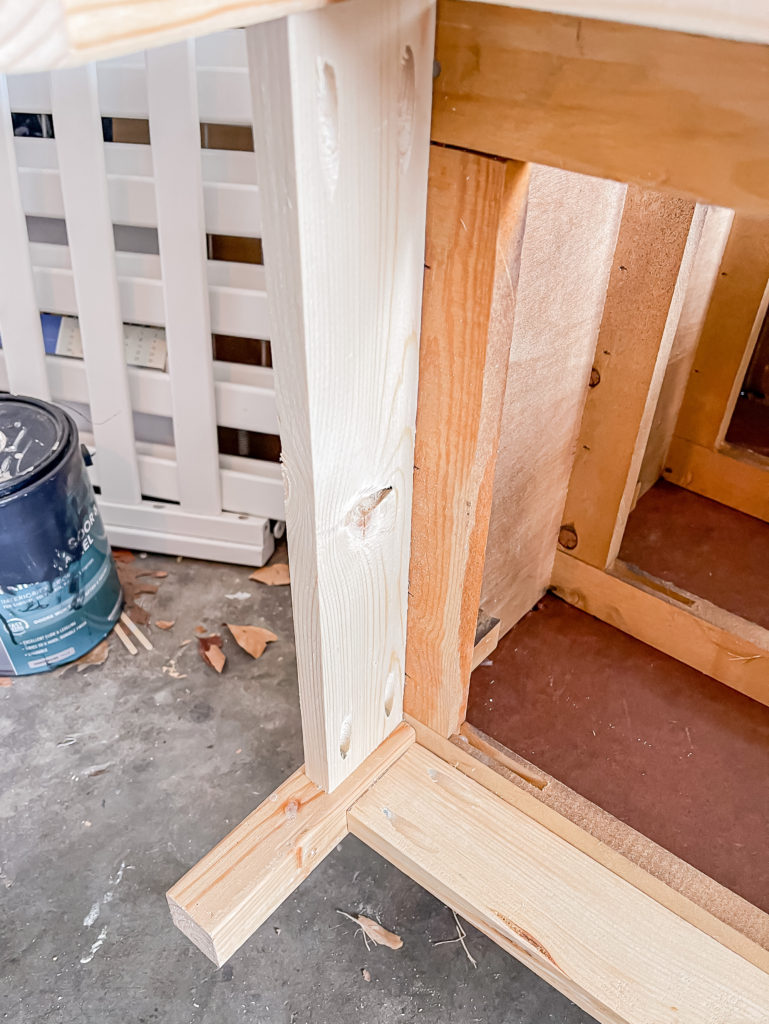
I went over a few spots with wood filler, then sanded everything smooth.
I also ran a bead of caulk along the small gap. at the top of the base. Once that was dry, I took it out to start applying primer and paint.
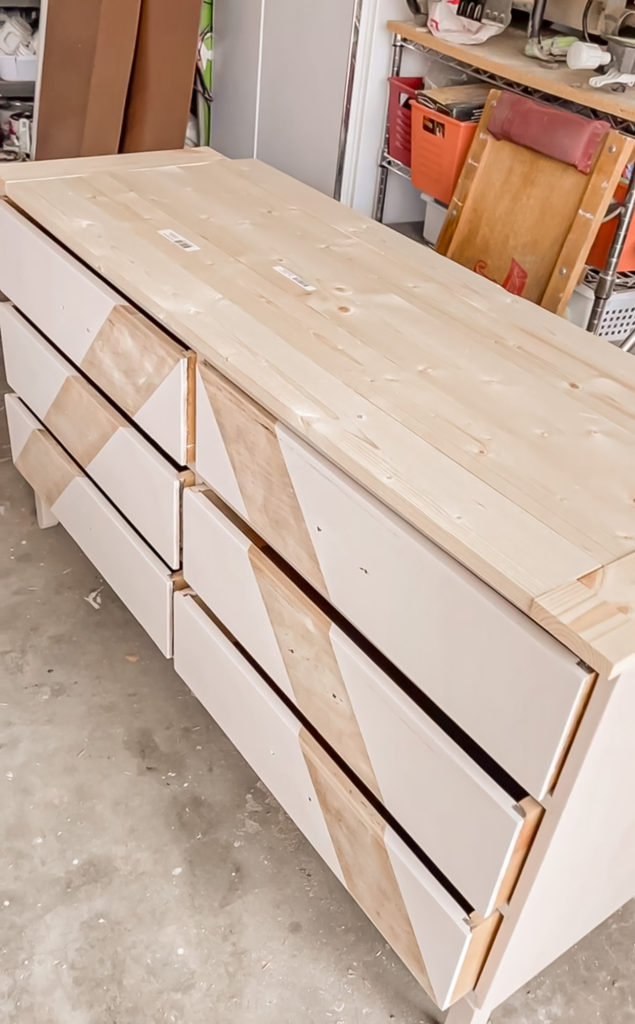
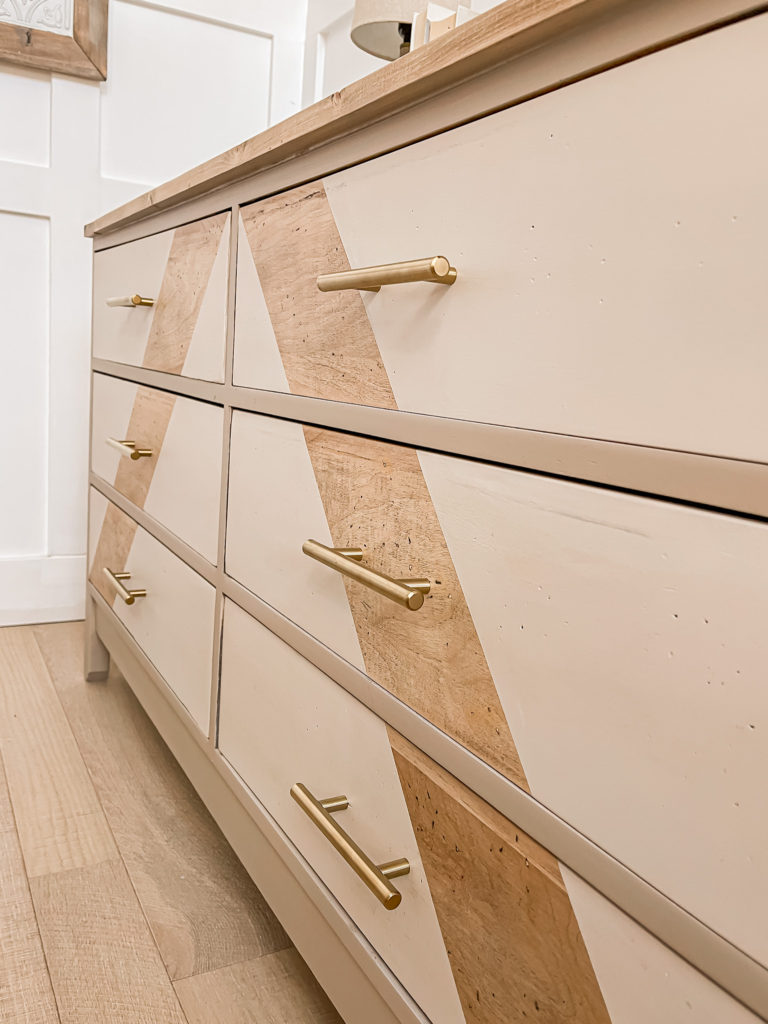
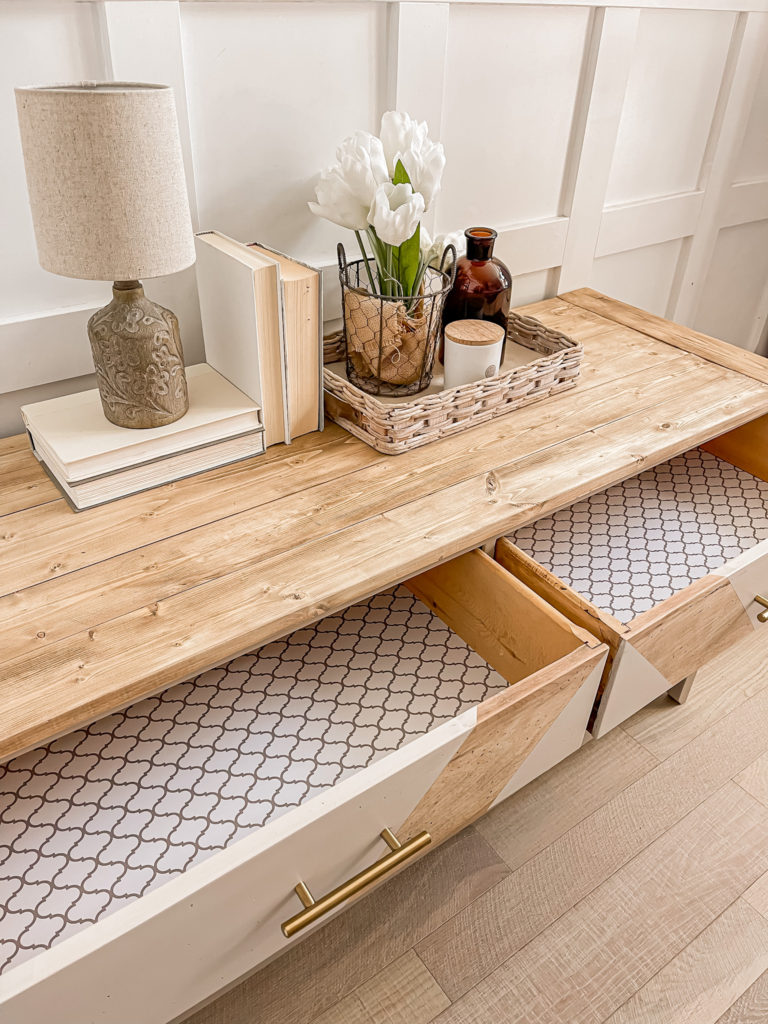
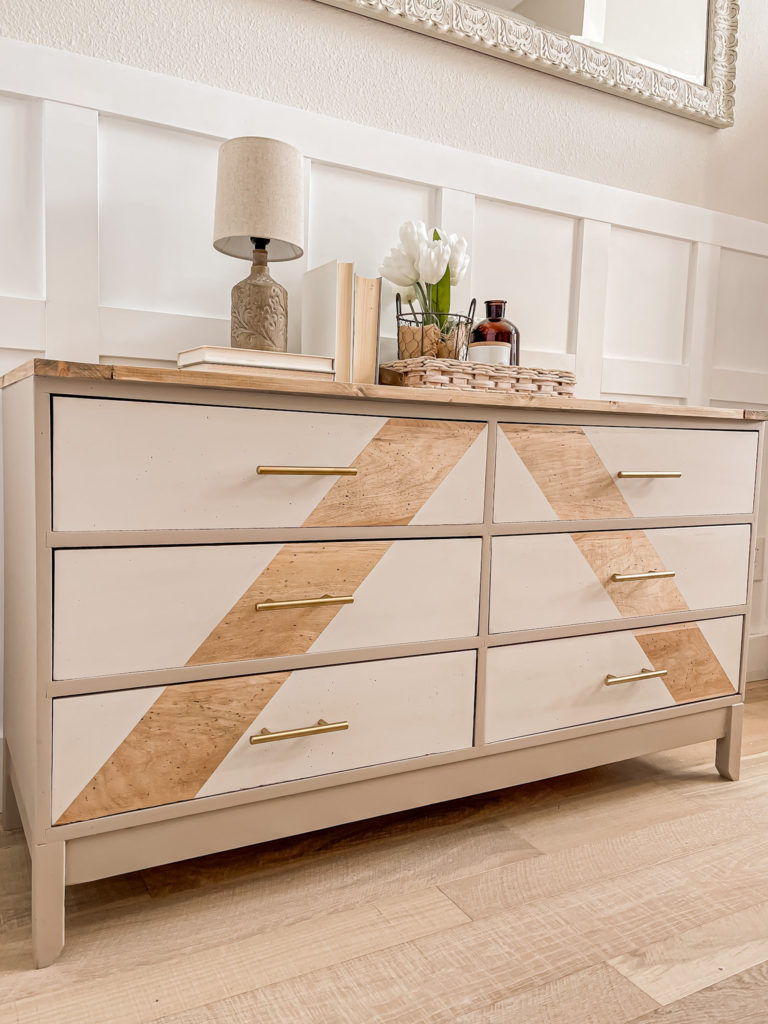
I painted the base a warm tan, and then lightened it a bit with some white paint to do the drawers. But I didn’t want to paint all of the drawers! I had sanded the drawers down to raw wood, but ultimately thought that a diagonal pattern would look pretty cool on them.
I used a 1×6 to trace where I wanted the diagonal to sit, then firmly applied Frogtape to the lines.
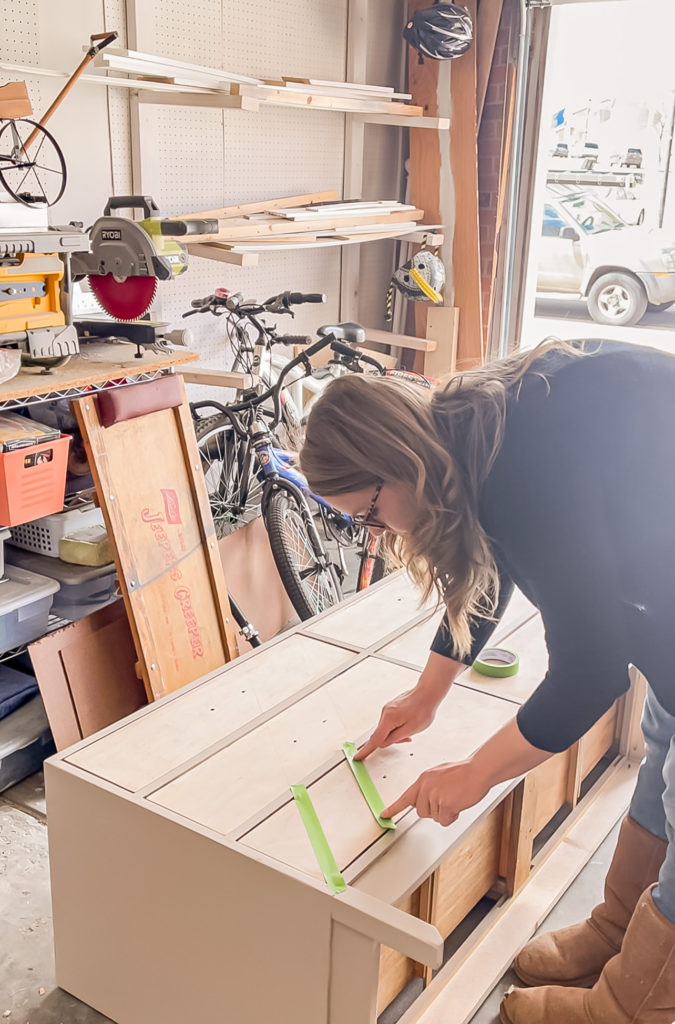
I used the lightened paint to paint on either side of the tape, then pulled the tape up to reveal the pretty design.
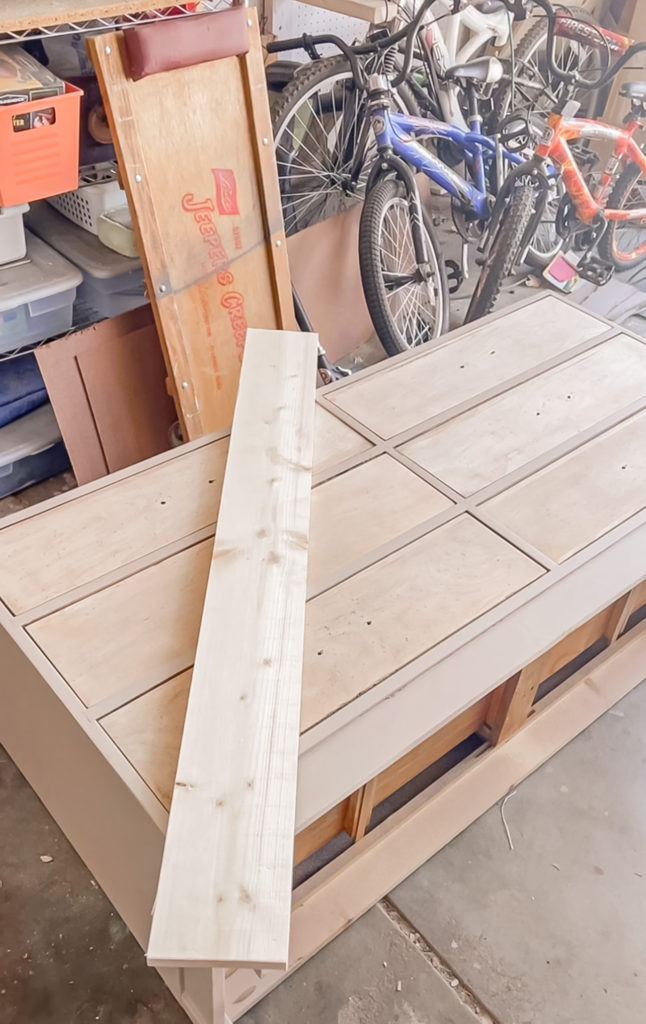
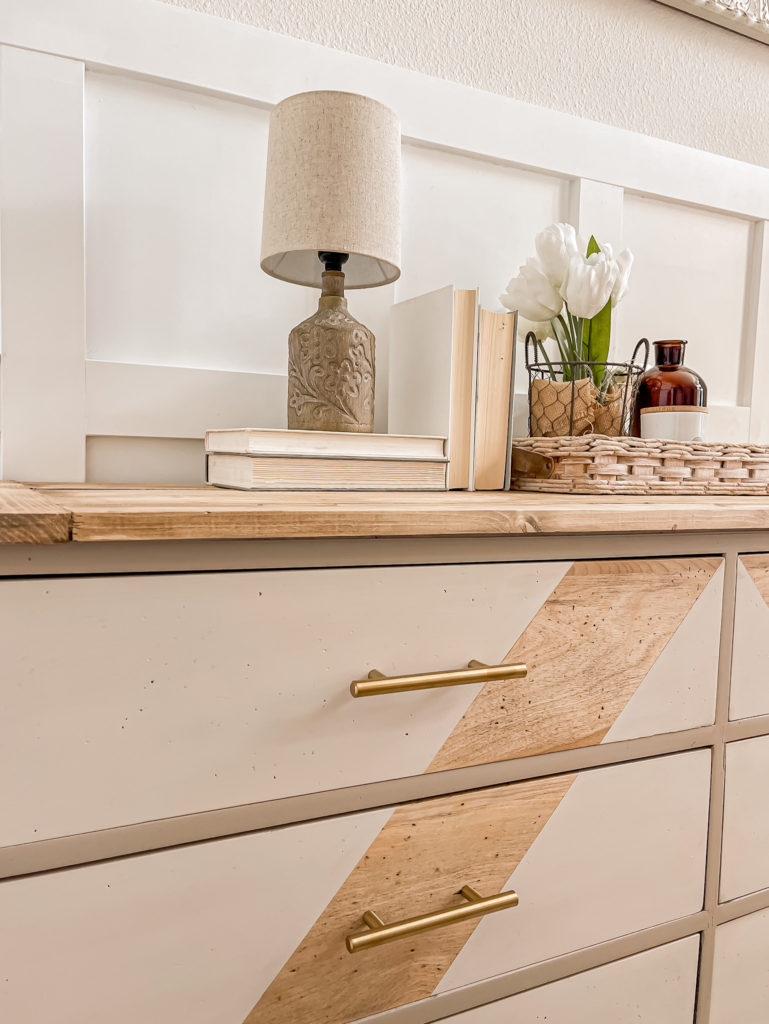
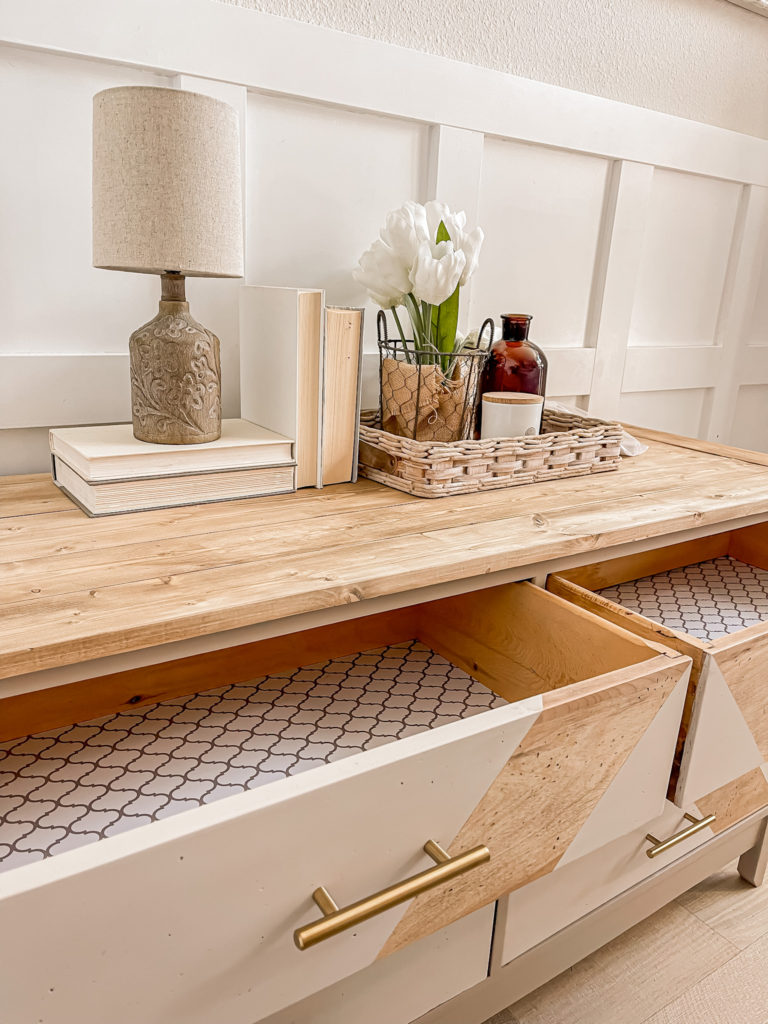
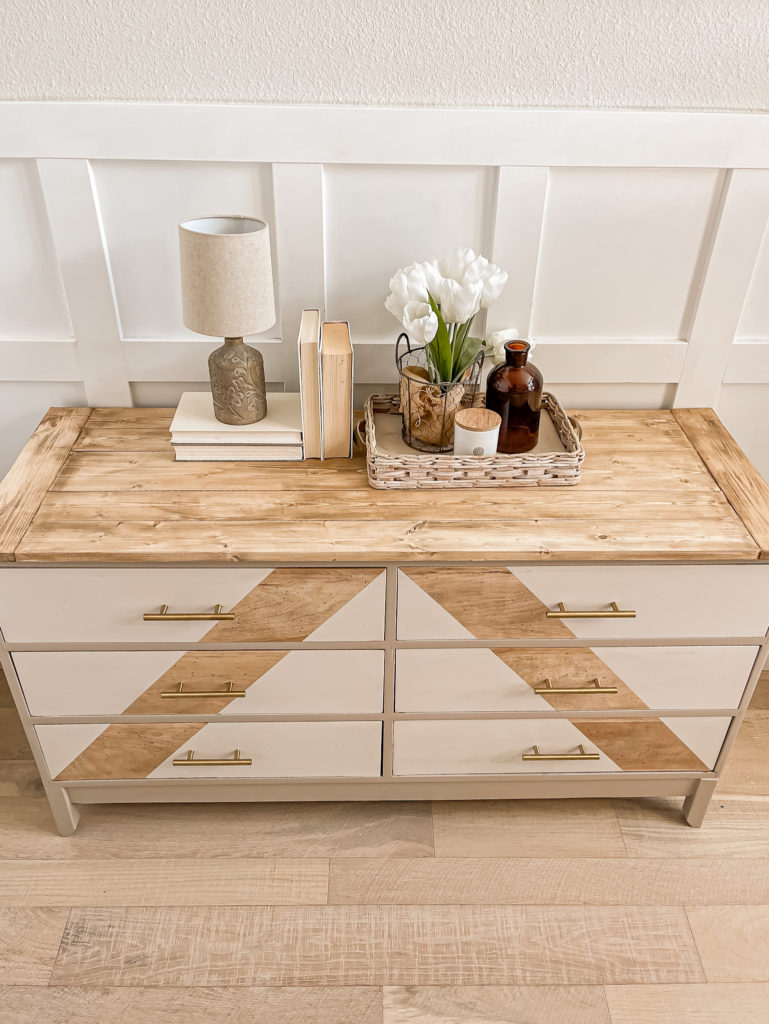
The new base fixed the bowing on the bottom, but the bowing on the top still needed to be fixed. I used a combination of pine boards to create a top, and applied pieces of scrap wood and shims underneath to leevel it out.
Once that was on ,I stained it to match the drawers before adding the hardware and drawer paper to finish it up!
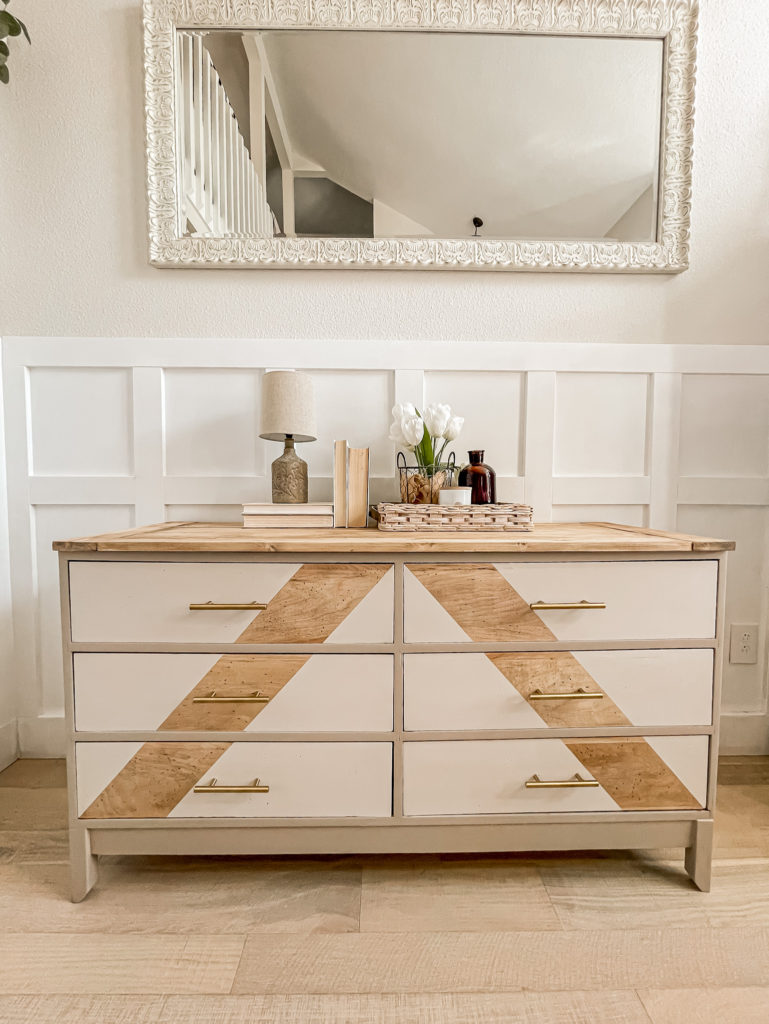
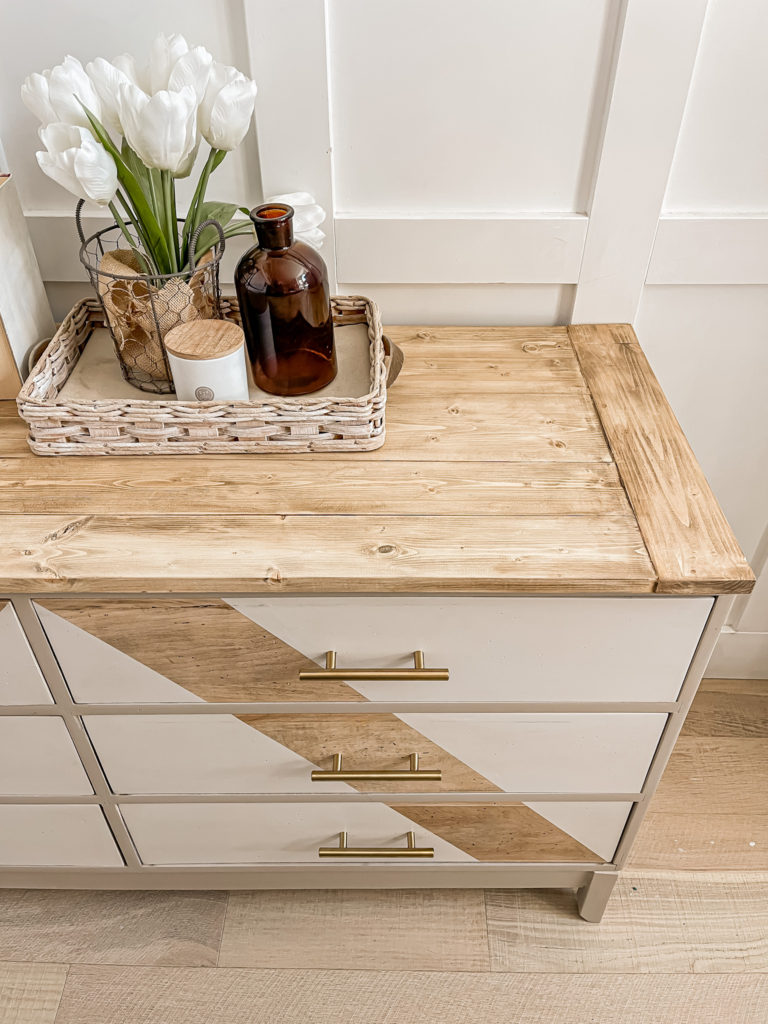
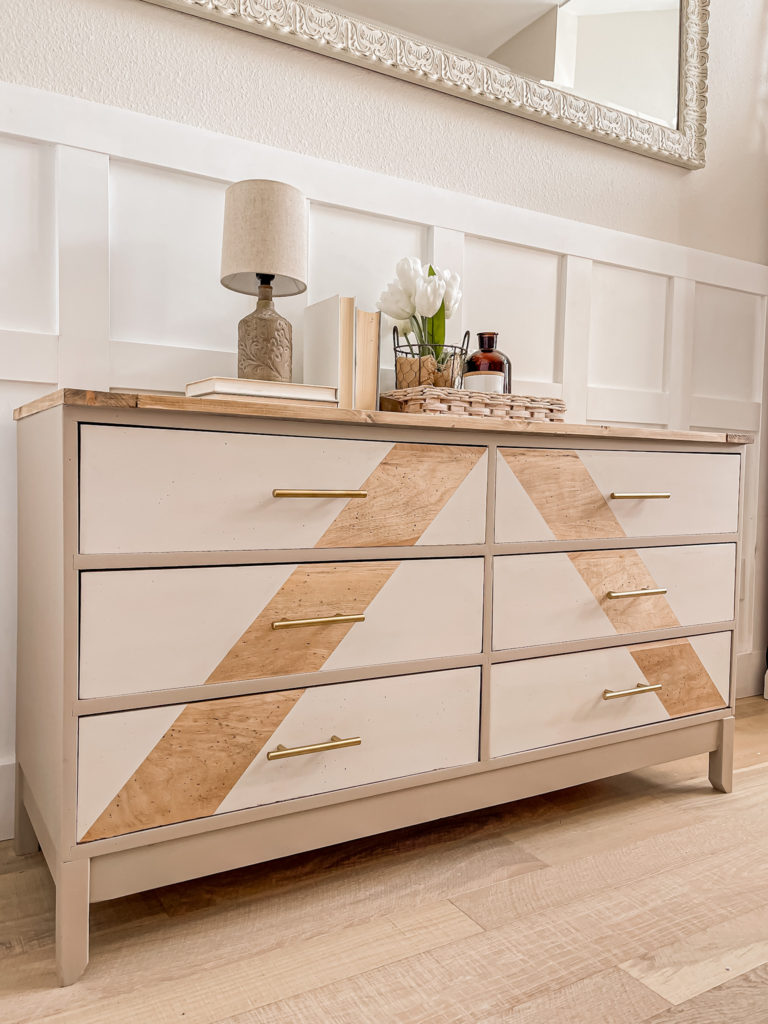
I love how fun the design turned out and I’m glad that I decided to use a different color on the drawers for contrast.
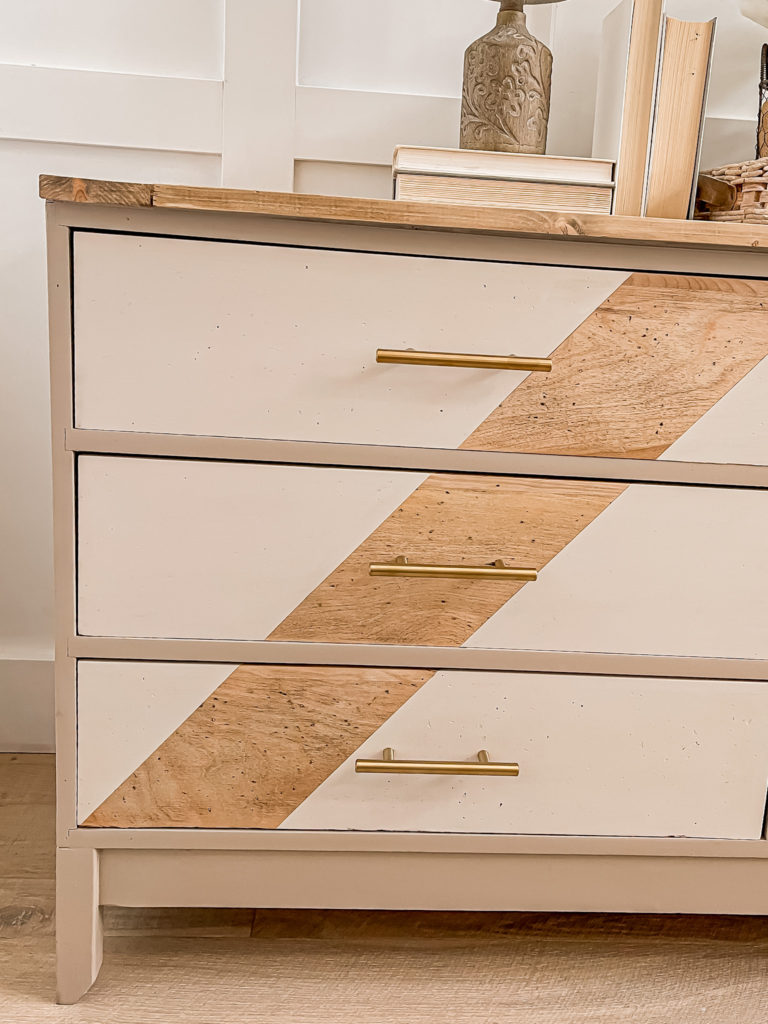
The new gold pull bars really shine on this piece and although I almost went with black cup pulls, I think that these fit the vibe much better.
This beauty was lucky enough to find its new home with my sister and brother in law which makes my heart extremely happy since I love this one so much!
Linking up to these awesome parties!
PIN FOR LATER!
WOW! That’s one of the prettiest furniture makeovers I’ve ever seen!! Looks awesome!!
Anther beautiful project!
That’s e I call an upcyle#alittlebitofeverything
You did a fabulous job giving this piece new life. It looks beautiful. I don’t think people always realize or appreciate how much work and time goes into these pieces.
I’m featuring you this week when the next To Grandma’s house we go Wednesday link party starts – thanks for sharing with us!