Happy Friday! I I hope you all had an enjoyable week. It’s been so hot here lately and I’m trying not to complain since we had such a cool start to the summer. I’m also trying to soak it in and enjoy the last few weeks until school starts back up—I feel like we still have so much that we want to to!
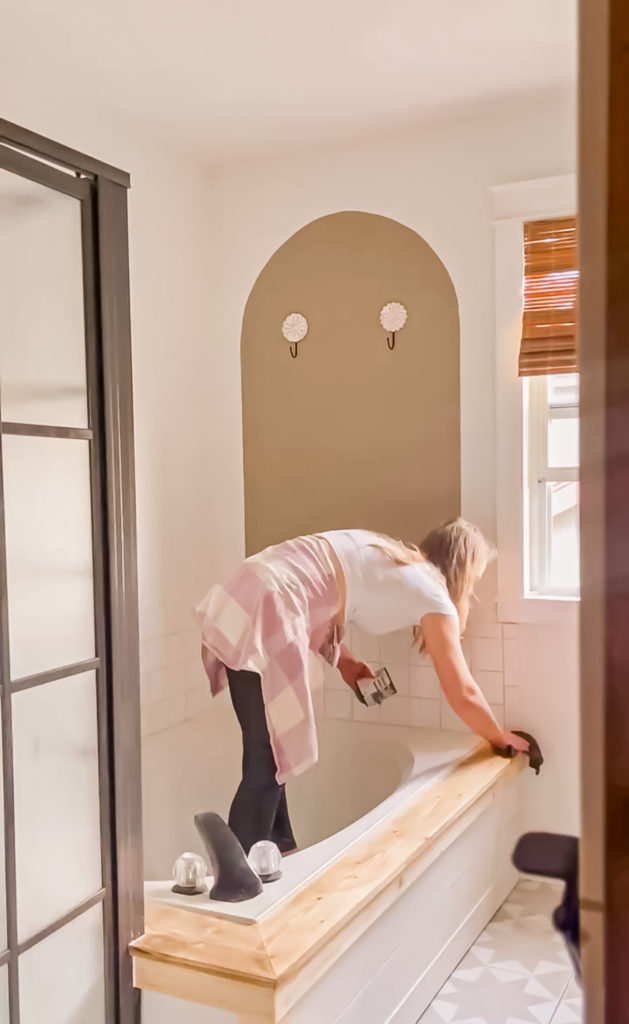
I have a couple more DIYs from the master bathroom refresh to share with you and today’s is a pretty simple one that made such an impact! I apologize in advance for the screenshot photos as we worked so fast that I didn’t stop to think of taking photos!
Supplies Used:(Affiliate links may be provided for convenience. For more info, see my full disclosure here.)
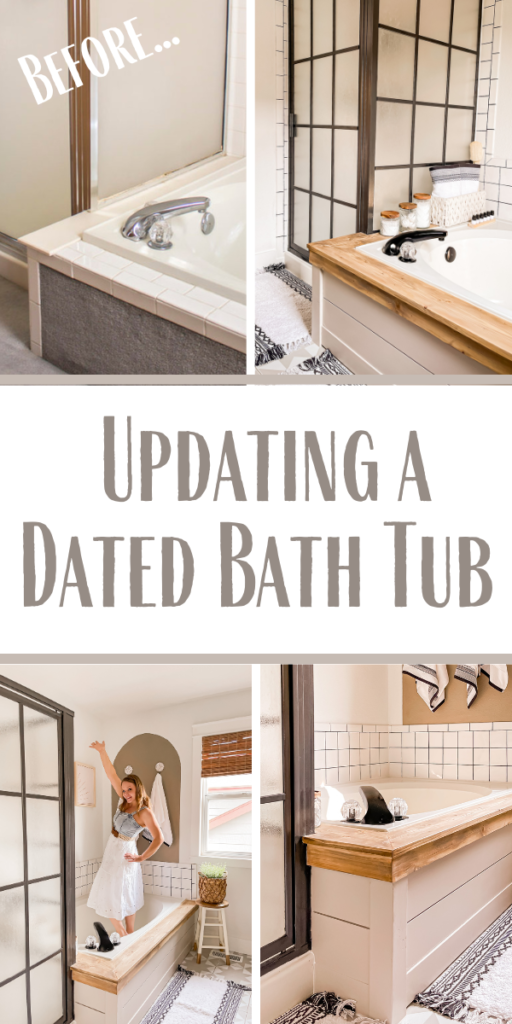
In case you’re new, here’s a peek at our tub when we first moved in.
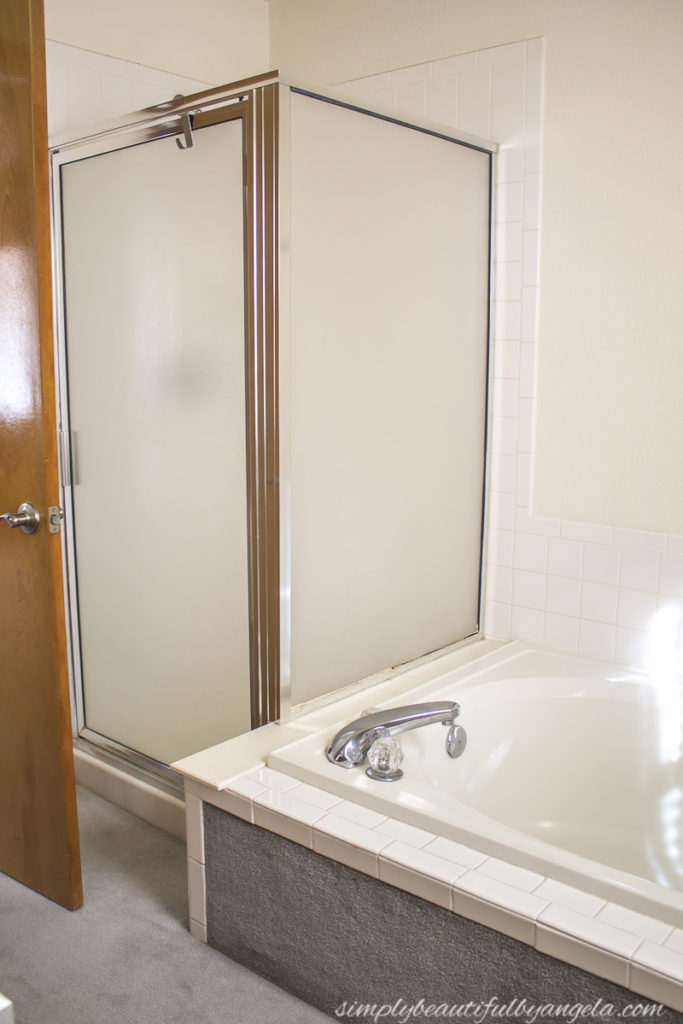
I had removed the dated carpet and replaced it with shiplap during our first makeover in here which made a huge difference!
It was such a nice and easy upgrade, however four years later the tiles had started to fall off and that piece of stone that separated it from the shower had cracked. One day I would love to tear the whole thing out and replace it with a free standing tub, but until we can budget that I decided that I would give it a little update.
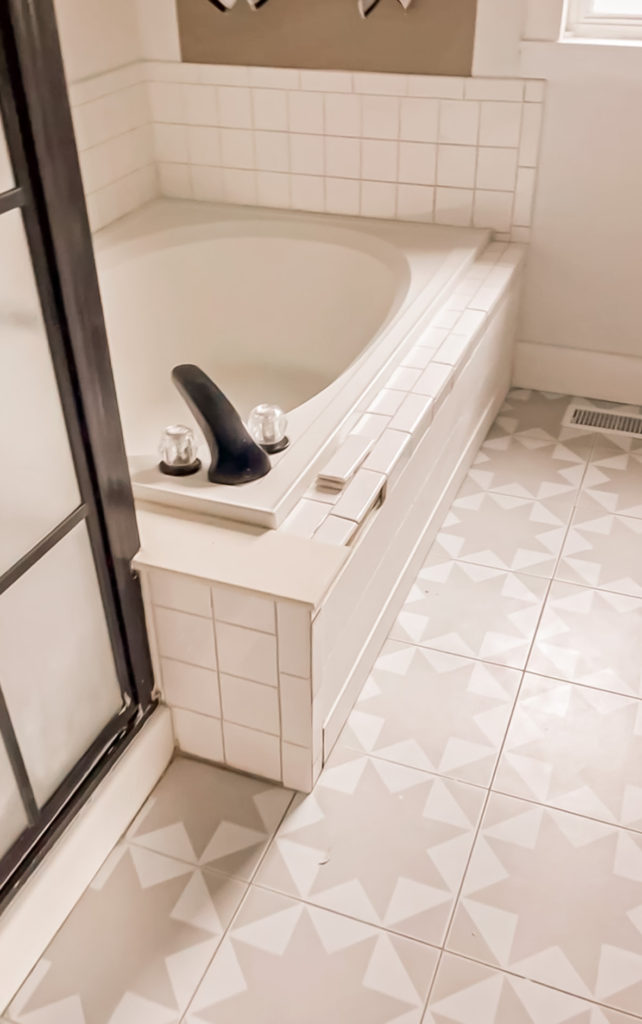
I was originally going to just glue the tiles back down and replace the cracked stone piece with wood, but things escalated rather quickly!
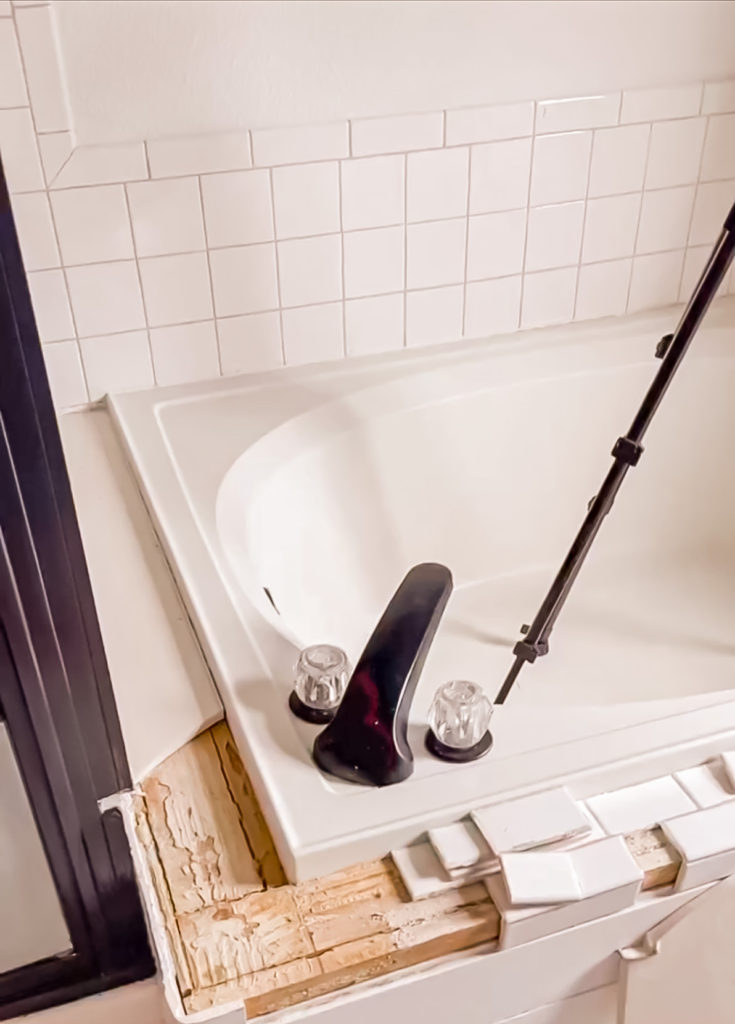
I learned that the stone piece actually went under the shower frame and couldn’t be removed after all. I thought that I could just cover that area with wood, but while I was trying to figure out how it would look with the tile on the other side, I had the idea to remove the busted tiles all together and wrap the wood all the way around.
We started by attaching a pieces of scrap wood to create a nice flush surface.
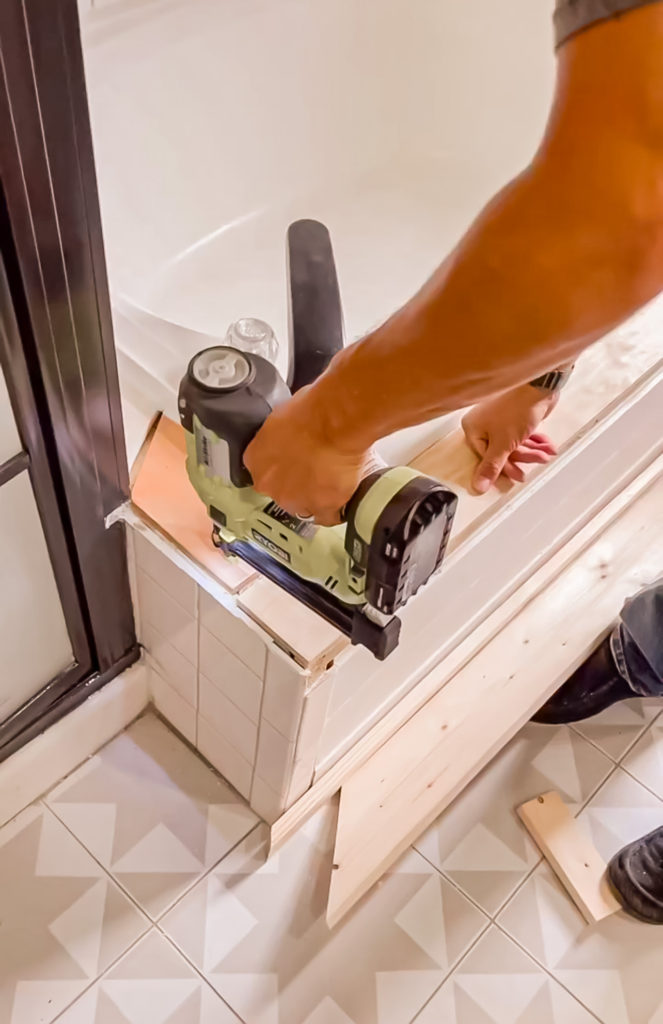
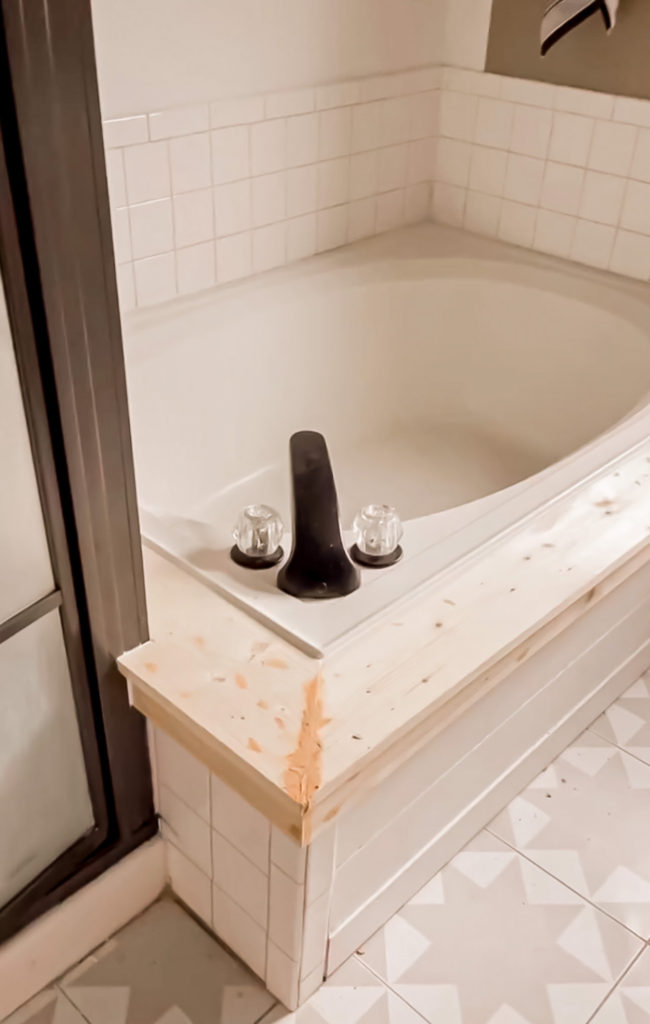
We then cut down some pine 1×6 boards for the top and 1x4s for the trim along the side. I filled all of the holes and seams with wood putty, then we stood back to admire it…
And something didn’t seem right. Anthony pointed out that the tiles on the side seemed out of place, so the next day we came back and started ripping those out.
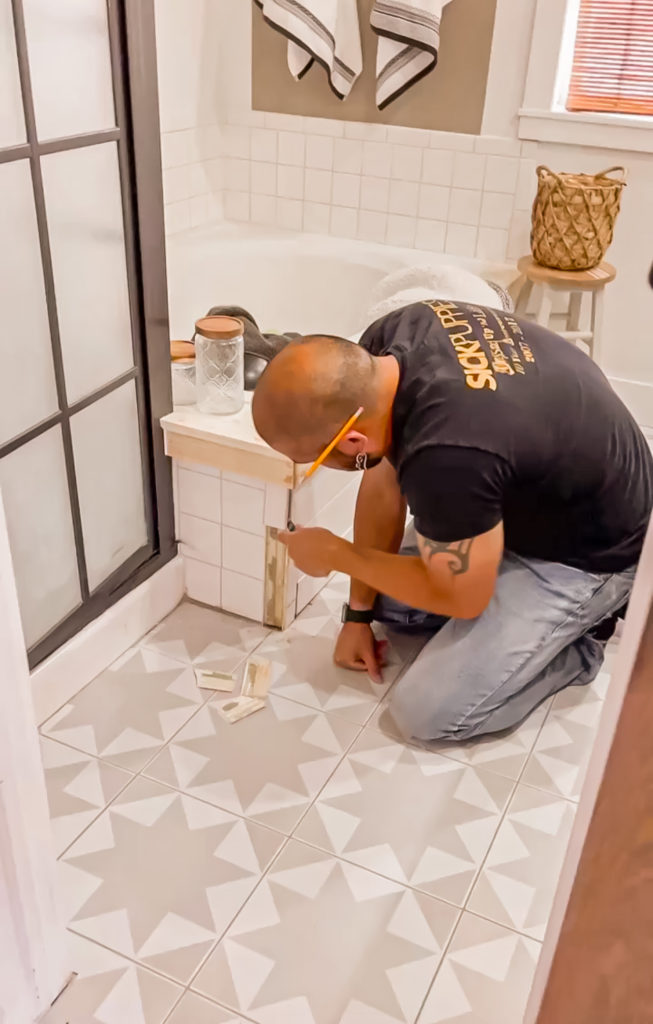
Anthony installed some shiplap to the side and some pine to trim the corner so that it flowed with the other side. So much better!
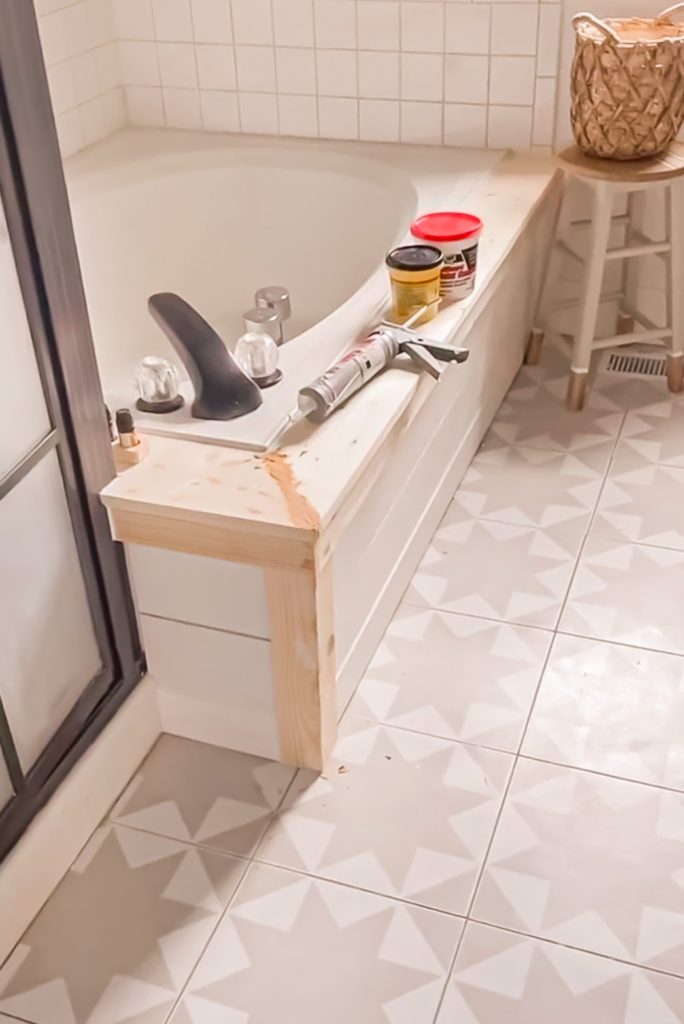
Once the installation master was done, it was my turn to make it pretty! I started by sanding everything down with my sander.
Then I stained it using dark wax with a coat of white wash on top.
I decided to paint the shiplap in the color Wheat Bread by Behr to match the accent wall behind the vanity.

Since the wood is expected to get hit with water droplets I wanted to do a good job sealing it. After a lot of research I learned that Tung Oil is one of the best products to use. I applied three coats and sure enough, water just beads right up the instant it hits the wood.
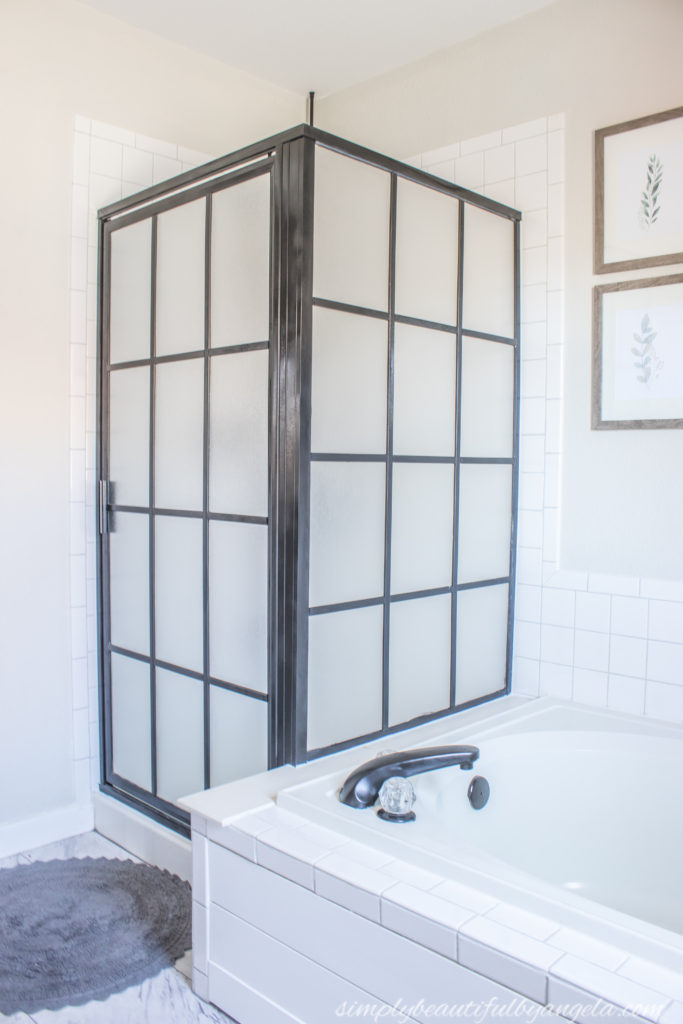
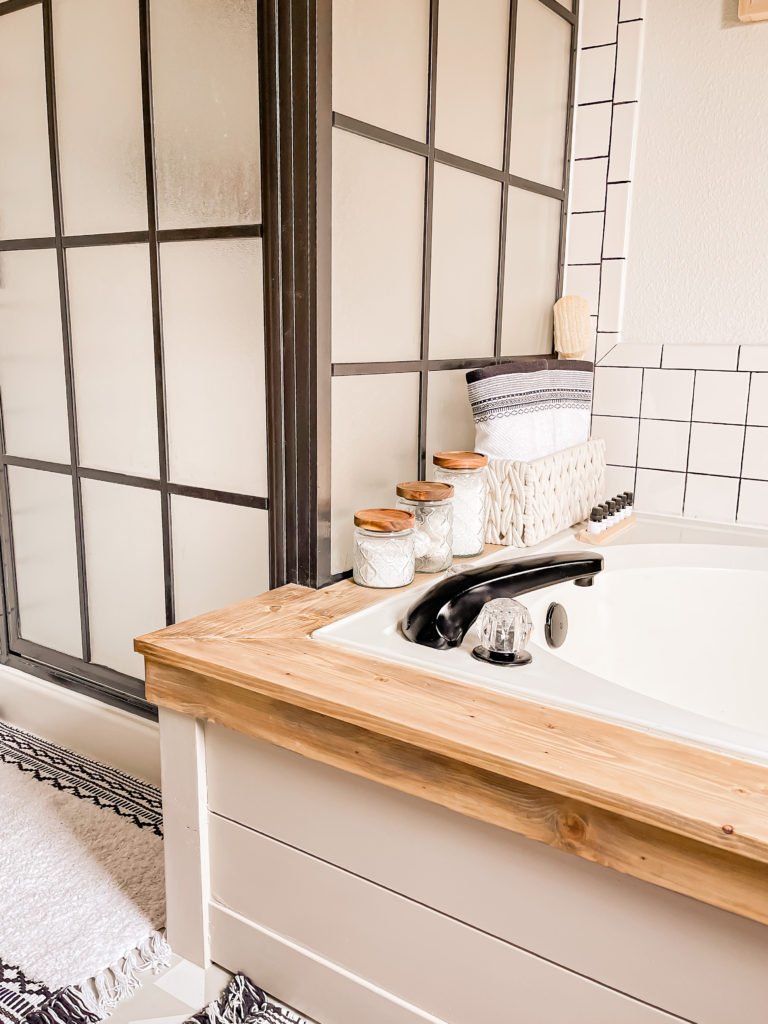
Here is the final look!
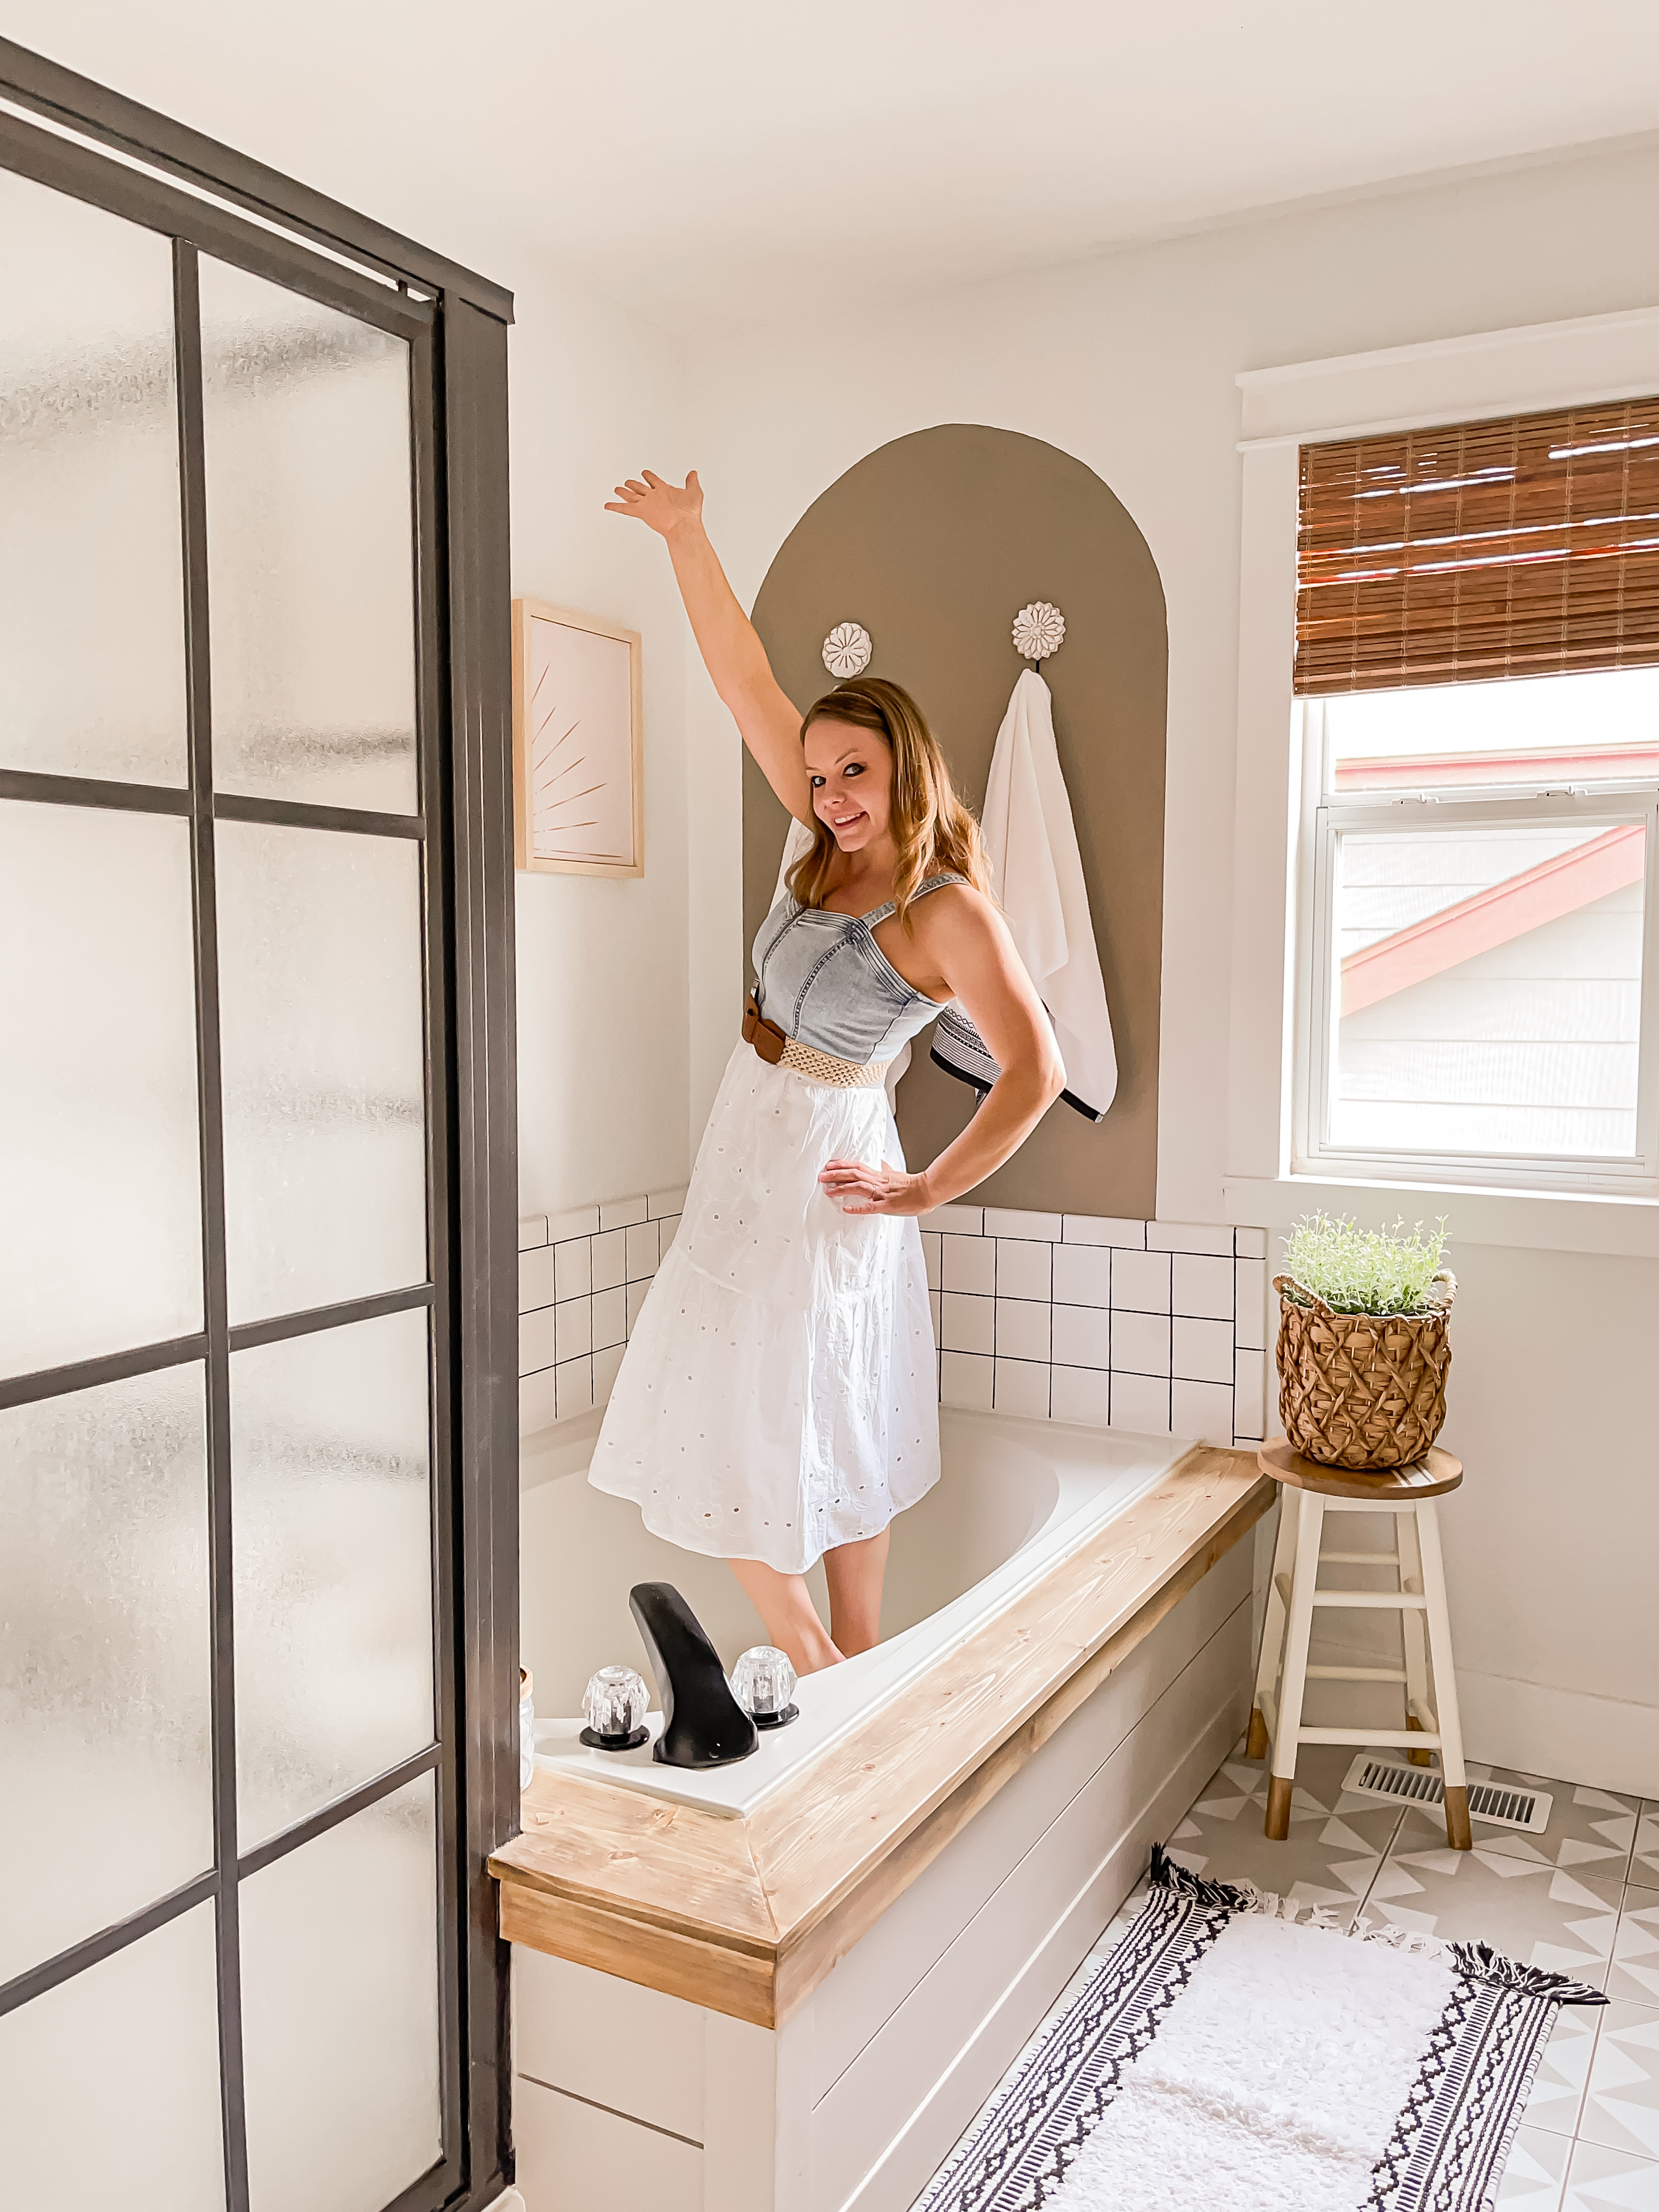
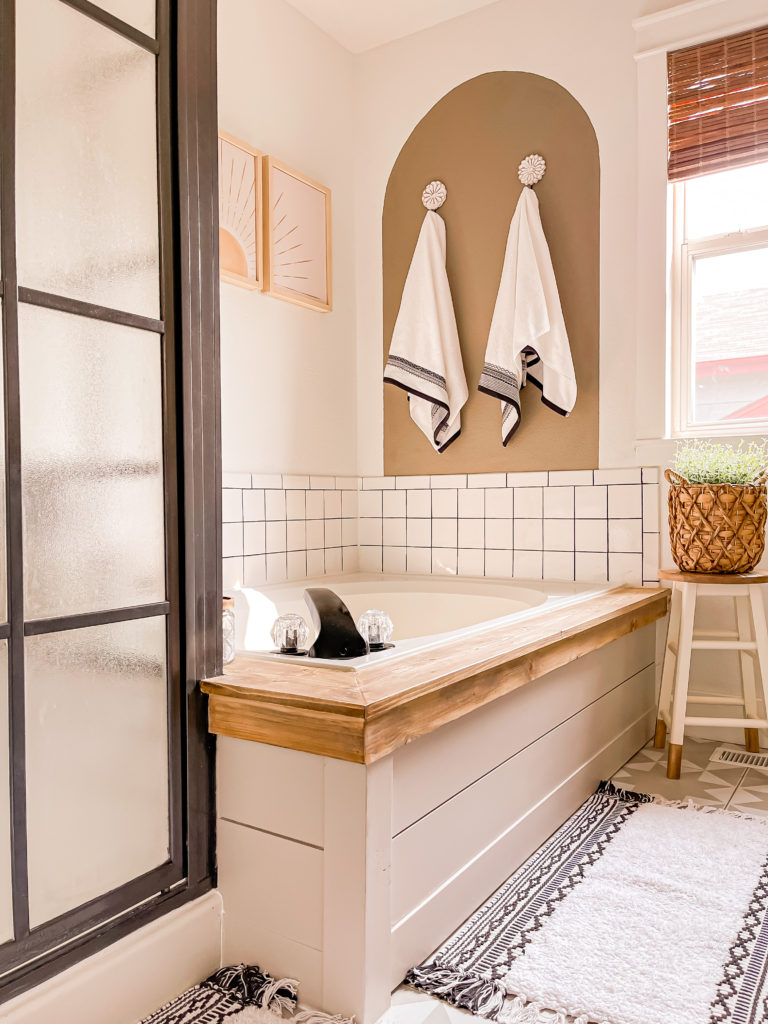
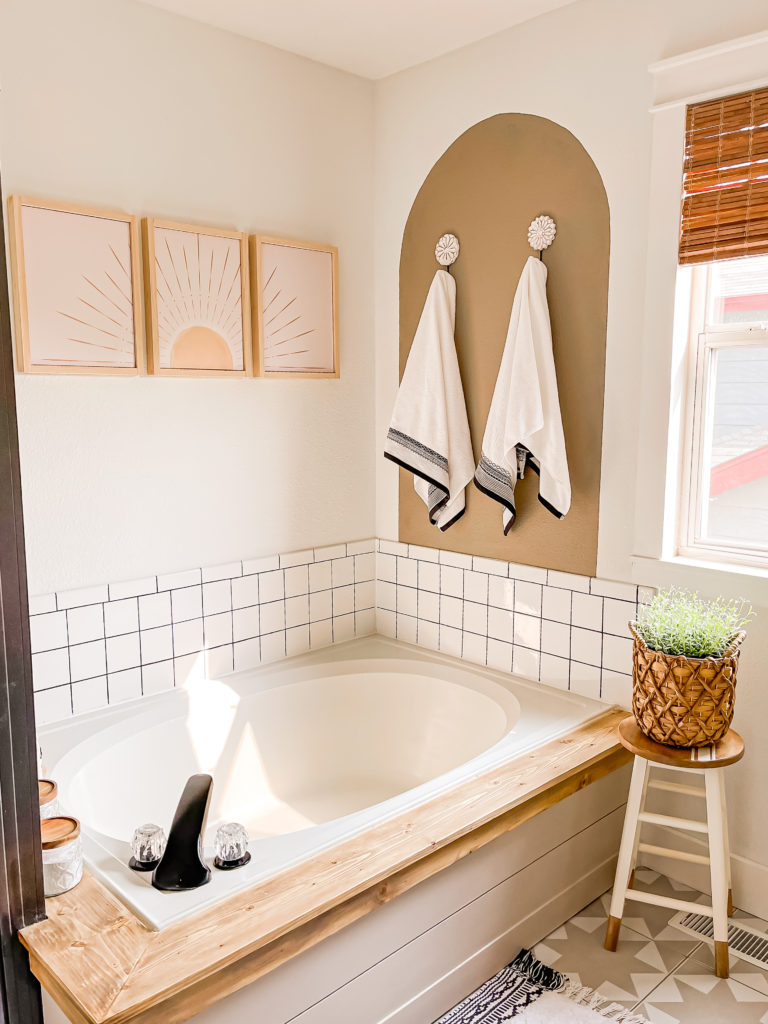
It’s such an improvement from the before and I wish I would have thought of doing this during the first makeover!
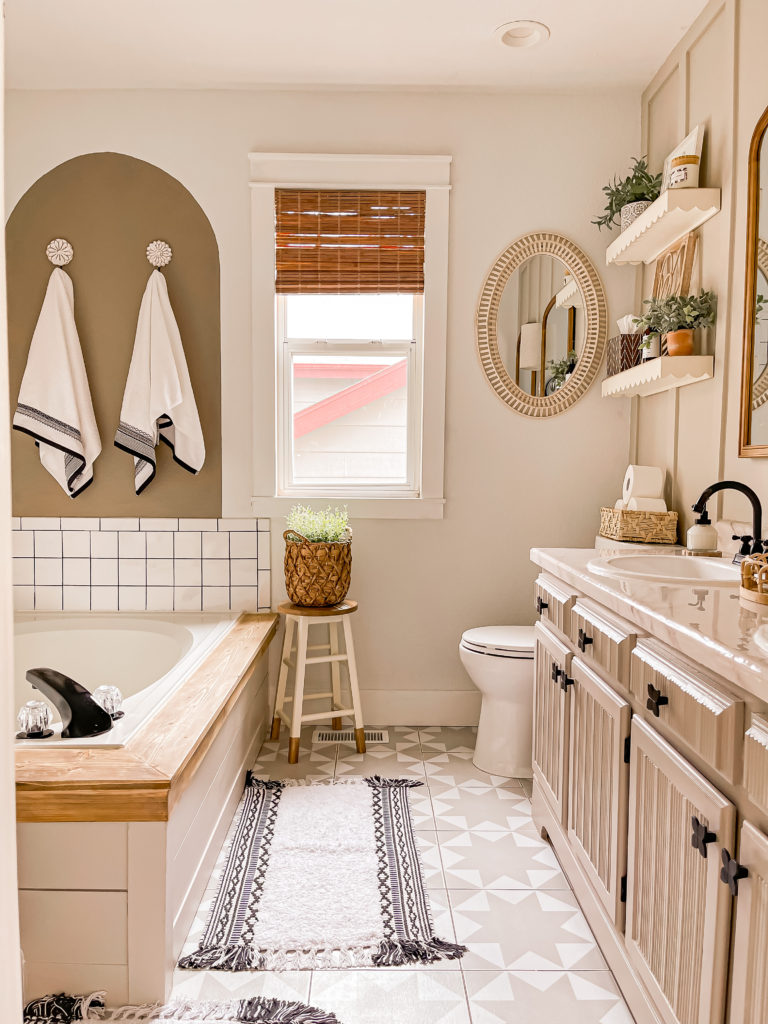
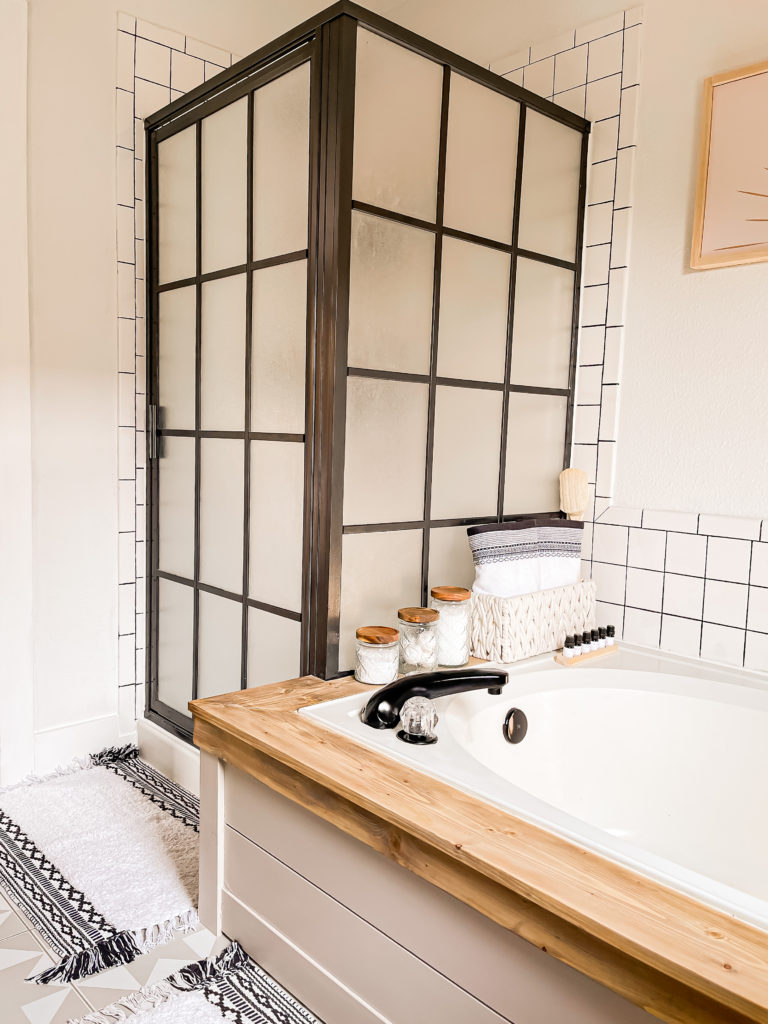
The wood warms the space up so much and makes bath time feel extra cozy!

Thanks for stopping by today! Happy a safe and happy weekend 😁
PIN FOR LATER!
Linking up to these awesome parties!
That turned out great!