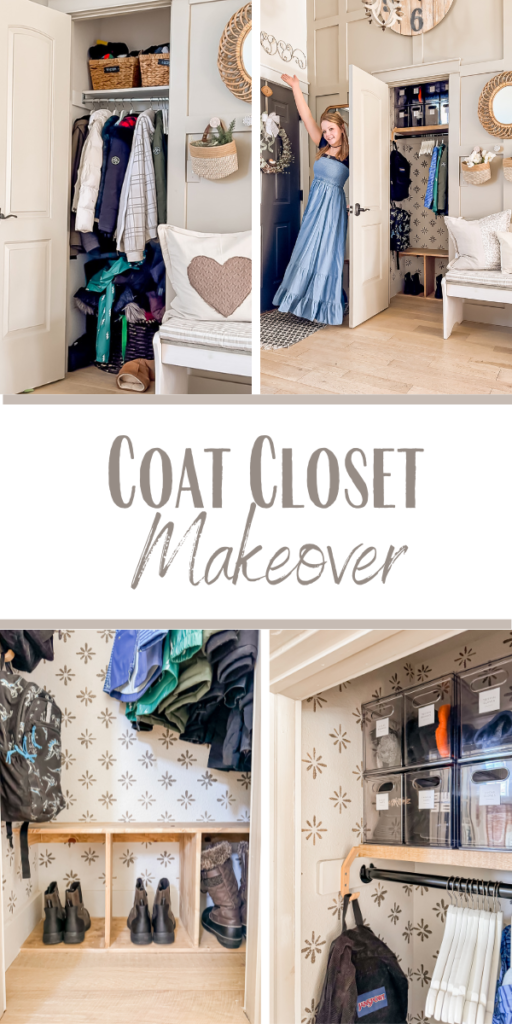
Happy Friday! As you may recall, I started the year with a goal of giving our coat closet a makeover to make it more functional and pretty. After weeks of putting it off, I finally got it together and went for it!
This was our starting point.
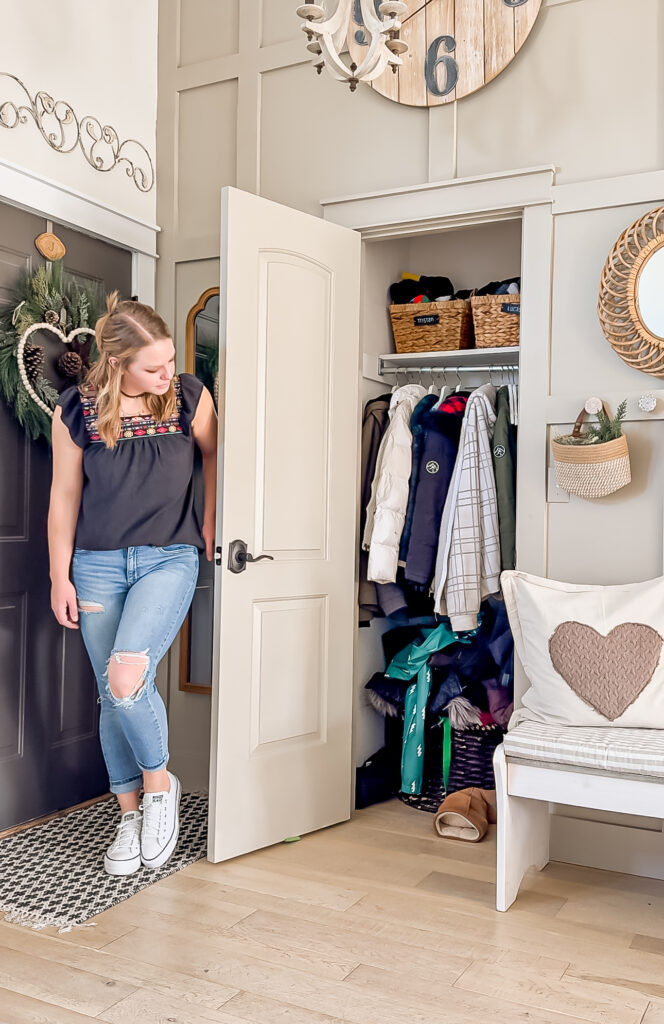
This closet is long since it goes all the way behind that wall with the bench and it is also fairly tall. Despite its spaciousness, I never felt like we utilized the space properly. And no matter how many times I attempted to organize it—it became messy again within no time!
I started by taking everything out and giving the whole space a nice new coat of paint.
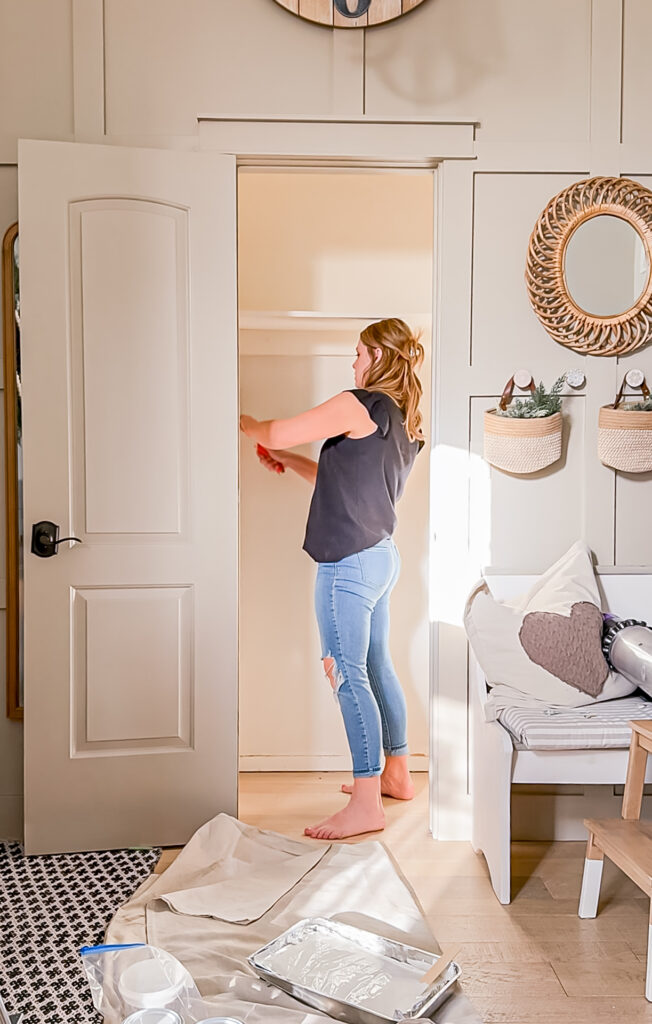
I had help from a cute assistant!
We used a very light version of BM Pashmina which is the color that was used on the board and batten. I had ordered a can at 50% but it was still too dark, so I ended up getting a can of white and mixing that with it at 50%—so if I’m thinking correctly that’s the original color at 25%…but I could be wrong haha!
The next day I installed baseboards (since we had skipped that when installing the new floors) and then I was ready to stencil! I chose this stencil which had a simple yet fun design. I used the color Stone Staue by SW.
I found the stencil easy to work with, however I did overload my roller a bit and didn’t get the most crisp lines! I decided to embrace it and distressed it with some sandpaper to make it look worn and the imperfections purposeful!
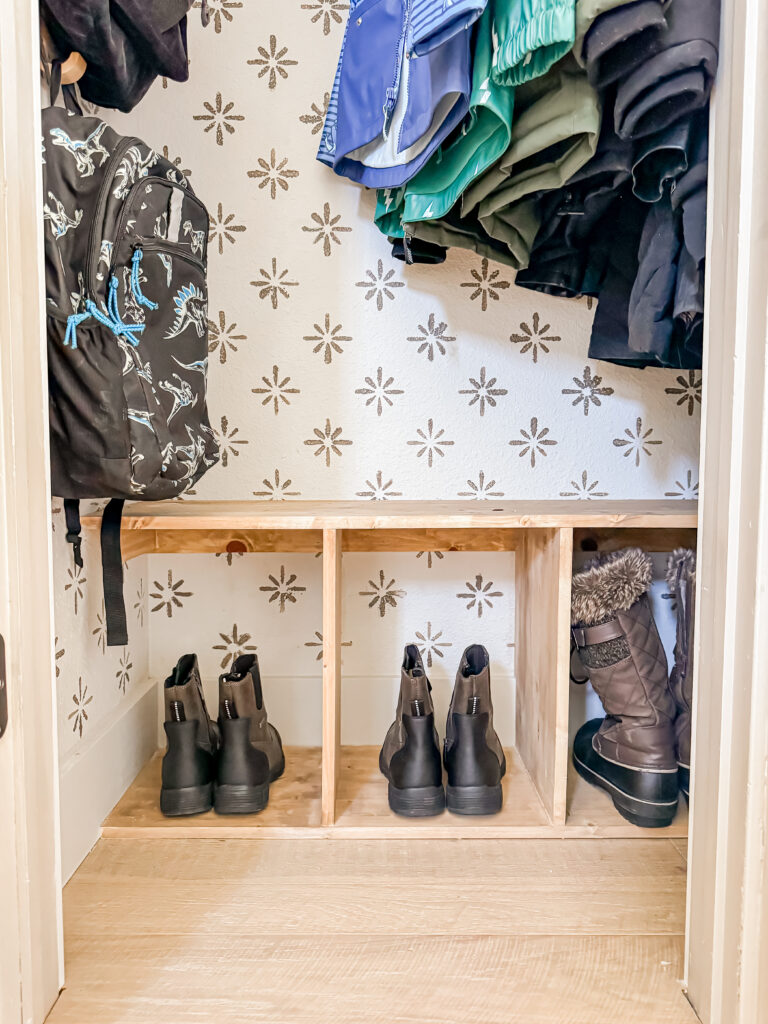
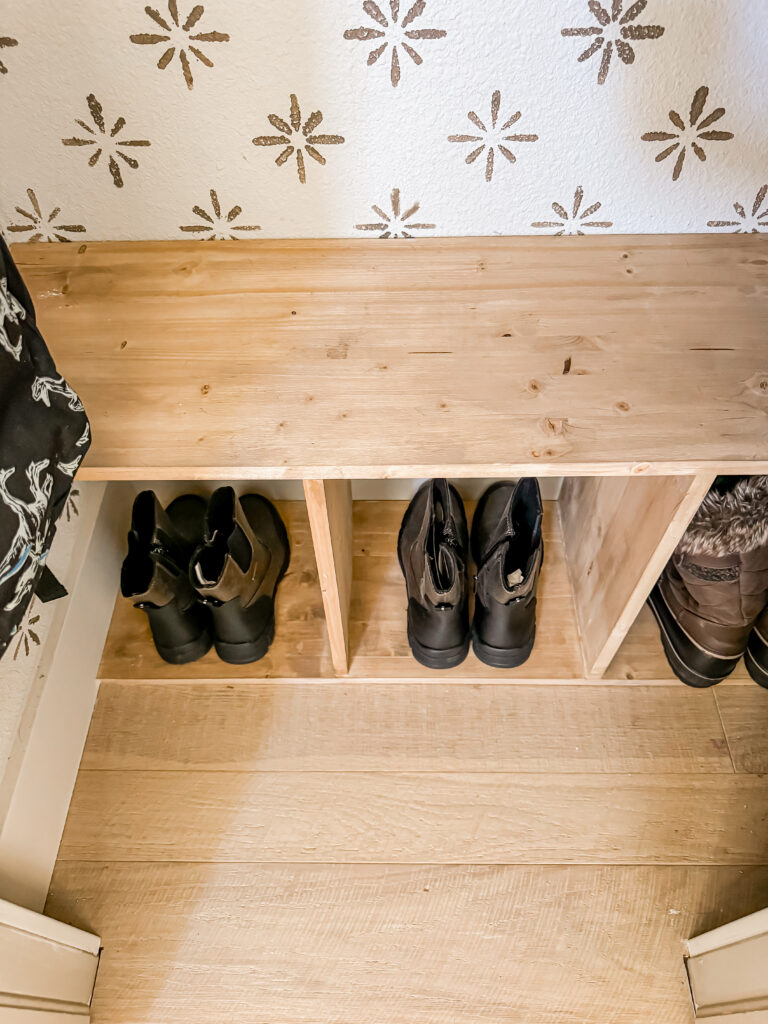
Next it was time for the wood cubbies that I wanted to build to hold our boots. Anthony took over here and implemented my design for me while I was at work. He started by securing a 1×3 to the studs as support.
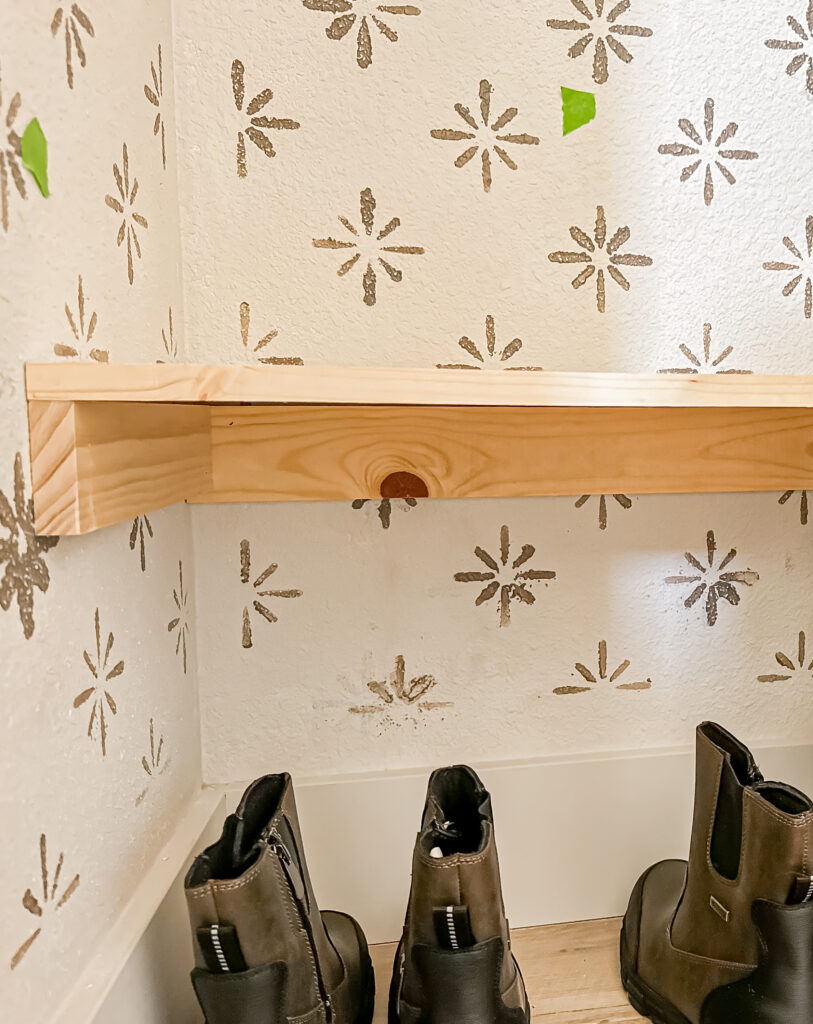
He then cut down a 12” pine board and attached that to the top.
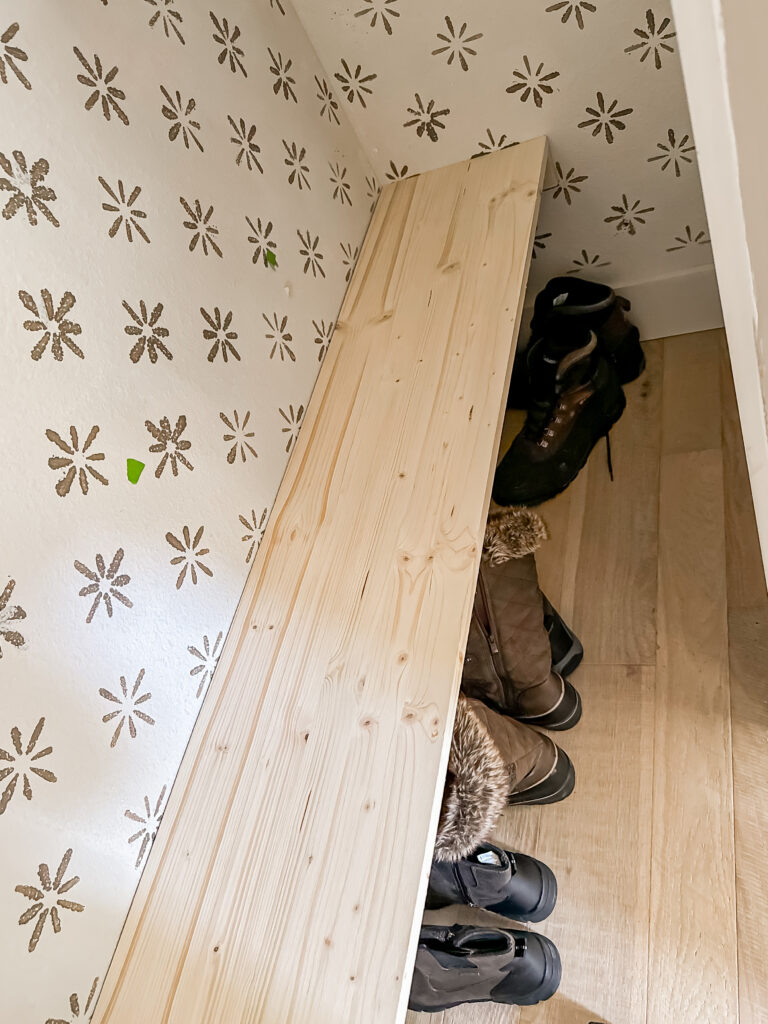
It was at this point that he informed me that my original idea of simply putting in dividers would not be stable, and that it would be better to have a bottom as well.
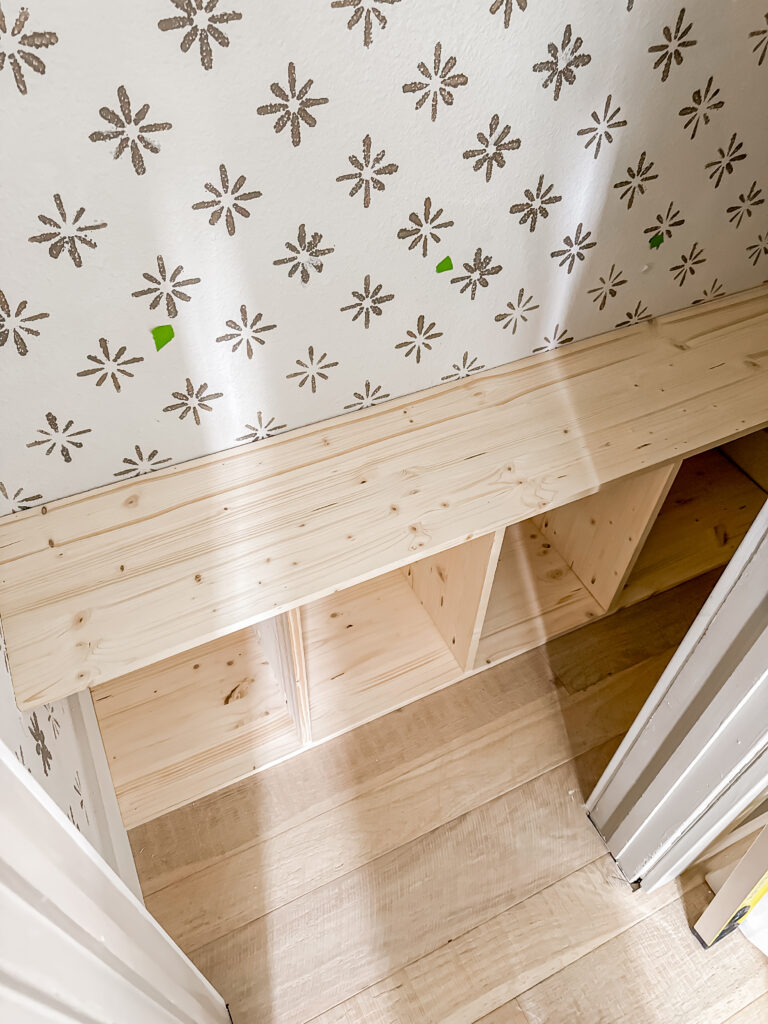
Next, he cut down a pine board and attached it to the top of the existing MDF shelf and then put a 1×2 in front to make it look like a chunky wood shelf. It looked pretty good, but seeing the MDF underneath bothered me so I got some wood contact paper to apply over it and it disguised it perfectly!
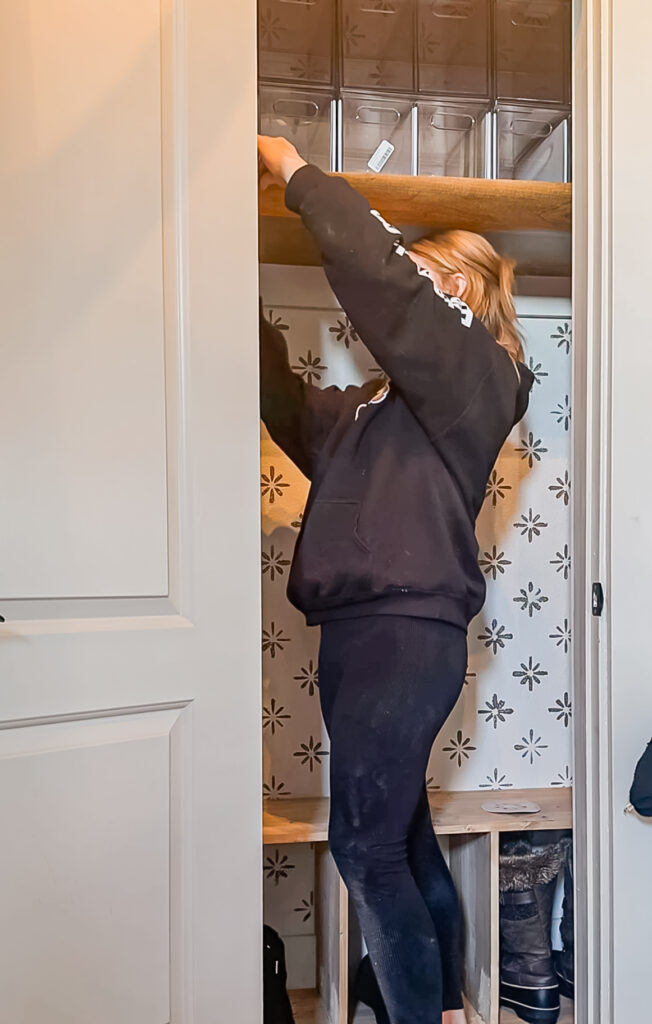
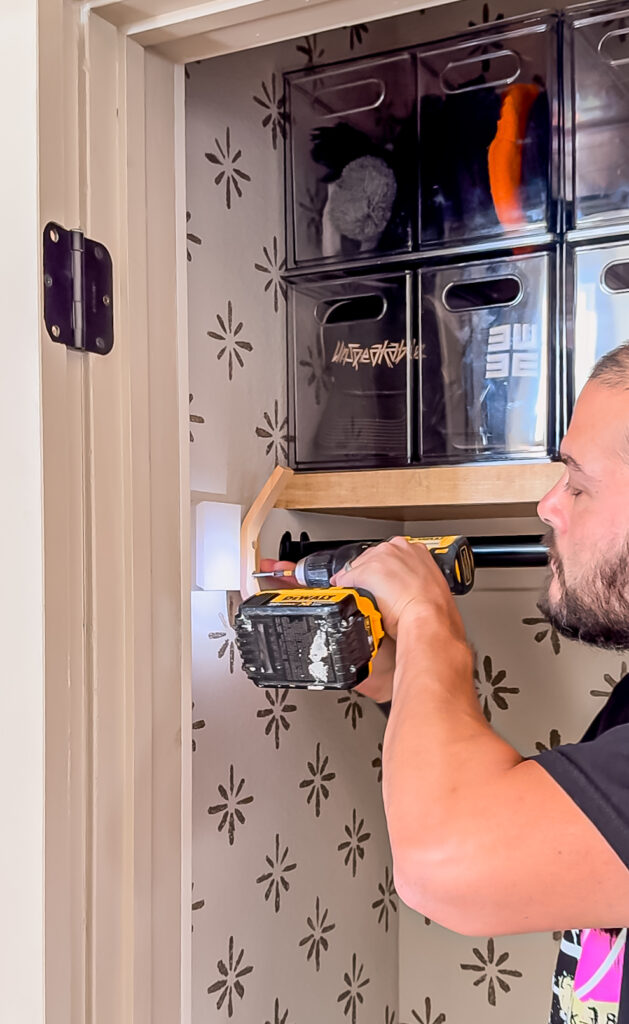
Originally I was just going to spray paint the existing rod, but when I saw how affordable this one was I decided to replace it. It’s a lot sturdier than the old one too!
Taco and I observed as Anthony measured out where to install the flanges.
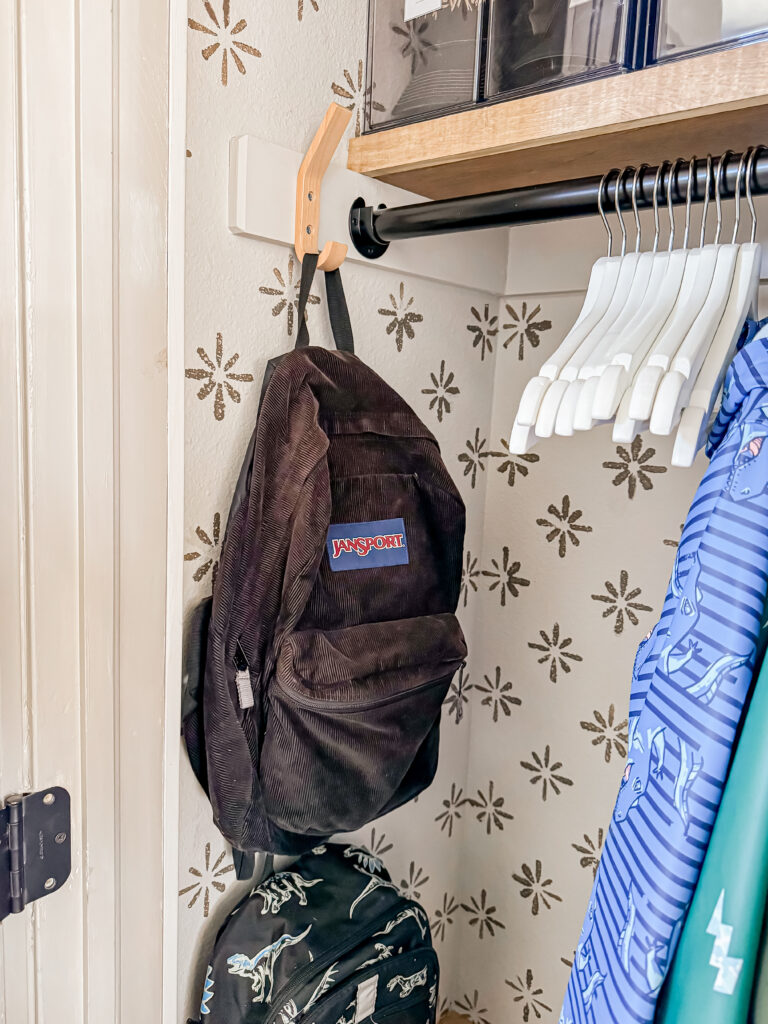
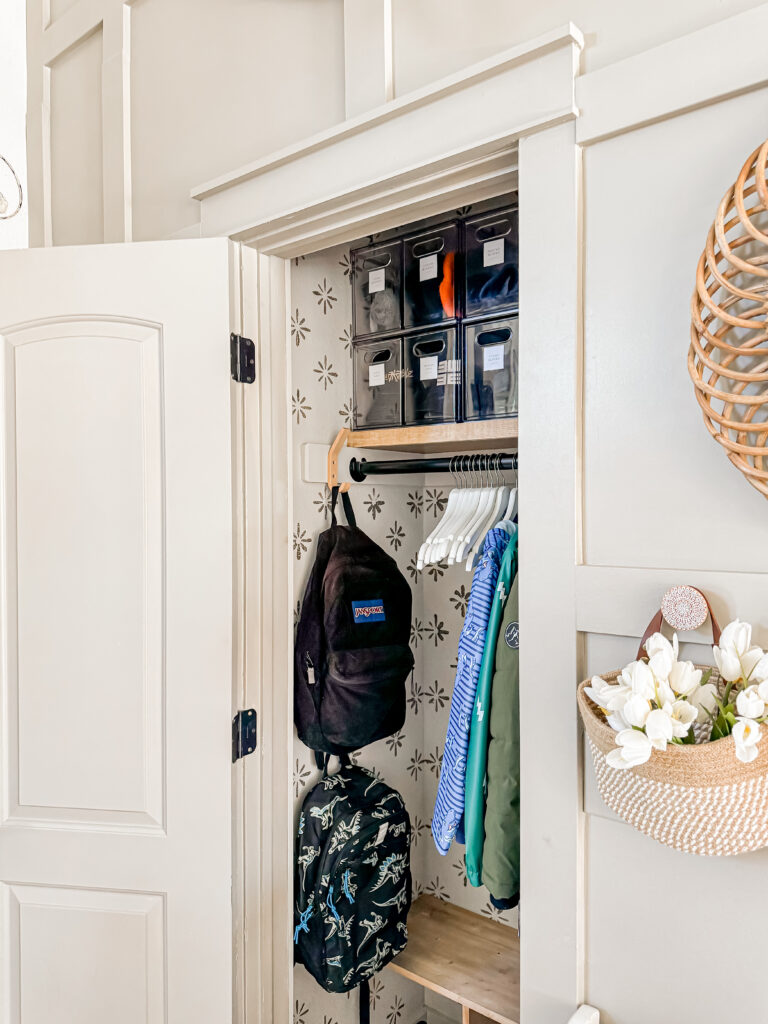
We installed these wooden hooks so that the boys could hang their backpacks in here.
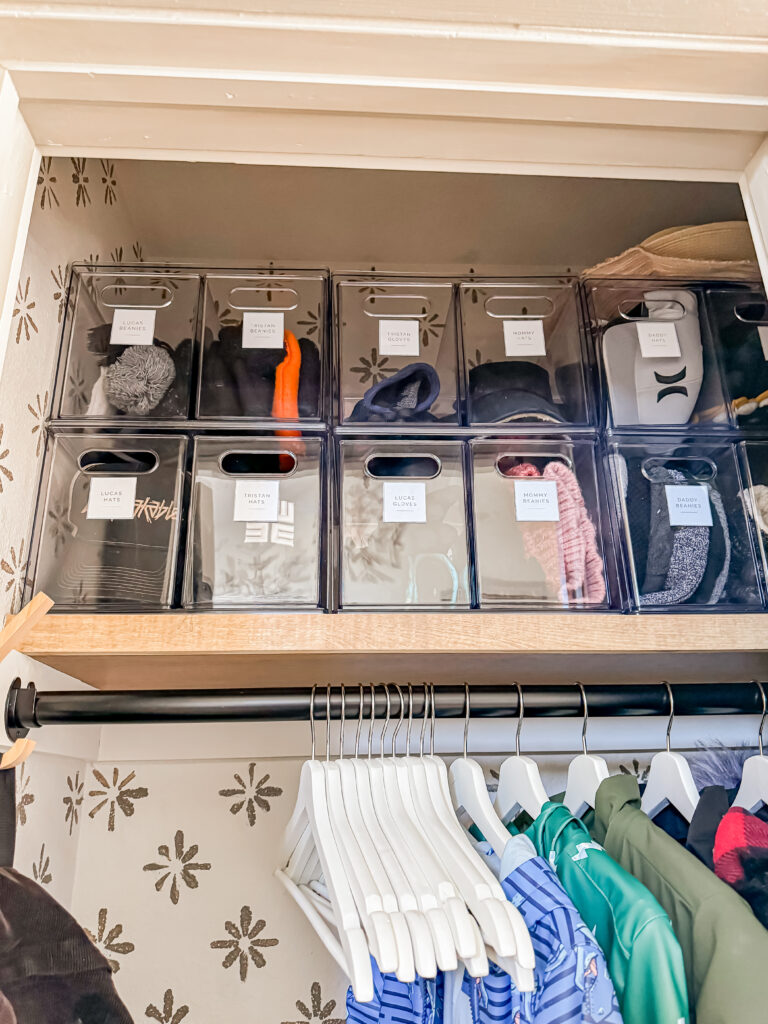
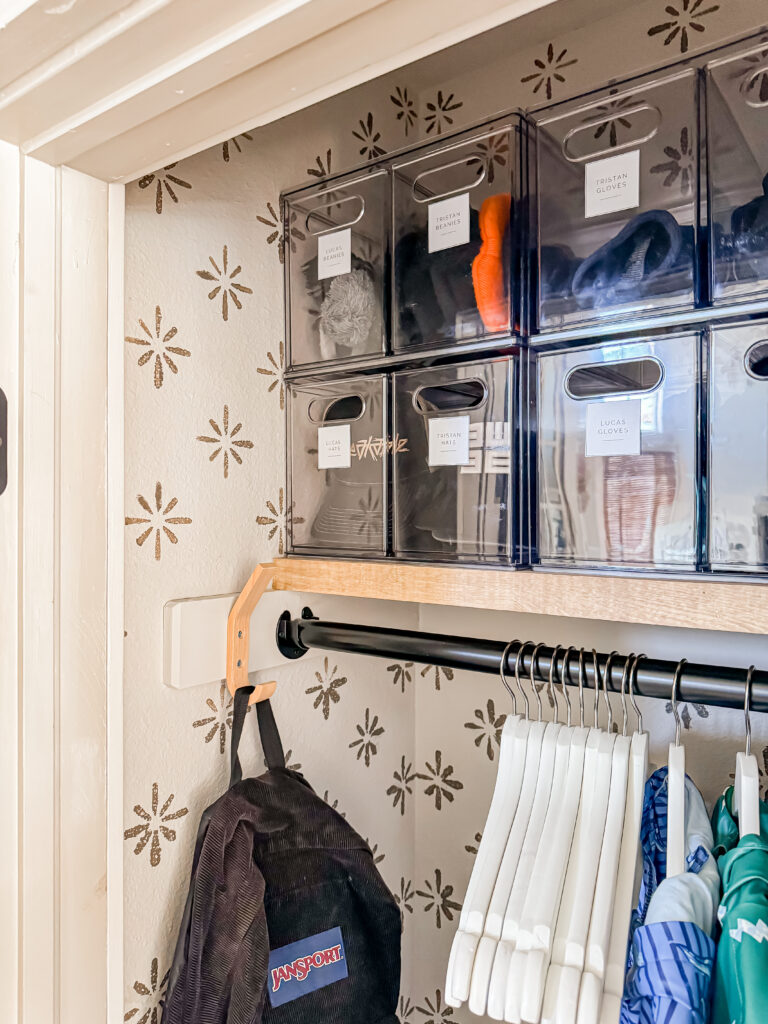
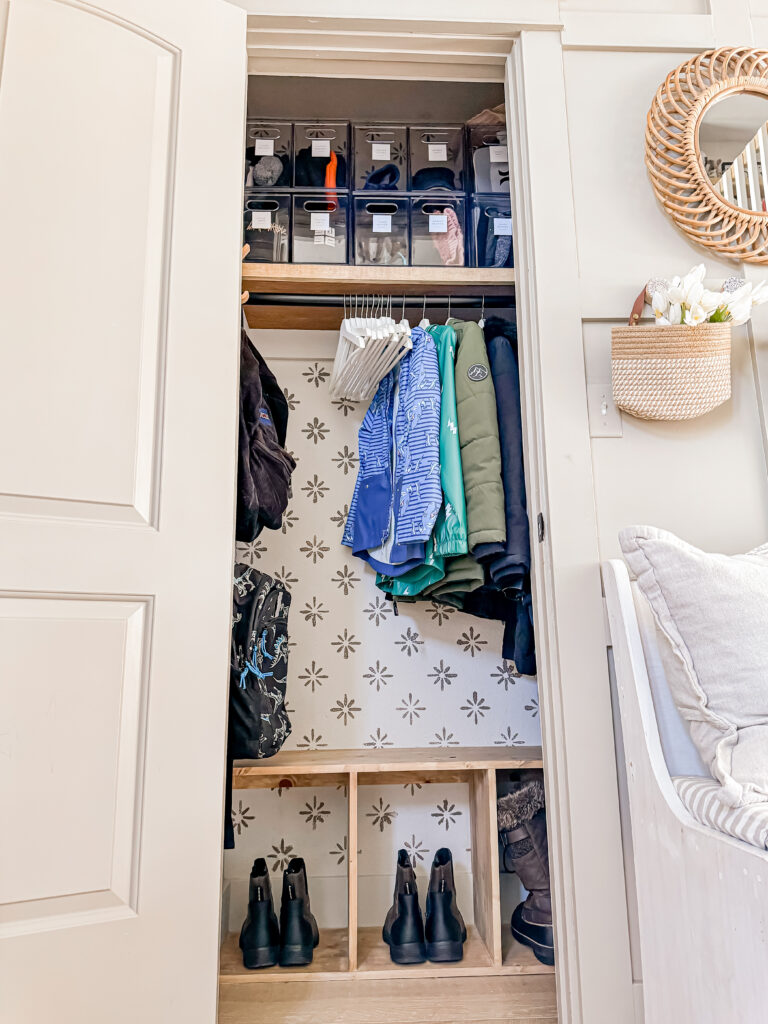
I finished it off with some clear drawers on the shelf and here is how it turned out!
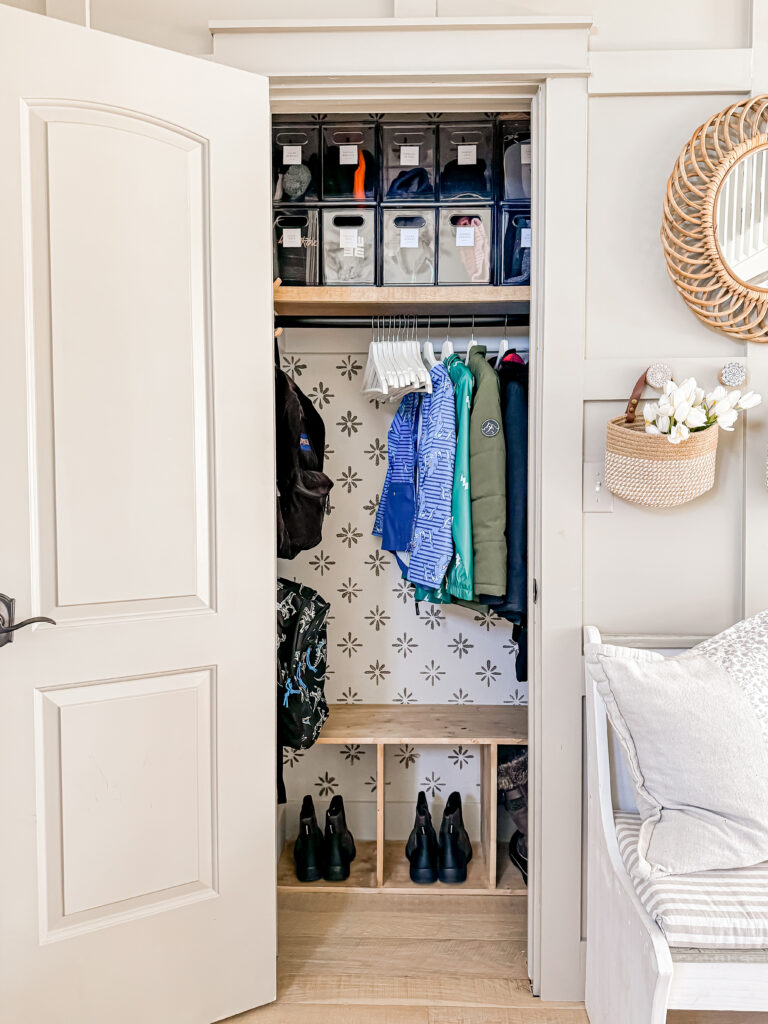
The floor used to be a dumping ground, but I’m hoping that the boot cubbies help keep it clear!
The stackable drawers utilize the tall ceiling space and give each family member a special spot for their items.
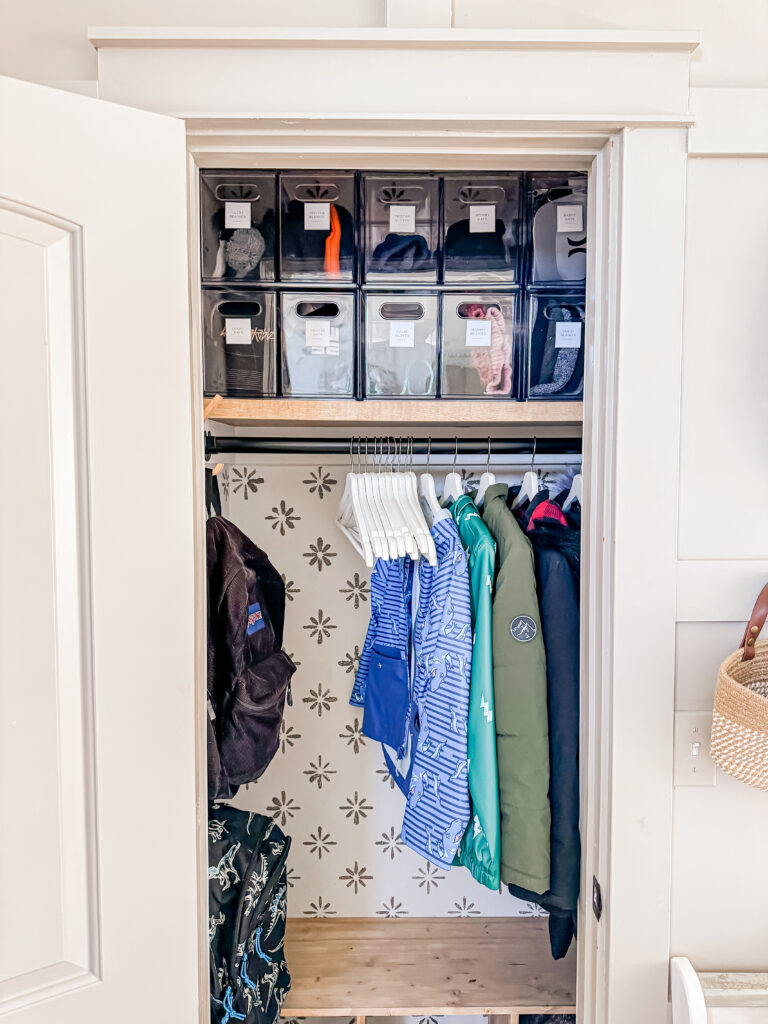
The boys have been loving that their backpack hooks are right by the front door and I have been loving how they can be hidden out of sight!
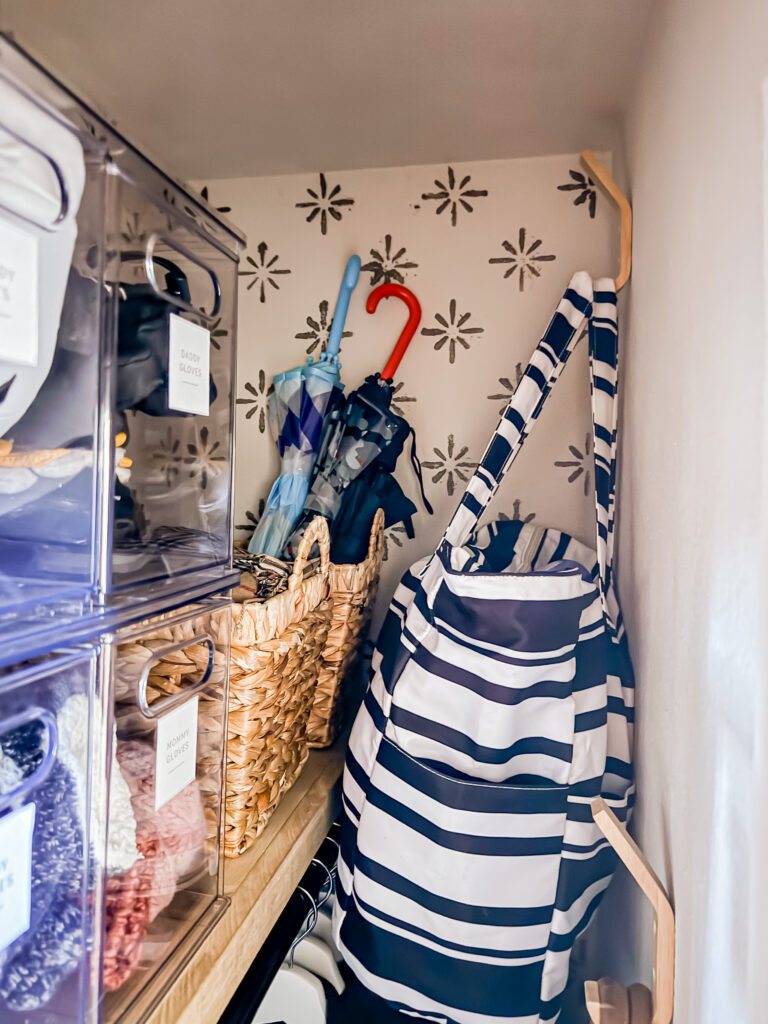
I wanted to utilize every square inch in here, so I tucked some baskets for scarfs and umbrellas in the back, and we installed two more hooks for the pool bag and my laptop bag along the back wall.
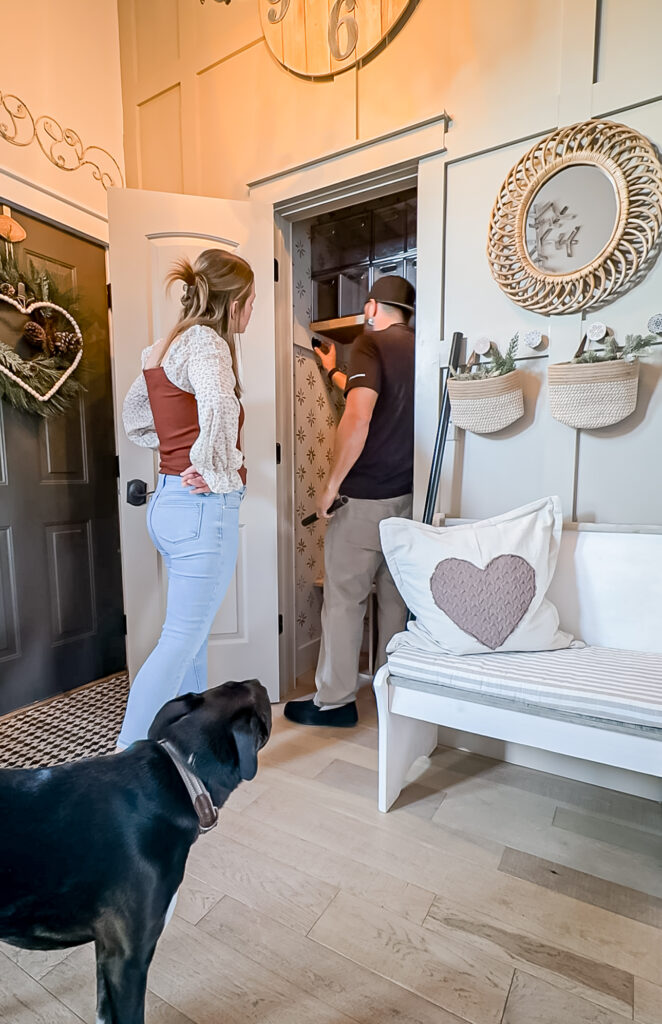
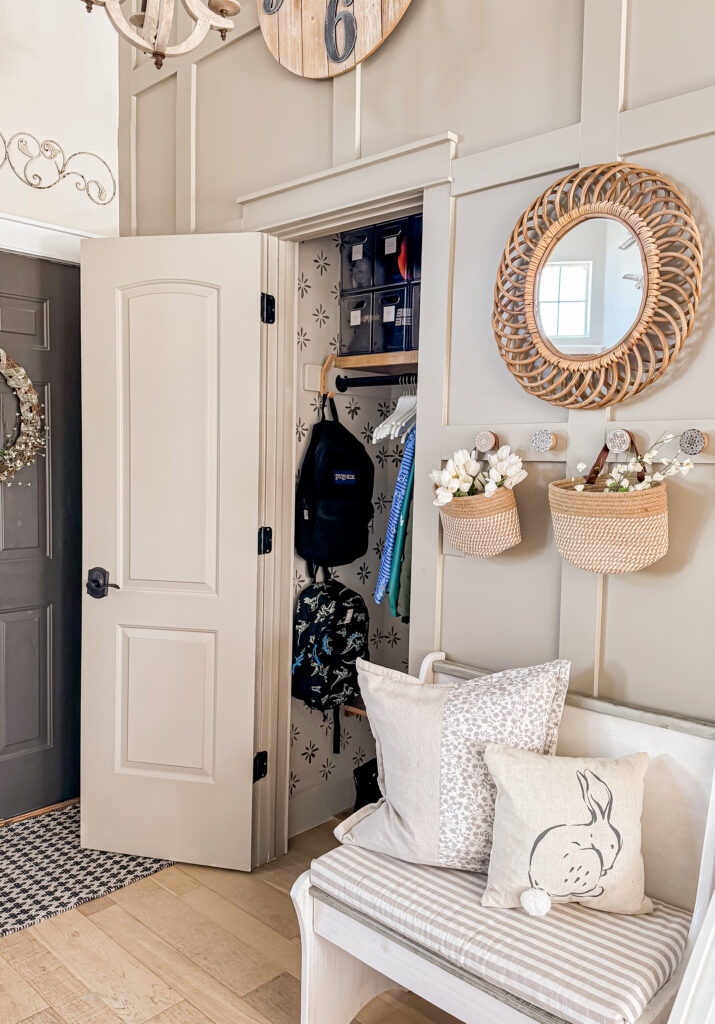
I used to absolutely dread opening this door because of the mess behind it, but now I enjoy it!
Links:(Affiliate links may be provided for convenience. For more info, see my full disclosure here.)
Linking up to these awesome parties!
PIN FOR LATER!
It looks great!
You’re a genius!! And beautiful as always!!!
Love! Love! Love! Now come do mine! 😊