**UPDATE** See how I did this again but was able to fill the foam look better HERE!
Hi guys! I hope you all had a fantastic Labor Day weekend. Our was very busy but tons of fun! We squeezed in a lot of activities with the kids including an entire day at Six Flags which was an absolute blast.
During naptime I got started on a little fall decorating and over the course of the weekend I must have painted at least 20 pumpkins. No joke!
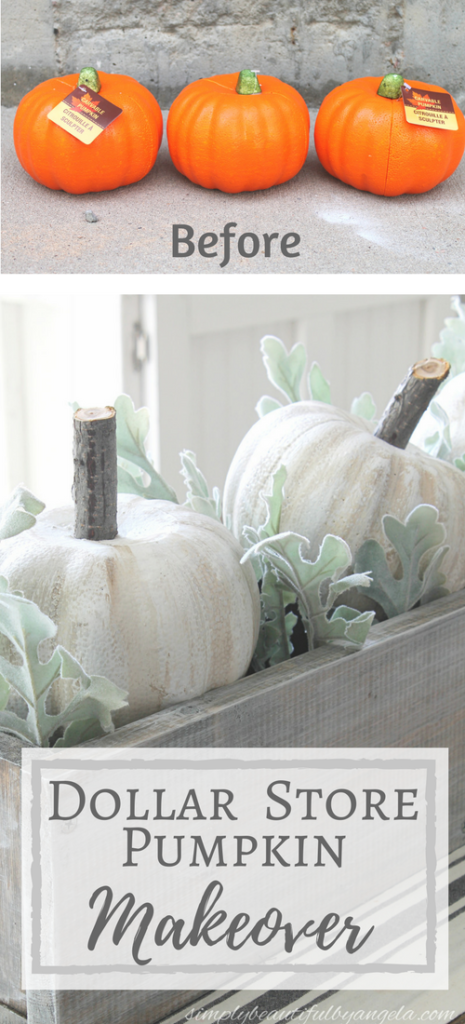
I decided that I want all white pumpkins this year so I’ve become a pumpkin painting machine. I had a lot of small ones from previous years but I decided that I needed some bigger ones too. So I went on a search to find some that weren’t going to break the bank.
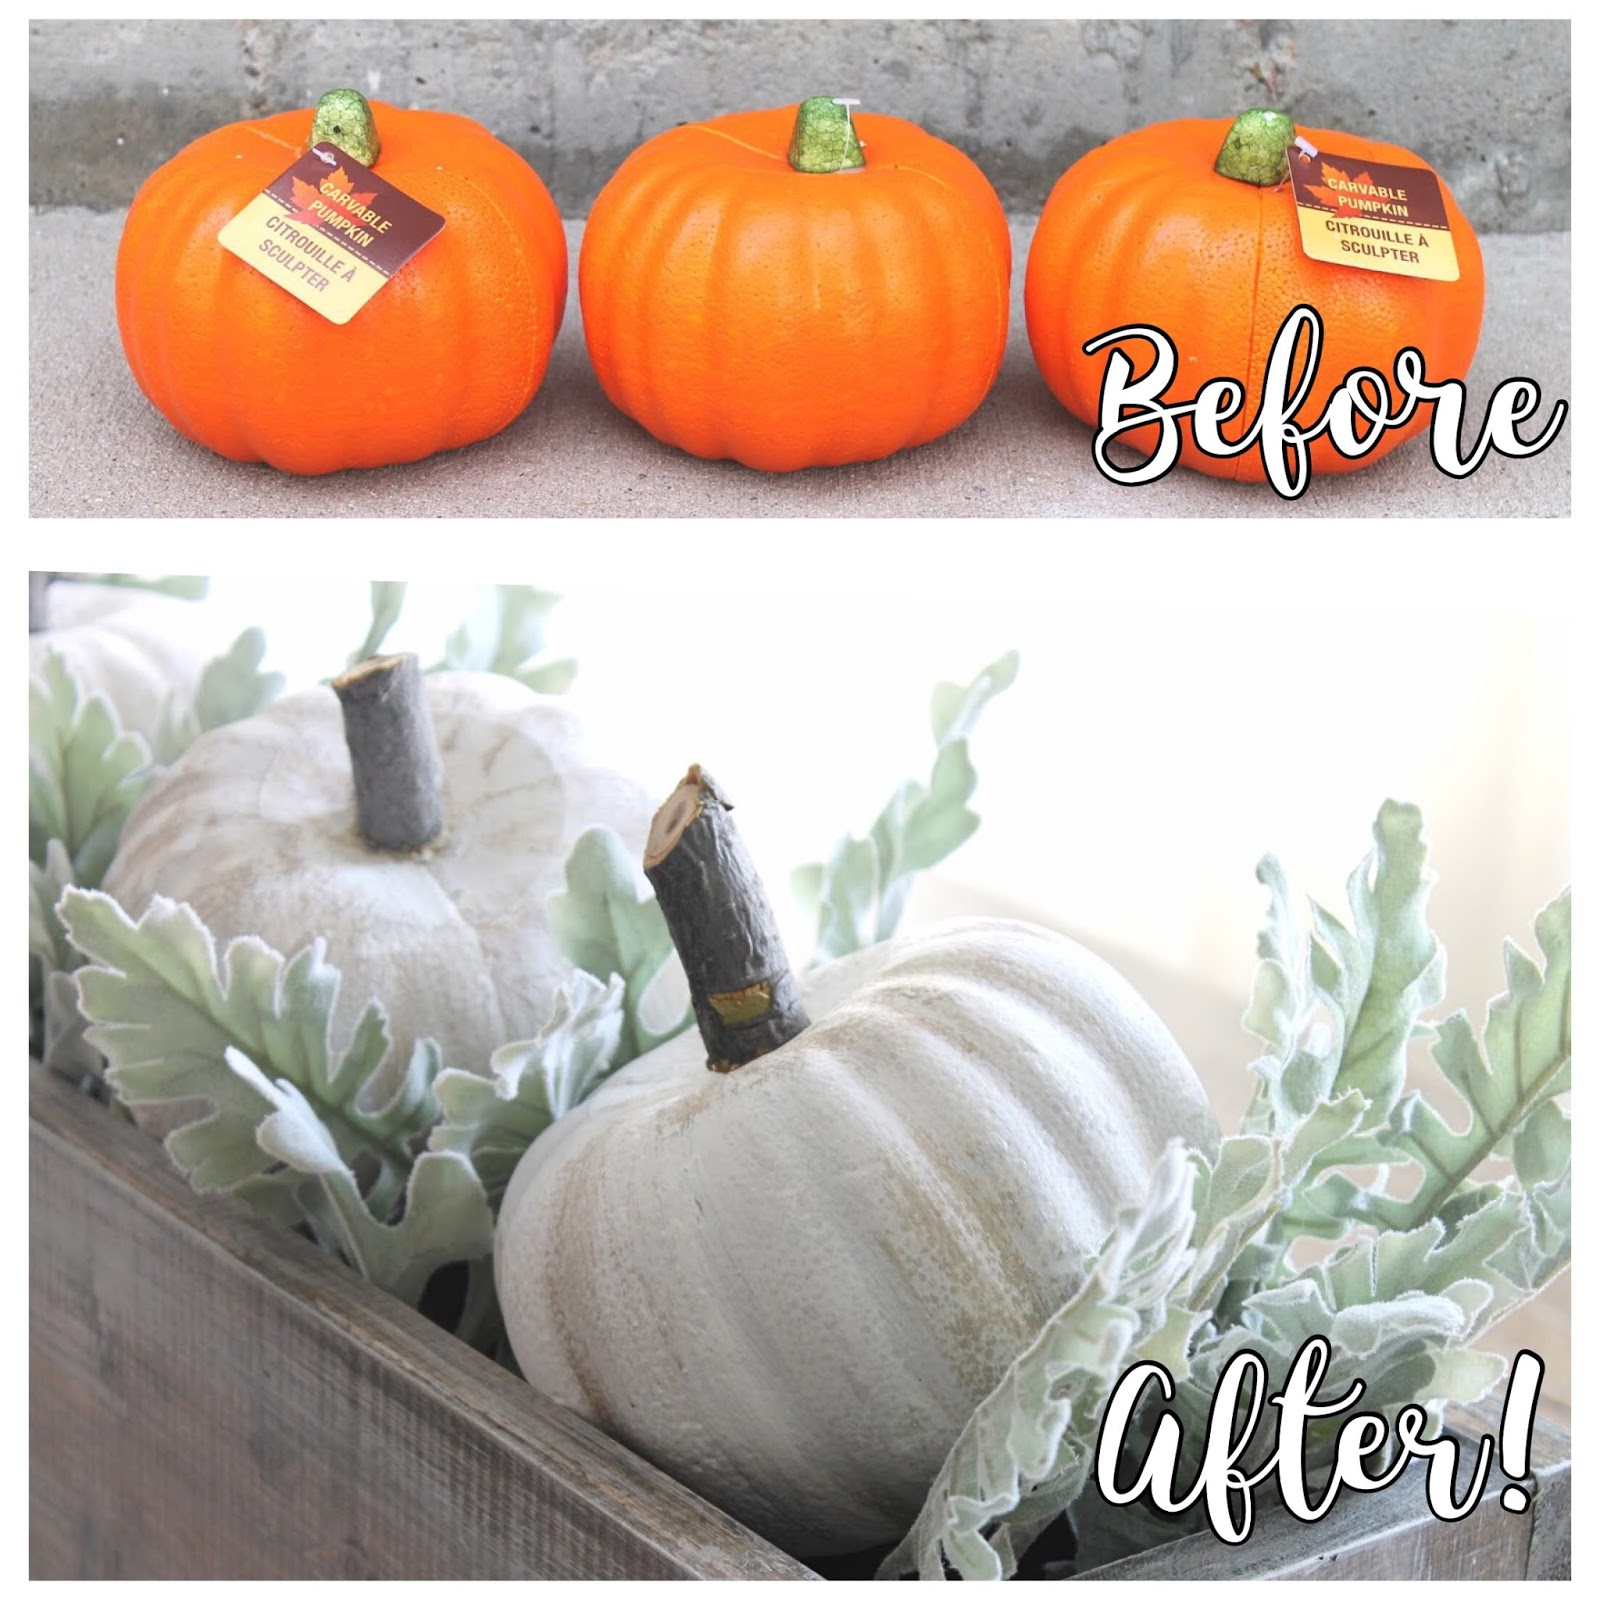
Have you all seen these pumpkins at the dollar store? I always just pass them by because let’s be real, they aren’t the most beautiful or realistic looking faux pumpkins out there!

But since I was in desperate need some bigger pumpkins I decided I would try to give them a little makeover to make them look a little less dollar-storish!
Supplies Used: (Affiliate links may be provided for convenience. For more info, see my full disclosure here.)
- Wood Filler
- Dark Brown Paint
- Plaster of Paris
- White Paint
- Valspar Dark Sealing Wax
- Waverly Inspirations Chalk Paint in Mineral
- Cloth
- Branches
- Liquid Nails
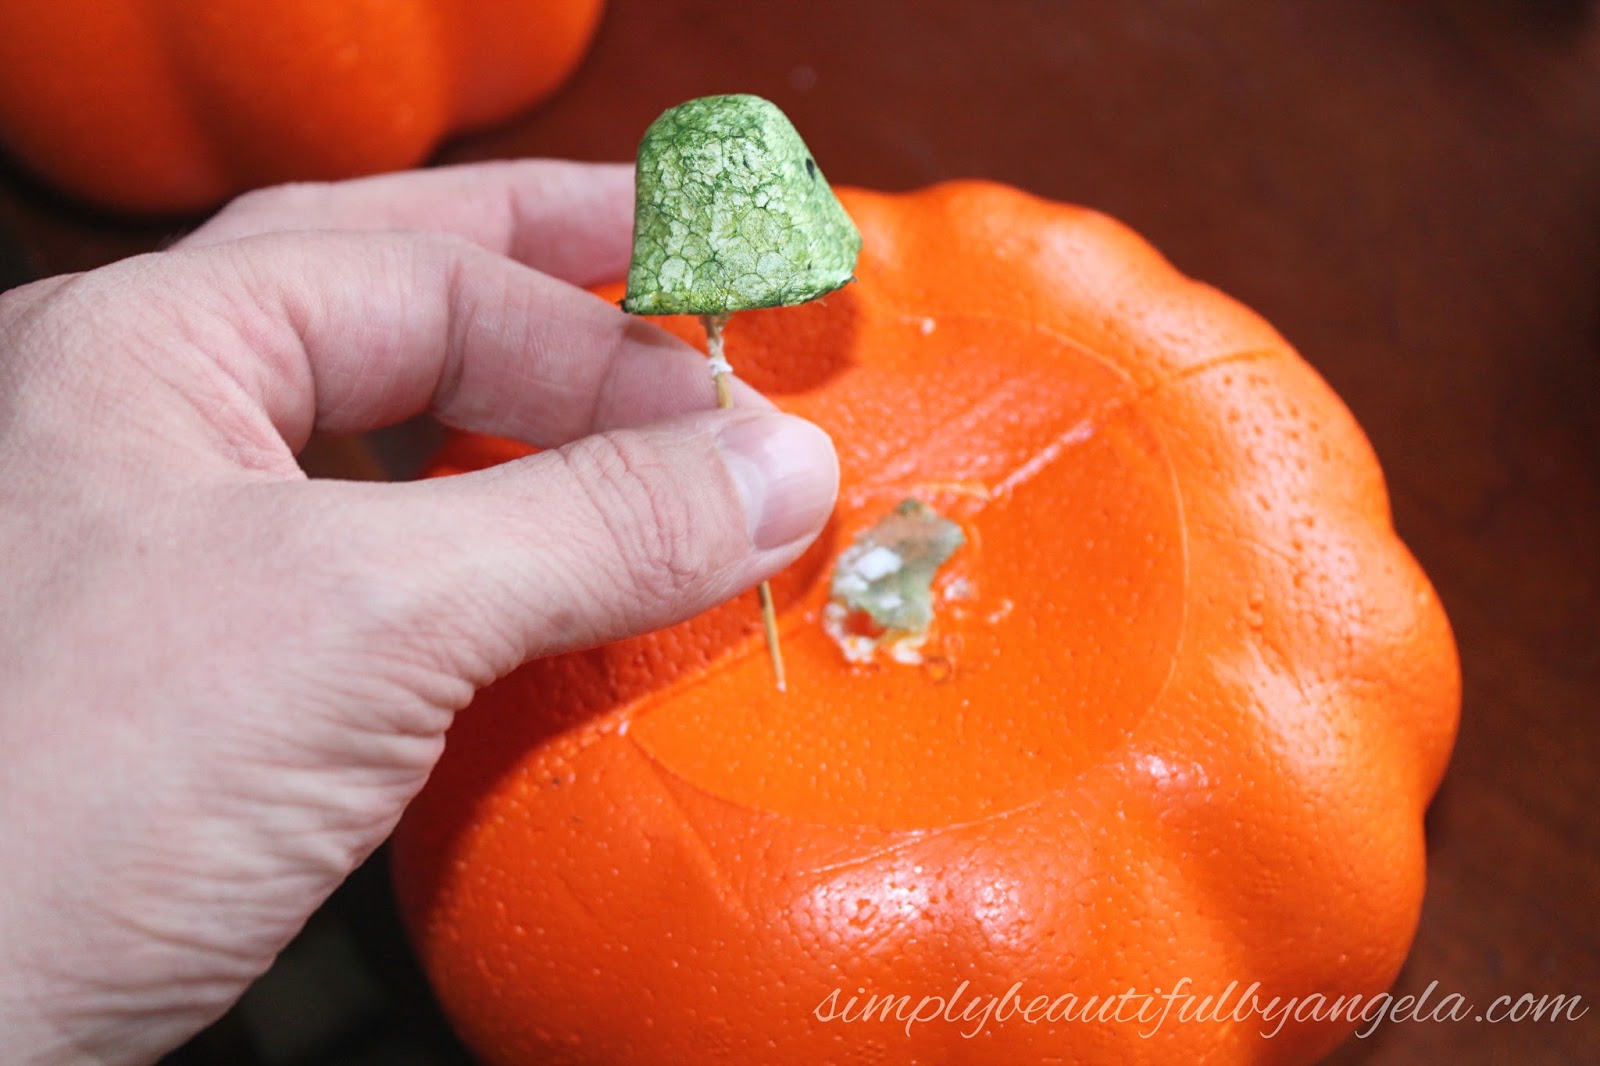
The first thing that I did was pop the stem off. They came off pretty easily although one did tear the pumpkin a little bit. Luckily this wasn’t noticeable once I was put my thicker stem on at the end.
I didn’t like that the seams in the middle were super deep so I began by filling them in with a little bit of wood filler.

Once that was dry, I gave each one a coat of dark brown acrylic paint to act as a base. I thought it would be a good idea to help prevent the fluorescent orange from bleeding through.

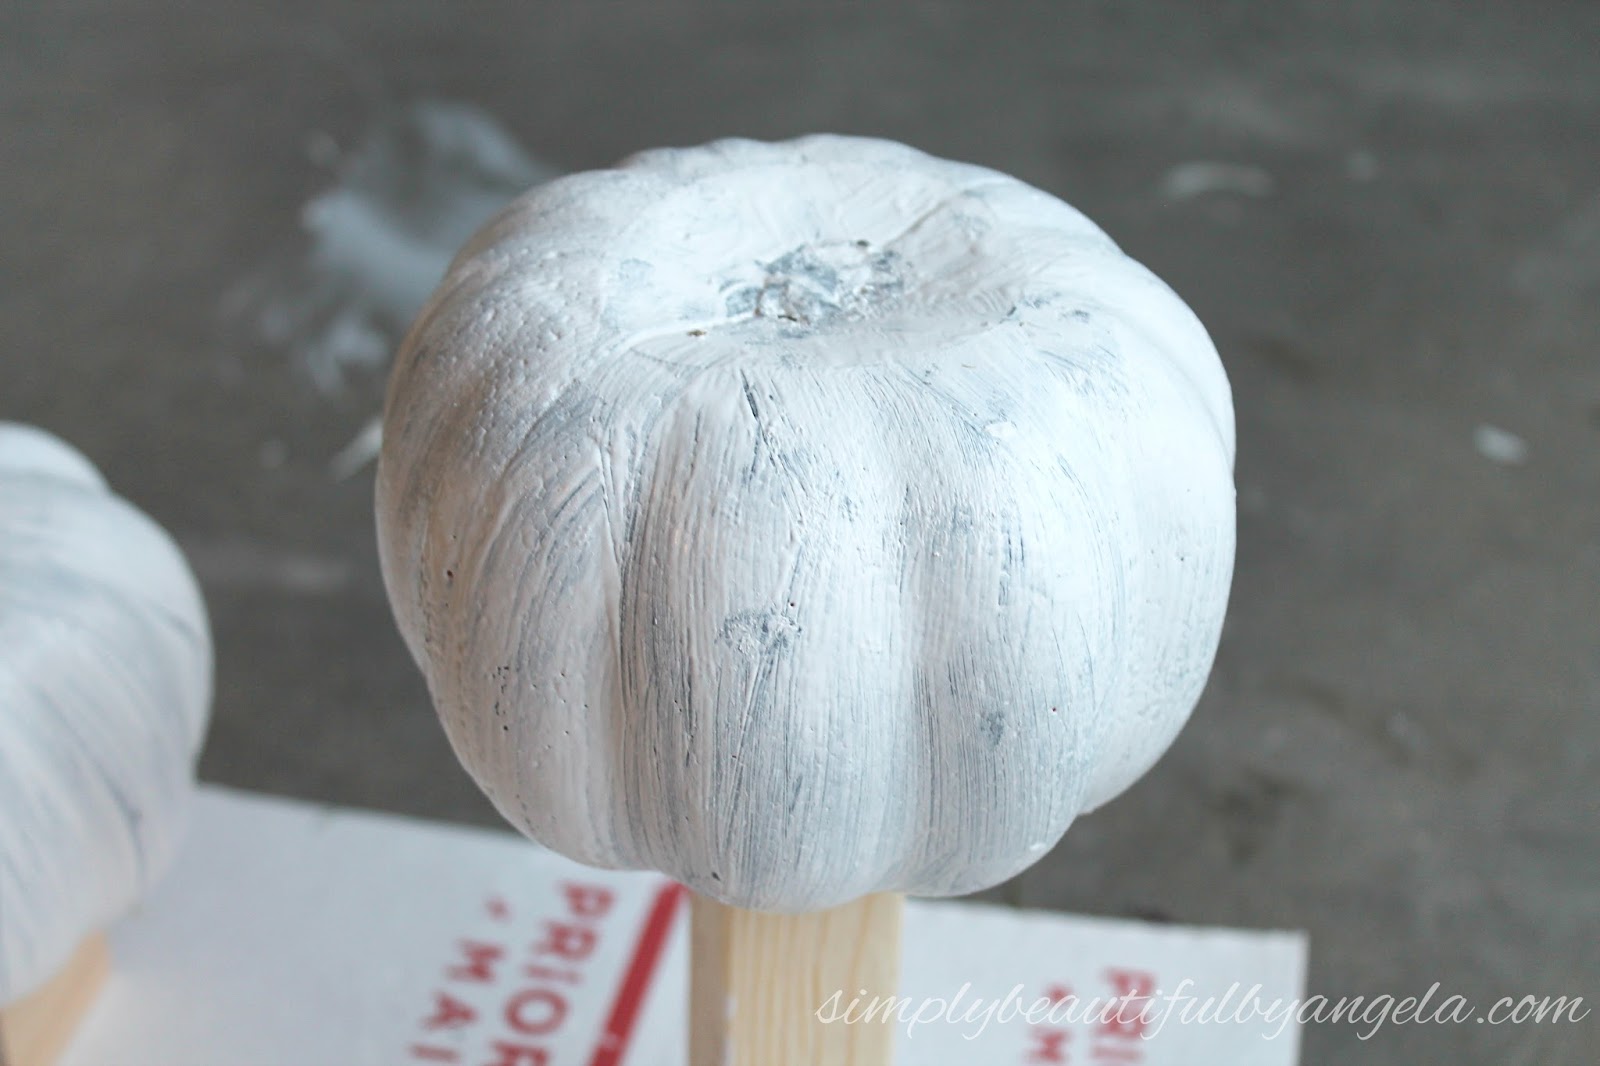
Once they were dry I went over them with two coats of a very thick version of my DIY chalk paint. I simply mixed about 3/4 cup of white latex paint with a 1/4 cup of Plaster of Paris.
This picture was taken after the first coat.
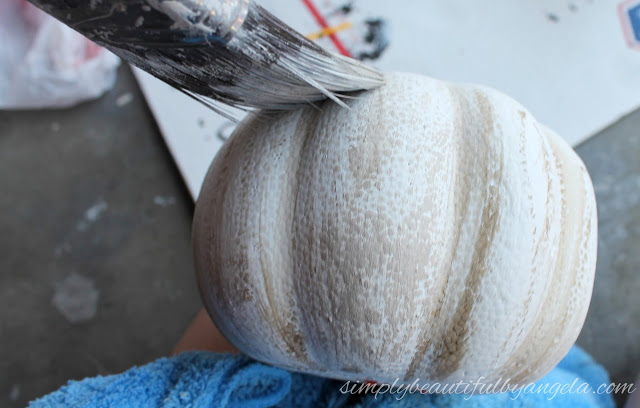
I wanted them to look pretty realistic so I had to dirty them up a little bit. To do this I dipped a small paintbrush in some Valspar Dark Sealing Wax and painted it on in the grooves of the pumpkin.
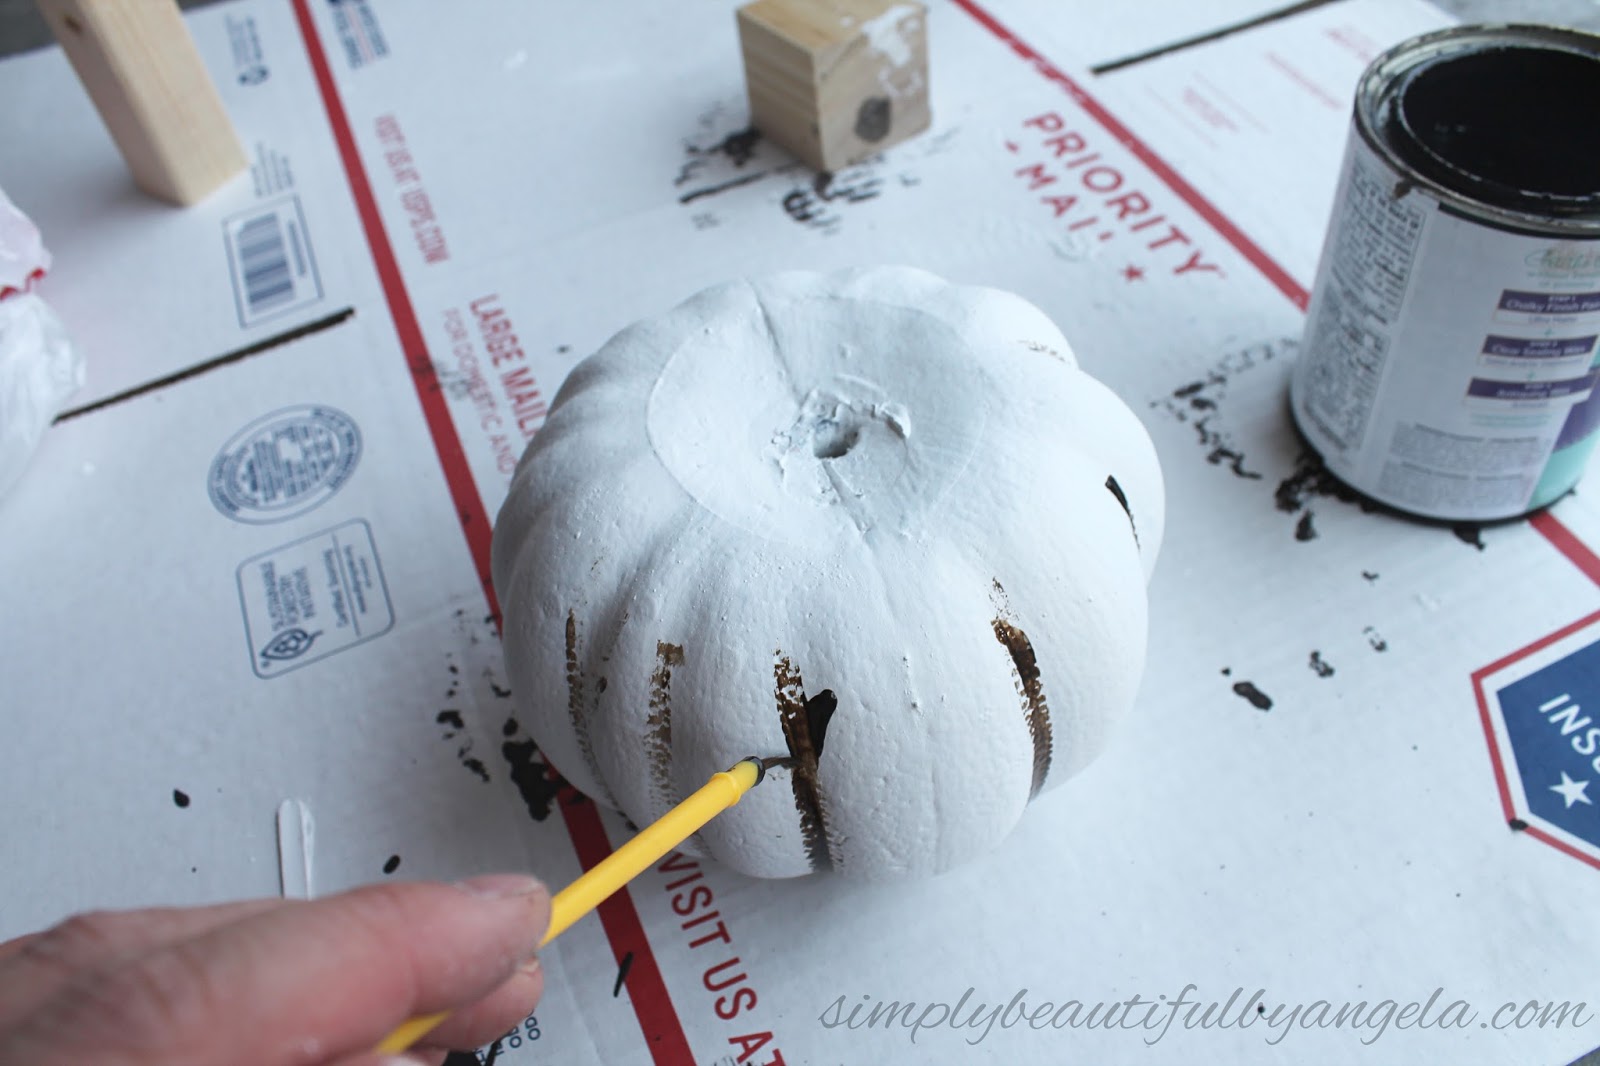
I then used a microfiber cloth to rub it in.

I also brushed a small amount of my light brown chalk paint over the entire pumpkin.
 .
.I finished them up by cutting small pieces off of a branch from our tree out front and secured them to the tops with liquid nails.
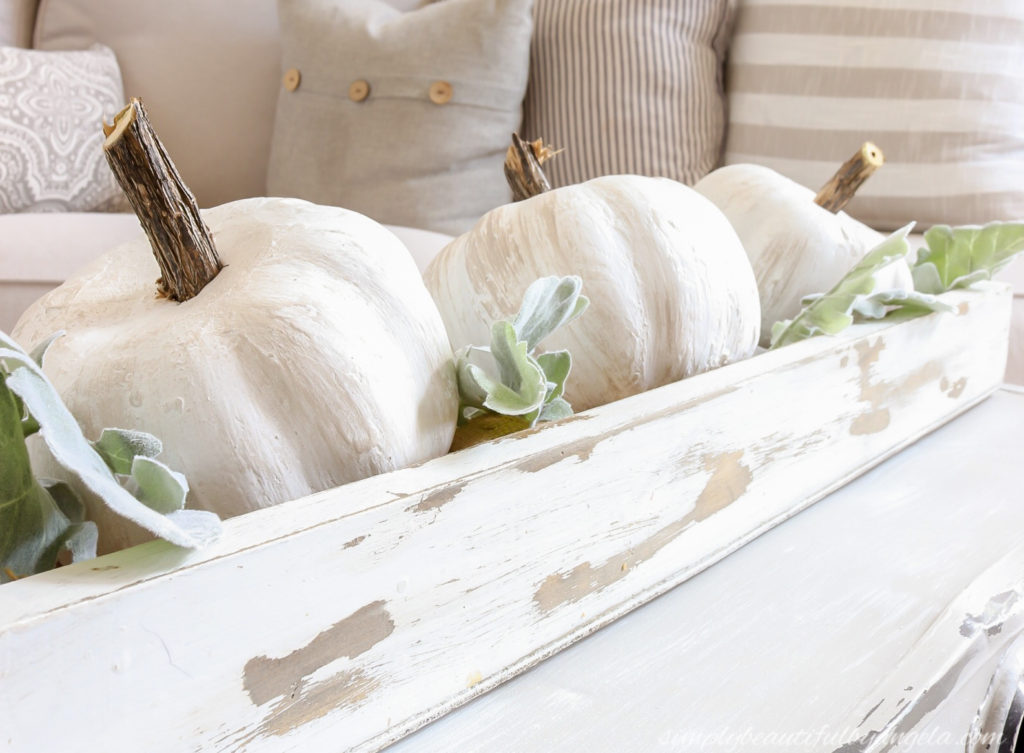
And here is how they turned out!

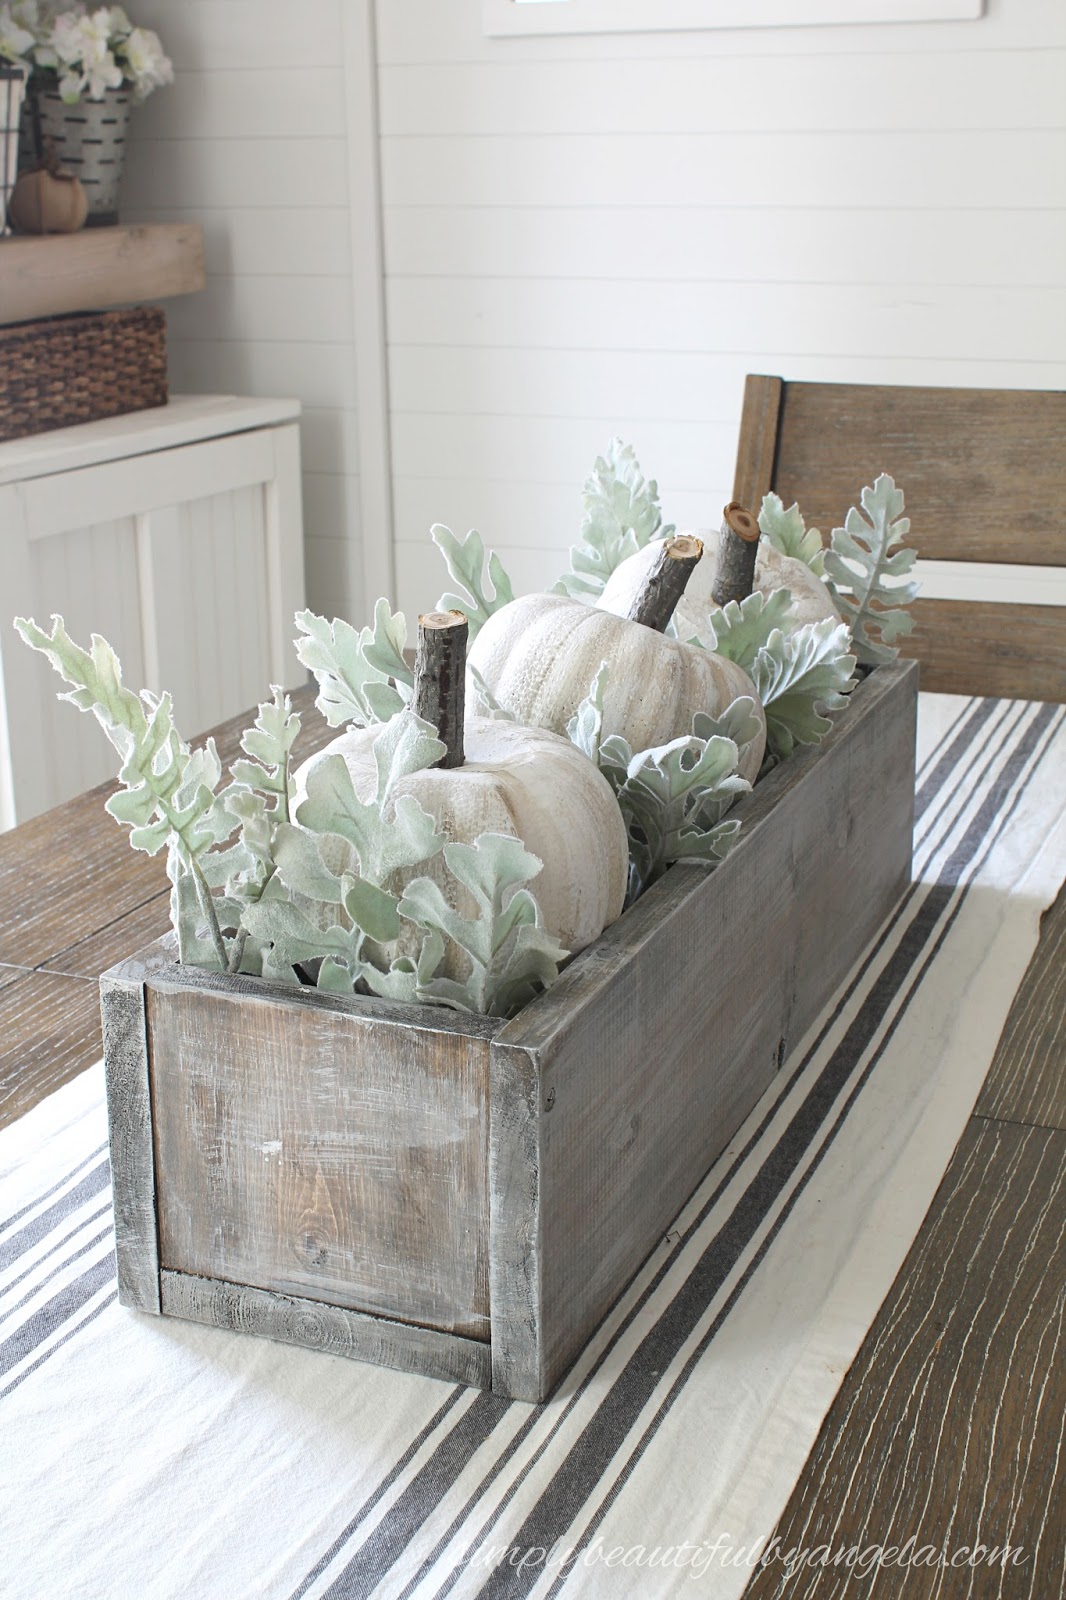


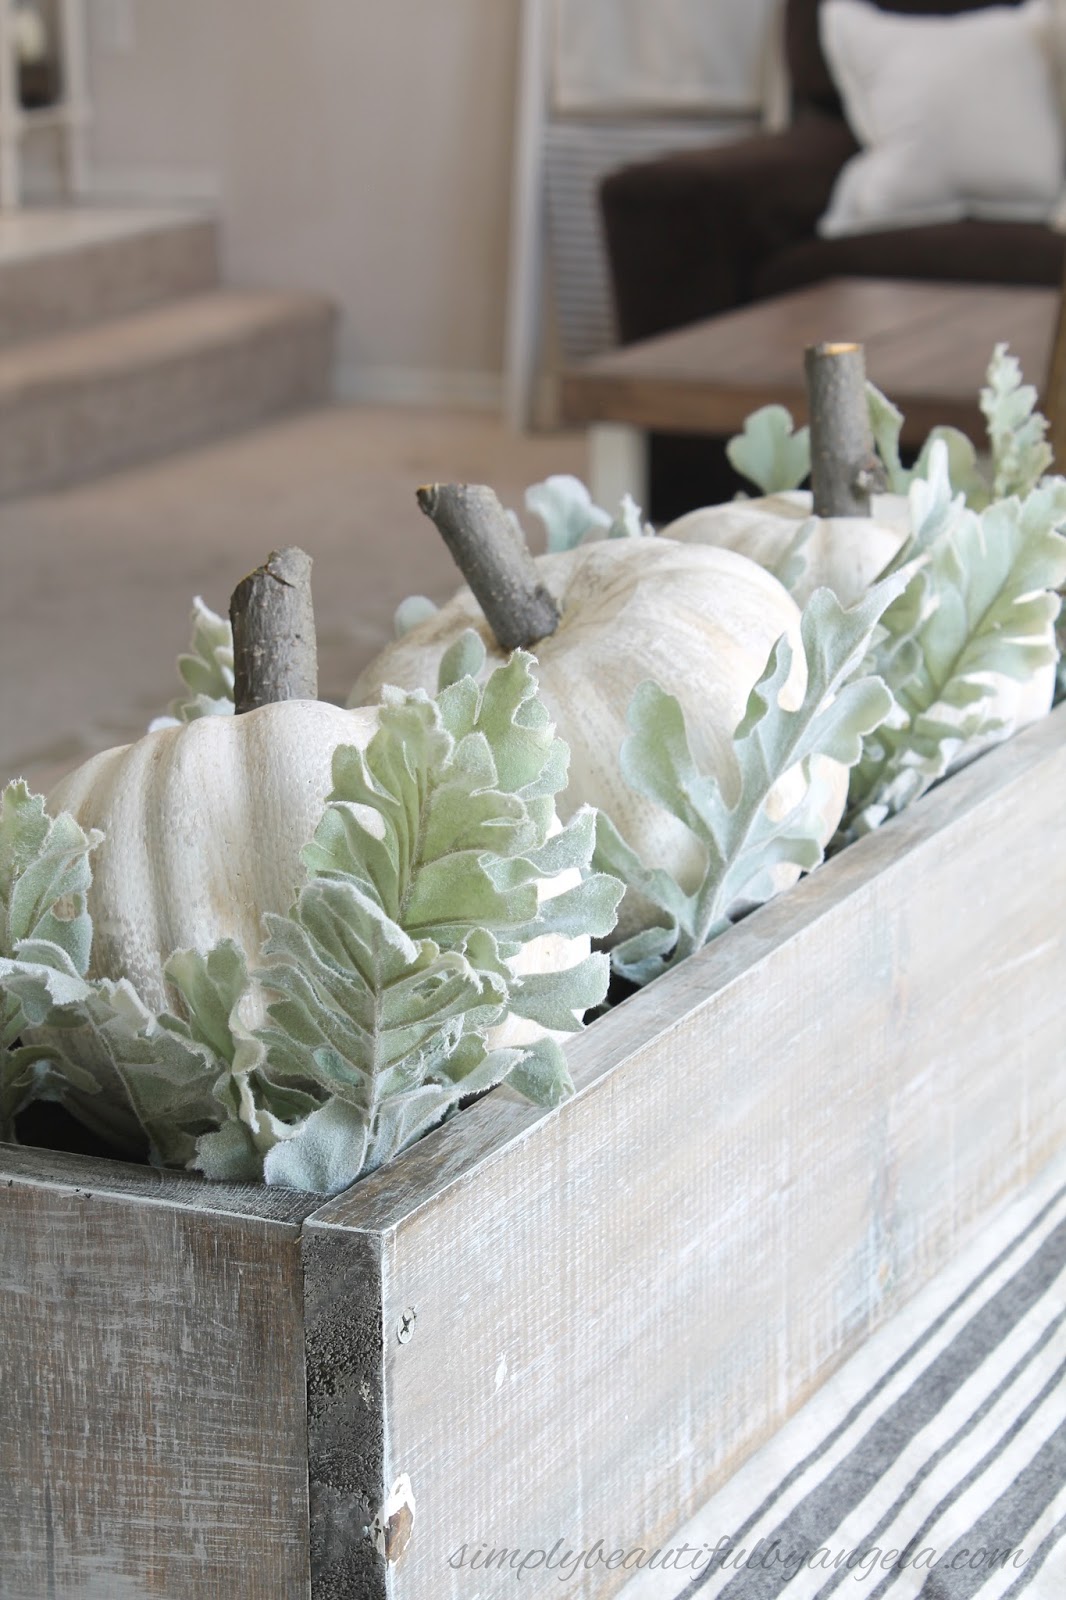
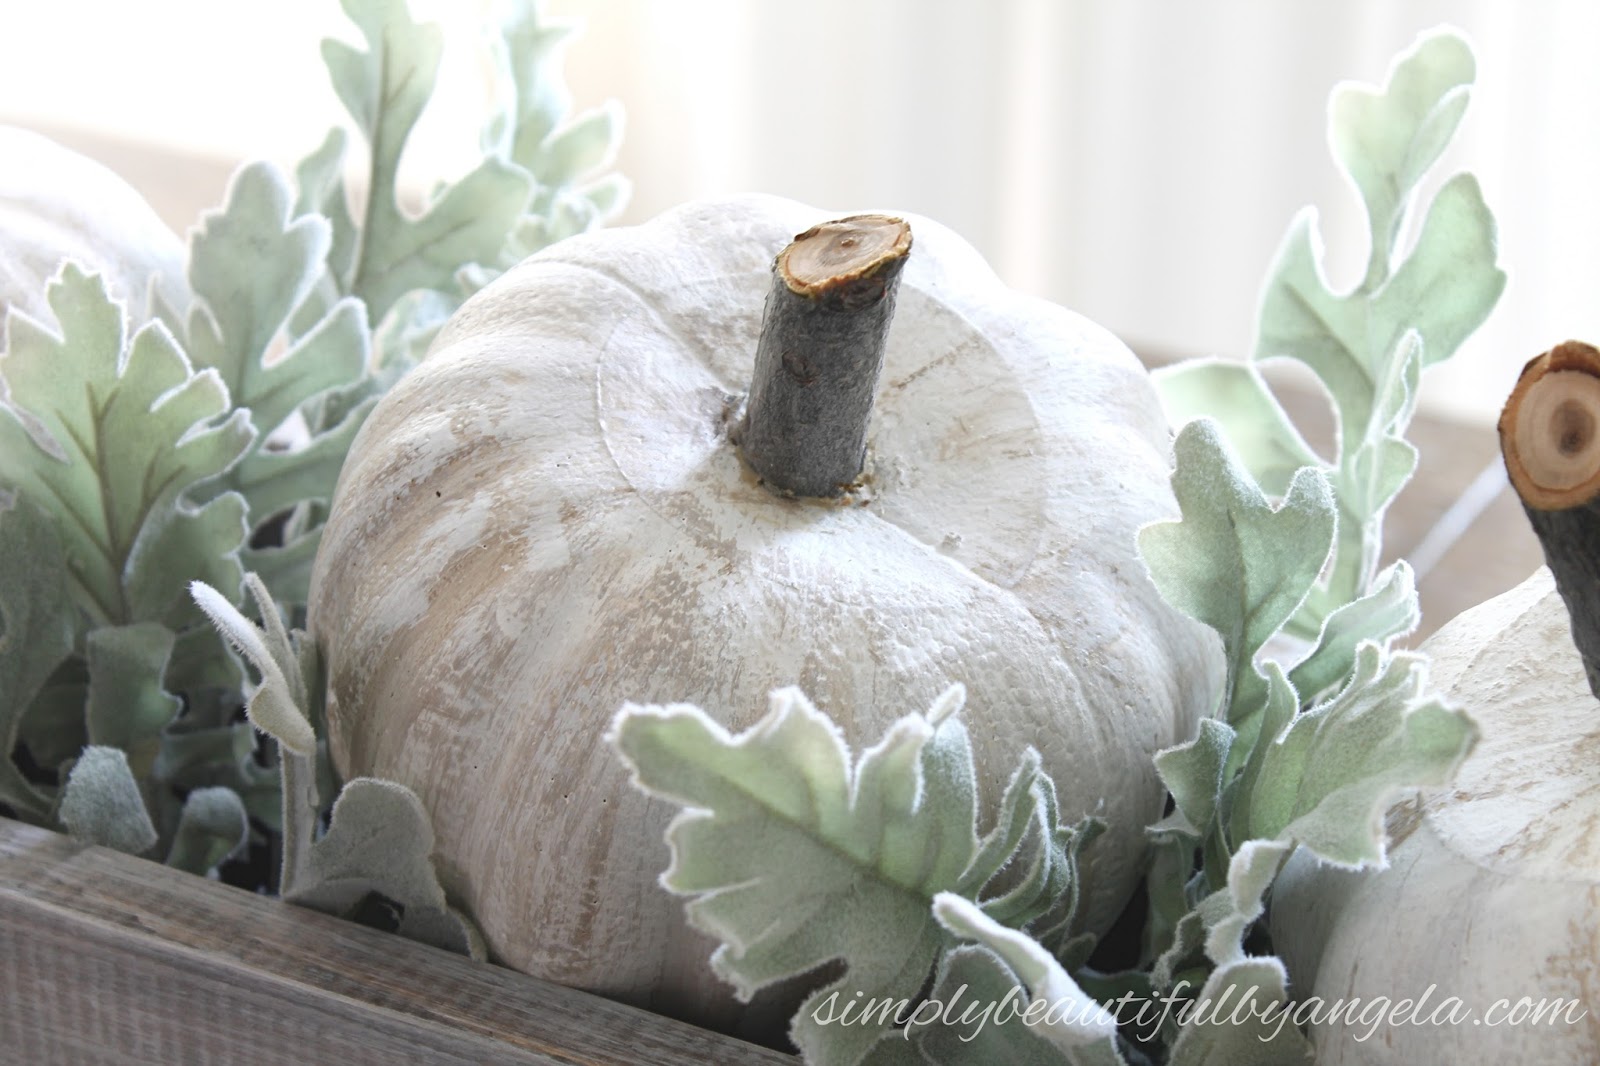

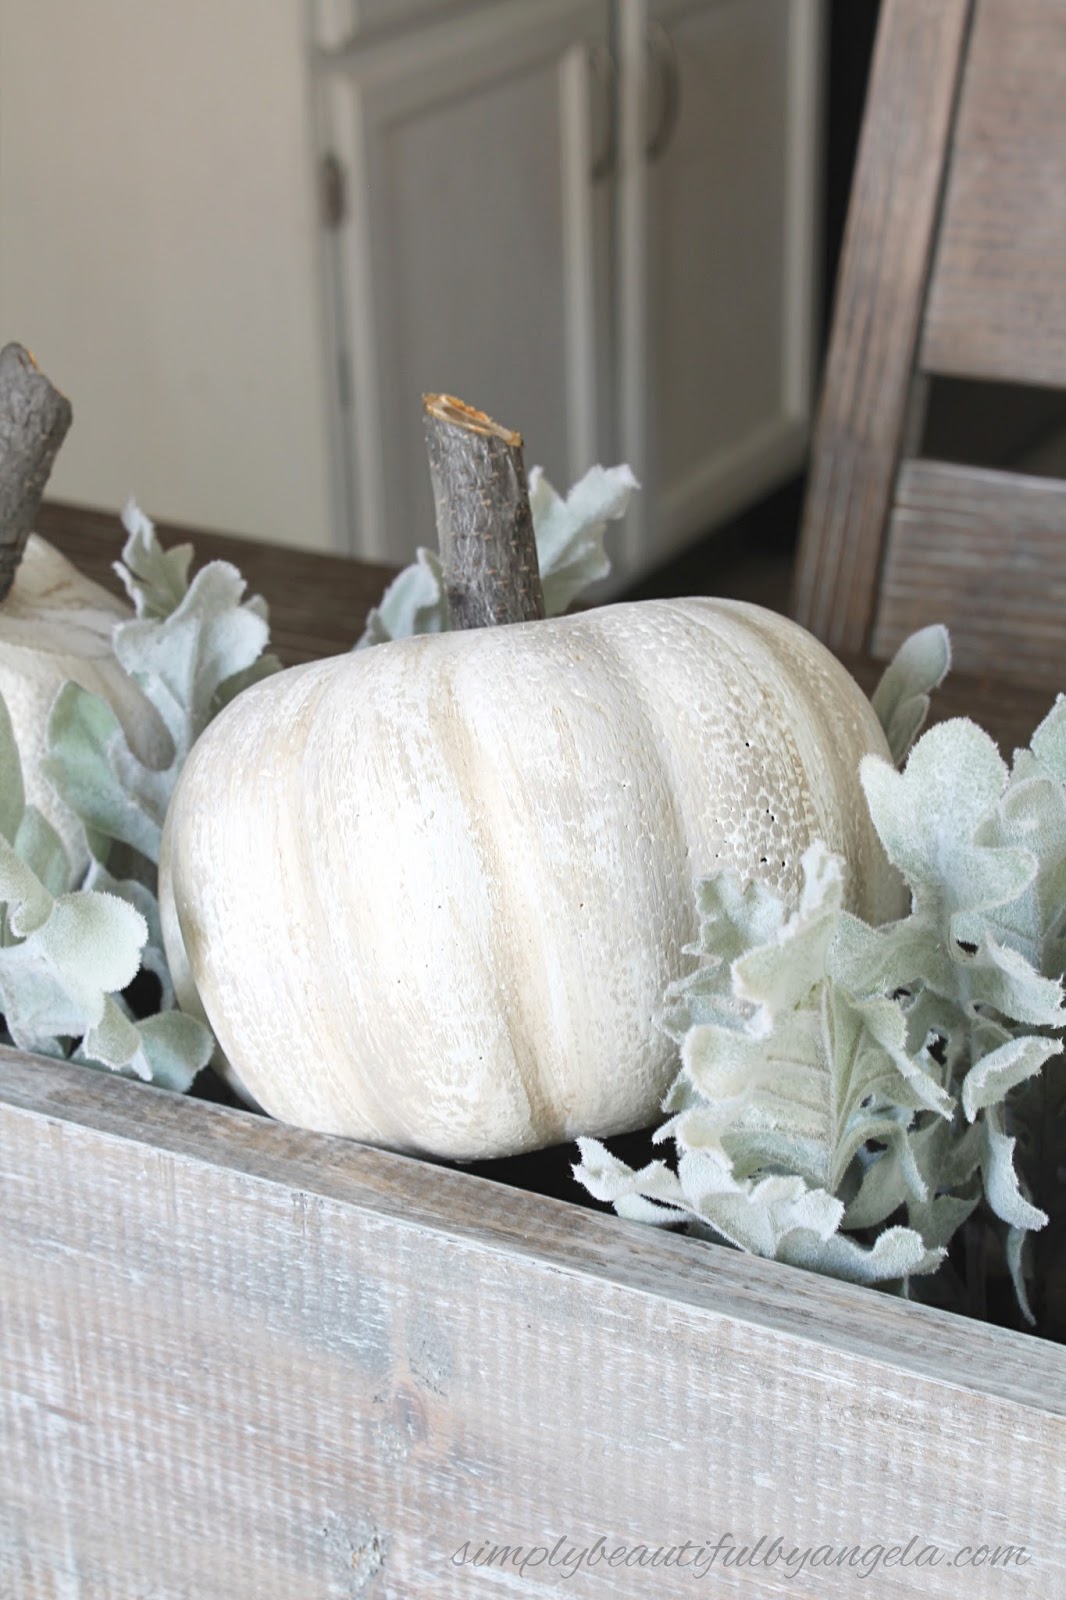

It’s really hard to believe that these came from the dollar store unless you pick it up and feel how lightweight it is.
I hope you all have a great rest of the week!

**UPDATE** See how I did this again but was able to fill the foam look better HERE!
Saw this in Imparting Grace. Love the paint technique! They all look great!
Thank you so much Cindy!!
So crafty. The pumpkins now don't look plastic and cheap. They look realistic and so much better. Thank you for the tutorial.
Thanks Danice! It's amazing what a couple of simple changes can do isn't it? 🙂
Hi Angela! This is my first time visiting I think! I also shared some Dollar Tree pumpkin makeovers over at Coastal Charm today. I LOVE Yours! Beautiful home too! I am going to give you a follow in instagram!
Amber
followtheyellowbrickhome.com
I really like your fall diy. I can love to make a few. Thanks for sharing this at the Inspiration Spotlight sharing
These are awesome! This is the best pumpkin makeover I've seen–and I think I've seen a bunch of them!
Thanks so much for sharing this at the Grace at Home party at Imparting Grace. I'm featuring you this week!
These came out amazing. I love the look of white pumpkins.Your painting technique is perfect.
Can I ask why you painted them dark first? I love them but I’m wondering if this is a necessary step