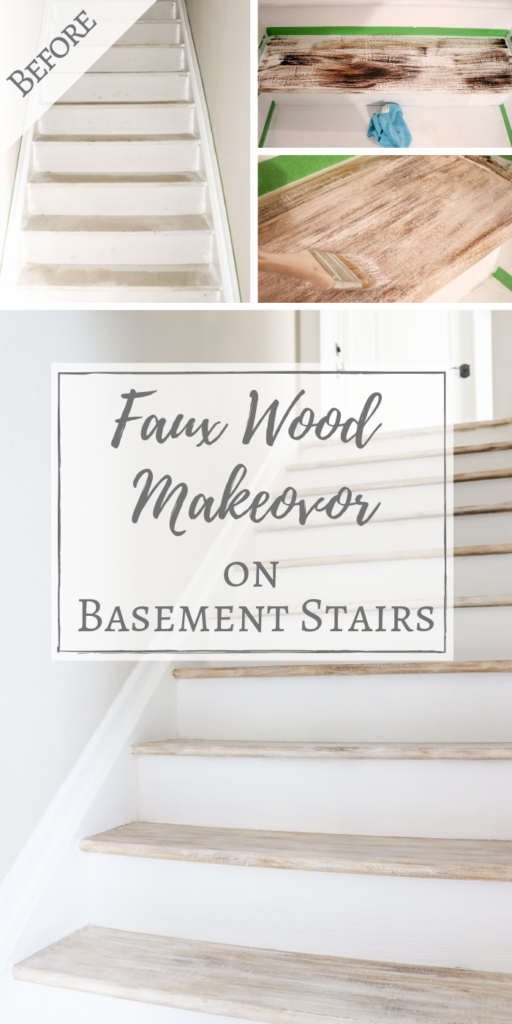
Hi guys! I hope you’re all having a nice week so far. It has been SO COLD here in Colorado. It’s really put a damper on a few projects that I’ve wanted to get done so I am eagerly hoping that it starts to warm up a little soon. I’m not asking for too much..just somewhere in the 50s or 60s…pretty please?
Anyways today I have a super exciting transformation to share with you guys. A few weeks ago I when I shared our budget flat panel door update I briefly mentioned the fact that the basement doorway was frameless.
To make a long story short, we couldn’t get the new door to fit the frame, so the hubby ended up going all Hulk on it and decided to knock the whole thing out. It sat like this for weeks while we debated between trying to rebuild it or purchasing a pre-hung door. But a funny thing happened. We found that we actually like having no door there, so we decided to just trim it out and leave it open. However the view into staircase leading down to the basement wasn’t the prettiest sight to walk by…
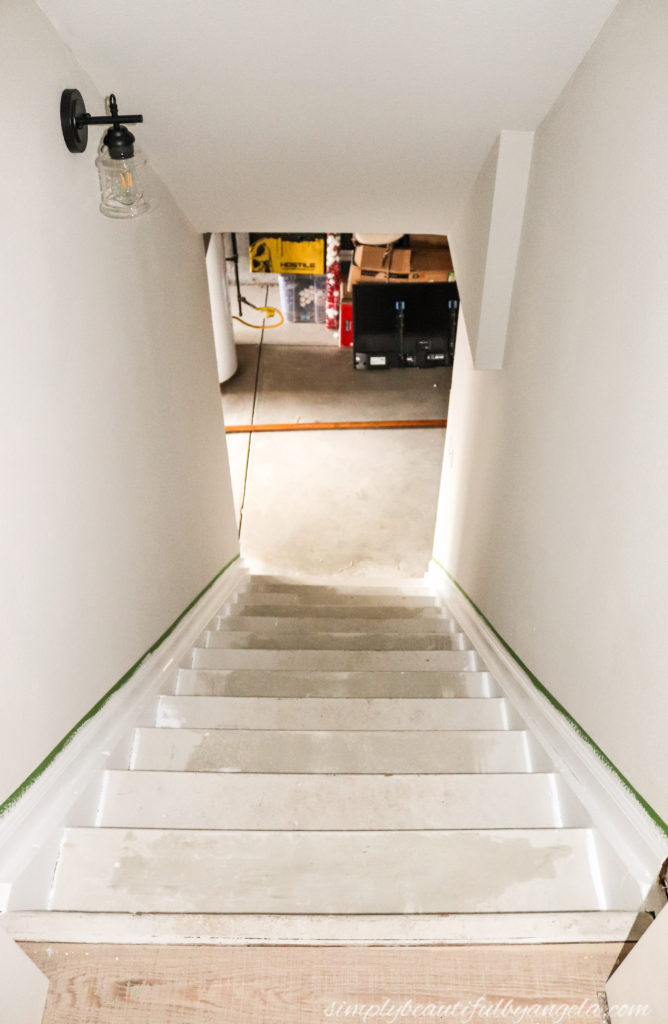
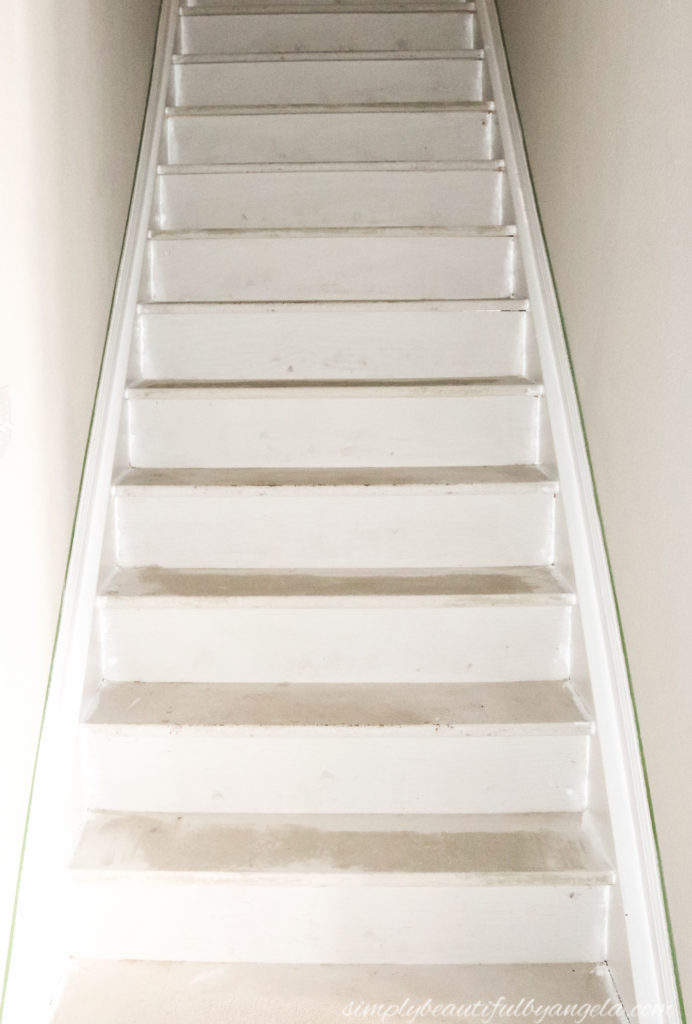
I didn’t snap a before picture, so you’ll have to use your imagination with me for a second. The walls were yellowish, the stair skirting was the same orange toned wood that’s throughout the rest of the house, and it had an outdated brass light fixture. I painted the walls SW Basalt Powder and the skirting white which instantly brightened the whole space. I also purchased a farmhouse style wall sconce to replace the outdated one.
But I was still totally stumped on what do with the dirty particle board steps. Replacing them definitely wasn’t in the budget, so I decided to attempt a faux wood look on them.
Supplies Used: (Affiliate links may be provided for convenience. For more info, see my full disclosure here.)
- Patch and Repair Drywall Compound/Knife
- 12-inch Taping Knife
- Medium Grit Sandpaper
- 4″ High Density Foam Mini Roller & Tray
- KILZ Primer/Sealer
- Valspar White Porch and Floor Latex Satin Enamel Paint
- Angled Paint Brush
- Chip Brush
- Frogtape
- Valspar Dark Sealing Wax
- Microfiber Cloths
- Minwax Polycrylic in Satin
- Caulk
Step 1. Mudding
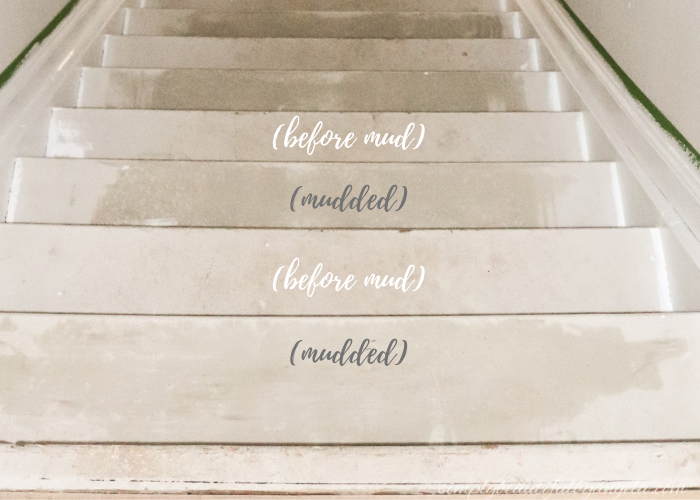
Our steps looked like they had received quite a bit of damage over the years and had a really ugly roughed up texture, so I decided to coat them with drywall mud to smooth them out.
I used this small container of drywall compound.
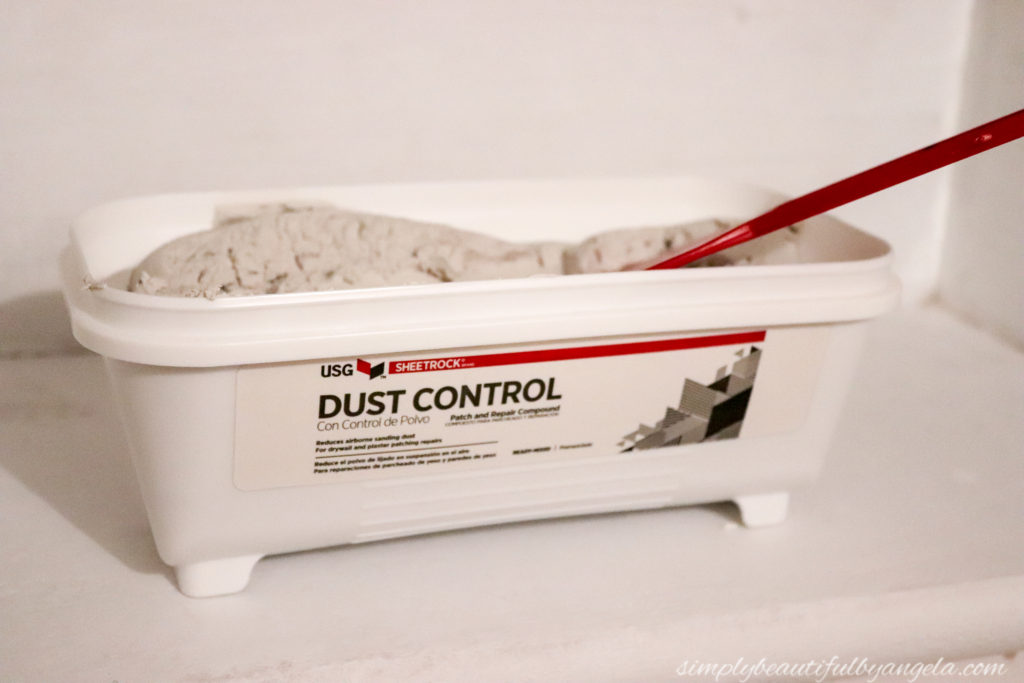
I used the knife that came with the tub to quickly smooth a layer of the compound over the entire step. This picture was taken while doing the second coat which is why it already looks pretty good!
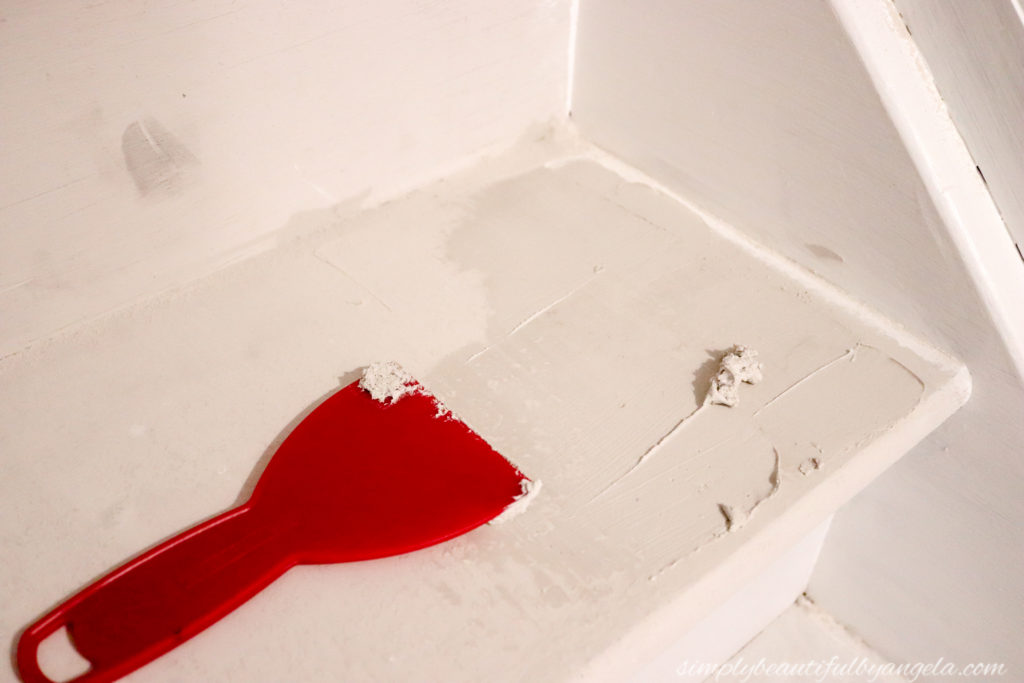
I wiped off the excess by running a 12-inch Taping Knife across the step to make it nice and level.
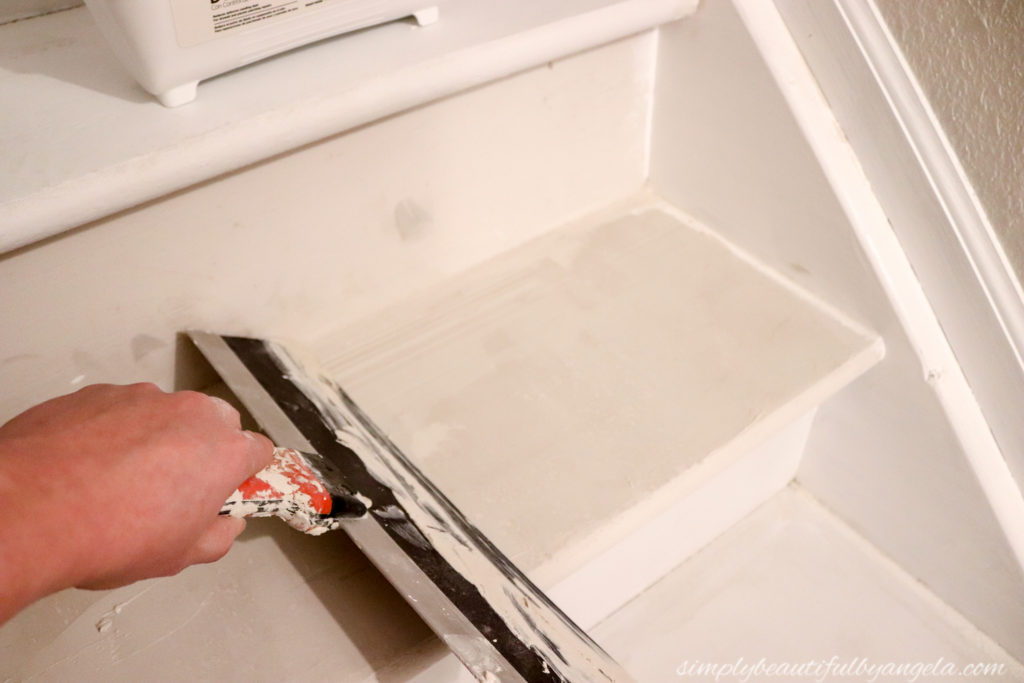
I gave each step a total of 3 coats, lightly sanding and vacuuming between coats. It actually went pretty quickly and it was kind of fun to see the steps gradually smoothing out.
I worked my way down every other step so that I could still have a way of using them. It’s hard to see in this picture, but I was so excited to see the difference the mud was making!
2. Primer
Once every other step had 3 coats of mud, I did one final sand followed by a good vacuum. I also used a rag to make sure that I got all of the remaining dust off. I then used a small foam roller apply a coat of primer to seal the drywall compound.
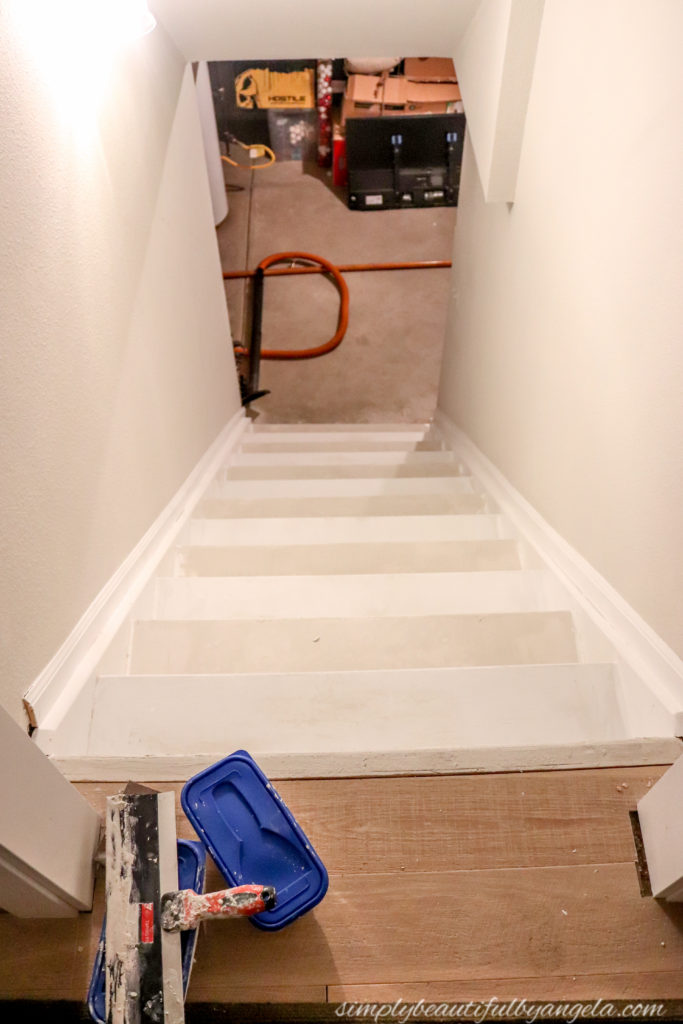
Once the primer was dry I went back and mudded/primed the remaining steps. Since the primer sealed them up, I felt comfortable stepping and sitting on them while I did this.
3. Paint
If your steps don’t have the roughness problem like ours did, then you can skip the first two steps and jump in right here–lucky you!
There are many different types of floor paint available out there and I honestly had a hard time choosing one. I finally decided on Valspar White Porch and Floor Latex Satin Enamel Paint. I knew that I wanted to avoid oil based because of the fumes, and I also wanted something pretty high quality since I want it to hold up for as long as possible. This fit the bill on both!
I rolled a coat on each step and riser, again working every other step at a time.
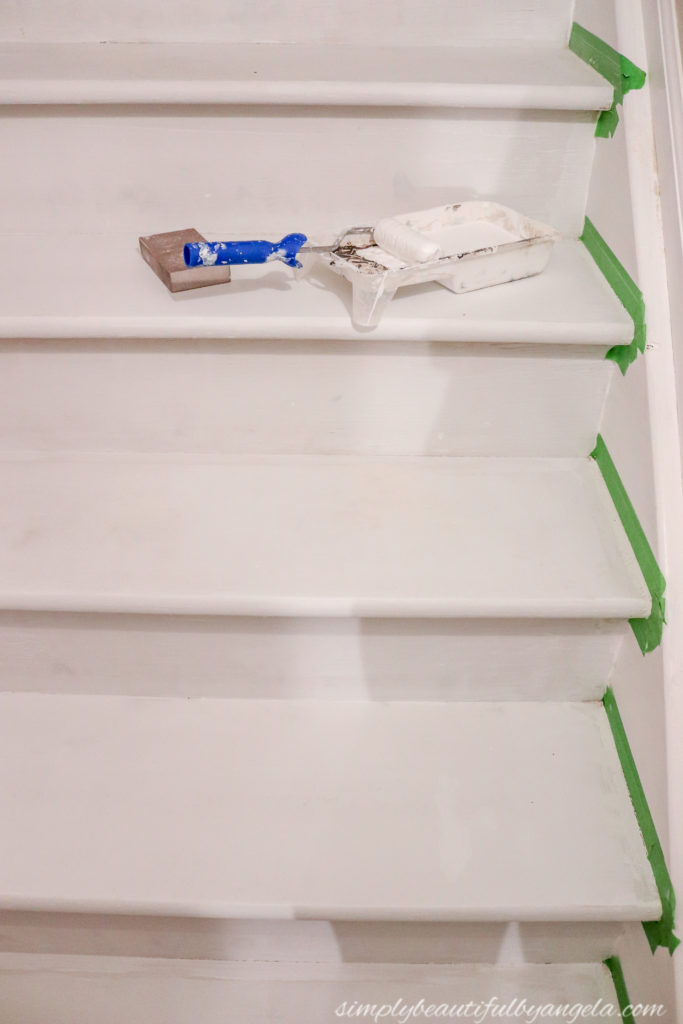
Once the first coat was dry, I lightly sanded before rolling on a second coat. However I added one crucial step on the second coat–I immediately went over it with an angled paint brush to create brush marks. I know what you’re thinking, don’t we usually want to avoid brush marks? Yes, but in this case I actually wanted nice deep ones and you’ll see why in the next step!
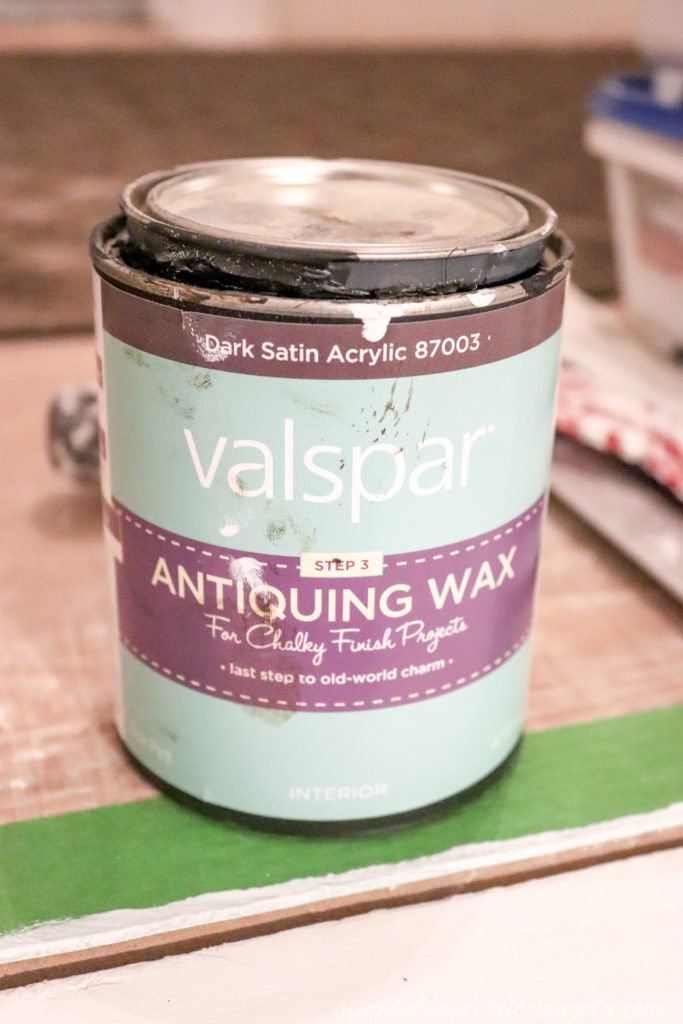
4. Antiquing Wax
Once my second coat of paint was dry, I skipped sanding and went straight to the wax (remember, I wanted to keep those nice heavy brush strokes!)
This is my favorite dark wax that I’ve discovered. I’ve used my can of Valspar dark sealing wax on so many different things. It’s probably one of my best invested supplies because a little bit goes such a long way! I’m pretty sure that any dark wax would achieve the same result, but this is my tried and true!
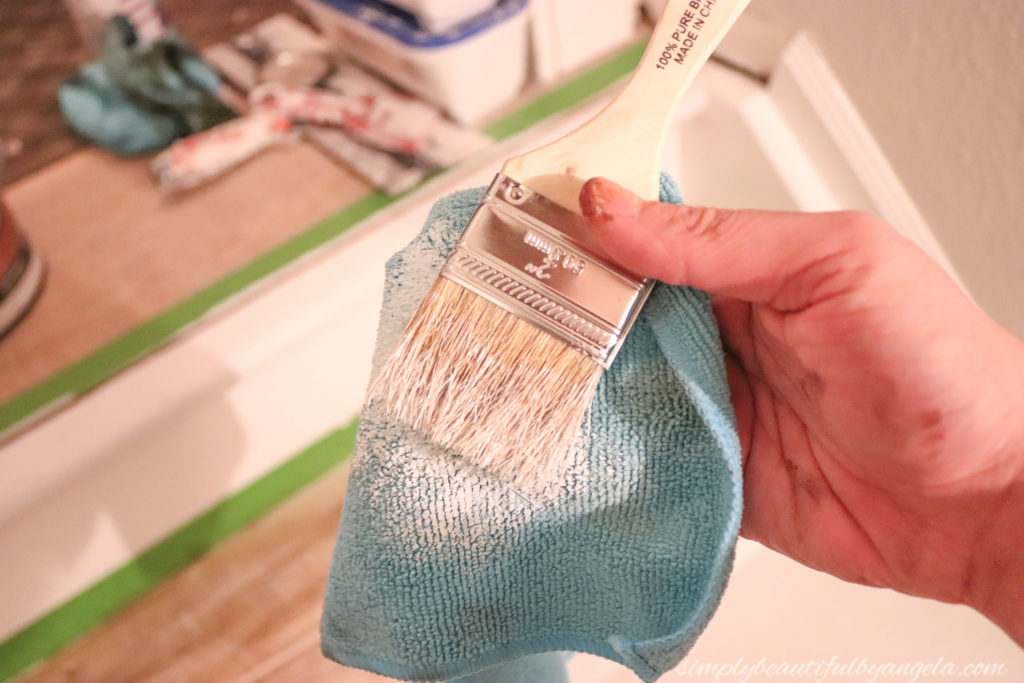
I taped off the edges of each step with Frogtape and then used a chip brush to apply the wax.

I immediately went back over it with a microfiber cloth to blend it in. I know, I know it’s not looking too pretty right now. Don’t sweat though, it’s going to get better I promise!
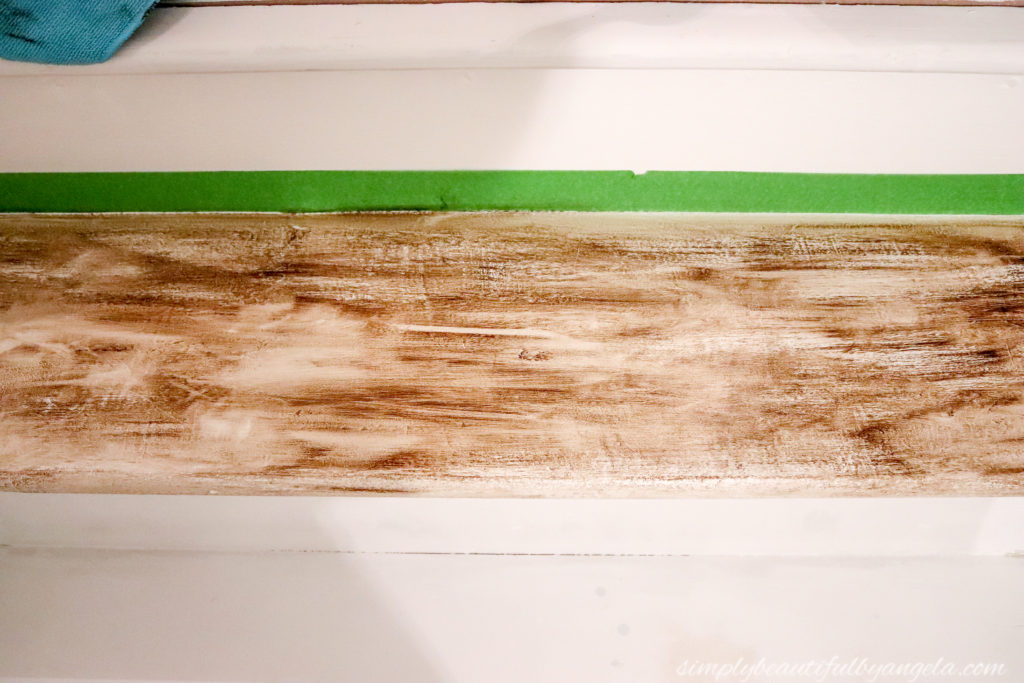
I did every other step, one step at a time.
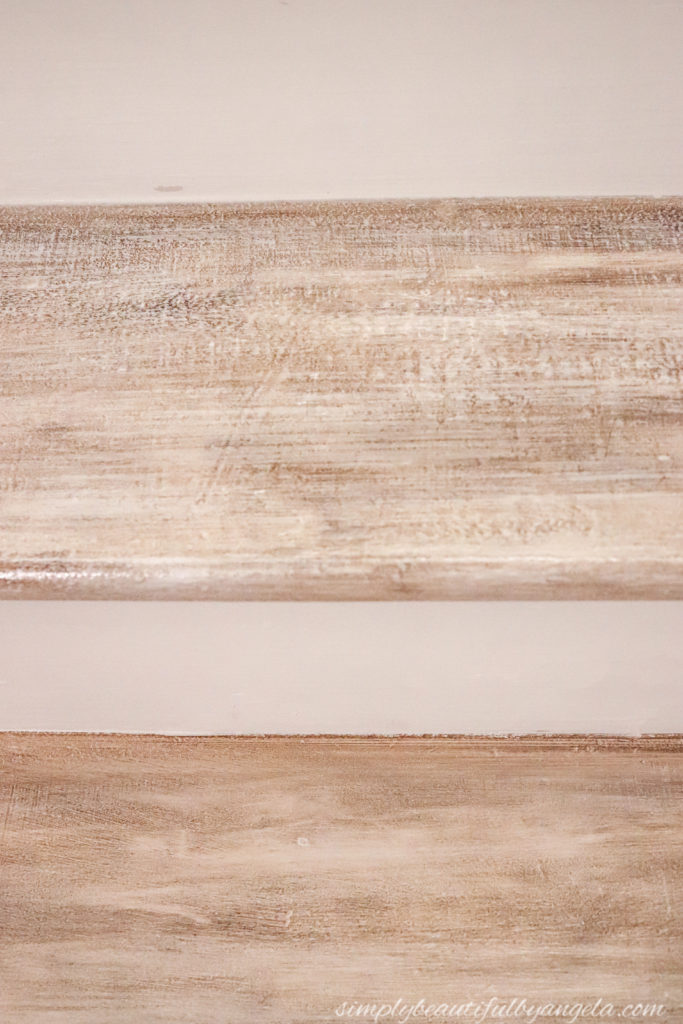
5. Dry Brushing
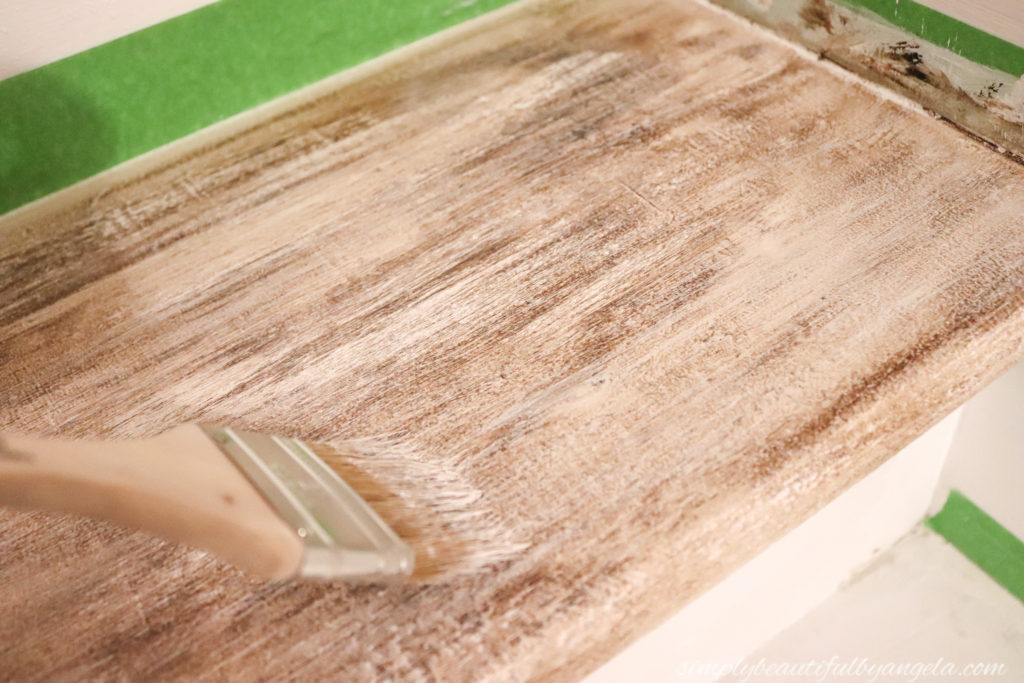
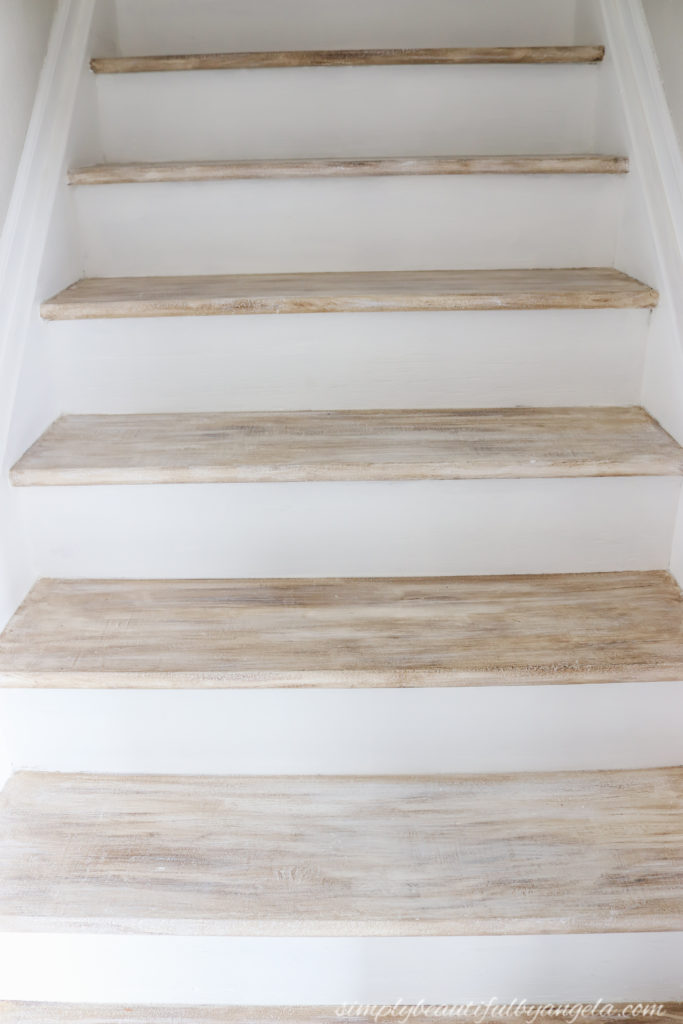
Next it was time to bring the wax to life and really make it look like wood. In order to do this, I dry brushed white paint on to each step.
If you aren’t familiar with dry brushing, you simply dip your brush in a small amount of paint, wipe it off on a cloth until it seems dry and then lightly drag it across the surface.
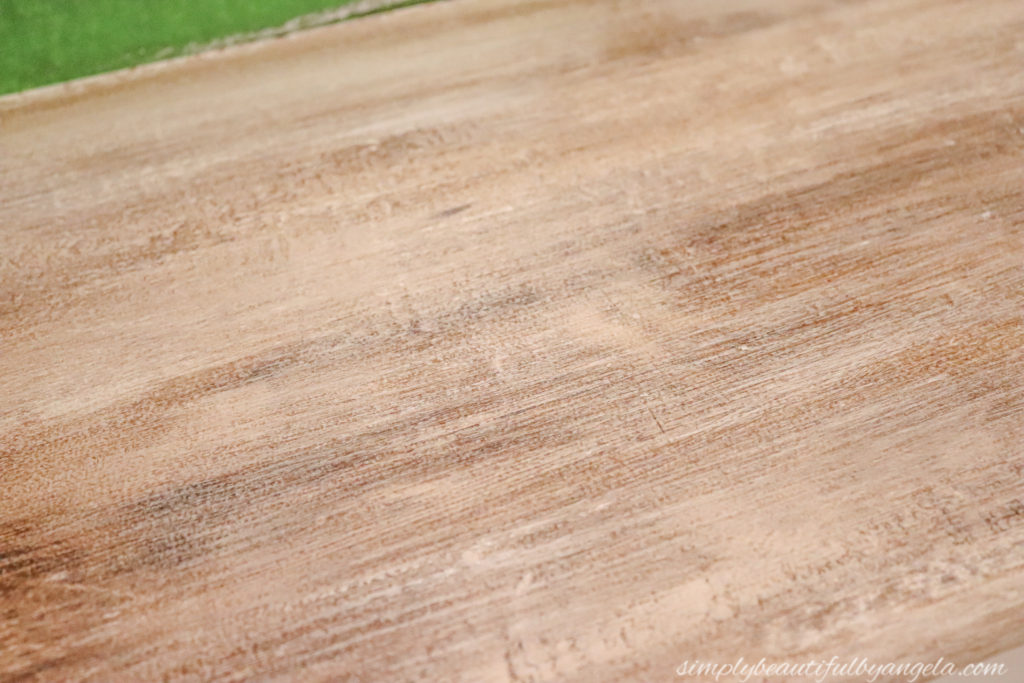
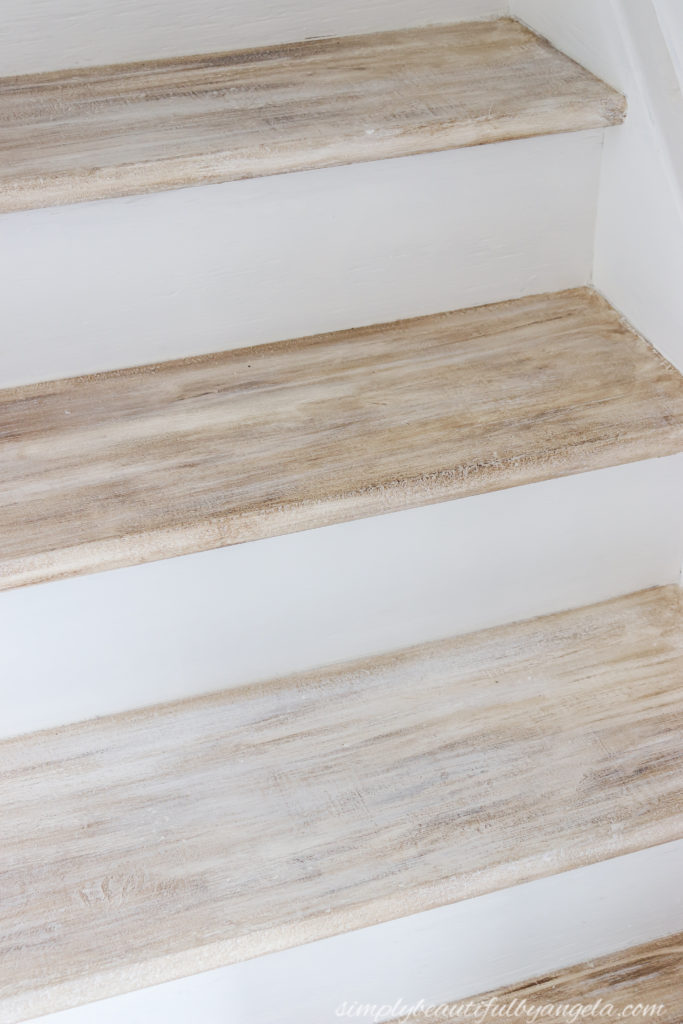
It makes it start to look like pretty weathered wood. This is where the brush strokes from earlier really start to pop.
6. Polycrylic
Once I achieved the perfect look on each step, I needed to decide how to protect my new masterpiece! I chose to use Minwax Polycrylic in Satin because it doesn’t yellow like polyurethane does. I applied two coats to each step with my angled brush, lightly sanding between coats. I was worried that it may make the stairs slippery, but they’re actually not bad! No different from regular wood stairs I would say.
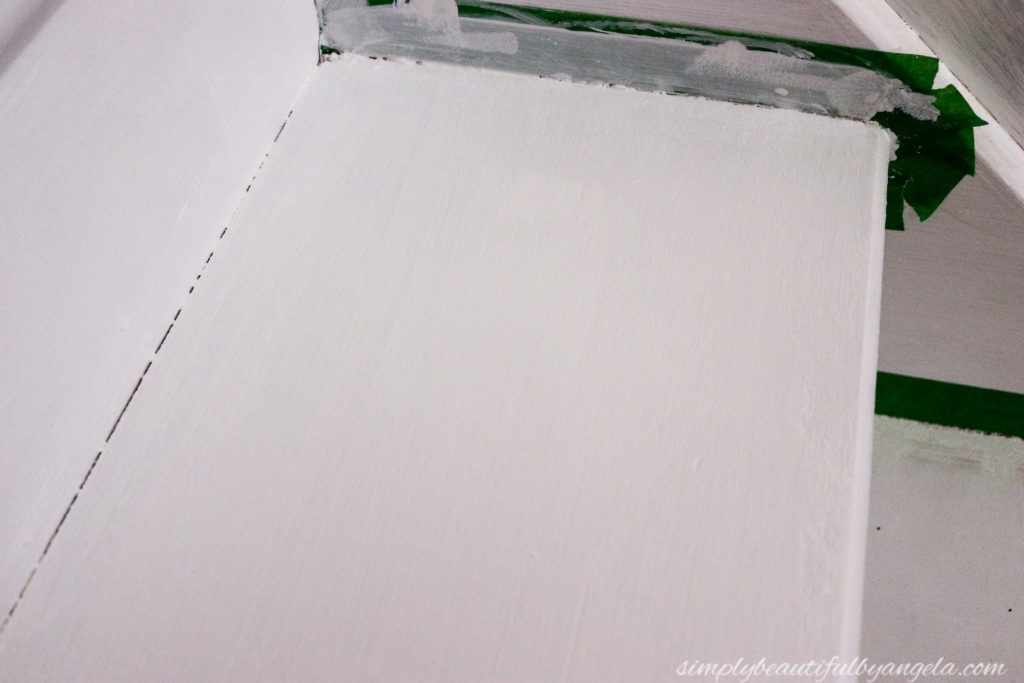
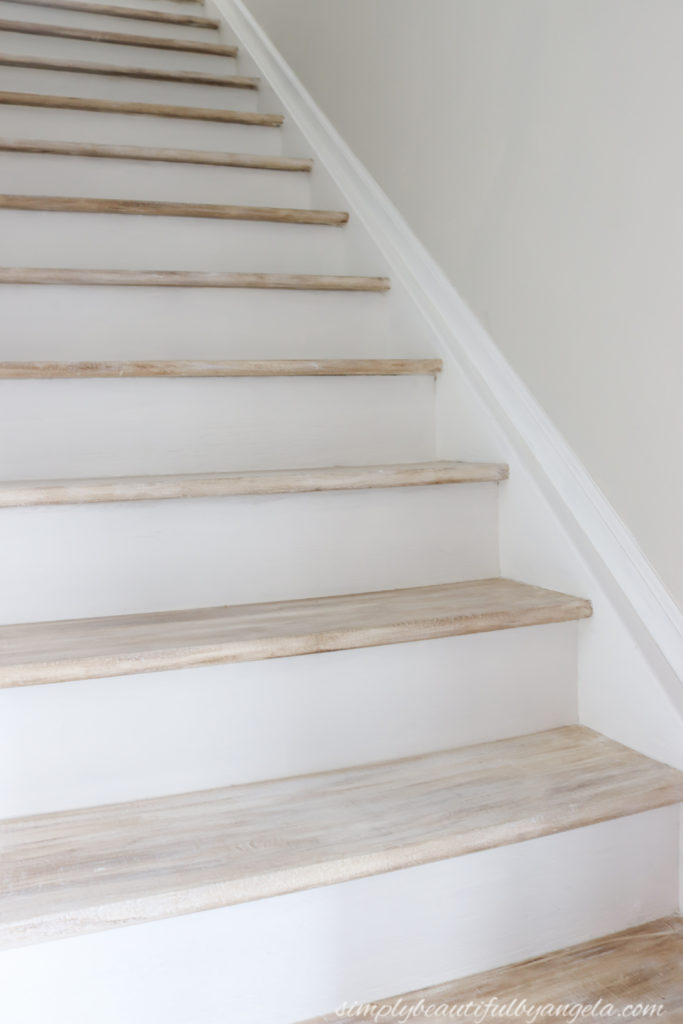
7. Caulking
To finish them up and make them look nice and clean, I caulked the gaps between the steps and the risers, as well as the sides. This also helped with any wax bleed that happened. In the picture below the top step is caulked, while the bottom one isn’t yet. See how much cleaner it looks?
Ready to see how they turned out? This is what the steps used to look like from the basement…
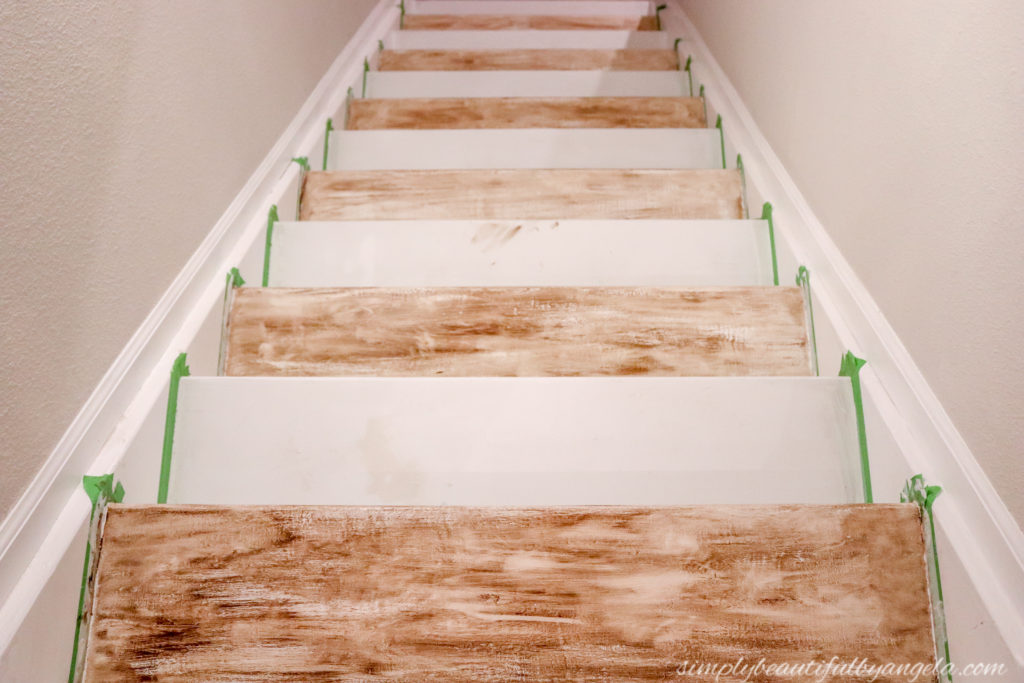
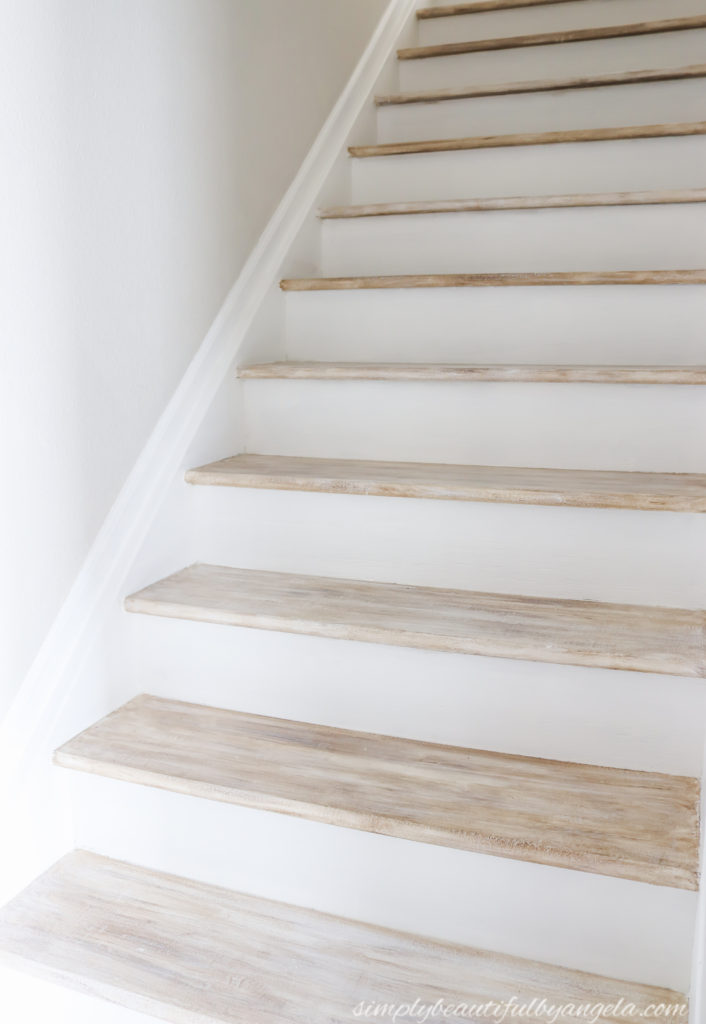
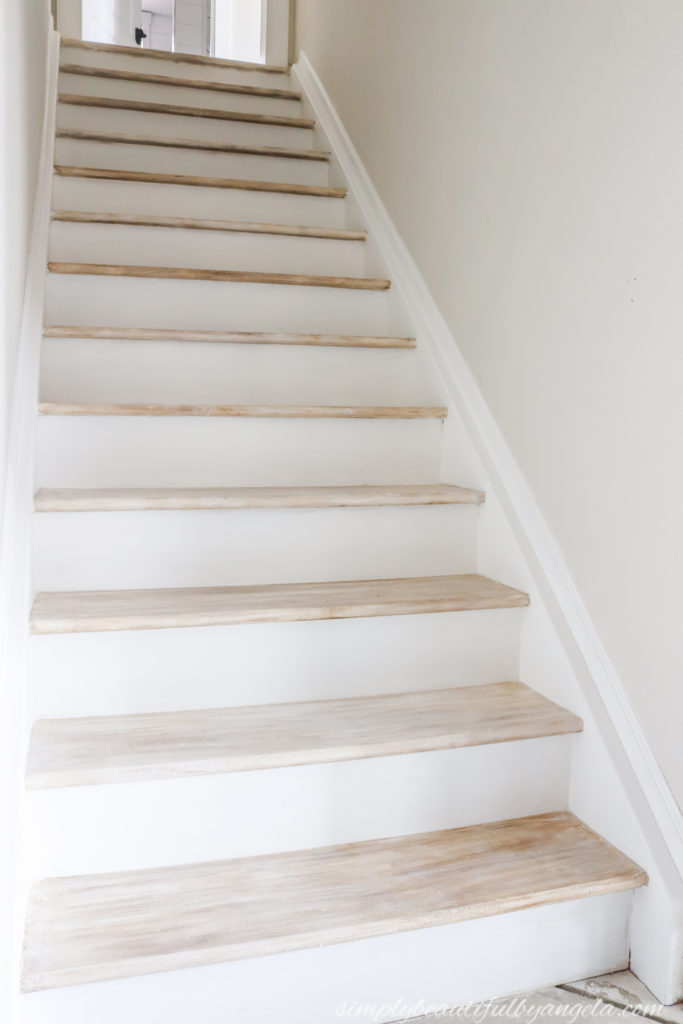
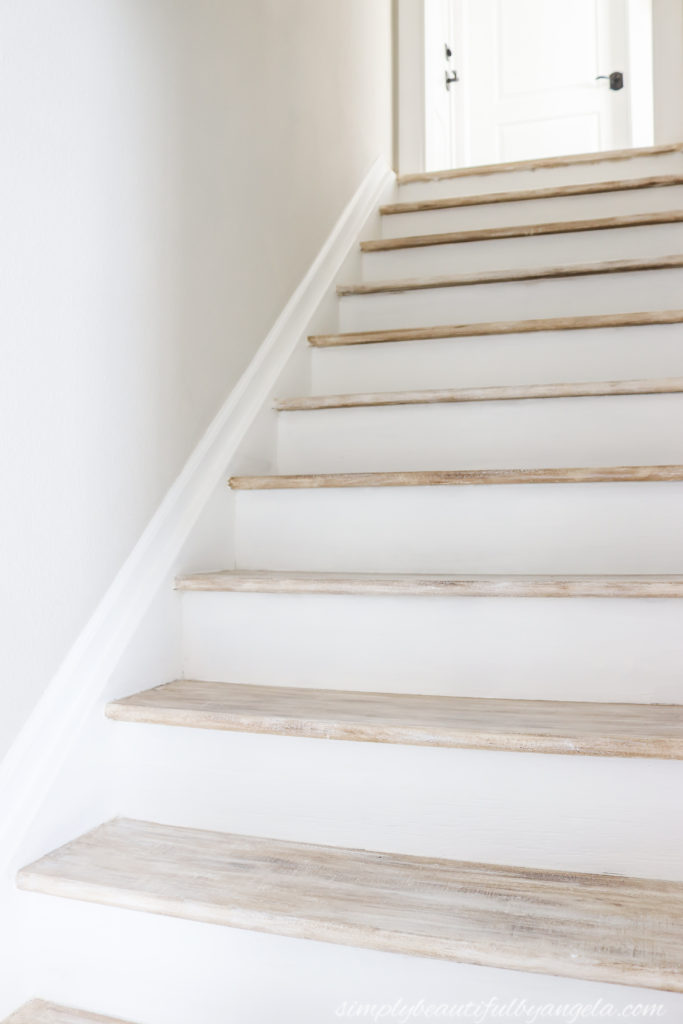
And this is how they look now!
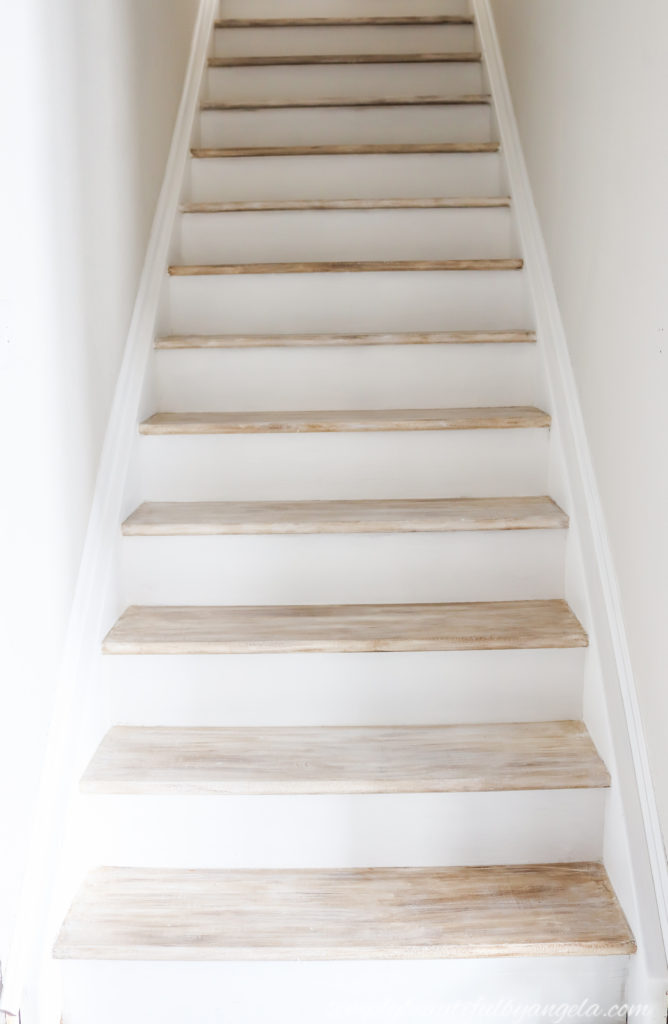

So fresh and pretty! It’s extremely hard to capture their beauty with the limited natural lighting that I had to work with, but I am seriously so happy with the new look!
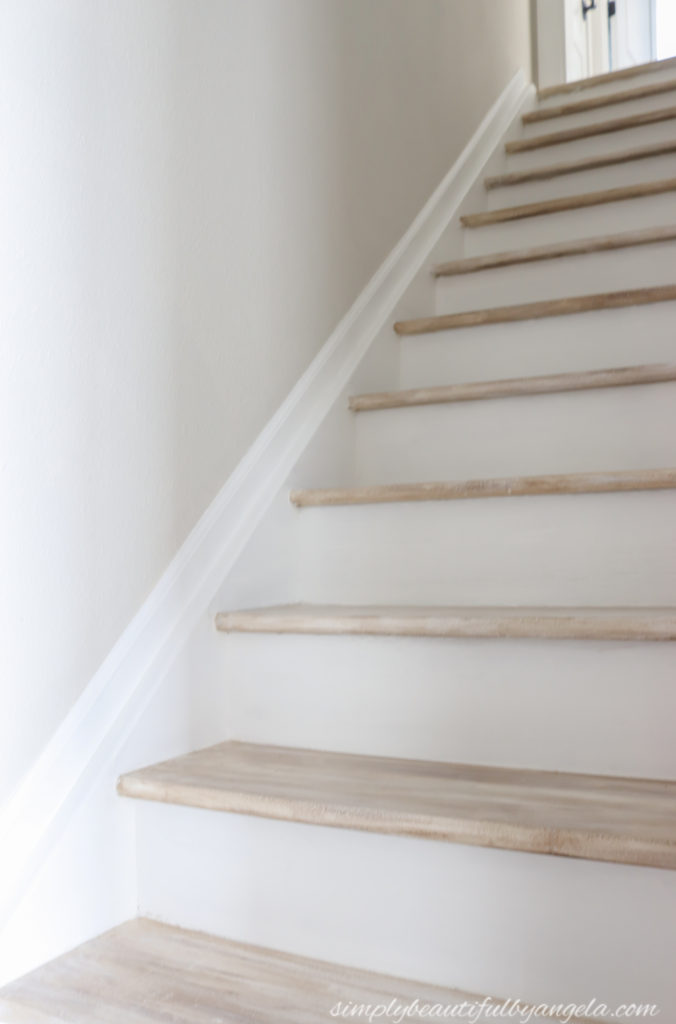
As a reminder this was the view from the top of the stairs before…
And now!

Again, really hard to photograph with little natural light, so excuse the harsh exposure and funky shadows!
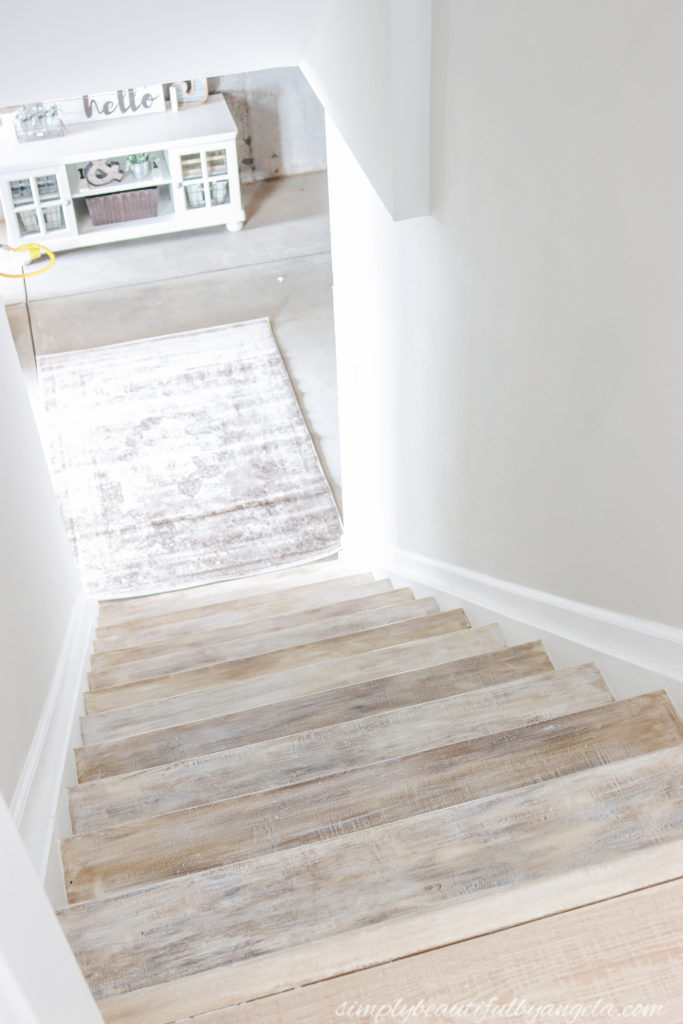
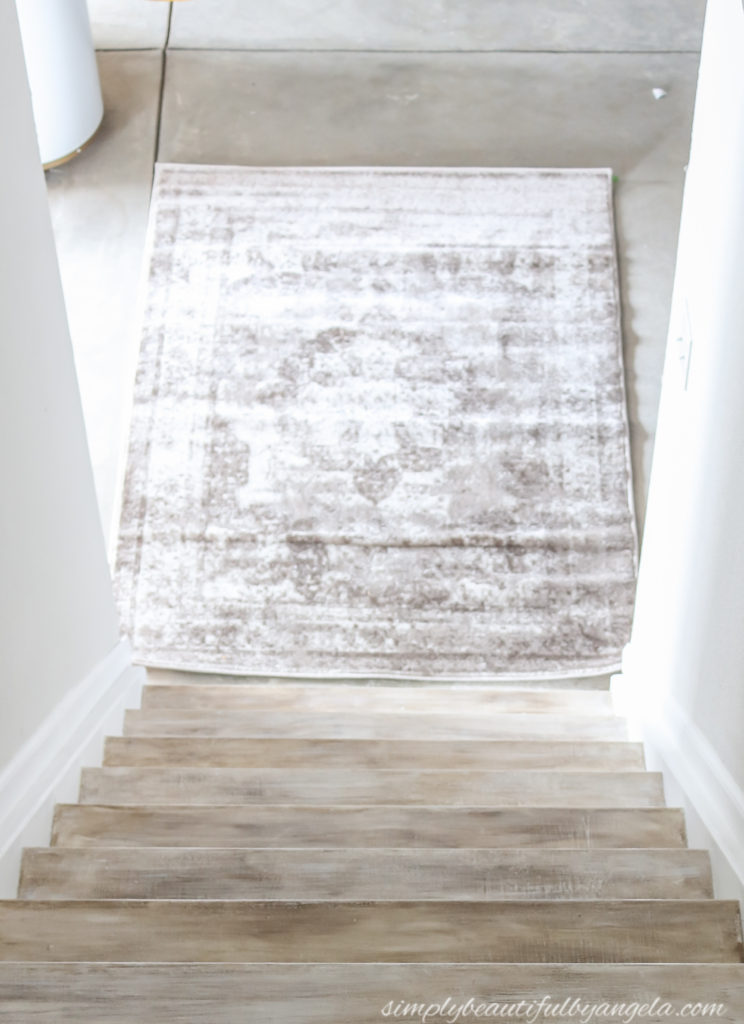
I found this super pretty vintage style area rug on Amazon for $25 to put at the bottom of the steps. I still need to iron the wrinkles out, but it’s really warmed up the view.
We took the old railing off while I was painting the walls and decided to build a new one out of pipes, so stay tuned for that!
It may not be as good as the real thing but it’s definitely a “step” up! You see what I did there? 😉
I hope this is encouragement for anyone else that has unsightly particle board steps that you can’t stand looking at another day!
Thanks for stopping by today my friends. I hope you have an amazing rest of the week and I will be back next week!
Linking up to these awesome parties!
They look great! I did a very similar treatment to my stairs in my home and although time consuming, it has a beautiful end result. And I actually love unedited photos that have shadows and are REAL! Everything on the internet is so editors that it looks nothing like real life.
Thank you so much for that Amber you have made my day! 🙂
You have the patience of a saint. Beautiful job. Bravo!
Thank you Suzanne haha! The patience definitely paid off 🙂
Wow! What a difference. I never would have guessed you could achieve that look with paint and wax. Love it! Thanks for sharing at Sweet Inspiration!
Thank you Amy! Yes I am so happy that I discovered this hack 🙂
What a great transformation#alittlebitofeverything@_karendennis
Thank you so much Karen!!
Nice job! Our old home had unfinished basement stairs that I was planning on sanding and staining but just couldn’t bring myself to spend all the time on them…and it was only half the stairs you had to do since they were broken up by a landing and the top part was carpeted. I admire your tenancity it taking this project on. Well worth it! The stairs look fabulous!
Thank you Audra! Yes it was a lot of work but I was so tired of looking at them and am so happy I finally did it! 🙂
Wow the finish result is just spectacular !!! Great job..
I’m just really dumb for DIY’s … lol
Thanks for join us at #alittlebitofeverything
Thank you Iveth!
Wow the finish result is just spectacular !!! Great job..
I’m just really dumb for DIY’s … lol
Thanks for join us at #alittlebitofeverything
Thank you Iveth!!
Lovely! You did a really nice job. A big improvement!
Thank you Michelle!!
Well done! This looks so classy x #Alittlebitofeverything
Aww thank you Rosie! 🙂
These look SO SO good!! Awesome job! I love using a faux wood treatment like this one. Hope you are staying warm, I’m in Denver (where are you located if you don’t mind me asking?) and I’m right there with you hoping it warms up soon! Yesterday was pretty nice but I am so ready for spring!
http://www.paperandvine.com
Thank you so much Hillary! I’m out in Parker, so nice to meet a fellow Coloradoan! Hopefully it starts to warm up soon for us and most of the colder weather is behind us 🙂
Oh Parker is so beautiful! That’s actually where I got married, at Black Bear Golf Course. So nice to meet you too – I’m loving catching up on your latest posts!!
That’s awesome!! You are so kind, thank you!
Oooo nicely done! I love this, and so easy. Bravo!
Thank you very much Ola!