Hello and happy Thrift Store Challenge day my friends!
So you all know that I like to be real with you guys, so full disclosure–I almost had to drop out of this one. Life has been super hectic lately and the project that I wanted to work on for this month’s challenge kept getting put off. By the time Saturday afternoon rolled around I was running errands and realized that there was absolutely no way I was going to have enough time to start and finish it in time.
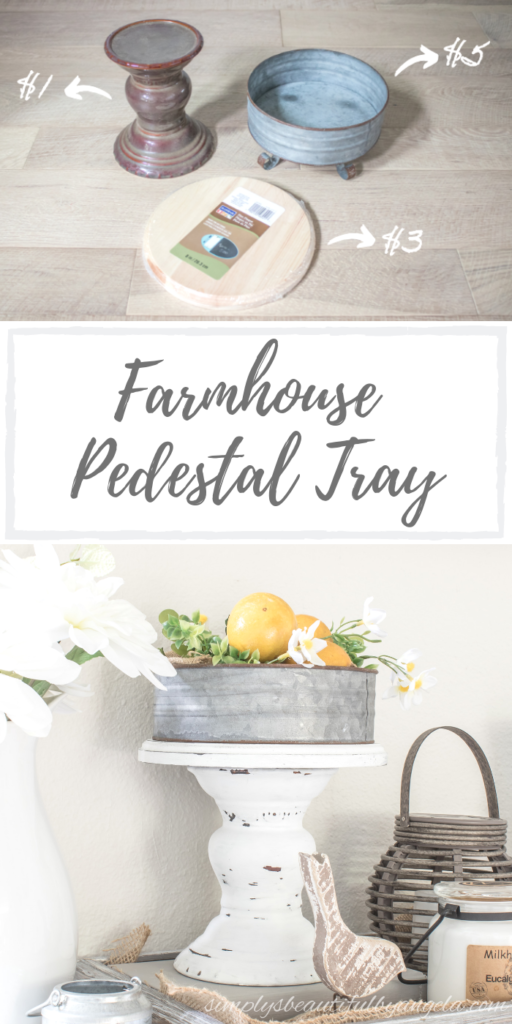
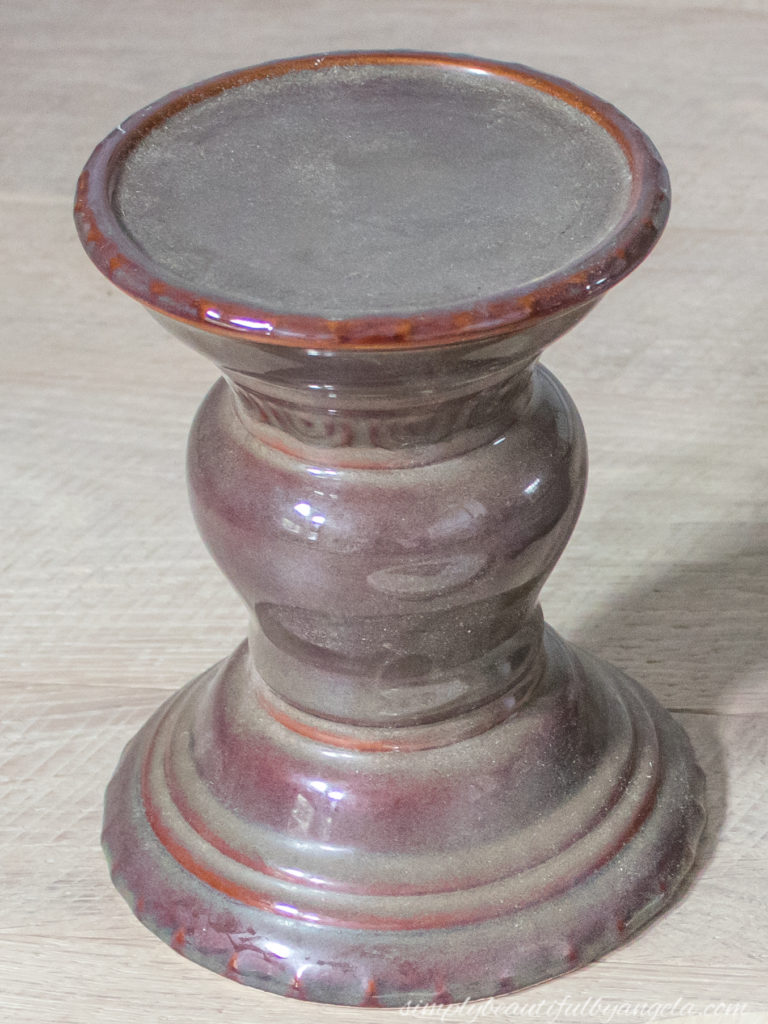
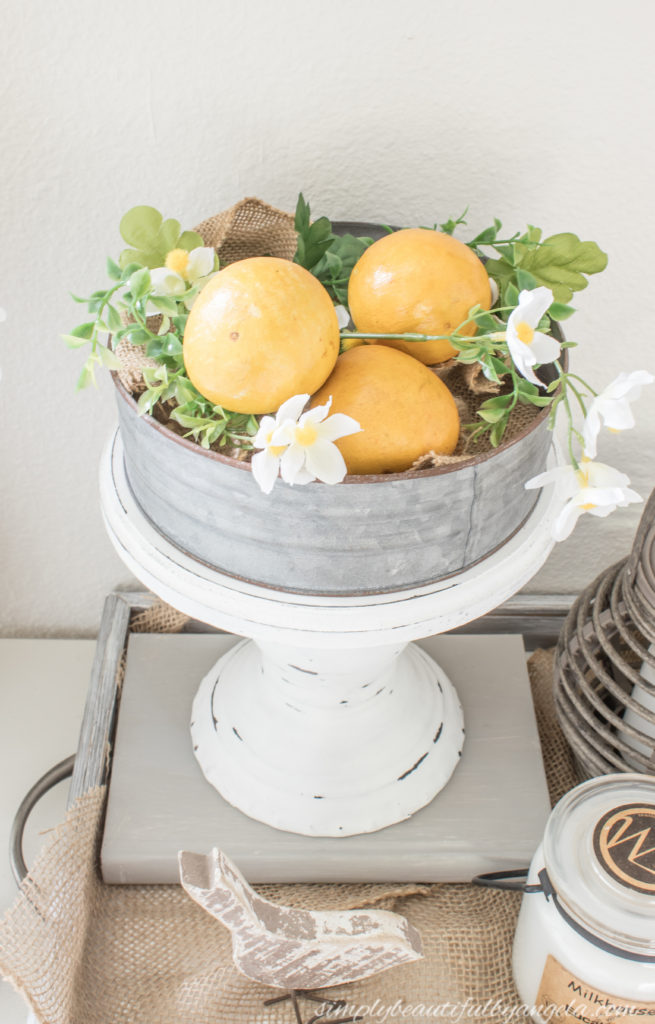
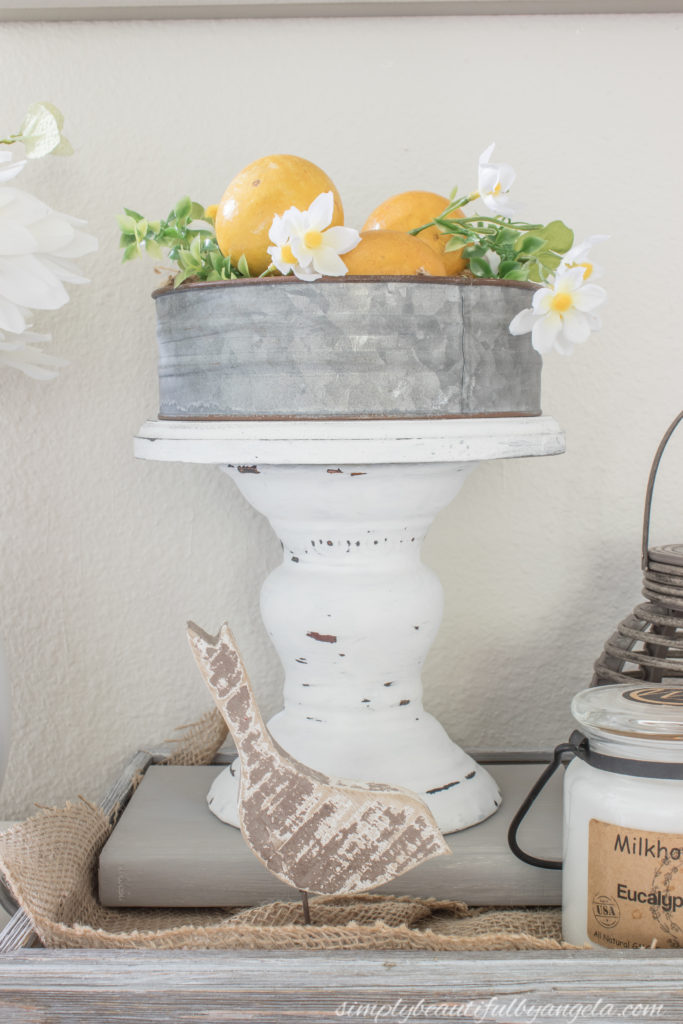
But luckily I always have a stash of thrifted items on hand. I started thinking about whether or not I had anything that I could use for a quick project, and that’s when this chunky candlestick came to mind.
Of course I couldn’t just paint it and leave as is–that would be WAY too boring! So I swung in to Michaels and picked up two things that would help turn this into something new and I can’t wait to show you how it turned out!

The Rules:
- Upcycle an item(s) from a thrift store, resale store, or garage sale into a new piece of decor.
- There’s no monthly theme.
- There’s no budget to stick to.
Meet the Hosts
Angela | Simply Beautiful By Angela – Angie | Grandma Creates – Meredith | Southbound Blog – Amanda | Domestically Creative – Molly | Just a Little Creativity – Jenny | Cookies Coffee and Crafts – Michelle | Michelle James Designs – Marie | DIY Adulation – Pili | My Sweet Things – Gail | Purple Hues and Me – Denise| My Thrifty House – Emy | Semigloss Design – Michelle | Our Crafty Mom – Lynne | My Family Thyme – Chas | Chas’ Crazy Creations – Kathleen | Our Hopeful Home – Carmen | Living Letter Home
Make sure you follow our board on Pinterest for more upcycled decor inspiration!
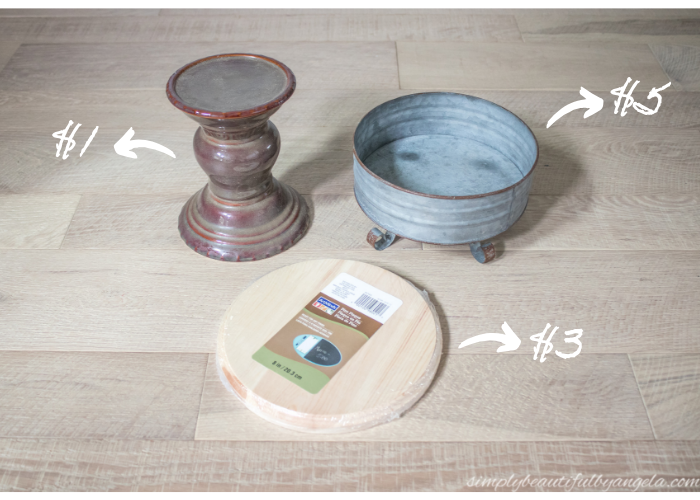
At Michaels I found this little galvanized tray and thought that it would be the perfect size to sit on top of the candle stick. I also decided to get a round piece of wood to sit on to make it look a little more finished.
Supplies Used:(Affiliate links may be provided for convenience. For more info, see my full disclosure here.)
- Rust-Oleum Flat Black Spray Paint
- DIY Chalk Paint (1 cup latex paint + 1 teaspoon Plaster of Paris)
- Petroleum Jelly
- Angled Brush
- 220 Grit Sandpaper
- Liquid Nails
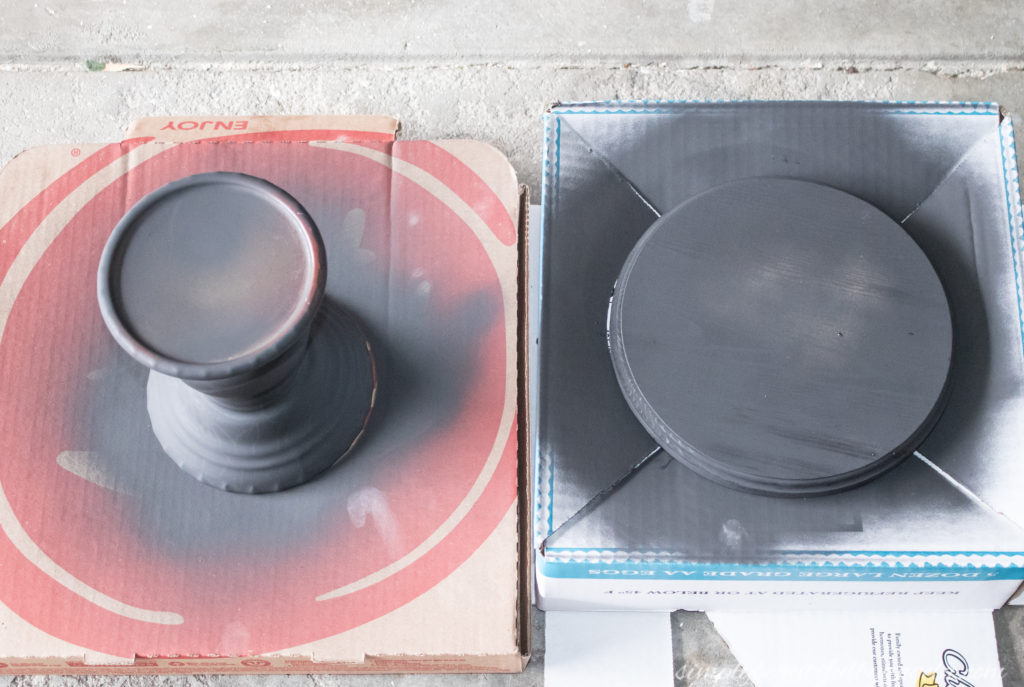
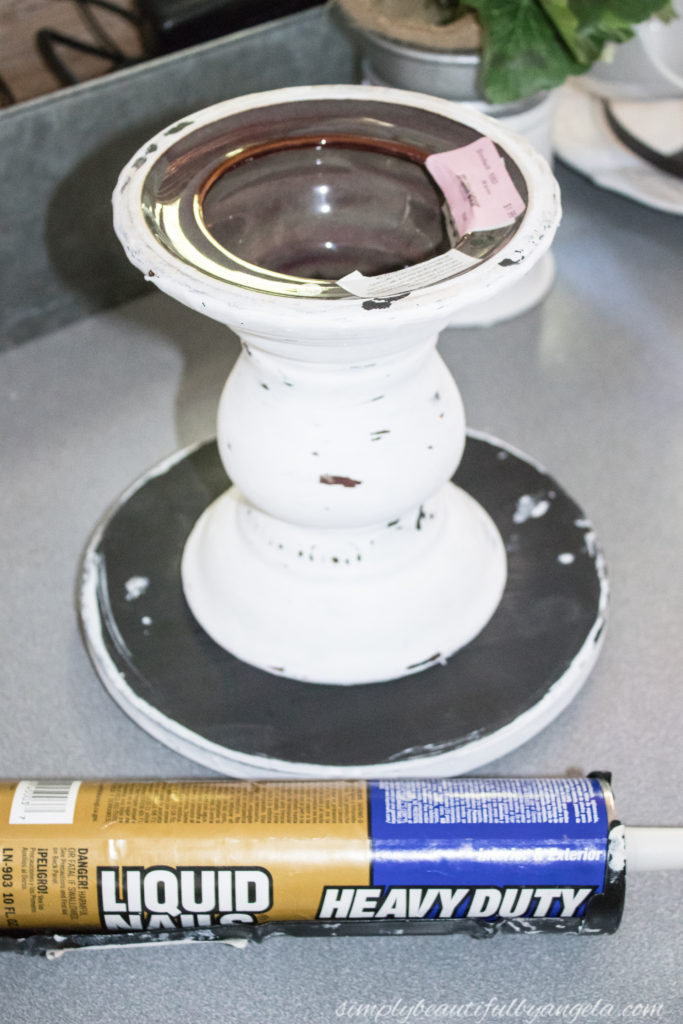
I began by giving both the candlestick and the wood a coat of flat black spray paint. I only focused on the areas that I knew would be exposed.
Since I was working at the speed of light I forgot to snap a picture of the next two steps! But they are so easy that no pics are needed, pinky promise 🙂
- I went around and put a little bit of petroleum jelly on the places that I wanted to be extra distressed since it keeps paint from sticking.
- Then I did 3 coats of my DIY chalk paint in white. Once the final coat was dry I went around with some fine grit sandpaper to distress.
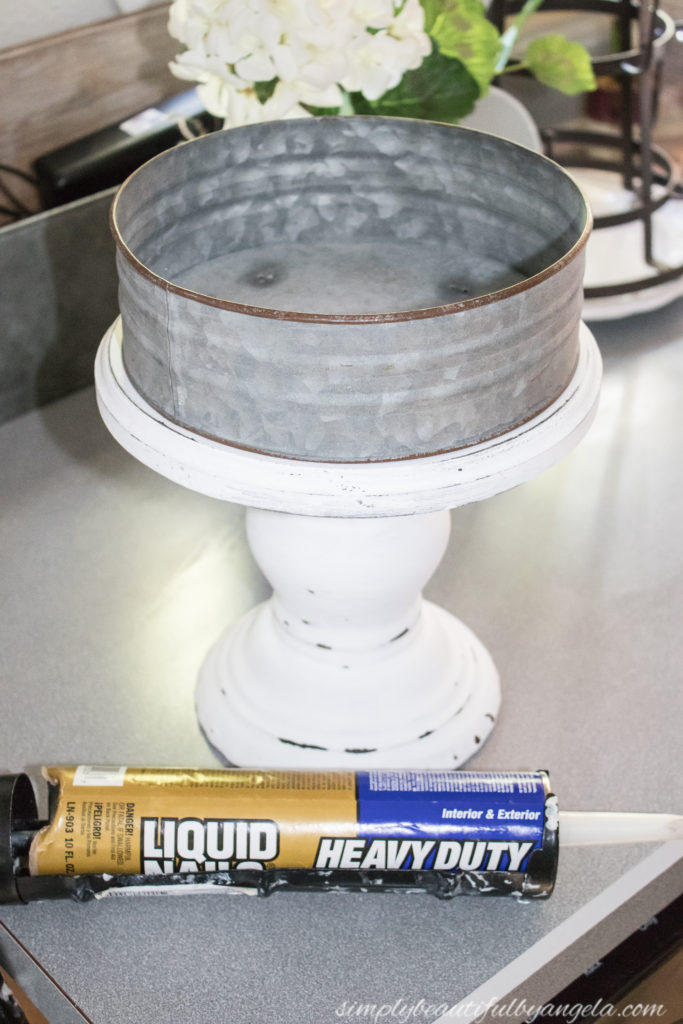
I centered the candlestick on the bottom of the wood and traced it. Then I ran a line of Liquid Nails along the top of the candlestick and then flipped it upsidedown to where I had traced it previously.
I was happy to find that the little metal feet easily snapped right off of the bottom of the galvanized tray.
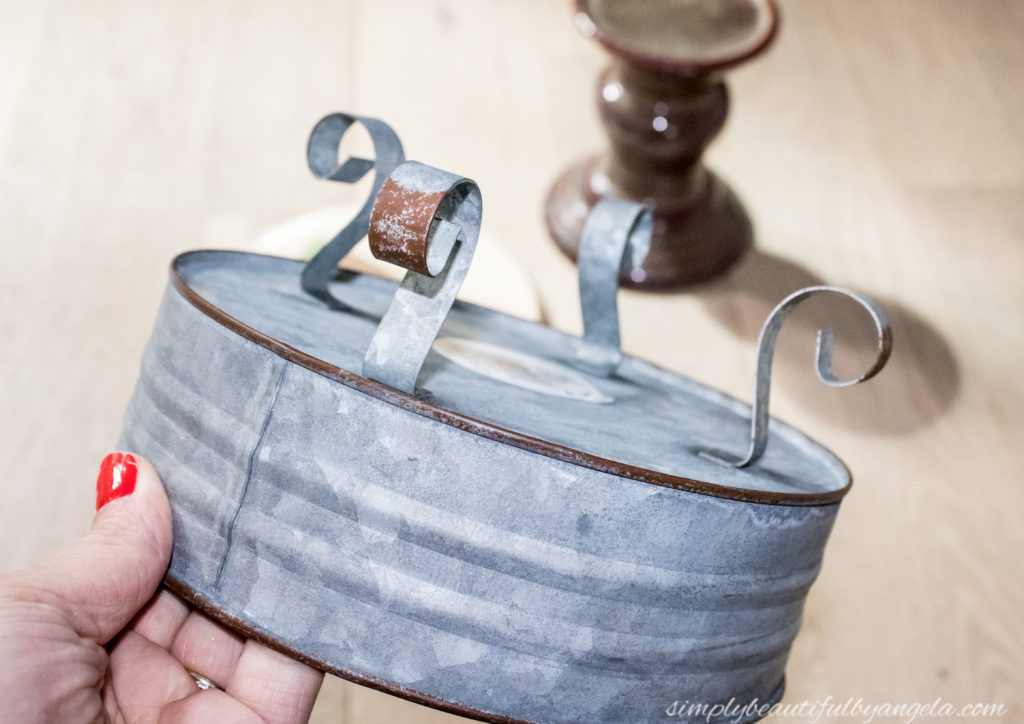
However I was not happy to find that the lip on the bottom made it so that Liquid Nails would have trouble adhering to the wood. Even after applying a ton and putting weight on, it didn’t want to stick. So for now I just have it set in place and if it moves around too much I’ll eventually screw it down.
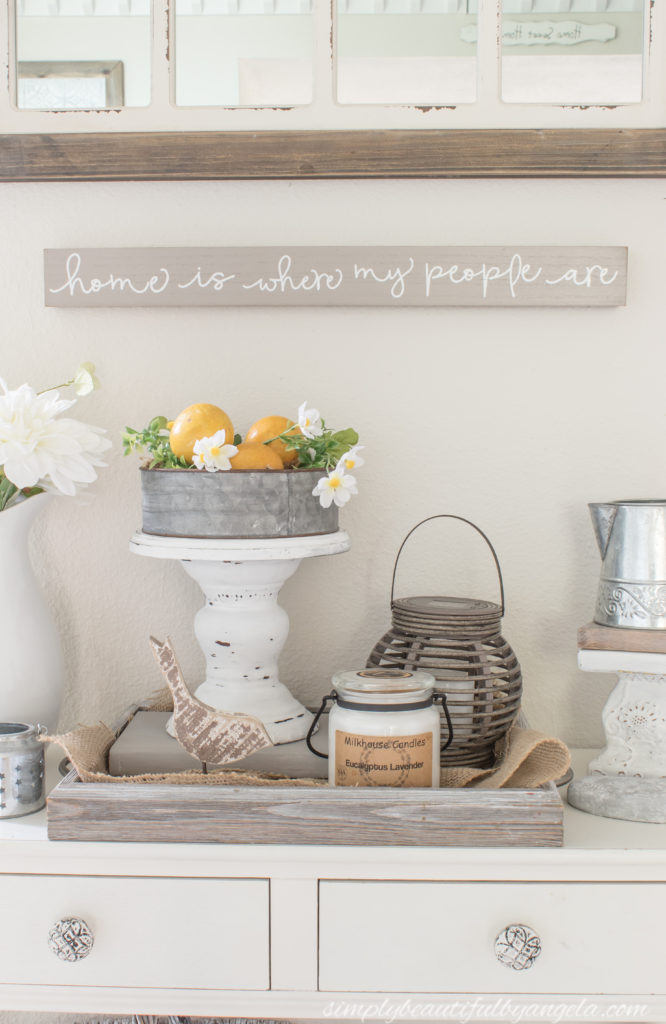
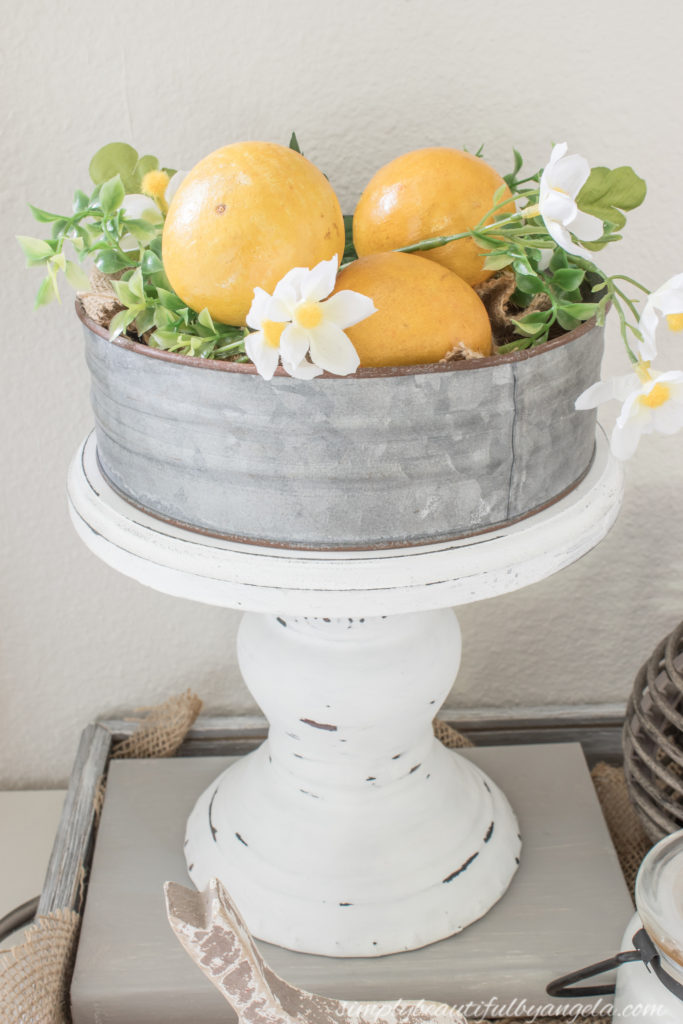
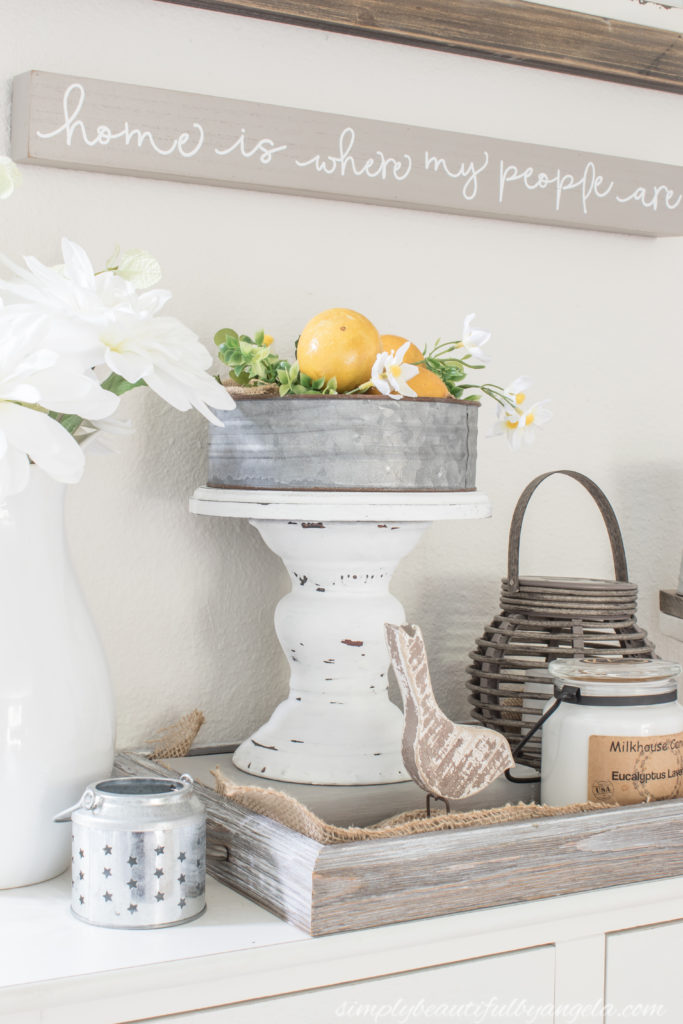
I decided to fill it with some burlap, faux flowers and lemons for summertime and am oh so happy with how it turned out!
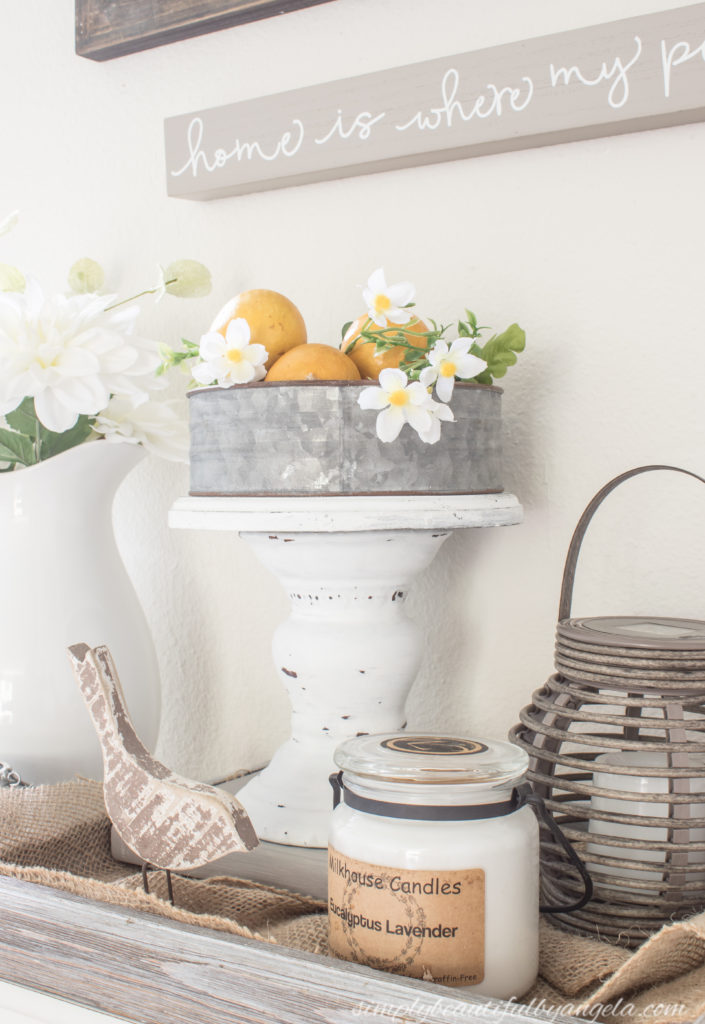
Not bad for $9 bucks, right?!
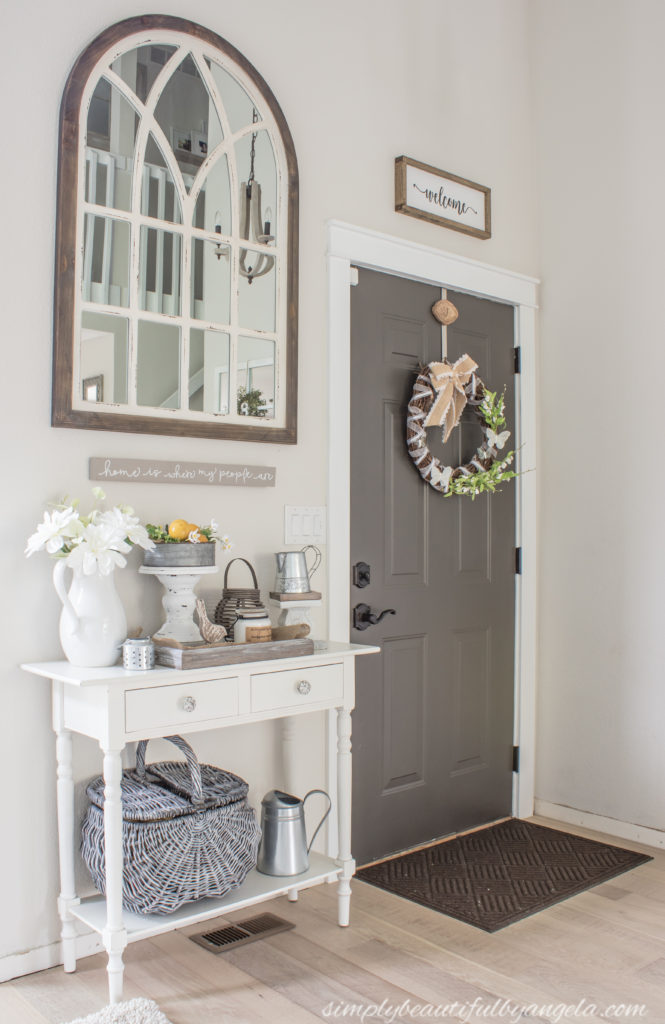
I actually had something else on the front table and just set this here to photograph it. However by the time I was done, I was so in love with it here that I decided it’s staying!
The detailing on the candle holder distressed beautifully and I’m so glad that I finally decided to break it out of my stash for this project. I have no idea when I got it–I am guessing somewhere 3 years ago?
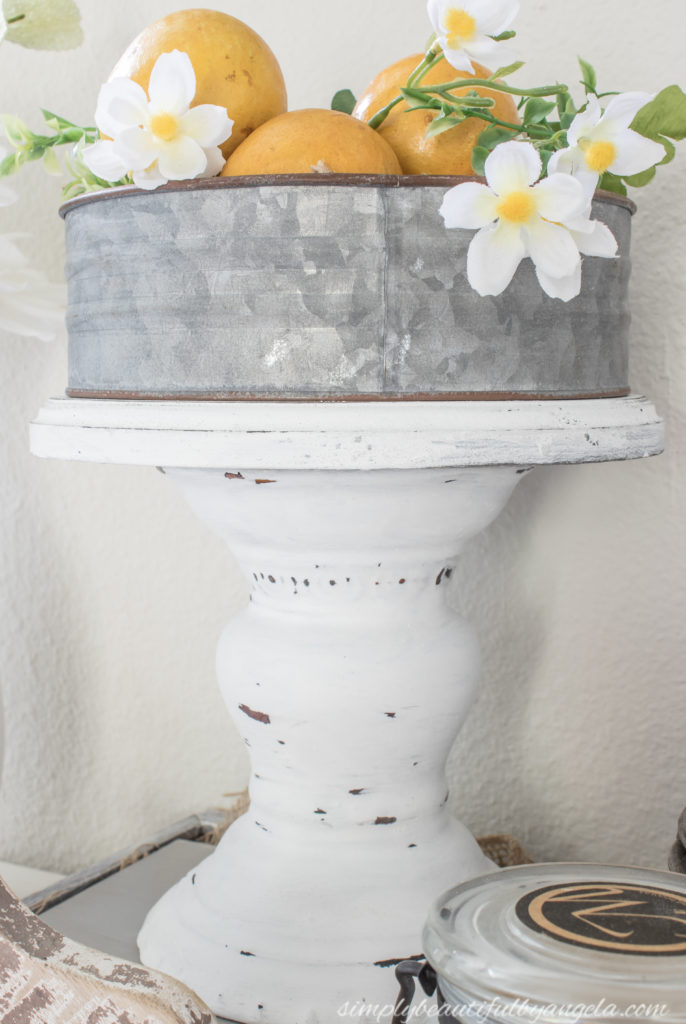
The distressing process did take a lot of the black paint off, but the original colors are so dark that you can’t really tell.
I know I’ve said it a million times but I truly love this amazing group of bloggers and this challenge because it really provides me with motivation to keep my creative side flowing even when life is nuts. If it weren’t for this challenge this candle stick would still be buried in the garage instead of looking pretty in our entry!

I’ve already been imagining what kind of fun goodies I can put in here for the other seasons…oh the possibilities!
Thanks for stopping by today my friends! I will be back next week to share a full summer home tour with you guys. See you then!
Linking up to these awesome parties!
This is such a cute project. It’s going to be so much fun to decorate with during the different seasons!
Thank you Emy, I totally agree and cannot wait!!
Seriously so adorable. I love this makeover, totally my style. You did a great job with all the pieces. And if the liquid nails don’t end up working, then yeah, just a few screws or even regular nails should hold it. LOVE it!
Thank you so much Molly! So far it’s in a spot not often disturbed by the kiddos so it’s staying in place nicely thank goodness 🙂
Oh my gosh, what a fantastic upcycle. Love the color and how it turned out. So very useful! Great job!
Thank you so much Chas!!
I am absolutely in love with this project! I need to find a chunky candlestick and tray now. I love how you have it decorated too with the lemons and greenery! Perfect for Summer!
Thank you Amanda!! I am so happy with how it all came together 🙂
This looks gorgeous! Actually, your entire entry way is stunning. Totally jealous. I love how you put all of the pieces together to create something amazing.
Thank you Marie 🙂
This is gorgeous!! It would look great with every season but I am in love with the lemon decor! I almost had to back out this month too but I am so glad that I didn’t!
Thank you Angie!! I’m so glad you were able to make it, your project turned out great too 🙂
How cute! Amazing what one can come up with in a pinch, isn’t it!
Thanks Naomi! Yes it truly is 🙂
I love it! And way to think on your feet. Thanks so much for sharing with us at the Summer Fun party. Pinned.
What a nice makeover, totally my style. Also that sign you have is lovely.
Thank you so much!
I love your style. So will be copying some of your ideas#alittlebitofeverything@_karendennis
Awww thank you so much Karen, you are so sweet! 🙂
Love this! I have a trio of almost identical candleholders tucked in a closet because the colors are dated. This is so happening to them!
Yesss that’s awesome Marie!! 🙂