Hello friends and happy Thursday to you! I hope you’ve all had a nice week so far. It’s the last Thursday of October and you know what that means–it’s Thrift Store Challenge Day!
The Rules:
- Upcycle an item(s) from a thrift store, resale store, or garage sale into a new piece of decor.
- There’s no monthly theme.
- There’s no budget to stick to.
Meet the Hosts
Angela | Simply Beautiful By Angela – Beverly | Across the Blvd – Lynne | My Family Thyme – Marie |Craft Rocker
Our Thrift Store Upcycle group of bloggers is looking to expand — and we need your help! Why not consider joining in our thrift store upcycle challenge on the last Thursday of each month? Make some friends while having fun and share your love of DIY with the world. It’s a win-win! Sound like something you’d be interested in? Just leave a comment at the end of this post with your contact info and a link to your blog. Someone will get back to you right away. We can’t wait to meet you!
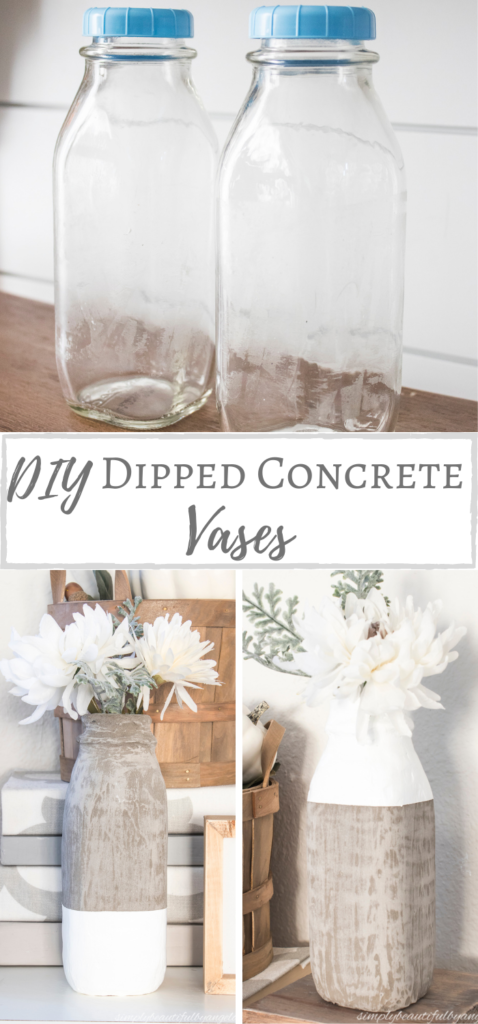
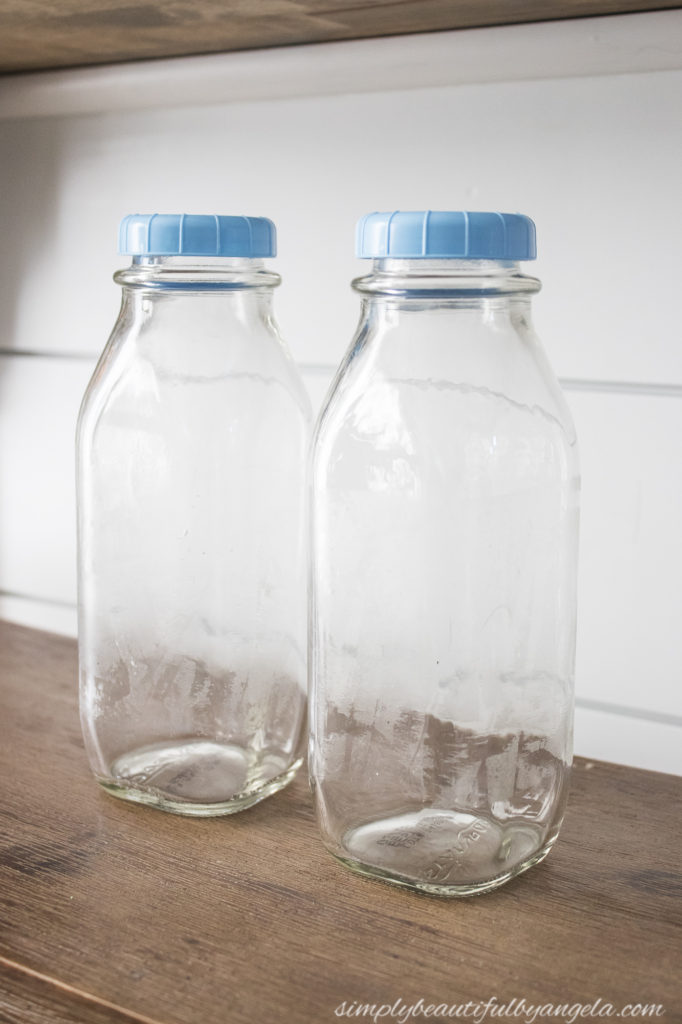
So moment of totally honesty here my friends–I totally spaced the challenge this month. This month just seriously seems like it flew by and this week totally snuck up on me. I remembered it Sunday night right after I crawled in to bed, so before I fell asleep I started thinking about anything that I may have laying around the house that I work with. That’s when I remembered these old glass bottles.
Supplies Used:(Affiliate links may be provided for convenience. For more info, see my full disclosure here.)
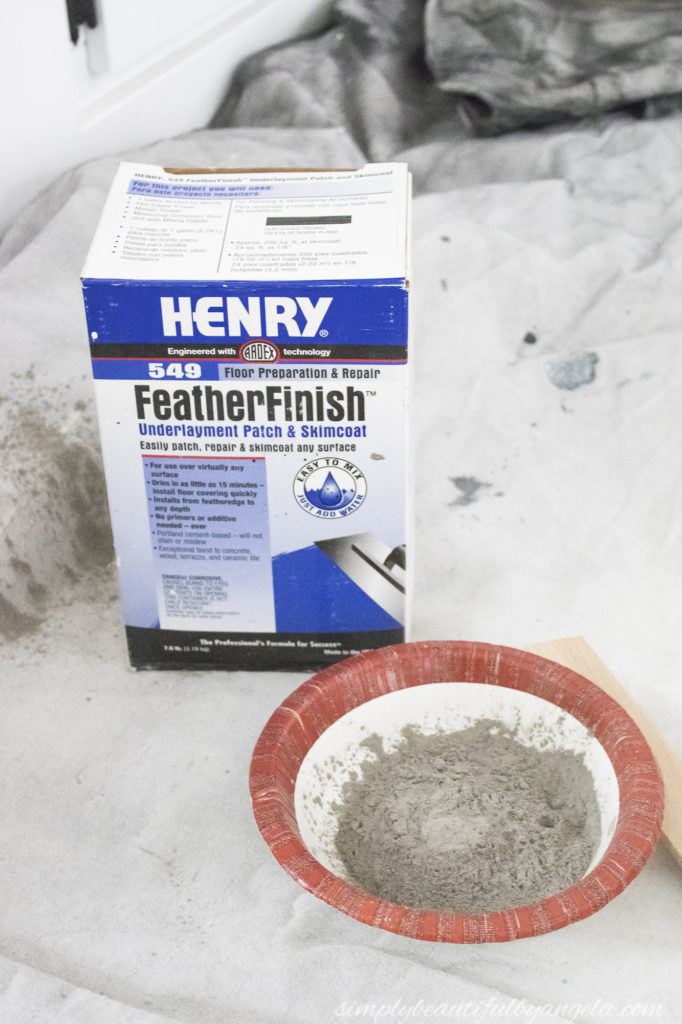
- Henry Feather Finish Coat
- Drywall Sandpaper
- Frogtape
- White Latex Paint
1. Mix Concrete
I began by grabbing my box of Henry Feather Finish Coat and mixed up a small amount with some water in a bowl. I don’t use an exact measurement, I just keep adding water and mix until I get a cake batter consistency.
2. Apply First Coat
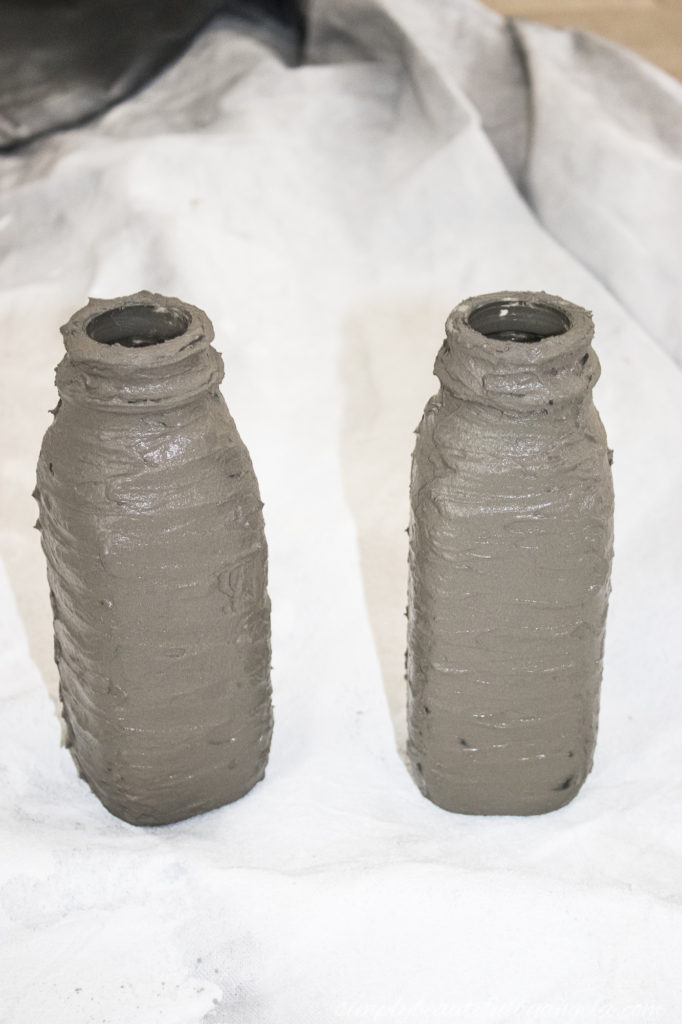
I started by using a wood shim to apply the first coat of concrete to the sides of the glass.
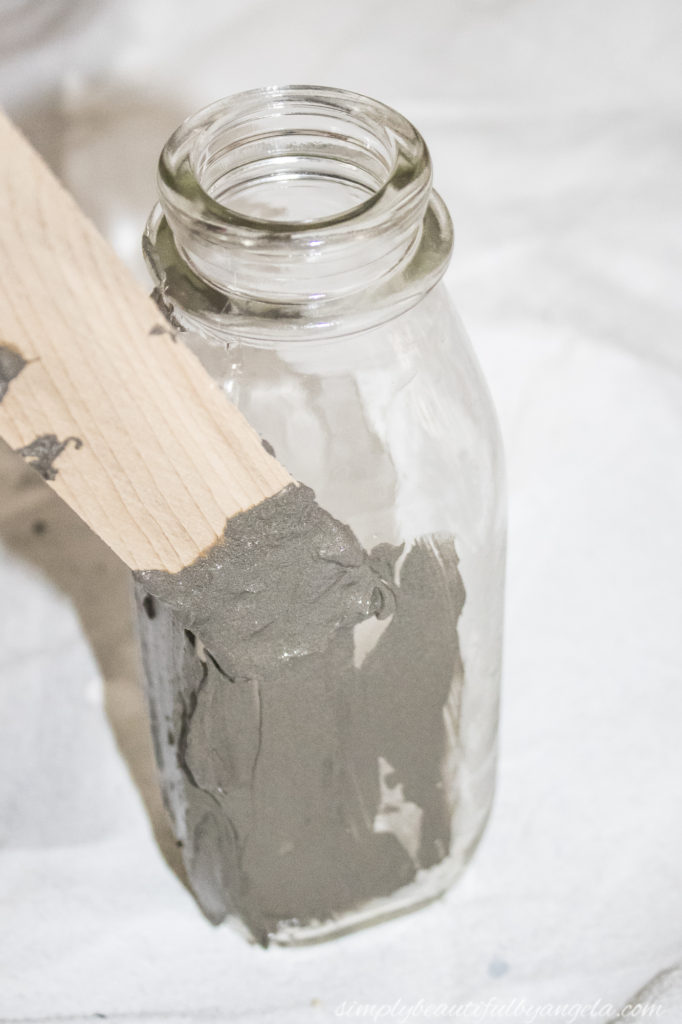
When I got to the top I used my hands to smooth it on. It was at this point that I realized it’s actually easier to just use your hands .
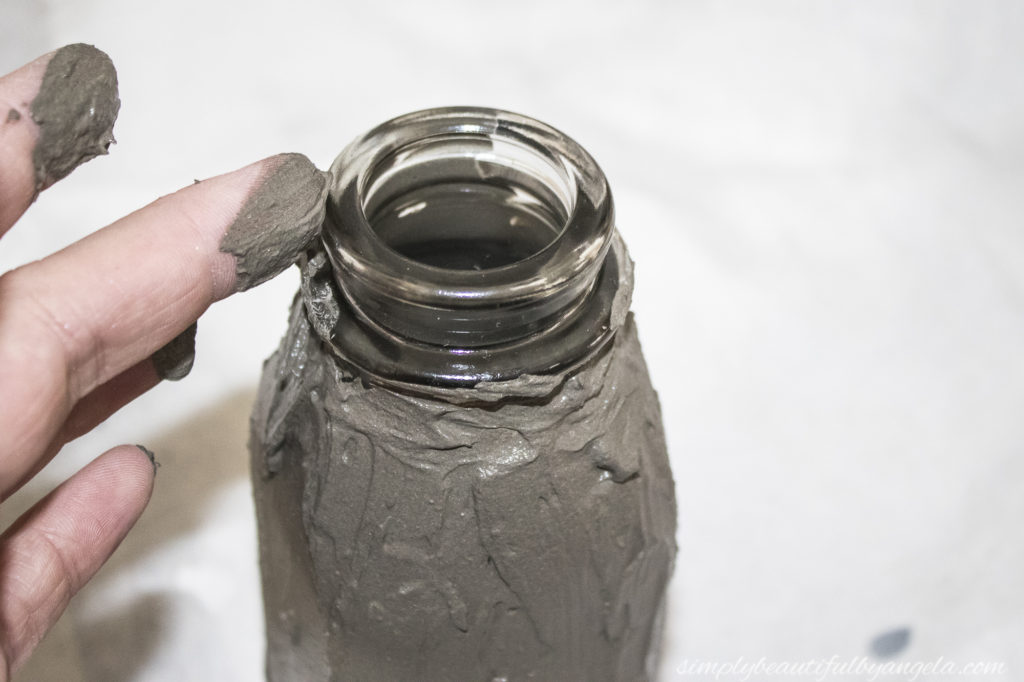
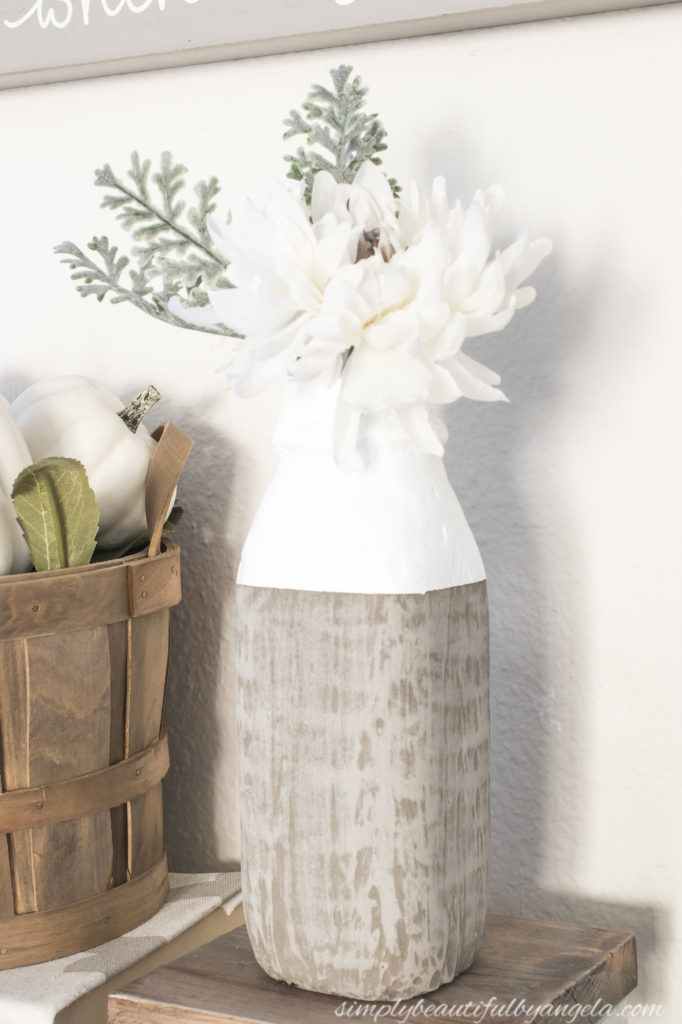
So I went back and smoothed it out horizontally with my fingers. I decided that I actually like the vertical look instead which is what I did for the second coat.
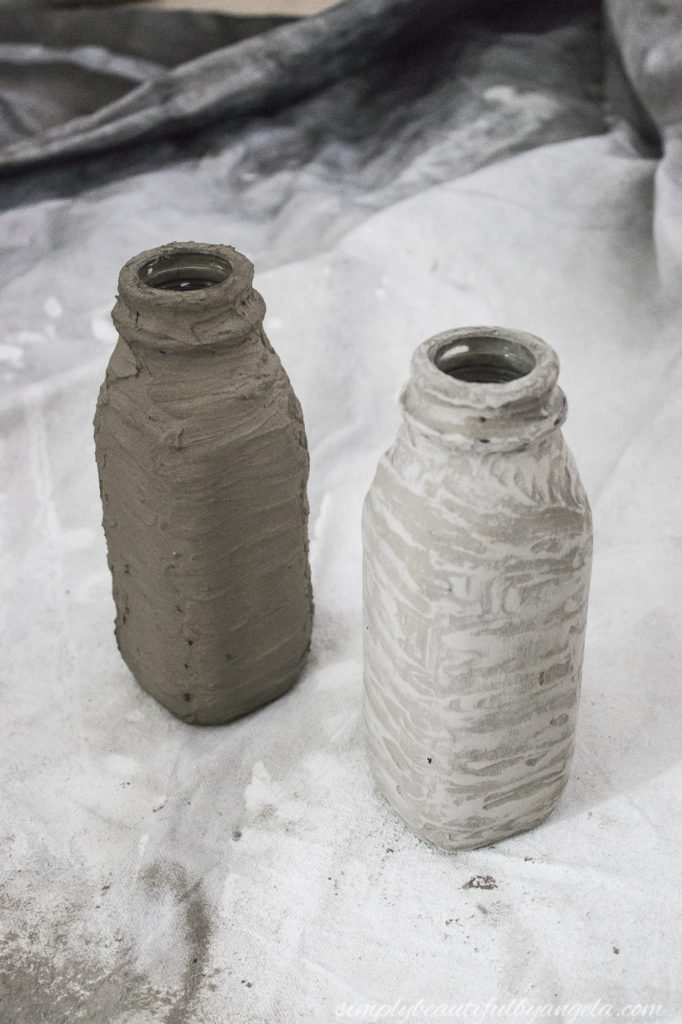
3. Sand, Sand Sand!
I found that the sturdiness and roughness of drywall sandpaper worked perfectly to smooth the concrete out once it’s dry. The color will lighten as it’s sanded as you can see in the picture below.
There were a few spots that I went too rough, so I applied a second coat, this time smoothing it on vertically.
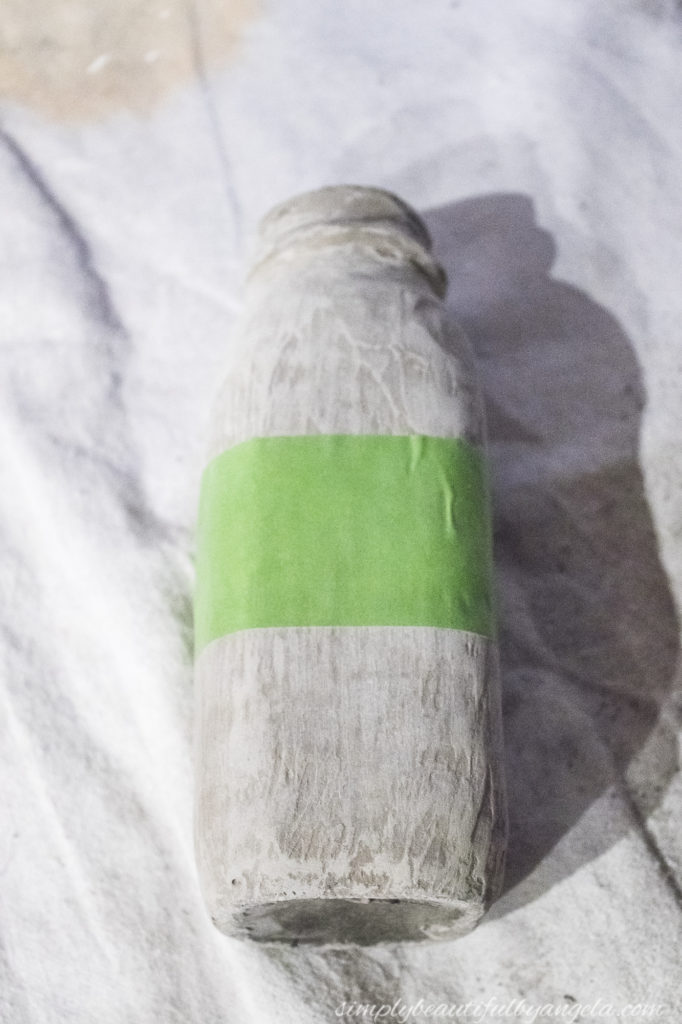
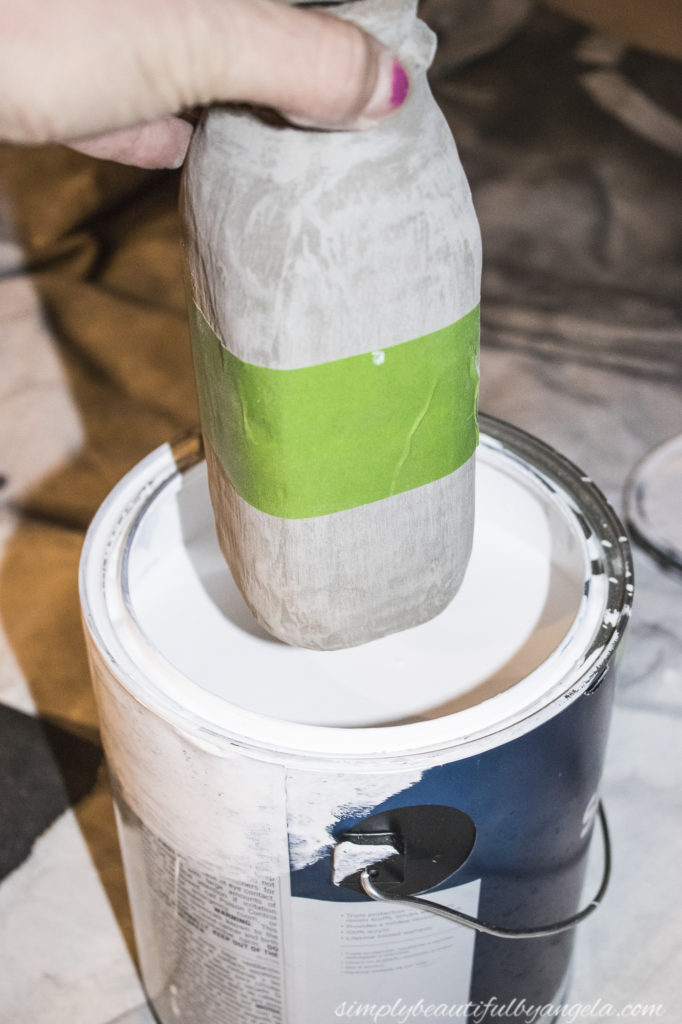
4. Tape and Dip
After the second coat had dried and been sanded, I decided to add a fun dipped look to them. I firmly pressed on some Frogtap on each one where I wanted the “dip” to begin.
Then I stuck it straight in to the can of paint! You could also use a brush to apply the paint but I didn’t want any brush strokes.
I set them on top of some old fruit cups on paper plates to dry overnight.
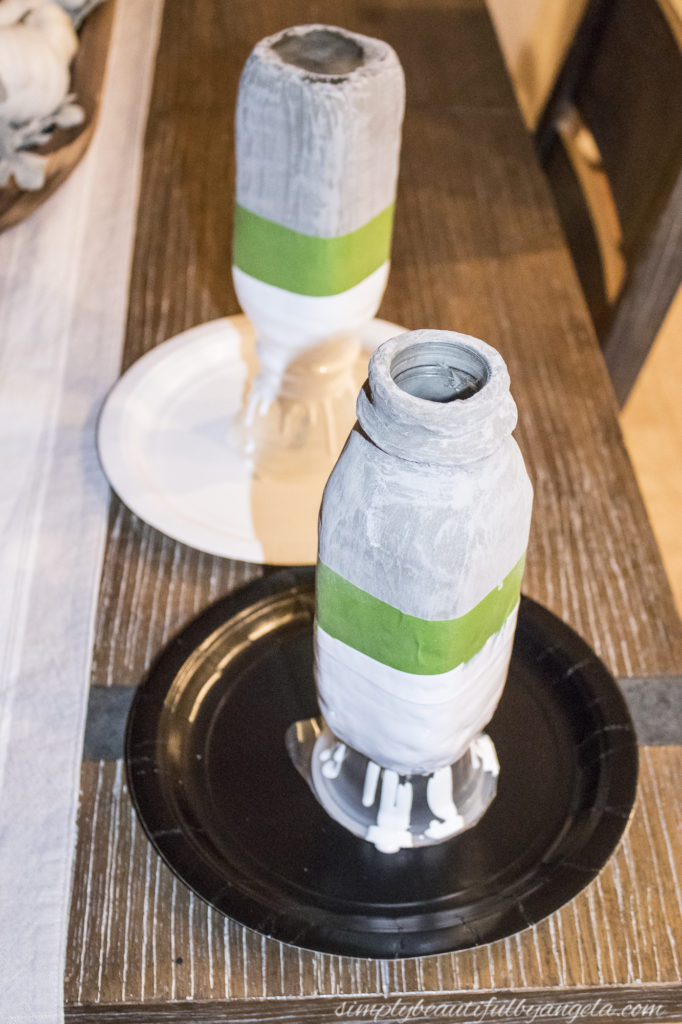
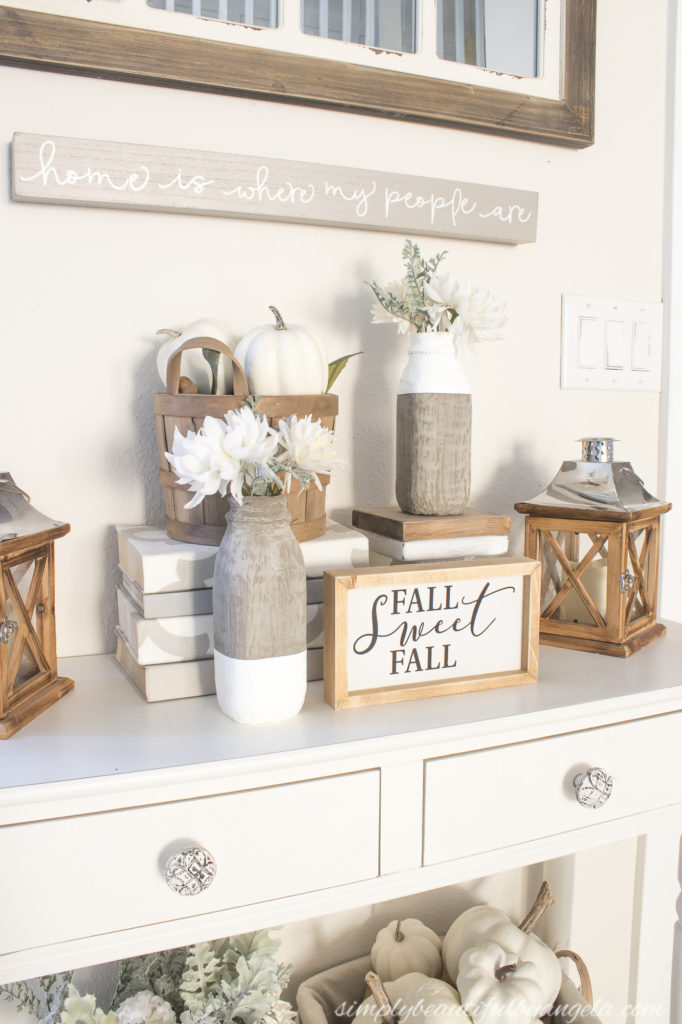
The next day I had to make a few touch ups where the paint either didn’t hit or dried funny, and here is how they turned out!
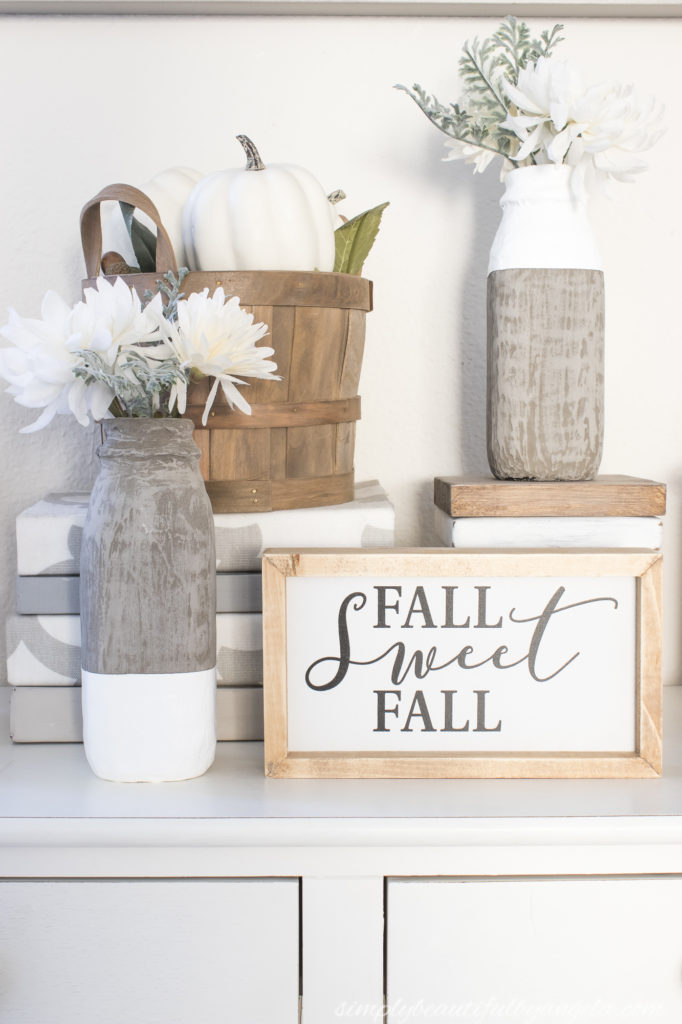
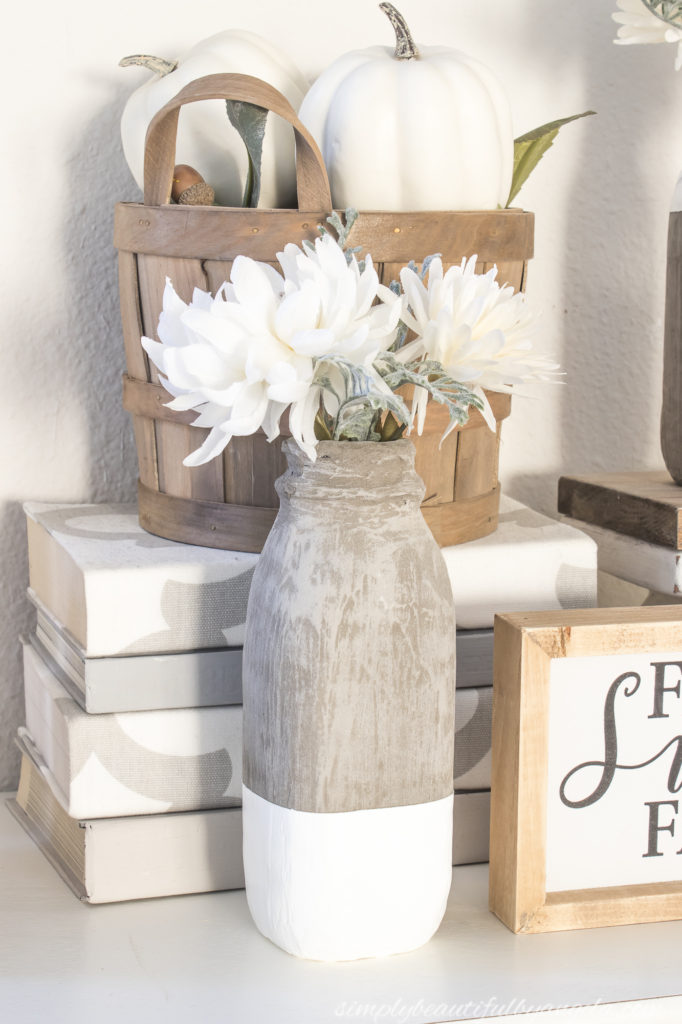
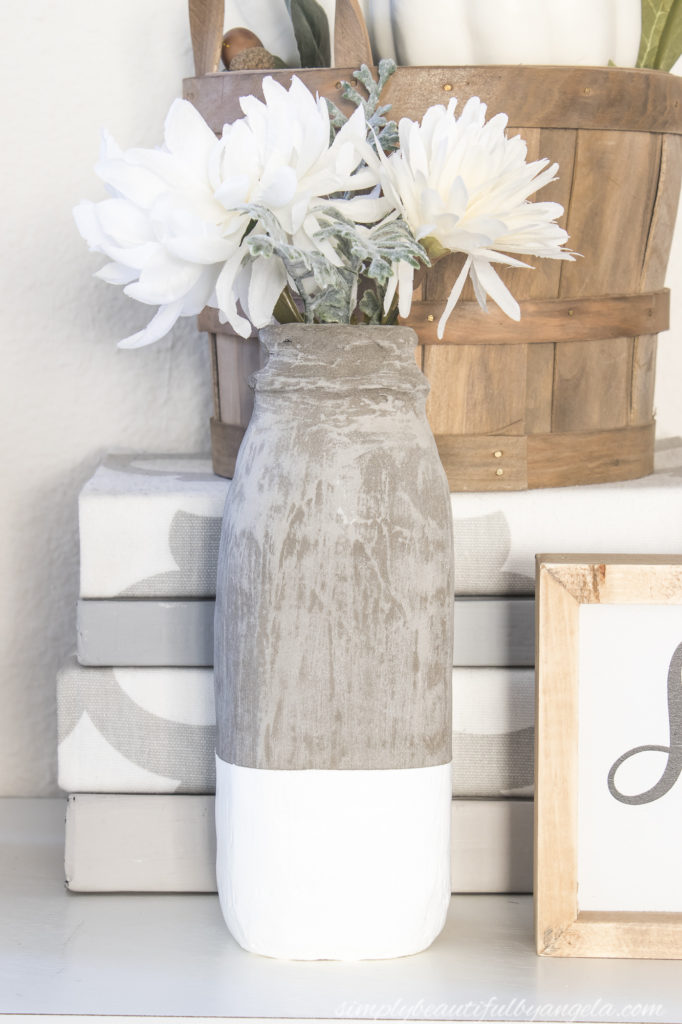
It’s hard to believe that these were ever just a simple glass jar, it feels like I could have found something similar to these in a fancy boutique store.
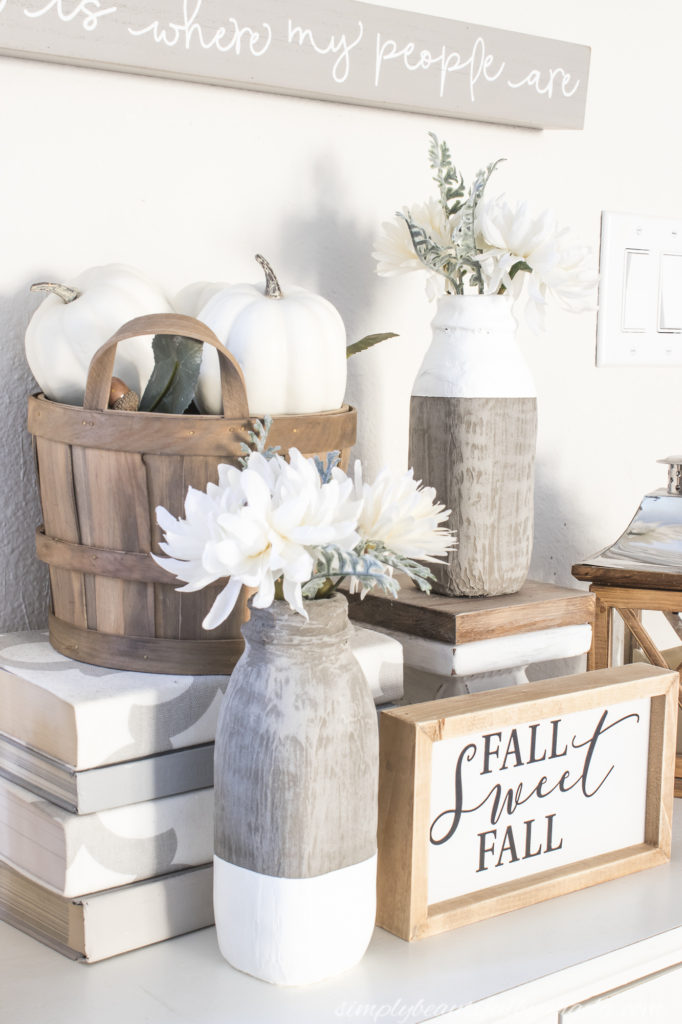
Sure they have their imperfections, but I think that makes them all the more interesting!
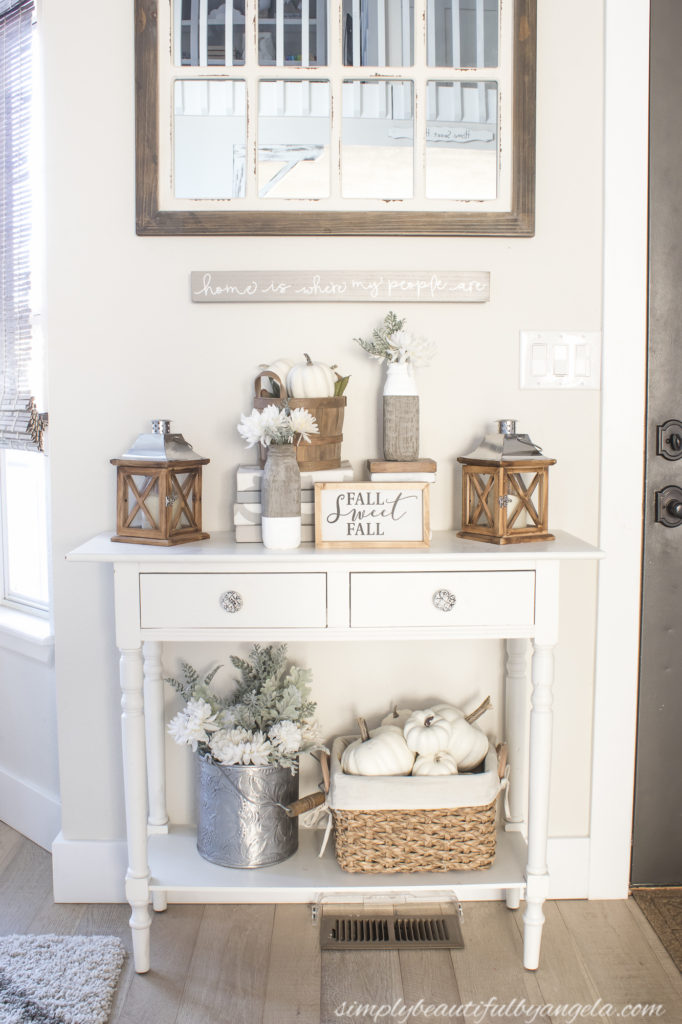
I set them up on the entry table for this photo shoot and am so happy with how they look that I decided to keep them there.
I’m so happy that you could join me today, be sure to check out what my friends created below!
And now for more thrifty goodess!