Hey guys, happy Thursday and happy Thrift Store Challenge day. I cannot believe that it’s already the last Thursday of the month, June seemed to disappear so quickly!

The Rules:
- Upcycle an item(s) from a thrift store, resale store, or garage sale into a new piece of decor.
- There’s no monthly theme.
- There’s no budget to stick to.
Meet the Hosts
Angela | Simply Beautiful By Angela – Beverly | Across the Blvd – Gail | Purple Hues and Me
Our Thrift Store Upcycle group of bloggers is always looking to expand — and we need your help! Why not consider joining in our thrift store upcycle challenge on the last Thursday of each month? Make some friends while having fun and share your love of DIY with the world. It’s a win-win! Sound like something you’d be interested in? Just leave a comment at the end of this post with your contact info and a link to your blog. Someone will get back to you right away. We can’t wait to meet you!
This month’s challenge snuck up on me so fast that I didn’t even get a chance to go browse the thrift store for a project. Luckily I already have plenty of thrifted items laying around the house, one of which was this little wooden box.
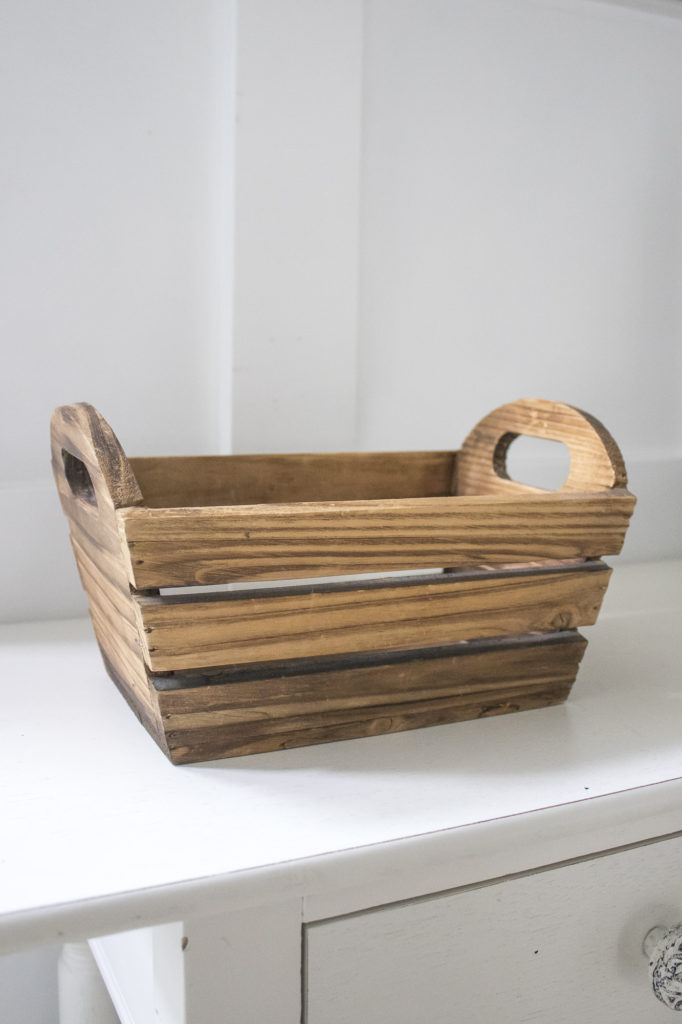
I always felt like it needed to be dressed up a little so I grabbed some supplies and got straight to work.
Supplies Used: (Affiliate links may be provided for convenience. For more info, see my full disclosure here.)
- Latex Paint in White
- Acrylic Paints in Black and Tan
- Stencil
- Rust-Oleum Satin Black Spray Paint
- Sandpaper
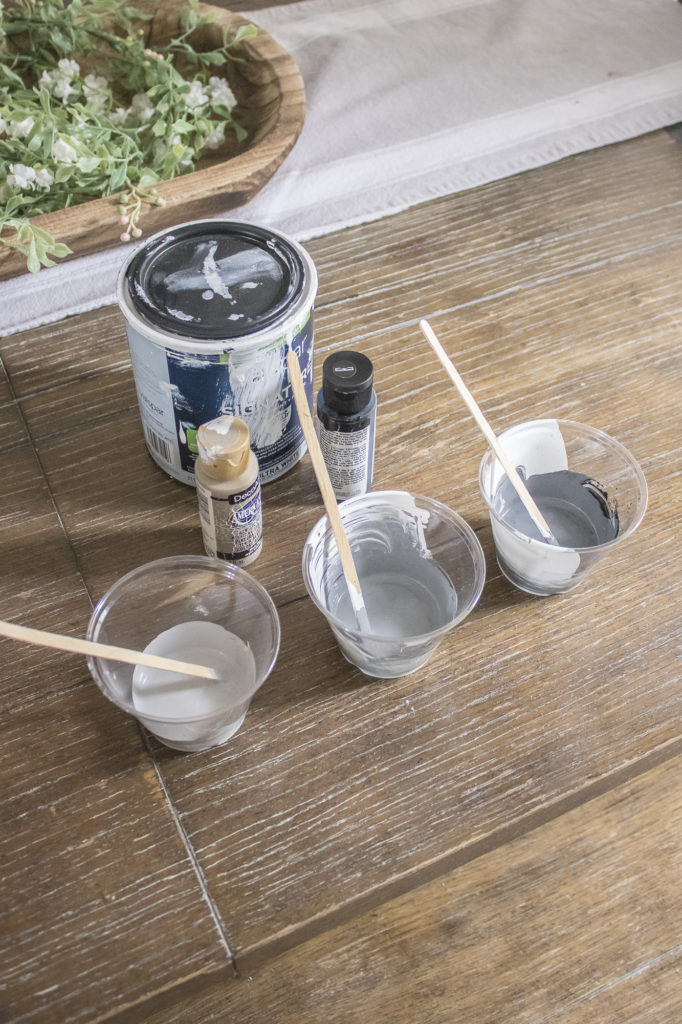
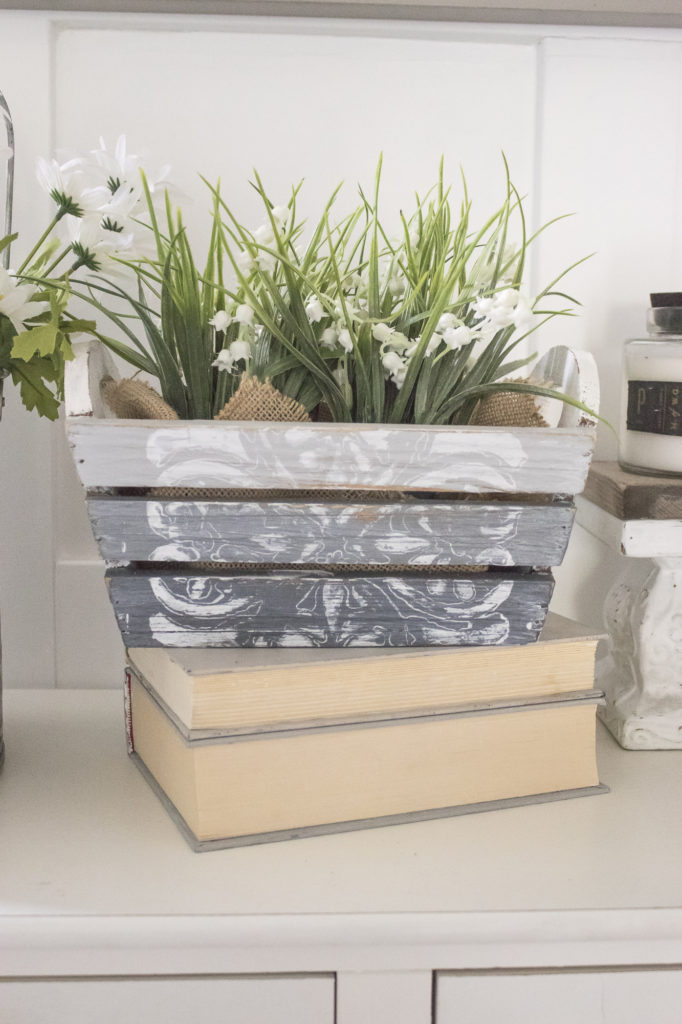
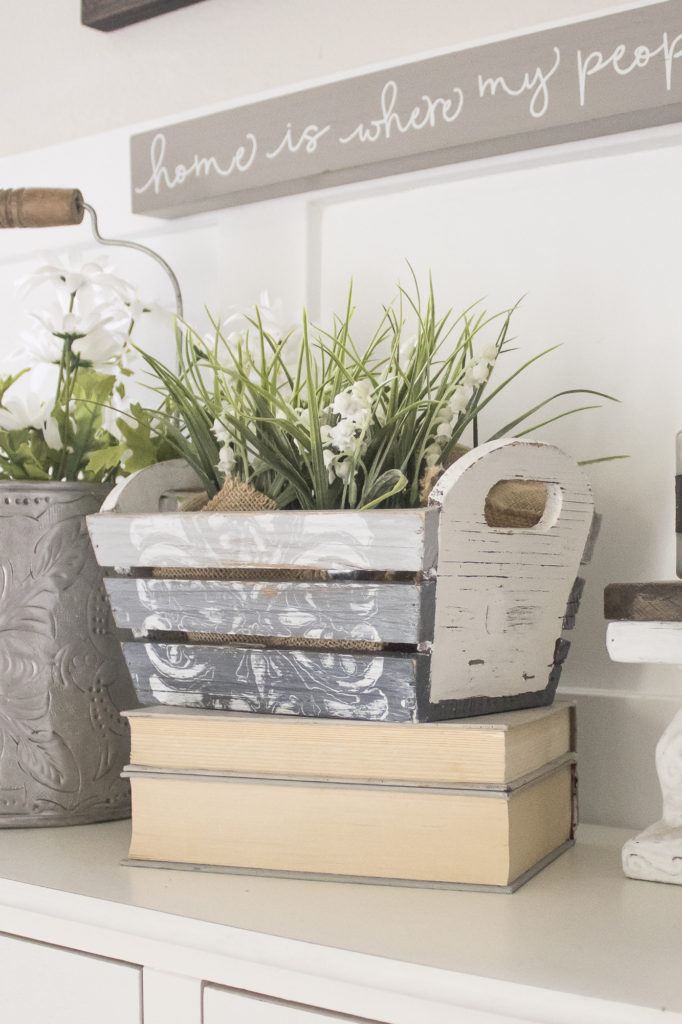
I began by adding white latex paint to three cups. I then gradually added black and tan acrylic paints to each one to create three shades increasing in darkness.
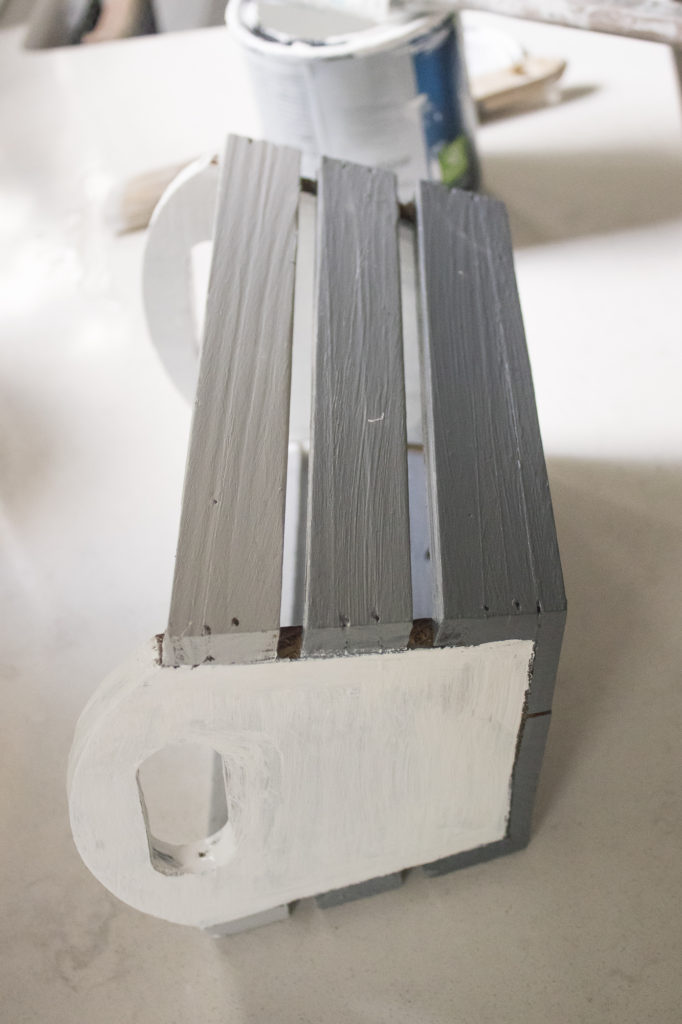
I painted the slats each a different color to create an Ombre effect, and then painted the sides white.
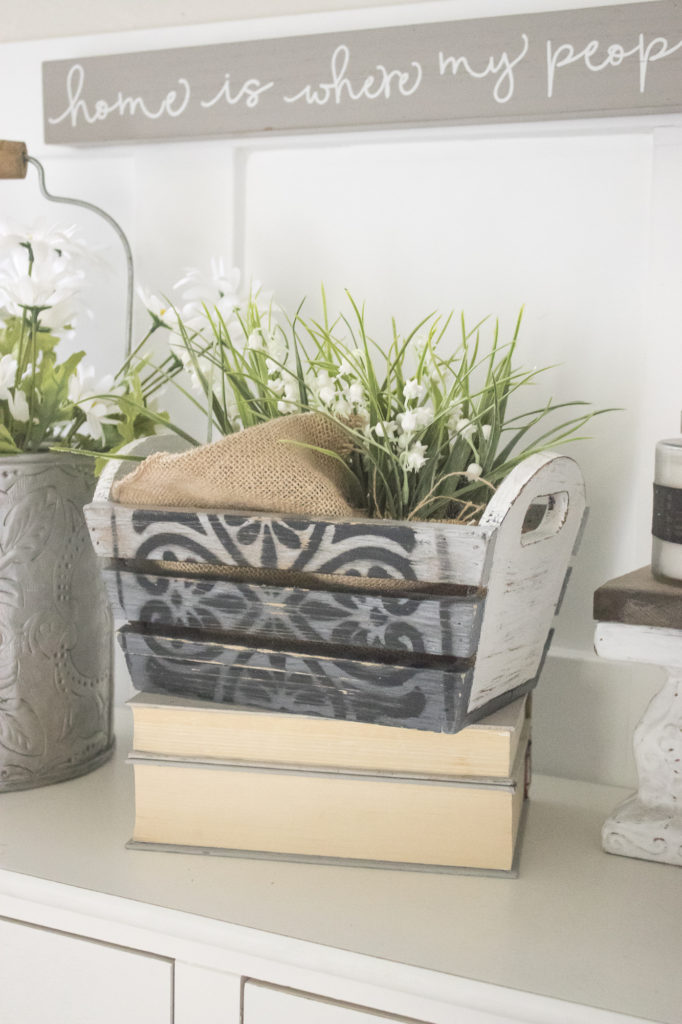
Next, I decided to use the stencil that I used for the recent dresser makeover that I did. I placed it down and painted over it with white paint.
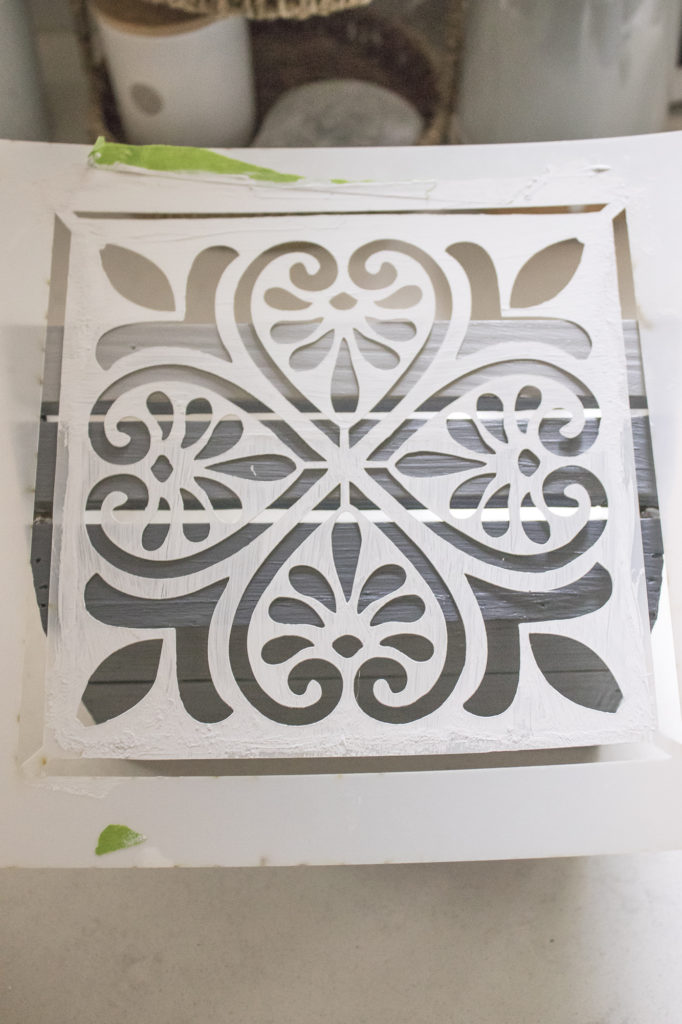
I was so excited to see how it turned out, but was shocked when I lifted the stencil to find this gloopy mess!
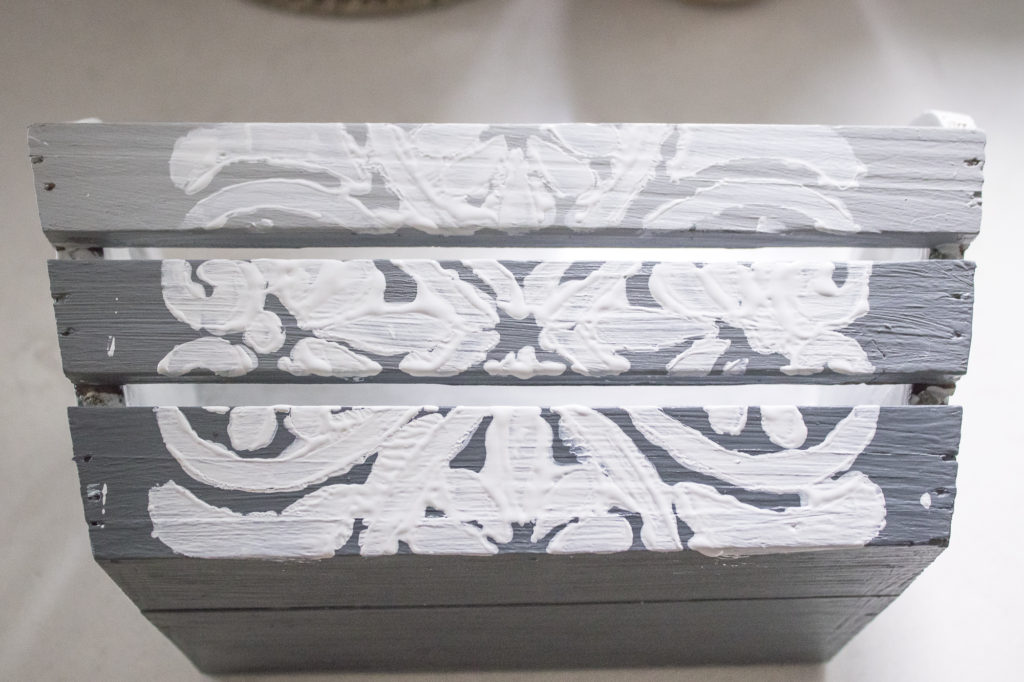
I forgot the cardinal rule of using multiple light coats while stenciling, and used way too much paint so it bled right out. I used a wet paper towel to try to wipe it off and start again, but it didn’t all come off and I was left with this–which was actually pretty cool!

Rather than painting over it to attempt it again, I decided to roll with it. I also decided to try something different on the other side for experimental sake. So I took it outside, laid the stencil down and used some black spray paint. I distressed each side with sandpaper to blend it all in and make it look worn and weathered.
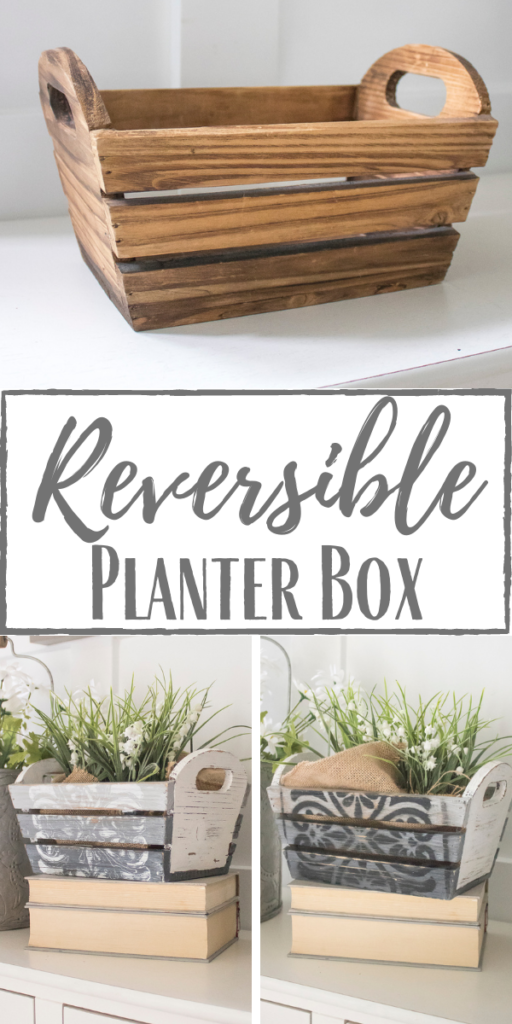
Now I have a reversible planter that I can turn around whenever I want to look at something different. Here is the white more organic looking side:

And here is the black more geometric side:
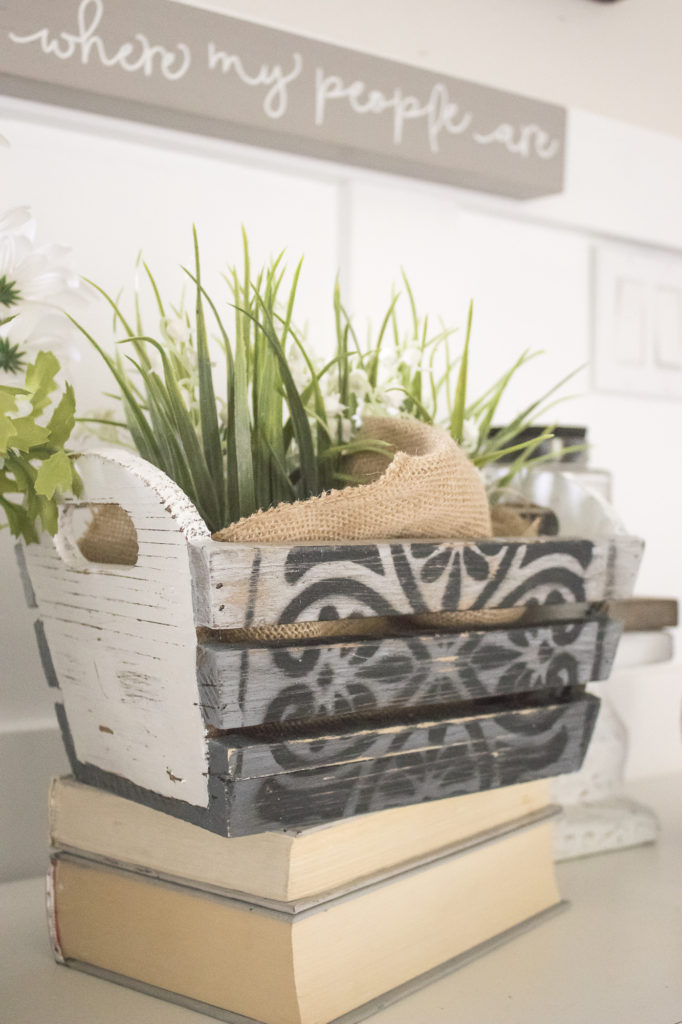
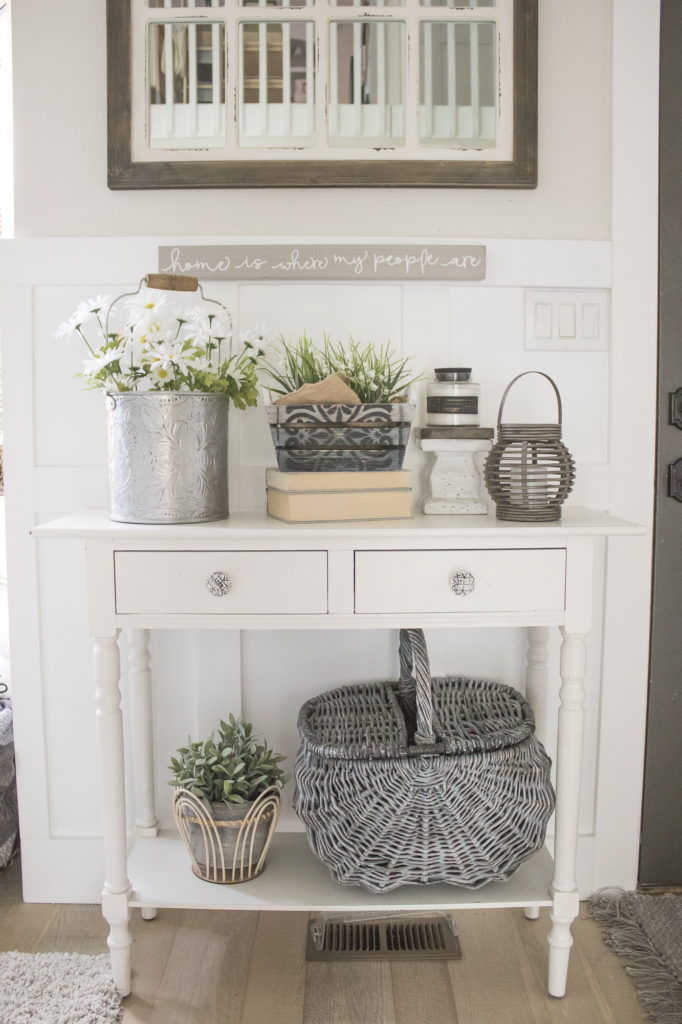
Even though it turned out nothing like I thought it would, it’s fun to have one planter with two different looks.
And now for more thrifty goodness!
Linking up to these awesome parties
PIN FOR LATER!
I love using stencils to give a new look to old items like this. Your reversible planter turned out so pretty. It looks great along with your other lovely decor pieces.
What a cool look for your planter, Angela! Sometimes the mistakes we make while crafting turns out to be the best idea ever! Love the colors and how it turned out!
I really like how the white stencil turned out. This is what I enjoy about crafting and DIY. You never know how the final result will turn out until you’re done, lol. I love this crate. Thank you for sharing, Angela!