

Hello and welcome to the final week of the One Room Challenge. It’s REVEAL time you guys!
This is my 5th time participating in this awesome bi-annual event hosted by the lovely Linda at Calling It Home. Although it may sound absolutely crazy to complete an entire room makeover in just 6 short weeks, the motivation that this challenge provides is huge! And having a finished room at the end of the madness is such a wonderful feeling.
I’ve been a painting, sanding, staining and decorating machine and each week I have questioned whether or not I would be able to finish up by today. But I powered through and all of my hard work has paid off because our master bathroom has a whole new look!
In case you’ve missed any of the fun along the way you can catch the previous weekly updates here:
One Room Challenge (Week 1): The Plans
One Room Challenge (Week 2): New Plans + Shower Stall Makeover
One Room Challenge (Week 3): Grout Paint + Concrete Countertops
One Room Challenge (Week 4): Major Progress
One Room Challenge (Week 5): Finishing Up
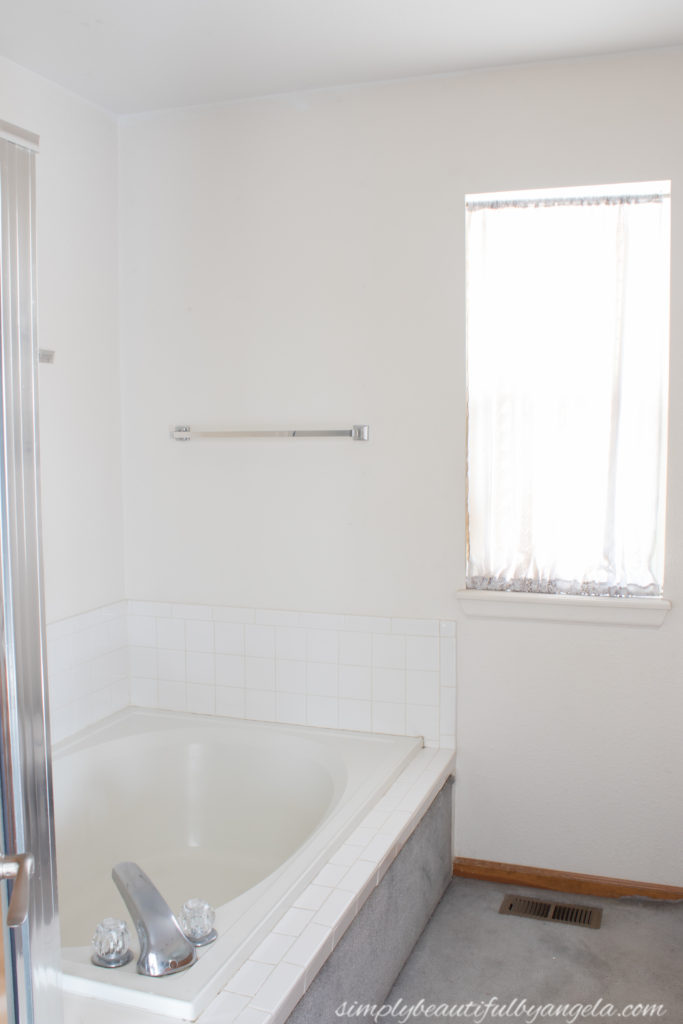
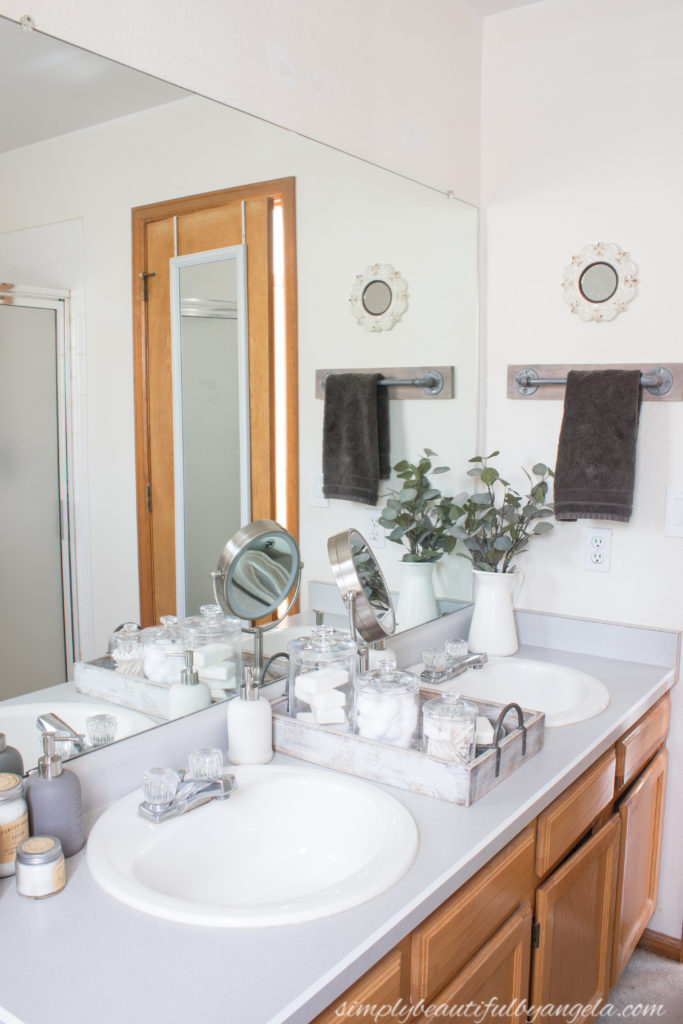
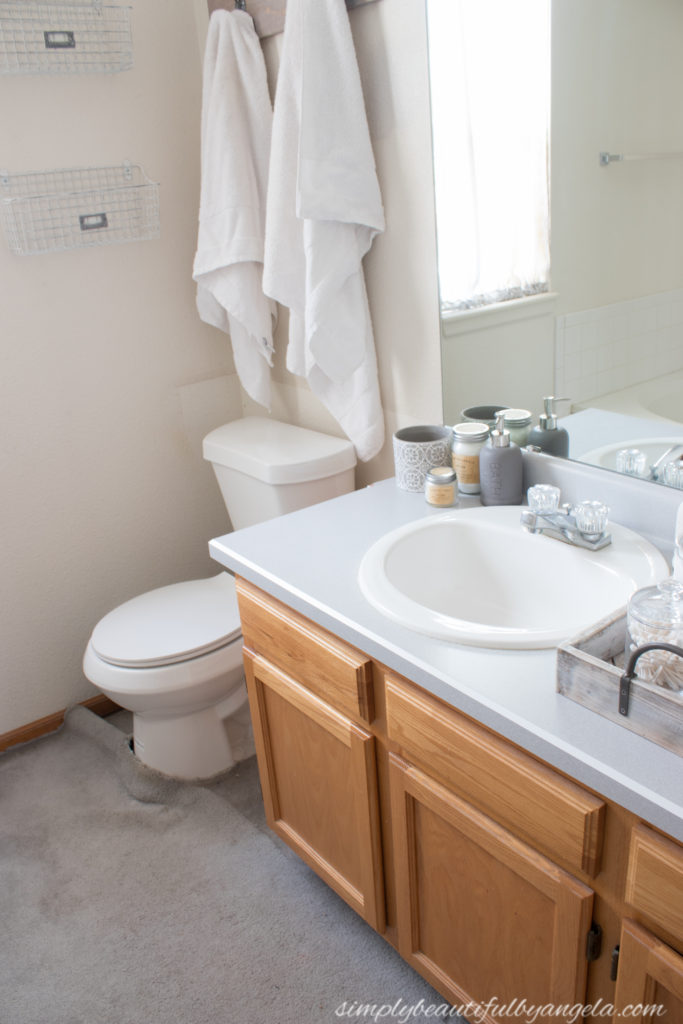
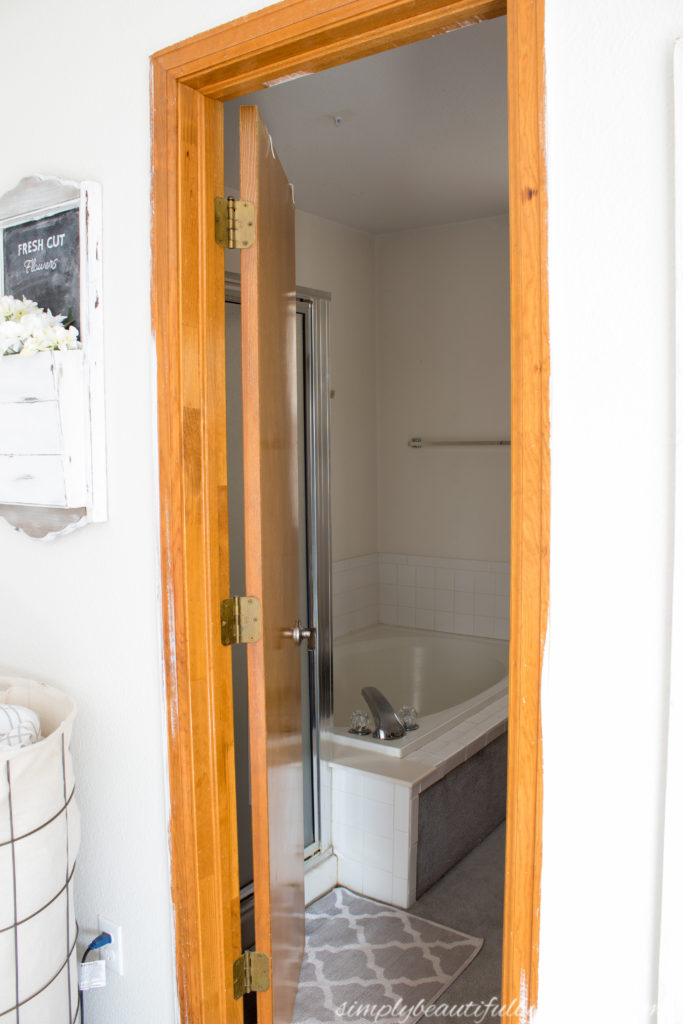
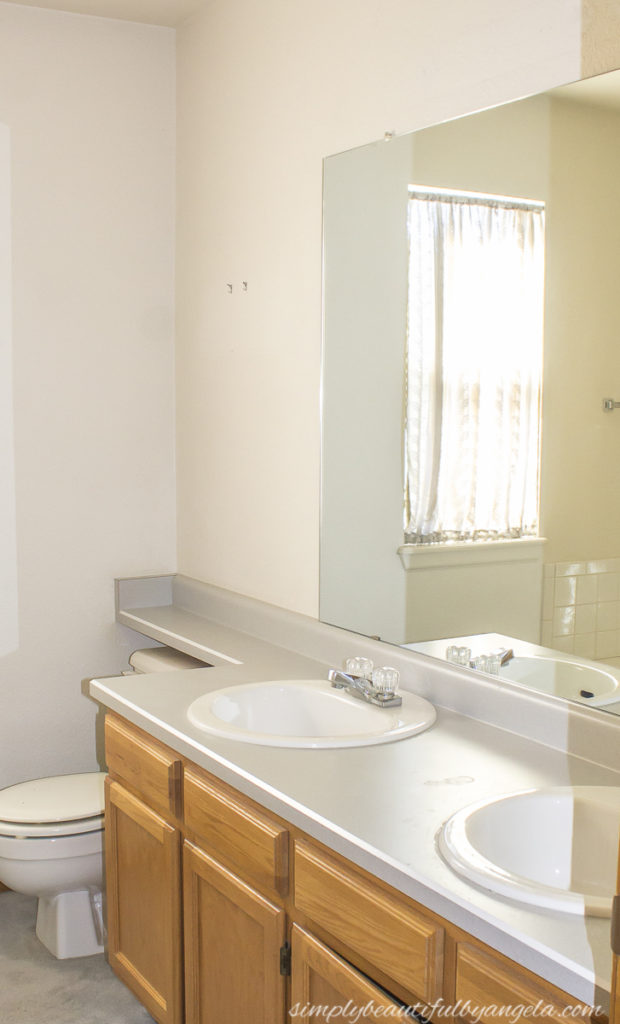
Let’s do a quick recap of what we started with 6 weeks ago.
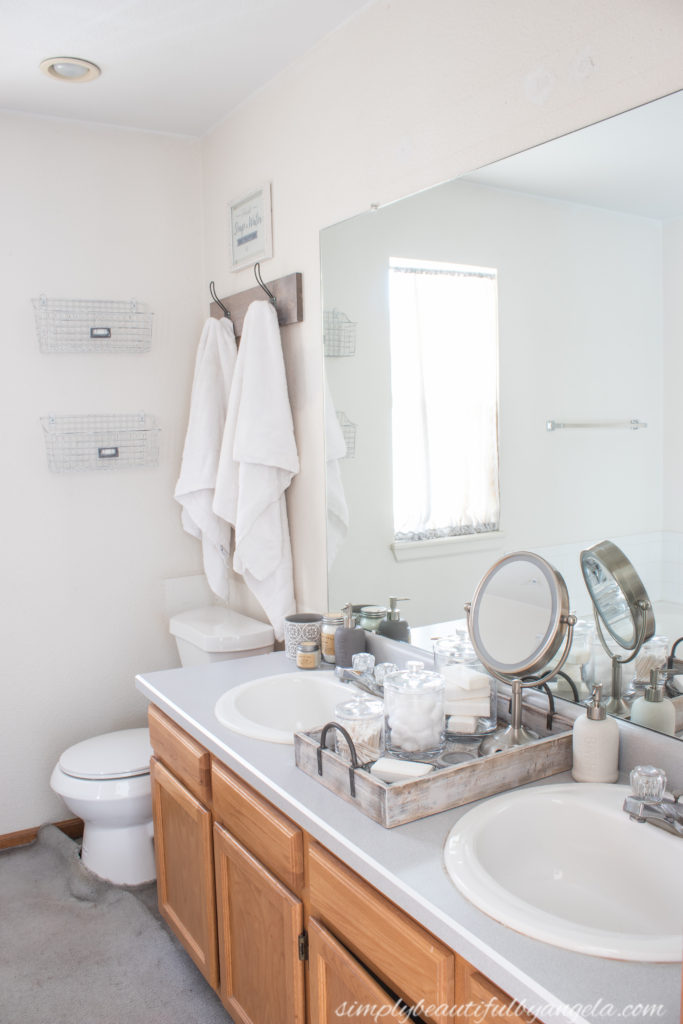
We have plans to eventually gut it someday, but since that’s not in the budget right now we put it on the back burner and lived with it in all of it’s dated glory. But I started thinking, “why live with something that we can’t stand until we get to that big renovation?” And that’s when the wheels started turning and I came up with plans to give this space a nice little budget refresh.
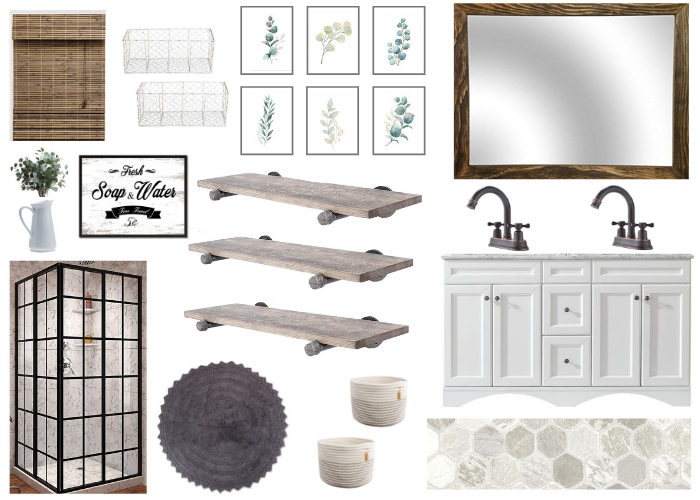
[Bamboo Blinds] [Wire Wall Baskets] [Botanical Eucalyptus Wall Art] [Wood Framed Mirror] [White Porcelain Pitcher] [Eucalyptus Stems] [Soap & Water Vintage Sign] [Pipe Wooden Shelves] [White Vanity with Marble Top] [Faucets] [Shower Stall] [Rug] [Round Baskets] [Floors]
So without further ado, come on in to the “new” master bathroom.

I spent a minimal amount of money compared to a big renovation, but this space feels totally different! I’m going to break down this post into sections and then at the end I will include a full source list.
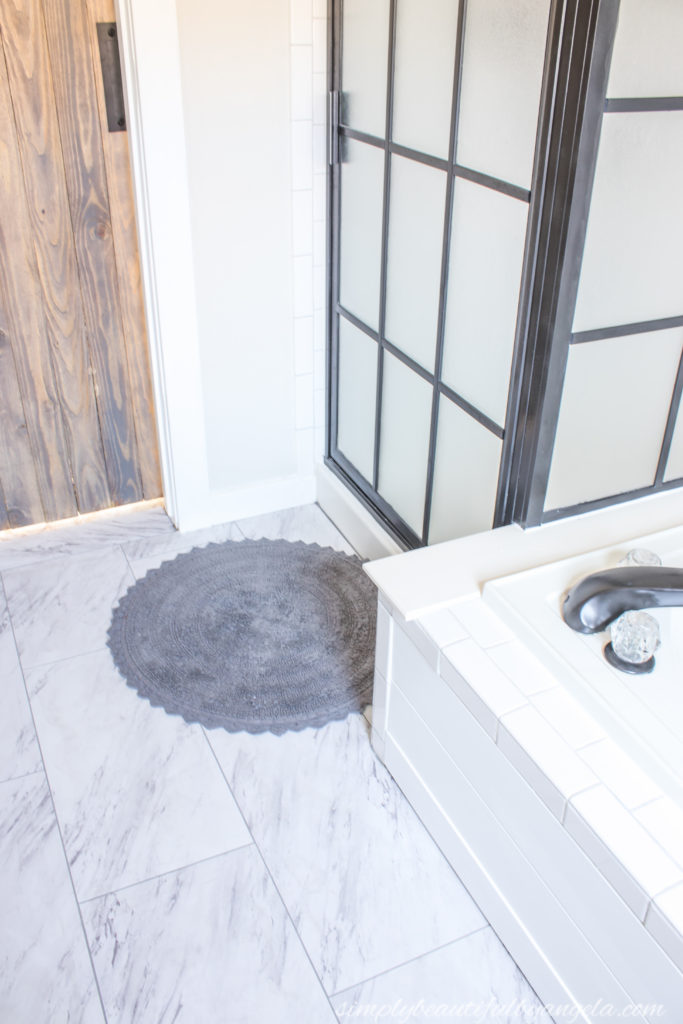
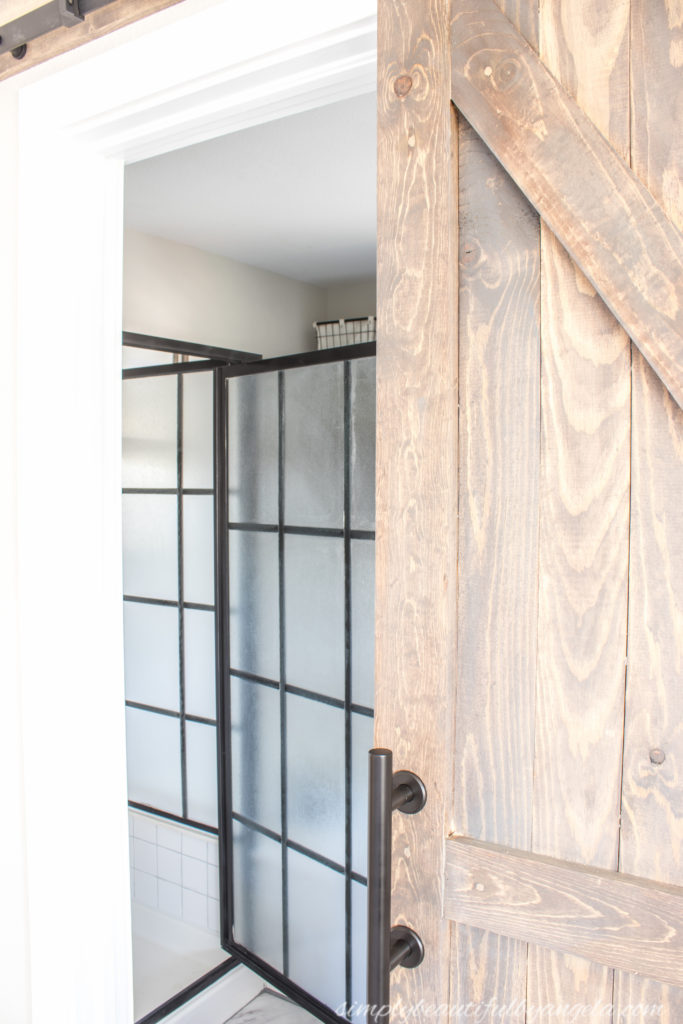
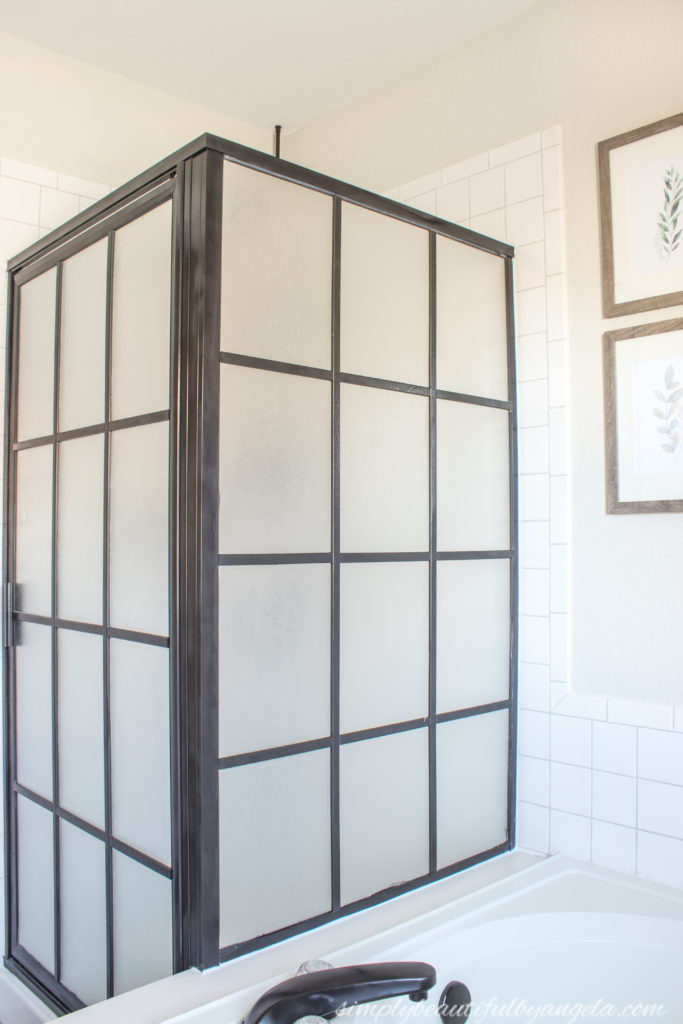
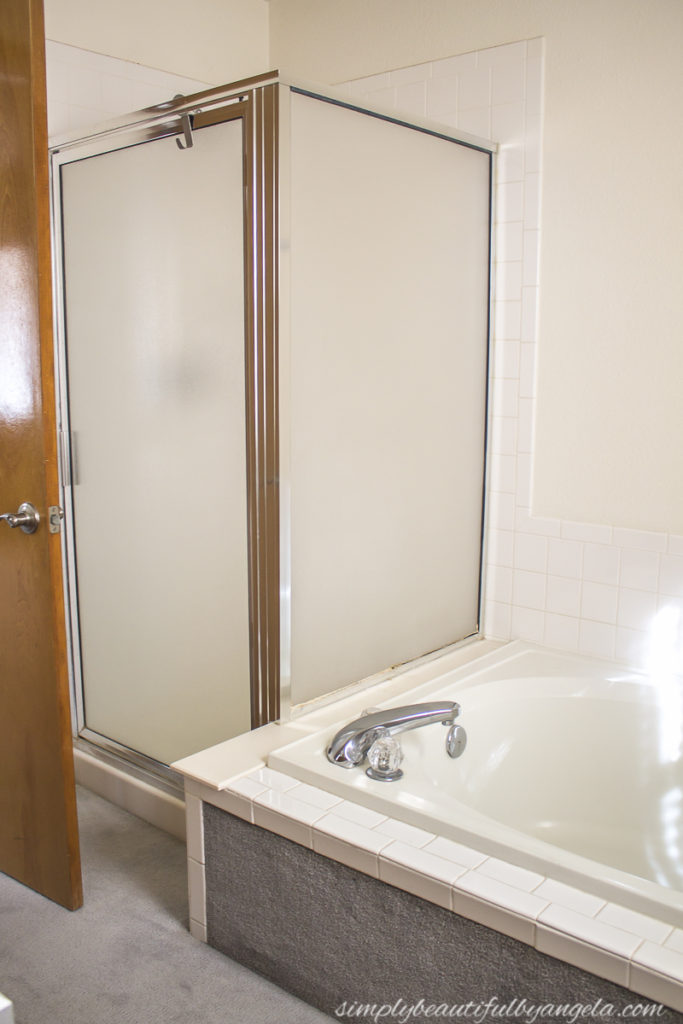
1. Shower
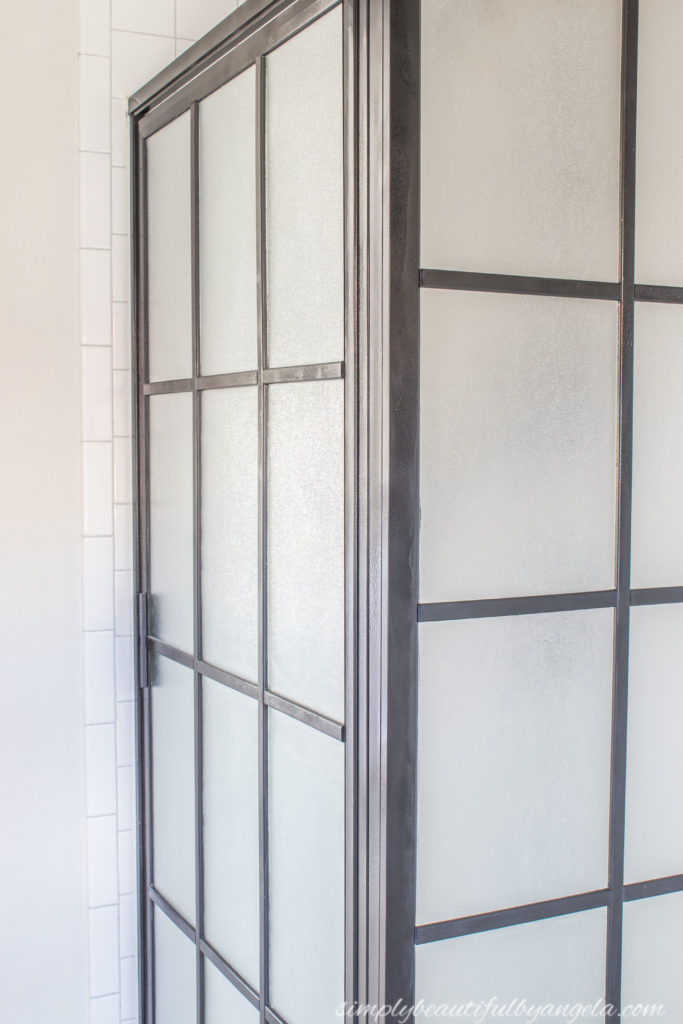
My favorite update is without a doubt, the shower stall. It was pretty blah and I knew that it had to change.
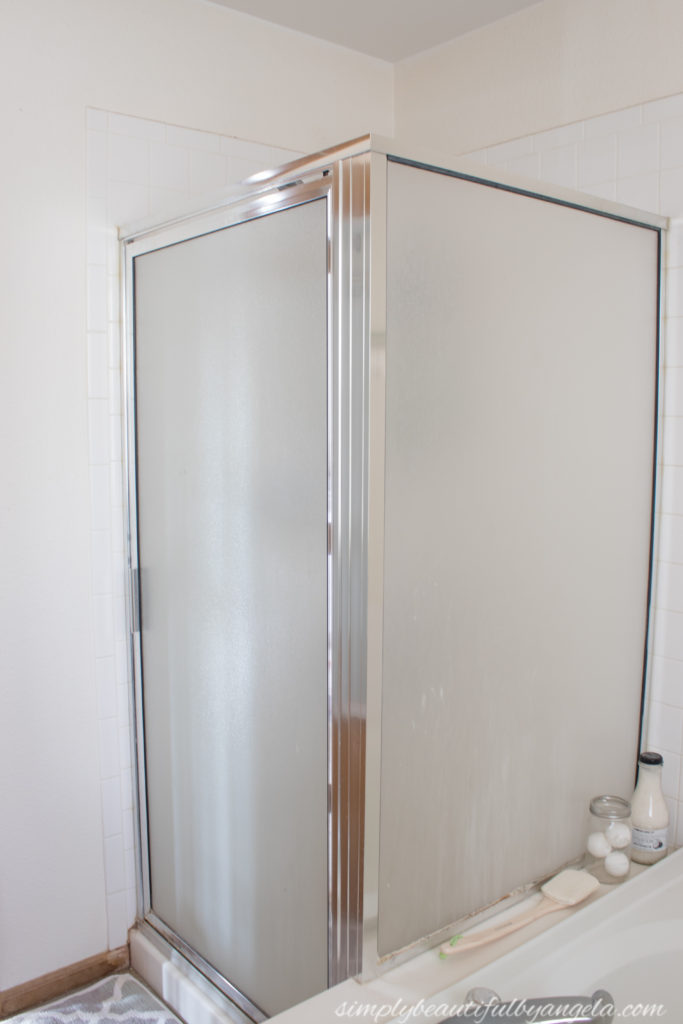
After A LOT of taping and spray painting, this is how it looks today!
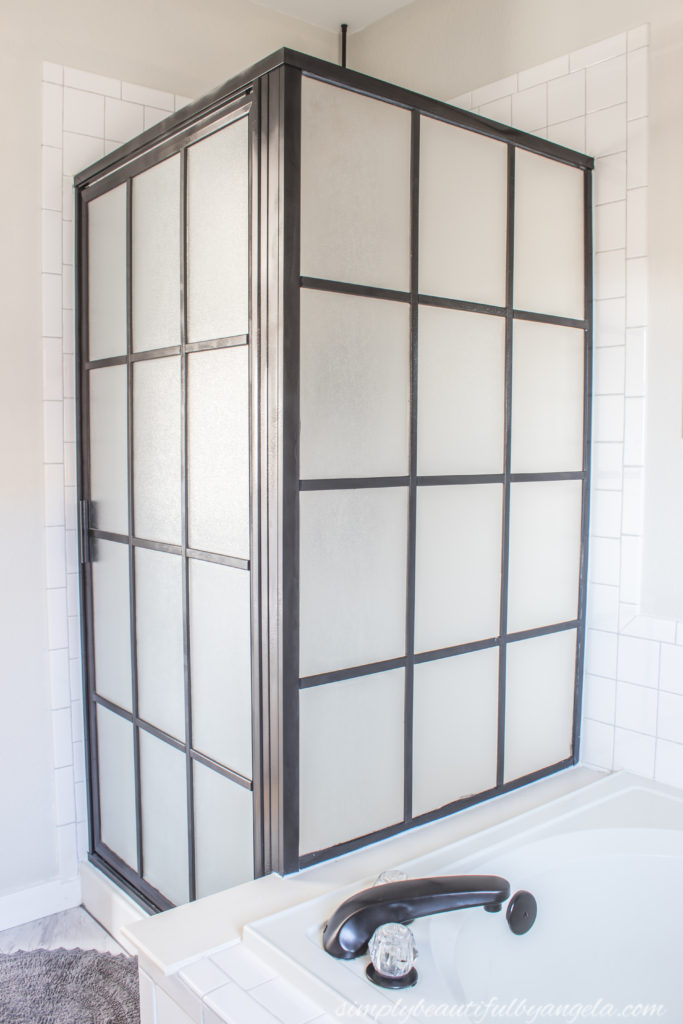
I used Rust-Oleum Hammered Black on the frame as well as the trim pieces that I added to the glass to create an industrial factory window look. (UPDATE–you can now find the tutorial here!)
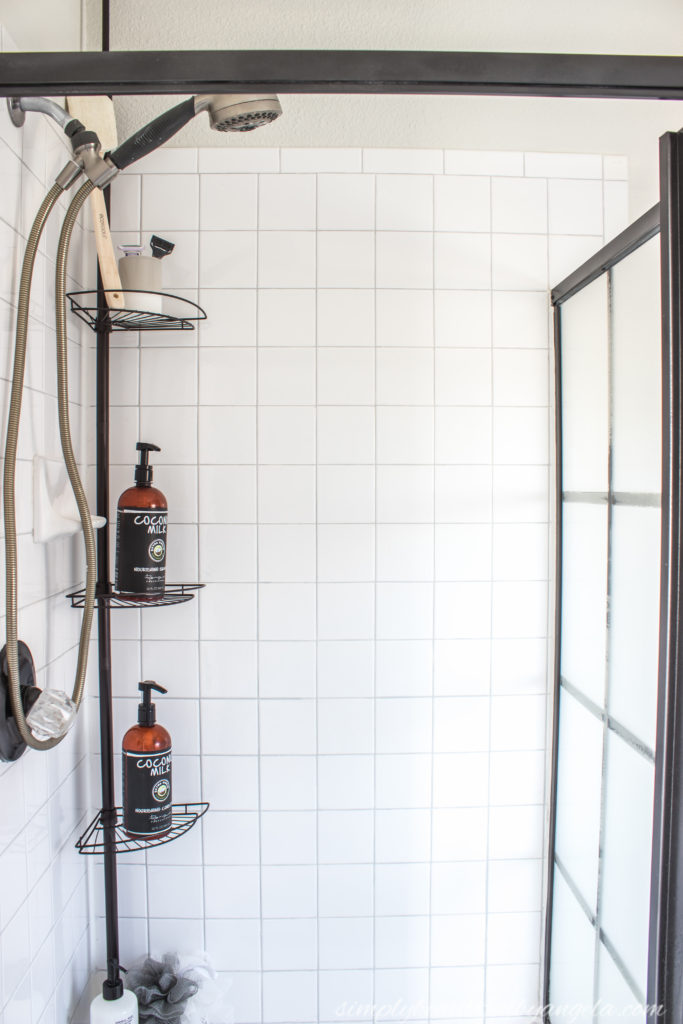
I also updated the old dirty grout to a pretty light gray using Grout Renew by Polyblend.
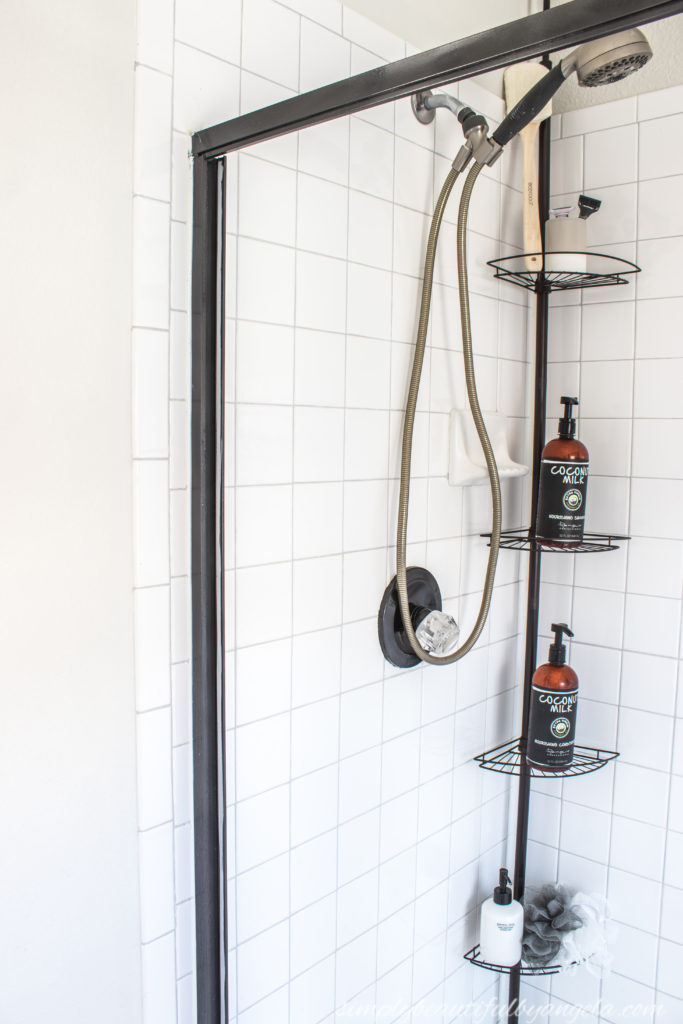
While I was painting the shower frame I decided to also paint the trim around the shower knob as well as the tub faucet. I also replaced our old gross shower caddy with this corner shower caddy that I found for an amazing deal on Amazon.
I promise to share a full tutorial on painting the shower soon, so stay tuned for that!
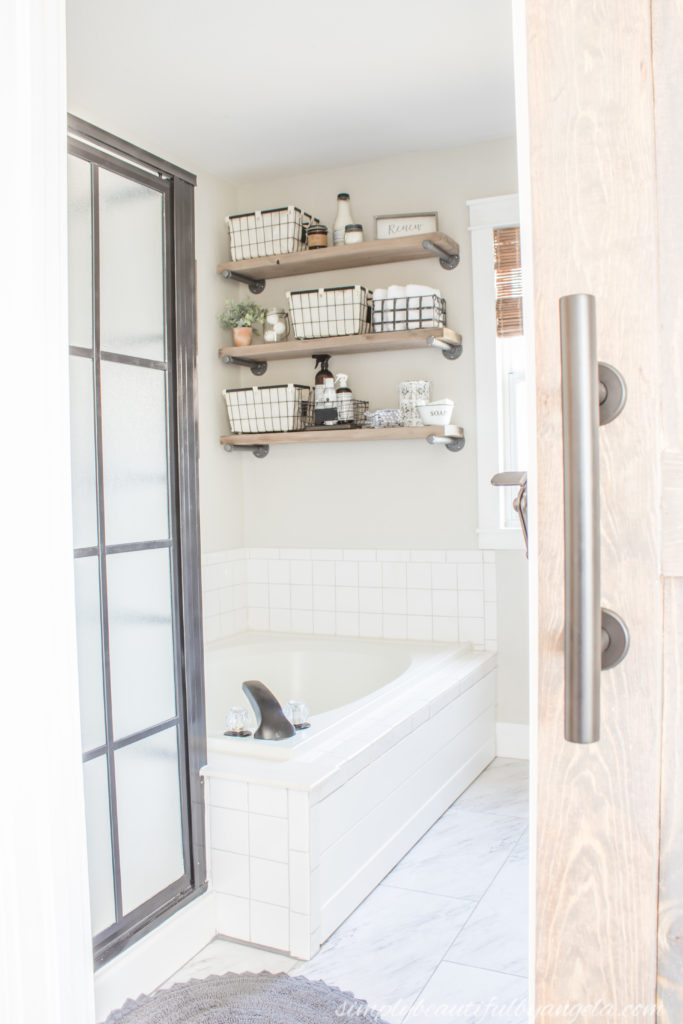
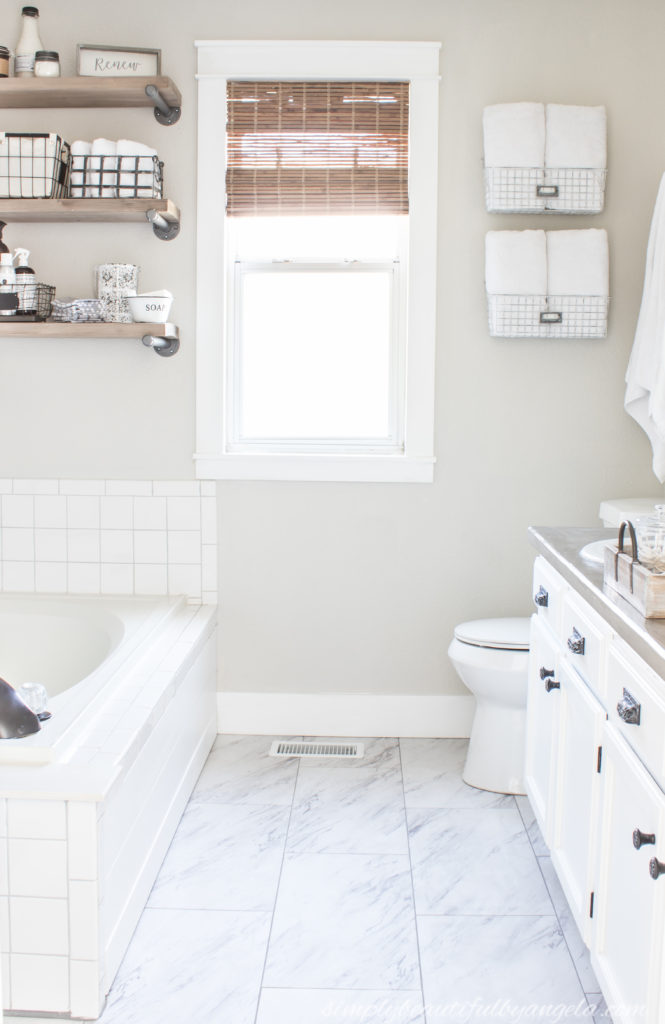
2. Walls Above Bathtub
The walls above the bathtub stayed blank ever since we moved in because I wasn’t sure what I should do with them.
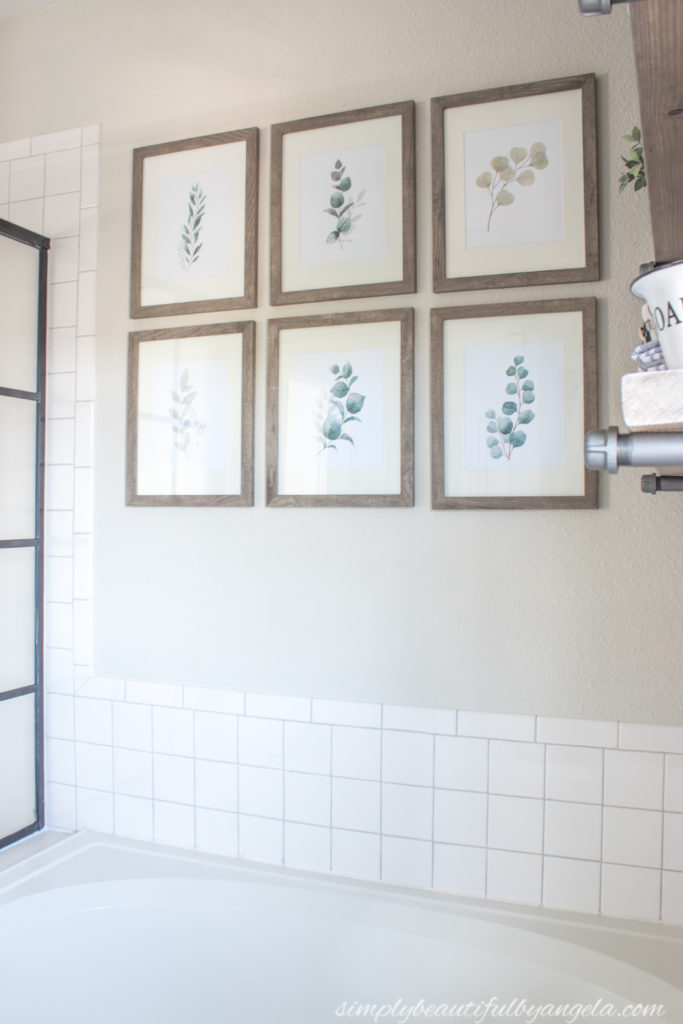
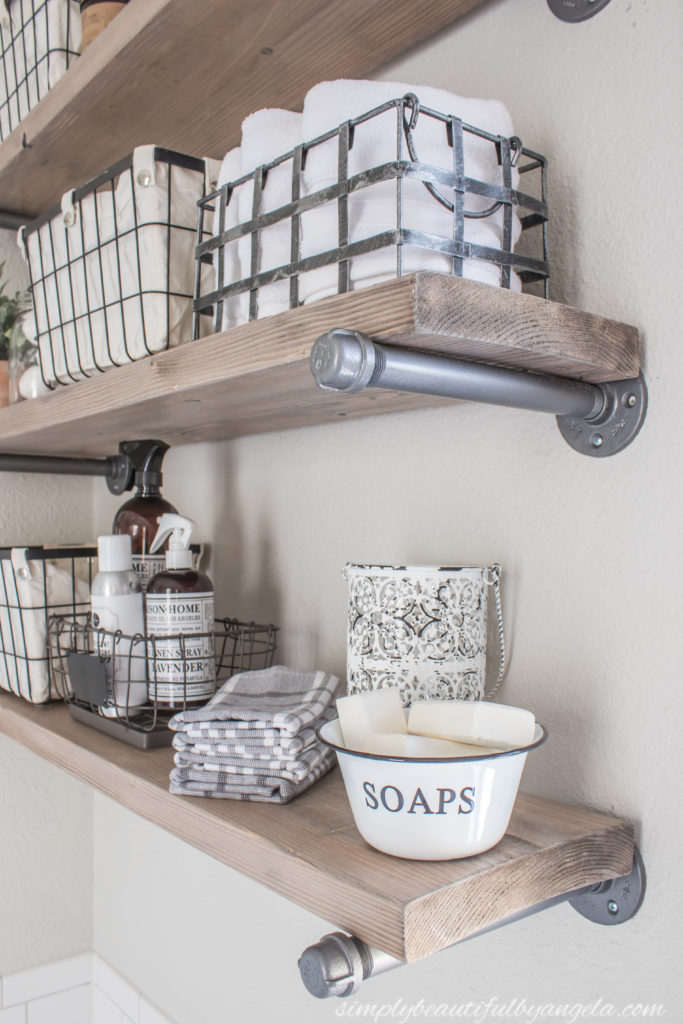
I finally decided to build some pipe shelving on the back wall (tutorial HERE!) and picked out some gorgeous botanical eucalyptus for the other.
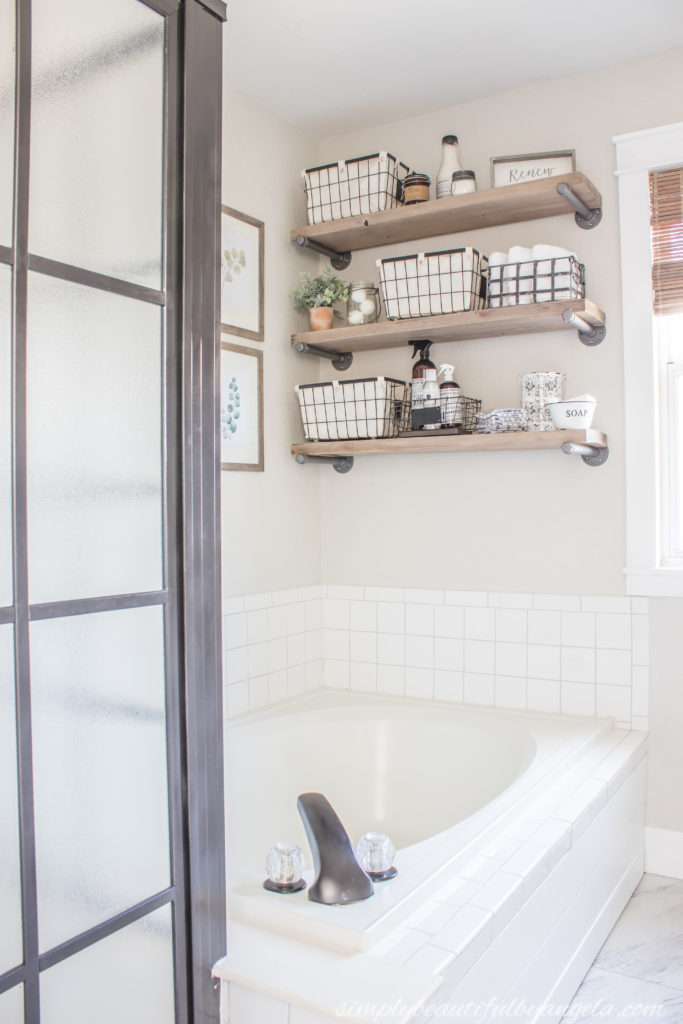
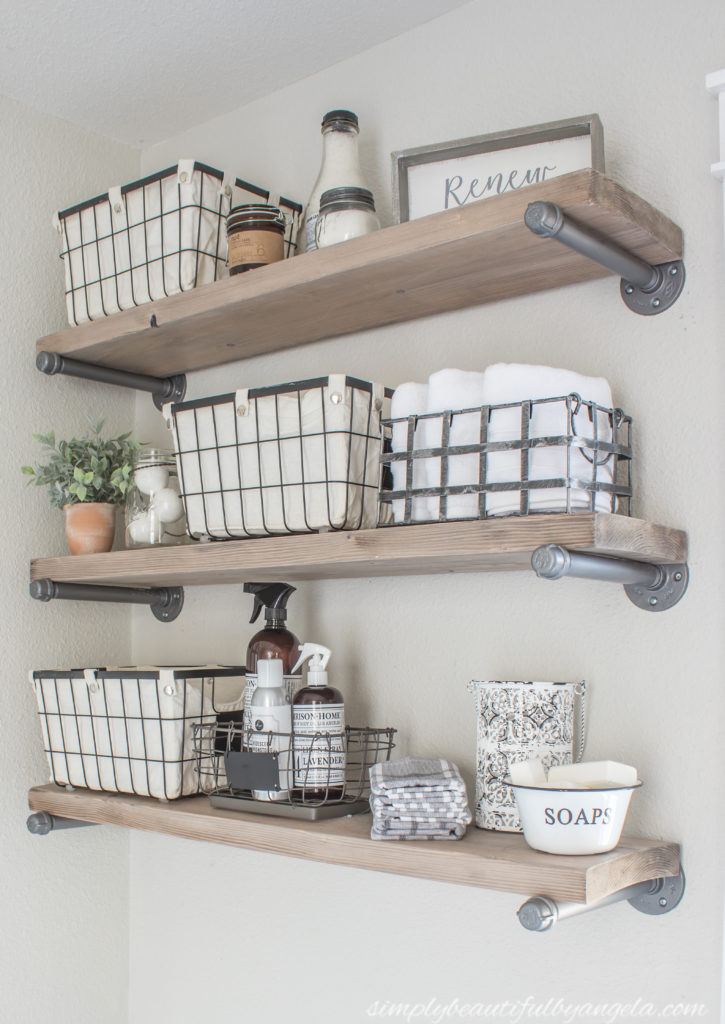
The shelves not only look nice, they are also super functional because they provide much needed storage since we don’t have a linen closet in here.
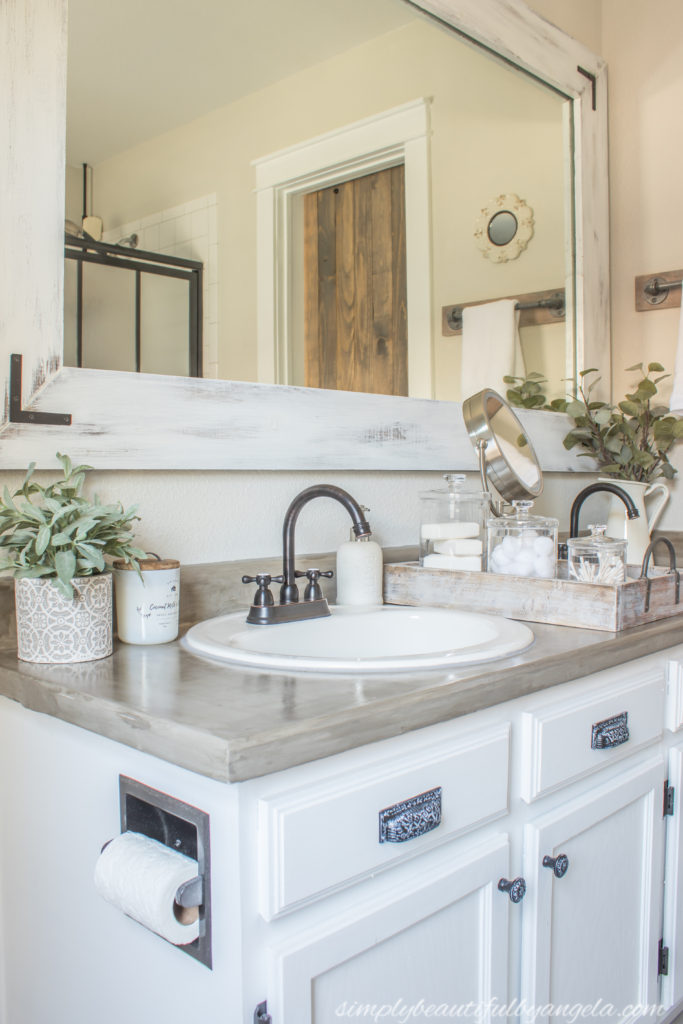
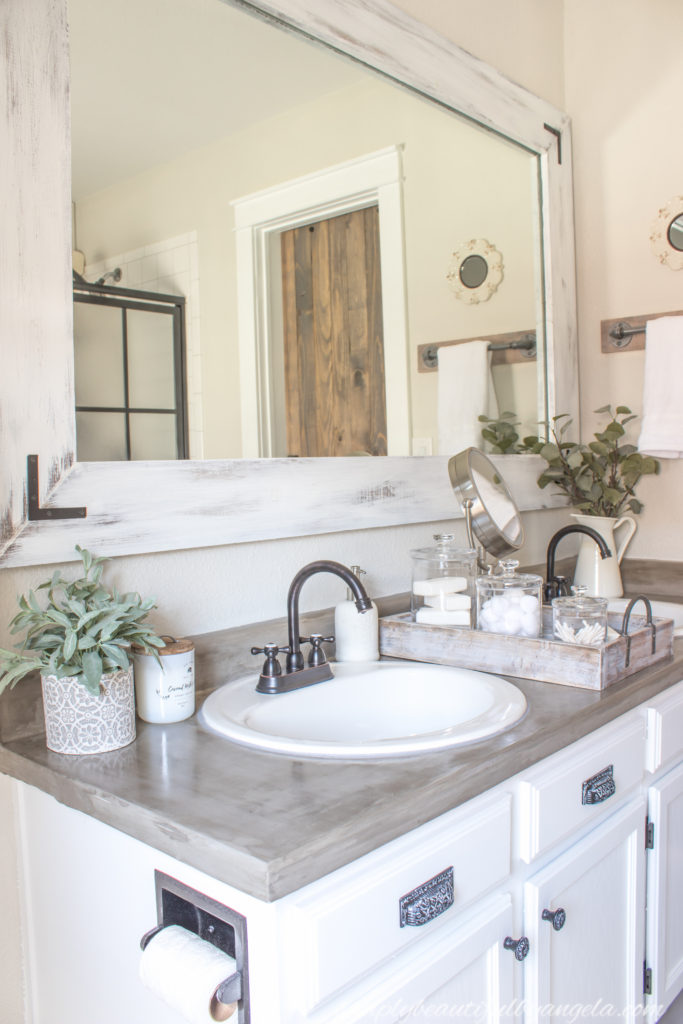
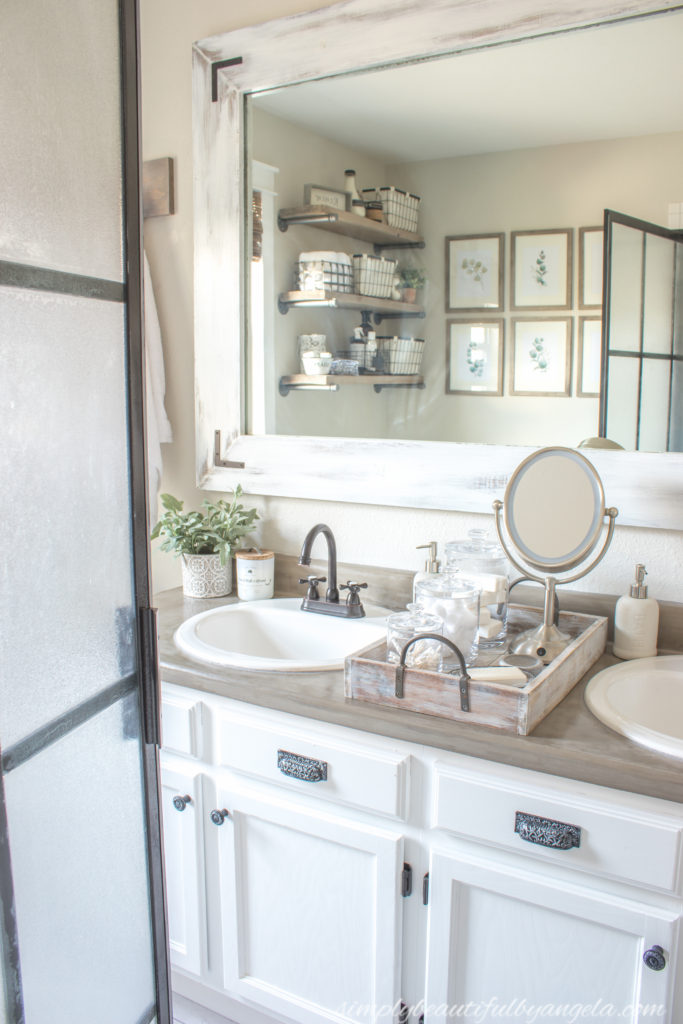
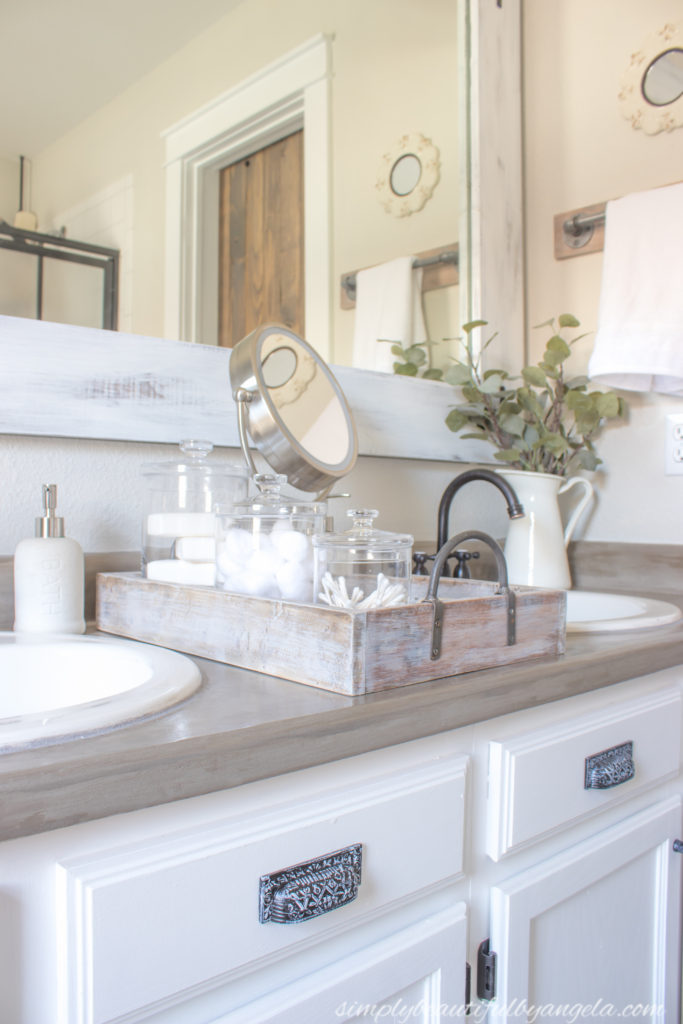
3. Vanity
The vanity is the standard 90s builder edition–oak cabinets with a laminate countertop underneath a large frameless mirror.
Since it’s still in pretty good shape and the cost of a new vanity isn’t something that we could take on right now, I covered it all up!
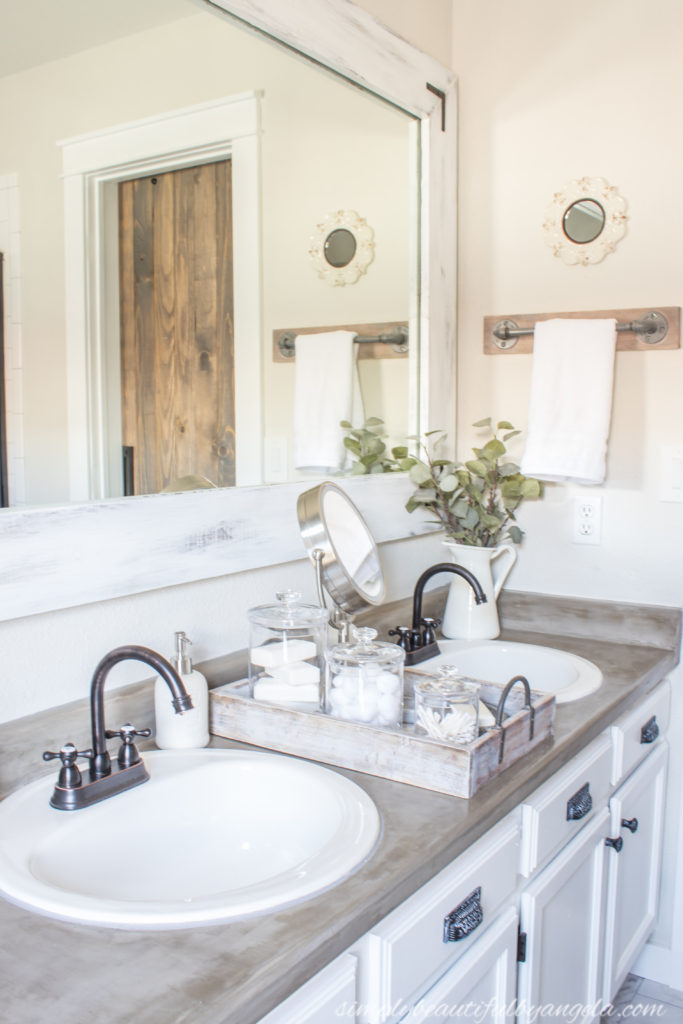
The cabinets got a couple coats of Behr’s Polar Bear in semigloss as well as some hardware.

I created a concrete counter by adding a few skim coats of Henry Feather Finish concrete directly over the laminate. It was so easy and I will be sharing a full tutorial on the process with you guys soon! (UPDATE–tutorial here!)
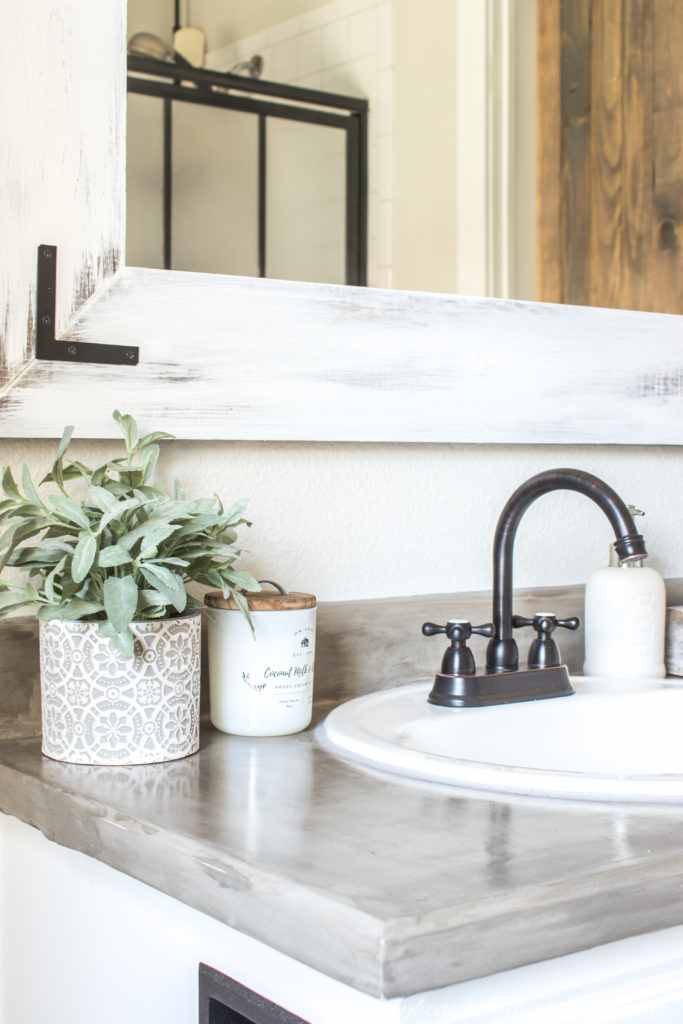
I researched the many different type of sealers before deciding on Tuff Duck Concrete Countertop Sealer and I am happy to report that so far it has been repelling water wonderfully!
Remember the end of the counter that we sloppily cut off when we replaced the toilet?
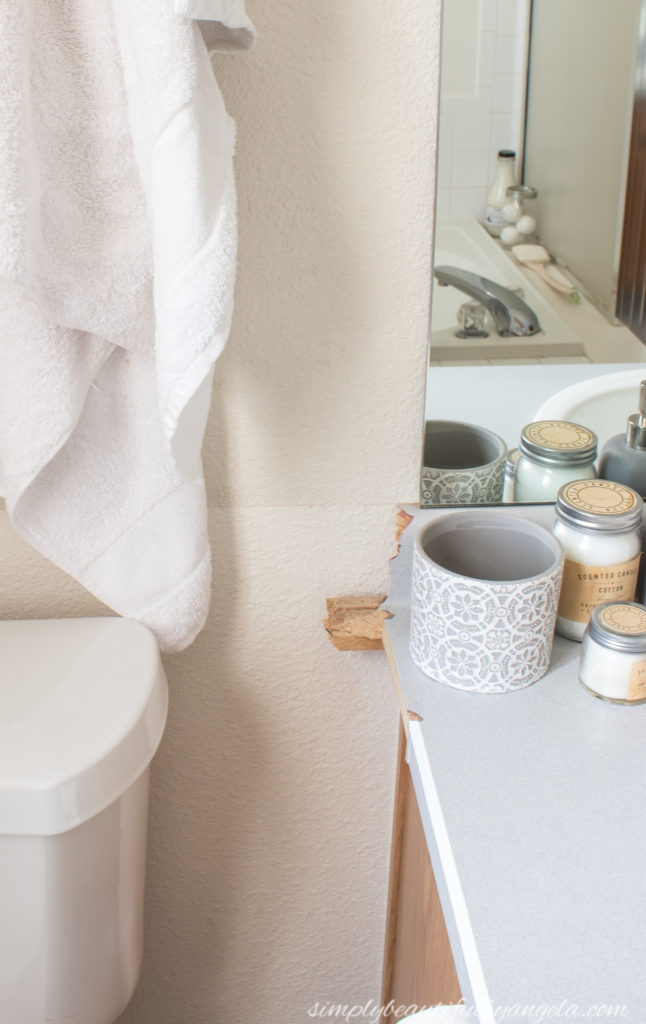
I used a saw to chop the remainder off and then managed to shape it pretty well with the concrete.
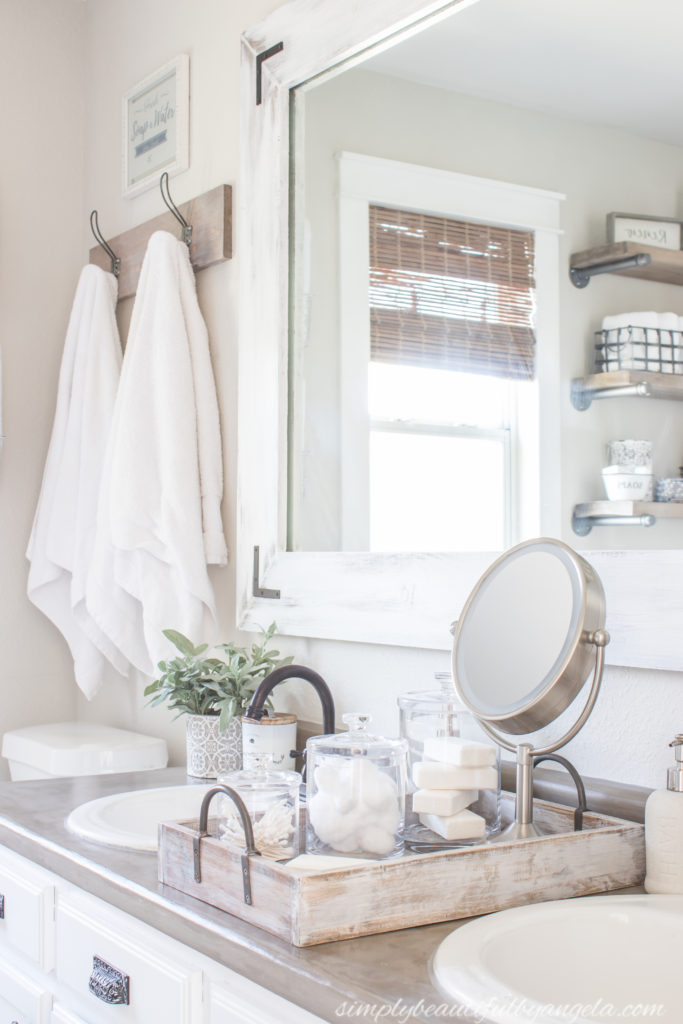
I replaced the plastic mirror clips with flat metal mirror clips so that I could put a frame over it. I made the frame out of 1x6s and secured it to the front of the mirror using command strips. We also raised it up from where it was located originally. Tutorial can be found HERE!
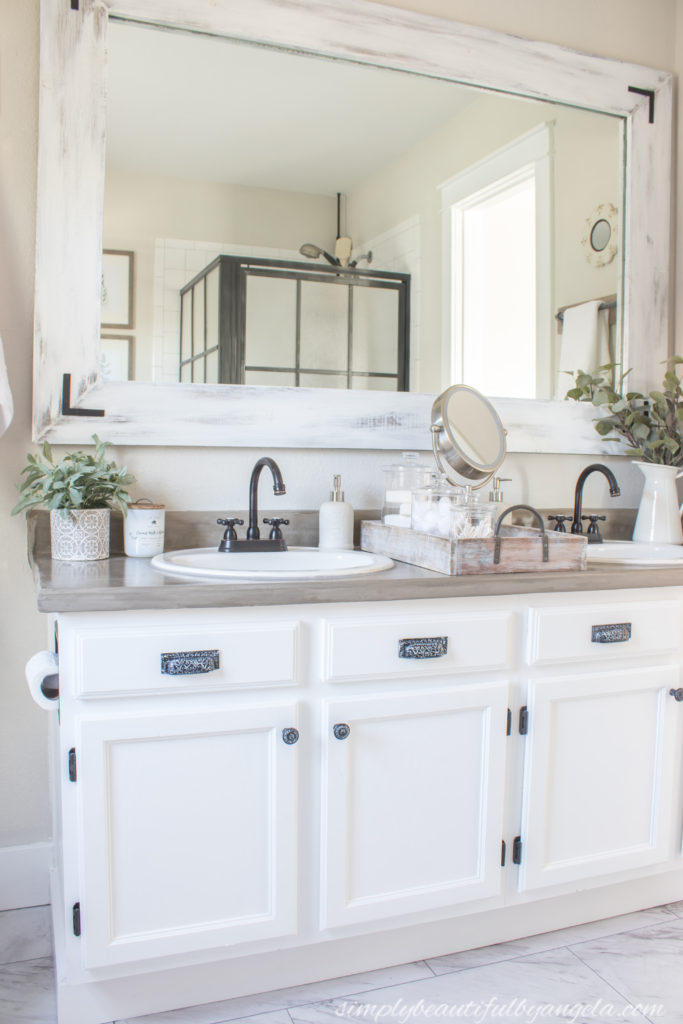
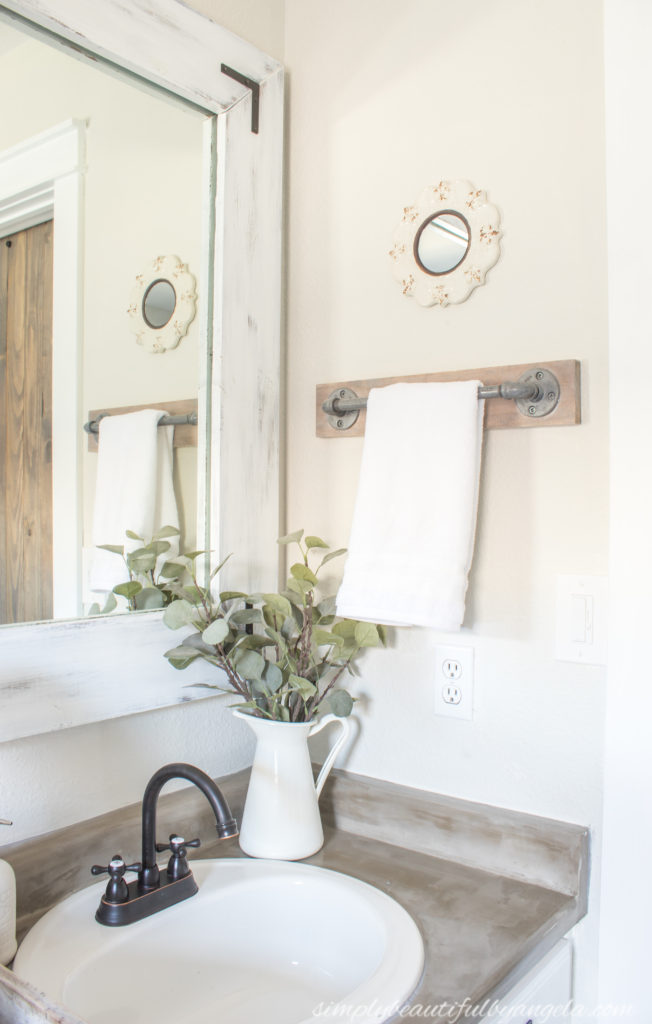
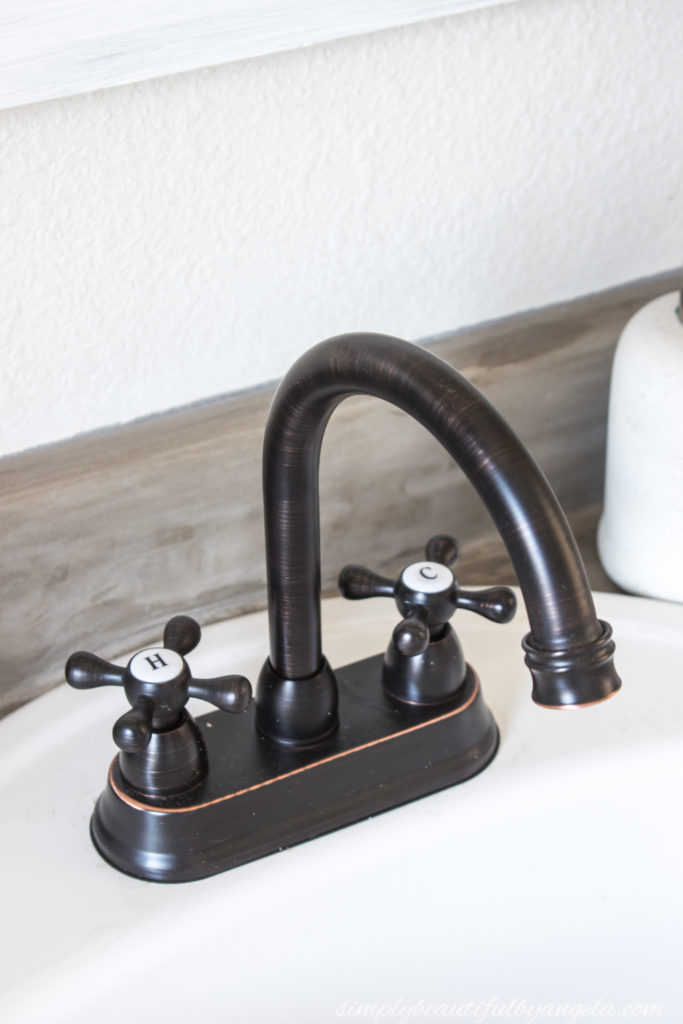
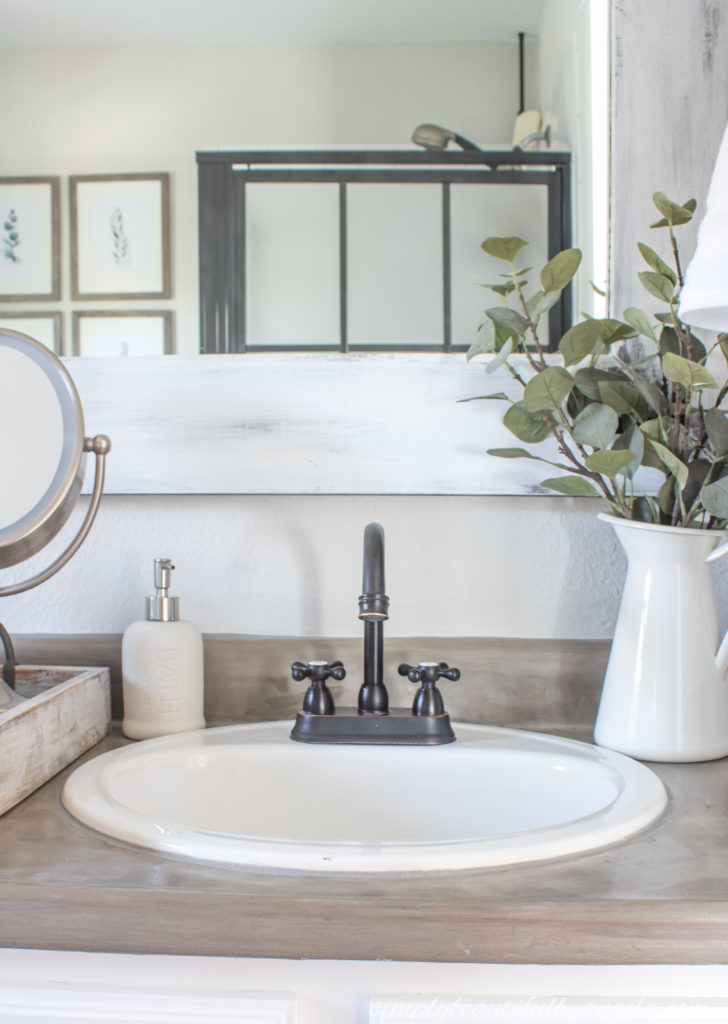
The old chrome faucets were difficult to use because they were so short. We are much happier with these tall oil rubbed bronze faucets and the knobs are just the cutest!
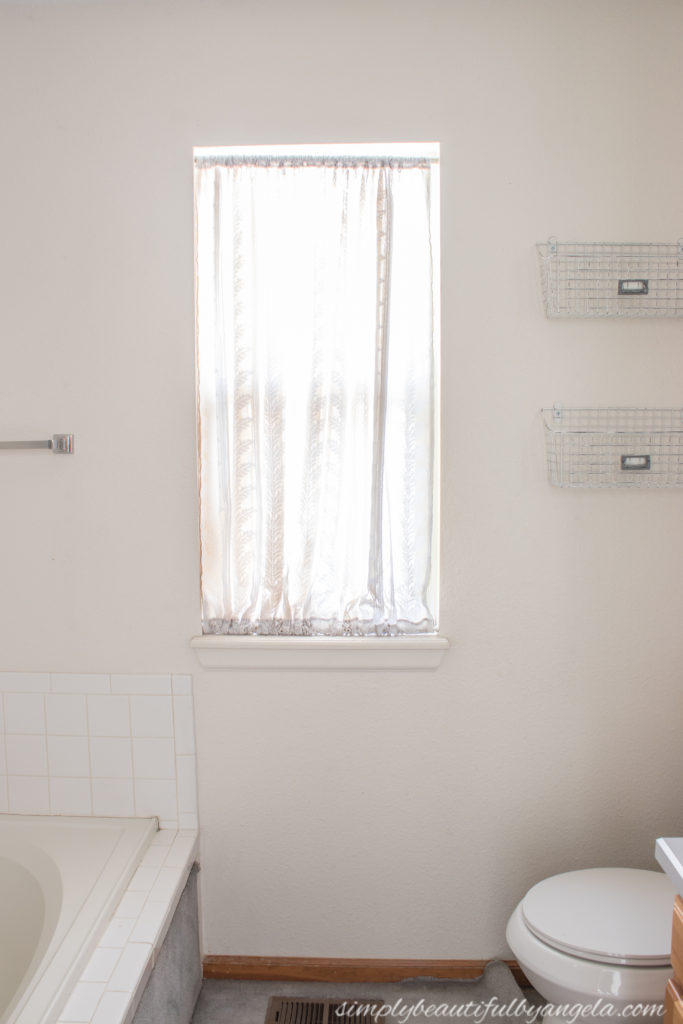
4. Window
The window that we have in here seemed so small. And the lace/chiffon shade that the previous owner had did a good job at hiding us from the the neighbors so we left it up, but it totally wasn’t my style.
Enter craftsman trim and bamboo shades to the rescue!
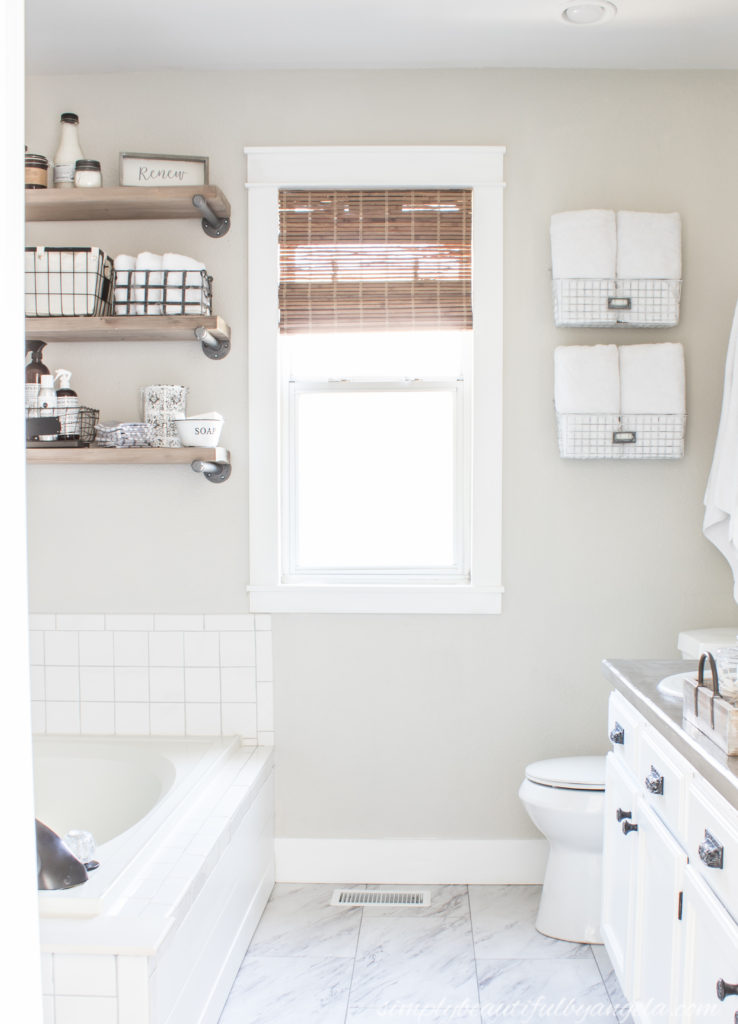
I followed the same process that I did when I installed the trim around our laundry room window (tutorial here). It’s super easy and cheap to do and makes such a big difference! I also ripped out the old trim around the door and replaced it with craftsman.
5. Floors
The worst part about this bathroom was without a doubt…the dreaded carpet. We ripped part of it up when we replaced the toilet shortly after we moved in, but then left it there while I brainstormed what to do next.
Even though there are some budget friendly tile options out there, I didn’t want to lay it all out only to have to rip it all back out when we do our gut later on. So when I saw that these faux marble vinyl tiles could be grouted, I was sold!
The best part is that it only cost me about $55 for the tiles and the grout! Budget flooring for the win! (Update–tutorial can be found HERE!)
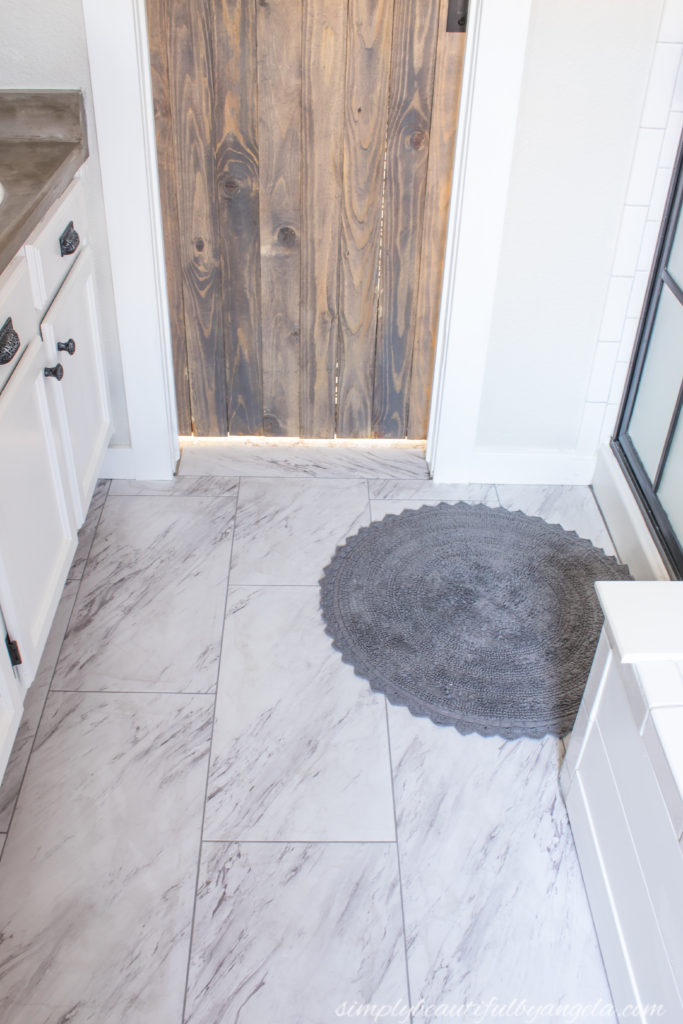
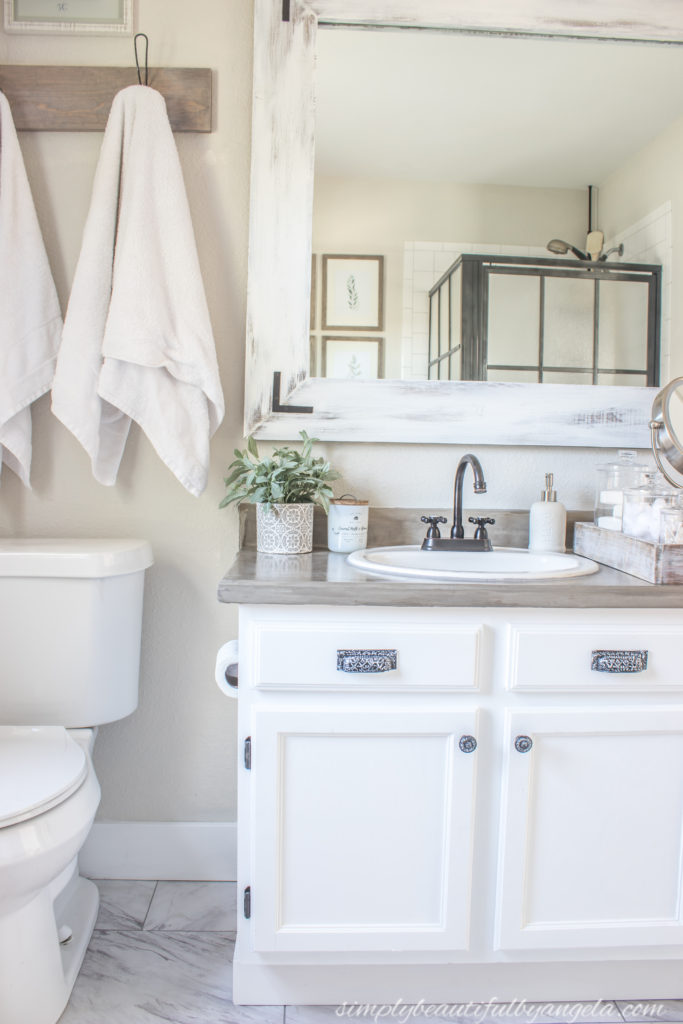
I debated whether or not it’s too much white with the vanity and the shiplap that I put on the side of the tub. I may give a faux wood treatment to the vanity and the shiplap to break it up a little, but for now I’m calling it spa like! 🙂
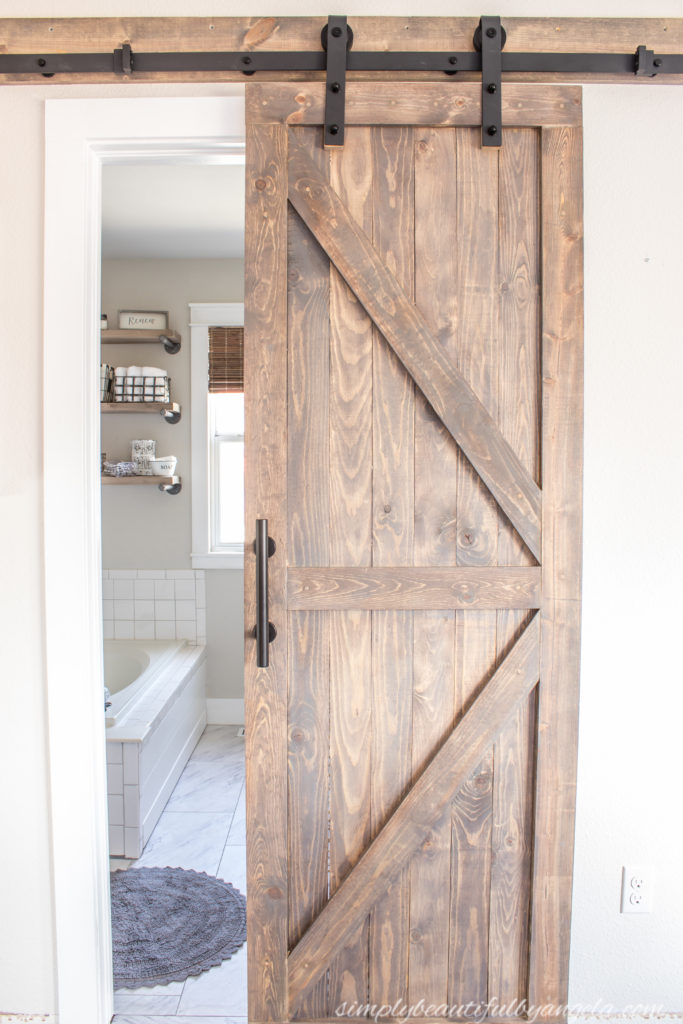
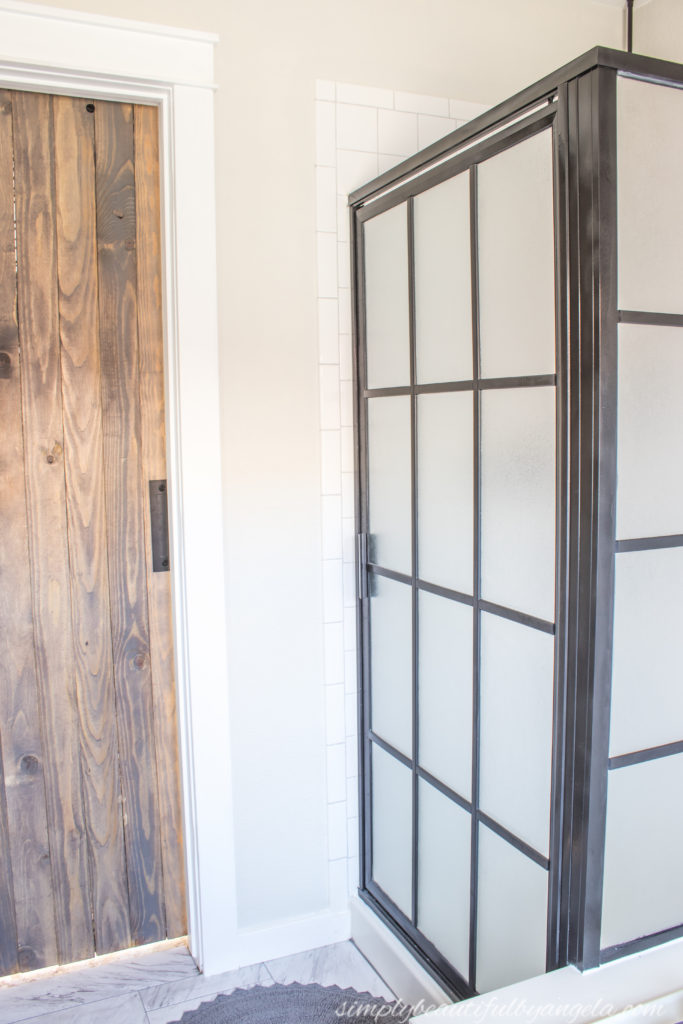
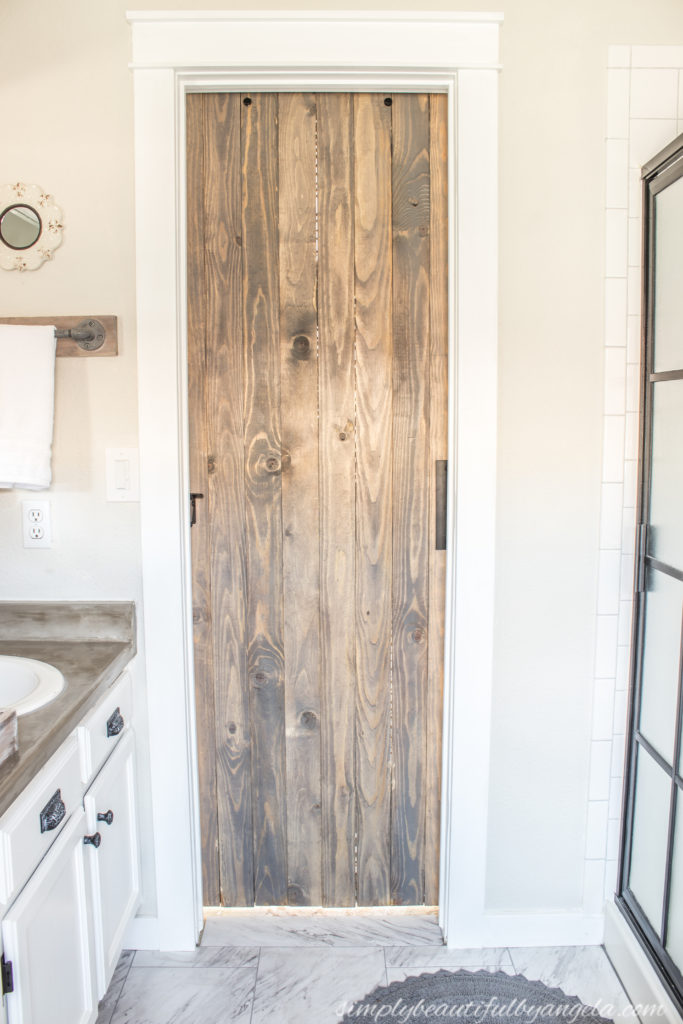
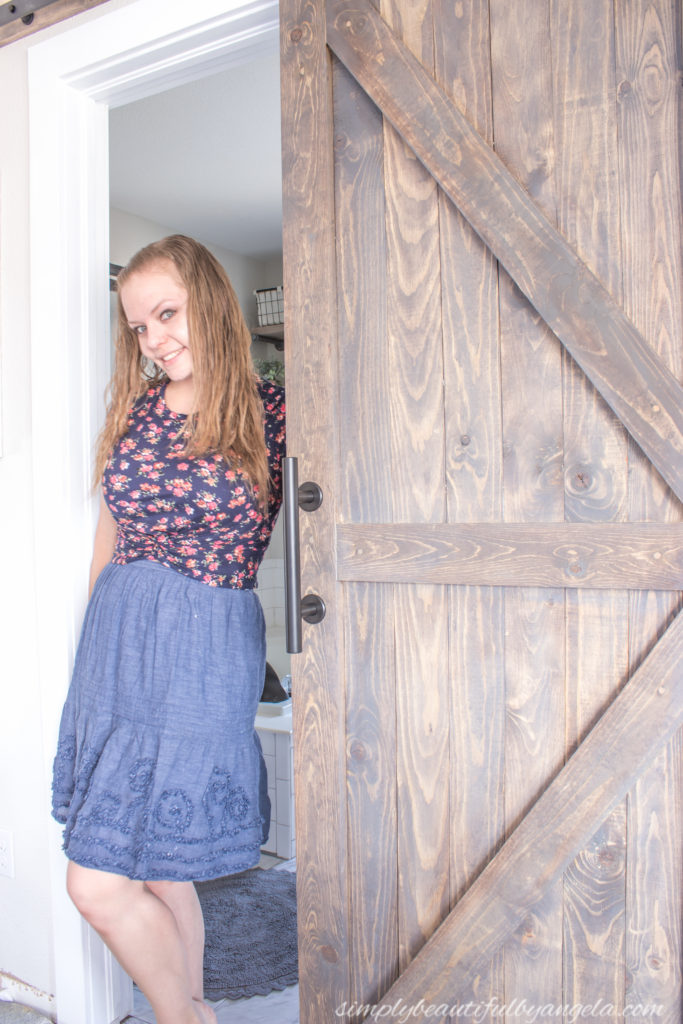
6. Barn Door
I’ve always dreamed of having a barn door, so when we moved in to this house and discovered what a pain the door opening in to shower was, I knew that it was the perfect excuse to finally build one.
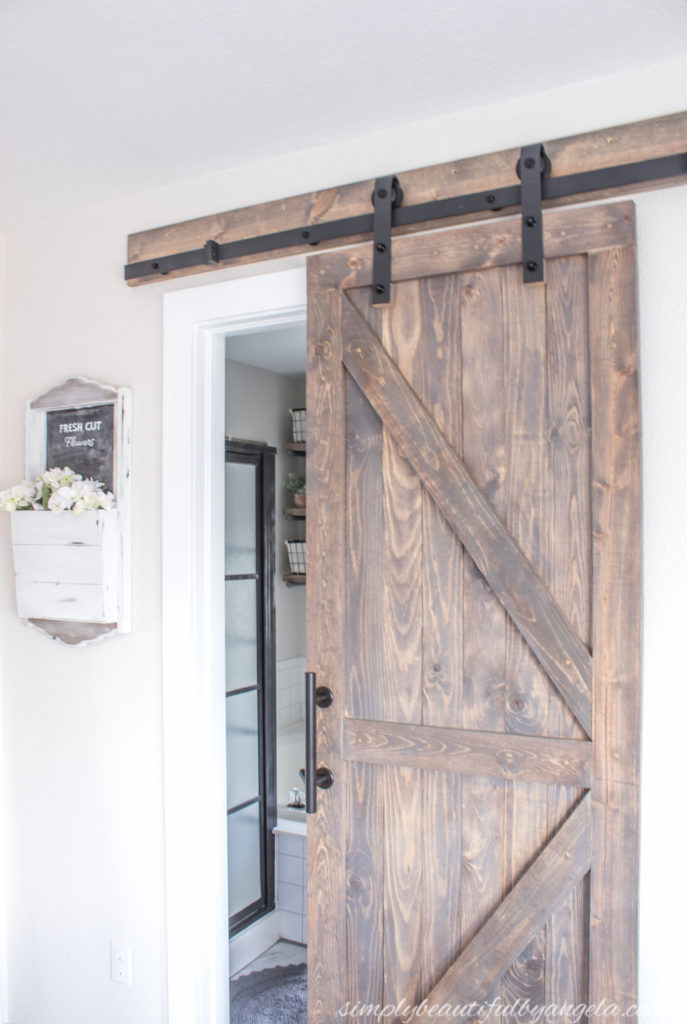
Building the door itself was actually very simple, although I still need to go back and fill some gaps with wood filler. However, we got a little confused while installing the hardware. After we were all done hanging it we realized that the header and rail actually needs to be shifted over to the right. By doing so, we can place the hangers closer to the door edges which is more typical than how we have them.
We are holding off on installing the floor guide until we do the hardwoods in the bedroom later this month, so we have to be super careful with it in the meantime.
I can’t even tell you guys how nice it’s been to have it out of the way of the shower door. We can now freely step out of the shower without fear of the other one of us entering and slamming straight into it.
7. Old Decor
If you have been around long enough to remember our last master bathroom that I completed for my second One Room Challenge, you will recognize some things are set up exactly the same. No use in changing a good thing, right?!
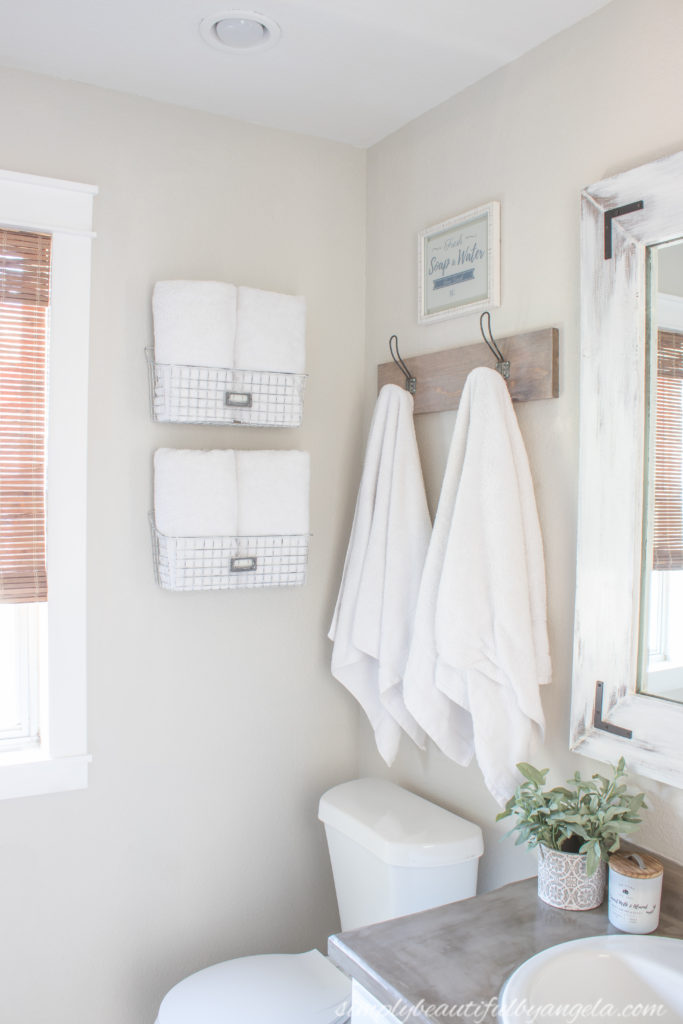
I still love our towel hooks that I made and the vintage style wire baskets that hold our spare towels, so of course those had to stay. I’m thinking about replacing the sign above the hooks but haven’t found anything that I like just yet.
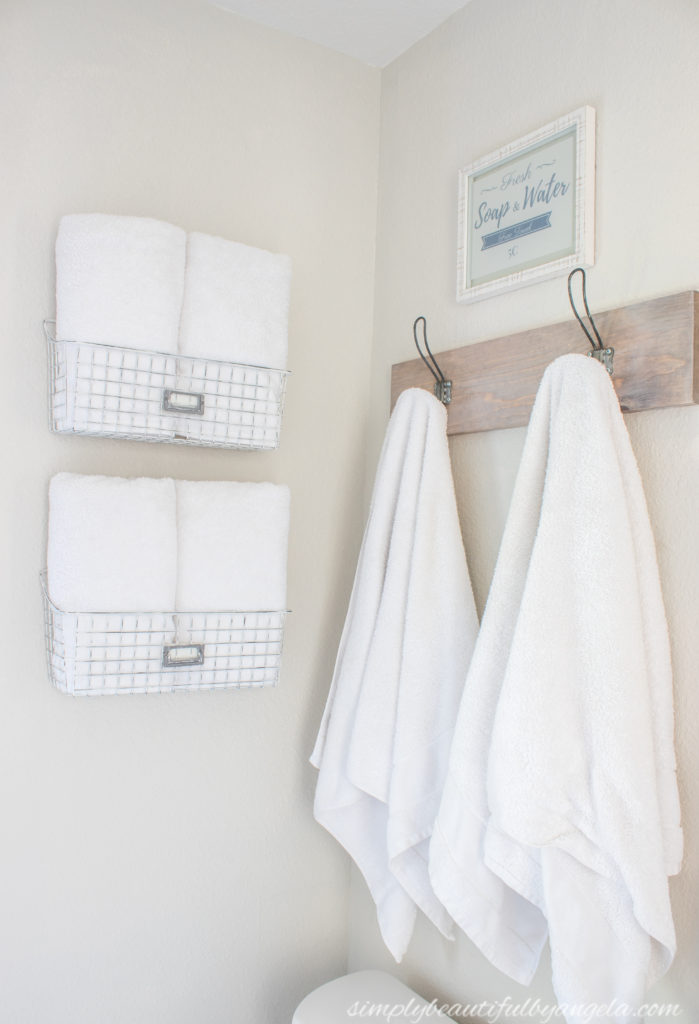
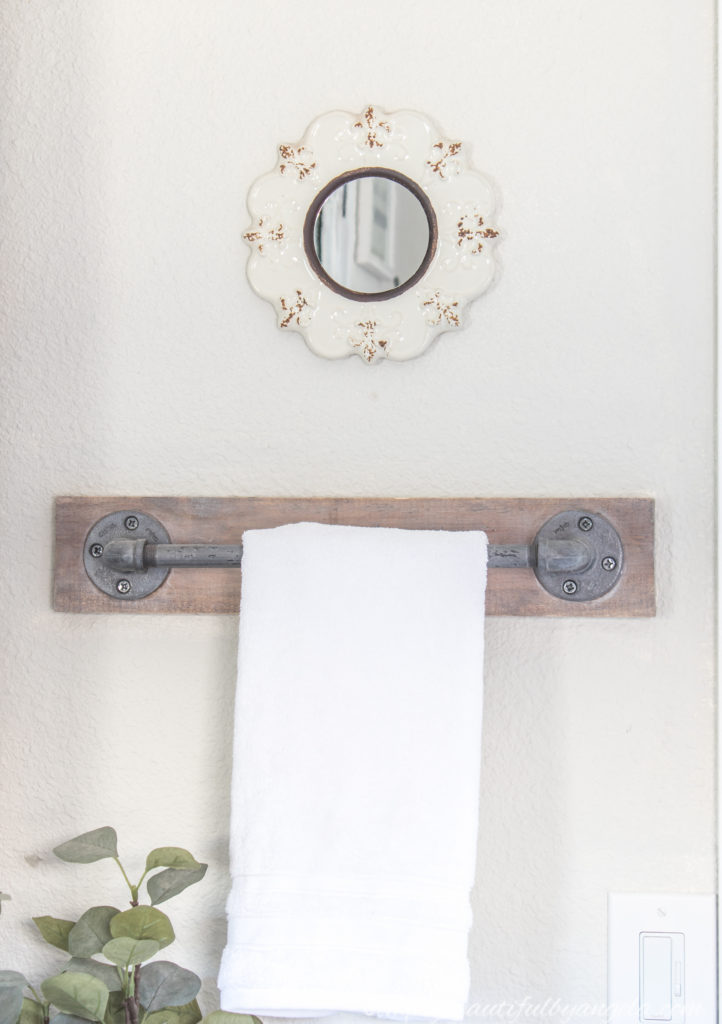
The pipe towel bar that I made and my pretty ceramic round mirror also made the move.
And the tray that I keep on the vanity is still a favorite so it stayed put as well.
I even kept the eucalyptus stems, pitcher and soap pumps.
I’m so pleased with how this little refresh turned out. This space used to make our skin crawl, but now it’s an absolute joy to be in here!

While I had the tripod set up taking these photos Tristan came in and wanted to take my picture, so I obliged. I laughed when I saw it because I look absolutely exhausted yet soooo happy with our new little oasis.
One last look at this bathroom from before we moved in compared to now…


It’s come so far! I hope this helps inspire any of you that are putting up with a dated bathroom to work with what you have and make the most of it until you can afford the big renovation.
Sources
A lot of items I already owned and I got them from places like TJ Maxx and Homegoods, but I linked similar items that I found on Amazon.
Upgrades
- Wall Paint (Basalt Powder by Sherwin Williams)
- Shower (tutorial here)
- Grout Renew by Polyblend
- Vanity Pulls
- Vanity Knobs
- Concrete Counter (tutorial here)
- Faucets
- Pop Up Drains
- Framed Mirror (tutorial here)
- Floors (tutorial here)
Shelf Accessories
- Black Wire Baskets (similar)
- Renew Sign (TJ Maxx)
- Potted Plant (similar)
- Metal Wire Basket (similar)
- Metal Wire Basket with Label (similar)
- Distressed White Candle Holder (similar)
- Soaps Bowl
Vanity Accessories
- Cement Planter
- White Candle with Wood Lid (similar)
- Soap Pumps
- Wood Tray (similar)
- Glass Canisters
- White pitcher
- Eucalyptus
Wall Decor
- Botanical Eucalyptus Prints
- Gray Wood Frames
- Wire wall baskets (tutorial here)
- Vintage Towel Hooks
- Soap & Water Sign (DIY print in this frame)
- Pipe bar (tutorial here but inspired by this one)
- Small Round Mirror
Other
Considering that most bathroom renovations cost thousands of dollars, I call this a major win in my book since I pulled all off this off for just a couple hundred!
Be sure to swing by here to check out all of the other room reveals!
Affiliate links may be provided for convenience. For more info, see my full disclosure here.
Linking up to these awesome parties!
Wooo Hooo girl you rocked it!! What an amazing job. My favorites are the shower and counter top redos…………………WOW. I am so impressed with your skills. I’m looking forward to the tutorials coming soon. Again thank you for sharing the talent you were blessed with. LOVE IT
Awww thank you so much Tina!! It feels like an entirely different space and I’m so impressed with how little I had to spend to pull it all off 🙂
Looks so serene and calm now. I do like the prints of 6, which makes that wall look larger, and of course the marble look floor, and lastly, the barn door.
I can imagine how hectic if was for you during those few short weeks to do all that, with some help from your husband. You did great! and thanks for sharing…
Thank you Maria!! I didn’t even think about the prints making the wall feel larger, you are absolutely right! Yes it was hectic but oh so worth it 🙂
Wow, Angela!
What a transformation! I LOVE how you trimmed out your shower stall to look like industrial windows…brilliant! The countertop is incredible too! And that barn door! I could go on and on — what a beautiful space you’ve created. I reckon it is a joy to be in there now! Y’all did a fantastic job! Thanks for sharing at Homestyle Gathering!
>>> Kim
Thank you so much Kim! I am so glad that all of my crazy ideas ended up pulling together so nicely!
All I can say is WOW!!! Absolutely beautiful. You did an amazing job. I was looking but didn’t see the color for your walls. Maybe I missed it. Could you please share? And again your bathroom looks amazing!
Thank you so much Sil! I did forget to add the wall color so I will go back and add that! It’s called Basalt Powder by Sherwin Williams and is a really light warm gray 🙂
Wow that transformation is amazing! I love what you did to the shower. So creative and that vanity makeover is incredible too!! Stopping over from Claire’s link up. Come say hi if you can! Such a fan!
Aww thank you so much Heather!
Stunning transformation! Pinned.
Happy spring, Kippi #kippiathome
Thank you so much Kippi, I really appreciate that!!
You did a great job with the upgrade! I love the barn door!
Thank you so much Alice! It’s definitely been nice to not have the door swinging in anymore!
What an amazing transformation, Angela. Love the concrete countertop and everything that adds such an industrial farmhouse look to your bathroom! Beautiful! So glad you shared at Homestyle Gathering!
Thank you so much Julie!!
Hi Angela!
I’m back to let you know that you are one of my features this week at Homestyle Gathering! Thanks for joining in and linking up to HG!
>>> Kim
Thank you so much Kim! Such an honor!! 🙂